Onoff
-
Posts
21029 -
Joined
-
Last visited
-
Days Won
206
Everything posted by Onoff
-

Bath Surround / Boxing In, and concealed pipework
Onoff replied to Onoff's topic in Bathrooms, Ensuites & Wetrooms
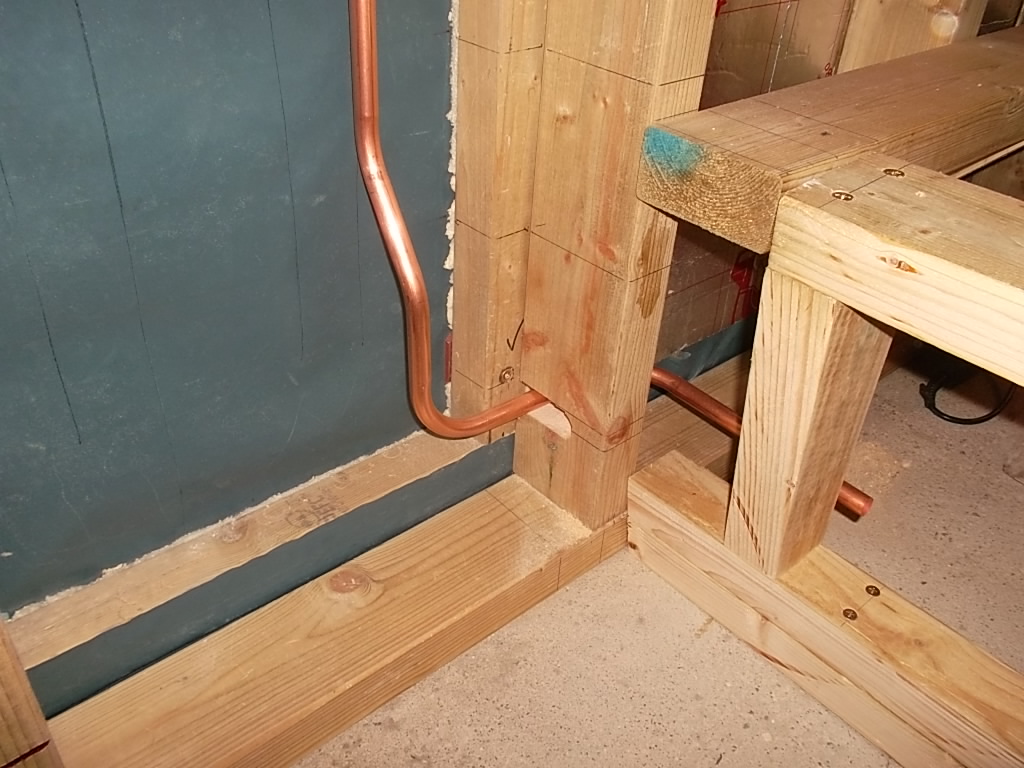
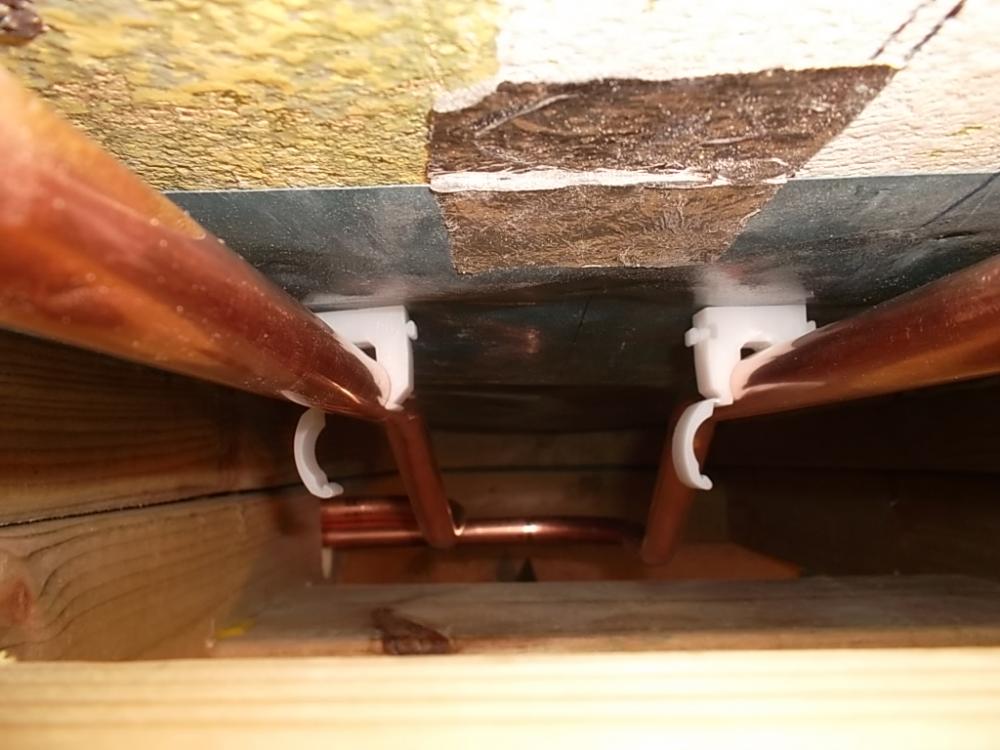
Cold bath feed bent, cranked and in. Tbh wish I'd made it a bit nearer over to the multi-tool! I'll go from here to a bit of that Hep2O PB to the bath filler /taps. Might put an access panel on the end of the bath to get to these connections. Next, the last one, the bath hot to figure off of the sink feed. Will re-position the clips too here and there: EDIT: Debating re-doing the hot feed to the sink so I can more neatly incorporate a tee off for the bath. And again might re-do the cold to the bath so it's further over to the right. I feel like I'm getting somewhere though!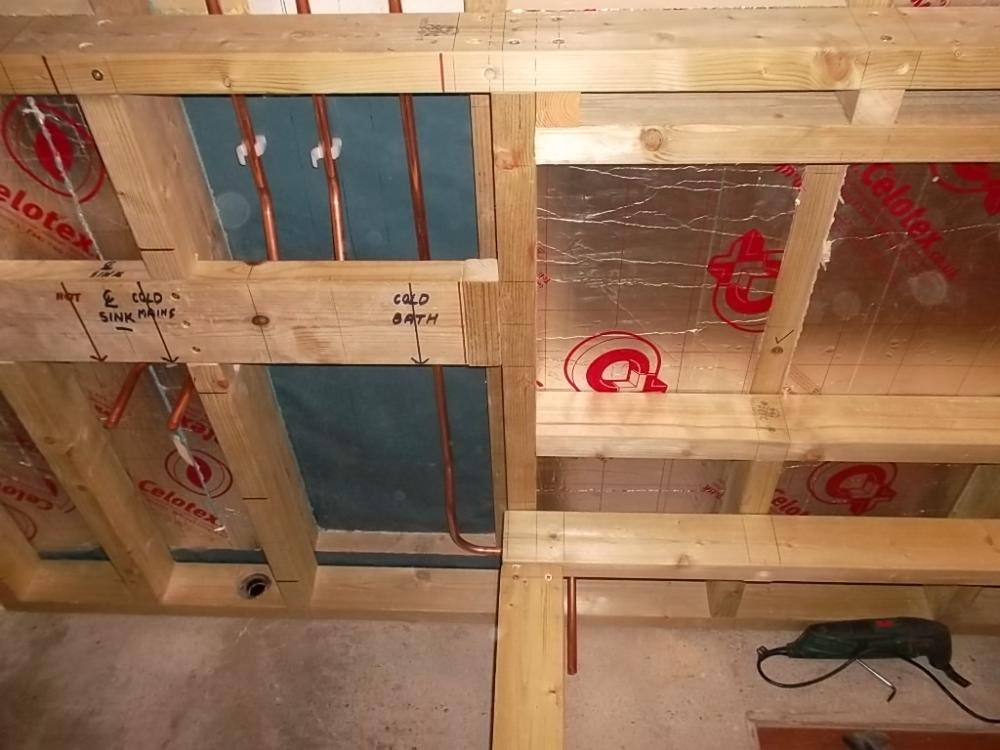

-
Bath Surround / Boxing In, and concealed pipework
Onoff replied to Onoff's topic in Bathrooms, Ensuites & Wetrooms
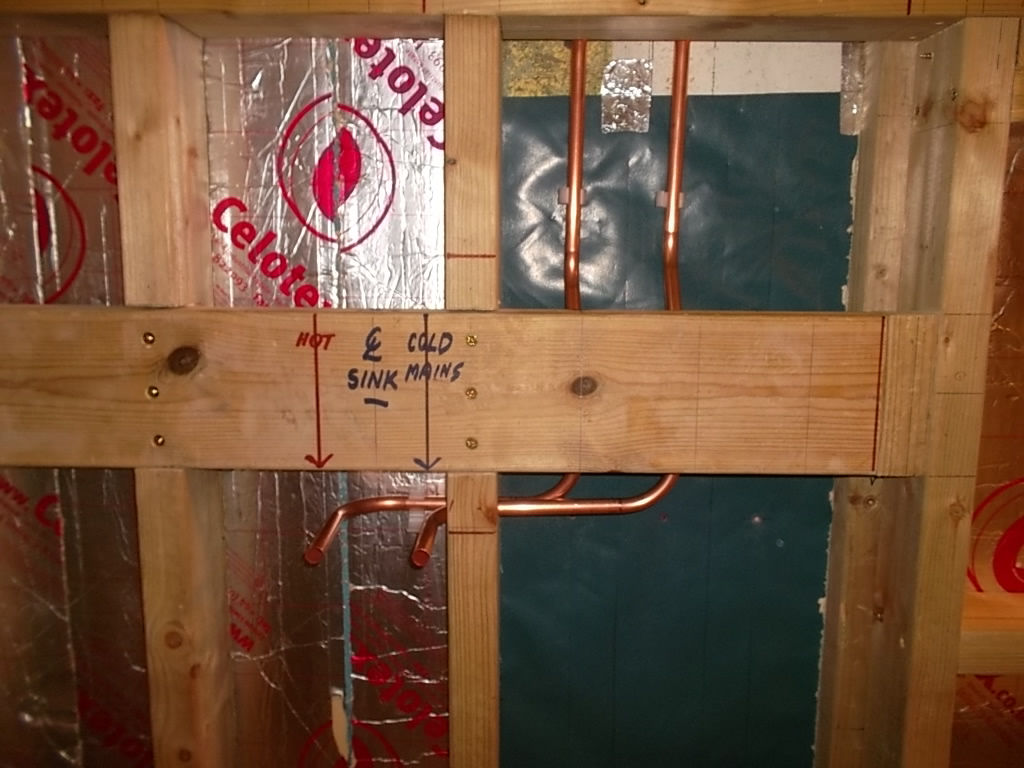
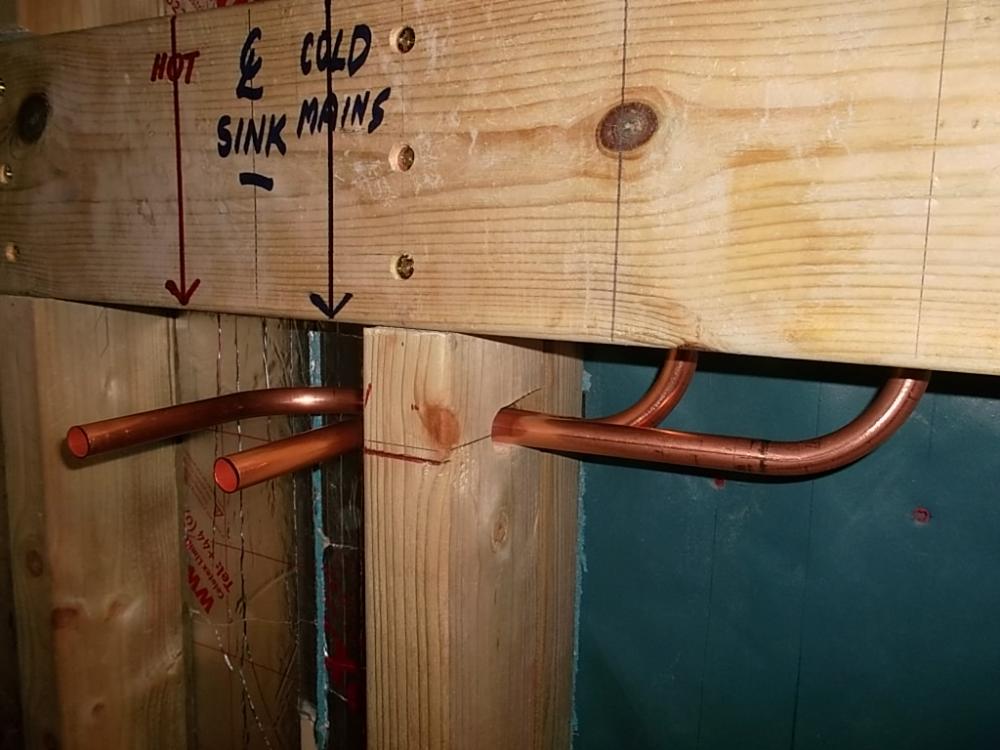
Is there an issue with having the hot feed 15mm copper to the bathroom basin physically touching the cold (mains) feed? It theoretically shouldn't according to the CAD but with my bending etc. Thinking noise potential and condensation. Option to wrap in Denso where they pass thru the dwarf stud wall or sleeve with something. Cheers, Actually I will have to have a soldered joint somewhere, I've got to tee off of that hot feed for the bath.....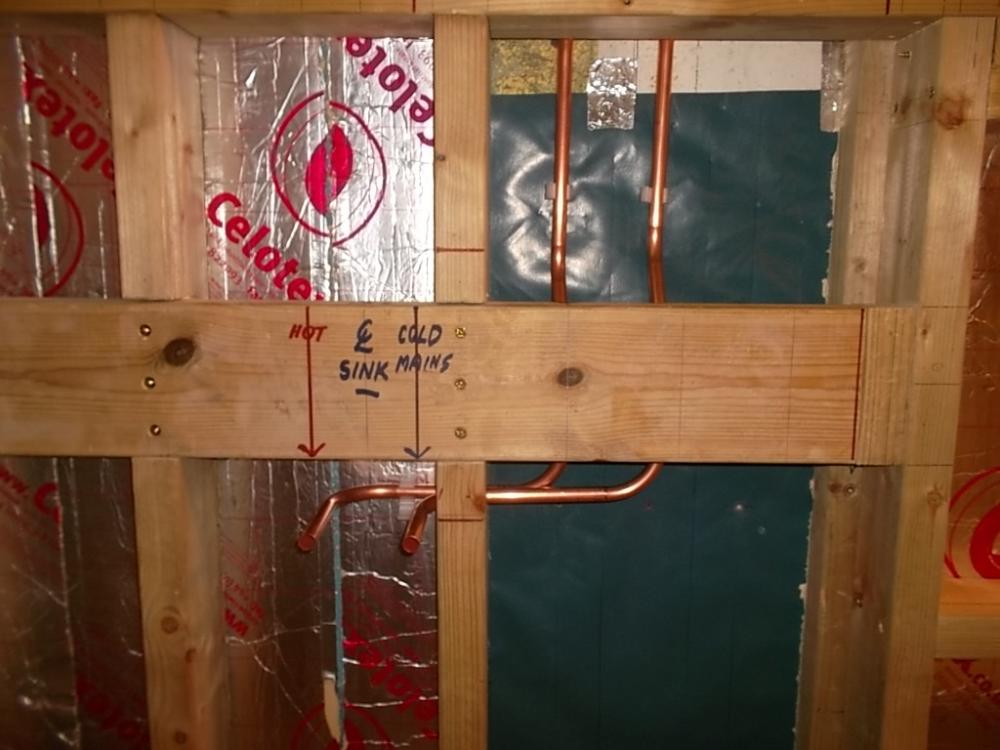
-
Bath Surround / Boxing In, and concealed pipework
Onoff replied to Onoff's topic in Bathrooms, Ensuites & Wetrooms
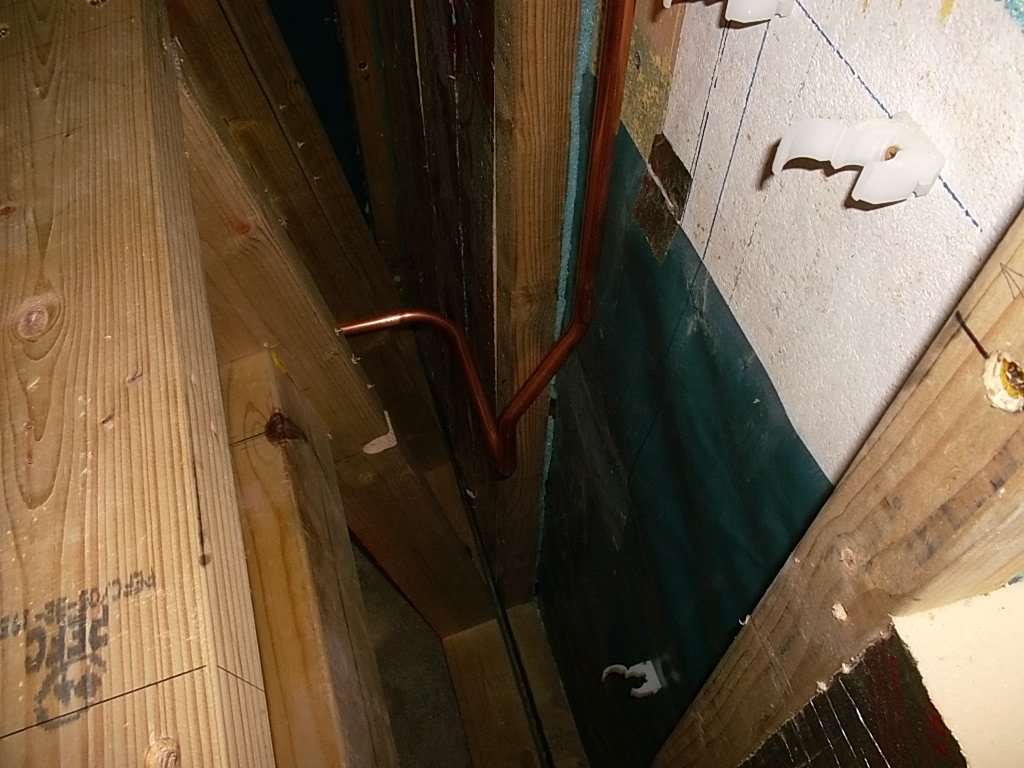
HAPPY...ish... No soldered joints just bending and offsetting, one down:
-
Credit/Debit Reward Cards, Discounts etc
Onoff replied to Ferdinand's topic in General Self Build & DIY Discussion
Went into The Works yesterday for the youngest wanting clay and other art materials. They're doing triple points on purchases over £10. http://www.theworks.co.uk/page/together-rewards-card -
Bath Surround / Boxing In, and concealed pipework
Onoff replied to Onoff's topic in Bathrooms, Ensuites & Wetrooms
Just that if the eaves becomes a room any isolation will be bound to be behind/ under something! -
Bath Surround / Boxing In, and concealed pipework
Onoff replied to Onoff's topic in Bathrooms, Ensuites & Wetrooms
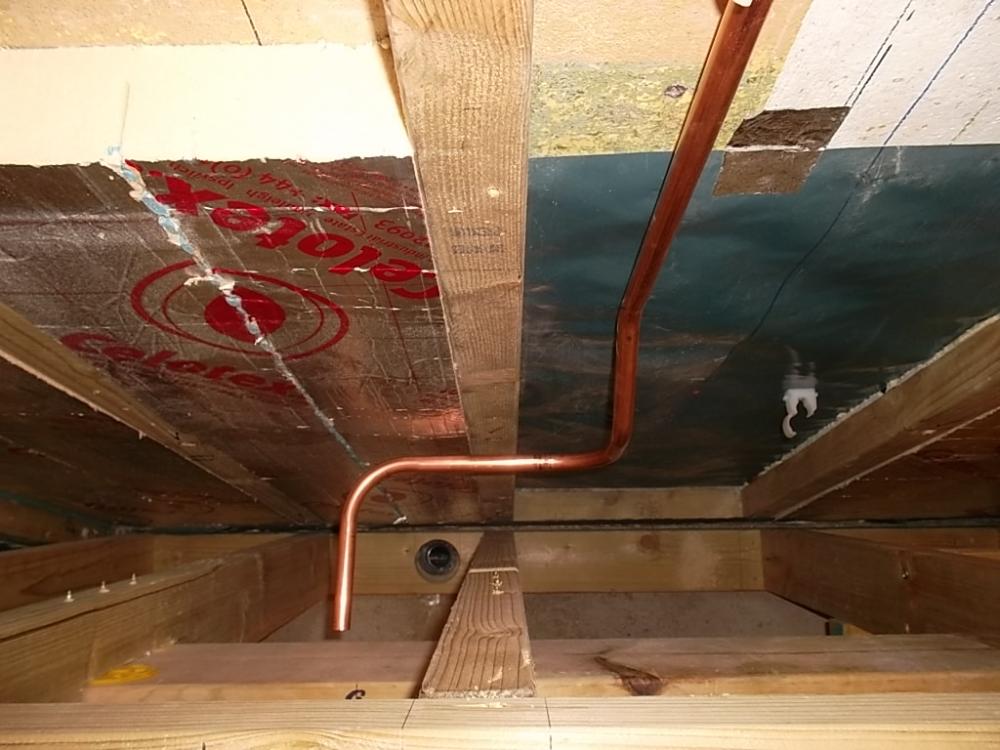
Loft is a blank canvas pretty much in the hipped roof end above the new bathroom ceiling. You can see the x3 15mm pipes coming up within the bundle of Cat-5: Still a lot of tidying to do up there with respect to existing "plumbing" (and wiring). Have to consider it carefully as we're toying with changing the roof to gable ends. The pipe with the x2 gate valves is the cold feed from the 25 gallon cws tank above the dormer. It comes down the dormer wall and goes left to feed the upstairs wc and upstairs bathroom basin, I capped it off with the push fit where it used to feed to downstairs bathroom I'm currently doing. The hot feed from the cylinder is the low down, horizontal one from the (red) ball valve at the mo that just feeds the upstairs basin sink. EDIT: All the ballofix valves are good quality, full bore ones, -
I've just been promised an 18V Makita drill body (the "white" one) for nowt. Friend of a friend was selling off her late husbands tools (a sparky) and the buyer just wanted the drill battery???
-
Bath Surround / Boxing In, and concealed pipework
Onoff replied to Onoff's topic in Bathrooms, Ensuites & Wetrooms
How about these and have the hot & cold to the sink coming horizontally through the wall in 15mm copper? http://www.screwfix.com/p/hep2o-push-fit-flexible-monobloc-tap-connectors-15mm-x-m10mm-x-300mm-2-pack/2043f -
Patination Oil to lead - to coat or not
Onoff replied to Stones's topic in Roofing, Tiling & Slating
Slightly off topic but S'fix have WD40 for £24.99 / 5ltrs -
Bath Surround / Boxing In, and concealed pipework
Onoff replied to Onoff's topic in Bathrooms, Ensuites & Wetrooms
Pub didn't work. Rethinking access, positions of sink / bath isolation valves etc..... -
Bath Surround / Boxing In, and concealed pipework
Onoff replied to Onoff's topic in Bathrooms, Ensuites & Wetrooms
Going to the pub!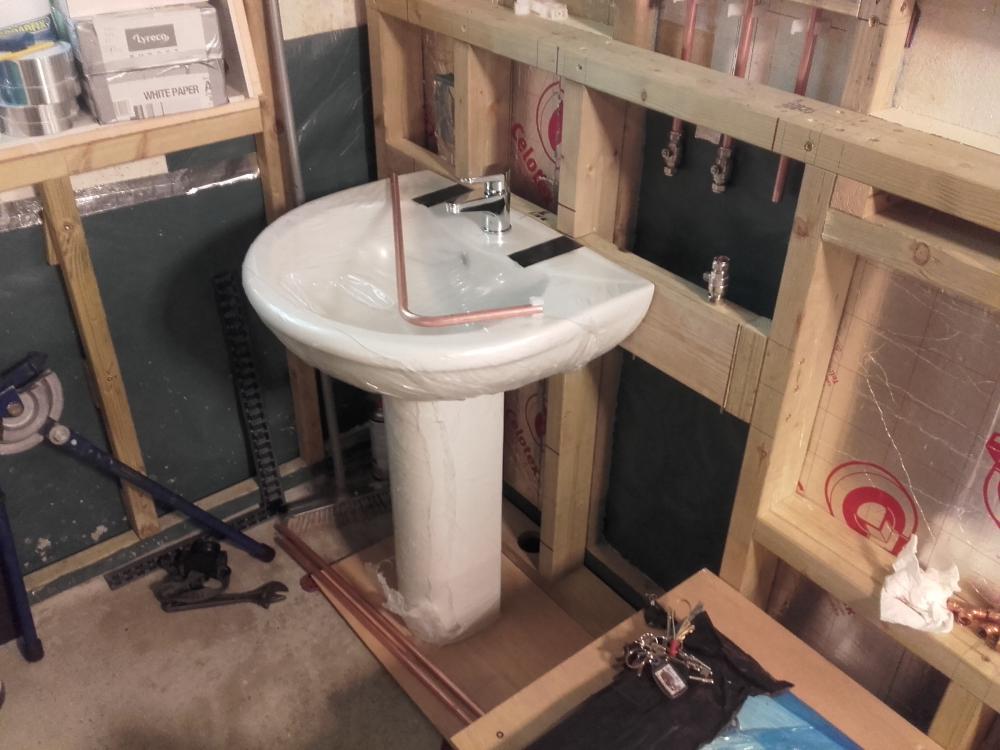
-
Bath Surround / Boxing In, and concealed pipework
Onoff replied to Onoff's topic in Bathrooms, Ensuites & Wetrooms
.....or do I try and put a set in the tails? -
Bath Surround / Boxing In, and concealed pipework
Onoff replied to Onoff's topic in Bathrooms, Ensuites & Wetrooms
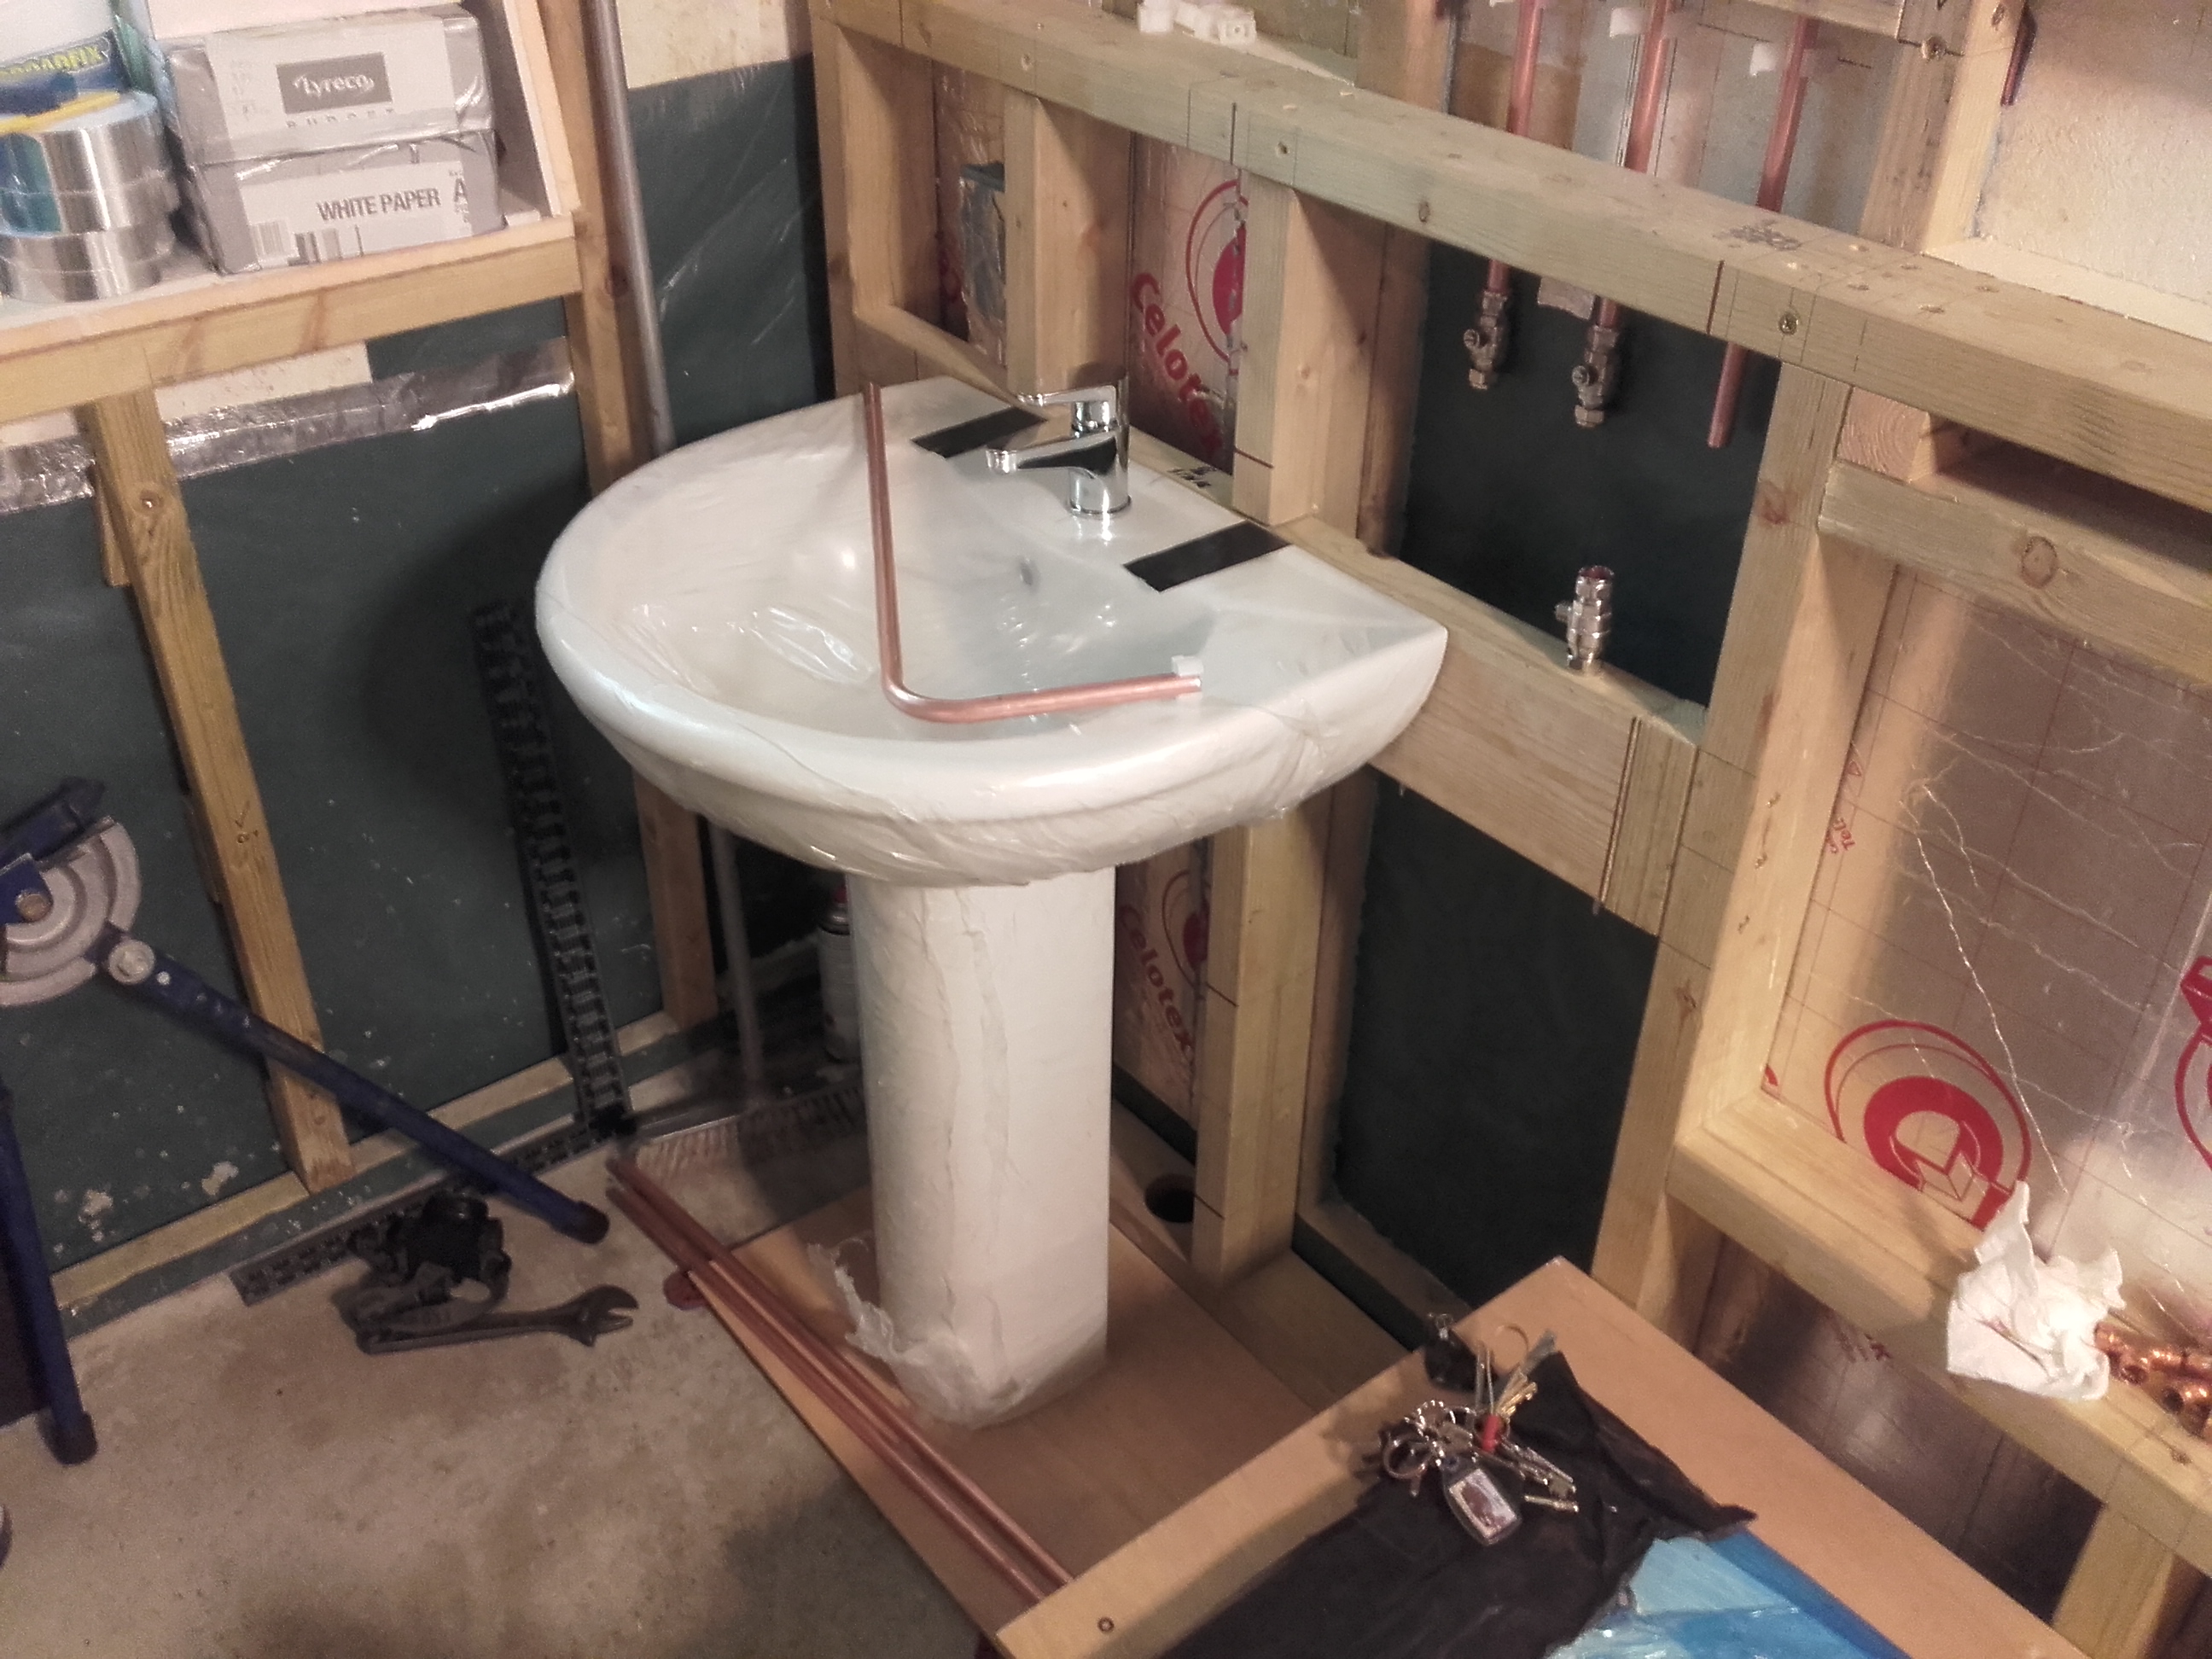
Driving me nuts tbh. I guess it's an experience thing but I'm off to find a couple on Neurofen in a minute! Trying to think ahead, minimising joints where inaccessible etc. It's; unwrap the sink, unwrap the pedestal, loosley position to gauge everything. That done put the sink and pedestal back in their boxes. Then realise I'm not sure if the planned removable tile will clash with the pedestal. At the same time thinking maybe the tile above will be better but will that clash with the sink? So, mark the tile positions on the studs; unwrap the sink etc again. Then the waste, do I lengthen the waste or shorten the tails? Every step something new. Dry fitting and taking apart all the time is a pita! Still I want it to look good in the end and be something to be proud of. (Ditched the push fit valves btw and going soldered copper and bends where I can). I'm sure I'll look back and laugh.....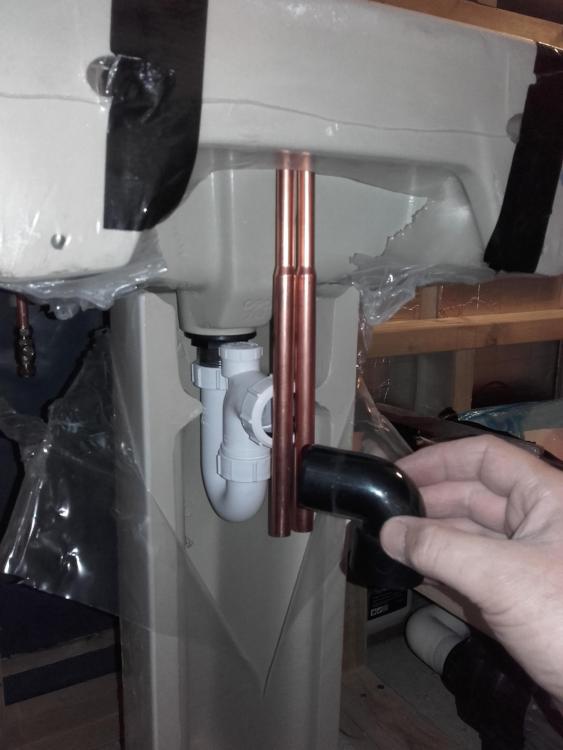


-
Bath Surround / Boxing In, and concealed pipework
Onoff replied to Onoff's topic in Bathrooms, Ensuites & Wetrooms
I F*****G hate plumbing! Hats off to those who do it and do it well. -
Bath Surround / Boxing In, and concealed pipework
Onoff replied to Onoff's topic in Bathrooms, Ensuites & Wetrooms
Ta, how many demounting operations will these fittings stand? I've got the proper tool btw. Should I maybe then have used compression fitting valves instead of push fit? Got a bit carried away! -
Bath Surround / Boxing In, and concealed pipework
Onoff replied to Onoff's topic in Bathrooms, Ensuites & Wetrooms
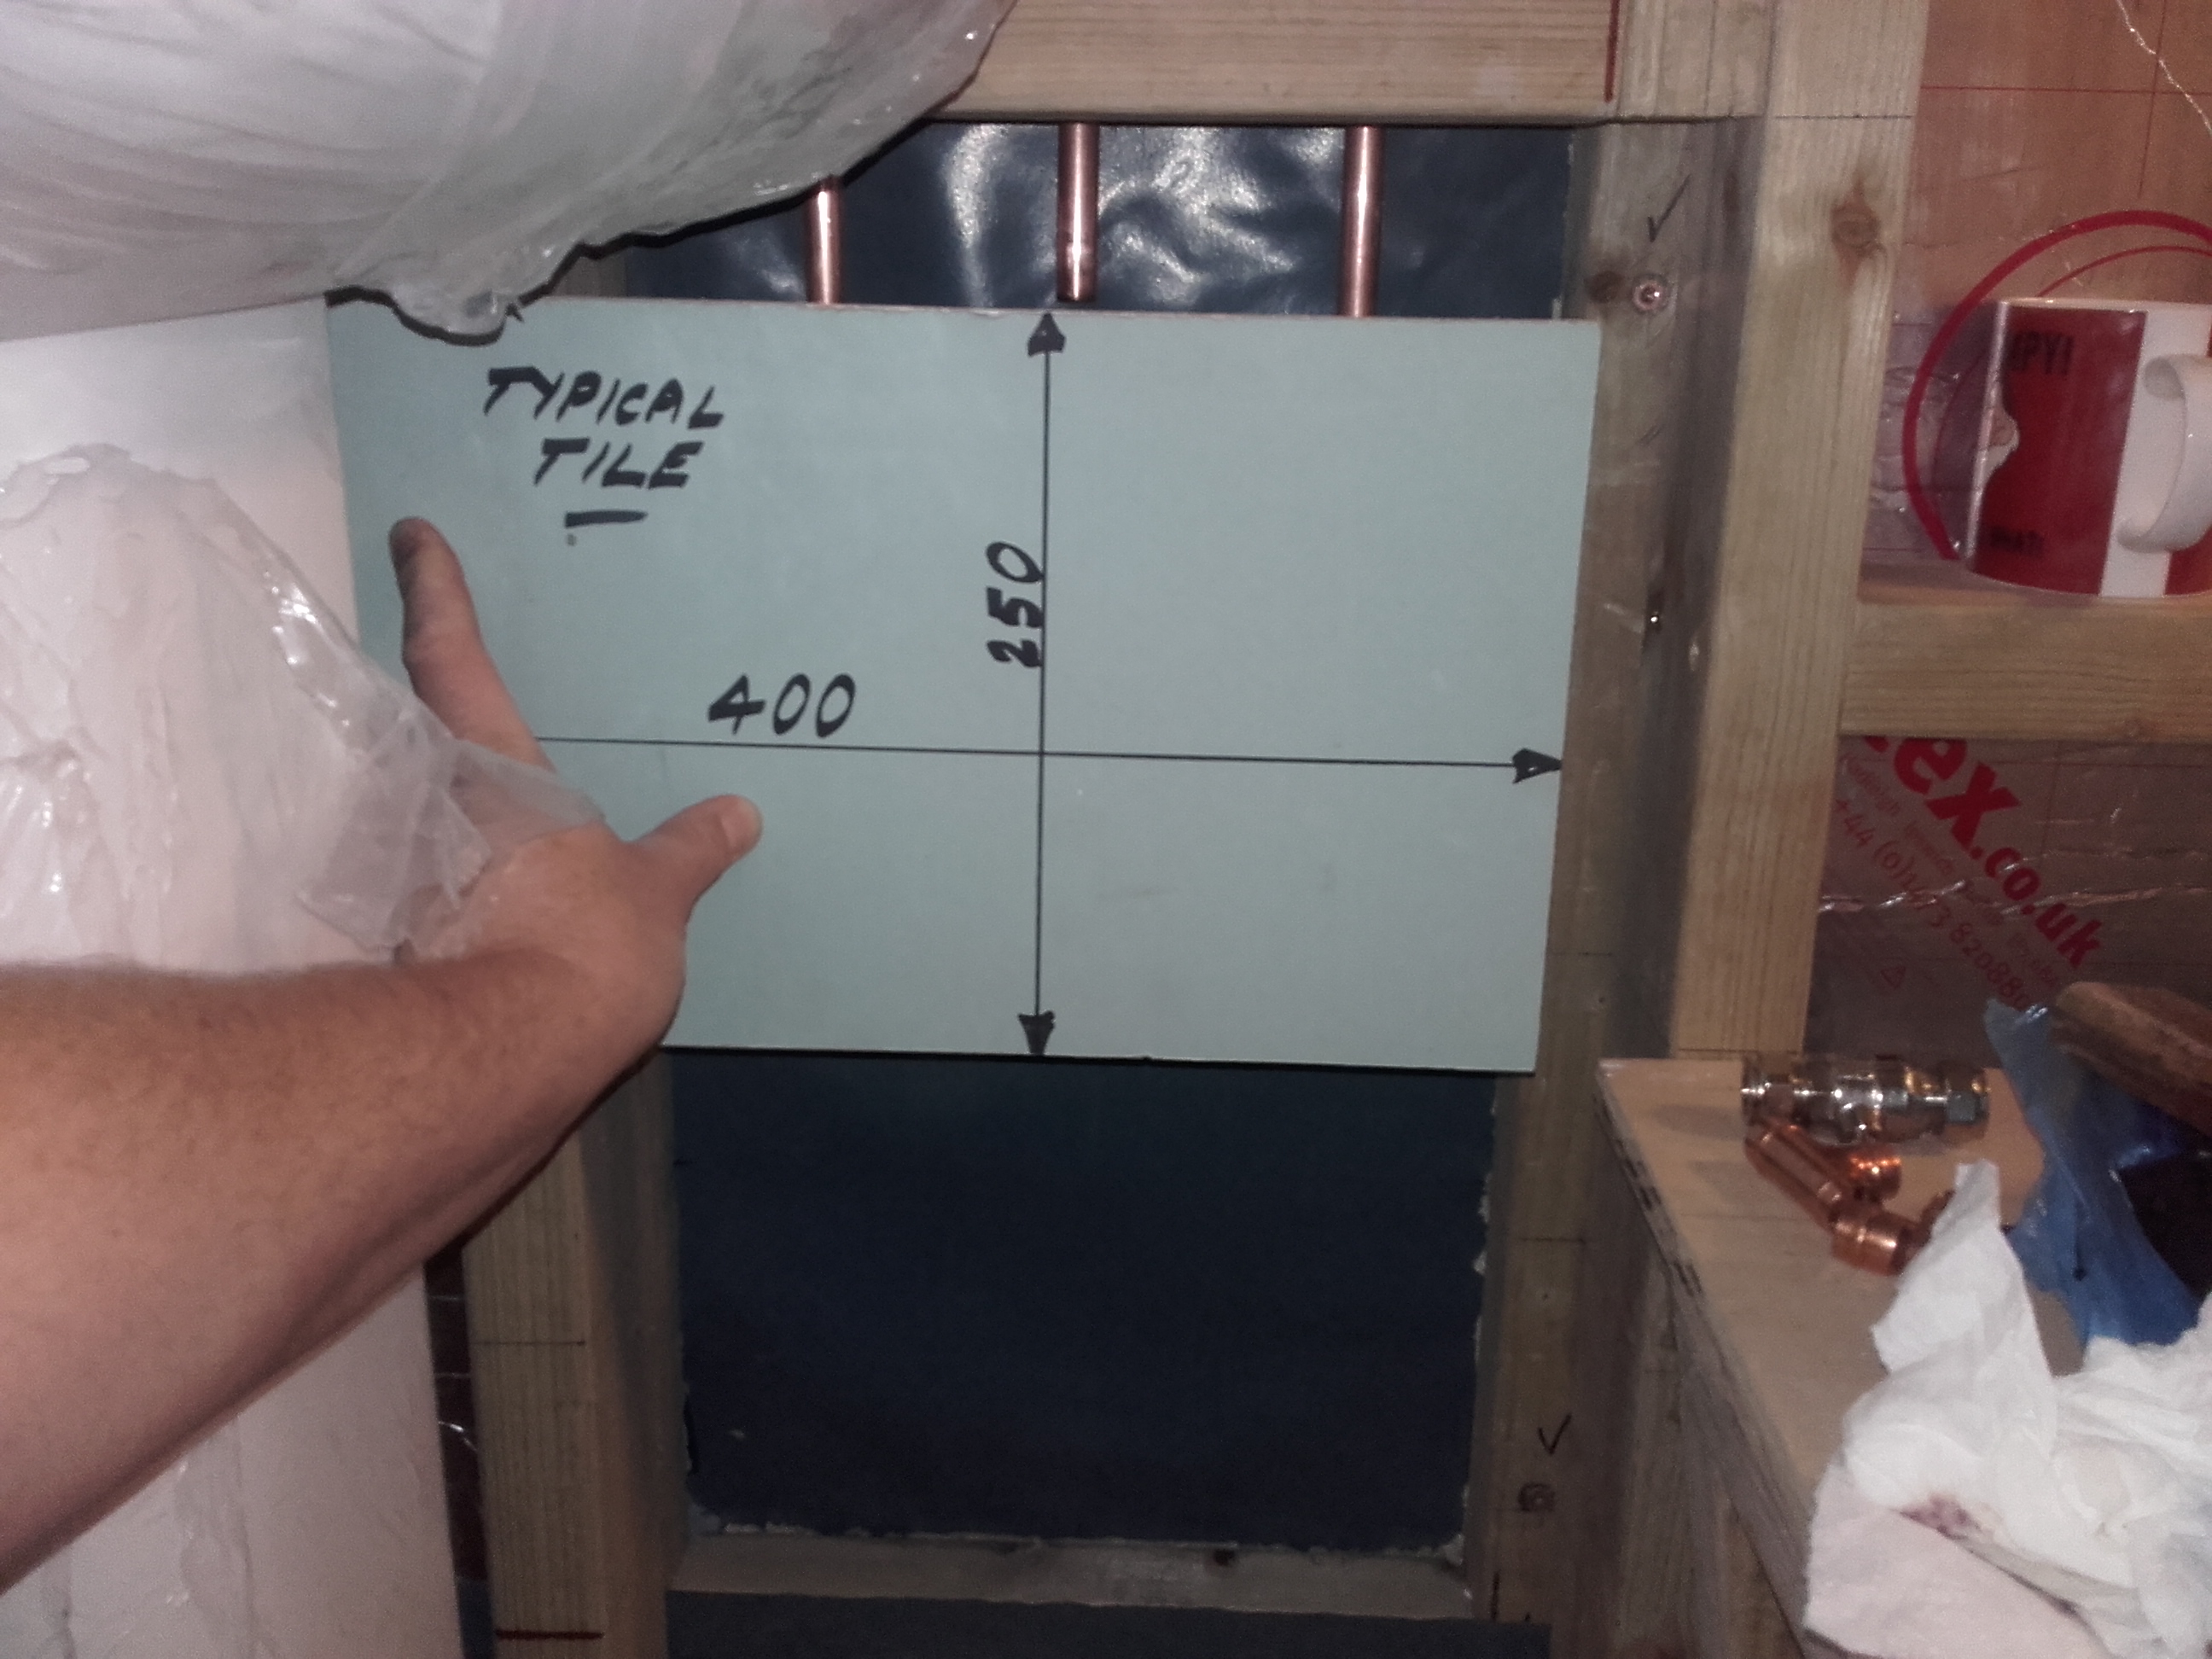
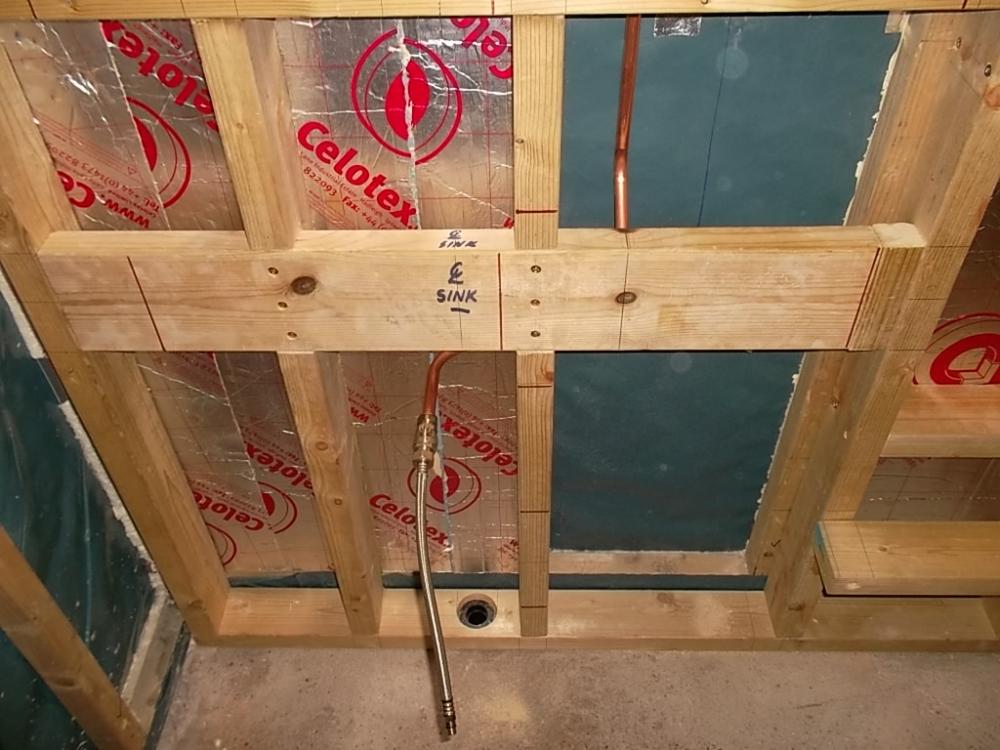
I'll openly admit I've not had much experience of using this push fit stuff, especially the pipe. Trying to make it all look neat. The 3 valves will be behind a removable tile: Next to drill the stud wall to take the pipes to the sink and bath! -
Bath Surround / Boxing In, and concealed pipework
Onoff replied to Onoff's topic in Bathrooms, Ensuites & Wetrooms
Bought a £16 Rothenberger shear type pipe cutter. Harder work tbh than the slightly dulled (blue) Screwfix own brand one I've already got! -
Bath Surround / Boxing In, and concealed pipework
Onoff replied to Onoff's topic in Bathrooms, Ensuites & Wetrooms
Yep, that's me! I was trying to rotate as I cut the pipe but it seemed a sharpness thing rather than lack of the knack. (I remembered you saying to do this back on eBuild I'm sure). Just for peace of mind I'll grab some new shears for the sake of £7/8. Last used this pair for a few cuts on 25 mm MDPE that had been lying around and was a bit mud steaked. Maybe dulled the edge a bit. Perhaps keep one set for "best"! -
Bath Surround / Boxing In, and concealed pipework
Onoff replied to Onoff's topic in Bathrooms, Ensuites & Wetrooms
Luckily the OP bought the Hep2O demounting tool when he bought the fittings.....seems a bit of an idiot to me! Still, it could have been worse "he" could have put the plasterboards on..... -
Bath Surround / Boxing In, and concealed pipework
Onoff replied to Onoff's topic in Bathrooms, Ensuites & Wetrooms
Wouldn't it be really funny if "somebody" forgot to fit the inserts..... -
Bath Surround / Boxing In, and concealed pipework
Onoff replied to Onoff's topic in Bathrooms, Ensuites & Wetrooms
OK, cutting this Hep2O PB pipe: Using a pair of "proper" pipe shears, well these in the link anyway, it cuts clean but leaves a slight oval - the pipe on the left. No burrs nothing. Using the normal 15mm copper pipe cutter (the disc type) it's more round but burred - the pipe on the left. The bloke on the Hepworth site video says to cut the plastic pipe with a normal pipe cutter used for copper??? http://www.screwfix.com/p/plastic-pipe-cutter-26mm/59590 Shears, shows the ovality better: Copper pipe cutter burred: The shears go through the JG white pipe like butter and leave it perfectly round. The Hep2O is much, much tougher to cut. How forgiving are these Hep2O push fit fittings to a bit of ovality? These shears btw did my UFH pipes perfectly. This is where Nick comes along and tells me a) To stop worrrying or b) To buy better quality, sharper plumbing tools! -
When I saw it done like that (admittedly only the once) I did wonder but then figured the makers (Aico & Kidde certainly) are happy for you to tee off of the radial run to alarm locator and control switches. EDIT: Could it be that it would generally be expected "historically" that if using a central "JB" it would not be of the maintenance free type and subject to screws loosening and losing power to the whole lot or the interconnects. Hence the WAGOs?
-
I've seen it done as a "lollipop" circuit before. That is T&E from the cu to a central junction box then "spoked" off of there via WAGO blocks in 3-core & E to each alarm.
-
I used st/st MIG wire in a zig-zag pattern on a small gable end years ago before I ply, battened and tiled it. Just to keep the Rockwool vertical.
-
You could start making your own solar thermal panels: