


Onoff
-
Posts
21128 -
Joined
-
Last visited
-
Days Won
206
Everything posted by Onoff
-
Setting out for the rainfall shower and I thought I'd get down off the stool and have a beer. Back up I went and promptly marked out about the other mark I'd originally marked for a downlight when I wasn't having a rainfall head or mitred corner! Bear in mind the mitre corner board wasn't in place as I was insulating the wall. Boy did it look wrong when I put the corner board in! Duly adjusted: I've the centre of the shower 570mm from the mitre board. Seems to give me enough elbow room. Fitting a ceiling shower arm then. Yet to get one. Seems there's a short type: And a longer version: Both the above are Hudson Reed dimensions. Does the short one day affix to a thin steel bracket above the plasterboard and the longer one through a noggin? Cheers
-
 Looks like then you've a UP320. I by contrast have the older UP200 that limits the flush plate choice to the Kappa range. Had to explain to SWMBO why she couldn't have a Samba flush plate she wanted as it was for the UP320. Thus she had to settle for what was available...not for the first time!
 -
This might make it clearer: Geberit_Flush_Brochure.pdf
-
Probably saw your avatar and thought you might turn up in person!
-
All the soil pipe people do something like this: https://www.marleyplumbinganddrainage.com/media/5423/pipe-laying.pdf
-
The 111.383.00.5 should be on one end of the cardboard box the frame came in. Other than that do the measurements tie up with this? https://catalog.geberit.com/public/product.aspx?cat=GB_GB-en_1&a=111.383.00.5 Then the accessories: https://catalog.geberit.com/File_Container/Overview_Tables/en-GB/DAS_157930.pdf If it is a Sigma then choose your flush plate: https://catalog.geberit.com/public/chapter.aspx?cat=GB_GB-en_1&ch=CH3_100500
-
+1. The stray we took on when we lived in the centre of town was scared of it's own shadow. It lived in the airing cupboard and was scared by frogs! 6 years later & taking it to the country where we are now and it virtually turned feral overnight and even grew tufts out of it's ears. Mainly a mouser than one for birds it'd clear a nest one by one in a constant stream of presents for us. Nothing like waking up and finding the "gifts" it'd brought us during the night. Never did find where it poo'd until it was in it's last legs then it was anywhere; lounge, hall etc. Still, she made 23.
-
Kevin McCloud did that Man Made Homes series using pet poo to produce bio gas I think.
-
Me!
-
@PeterW, what contactors are you after? I've a few collected from panel upgrades/rip outs etc. Only got a couple of timers though but I'm keeping them...can't remember what the project was though! Something like this, 230V coil, 20A rated? TeSys K_LC1K0910M7.pdf I might have 3. Got some plug in, 11-pin base stuff too. 10A @ 250vac but 24vdc coils. Could do you a psu as well I think!
-
Bath Surround / Boxing In, and concealed pipework
Onoff replied to Onoff's topic in Bathrooms, Ensuites & Wetrooms
Tiles BOUGHT! Sitting in their boxes gathering dust... -
Bath Surround / Boxing In, and concealed pipework
Onoff replied to Onoff's topic in Bathrooms, Ensuites & Wetrooms
Ive got 25mm of eps (offcuts) behind the pipes. It's got to be better than nothing? -
Sounds like a pretty standard control panel to me. 4 circuits in a box...no different to a cu. Most manufacturers offer timers and contactors to go in their cus. Go for it. Tbh there's DIN rail mounting time switches that'll handle 16A on their own without the need for a contactor(s) if that helps. Not cheap if you go for a name though! I'd try and standardise on say 16A throughout if going that route so you can chop and change in the event of a fault. Preceeded by its own appropriately rated circuit protection. Or buy slightly more obscure ones along with spares.
-
I know. Tbh the packs aren't as numerous as they appear. Originally it was just 5 fixings per vertical stud but the concrete screws wouldn't hold very well in this bit of the wall. So in went some horizontal 3"x2"s fixed with resin studs.
-
Cheap seats here! OK, no EPS beads but all this "old crap" is going in the wall with copious amounts of gun foam and foil!
-
Good shout other than I've got to BUY it! Was hoping to just use up the old crap lying around.
-
@Jude1234, what is the Geberit part number for your Duofix frame? This link maybe, under Pro Area, lists for the different flush plates for SIgma, Omega, Kappa cisterns etc: https://www.geberit.co.uk/products/bathroom/geberit-flush-plates/
-
Bath Surround / Boxing In, and concealed pipework
Onoff replied to Onoff's topic in Bathrooms, Ensuites & Wetrooms
I decided the shallow pocket could be made deeper by chiselling away the two projecting breeze blocks. OMG THE dust! Should have worn a mask but washing if down now! ? Not for the first time SWMBO unimpressed by the mess my Lidl tool's made! -
Thermal more so. Rather than keep faffing cutting PIR offcuts and foaming them in I wondered whether to just staple the vcl on and fill as I go with beads:
-
Bath Surround / Boxing In, and concealed pipework
Onoff replied to Onoff's topic in Bathrooms, Ensuites & Wetrooms
Need to be rid of this diagonal soil in the loft space above the bathroom. Plan is to fit a branch laid on its side: The branch will hopefully allow me to put other wcs in later should I decide to. I've slid in one of these plugs with a bit of silicon spray for now. Went in very easy once lubed up. I might try and devise some sort of "safety clip / bracket" in case a future traffic jam forces it out! I just hope there's enough sweep for the No.2s to fly round the right angle! -
Is this stuff any good for insulation in a timber stud wall? http://www.stvincents.co.uk/polystyrene_beads.php
-
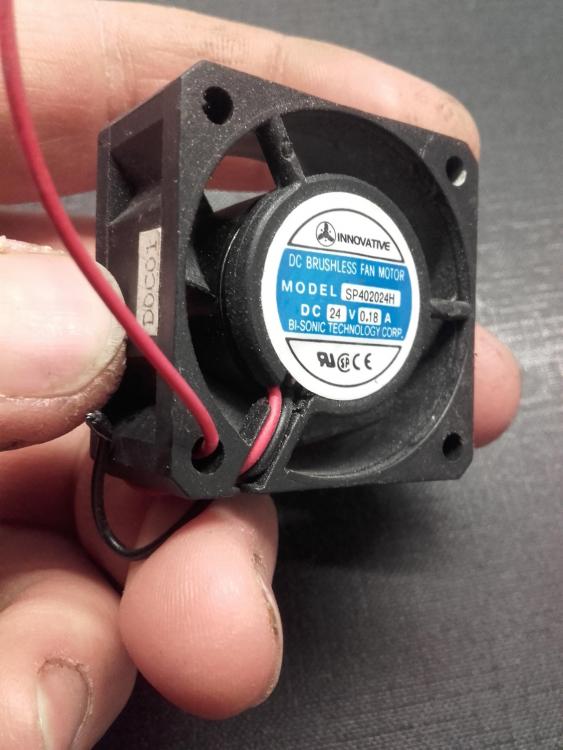
@le-cerveau, how about 7.77 CFM? About 25% of the first one. Thinking though that my diy set up will be lossy around the flush plate? Or...I fit the bigger one and a little pwm speed drive. If I can smell it, I turn it up! Something like this: https://www.esr.co.uk/products/frame_motor-control.htm
-
About 3 years if you DIY it and have zero experience...
-
Bath Surround / Boxing In, and concealed pipework
Onoff replied to Onoff's topic in Bathrooms, Ensuites & Wetrooms
To finish this corner off: After packing with insulation the intent was to apply a vcl to the face of the studs/insulation and then Aqua Panel over that. Like this: However SWMBO caught sight of the mitred corner detail "somebody" on here did which led me down that route. So I'm not sure now whether to bring the (green) vcl into the corner as originally planned like in "A" below or across the face of the mitre as shown in "B". If "A" I think I'll need a couple of full height strips of maybe MR plasterboard to stop the vcl billowing as I'm not continuing the Aqua Panel into the corner: -
It was out of a dead variable speed drive from memory. I'm sure I have some around half this size...


