Onoff
-
Posts
21127 -
Joined
-
Last visited
-
Days Won
206
Everything posted by Onoff
-
That'd save me making one! But where's the fun in that?
-
If you've never actually been in the loft then how do you know they're really there? Shrodinger's cat etc...
-
New thread; "Show us yer tampers!"
-
Necessity is the mother of all invention and all that! Pity you didn't have any small glass roof lights lying around, you could have covered a larger area with it...
-

DIY Heat Exchanger
Onoff replied to Onoff's topic in Mechanical Ventilation with Heat Recovery (MVHR)
Searching at random I found thin wall plastic tubes in 4' lengths: http://www.visipak.co.uk/tube_packaging.shtml -
Landscape fabric over a solid retaining upstand. You'd only need drainage along the base so leave a gap?
-
DIY Heat Exchanger
Onoff replied to Onoff's topic in Mechanical Ventilation with Heat Recovery (MVHR)
Anything to delay finishing and having to talk to SWMBO! More loft time this way plus it's FUN! -
DIY Heat Exchanger
Onoff replied to Onoff's topic in Mechanical Ventilation with Heat Recovery (MVHR)
Thanks. So the extract takes in moist warm air and displaces with air drawn from under the bathroom door? Right then, onto fan size. Do I just get into Part F to size the extract as normal as in the lpm requirements? Would it need to be bigger to account for losses and restrictions through the exchanger? I guess I'd also want to take my diy Geberit pan extract pipe to this? Otherwise I'd be losing the heat from that warm, moist pan air! -
DIY Heat Exchanger
Onoff replied to Onoff's topic in Mechanical Ventilation with Heat Recovery (MVHR)
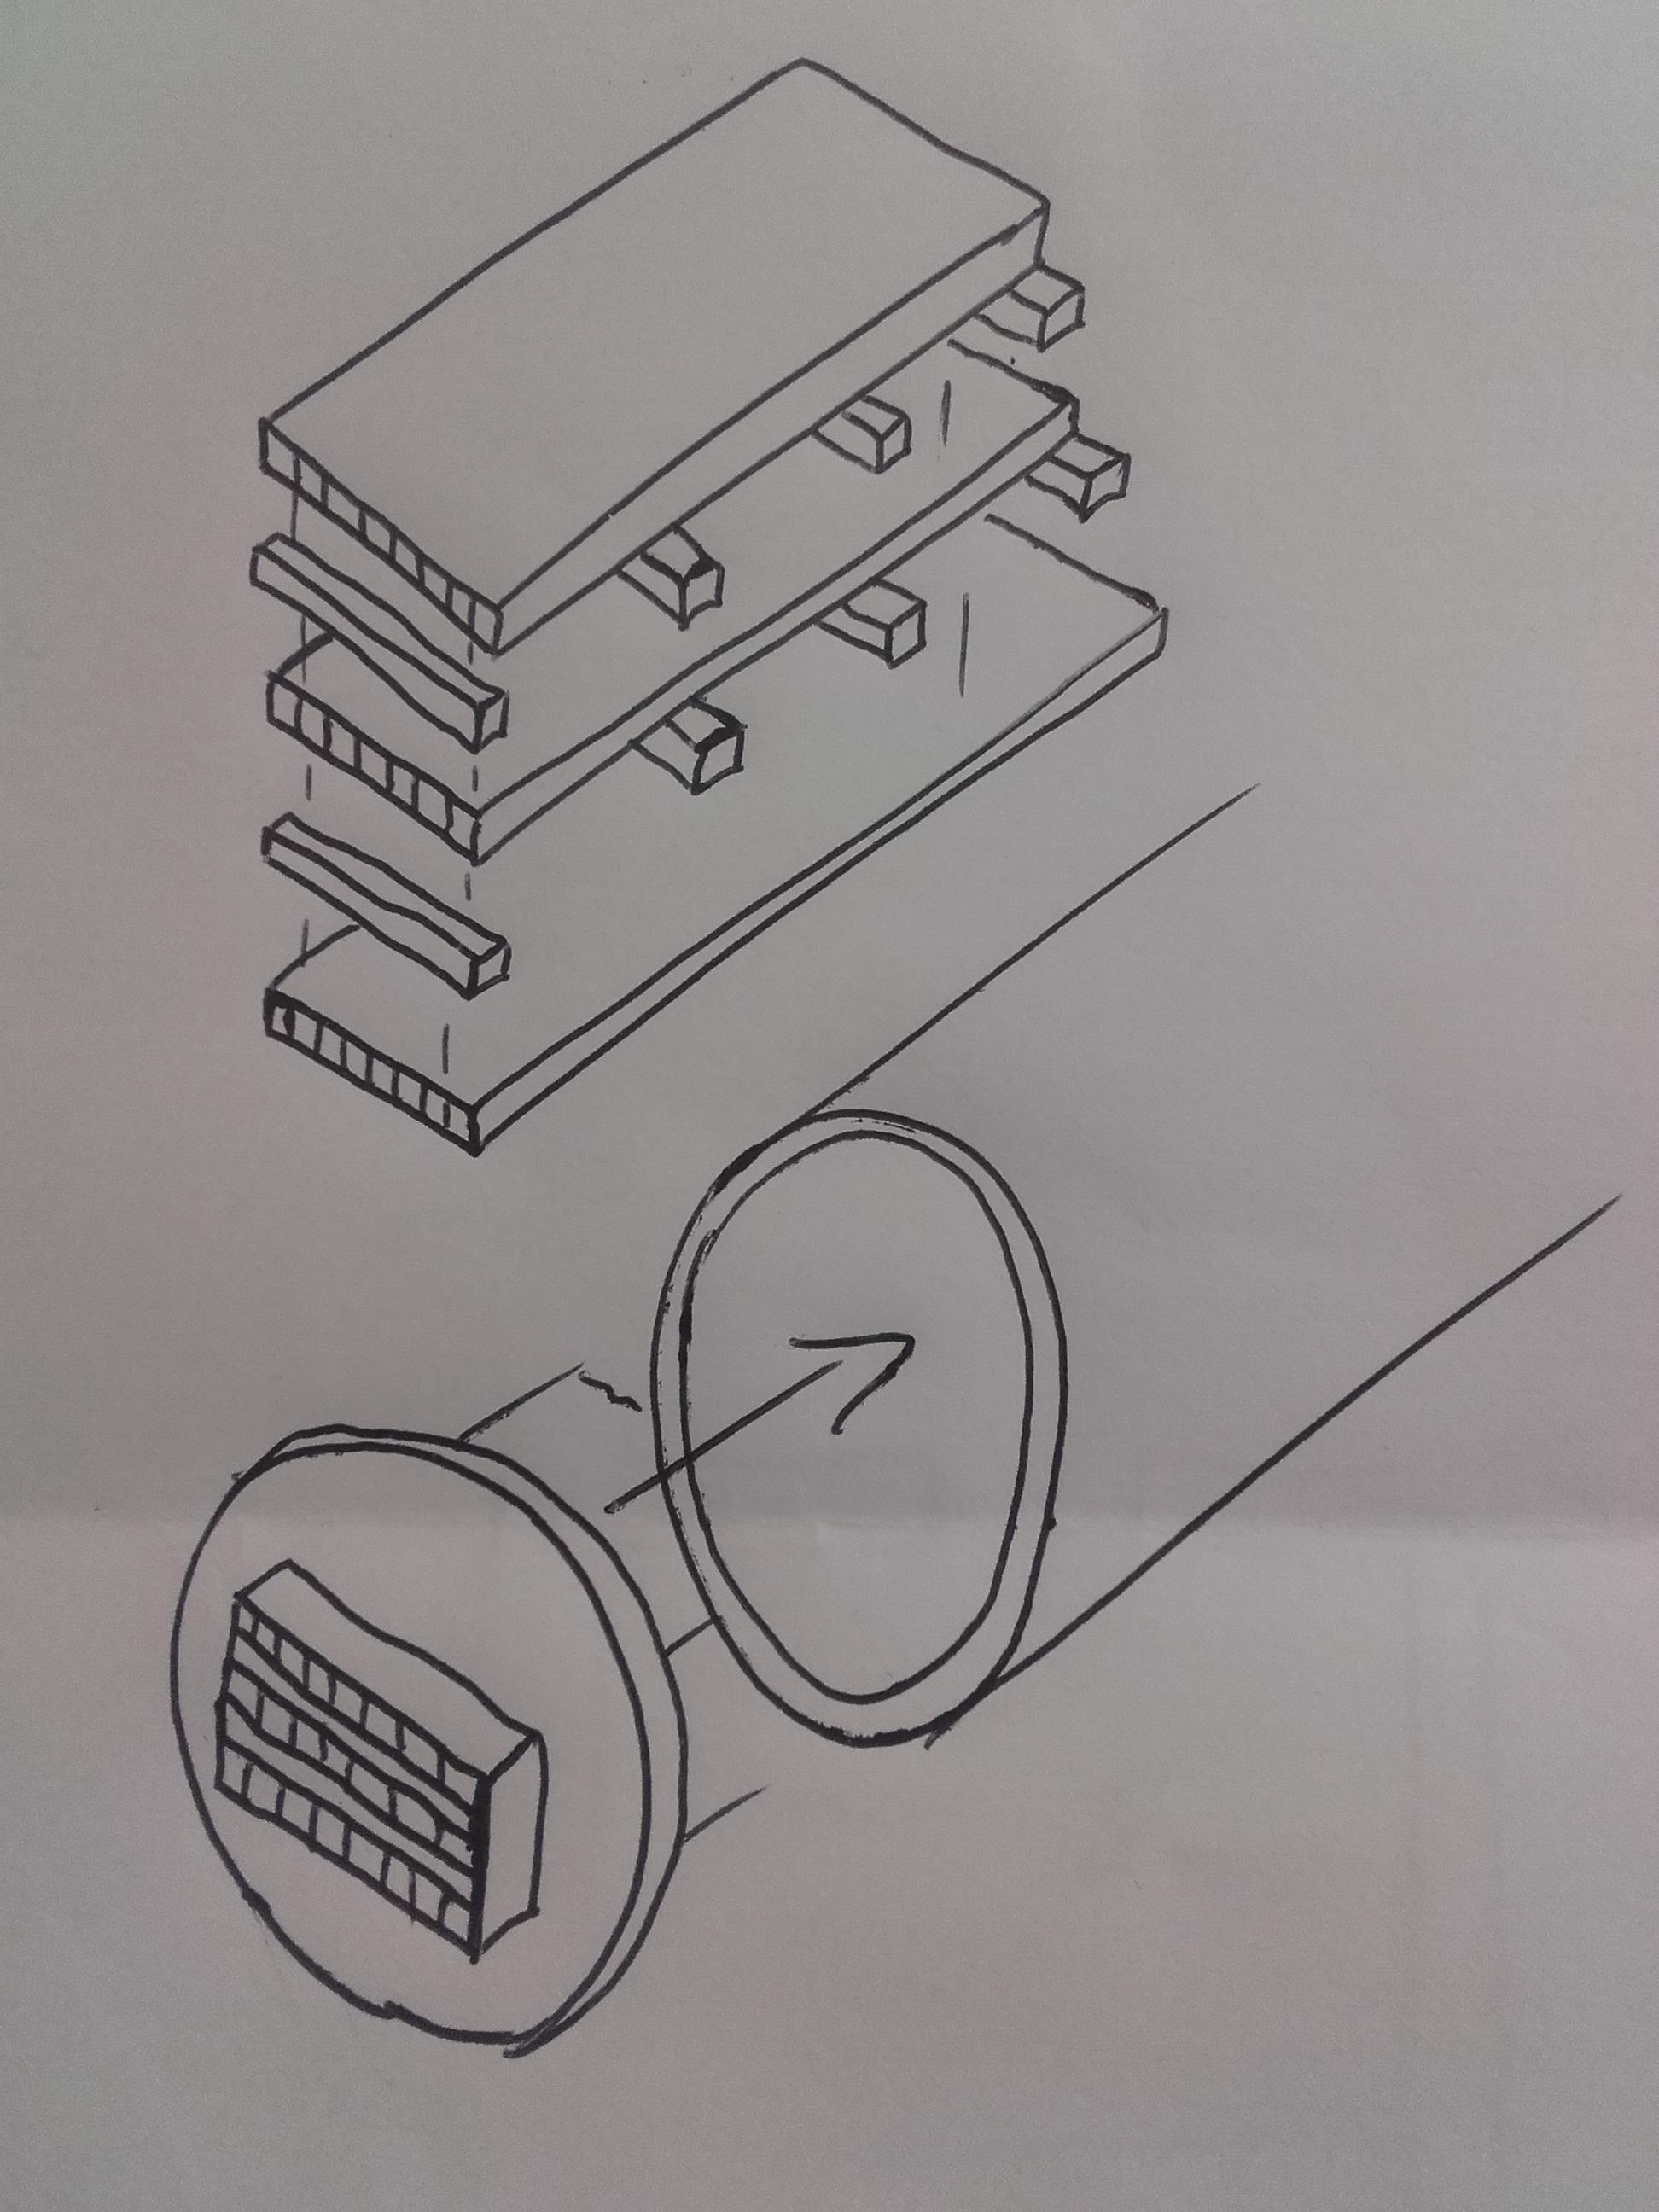
As a bit of a hybrid design could a long, thin stack of hit & miss Coroplast sheets replace the drinking straws then just seal around the rectangular hole where the stack passes thru the plates at the end?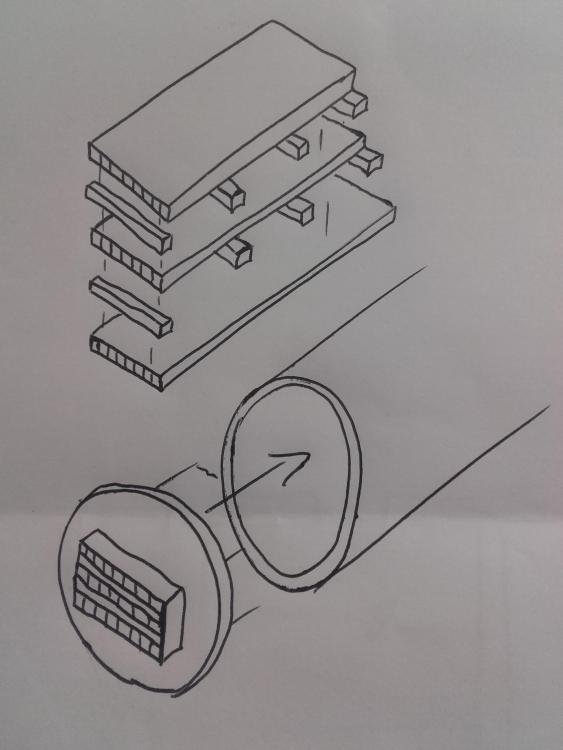
-
DIY Heat Exchanger
Onoff replied to Onoff's topic in Mechanical Ventilation with Heat Recovery (MVHR)
When do I ever listen? Any excuse to play with the junk I've got here! Would 15mm copper pipe do for the "drinking straws"? Appreciate they're a bit bigger! The layout and runs maybe work? It'd be dead simple: Soffit is close by, easy condensate run to. Have I got the shell & tube inlet/outlets in the right position? Is it ok having the inlet and outlet in the same room? Could drop straight through the ceiling from the main tube. I could load it with sensors to try and gauge the efficiency.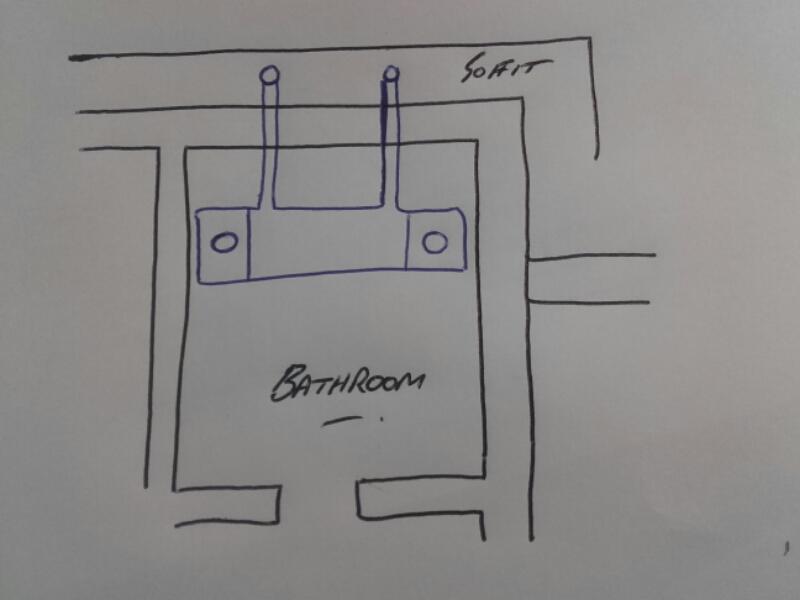
-
DIY Heat Exchanger
Onoff replied to Onoff's topic in Mechanical Ventilation with Heat Recovery (MVHR)
So you need a thinner wall? Just edited my post btw with more info. -
DIY Heat Exchanger
Onoff replied to Onoff's topic in Mechanical Ventilation with Heat Recovery (MVHR)
"If you're serious about it, I have some closed cell PE tubing left over from our MVHR installation, which might be of use as an outer housing for a tube-based unit. I think I have a length of 180 and another of 200 or 220. Happy to send it your way if of interest." @jack, cheers for that, Figured I'd reply in here rather than detract from the other thread! "SE England" - I could likely collect! What would be the advantage of using your stuff over say soil pipe fittings for the outer tube, drain pipe up the centre and encasing the lot in "insulation". I'm thinking whether I could do a hairpin or otherwise cranked design up in the loft. NO idea btw where to start! So: - Single, well insulated room with vcl. - 150pir + 25mm eps in the floor - 145/150mm pir between joists in the ceiling (currently 100mm with rest to be added) - multiple downlight, speaker, body dryer penetrations in the ceiling but these will be insulated over and the vcl reinstated - several galv conduit drops in the walls - will be intumescent or Wiska gel sealed once wiring is complete - gap, tba under the door leading to the rest of the house - room is nom 3m x 3m x 2.47m high so nom 22m3 volume. Fan sizes etc? Vent positions? -
Floor tiles are 330mm sq. 8mm thick, ceramic: And this is the first lot to cut: A bit worried about how the super pointy, "scalene" esque ones will come out!
-
MVHR with extract only mode
Onoff replied to MikeGrahamT21's topic in Mechanical Ventilation with Heat Recovery (MVHR)
The bathroom is in effect an all round insulated, sealed via vcl box. The only gap will be at the door. Quite keen to have a bash at a DIY single room solution. The one thing I do have is space for a "long" unit like the tubular one. It would have to go in the uninsulated space above the bathroom ceiling but the tube itself could be externally insulated. I'm pretty close to the soffit to site the intake and extract. Where to site the other two ducts? -
MVHR with extract only mode
Onoff replied to MikeGrahamT21's topic in Mechanical Ventilation with Heat Recovery (MVHR)
Yep -
MVHR with extract only mode
Onoff replied to MikeGrahamT21's topic in Mechanical Ventilation with Heat Recovery (MVHR)
No, I meant use Buffalo Board instead of normal ply for the enclosure. It's like a black / brown resin impregnated, phenolic faced, birch ply with one side smooth like Formica and the other non slip & embossed. http://www.advancedtechnicalpanels.co.uk/products/buffalo-board-birch-plywood -
MVHR with extract only mode
Onoff replied to MikeGrahamT21's topic in Mechanical Ventilation with Heat Recovery (MVHR)
Tell me more! What's the difference between the two types? I was thinking to make o/of Buffalo Board and incorporate a st/st drip tray in the bottom. -
Once the ply has been tanked can it be tiled onto with tile adhesive? Seem to remember it's best to stick tiles direct to ply with cheap silicon but as I say this will be tanked not bare ply. Ref tanking...not being known for speed can I tank and then come back to tiling a bit later? This assuming I don't puncture the tanking in the meantime.
-
I need to get some more tanking strip if not another complete large tanking kit as I need to do around the bath and long pocket there. That pocket rear face is just mrpb. The bath deck and up to the pocket is 12 & 18mm marine ply. I'm planning strip at the rear of the bath on the ply and up the mrpb wall. I'll tank that ply wall then to the height of the pocket. Where the pocket is I'll put a strip from the ply bath deck up where it goes vertical - there's a black / white Sikaflex EBT seem at the junction you can just see. Then in the pocket a strip over the ply/mrpb interface. Then tank the lot and try and not get it on the bath!
-
MVHR with extract only mode
Onoff replied to MikeGrahamT21's topic in Mechanical Ventilation with Heat Recovery (MVHR)
There's a thread here on a DIY plastic sheet head exchanger I found a while back if you're intetested: -
Some "high street" outlets deserve to go out of business.
Onoff replied to ProDave's topic in Kitchen & Household Appliances
+1 to Co-op. Had a good few appliances off of them. Only issue we had was a dent in the side of a Hotpoint WMD960 washing machine found on delivery. Saying that it isn't visible once installed and we got a HUGE discount off it. The machine has been crap mind, so glad we have a service contract on it. It's paid for itself numerous times. From drum bearings to main board to rust! -
Good shout. I can make a little former / tamper so all 3 are the same. I'll do that THEN tank them. Should I prime the Aqua Panel with anything prior to doing the filet d'you think? Neat SBR maybe? What angle do you reckon?
-
I'd forgotten about that thread. Soon came flooding back, it's the one I showed SWMBO whereafter she wanted a mitre corner like Nick did! I'm going to apply the strip to: - the floor / wall junction - floor to ceiling either side of the Notre - over the mixer I'm not sure ref the pockets though? Do the internal AND external corners with strip? As an aside on the pockets I'm still debating whether to put a slope of a few degrees on the bottom to aid water run off? If I do, how to do it? Some sort of packer to raise the back of the tile up maybe or a series of accurately cut wedges? @Nickfromwales, in the link you cover the mixer with tape but there's a gap in the centre. Any reason why I cant just cut 3 accurate holes in mine and slip it on?
-
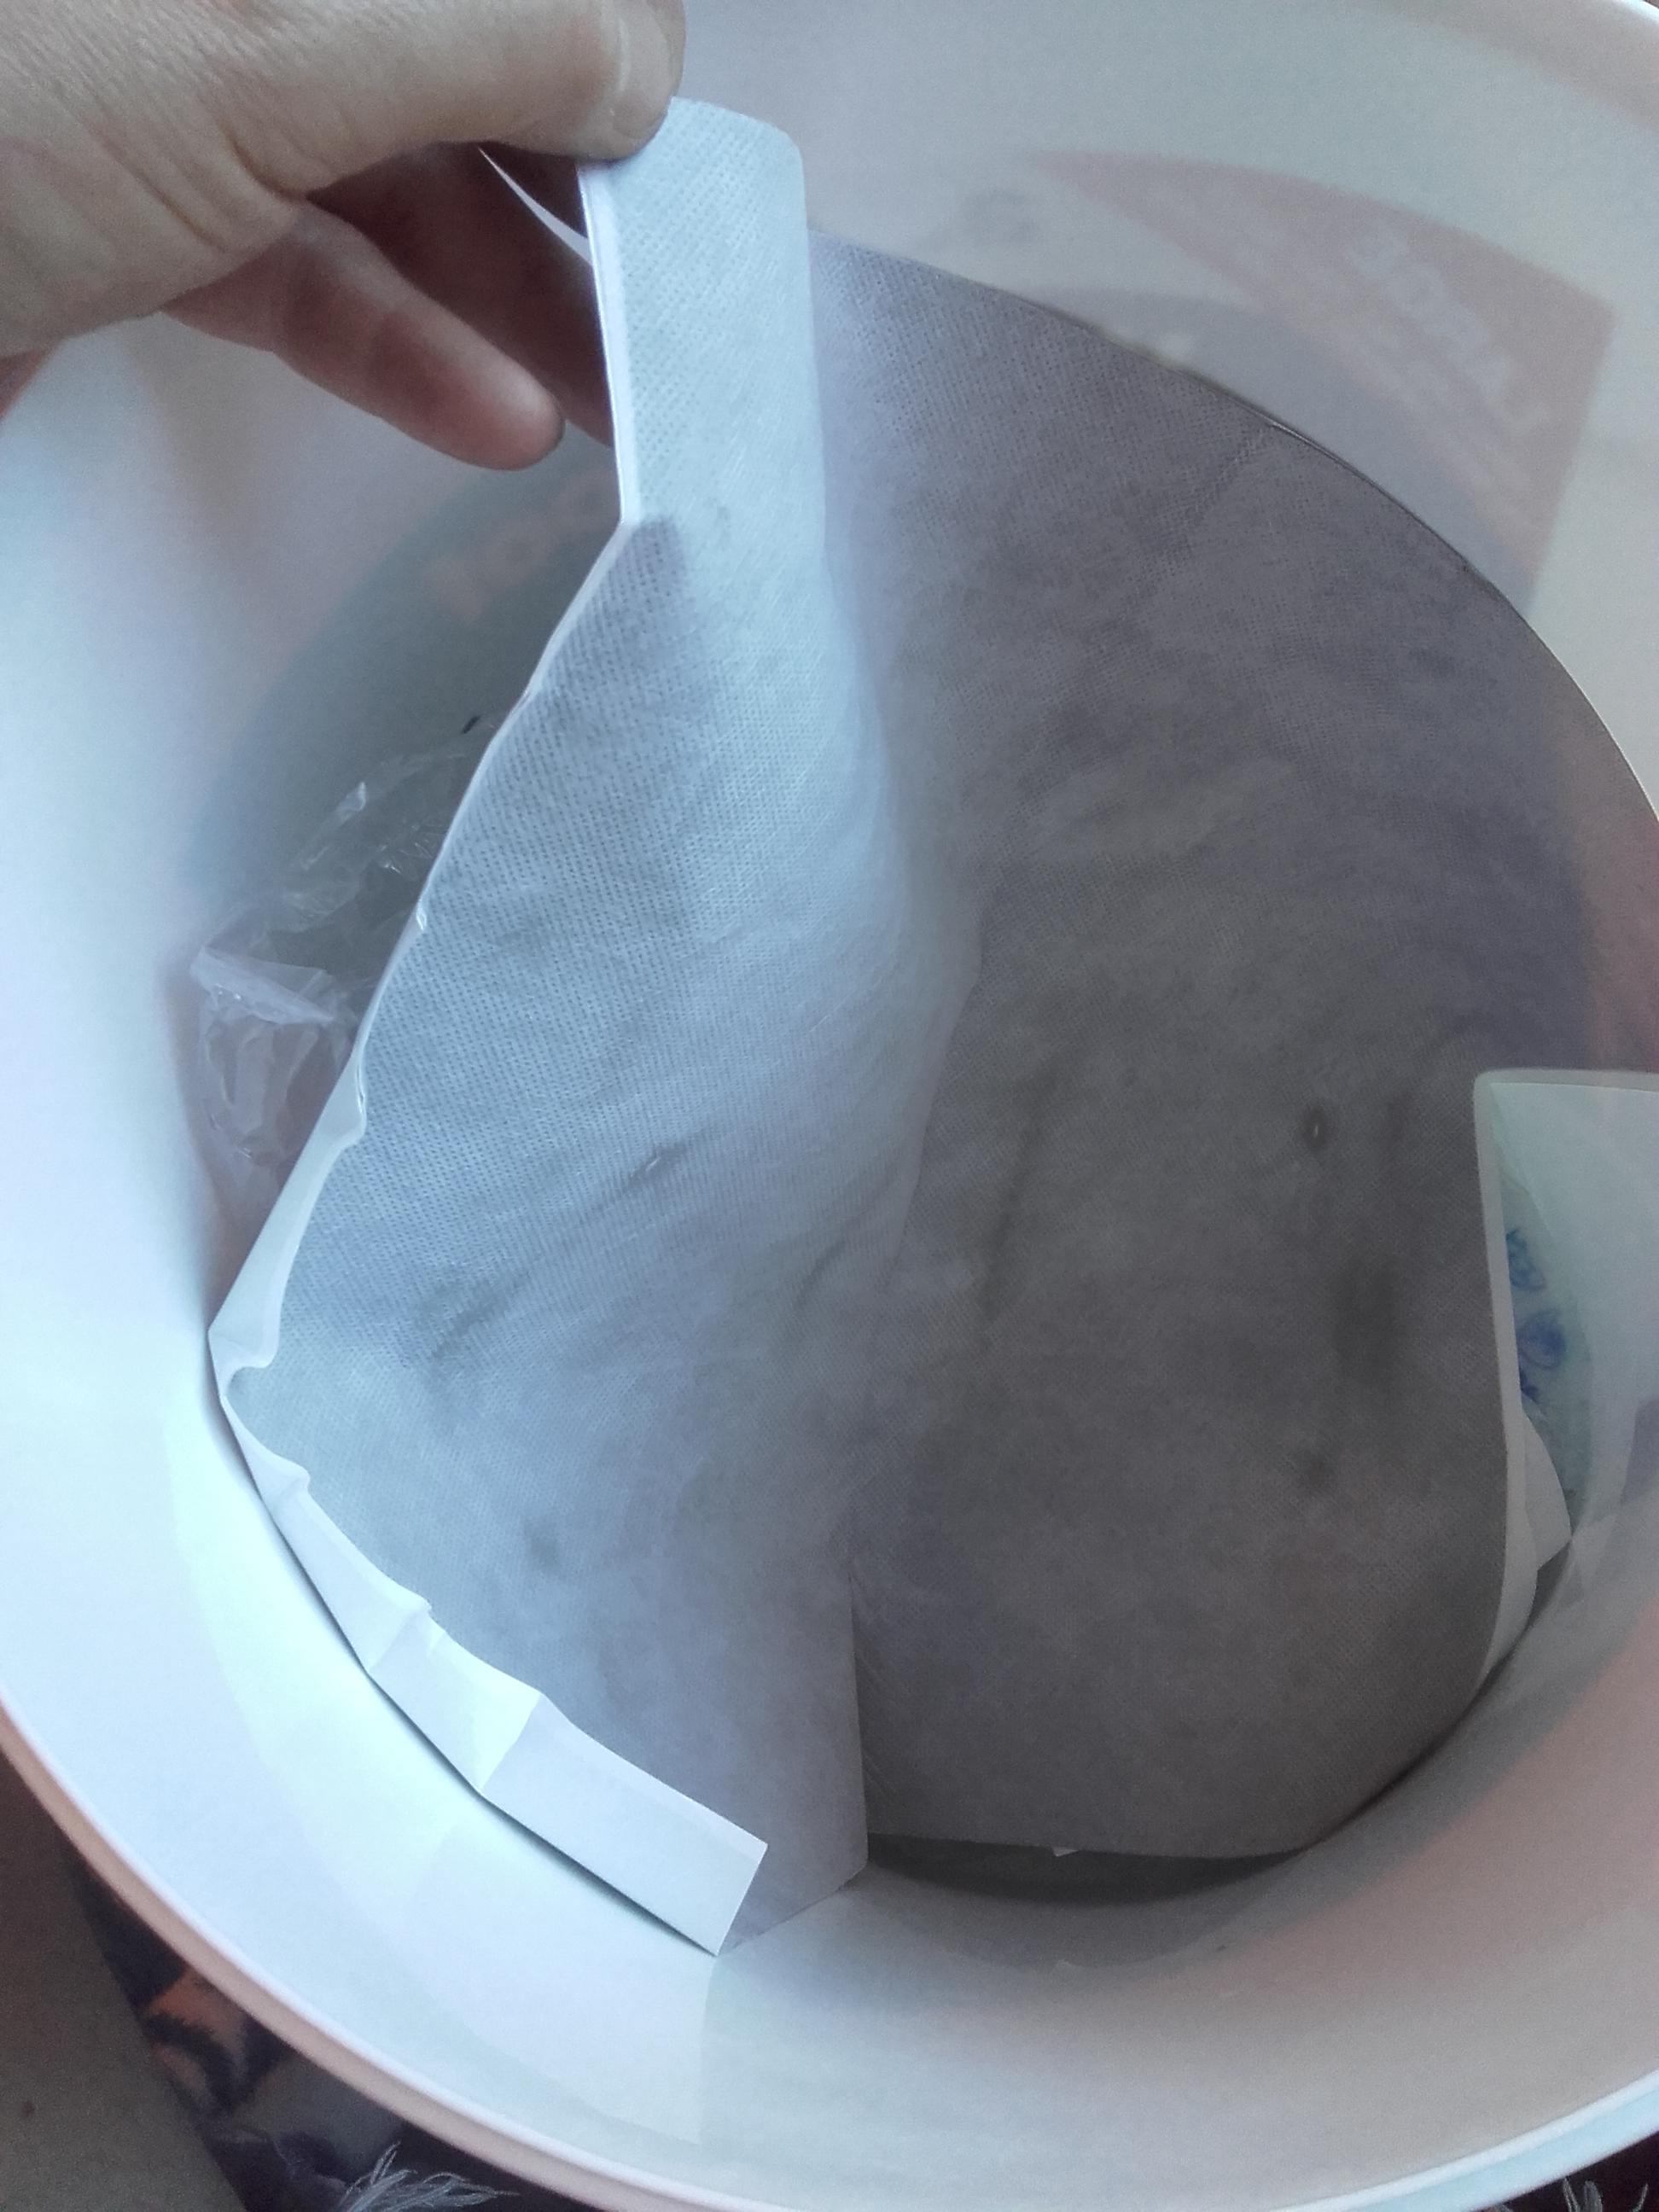
Figured I might as well ask some questions on the subject of tanking a wet room on it's own thread! Might assist someone else. I have an Aquaseal Large Waterproof Tanking Kit. First off it comes with a "Waterproof Tanking Drain Mat", this: It's about 400x400mm. It's meant to go under / around the shower waste. However, as I'm having a Geberit wall drain that has a membrane built in: I was wondering if I could then use the now spare Drain Mat over the shower mixer?
-
Anyone recommend a manual, score & snap tile clutter?