Onoff
-
Posts
21125 -
Joined
-
Last visited
-
Days Won
206
Everything posted by Onoff
-
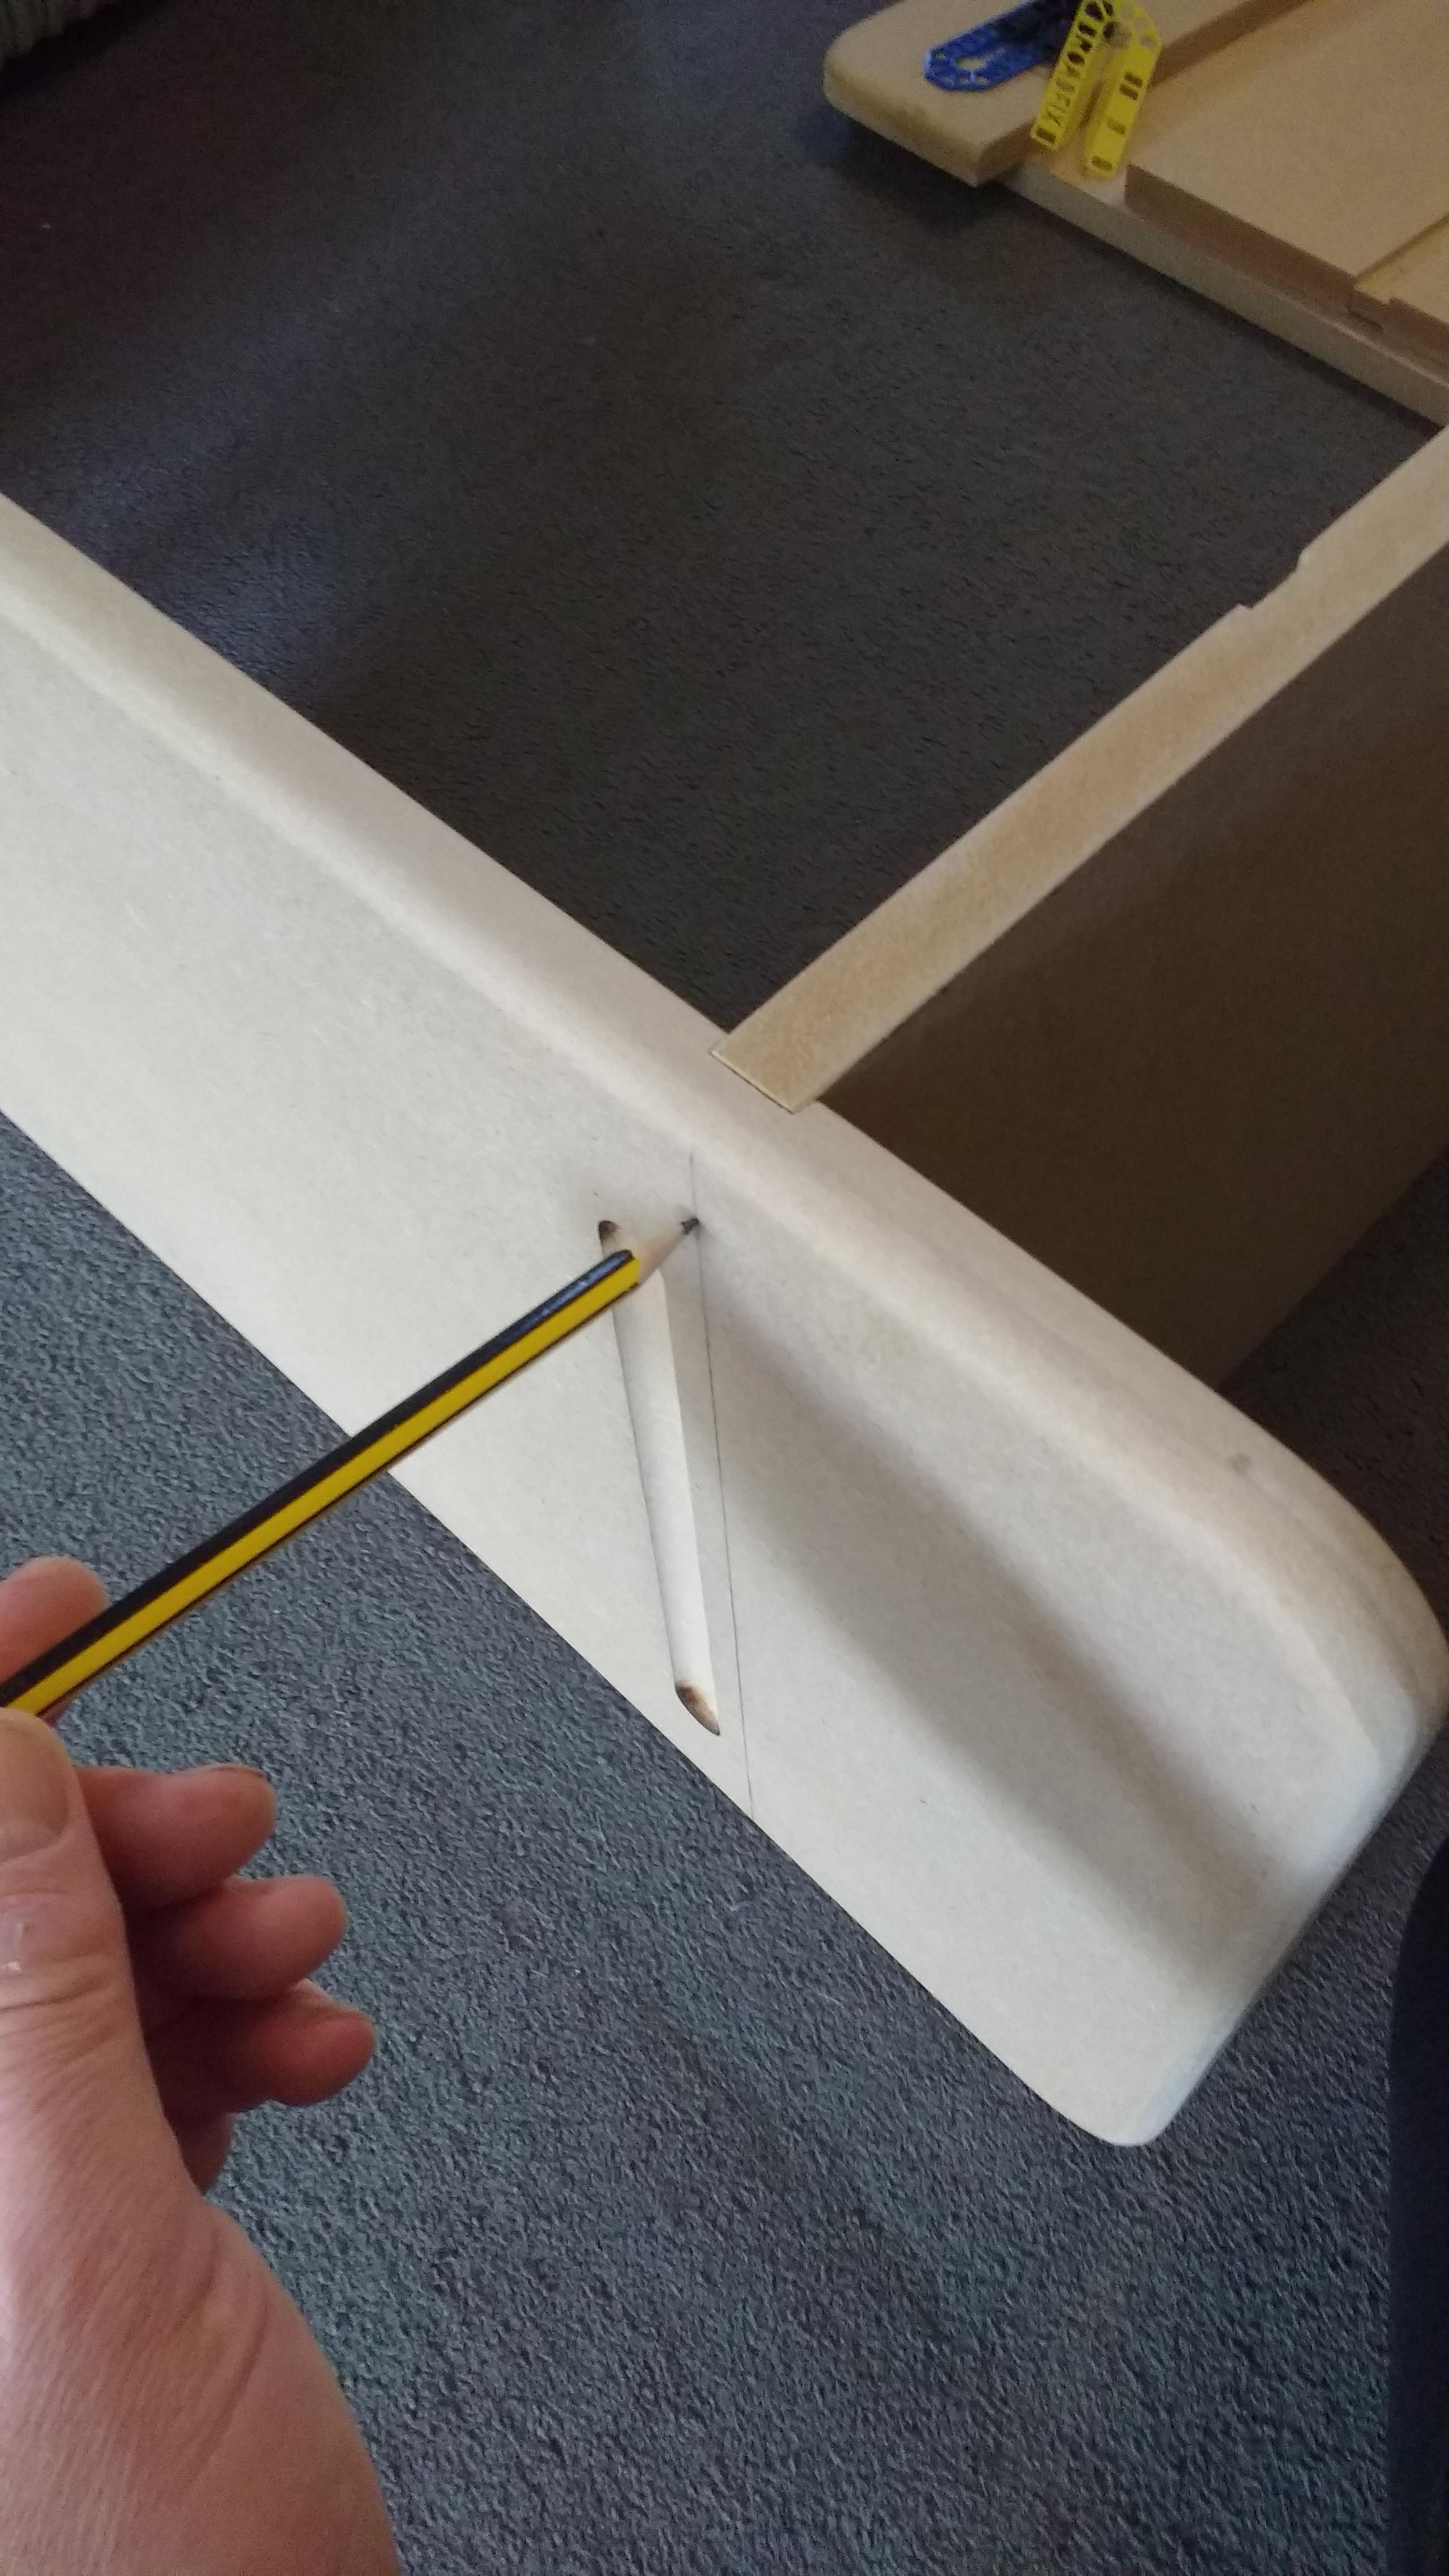
Making a quick bedside table for No2 daughter in 18mm MDF. Space for her laptop, a shelf and bottle holder. She dictated how she wanted it. It'll be primed then roller painted black, probably with Bedec barn pain. I've glued with Gorilla glue and screwed with 4mm Goldscrews. Screw heads counter-bored as a feature and will be filled. (One joint is tbh just Gorilla glue so currently sat weighted down with some heavy books). Done now but one thing I never know, is there a need, particularly in MDF, to pilot drill first before screwing? I always do tbh.


-
Benefits of that waterproofer outweigh the costs. Makes the mix much easier to work with.
-
I just dug a 13m long trench, 700mm deep and 100-150mm wide. A mattock is invaluable and then some. Was using the flat to lift the spoil at the end. Less than my boots width. That was in clay. For digging straight down by hand, a relatively small hole then you won't go far wrong with one of these pronged digging tools followed by the digging spoons. Great too for general tilling of garden beds. Mine I think is Wilkinson Sword and has flat blade prongs. Don't think they make them any longer. This sort of thing but I'd say mine is more robust with the 4 heavy duty blades instead of round prongs: (Designed I think original for the elderly so save them bending etc).

-
Might be worth adding some of this to your mortar mix? I use it all the time: https://www.toolstation.com/everbuild-202-integral-liquid-waterproofer/p80460 Think I add something like 1L to a builders bucket of water. Instructions: 202-Integral-Liquid-Waterproofer-V1.1.pdf
-
Why not a brass one (that wouldn't rust)?
-
No need. Fit the bib tap to the wall making sure the holes are nicely orientated. THEN put about 23 turns of tape on the thread and wind it in. You'll feel when it's tight enough, just never turn it back. I might add my render is rock solid.
-
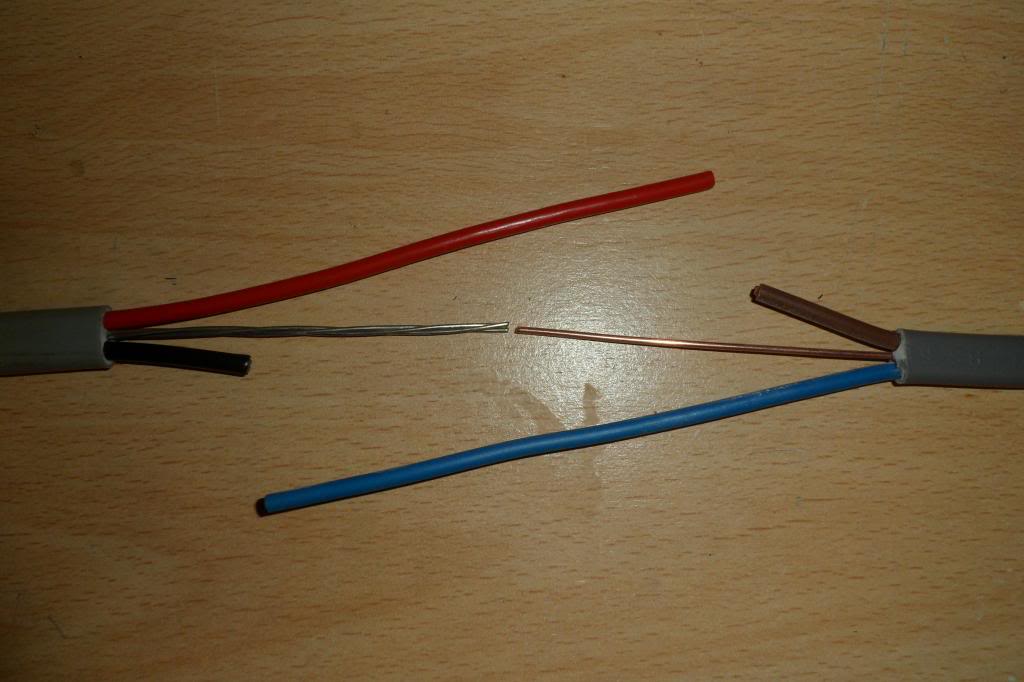
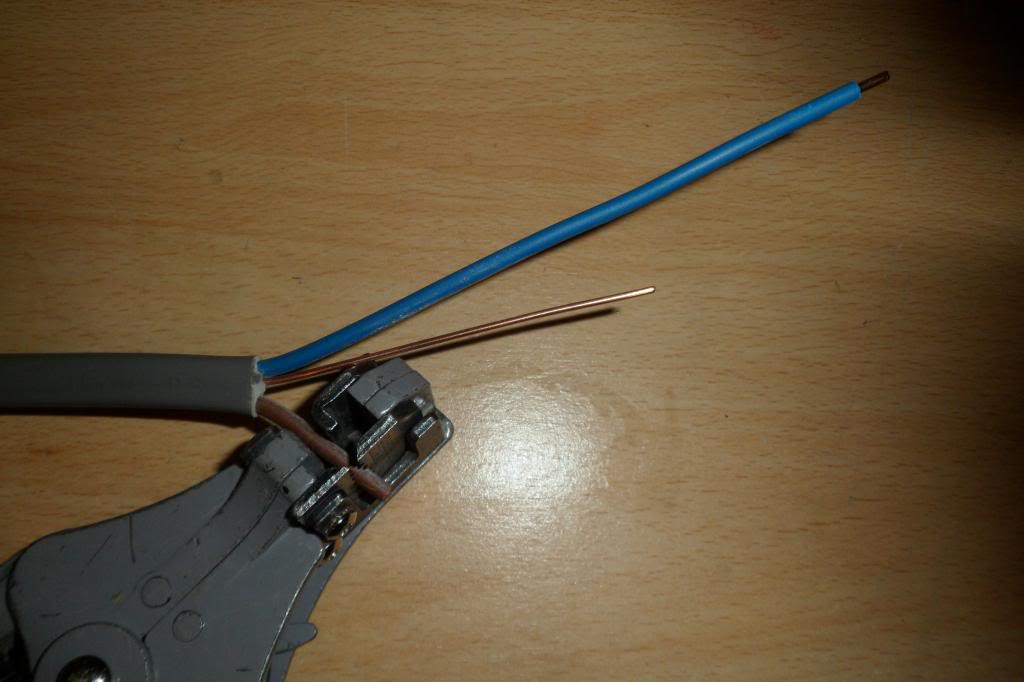
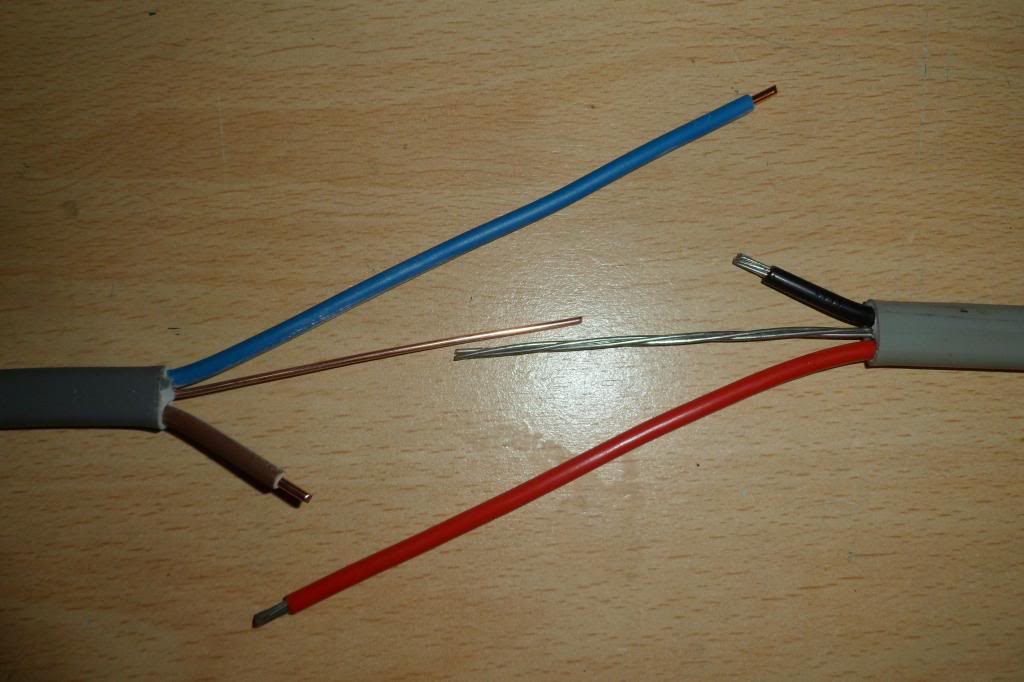
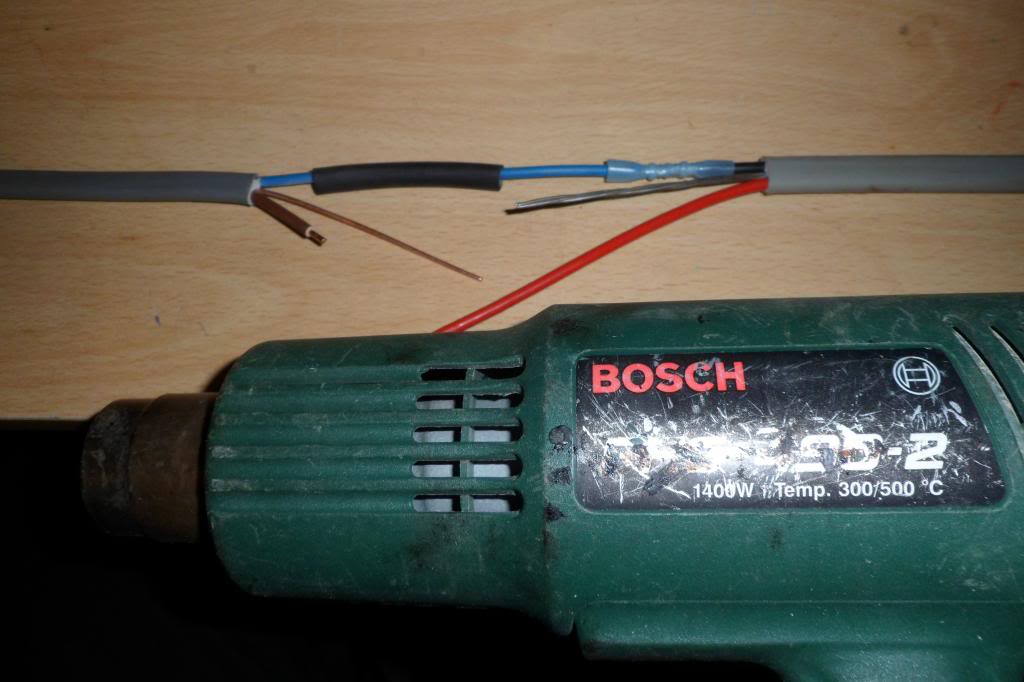
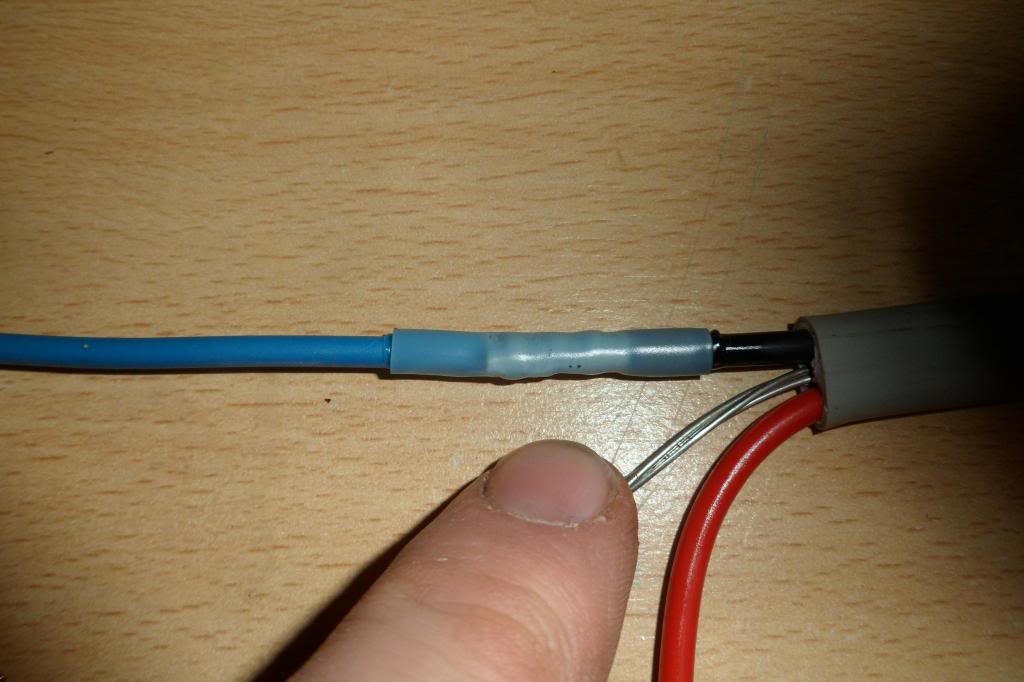
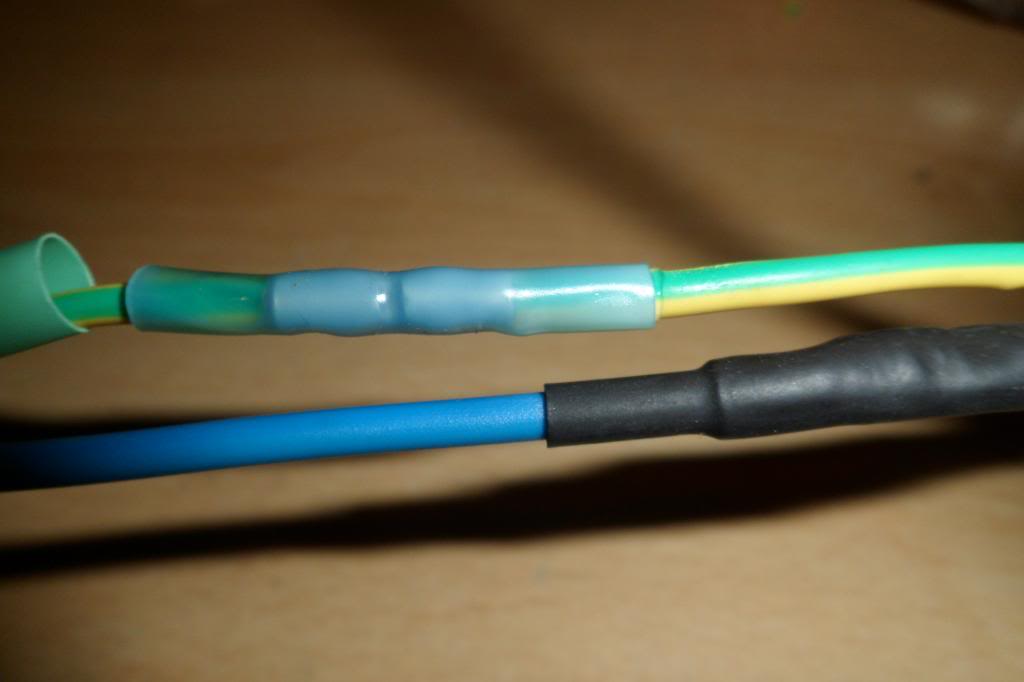
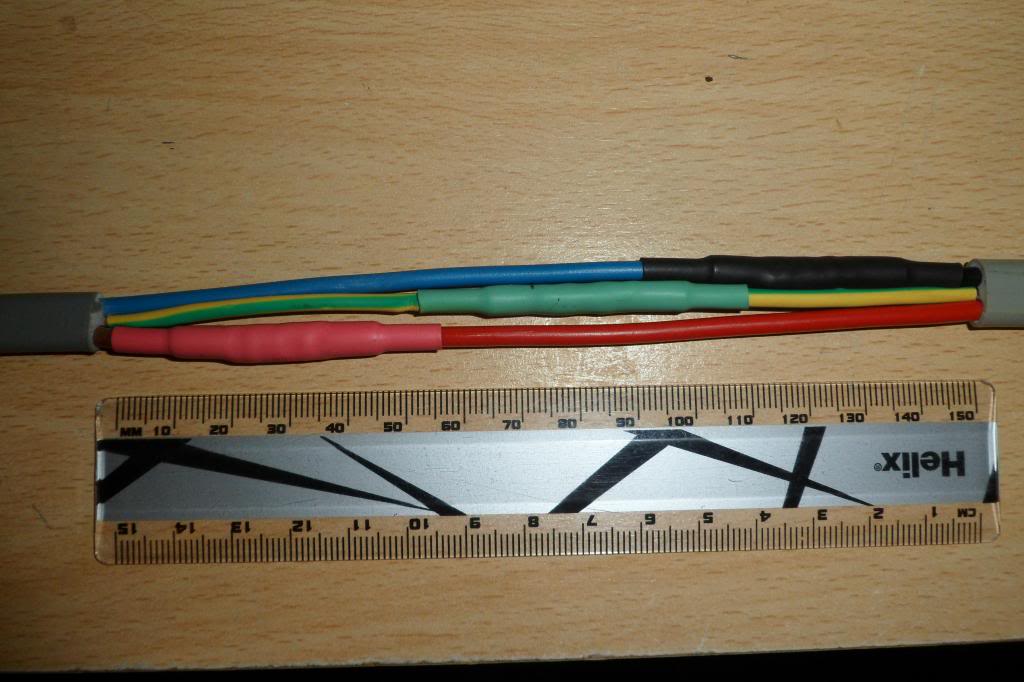
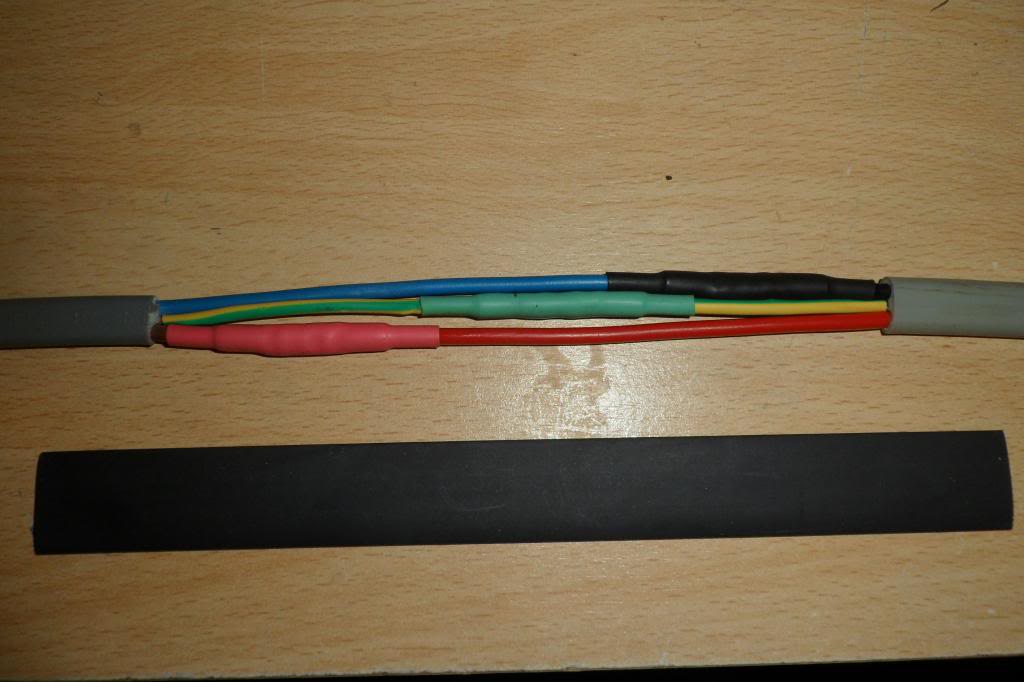
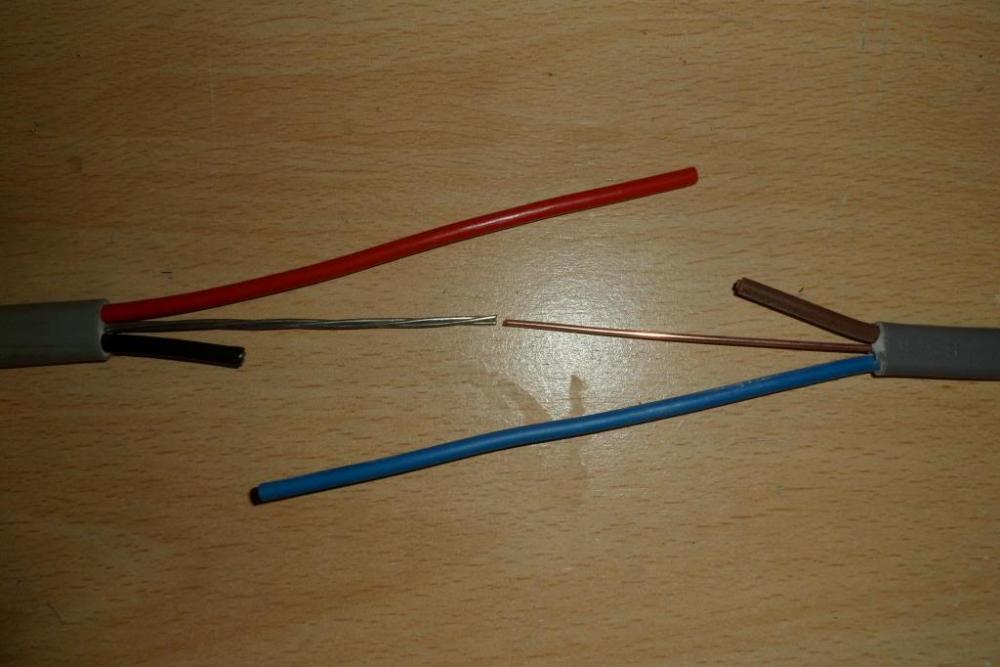
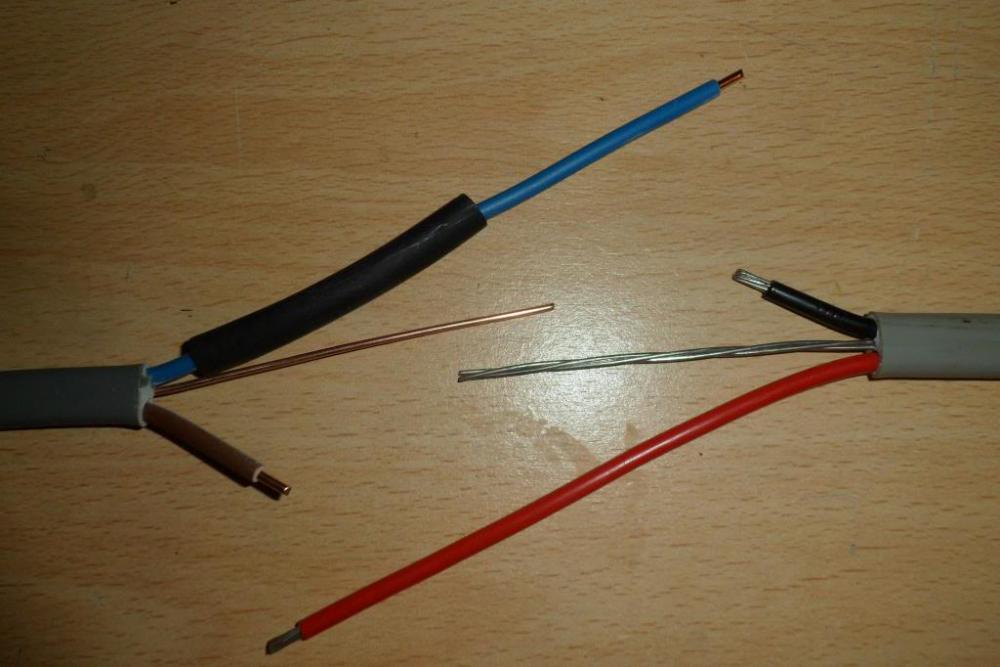
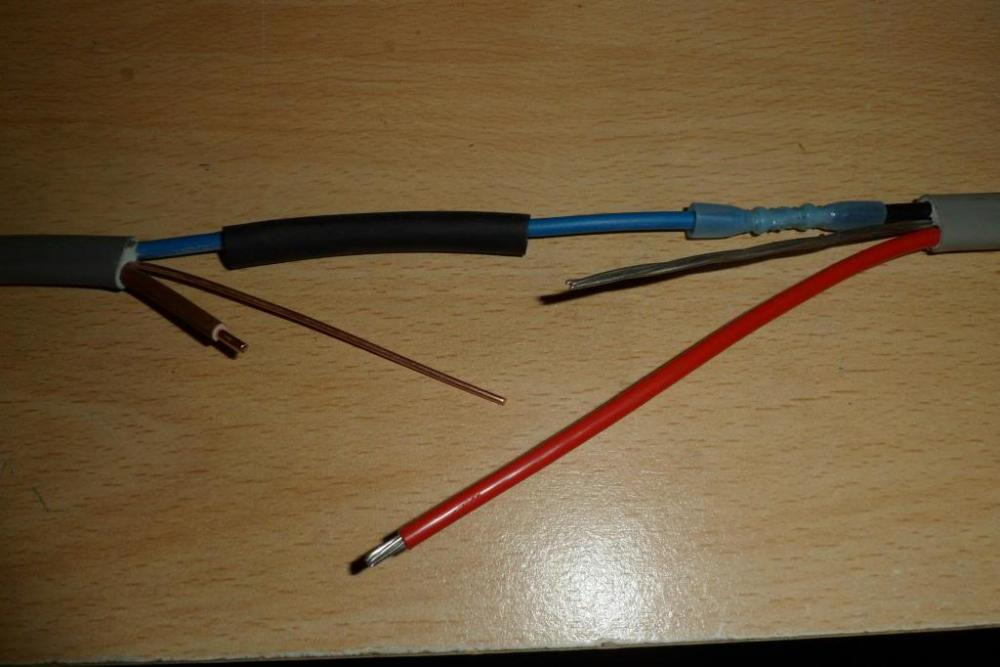
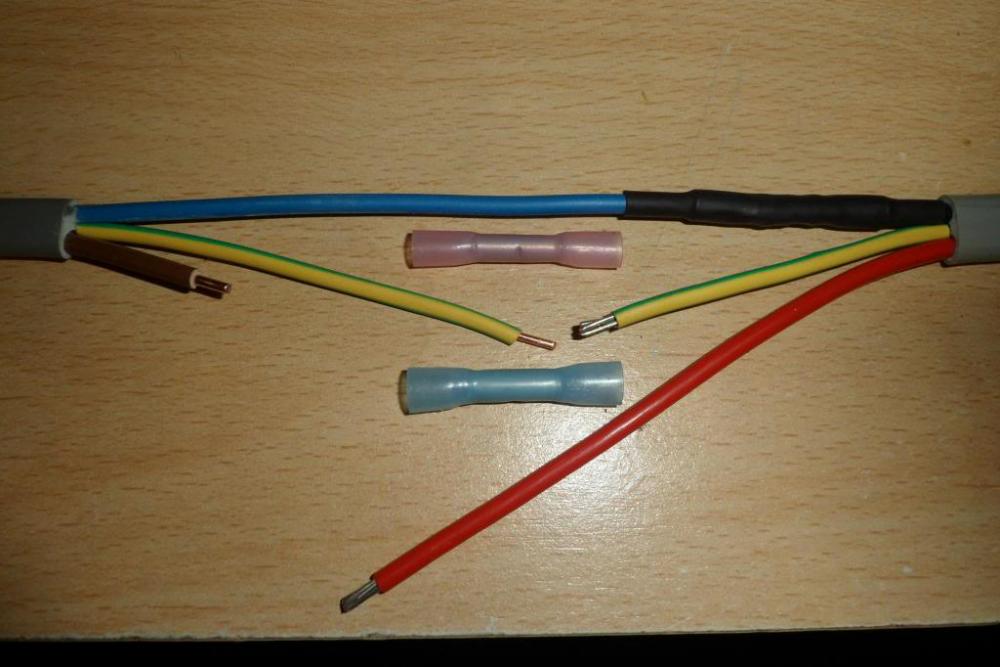
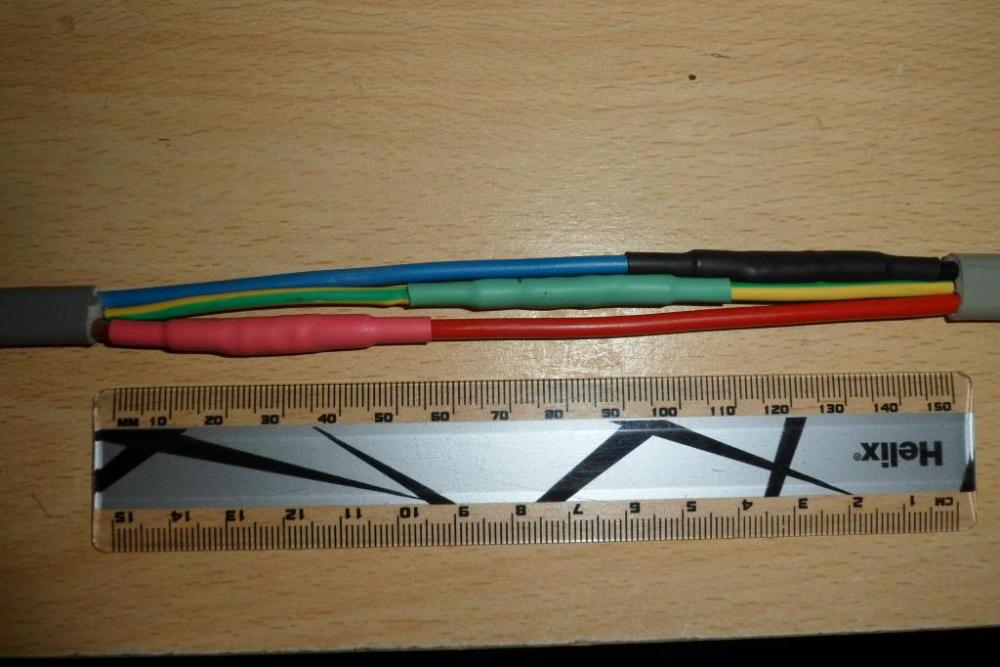
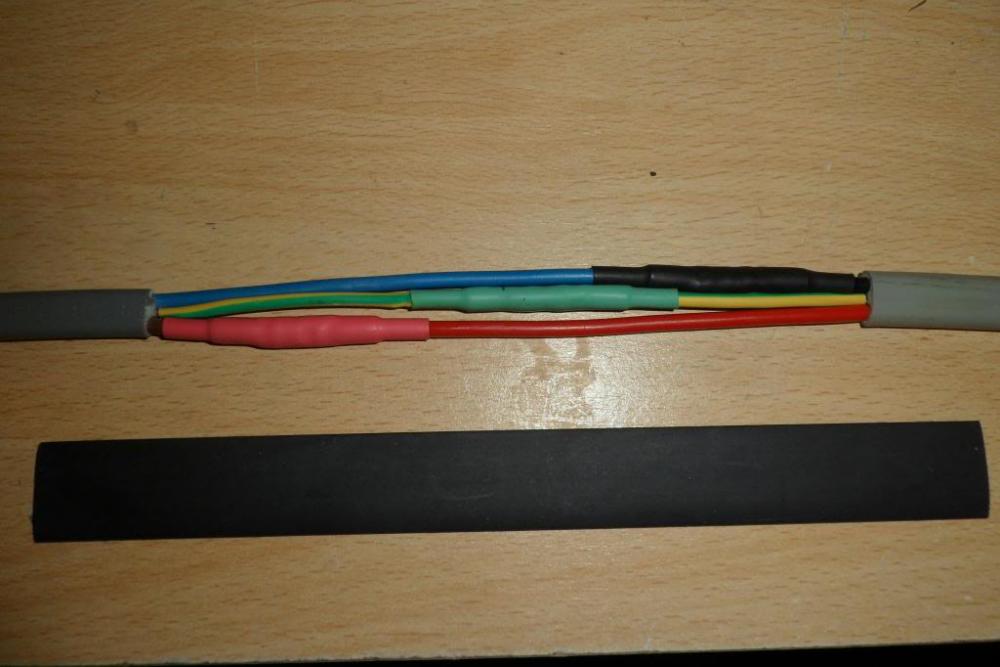
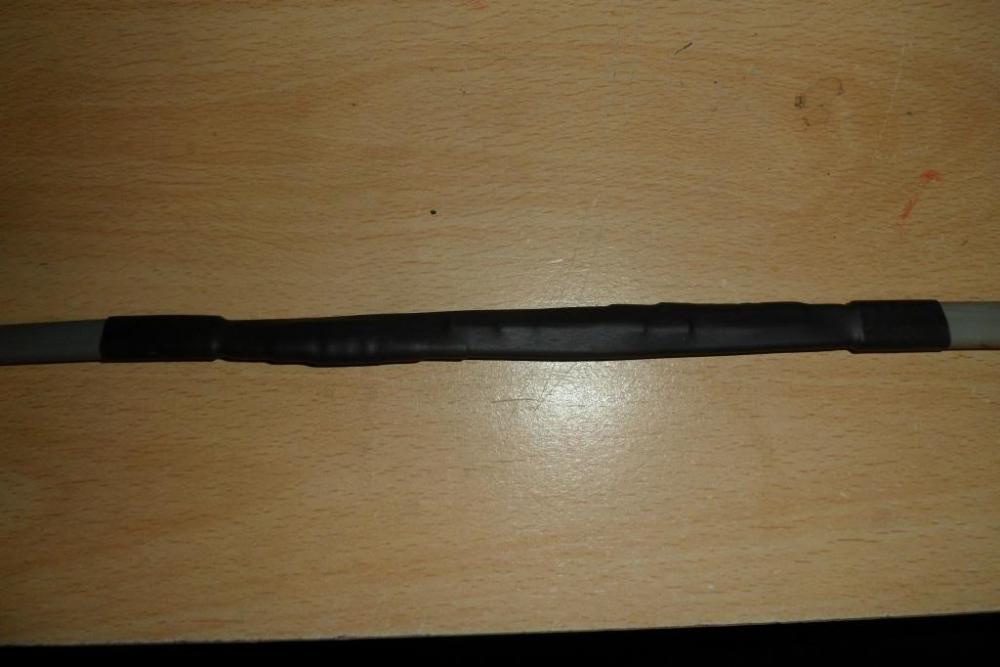
Not sure on the Dutch regs but in the UK, in line with our regs, you can crimp or solder to effect a maintenance free joint. This was to demo joining two bits of T&E, 2.5mm new & old in this case, (note the cpc (earth) might be smaller): Dead easy on a bench, fiddly in a wall, even getting the crimping tool in of course: Strip the sheaths: Stagger the joints so you don't get the "python after a large meal" bulge in the middle. The join needs to be long enough so you can slip the heatshrink on and slide along far enough to do the crimping and ideally shrink the crimp without affecting the tubular heat shrink: Strip the ends: Heatshrink slipped on BEFORE you crimp! Crimp heat shrunk - has glue in that melts and sticks to the core: Green / yellow sleeving on. SOMETIMES as said above you might want a smaller crimp for the cpc: Cpc done: All neatly crimped, old colours for the heatshrink 'cos I've got it: Heatshrink over the top: Chuck it in the wall and get plastering! Similarly it could be soldered but make damn sure you get no sharp wispy bits of solder that might poke through the heatshrink!


-
You can get a tap with a dcv already fitted. This is the one I used: https://www.screwfix.com/p/outside-tap-with-double-check-valve-15mm-x/37241#product_additional_details_container
-
Behave!
-
Just to add that neighbouring properties have been suffering too. I've made contact with the pest control guy an adjacent landlord uses and will get him to visit. Charges £180 and visits four times. Any more issues and I'll drag the WM out and metal plate behind there too.
-
I don't know how old your parents are but you might want to consider good access for later in life should they become infirm/need a carer to assist. @Ferdinand (who's going to put the link to his thread up ? ) fairly recently did an accessible bathroom refurb. Tanking tbh is pretty easy. You could consider one of the very low profile shower formers and have no tray, just tile the whole floor, including the shower area then bond the glass screen(s) directly to that. Takes a bit of attention to detail that. @Nickfromwales might be able to point at a former. My kids are just going to sit me in a plastic garden chair and point a hose at me! One thing with the rainfall head, if you go in after someone else has used it you can get cold drips coming down on you. Though I really wanted to do the rainfall head I mainly use the spray hose/riser. That Hudson Reed shower valve selects rainfall/spray hose or both. Quite a few people on here have the same model.
-
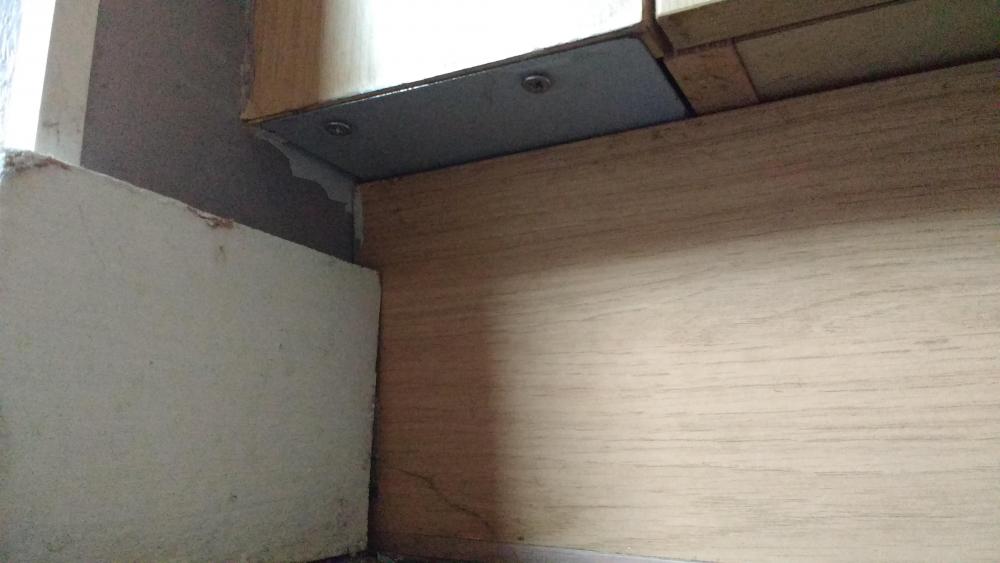
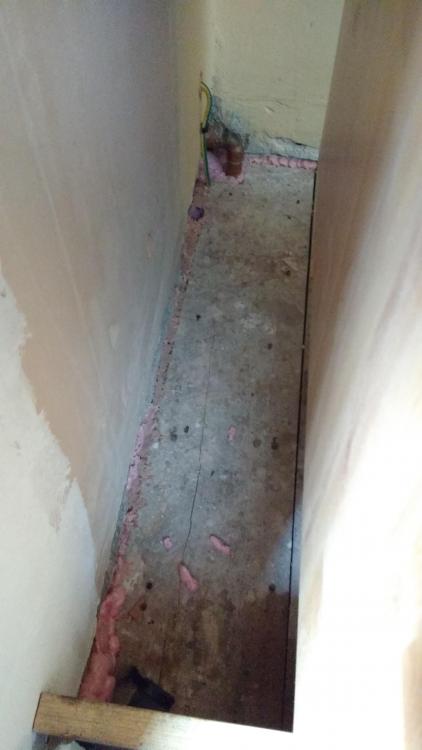
It would be very awkward to get in there and redo the "plaster" that came off when they removed the skirting. I was wondering about fitting a small angle iron and if there was some cementitious product I could get in behind it that they wouldn't like chewing? Maybe a sloppy sharp sand slurry?
-
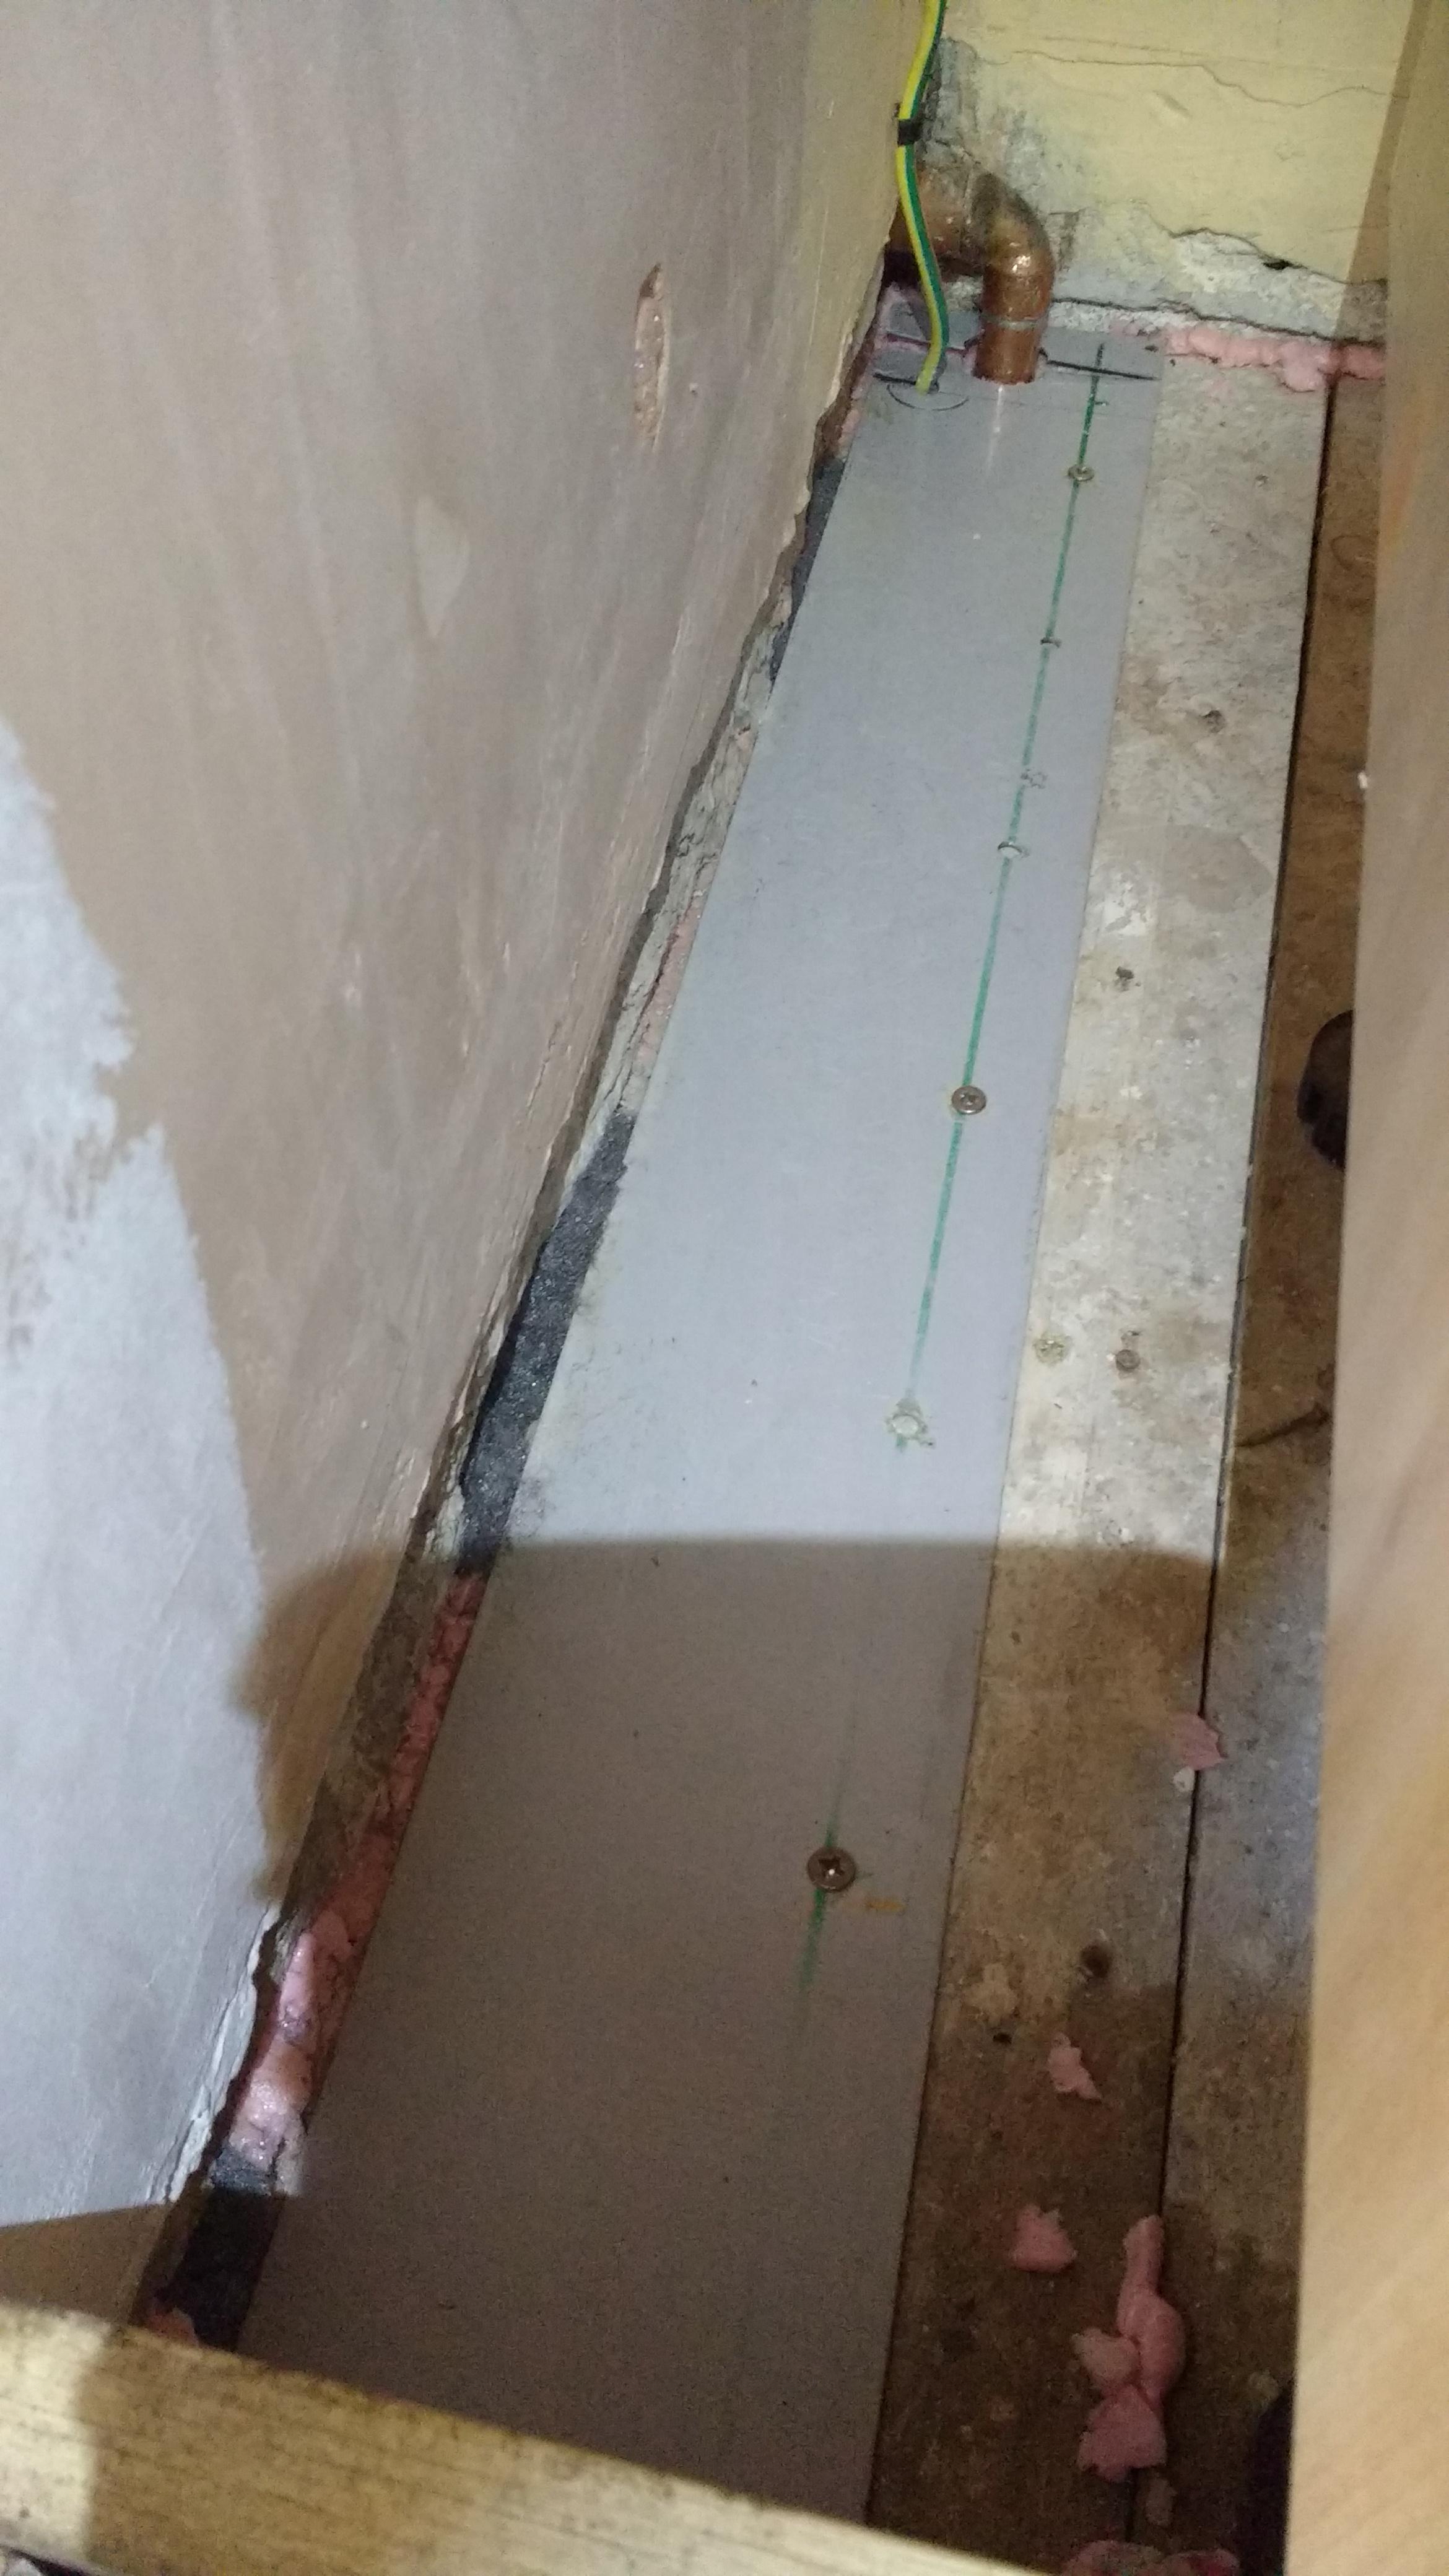
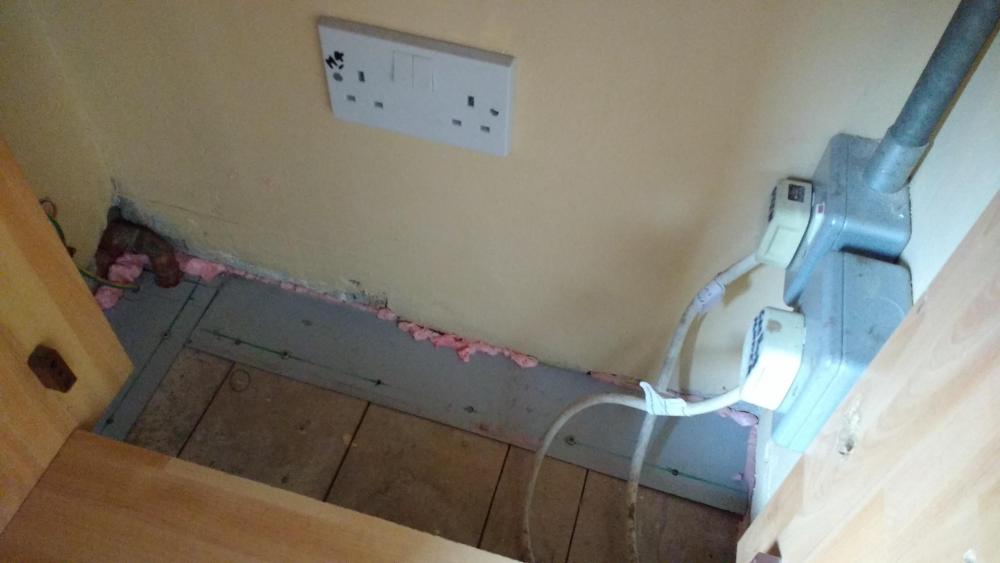
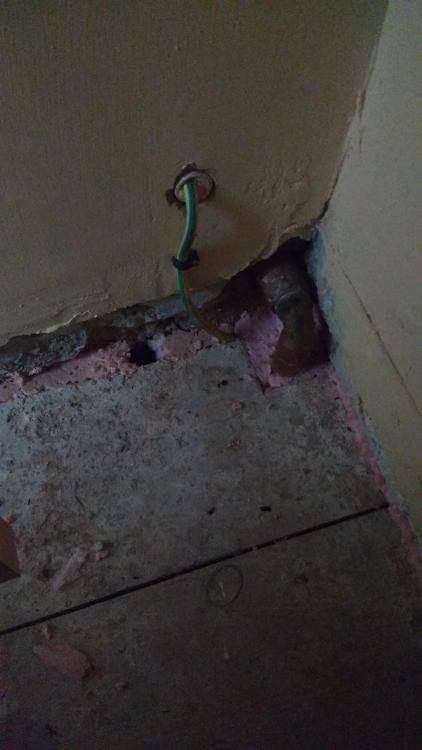
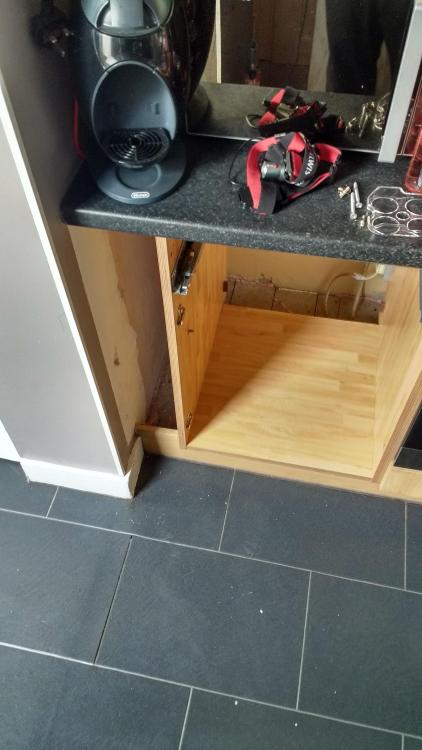
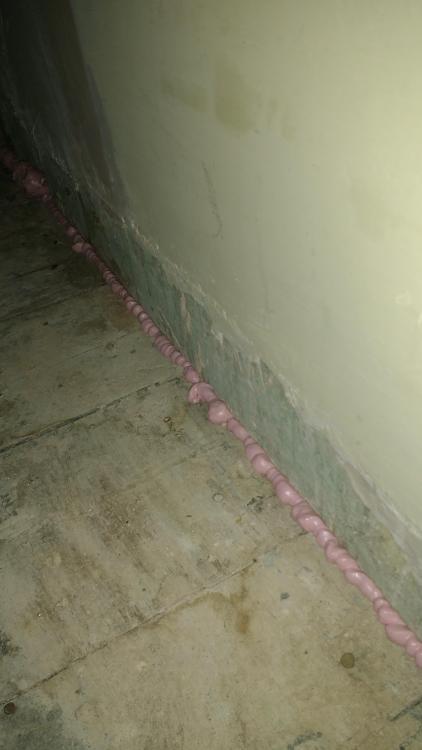
Found another hole! A mouse was seen disappearing up under that side panel where the skirting returns: Took the side panel off, draw out, cabinet back out: Mouse had chewed up through the foam just near that earth wire: Plated over with steel sheet, packed any gaps with wire wool and foamed over: Plated too under the side panel:


-
Country lanes here. If you want a kerb at the bottom of your drive you put one in yourself. All the rich folk have granite sets.
-
235/45/17s here. Like bloody rubber bands on the these roads with all the potholes!
-
There is a whiff of squirrel about the new (to me) Mondeo here...
-
That'll have been Speedo Gonzalez...
-
I've started a reply to this thread and will post it up when finished.
-
I'll raise you a RAT under the fabric battery cover of my then daily driver, the Golf GTI where it had built a nest. I'd not been driving the car much during the first lockdown.I popped the bonnet to check the fluids etc and it was like whack a mole.
-
Think I've mentioned before our cat always leaves that greenish internal organ on the stairs right where I tread on it...
-
My cat would bring a mouse home and the dog, a flat coat retriever would snatch it and gulp it down if it could just to deny the cat. It ALWAYS came back up at the most inopportune moment...whilst we were having dinner etc.
-
Down to one mouse...we think, or a least a lot less. Hoping maybe a trap will sort. I reckon a big issue is where they removed the original skirting exposing the ends of the floor boards where they don't quite meet the wall. I'm hoping to pay another visit. One more cupboard to get behind then maybe angle iron time!
-
Bedec?
-
Nothing wrong with my grouting, it's the tiling that's crap!