Onoff
-
Posts
21124 -
Joined
-
Last visited
-
Days Won
206
Everything posted by Onoff
-
You had a forklift as well as a telehandler?
-
Illbrück FM330 skins up like rubber and really tough rubber at that. It's actually quite noticeable when you cut it compared to even Soudal products which were my previous goto.
-

Sore feet - better boots!
Onoff replied to Lincolnshire Ian's topic in General Self Build & DIY Discussion
DeWalt Bolster, comfy from out of the box but lucky if they don't fall apart within 6 months! 😡 -
Sore feet - better boots!
Onoff replied to Lincolnshire Ian's topic in General Self Build & DIY Discussion
Bigger men, bigger shovels! Taylor, Gilbreth? -
🤣
-
Could print in TPU rubber...
-
3D printed feet.
-
I'll was just a bit worried the bin bag material is rather flammable.
-
How best do I insulate above this boiler hatch. There's 270mm (100+170) of roll stuff in the main roof then 250m of stacked Rockwool batts above the boiler...except for above the hatch.
-
How to release water in combi boiler to repair a leakage?
Onoff replied to LLL's topic in General Plumbing
According to ChatGPT: https://chatgpt.com/share/68e973b3-9810-8006-85ab-ce163c5f9890 -
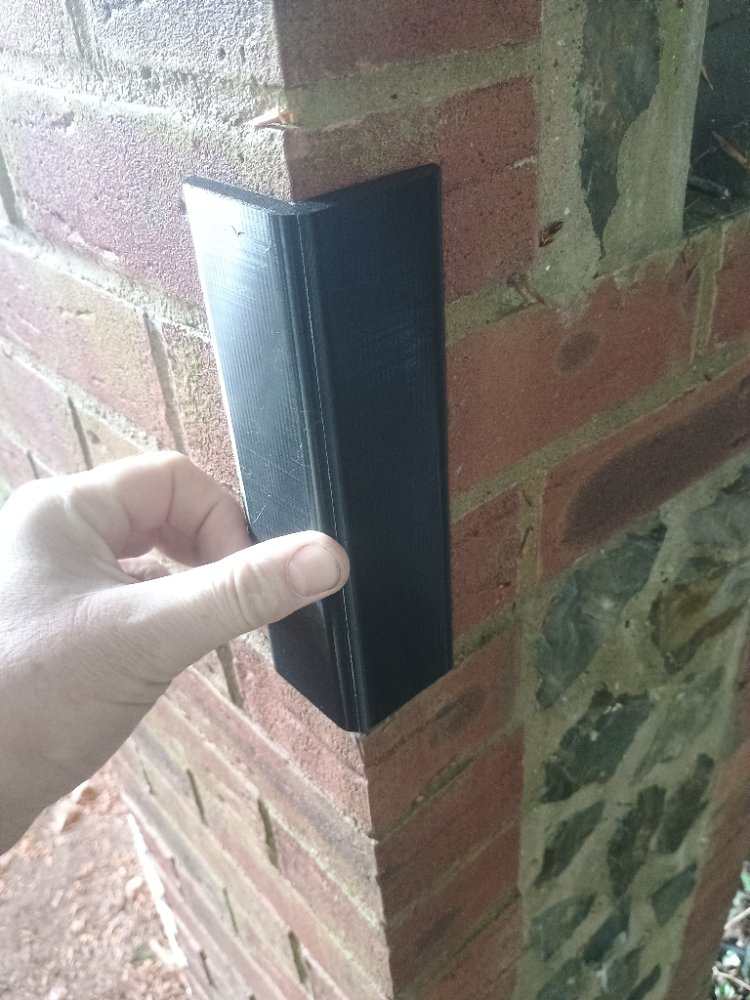
Used Everbuild Sika Multi Stick to stick 3D printed, TPU corner protectors onto my gate pillars:

-
Illbrück FM330 walks all over the Soudal stuff I used before finding it. Not sure mind if you could use the FM330 for say sticking EPS to concrete like the Soudal Low Expansion foam. That works a treat.
-
Post getting an EV charger fitted
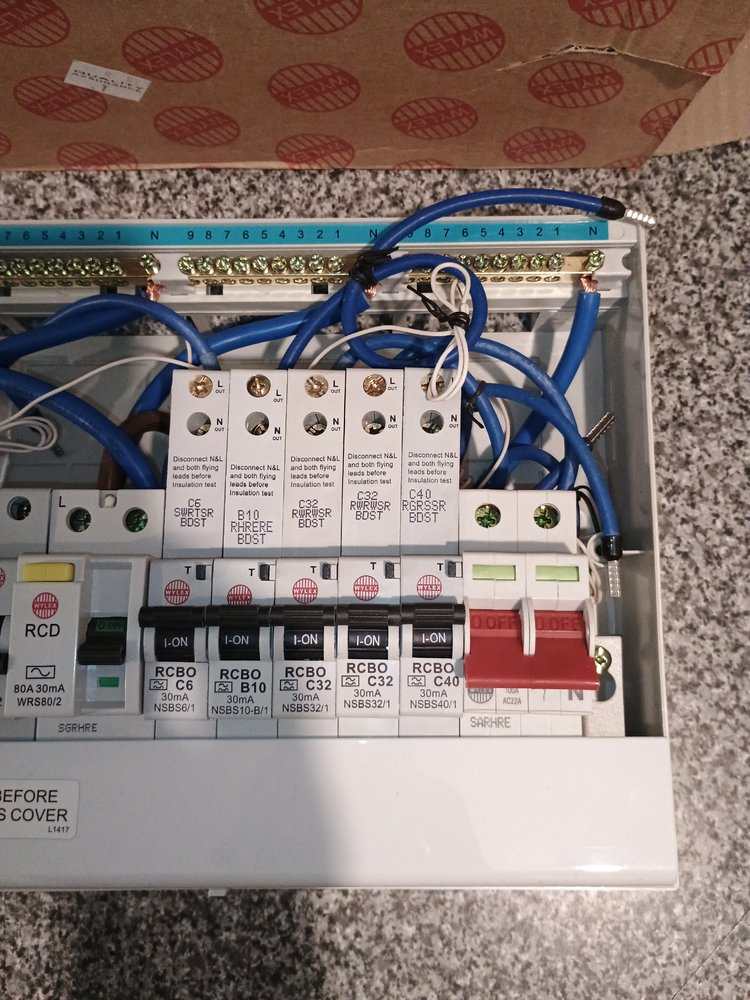
Onoff replied to Tennentslager's topic in Consumer Units, RCDs, MCBOs
Or drop in some RCBOs to keep the lights on when the washing machine etc dies 😉 -
Post getting an EV charger fitted
Onoff replied to Tennentslager's topic in Consumer Units, RCDs, MCBOs
Other than it's "old"? Are they Wylex NSB** breakers? If so they're obsolete. Looks like you have half the circuits on the main switch and half on the RCD. However...if a NSB range C40 RCBO would do for your EV charger I may have one here. I have a bnib old stock CU. Think I've a B32 RCBO too...again new... Is that SWA in a regular stuffing gland?
-
I've long been under the clearly mistaken impression such vents had to fit over a slot in the window head. There was me considering fitting them and how I'd set a router up to achieve it accurately without taking the window out! A line of holes, much easier! Doesn't a positive ventilation unit push "heat" out through the trickle vents though thus your bills go up?
-
The blocks will absolutely have a damming effect in holding water back and raising the level of the water where it's held. It may also allow water to divert somewhere it didn't go before. Plus making you go "Damn!" when it leaks.
-
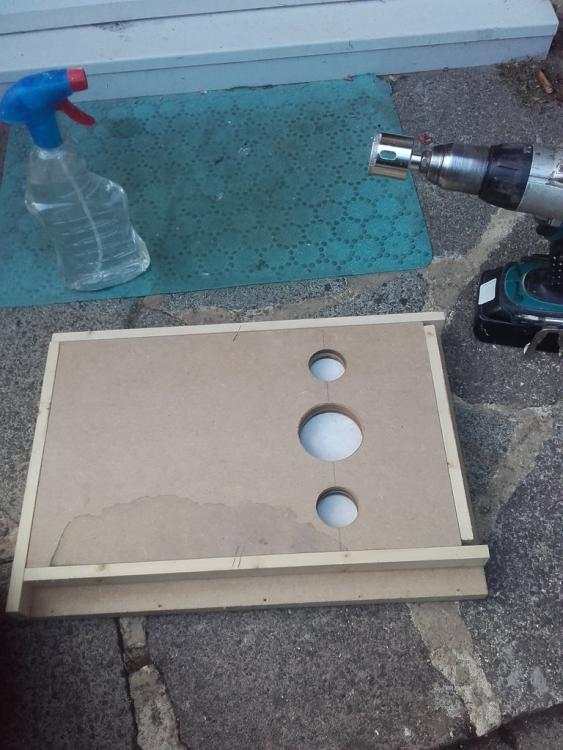
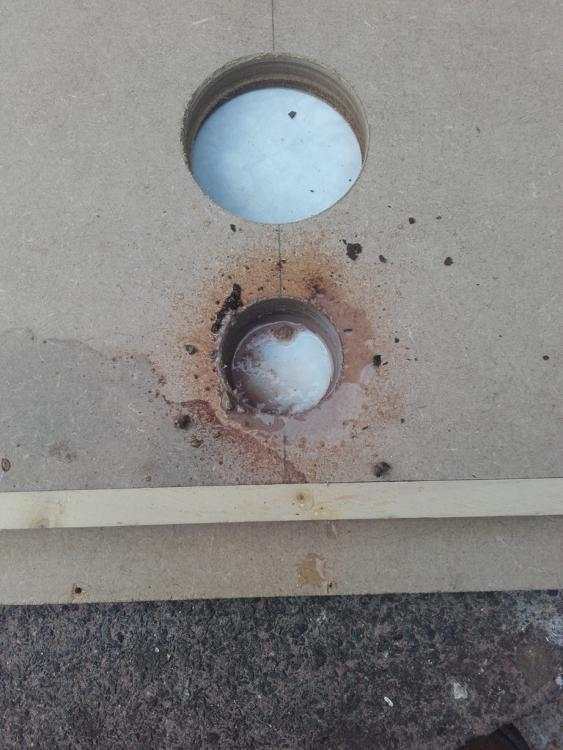
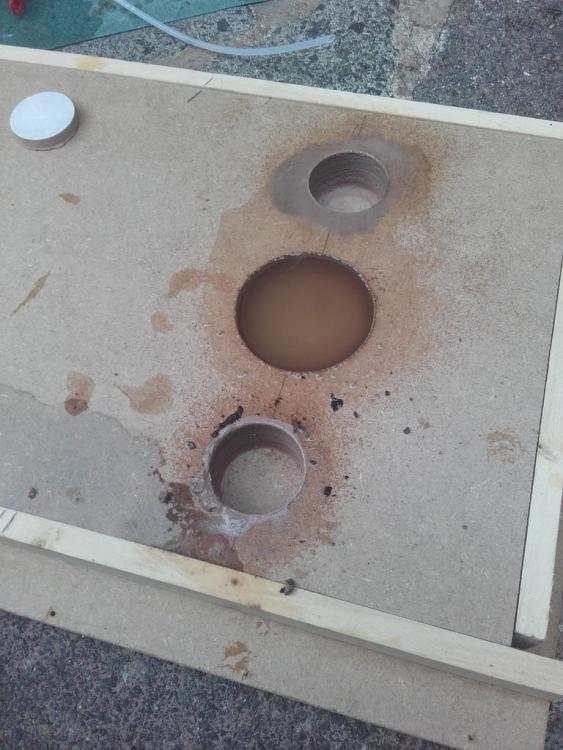
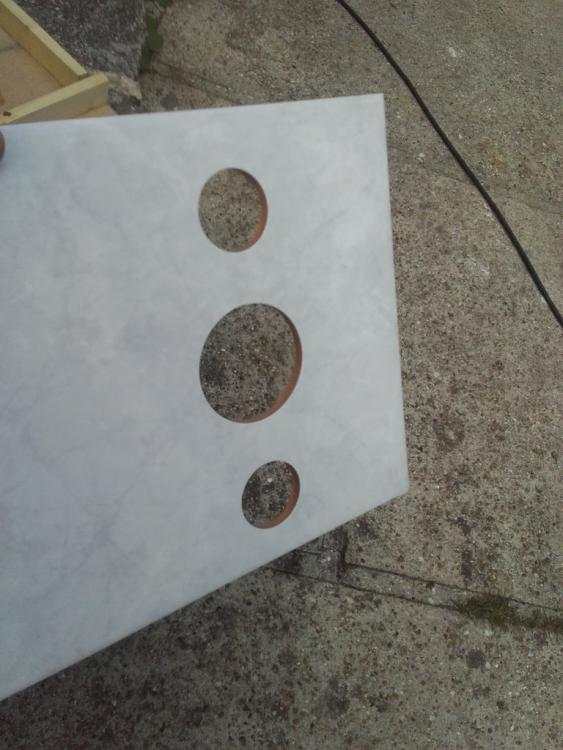
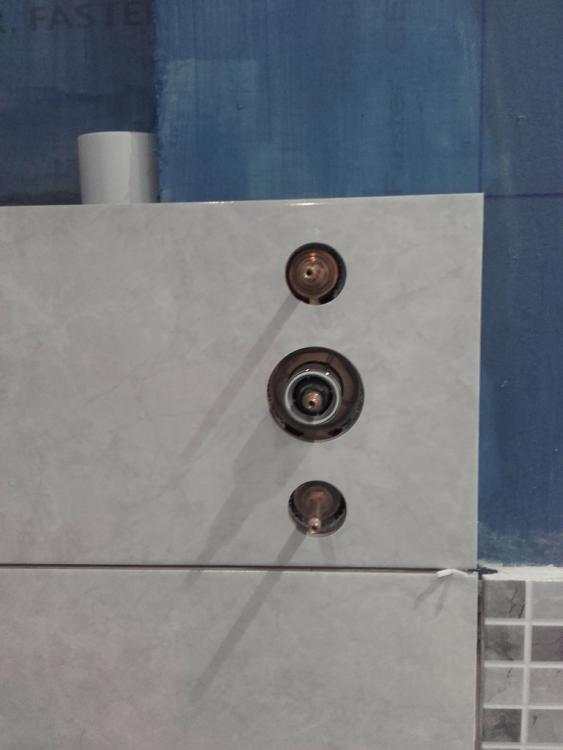
Best approach for drilling 20mm terrazzo tile?
Onoff replied to markharro's topic in Bathrooms, Ensuites & Wetrooms
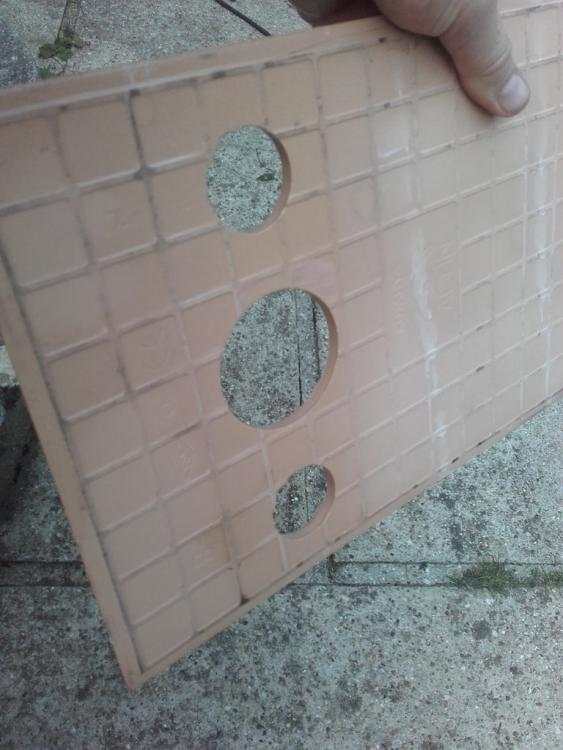
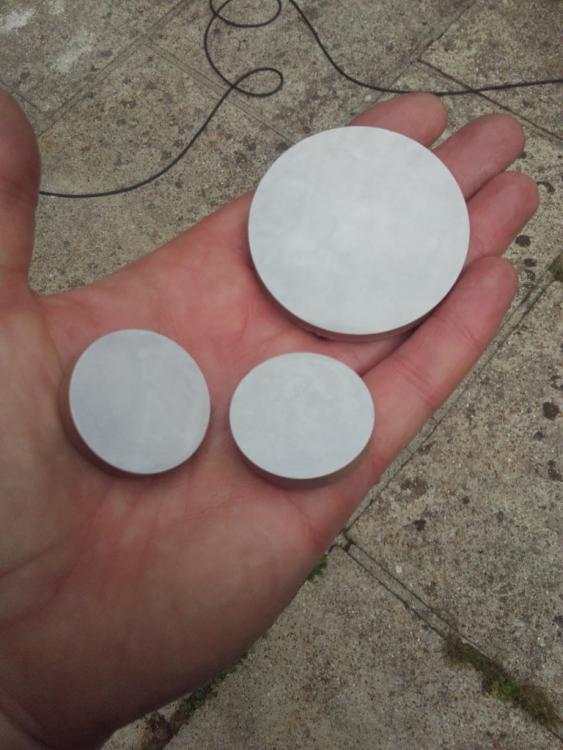
I've made jig boxes before to hold tiles: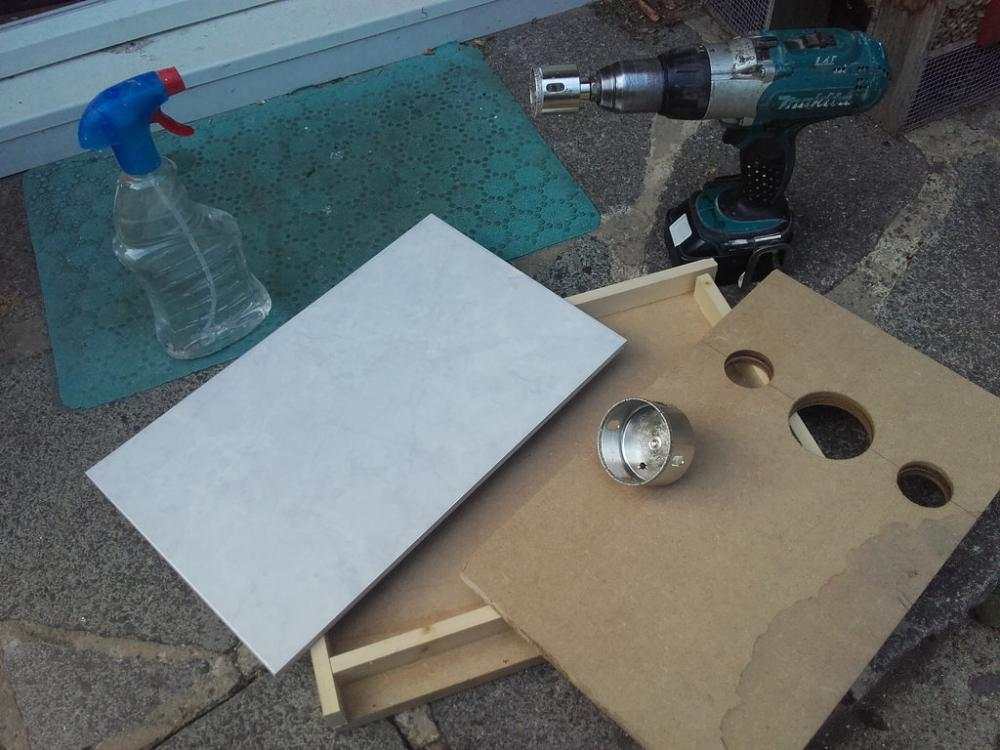

-
Some people have even considered building a "liveable" man cave and disguising it as a shipping container...
-
I've used The Dogs B******s and Sticks Like Sh!t to stick tiles to moisture resistant plasterboard. CT1 is no good for fixing leaking heating oil or hydraulic tanks.
-
It's not a Wickes product. BT1 is made by C-Tec who make CT1 but it's specifically meant for bathrooms etc as it has anti bacterial / anti microbial properties.
-
Could this be a bust water main eroding underneath?
-
Kevin Cashin at C-Tec, the makers of CT1 suggested it. The tiles have been on I'm guessing 6+ years now and are going nowhere. The bath sides slope in slightly too. The end and side panels are removable for access to the pump and plumbing. There's discreet fixings covered with silicone. I didn't grout just used Forever White so everything can flex and be cut out easily.
-
Yes. I used it to stick ceramic tiles to marine ply.
-
@MJNewton used Desmopol liquid pu:
-
Nickel sulphide inclusion maybe?