


Nestor
-
Posts
806 -
Joined
-
Last visited
-
Days Won
6
Everything posted by Nestor
-
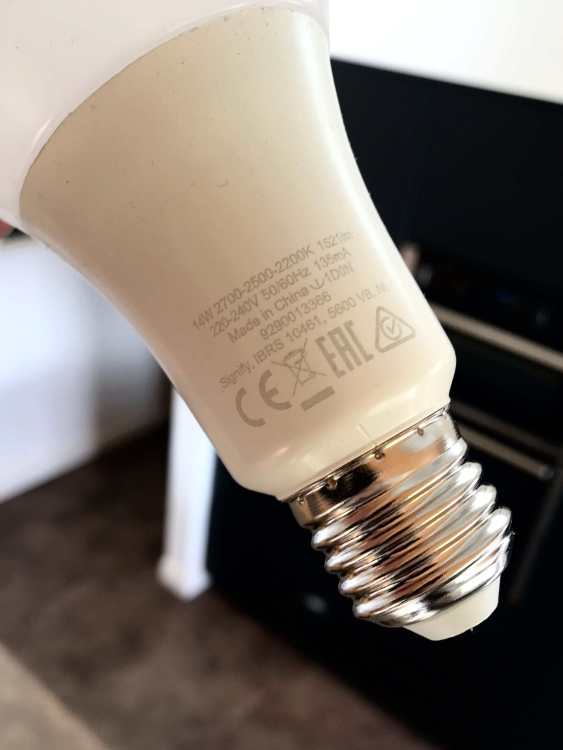
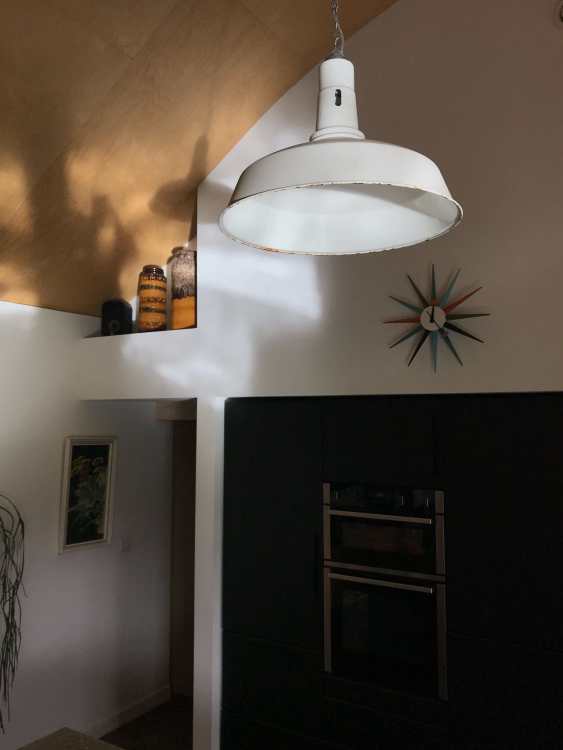
We have a single pendants above the island and dining table, 4 floor lamps and 2 wall Anglepoise. Bit of chaos but it works for us. 3000K seems just right. Fitted with a Philips 14W 2700/2500/2200K which works off the wall switch. Can you find a LED with adjustable temperatures? Brightness is also a consideration. As @Mike consistency throughout the room if possible.
-
I don't have green fingers, what to do?
Nestor replied to Post and beam's topic in Landscaping, Decking & Patios
Sounds great. If the ride on is more of a finishing mower it might struggle until most of the field is under control unless it is a brush cutter / flail, you will know if it starts shredding belts. Areas for wild flowers ideally need to be power harrowed (you could try a rotovator) before seeding with Yellow rattle (helps reduce the perennial grasses) and other wild flower seeds. What to do with the meadow grass needs to be considered, ours is cut and bailed late summer, once the seed heads have flowered, cut and leave on the ground for a few days during a dry, warm period and then remove all the cut material. I have used a scythe. Continually dig out, remove the roots, cut back the unwanted shrubs, some even spot spray as well. It is a bit of a task, takes a few years to establish but very rewarding. -
I don't have green fingers, what to do?
Nestor replied to Post and beam's topic in Landscaping, Decking & Patios
We can but dream, had a Husaberg 600 which I used at Lydden and Brands for supermoto days out. Had to call out the AA outside the gates at Brands to take me home as big end gone!! -
I don't have green fingers, what to do?
Nestor replied to Post and beam's topic in Landscaping, Decking & Patios
It won't power harrow the field though.
-
I don't have green fingers, what to do?
Nestor replied to Post and beam's topic in Landscaping, Decking & Patios
A bit of space is a nice issue to have really and a few questions. Does it have hawthorn, brambles, bracken, dock as well as grasses growing wildly? Is it level, does it have good stock proof fencing or hedges and do you have responsibility for the boundaries? What would you like it to be, an area of short grass with easy maintenance by regular mowing? Would you like a wild flower meadow, a small copse of native or fruit trees. Post some photos. What Ducati is that, a 750 Sport? -
Fire Stop Locations for Timber frame with external cladding
Nestor replied to HanleeHouse's topic in Timber Frame
The mesh is fine, how effective it is, down to whoever fits it. -
Fire Stop Locations for Timber frame with external cladding
Nestor replied to HanleeHouse's topic in Timber Frame
I fixed this mesh at the top and bottom of the battens behind the Cedar cladding. https://www.robinsonwirecloth.co.uk/online-shop/Soffit-insect-mesh-stainless-steel-30m-roll-p49612077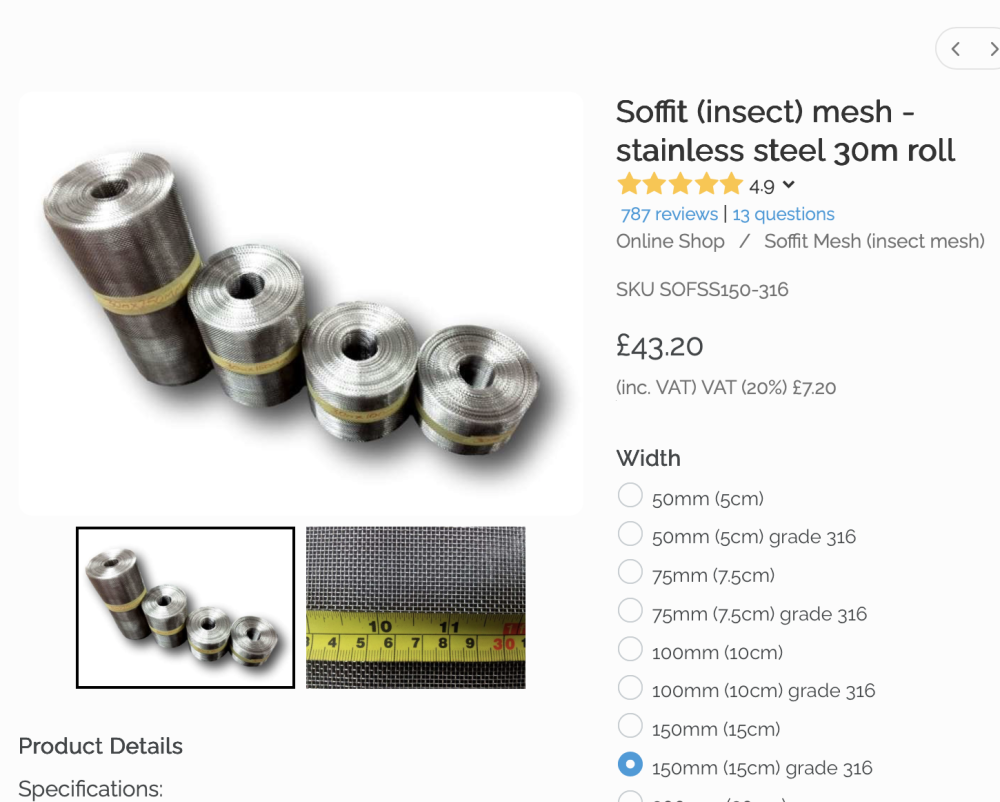
-
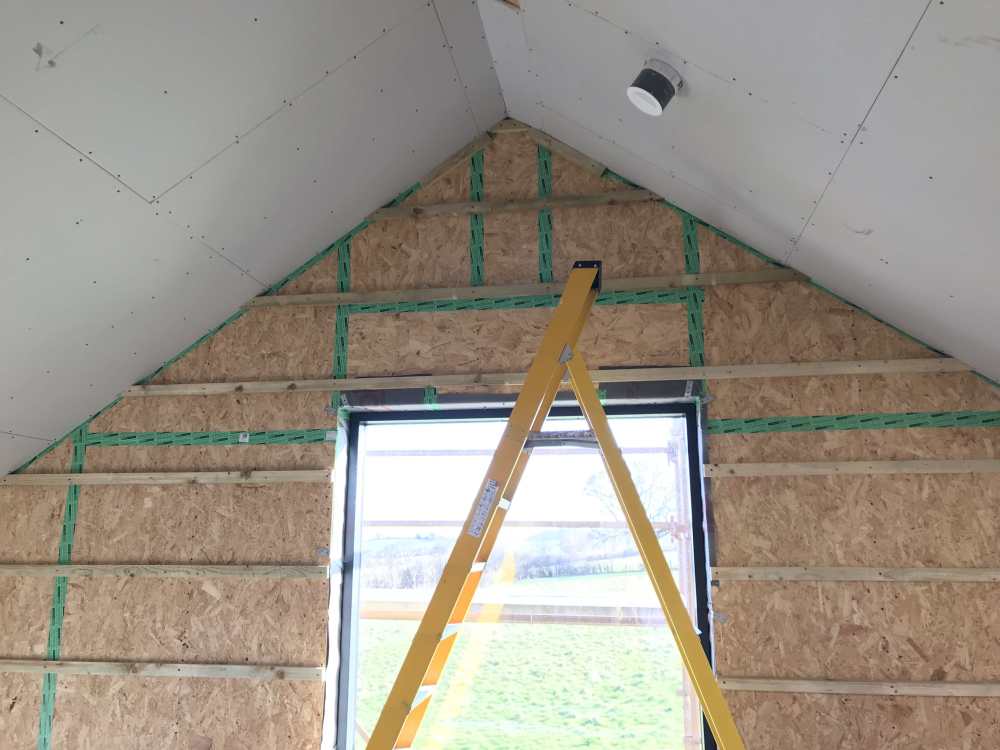
Yes, I fixed PB next to OSB on the sloped ceilings. Service batten only fixed to walls.
-
This is for bearings but probably a step earlier.
-
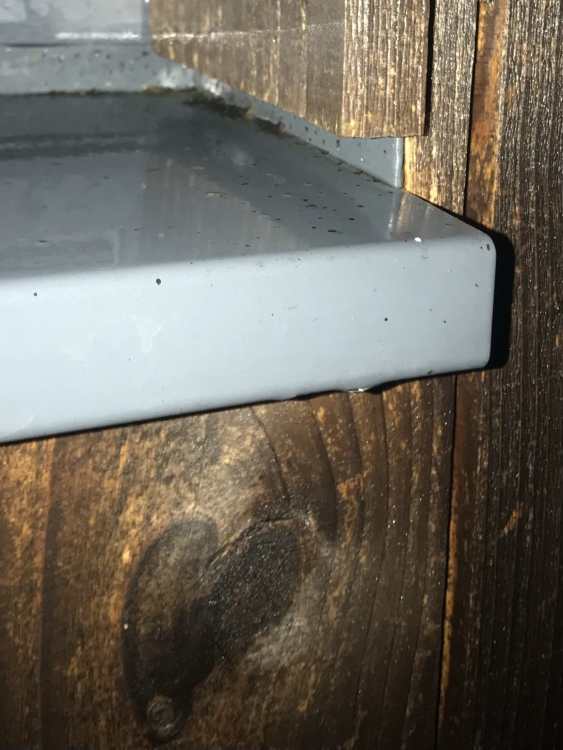
Is the cill part of the actual window frame? My cills were separate to the window with 10mm upstands at the back and sides. Slotted into a grove within the bottom of the window frame. The cedar cladding reveal then butted up next to the upstand at the sides with a small gap to allow water to escape. Photo enclosed, it's bucketing down at the moment.
-
Plastering costs? What options do I have to DIY?
Nestor replied to Great_scot_selfbuild's topic in Plastering & Rendering
Yes, 6mm + 4mm for the ceiling curve. All depends on the radius and how much pressure you can apply before fixing. Birch ply was only treated with clear osmo oil. I had to create a very tight curve above some stairs and cut lines on the back of the plasterboard, it did work.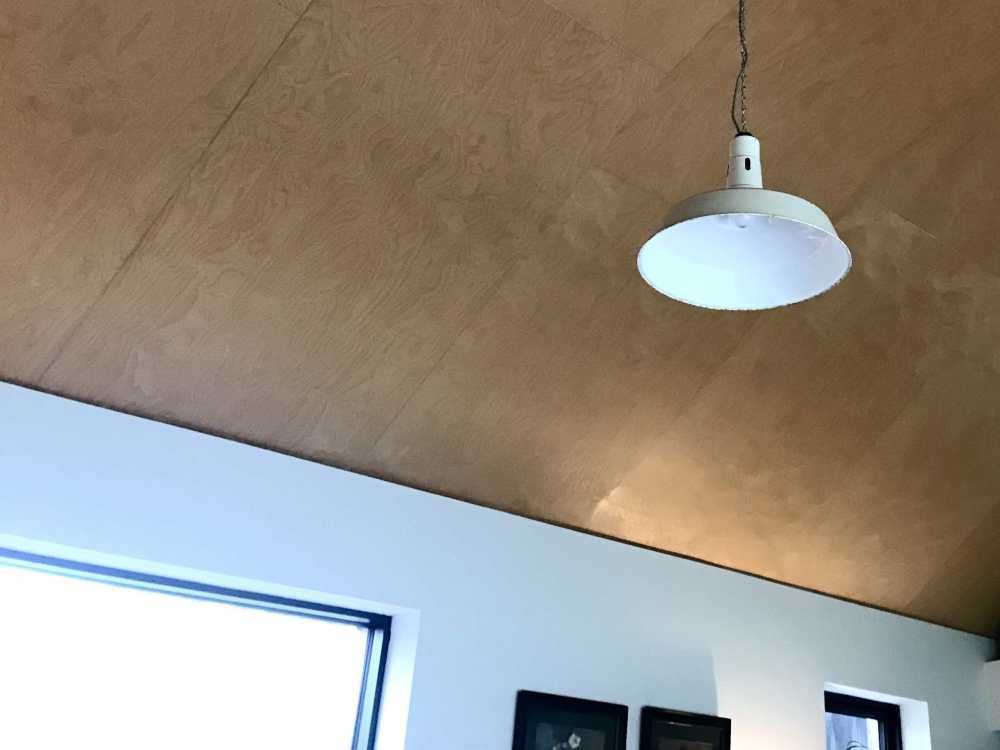
-
Week 15 - UFH, screed, and render base coat
Nestor commented on Benpointer's blog entry in Contemporary build in north Dorset
-
Plastering costs? What options do I have to DIY?
Nestor replied to Great_scot_selfbuild's topic in Plastering & Rendering
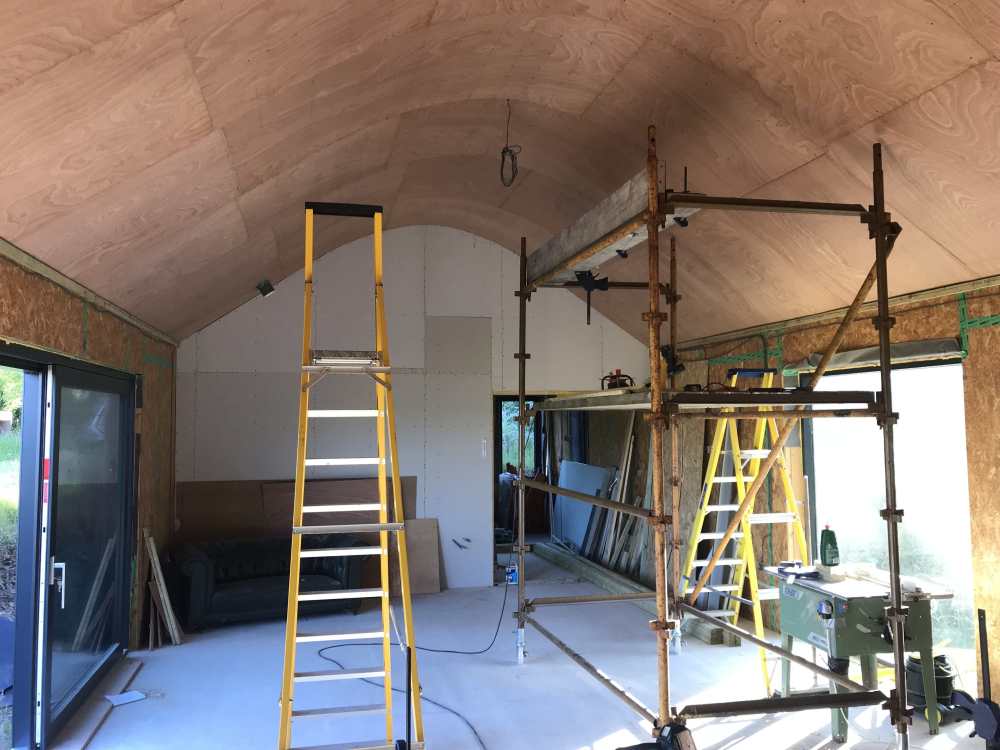
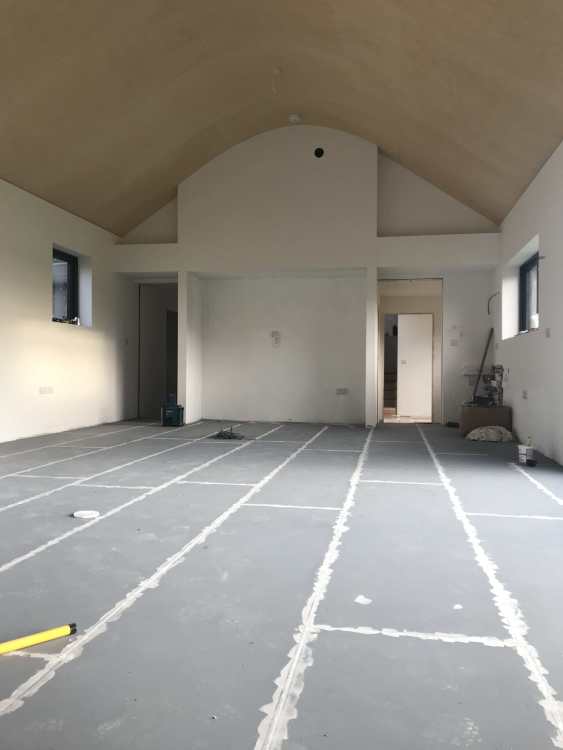
I had a 10.5m steel for the ridge and did not want to just box it in. So made a frame, similar to a skateboard halfpipe, covered in red faced plywood, then glued and pinned 4mm birch ply. Have two long pendant light fittings, one over island, other over dining table. Your friends might well be right. Will try and find recent photo.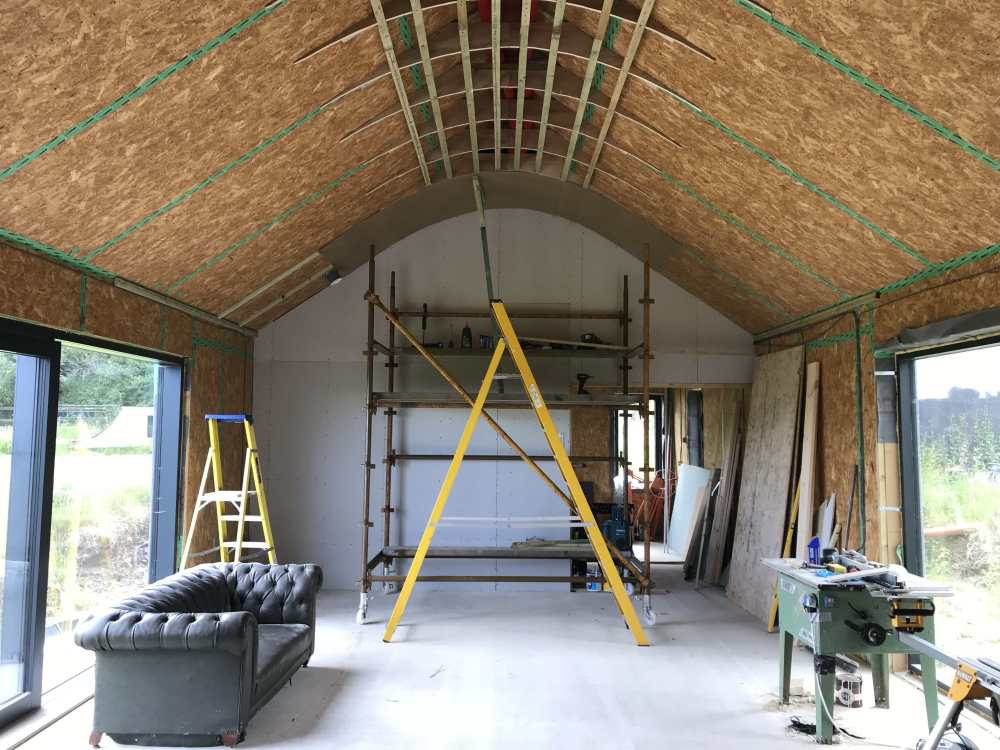
-
Plastering costs? What options do I have to DIY?
Nestor replied to Great_scot_selfbuild's topic in Plastering & Rendering
I have a similar size home, about 800sqm needed skimmimg. It was a job for a highly skilled professional and really appreciated the quality of the final result. I did all the plaster boarding and fitted our main ceiling of 60sqm in birch plywood. I used a wind up lifter for the high ceilings. It is a big task. Back in 2018 I paid £7.00 per sqm, I supplied all the tape, plaster and beading. Pick a number a double / triple it?? Window reveals need to be included. Get some quotes for whole job. @nod will share same advice. -
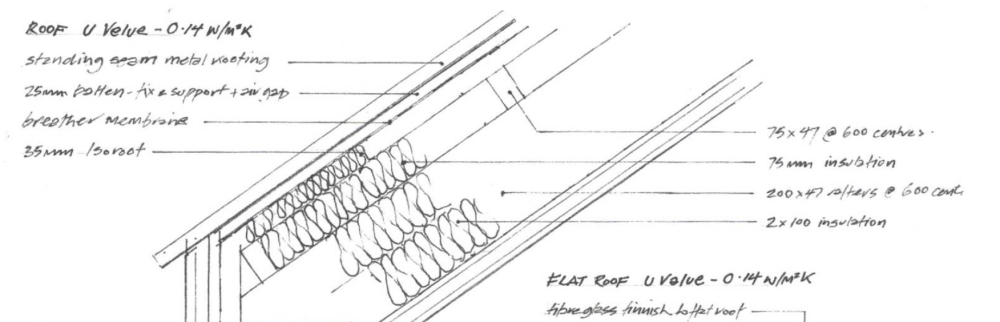
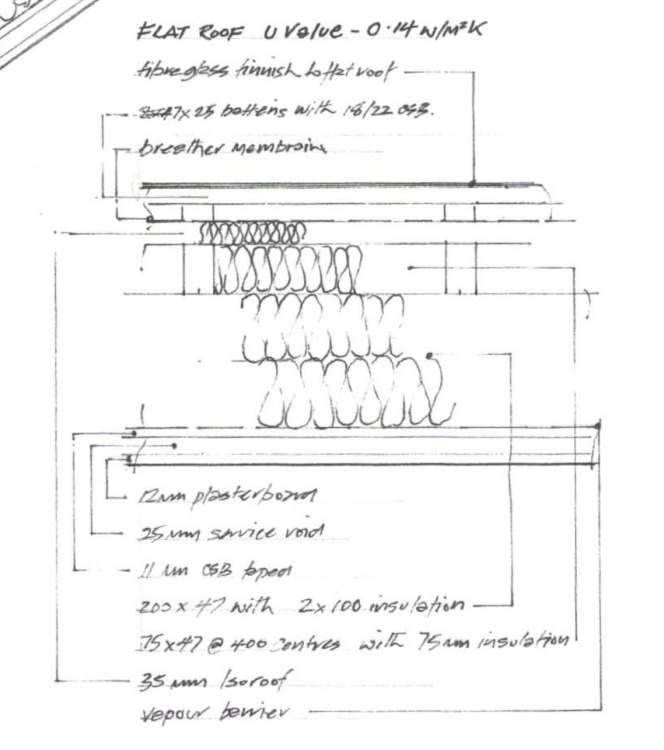
@Iceverge I do like this roof build up, similar approach to our roof, I have included drawings including my fibreglass flat roof. The drawings were all done by hand using Rotring pen! These are screen grabs. 200mm Rafters with Rockwool 75mm counter batten with Rockwool 35mm Isotherm T&G Breather membrane 25mm Batten for air gap Standing seam metal roof On the inside of rafters Vapour. barrier 11mm OSB 25mm Batten Plasterboard
- 77 replies
-
- 2
-

-
- flat roof
- condensation
- (and 2 more)
-
Rebuilding after demolishing question
Nestor replied to dustyb's topic in General Self Build & DIY Discussion
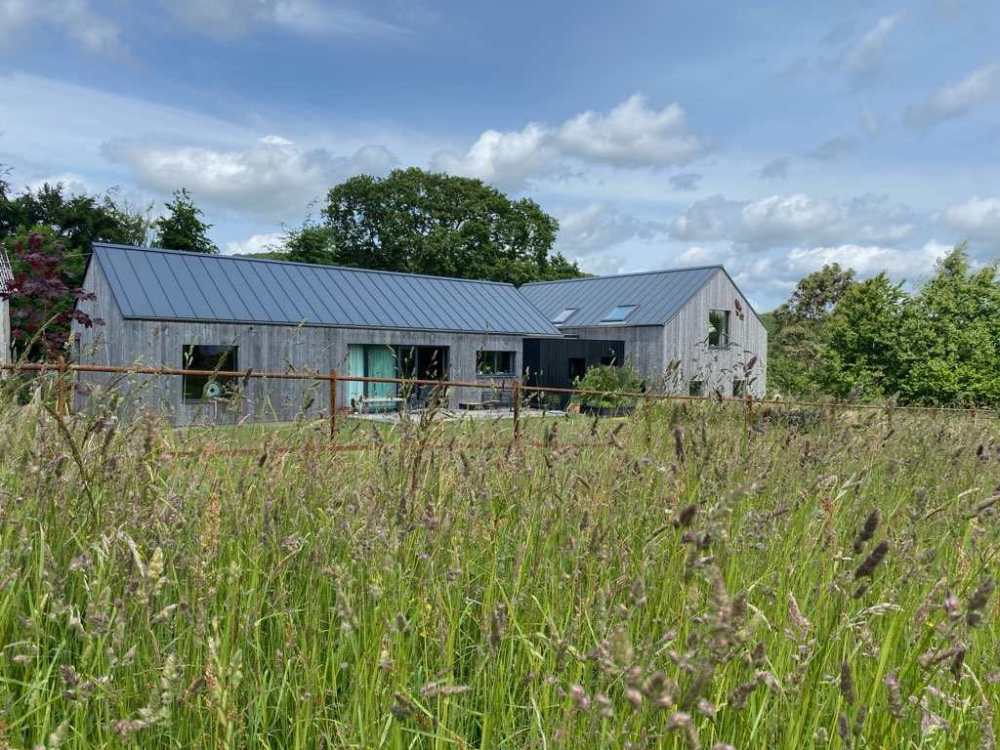
Had some very minor domestic renovation experience but achieved possibly 90% of our self build. Paid professionals for electrics, plaster skimming, ASHP, window installation and screed. It is doable, time, money, quality consideration. 3 years before we moved in and 6 years later fitting final architrave ready for repainting!! Has been an amazing experience, learnt so much and the amazing contributions from Buildhub. My Dad, 75 years at the time helped me with the stick build. Would look at other build methods in the future.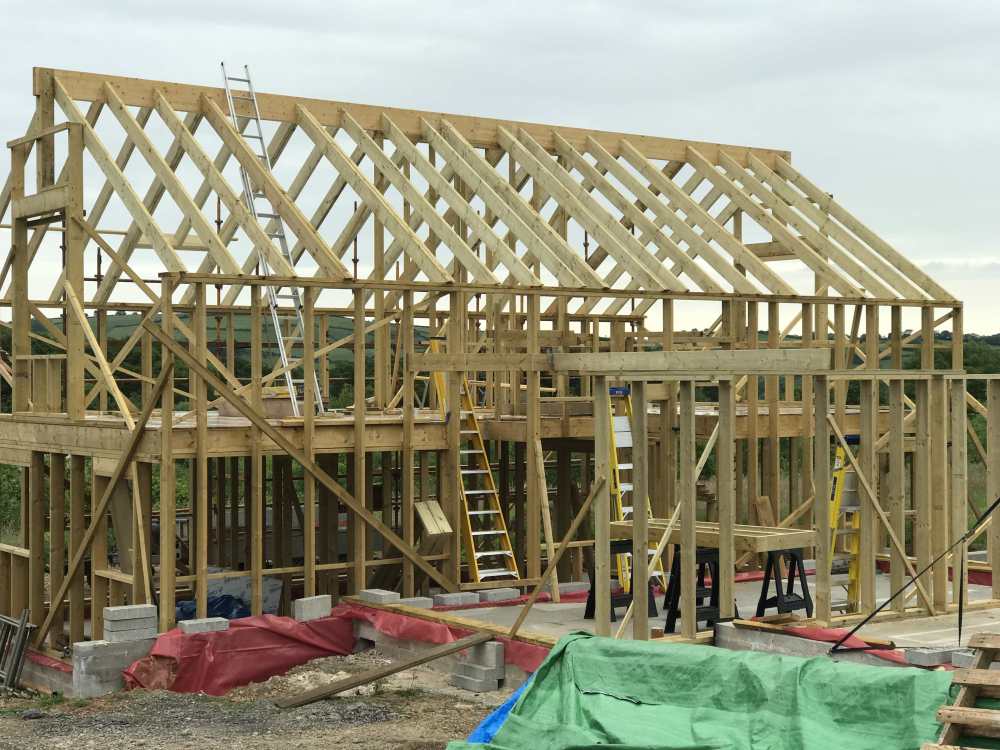
-
Fabric and ventilation heat loss calculator
Nestor replied to Jeremy Harris's topic in Heat Insulation
@JohnMo Just a quick one but what are your thoughts on the actual volume of the property as well as floor area as no consideration for differing ceiling heights. Could volume be part of a heat loss calculator? Is it relevant? -
Internorm KS430 sliding door seals question
Nestor replied to Mr Blobby's topic in Windows & Glazing
We have HS330, triple glazed timber / aluminium lift sliding door. A lot of timber in the doors and no condensation except outside on certain days. No problem with the fixed seals. Not an expert but would say fitting error. Like you the fitters and some parts of manufacturers were poor quality. Disappointing. Add to the list.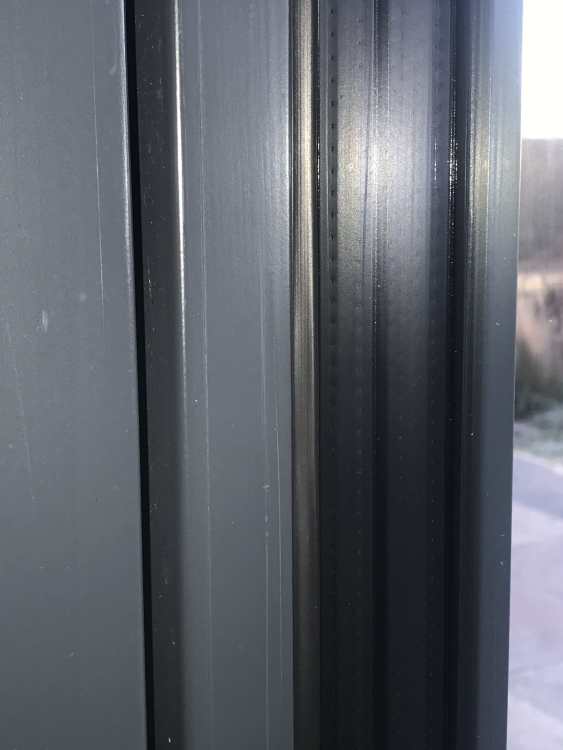
-
Rear extension with existing small protrusion
Nestor replied to NoPaddle's topic in Planning Permission
Why build and restrict yourself to 3 metres depth with PD? Need to go full plans. -
Not an expert but have similar thoughts about where the internal floor build up meets the external walls, no sufficient thermal break visible to me. I fitted 20mm Pavatherm reveal boards in the window apertures, timber frame build. Not suitable under large doors due to compression so used 25mm plywood. Walls are 390mm deep.
-
Thanks Nick, this was just an internal cupboard but do understand the principle. Thought that these perimeter strips were more to allow for expansion and stopping the screed escaping, the external walls are 420mm wide! Have a great Christmas.
-
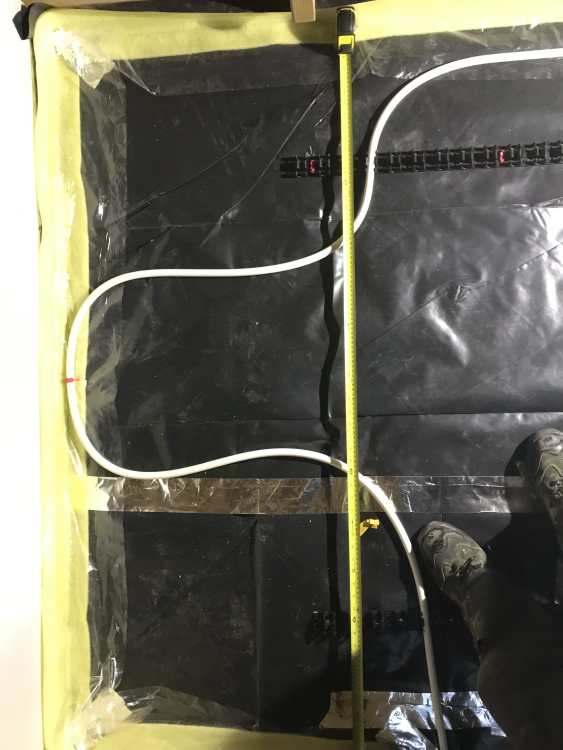
I have enclosed a shot, it is inside a hall cupboard! I fitted 150mm celotex tight to the walls, taped all the joints, fitted plastic sheet, taped then UFH. The perimeter edge insulation has an adhesive strip on one side which fixes to the upstand / wall and polythene apron which lies on the floor. Just need to make sure the screed cannot escape. Hope that helps.
-
Oak worktop and Osmo Top Oil (3068 Natural version)
Nestor replied to paro's topic in Kitchen Units & Worktops
I installed similar worktops in 2006, very pleased with them. The final surface was a smooth as glass. Once in use the minor blemishes will hopefully become less relevant. Easy to maintain, every couple of years I would rub down with wire wool / sandpaper and reapply with a cloth. I did test the 3068 but found the white pigment interfered with the actual colour of the wood, this was a few years back. -
Clicked on the link expecting details about U values and weather compensation curves. Lovely surprise. Best landlord .
-
Oak worktop and Osmo Top Oil (3068 Natural version)
Nestor replied to paro's topic in Kitchen Units & Worktops
Not quite the same but have just painted 14 flush plywood internal doors with black Osmo Oil stain. I did 3 coats, first 2 applied with a 4" roller and sanded with 320. Top coat applied very liberally with lint free cloth wrapped around a hand pad holder, Osmo do a fleece, link below. https://www.wood-finishes-direct.com/product/osmo-hand-applicator-fleece?sid=1&s=3970027-c23026905f54b60afc435908c3958a1f&r=10&p=1 Have you noticed any white pigment in the 3068?





