Declan52
-
Posts
4449 -
Joined
-
Last visited
-
Days Won
10
Everything posted by Declan52
-

Celotex installed in cavity block wall build
Declan52 replied to Hastings's topic in Heat Insulation
They have a tongue and groove so if installed correctly then you don't need tape. But it all comes down to how they are put in. Put it in wrong and even tape won't solve the heat loss. -
Kwikstage scaffolding questions
Declan52 replied to Vijay's topic in General Self Build & DIY Discussion
Yeah a hop up will make it easier. The return transoms are used at the level you plank out. So you lift them as you go up. If you have a few levels planked out then you need them on each of these corners. -
Just use a long drill bit and drill a perp, vertical motar join between the bricks, out on the outside so it looks nice. It will burst out on the inside though.
-
I got this set as a secret santa and am very impressed with it. Just remember these kind of sets aren't for taking off the car wheel. https://www.amazon.co.uk/Bahco-SL25-Socket-Piece-Drive/dp/B000Y8XCA8?ref_=bl_dp_s_mw_4026266031
-
Both Jeremy and nick have always been honest in anything they said about either sunamp or any other item they have been posting about. They call it as they see it with both the good and bad being aired. We are also very lucky to have some one with nicks knowledge about Sunamp available to answer most of the questions that get asked.
-
Best way to finance self build with advanced payments
Declan52 replied to Emma Hunt's topic in Introduce Yourself
Do you have to demolish the house to build the new one, as in do they over lap on the site?? If they don't overlap then you could you use your savings to get the structure up. £170k should put up most buildings, if not then you might need to rejig the size to suit. Once the structure is up then you have a more valuable item to mortgage against. At the minute you just have a plot which is maxed out its value. By building the frame you will increase its value hopefully enough to release enough equity to finish the build. If you can get a mortgage company that pays out at certain stages like, sub floor, wall plate(complete frame if timber frame) roofed, wind and water tight, first fix, second fix and then finished then once you got approval then you would have money coming in to finance the next stage and so on and so on. Each mortgage company will have their own schedule so you will not only have to find one willing to lend but also whose stage payment schedule suit your build. And then it's just a shot in the dark so you really need to get a mortgage advisor on board early and see what deals are out there and if these are available to you. Or is there any room on the site to keep the house and divide the plot up. You sell the house and then use this money to finance the build. Or as hard as it may be you sell the plot with the planning permission and bank the money and hope it's enough to start some where else. -
With a bit of practice you will soon be able to glide in your 9 inch stilettos so don't give up just yet.
-
Hairline crack starting from the top corner of the room
Declan52 replied to Tyler's topic in Introduce Yourself
It's just the join of the scrim cloth from the ceiling to the wall. It's a fairly regular thing to happen so nothing to worry about. Just let your house dry out and move and shrink and when it stops, about 18 months from the heating went on then you can start to sand and fill. -
Greetings from Glasgow from a novice handym’am
Declan52 replied to Gow's topic in Introduce Yourself
Do you have to keep the original windows or can you take them or and replace with a 3g unit?? Piv only works if your house has a lot of leakage. So you can't really seal the house up and install it. It relies on the unit pushing the air inside the house out via the fabric and replace it from the outside. You could remove all the flooring and skirting and put a membrane down and seal it to the wall do nothing from below can get through. This will also stop draughts. A polythene type roll or a proper airtightness membrane will work, just depends on your budget. Can you put the plans up to see what other options we could see with regards the extension. -
Could you double board the bad ones with another strip of plasterboard. Measure out to where the tape ends and use either a 6mm or 9mm strip. Use expanding foam to hold hit in place. Might help with sorting out how of Square they are. As above if they are badly out your eye will notice it every time you look that way so it needs fixed if you couldn't live with looking at that all the time. Don't forget about a bead of caulk as well.
-
Kwikstage scaffolding questions
Declan52 replied to Vijay's topic in General Self Build & DIY Discussion
Needs to be far enough out that it won't hit the over hang of your roof. You can use a 2 board hop up bracket and then it comes off when your at the roof height. https://www.scaffoldingsupplies.co.uk/products/details/3072.html Or set it 9 inches from the wall and if it needs moved out for the tiles as long as you have it sitting on timber it can be slid out easily enough to where it needs to go. -
One of these. It's a leg that you can jack up I think that's where the name comes from!!! https://www.scaffoldingsupplies.co.uk/products/details/3540.html
-
Loosen the tie bar and use a plank/ledger as a lever and wedge it against the wall and push the standard out enough to get your tiles in. If you have the jack leg on a bit of timber, like your meant to, then it will slide out very easy. A few goes will do it and then redo the clamp.
-
Methylated spirits works as well. I used a craft knife to slice the tape then cleaned it down. A small bead of caulk then finished the edge.
-
That's what I done. A thumb turn stopped it straight away.
-
These are the hinges I used. https://www.ironmongerydirect.co.uk/product/twin-ball-bearing-hinge-102x76x3mm-304-satin-stainless-steel-pair-321864 Not much more than your pick dave but a better hinge in terms of its weight capacity.
-
They are called flush bolts. https://www.ironmongerydirect.co.uk/browse/bolts-stops-and-accessories/flush-bolts?fi=c How are you working the join in the double doors. I have a metal decorative trim instead of routing out both doors. Much easier to do.
-
I built a chalet bungalow. So it's sort of a compromise which works for us. In terms of extra costs the obvious of extra foundations and cost for the extra concrete and ufh pipes in the screed plus more insulation under the screed. I used attic truss which where very easy to work with. Roof only took 2 days to swing them all into place and have it braced up.
-
When I was looking into mine I also wanted to be able to use a wbs to supplement the heating demand. The problem that was explained to me is you can't just turn a wbs of. So how do you deal with the fact you want the stove to be still lit but not cause the tank to overheat. . My plumber had spec a 2nd tank in the loft as a heat dump plus a radiator as a backup dump. There where lots of other plumbing bits but it soon all added up in cost and complexity that's why I ruled it out. I just have a normal wbs which when lit it will heat the complete house through convection. This heat will stay in the house for 2-3 days depending on how cold it is outside. Don't underestimate how much wood you will need if you have to heat the water as well. An ashp will still deliver heat in the winter but if you want water heated to over 50 degrees it will start to lose efficiency. I use a pellet boiler for my main heating but I'm not sure you would want one as just a room heater. They just blow out hot air through grills at the top. Plus they don't have the same look as a log smouldering away.
-
MVHR air flow rates
Declan52 replied to lizzie's topic in Mechanical Ventilation with Heat Recovery (MVHR)
For about the first month or two every one was told that before you went to shower you hit the boost button. Then being lazy we just stopped using the boost. In over four years the bathroom has always cleared within a few mins. -
Logix ICF: Build anything slower!
Declan52 replied to willbish's topic in Insulated Concrete Formwork (ICF)
Not a good start to your build. Have you been able to find out if the quality of blocks they are producing has improved. You have waited all this time and like most things if they are rushing to produce these blocks to fulfil orders then quality is what usually slips. Have they give you any guarantee what will be delivered as in it will be X amount of blocks. Just asking in case they are spreading what they have around just to get people started but no one has enough to really get going. -
Kwikstage scaffolding questions
Declan52 replied to Vijay's topic in General Self Build & DIY Discussion
Yep the standard will only have a ledger/trannie at the top once its high enough to go over the wall. The diagonal will just stop it from moving in and out. Standards are 9ft9 mainly but you can get shorter bars, 6ft6 and 3ft3. Each standard will have 4 V shapes welded onto the bar at approx 1ft6 intervals. They look like a star. You use whatever type of ladder you have. Internal stairs are safer as nothing can fall in you as the planks above protect you. If it is on the outside then make sure it's long enough to get to your highest lift and go past it so it's safer to use. Make sure its tied to the bars as well. -
Floor insulation perimeter installation? (block build)
Declan52 replied to JamieM's topic in Heat Insulation
I put them on at every door way. Nothing fancy like a strip, the screeder just used his trowel to cut into the sand cement mix and leave a slot. If your going for the liquid type then I presume you need a proper strip. -
Kwikstage scaffolding questions
Declan52 replied to Vijay's topic in General Self Build & DIY Discussion
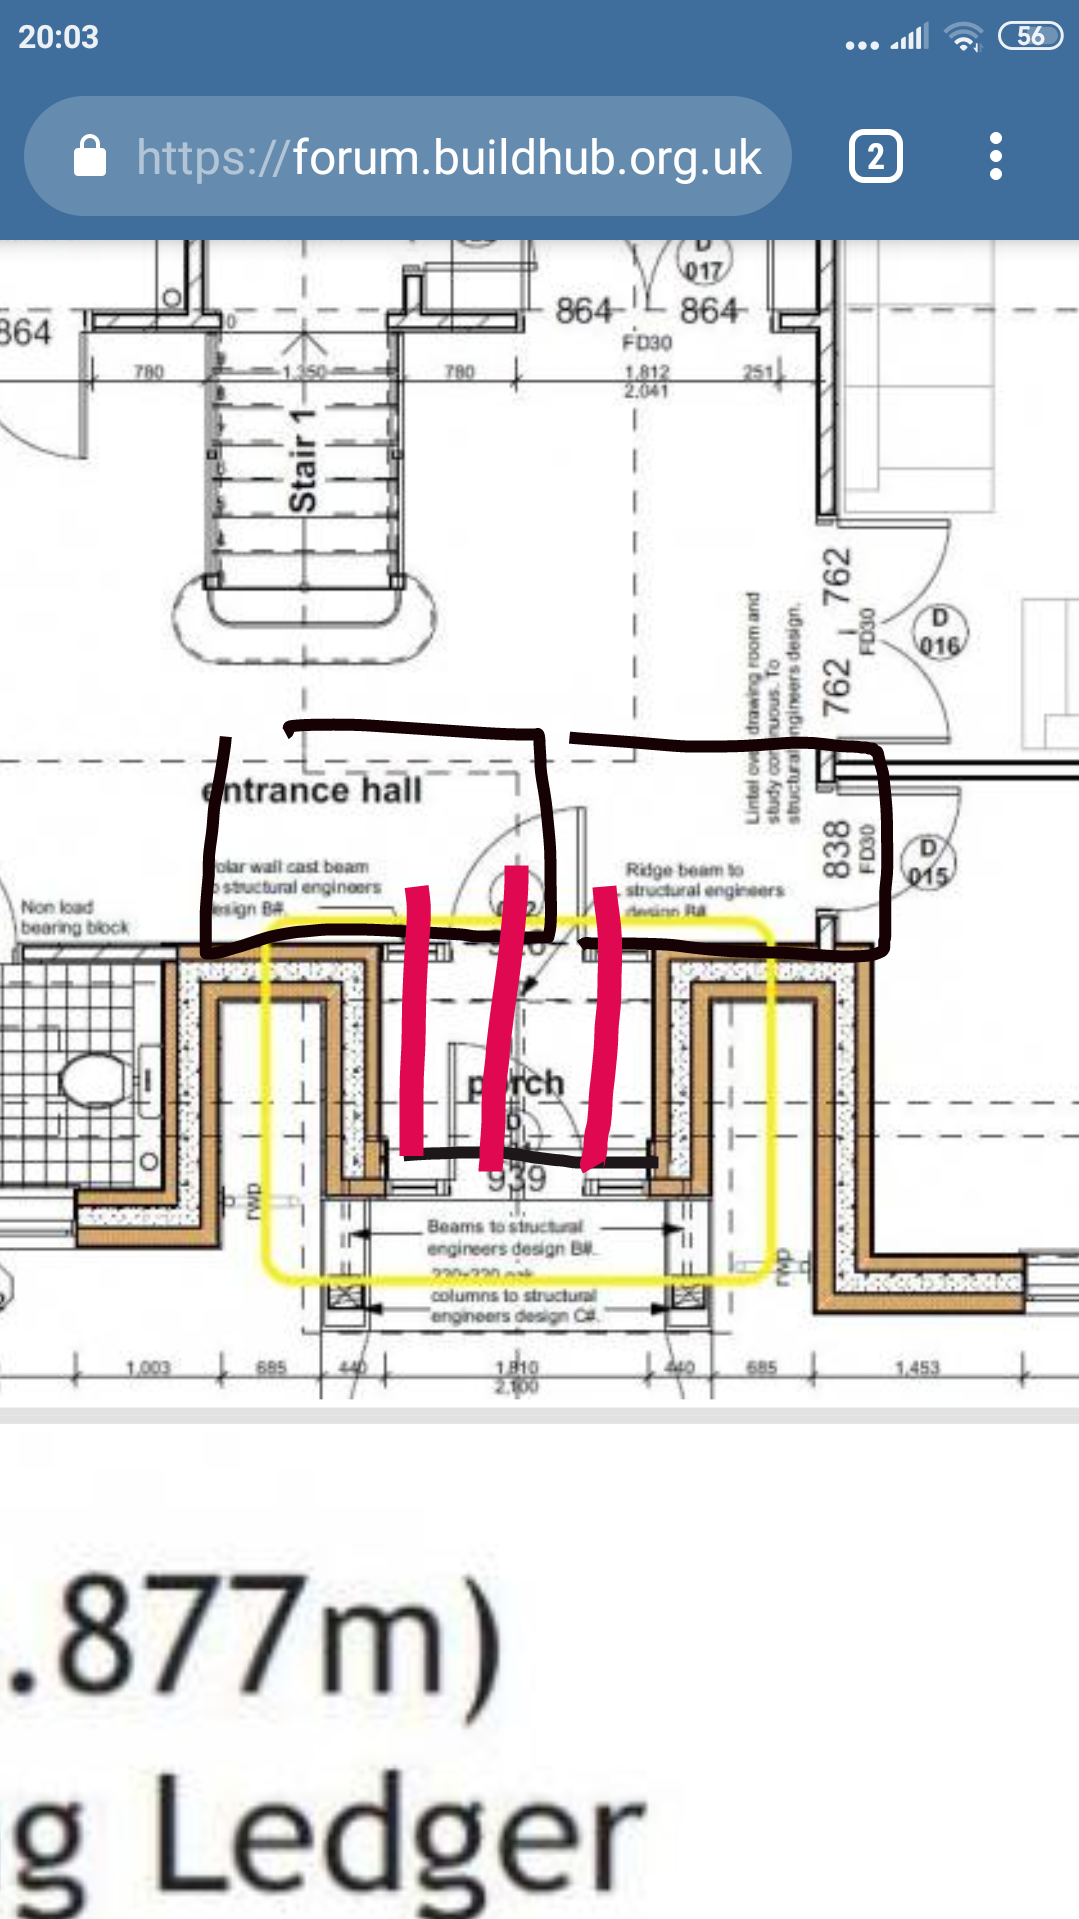
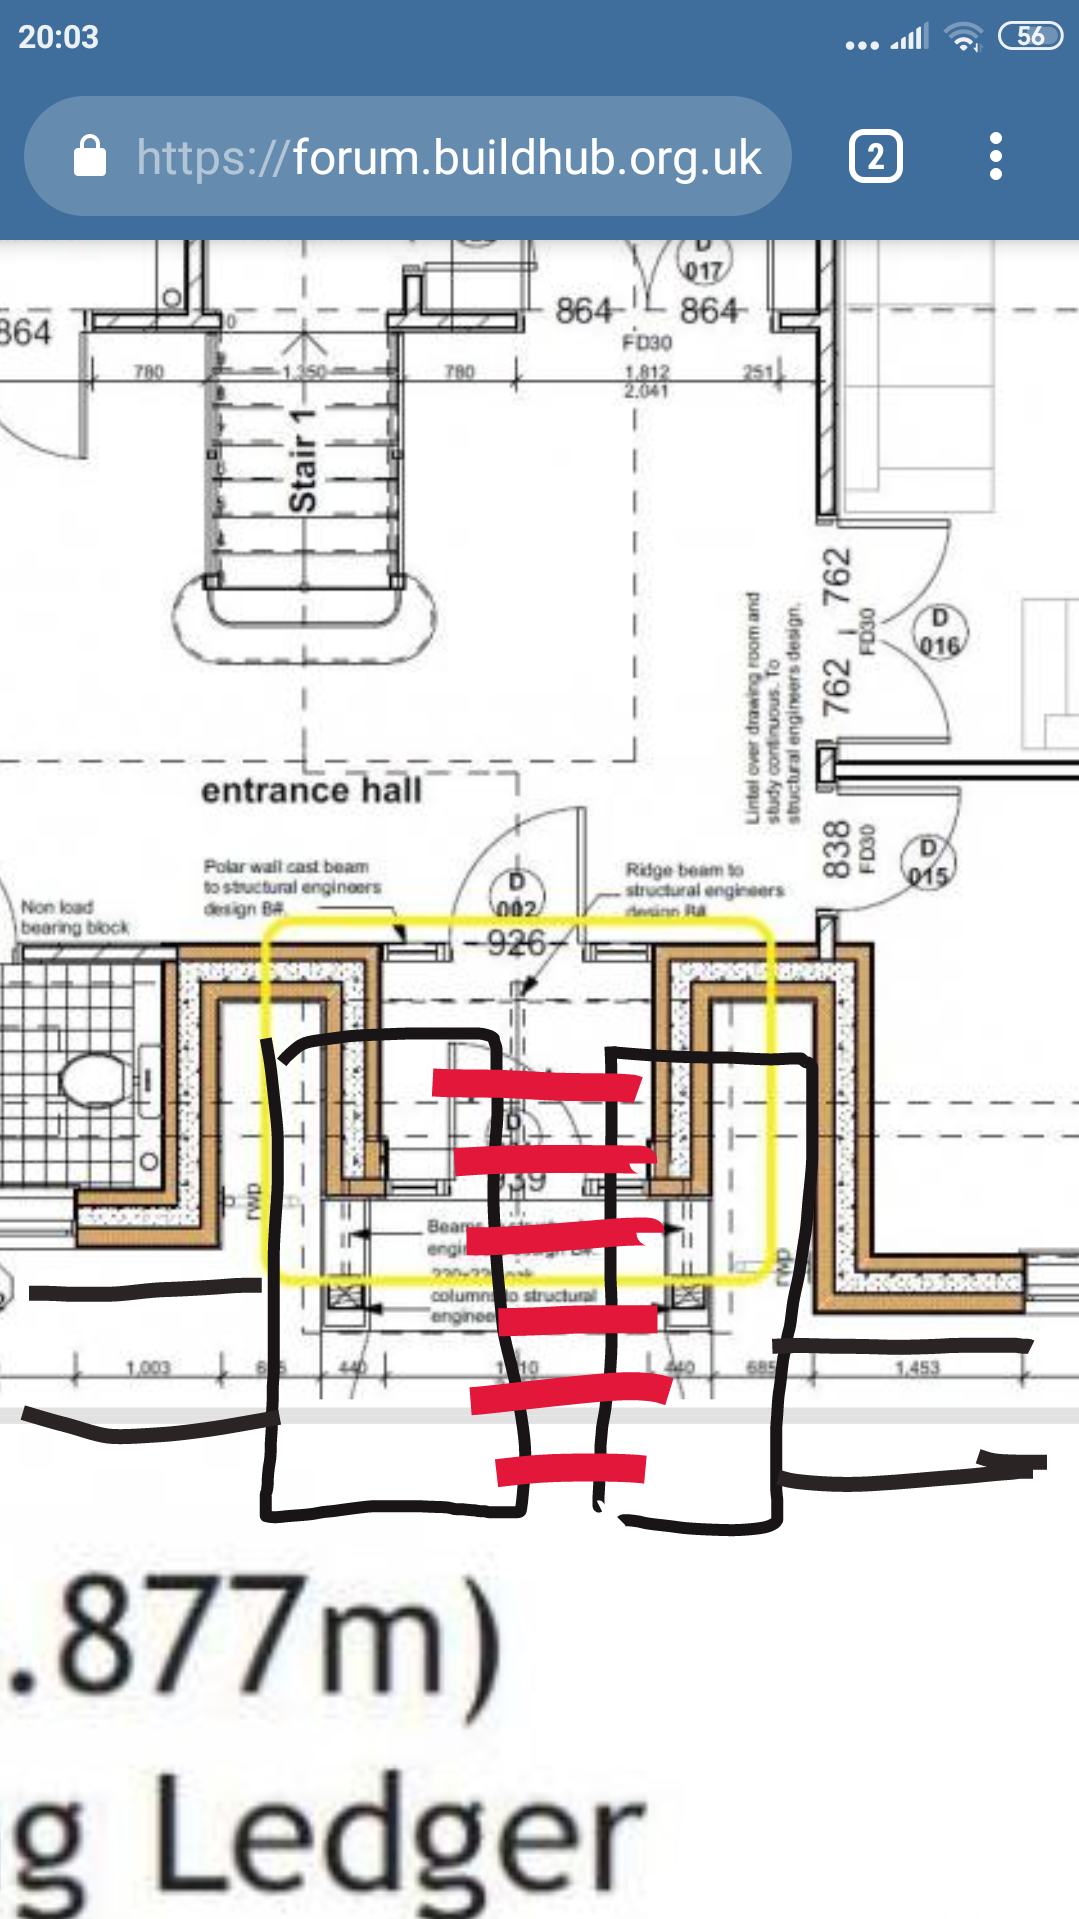
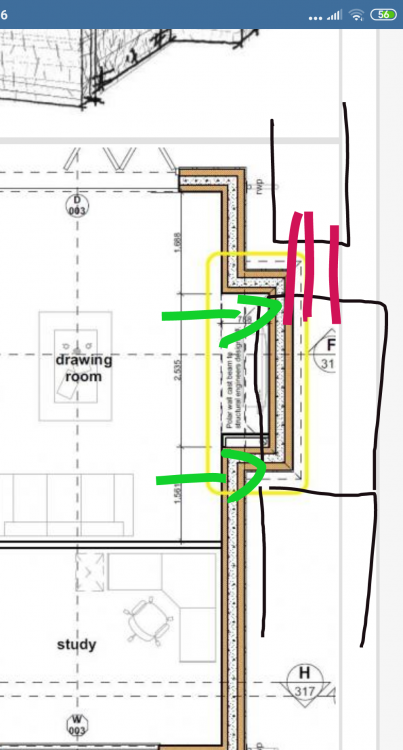
The chimney is the easy bit. You will need to scaffold it twice and leave the small roof of till the main work is done. The first pic is when your on the first lift. Your basically putting one single bay in the middle of the chimney and bridge both gaps to the other runs. Will need to be all tied together. The second pic is when your above the height of that wall of the chimney. You continue the run and will have a single standard in the room. You won't be able to connect anything to it until it's above the wall height so you put a diagonal brace on where the green arrow are. Once above the wall height then put the ledgers and trannies in as usual. Then you just bridge the gap and tie both runs together. The porch is going to be a bit more tricky. For the first lift I would put 2 bays inside the house and 2 trestles at the door and then plank the gap and do that from the inside. Once your above the porch walls then it's 2 separate bays and planks covering the gap. This will be handy when doing the roof as it will be a massive area to load timber and tiles on to.


-
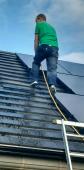
how (not?) to erect scaffolding
Declan52 replied to ProDave's topic in General Self Build & DIY Discussion
Just crazy doing that with it any high vis on!!!