Declan52
-
Posts
4449 -
Joined
-
Last visited
-
Days Won
10
Everything posted by Declan52
-
Mark the post on all four sides and use your new very sharp handsaw and cut it up using your lines as a guide. You will need to cut the point of it as well. Use a 2 L shape brackets to hold the other beams together on the inside and if you want 2 coach screws in from the ends like is marked on the drawing. Not sure if you have bought the threaded bars yet if not you could use the same screws for attaching the beams to the posts. Something like these. They will be much easier to put in with a cordless or an impact driver of you have one. Just go nice and slow and depending on the beams you might need a pilot hole first. https://www.screwfix.com/p/turbocoach-coach-screws-zinc-plated-8-x-120mm-50-pack/2394g
-
Why not just make the deck big enough to have the shed fully sitting on it on each section???
-
I don't really care what your debating but when your adding in personal jibes then I start to care. So just stick to the facts.
-
Let's just stick to the facts please. This is becoming a little too personal.
-
Us folk working behind the scenes are always interested in how members come to find the forum. Most would be via a Google search when they are looking for a solution to a certain building related issue but you are implying word of mouth. Could you expand on that? Oh and welcome.
-
You missed your true calling!!!
-
Play nice.
-

The right tool for the job or just a right tool.
Declan52 replied to MikeSharp01's topic in Timber Frame
Nope the peelers took it out!!! The film driven about John delorean is worth a watch. -
The right tool for the job or just a right tool.
Declan52 replied to MikeSharp01's topic in Timber Frame
Guy down the road from me has one. Still smile every time I see it. -
Is this the final plan?? So it will look like this then when complete. Why is one shoe no good???
-
Everything is viable. You just need to plan it from the start.
-
Before you take another step please do out a plan. Just a top view will do. 2 simple rectangles with one being the deck and one being the shed. Include the side the shed door is on the plan. Once we know all this info then we can give you more help. It's just getting that hard to follow as your jumping from idea to idea and nobody really knows what your end goal is even you I suspect. If you want an overhang at the stream draw it on the plan. If you want another overhang at the side to access the other area then draw it on. If you want to be able to get to the stream overhang from going via the shed then draw that in. You don't want to do this then start adding extra bits in which won't be as strong as you designing them in in the first place. It will be cheaper to do it right at the start instead of a bodge job later on. So sit down with whatever you have to do a plan. We won't care if it's in pencil or crayon, a ms Paint or a super fancy cad drawing. You just need to decide what you want then we can give you the best method to get there. For lifting the beam up an inch you just have to use something that won't absorb water and is strong enough to take the weight. Slate for example, a piece of paving flag would be 50mm but would do the job. Your bound to have 2 bits of something lying round your house to do this.
-
Two plumb bits of timber each side and fill with a render mix. The timber will give you a guide to keep it nice and straight. But as above it will take a few goes to get it on and not fall of. Wet the wall before each attempt.
-
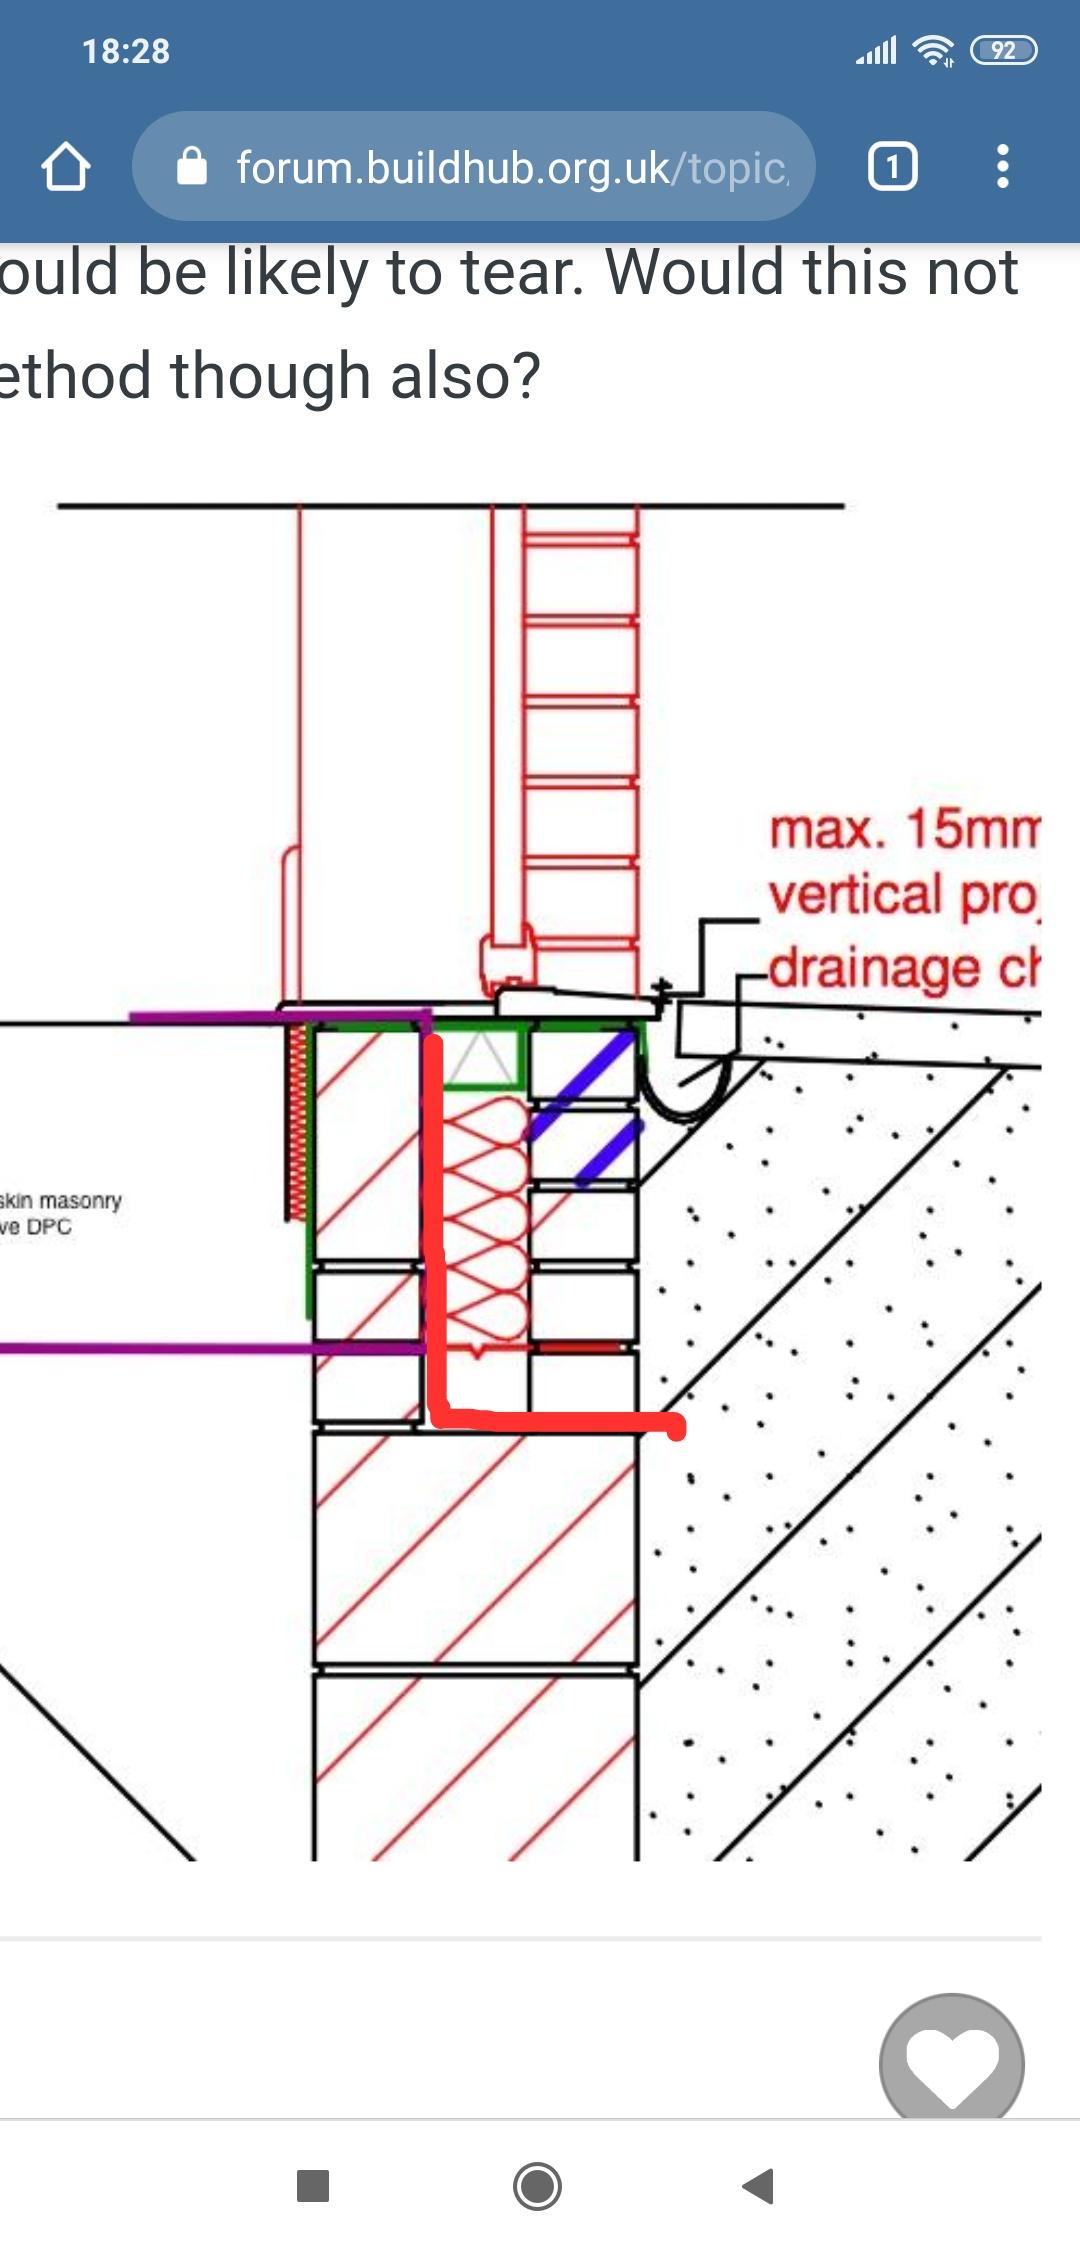
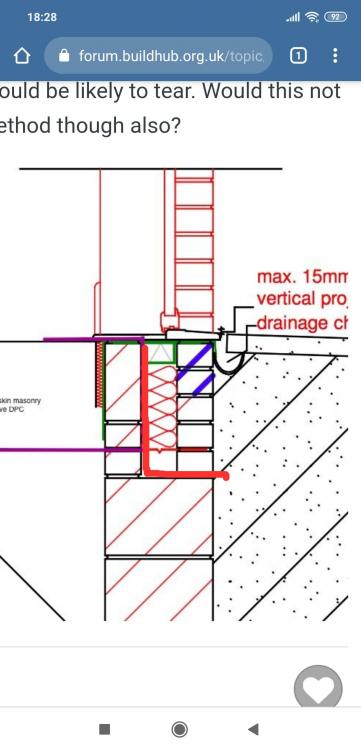
Under the inside skin of blocks you build a normal dpc in. You can use 18" which will give you enough of an overlap to slide your dpm under and glue/tape so you get a continuous barrier. Once the first course is on and hardened you put sand over the top to cover the dpc so any droppings from the blocks hit the sand. When the blocks are all done the droppings will come off the dpc easily and your left with a nice clean dpc with no puncture holes. The inside of the cavity will dry out so don't be worrying about that . You can tank the cavity to stop water getting through instead of doing that wrap bit in your first pic. On the pic I should have continued the red line to the left so it's built in the wall with the blocks holding it in place.
-
You can use the same threaded bar to attach the beams to your posts. A nail/ screw just to hold it all in place then drill straight through beam and post and put your washers and nuts on and tighten it up. Don't skimp on the fixings that you use for the base. It's the only thing keeping your shed attached to the ground. Threaded bar and resin will be the easiest method for you. Just do as @Onoff stated above. Have all the holes drilled and all the threaded bar cut to size with the tops taped up and the holes cleaned out then it's only a 60 sec job each base. Squirt the resin, drop, the rod in, twist it and leave it plumb then move onto the next hole. When you have done each base clean the excess and base is finished. Then repeat and repeat until all are done.
-
Do it like this, nice and simple.
-
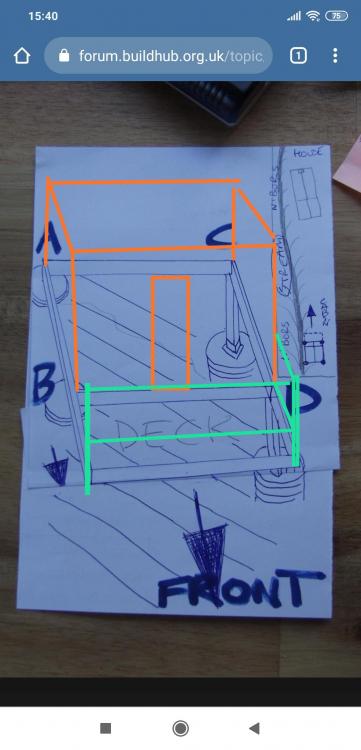
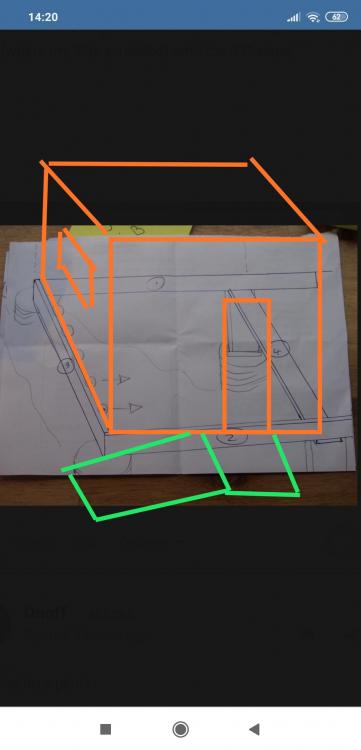
The orange lines are an overhanging deck out from what you have on that plan. They will go down that side and join up with the other bit that is already meant to over hang. You will end up with a path on 2 sides which both are over hanging. This just shows the importance of having an actual plan drew out then we could have edited that drawing . I think no matter how long it will take you need to sit down and draw a plan out.
-
This one
-
If your building a cavity then why would you put the insulation on the outside?? Much easier to use the cavity in the way the vast majority of traditional builds do and stick the insulation in there.
-
A few posts back I put up a pic which should do your job.
-
So what was the original plan for getting out on to the overhang?? I think we all just assumed you where buying a shed with a door on that side and then you would make another opening on whatever side suited your access the best. Or had you never planned to access the overhang area from inside the shed?? Or have you not given much thought to this aspect yet??
-
Or you could really go to town and have an overhang on both sides so you can walk round to your seating area without going into the cabin. This will be the more expensive option as not only will the timber joists need to be longer but you will need more of whatever you where going to use as a barrier to stop kids falling into the stream.
-
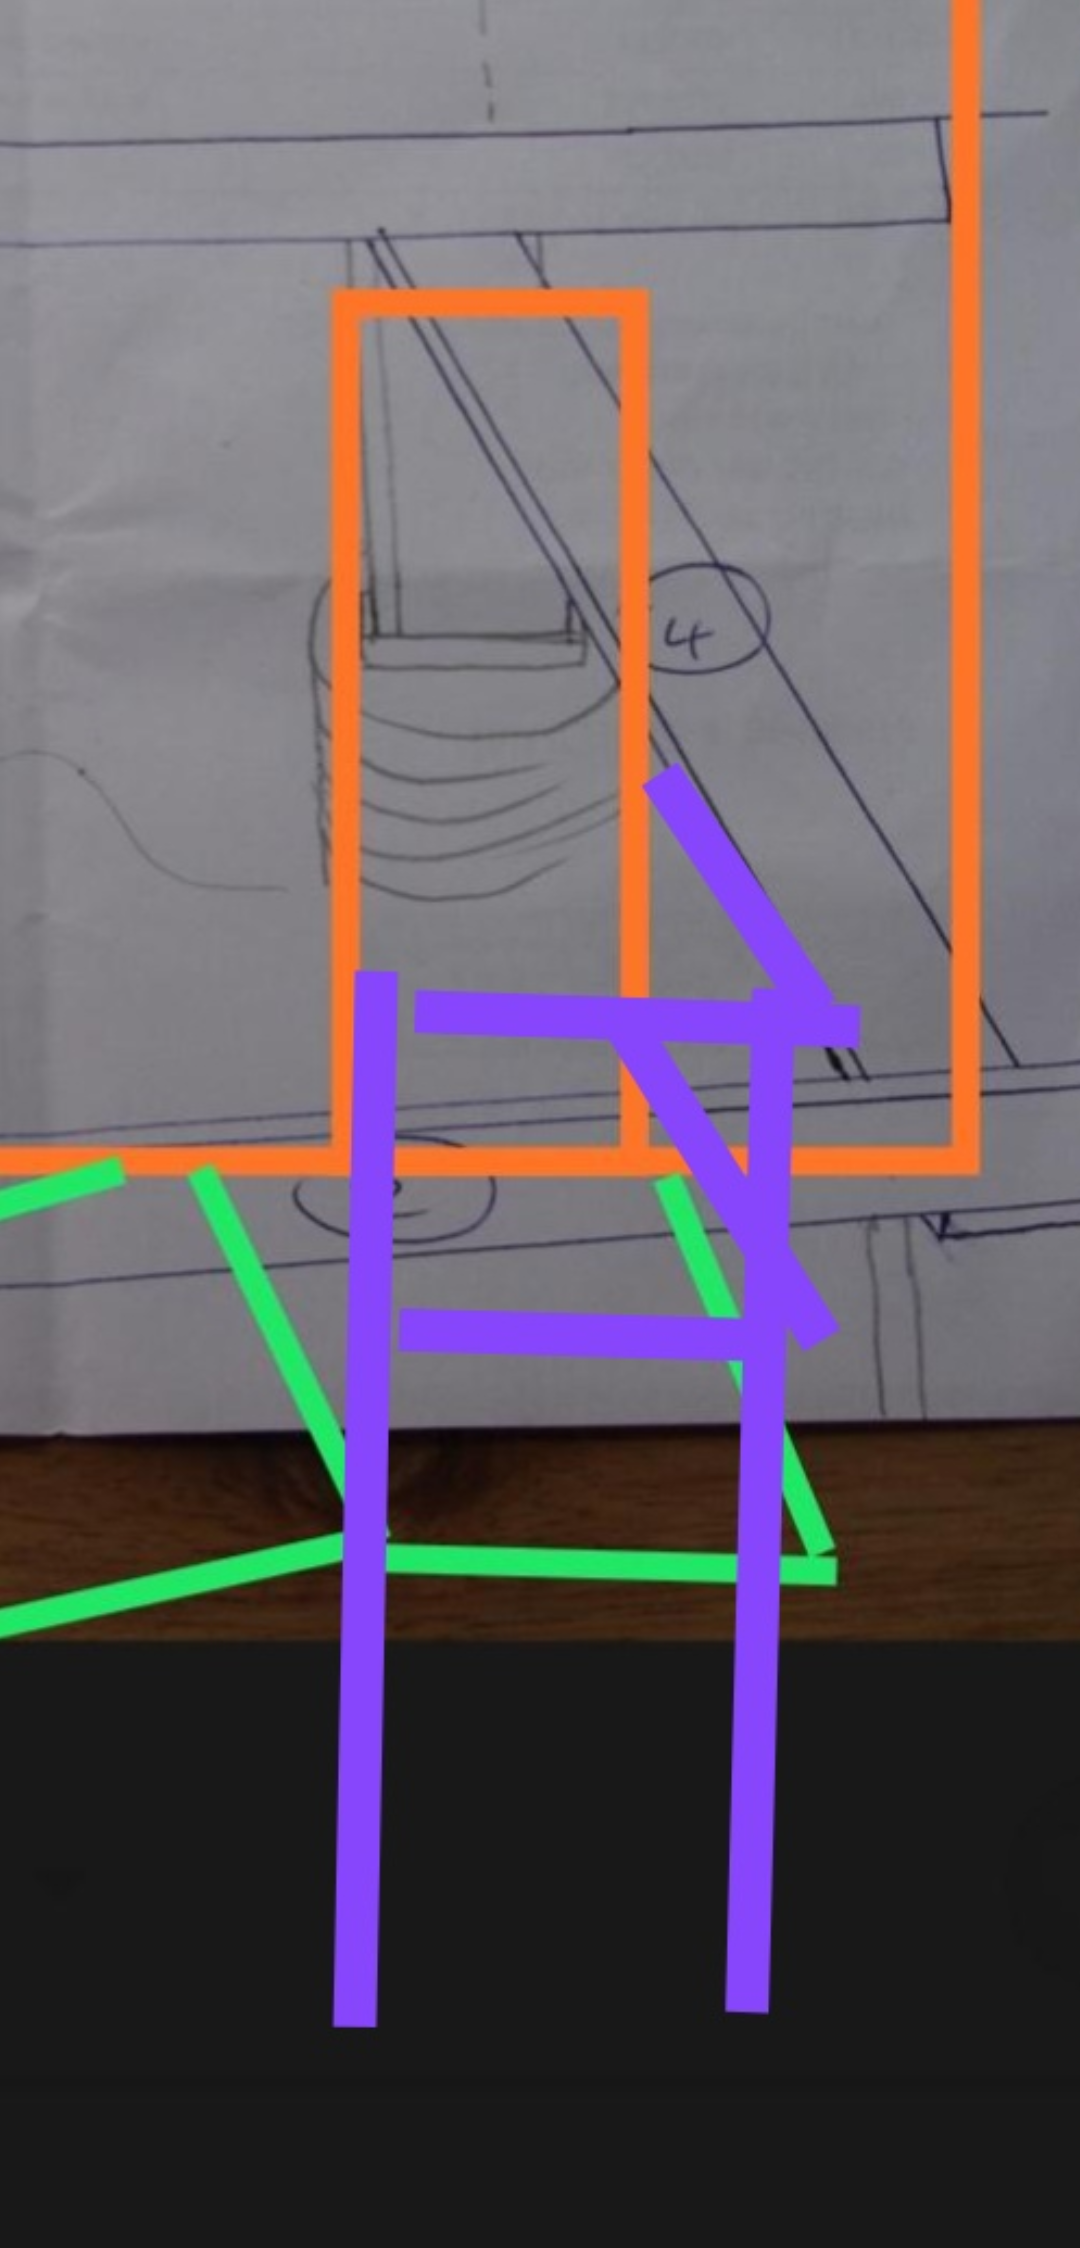
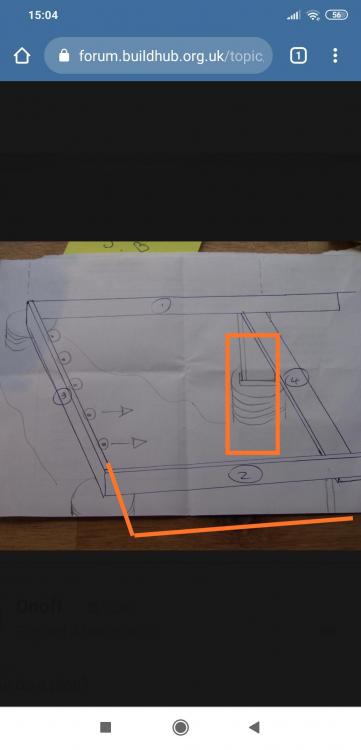
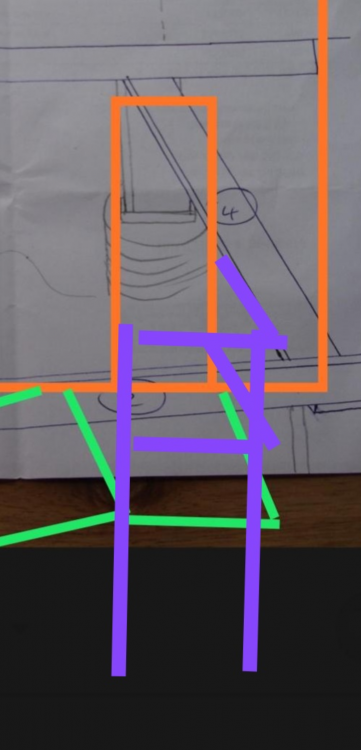
Option 2. Build the deck and put the shed on. This will give you the door position. Then you can use 2 3*3/4*4fence posts to give you both something for the deck to attach on plus will give you enough height to let you form some sort of bannister to stop you falling into the stream. Dig 2 holes drop the posts in and put a bag of postcrete into each hole with some water. Plumb the posts and leave to set. So it will look like this.
-
Is this what u have in mind????
-
Just draw it out with a pencil and a ruler and take a pic with your phone and post it. We are not looking a work of art just a bit of a better idea on how you intend it to look so we can help you get there a bit easier.