BadgerBodger
-
Posts
196 -
Joined
-
Last visited
-
Days Won
1
Everything posted by BadgerBodger
-
I think you’re right, my problem is that I do this and then don’t want to let go. You know, maybe, maybe I’ll need it again… you know. Fortunately the seller immediately accepted the return when I offered to get a second opinion from Hilti. Can’t for the life of me figure what would have prompted that. Might give it one more try and if not, I’ll have to bite the bullet and empty my wallet with Hilti. They do have mighty fine tools!
-
Hmmm. Sounds like admin. Too many times disappointed. I think my experience with eBay has been 1:5 for acceptable product v. Disappointment. and pretty much all the satisfactory transactions were for new products. it’s just frustrating that when I sell, I make a point of listing and photographing all worn parts, stating age and serviceability, known quirks etc. my problem with this specific tool is I need it for roughly 10 weeks, likely never again, rental is likely to cost more than purchase (rented tool will be over spec for my needs) and often that comes with a load of running about too when the tool breaks down etc.
-
Where do people get good quality second hand tools. I’ve had yet another bad experience on EBay, this time with a Hilti PAT. I always swear I’ll never go back, but new for a while, then the lure of a better price for a tool I’ll use for a couple of weeks calls….
-
Air hooks for Radon membrane
BadgerBodger replied to flanagaj's topic in General Self Build & DIY Discussion
From experience this wouldn’t actually be hanging like that below the tray. That bit isn’t really their bag so they won’t pay much credence to it. I used Kingspan green guard full fill below DPC and PIR full fill above. The thermal bridge in the blockwork was dealt with by marmox blocks. The detail on the left, is that a tanking product running up to/under the tray? Assume so as EGL is above IGL -
Bathroom wet UFH floor buildup
BadgerBodger replied to Super_Paulie's topic in Bathrooms, Ensuites & Wetrooms
Out of curiosity, I see these gypsum and cement based t&g floor boards, I was thinking of using these in my bathrooms with spreader plates below. Ok to tile direct? Thoughts on a postcard… -
When I weighed it up for my job it worked out marginally cheaper per cube for wagons/volumetric. The part load charge tipped it over the the balance so less than 6 cube volumetric was cheaper because you don’t pay part load on the make-up. My builder called the first load in (volumetric) and the concrete co. Invoiced him rather than me. I saw his rate was a good bit cheaper than mine and paid up tipping the balance to volumetric all the way! Whenever I called it in myself thereafter I got his rate From then on, volumetric was cheaper no matter what the call off!
-
Yeah, I’m struggling here. two ways of doing this depending on skills of the groundworker easiest and simplest is cast the lower footing. wait. Cast the higher footing with desired overlap using shutters. Repeat as required for desired. No. Of steps and lay of the land. better would be a monolithic pour but but more demanding on skill. bricklayer doesn’t need to tie in to the step per se unless for some reason engineer says he should. If he did need to engineer would specify requirement I.e screw tie, resin helical, frame tie etc seems unlikely though
-
Would you risk pulling footings at the moment?
BadgerBodger replied to flanagaj's topic in Foundations
No time like now. The amount of jobs I start in the ground in the depths of winter is far higher than those which start in summer. It generally pans out ok unless there is a significant seasonal water table. Even that is generally manageable if less than ideal. -
is there a better kind of roofing / cladding batten?
BadgerBodger replied to Alan Ambrose's topic in Building Materials
Red batten, nail. Never had an issue. -
Mat Wells yay or nay and if yay what mat?
BadgerBodger replied to Beau's topic in General Construction Issues
Mat well for main doors every time. Rubber backed coir. Comes in various depths. Cut to size. If you want something a bit more you can go with something like Forbo Coral. It’s industrial but they do some more „premium” colourways and patterns… -
3.5 bar…
-
I know I’ll probably be told this is wrong but I pneumatic tested mine and left pressurised while pouring. And then beyond. I forgot and knicked the pipe which was flush up to the edge of the concrete in a rebate I left so I could screed the shower to falls and boy did I get a surprise.
-
Back to the heat pump compatible fan coils…. Does anyone have any recommendations??? or with the „fan assisted radiators” (basically a fan coil so far as I can see)? Or is running AC split system more effective? If so, I’m assuming heatpump could be downsized to offset capacity provided by AC heating/cooling
-
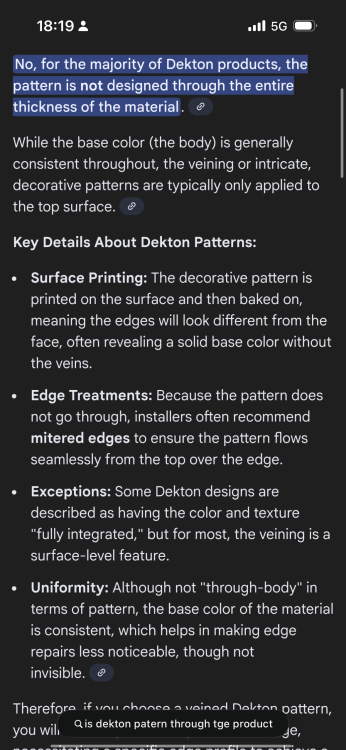
I may be wrong in part then. I went to as showroom, saw the product and what I saw was a solid core colour, with a patterned surface, but the routed grooves were solid colour like the core, indicating that the pattern was not throughout. It would seem the core and product is indeed some sort of composite, as you have deceived from tge product literature. But the patter IS only skin deep… in the products I saw certainly.. perhaps not in all… So still a solid grade laminate but not the same as trespa… Although looking at it, you can get Dekton cladding panels… that would be something
-
Sort of, more carpentry/joinery expertise than general builder but that’s the case for most worktop installs. You still have to be extremely precise to make sure it looks good. Pattern matching joints or book matching larger countertops to give the appearance of continuity. While I’ve been looking at it your chosen supplier comes out, templates the kitchen and then it appears to come to site pre cut. The installers will then piece in what is sent. All of them require finesse as it’s an immediately obvious feature that you experience day in, day out
-
I think dekton is what I’d normally call a solid grade laminate - the kind you see toilet cubicles and IPS (integrated panel systems, the things you see behind toilets in commercial buildings) in public buildings which you have high thoroughfare/risk of damage. solid grade as opposed to high pressure laminate which is essentially melamine cited chipboard or MDF. One of the most obvious differences is that there isn’t any stone/quartz and its a „printed” surface meaning the pattern isn’t continuous through the product - cut edges will be collared the same as the core material which may be black, grey, white etc. but because it has no natural material within, it is allegedly more resilient to damage by heat, chemical etc BUT in my view whilst that’s great in some settings, because the pattern is only on the top, any deep gouges or physical damage the impact is more obvious because it exposed the core which is patternless
-
Aluminium guttering/downpipes recommendations?
BadgerBodger replied to Chris HB's topic in Rainwater, Guttering & SuDS
Unfortunately not. -
Aluminium guttering/downpipes recommendations?
BadgerBodger replied to Chris HB's topic in Rainwater, Guttering & SuDS
Yeah. It’s certainly a nice to have. The cast aluminium is at the top end for price (only cast iron above that I saw). I can’t really say I see much benefit to it. I’ve fitted all kinds of gutter and the stuff on my mums house is 30 years in and going fine (cheap plastic 1/2 round on spikes). Doesn’t look as nice is the only thing but cast effect plastic looks pretty damned good -
Aluminium guttering/downpipes recommendations?
BadgerBodger replied to Chris HB's topic in Rainwater, Guttering & SuDS
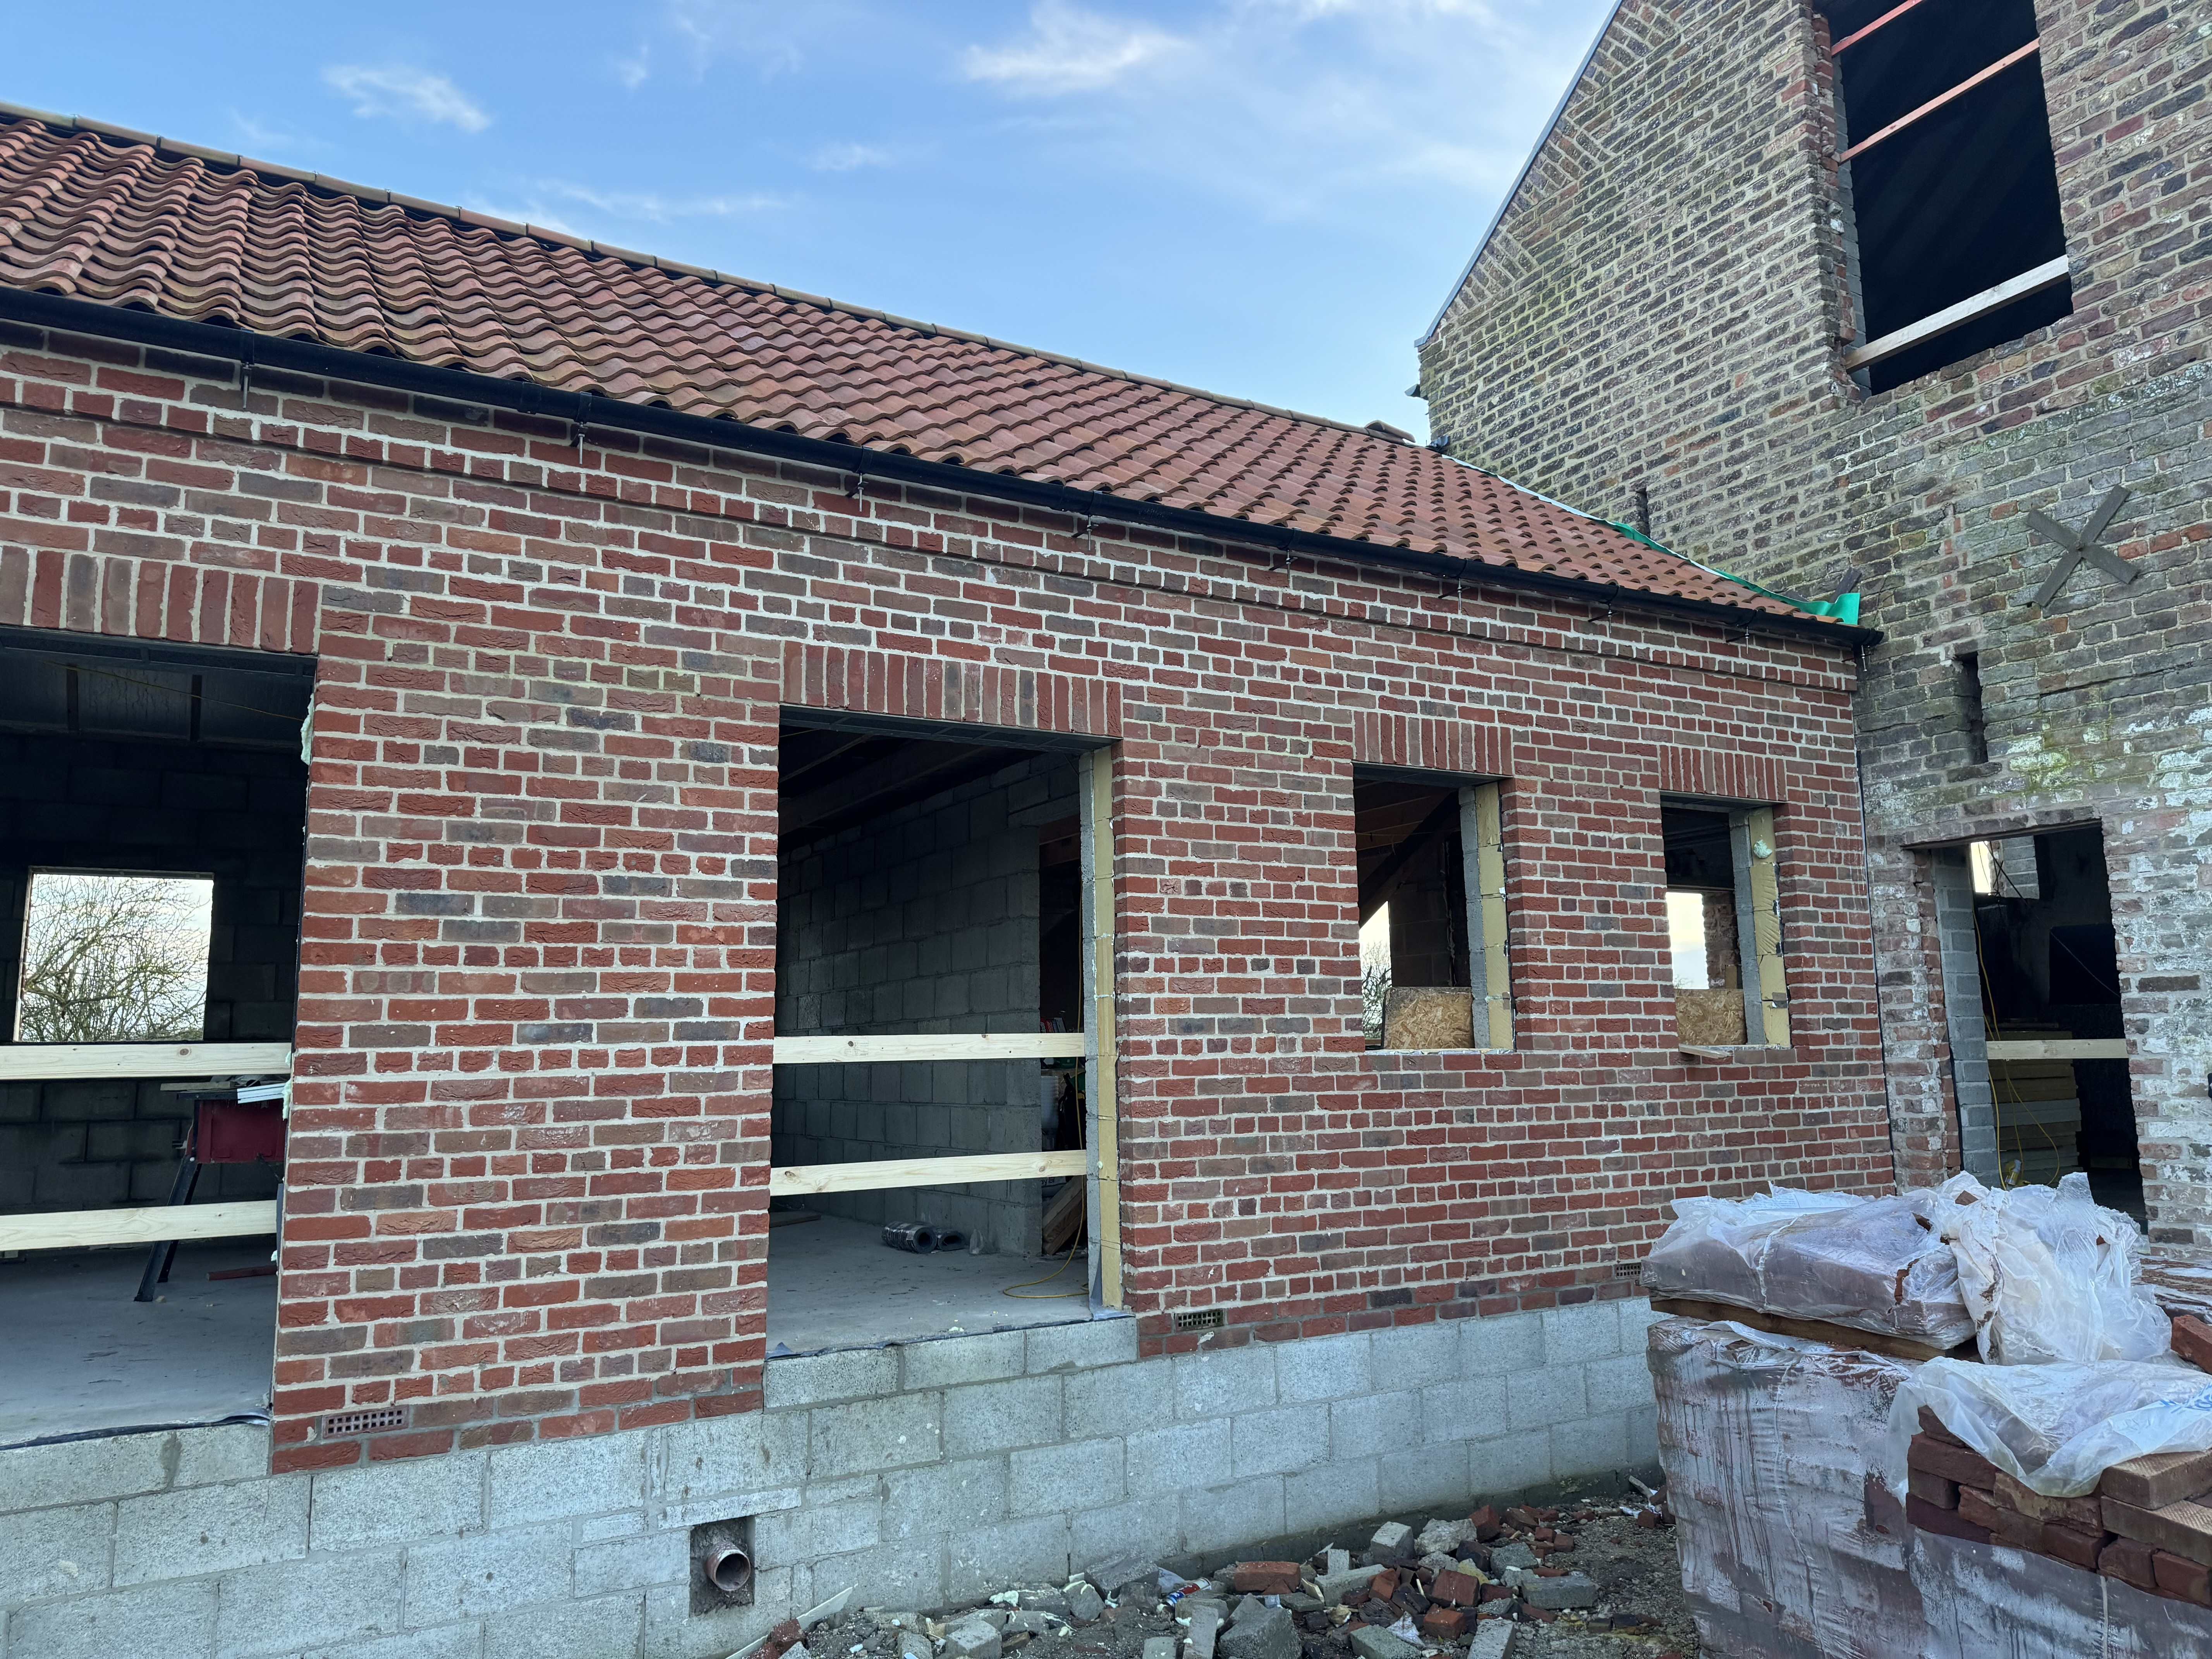
Longevity, they say 50 years+ (more with maintenance) mine was mandated by the conservation officer (listed building) I wouldn’t have used it if not. Material cost - £6,500 +/- if I recall. 70m 125mm 1/2 round with 40m downpipe inc brackets, fixings etc for cast effect plastic you can half that for straight plastic less than half again -
Aluminium guttering/downpipes recommendations?
BadgerBodger replied to Chris HB's topic in Rainwater, Guttering & SuDS
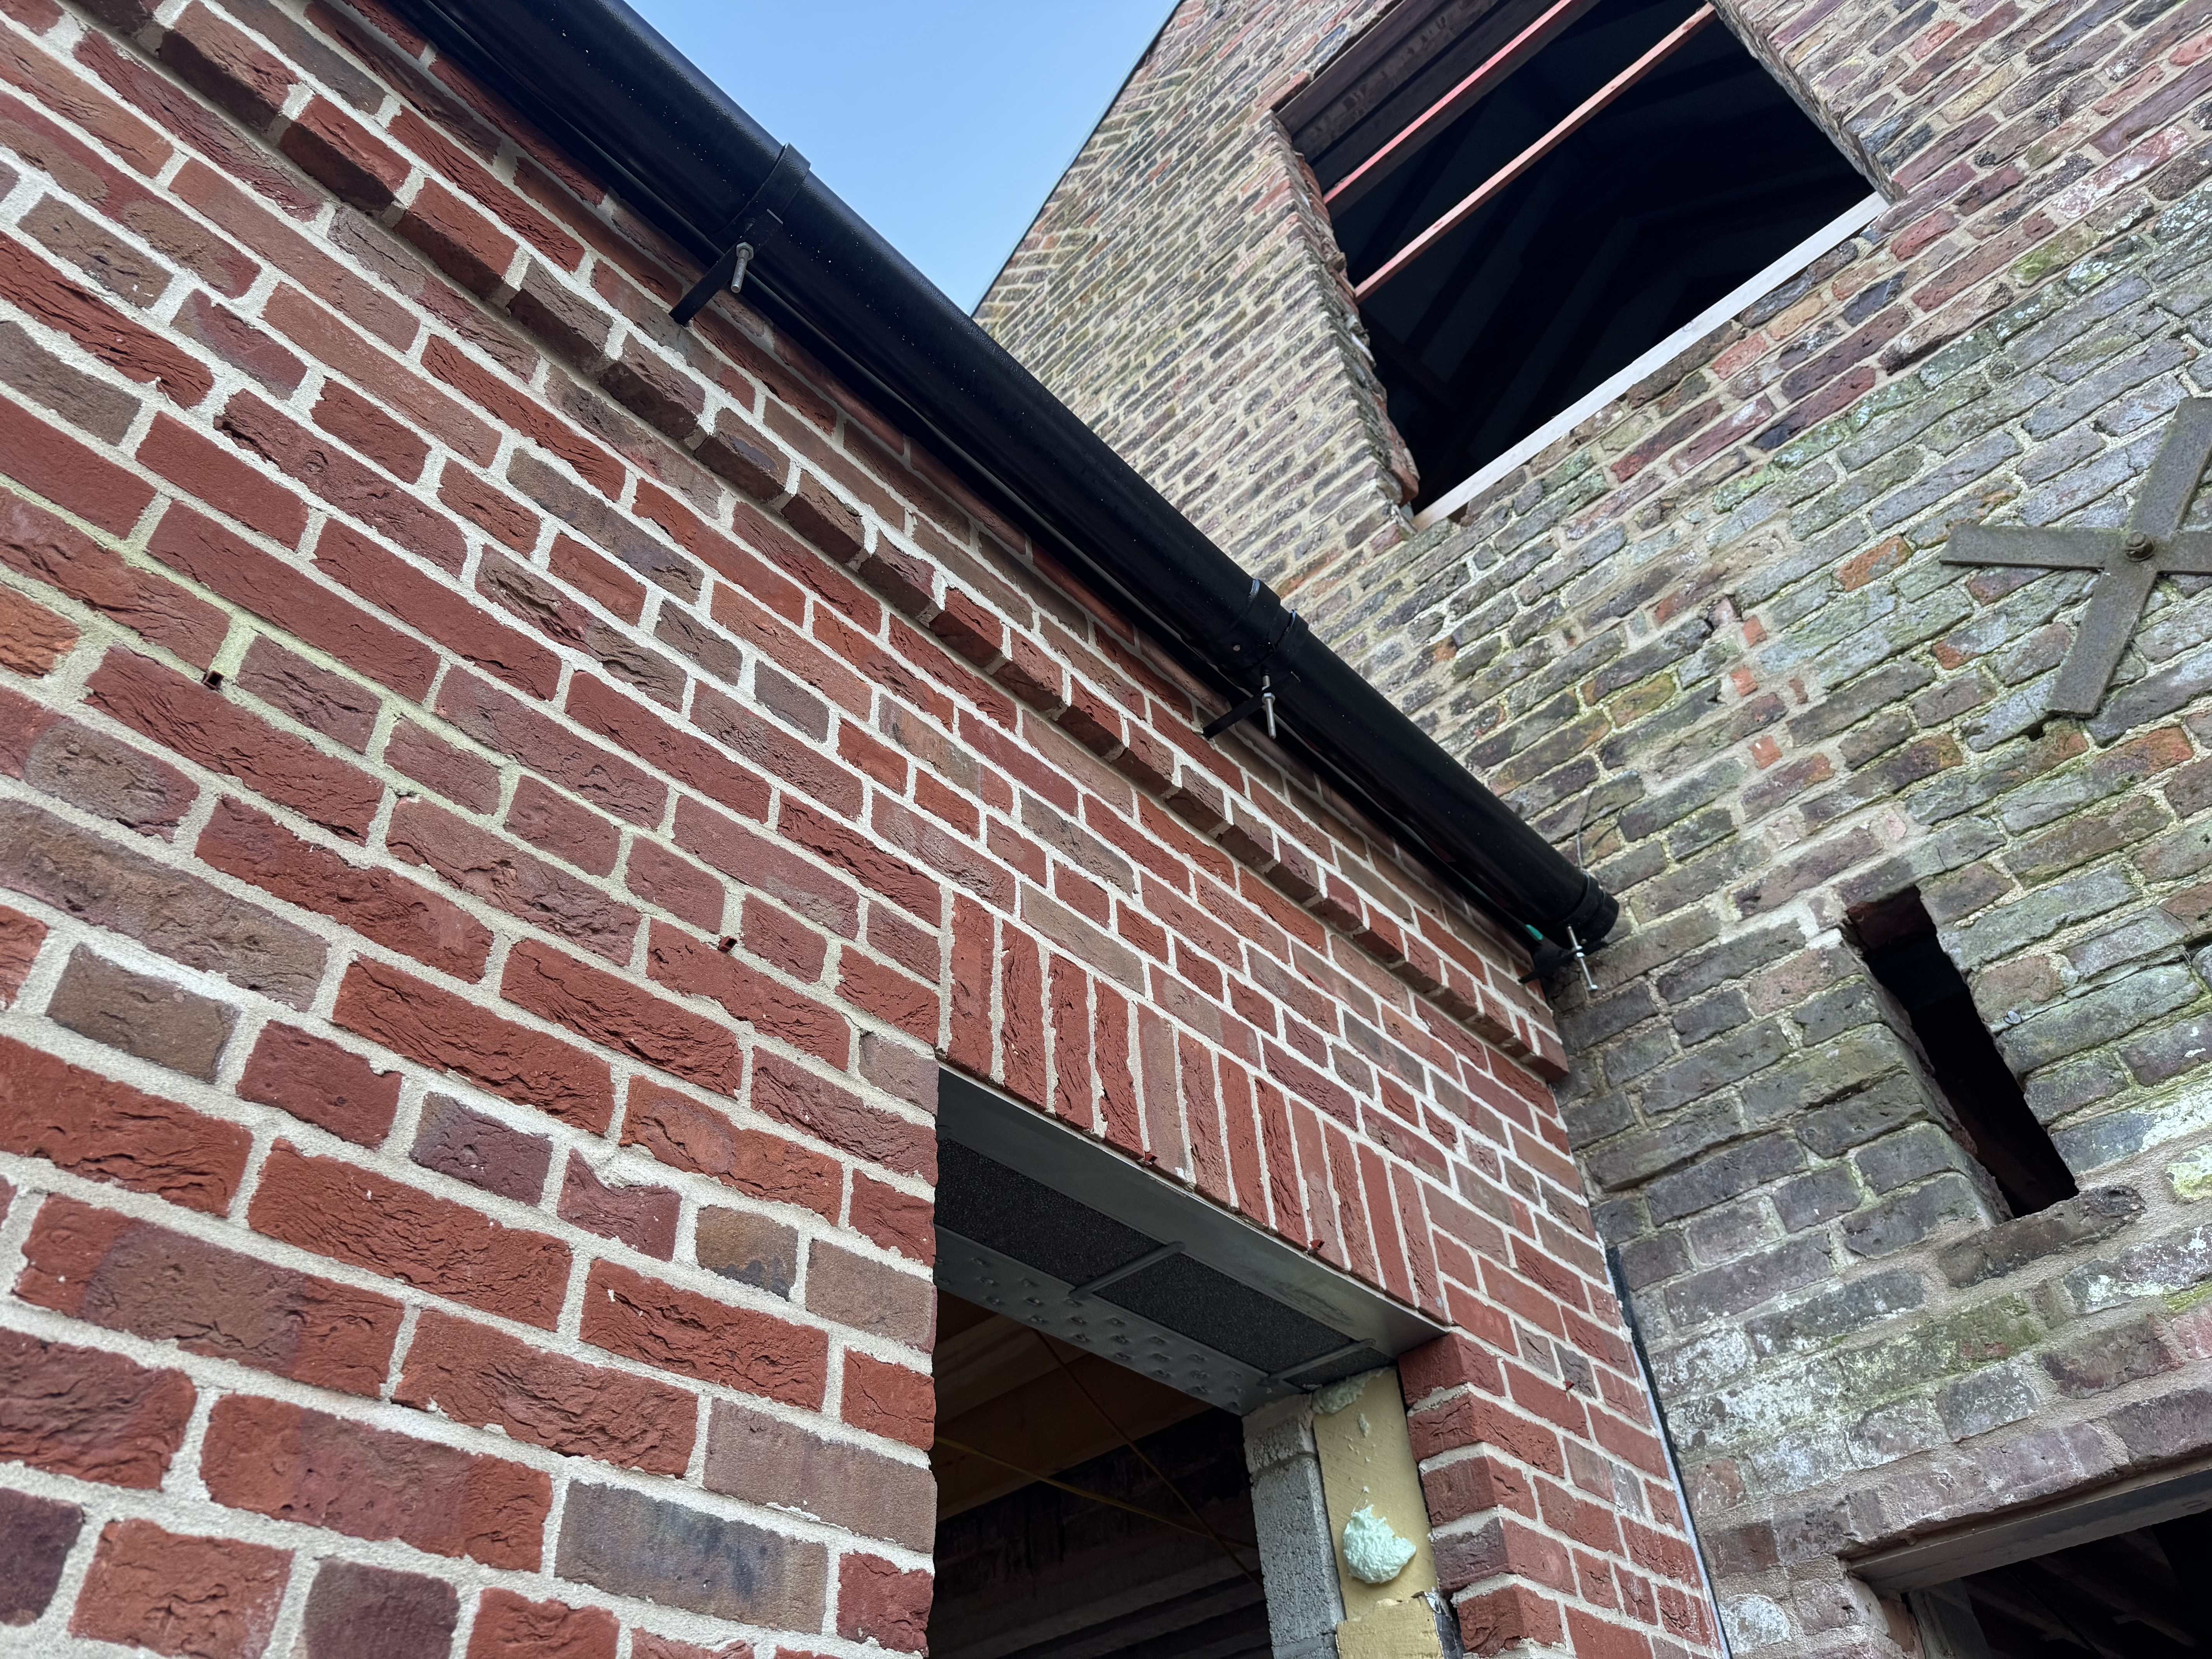
yes. In time. The quotes for pointing were wild. (380m2) so when all is said and done I’ll see what’s left and see what the best way of going about it is. likely nothing in left in the pot so it’ll be time to learn how to lime point. When I chose my scaffold tower I had this in mind and got something to reach everything. I’ve had the tops of the gables done while I had a scaffold up for the roof. I’m in two minds about this. it would essentially make the barn look a lot cleaner but it would also turn it bright red and, I think lose a lot of character. It’s got a burnish to the brick l, whether that’s age and „pollution” or how they were fired, I don’t know but inside the building they’re solid reds. I quite like how you can see how the old buildings abutted from the paint on the outside (which would have been in) I think I’ll just wire brush the most offensive areas as I point it. You can see the gables look great without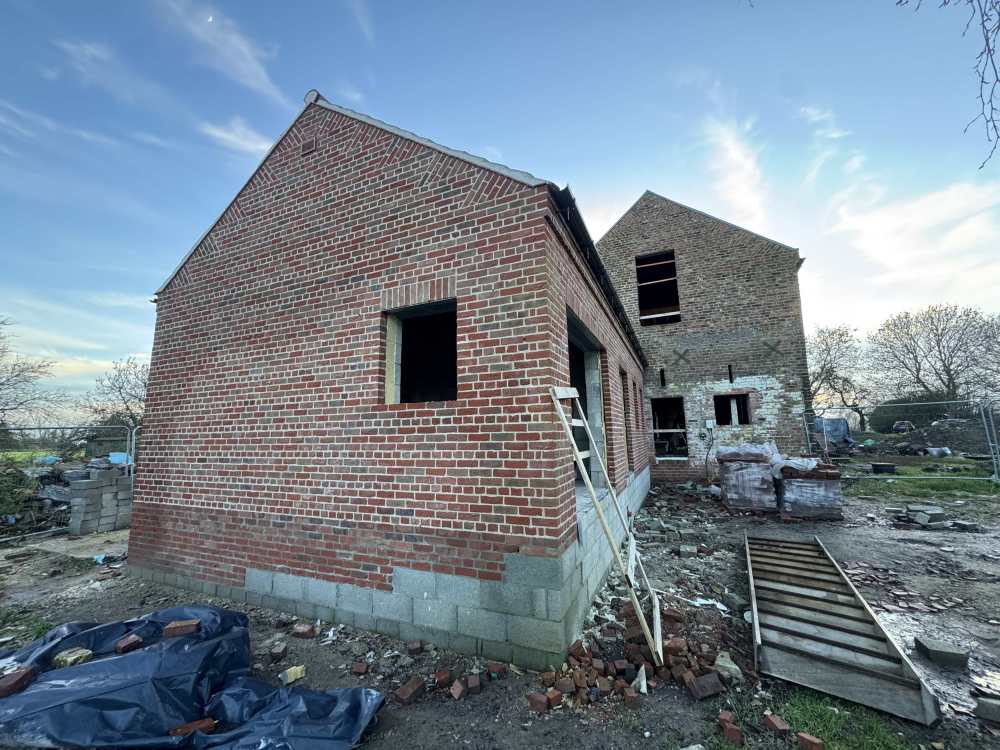
-
Aluminium guttering/downpipes recommendations?
BadgerBodger replied to Chris HB's topic in Rainwater, Guttering & SuDS
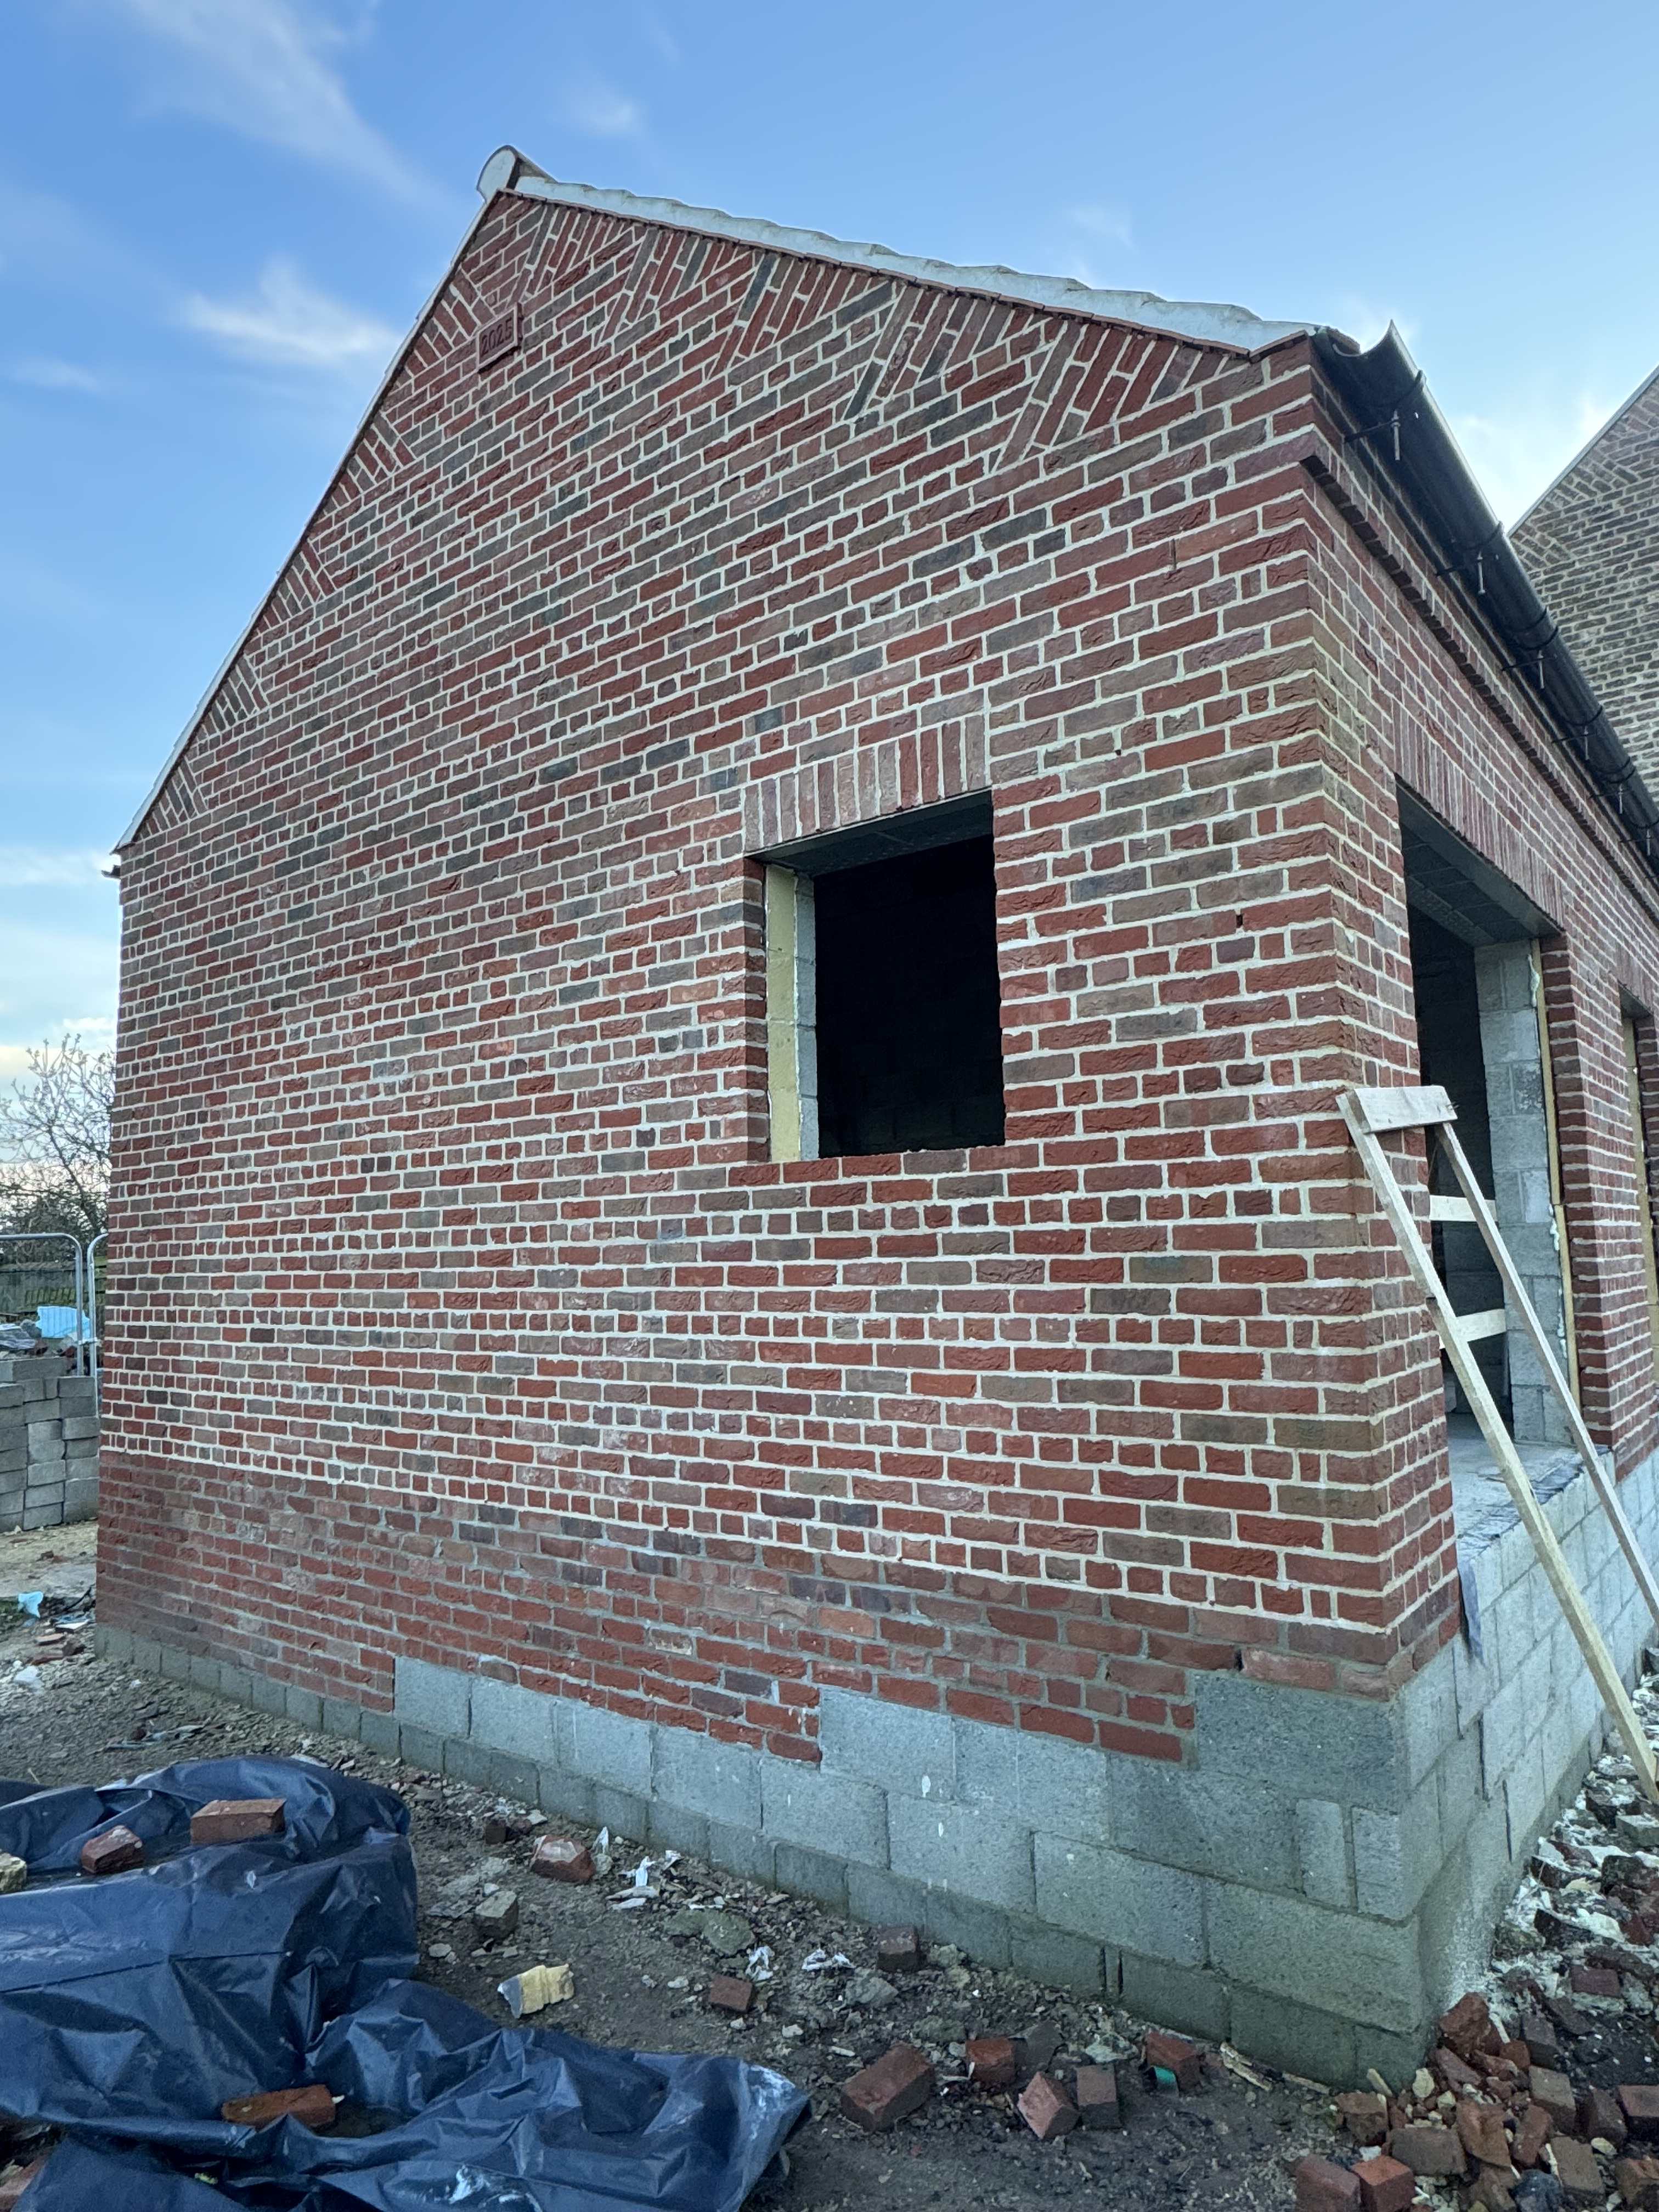
I’m so happy with they way it turned out. absolutey worth the small extra cost. you can see the below ground in OPC instead of white cement and the difference the white mortar makes -
Aluminium guttering/downpipes recommendations?
BadgerBodger replied to Chris HB's topic in Rainwater, Guttering & SuDS
Better later than never. don’t mind the green, that’s on me for not connecting the bottom section for a month.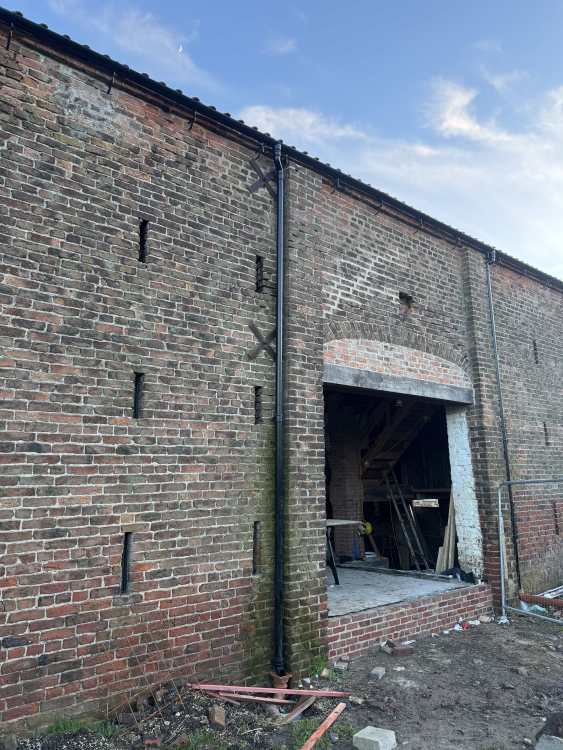


-
Insulated hot and cold water pipes?
BadgerBodger replied to Alan Ambrose's topic in General Plumbing
No. But thinking about more deeply a good bit less. Tank is at east end nearest heat pump. Length of build from on end to the other 32m + 6m elevation between GF and FF. ad in a bit for not being able to make the most direct route. Call it 45m on the safe side. Nonetheless. Having to draw down on 45m pipework to have a shower, run the water to wash your hands is gonna waste a good lot of water and I imagine, in the case of the WHB, you’ve probably washed your hands before you get the hot water in the most extreme case. The kitchen and master bed are still 15 and 25m respectively! -
Insulated hot and cold water pipes?
BadgerBodger replied to Alan Ambrose's topic in General Plumbing
Someone smarter than me will have to answer that precisely. I haven’t researched the install that far yet. I’ll have a stab though and someone can correct me My logic says no. The cylinder is topped up with mains water via mains inlet (top if I recall last time a was meddling with one) and then the flow which becomes the pump feed exits bottom and the return would be another top entry. So as long as the cold water supply keeps up with the usage (there would be no interference with flow) only the usual dilution of heat caused by the cold water top-up this is roughly based on my current immersion set-up so it may differ with ASHP but again my logic says no. -
Insulated hot and cold water pipes?
BadgerBodger replied to Alan Ambrose's topic in General Plumbing
Yes, my thoughts were that we are a pretty habitual family and our DHW usage is pretty much confined to two distinct blocks of time 0500-0800 (showers and washing up) and 1700-2000 (baths, showers and washing up) with random intermittent use inbetween. I’m putting the tank right above the main cloakroom which will get the majority of the use during the day. But the longest run is likely to be 55m if I did it radially (one of the kids bedrooms) and when it’s bathtime it’s bathtime if you know what I mean. Reckon I’m pretty convinced that recirc is the most water efficient (we’re on a pumped treatment tank) and could well be the most energy efficient if well lagged AND suitable automation/control is installed.