Spinny
-
Posts
923 -
Joined
-
Last visited
-
Days Won
1
Everything posted by Spinny
-
So I have kitchen cabinet people saying they normally just stick the LED strip to the underside of the worktop. Worktop people say it can be stuck on the bottom, but they can also cut a rebate in the underside of the quartz, for which there is no standard size rebate, and customer needs to specify depending on strip size used. . Anyone have this in their kitchen ? I guess you do @nod - did you buy the strip ?
-
Anyone used LED strip under the edge of a kitchen worktop ? Does it need to be IP65 or is IP20 going to be fine ? Does it need to be 8mm wide, could I use 10mm addressable ? Need to rebate the underside edge of the work top ?
-
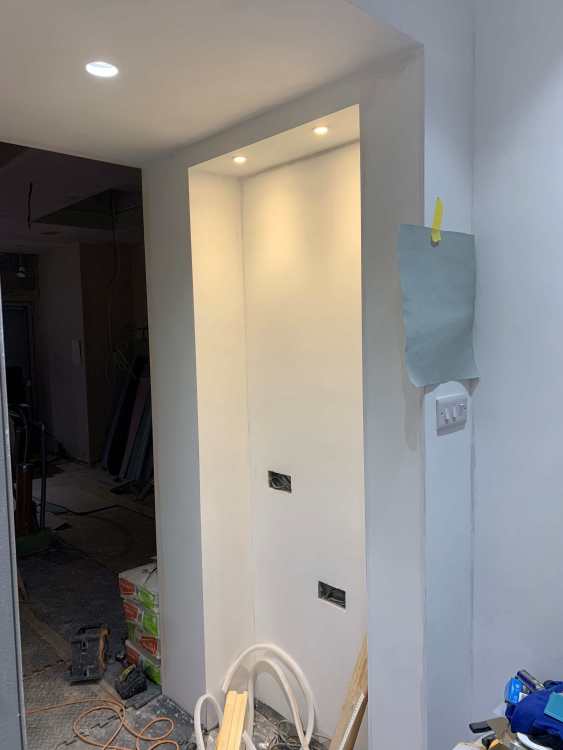
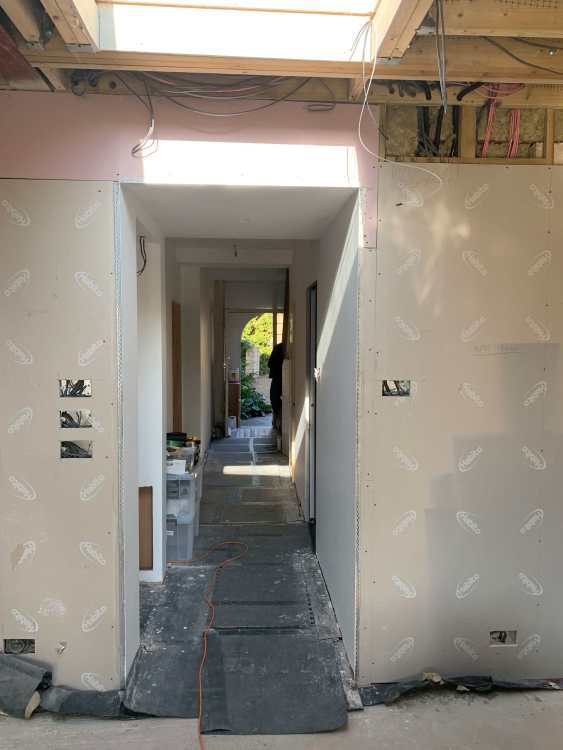
How it is going... Shelves to follow in due course.
-
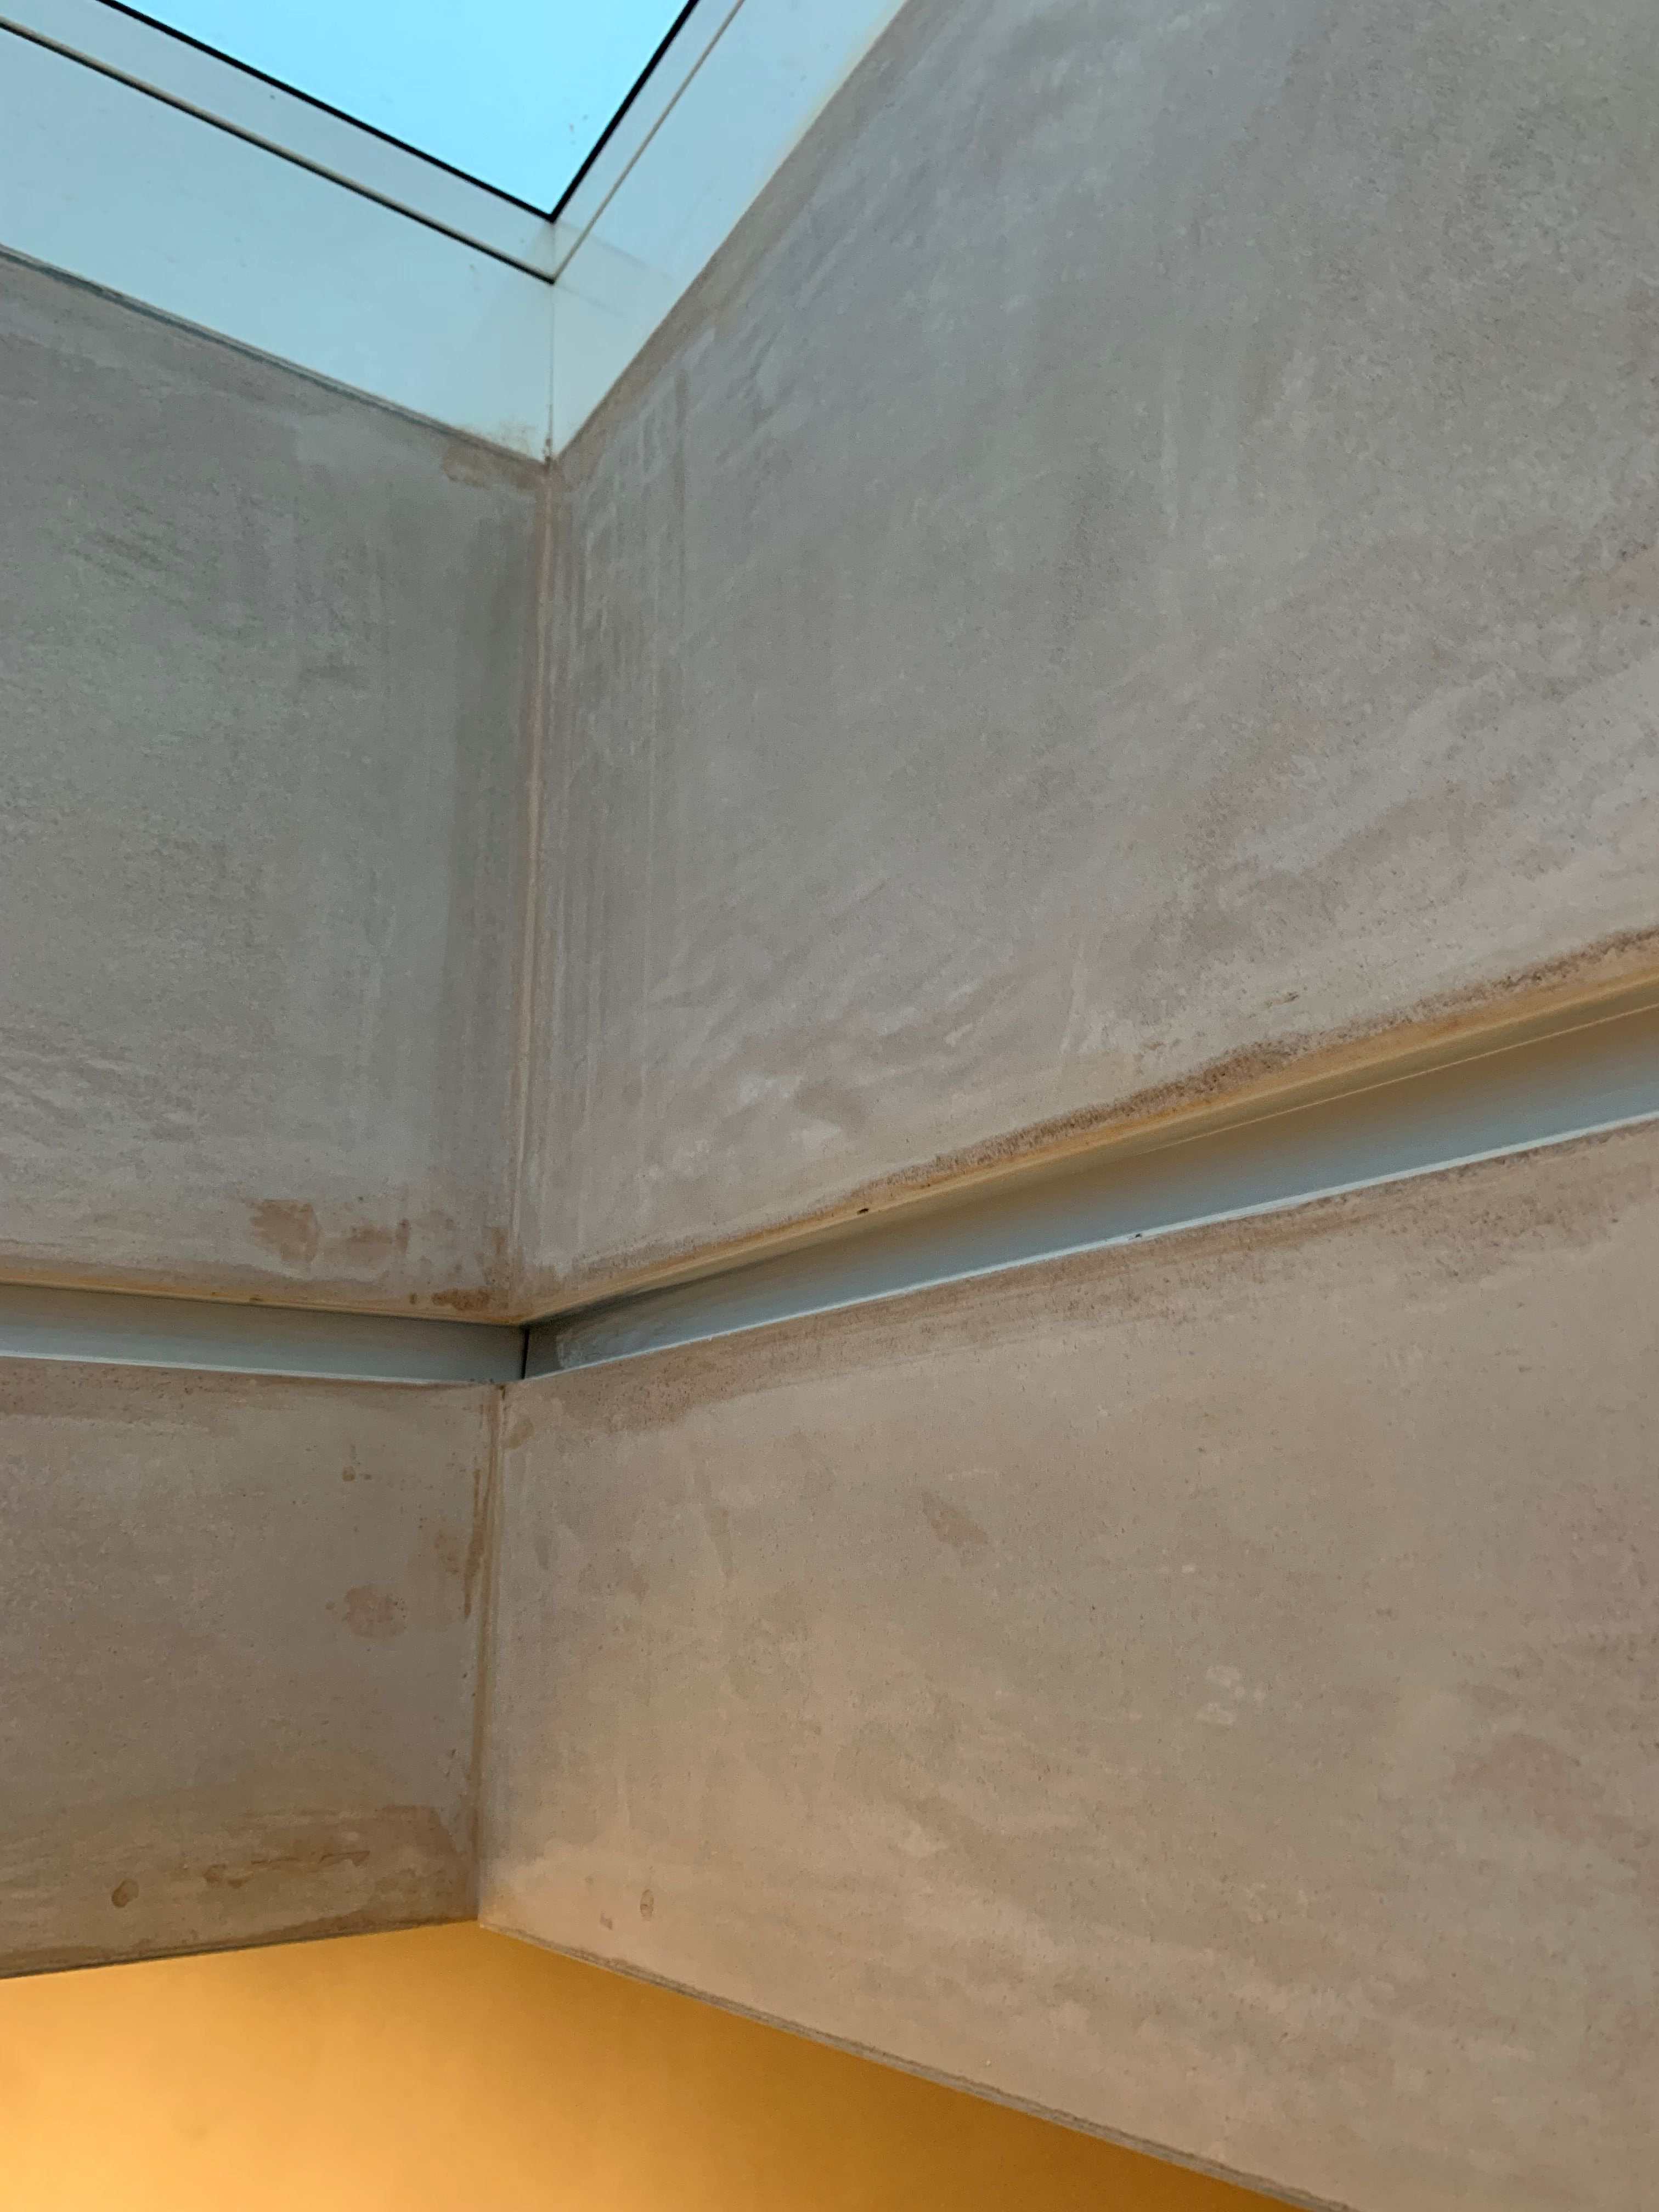
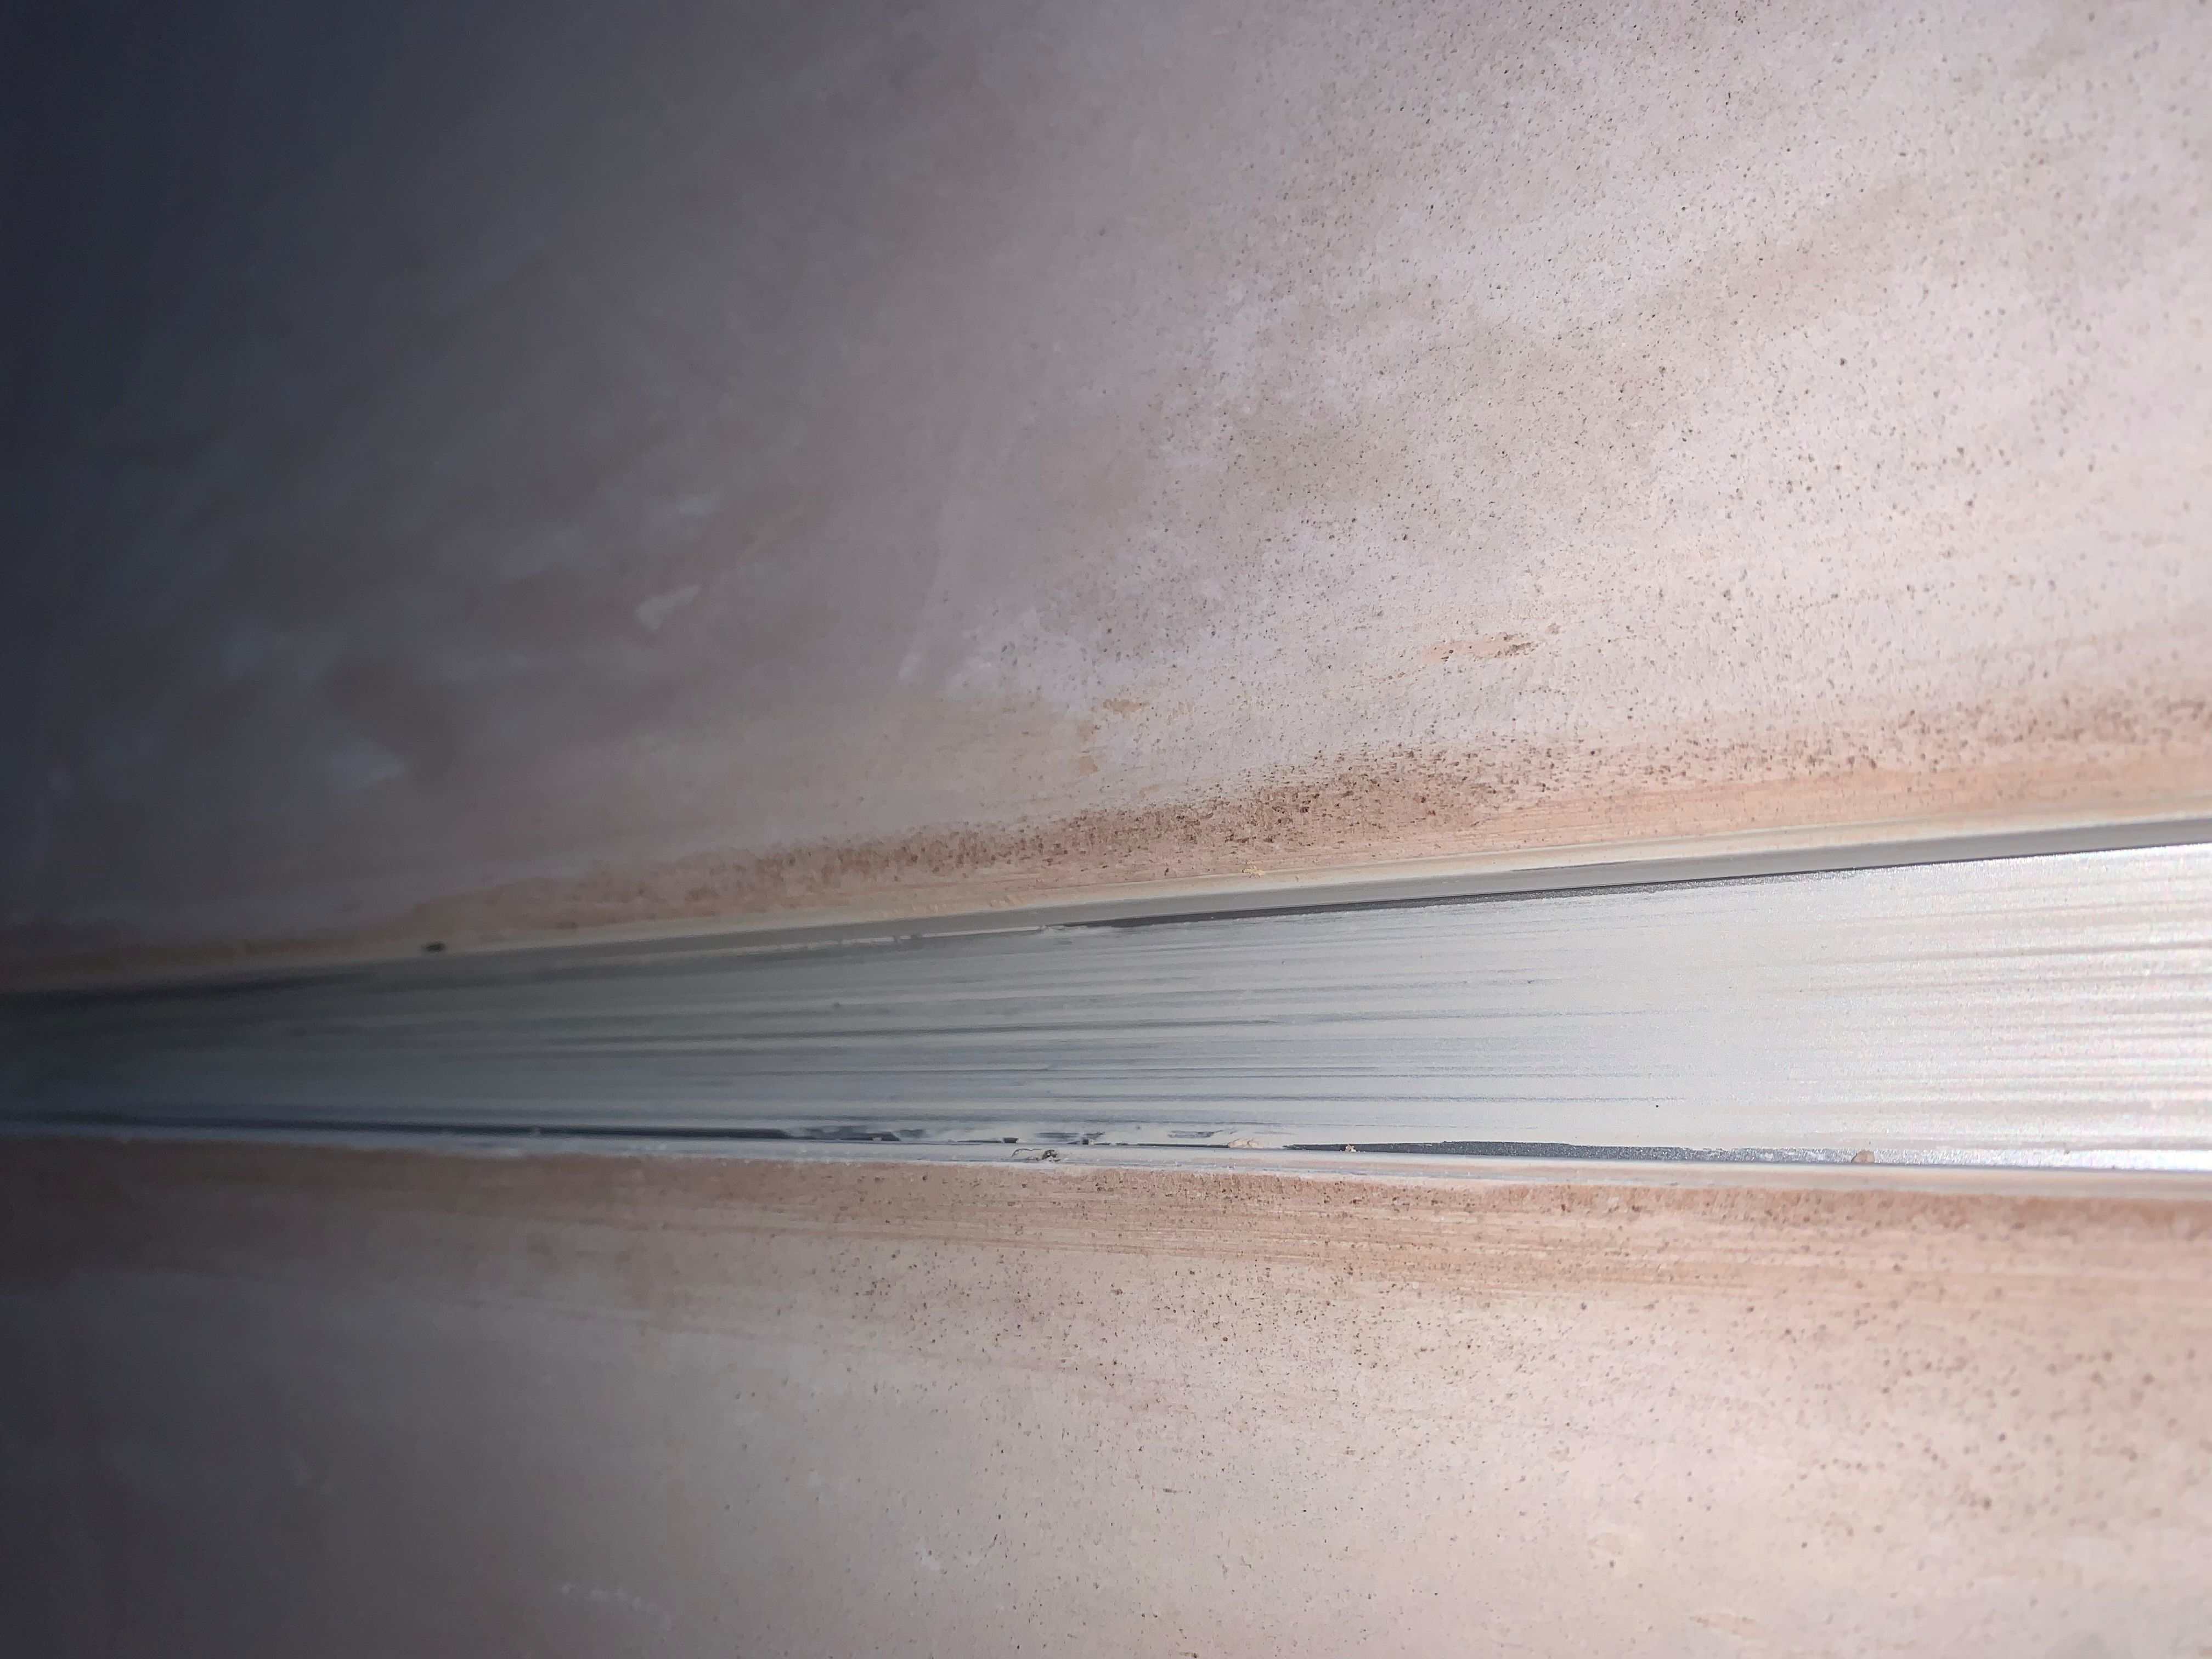
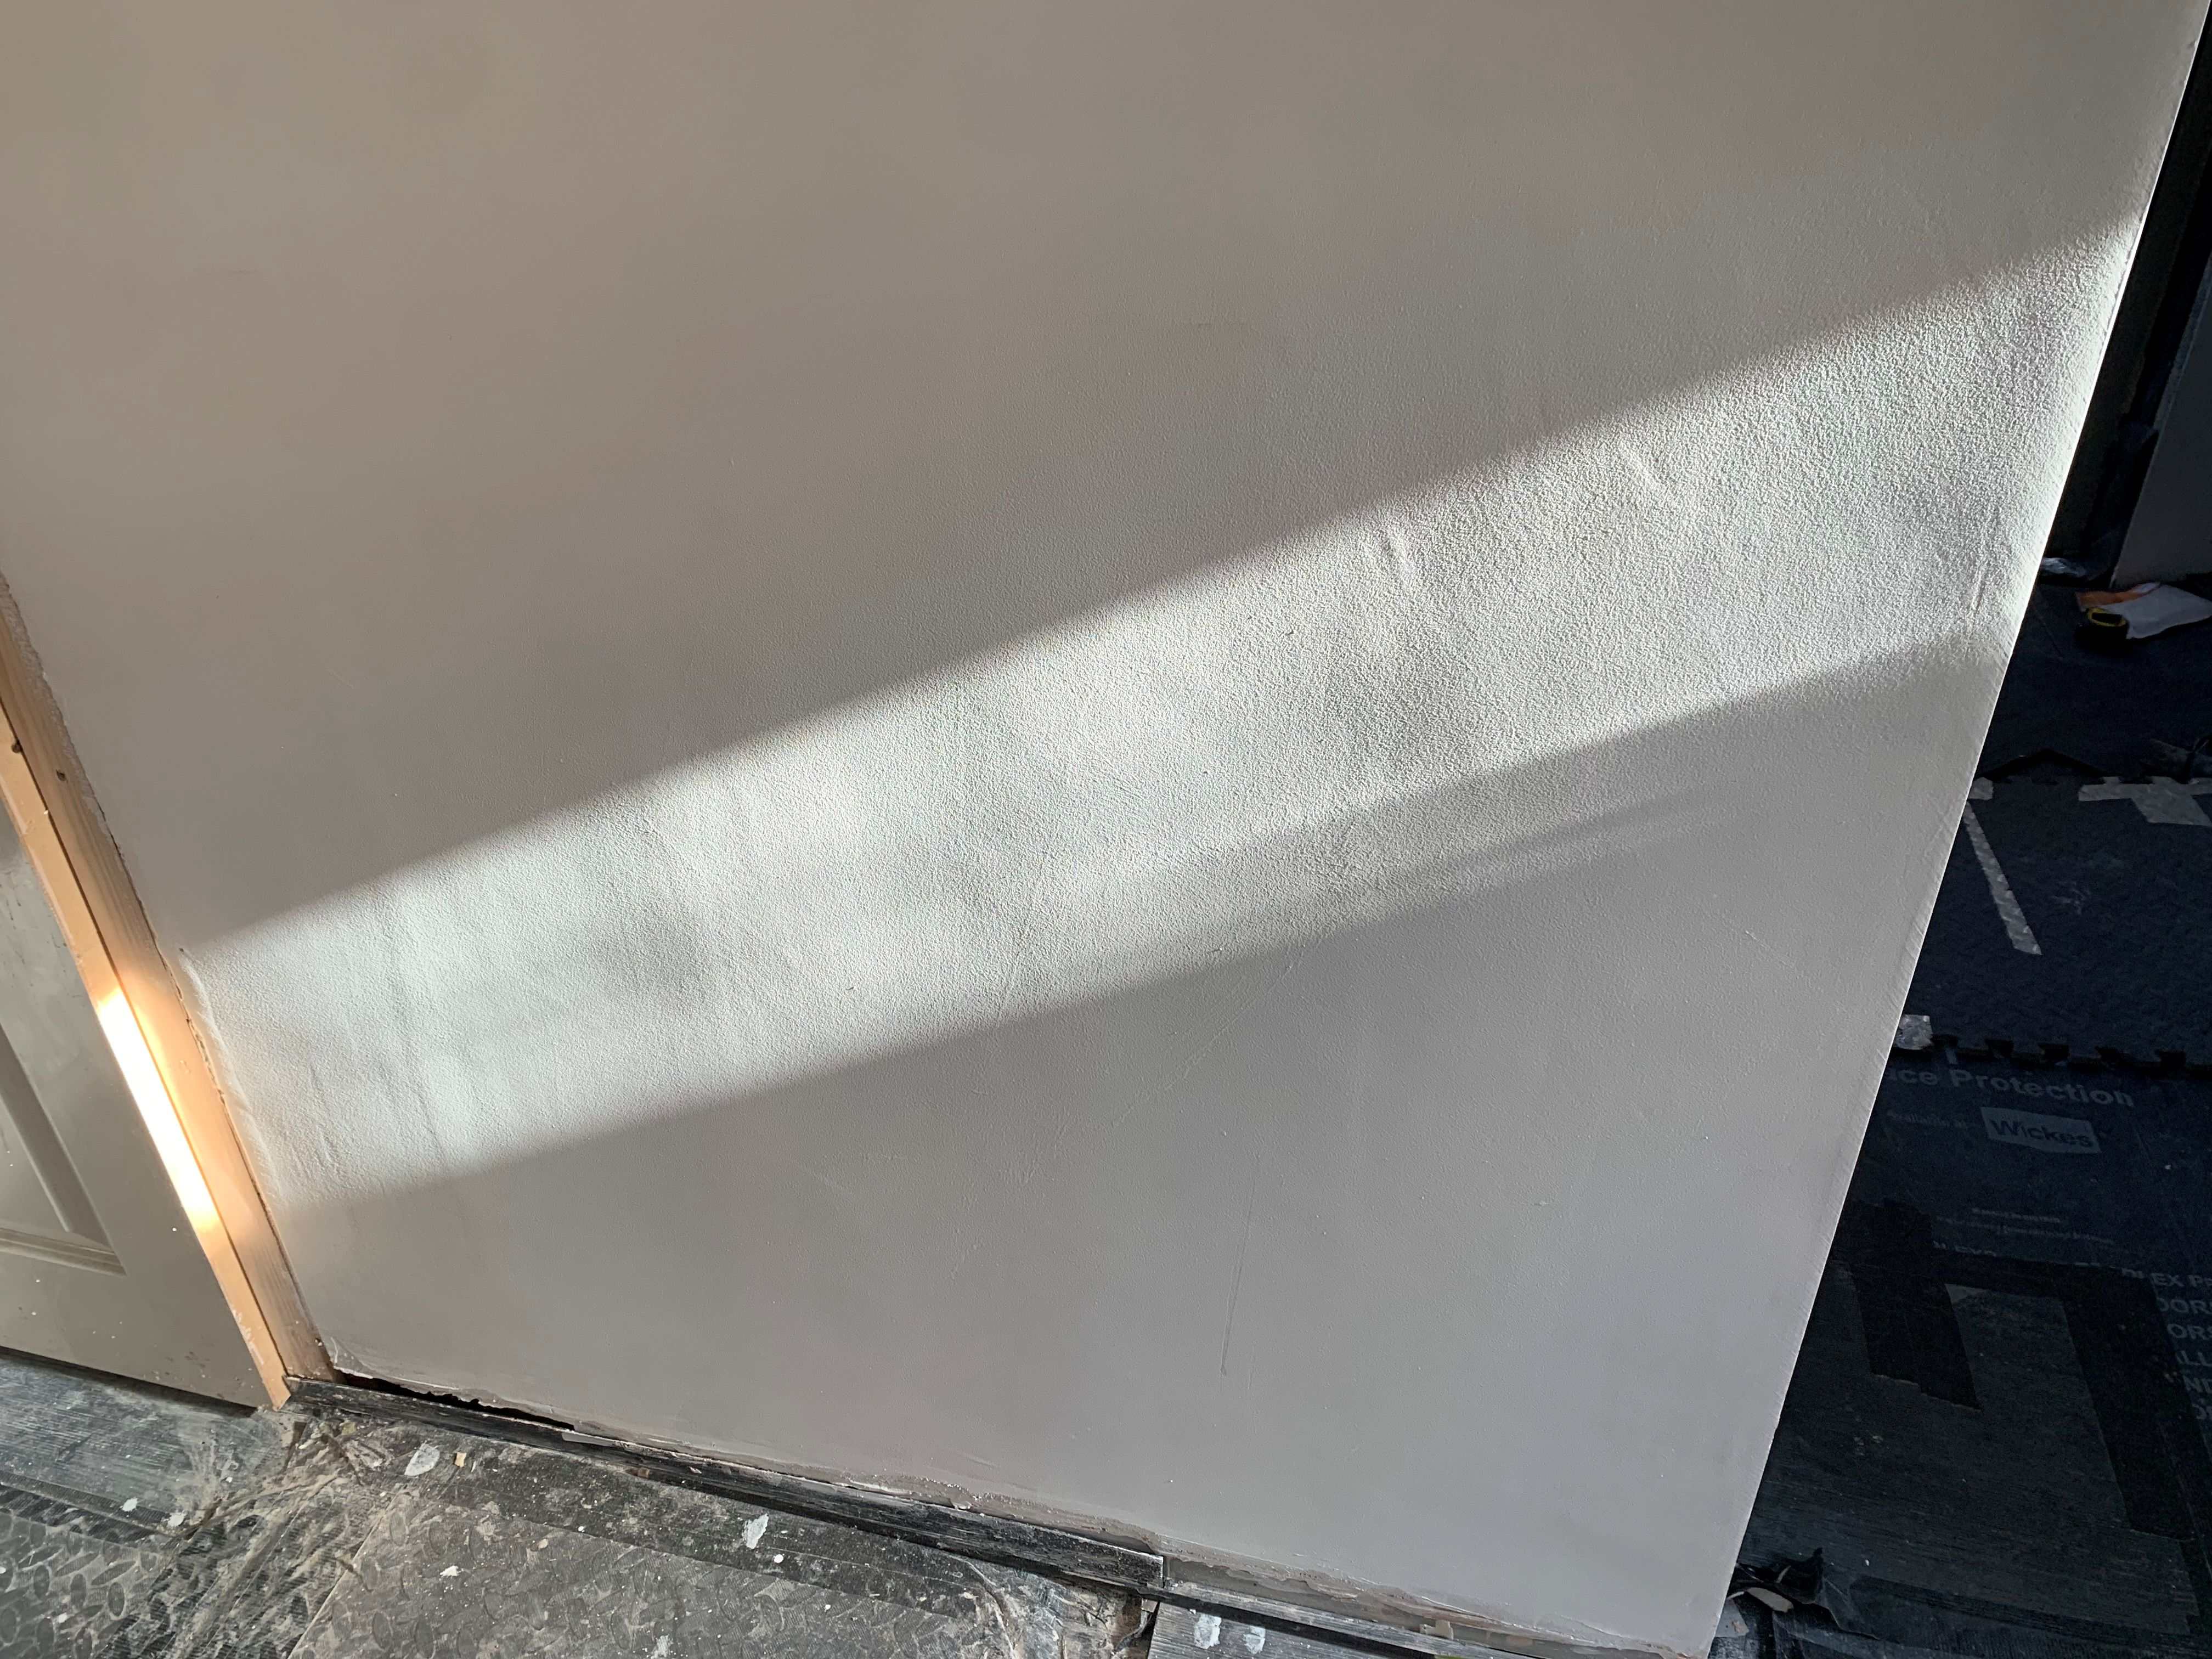
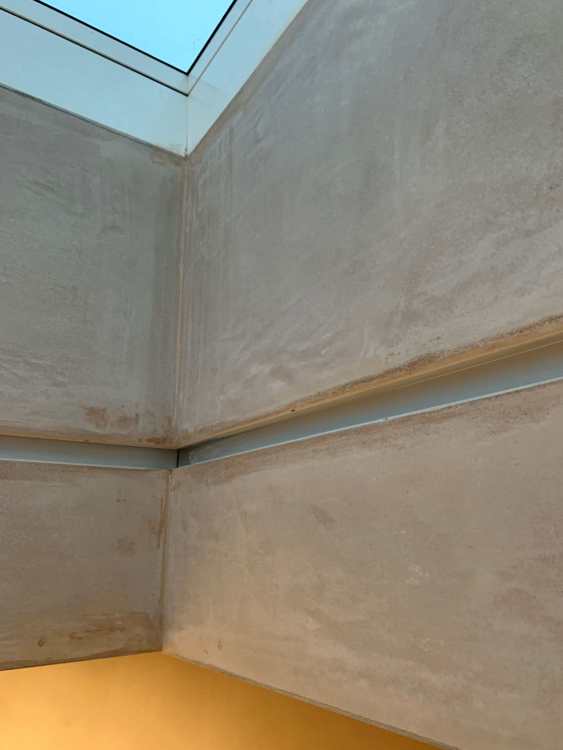
Looking at the rooflight makes me concerned regarding the edges adjacent to the LED profile etc... The plaster is grainy/gritty adjacent to the profile and in places near the top bead. The profile was filled with a foam strip to keep it clean during plastering at the plasterers request - but maybe not a good idea ?

-
Bristol area.
-
Do you mean this type of metal tape...? https://www.screwfix.com/p/diall-reinforced-corner-jointing-tape-white-30m-x-50mm/981CF?tc=LA5&gclsrc=aw.ds&gad_source=1&gad_campaignid=895557794&gbraid=0AAAAAD8IdPzVzwpk2ymfDGpaiBjB_P_U2&gclid=EAIaIQobChMIvOGIjqTCkAMVyYBQBh1kaAggEAQYAiABEgJG6vD_BwE Oddly people referring to using it on external corners, but we have metal beads on those.
-
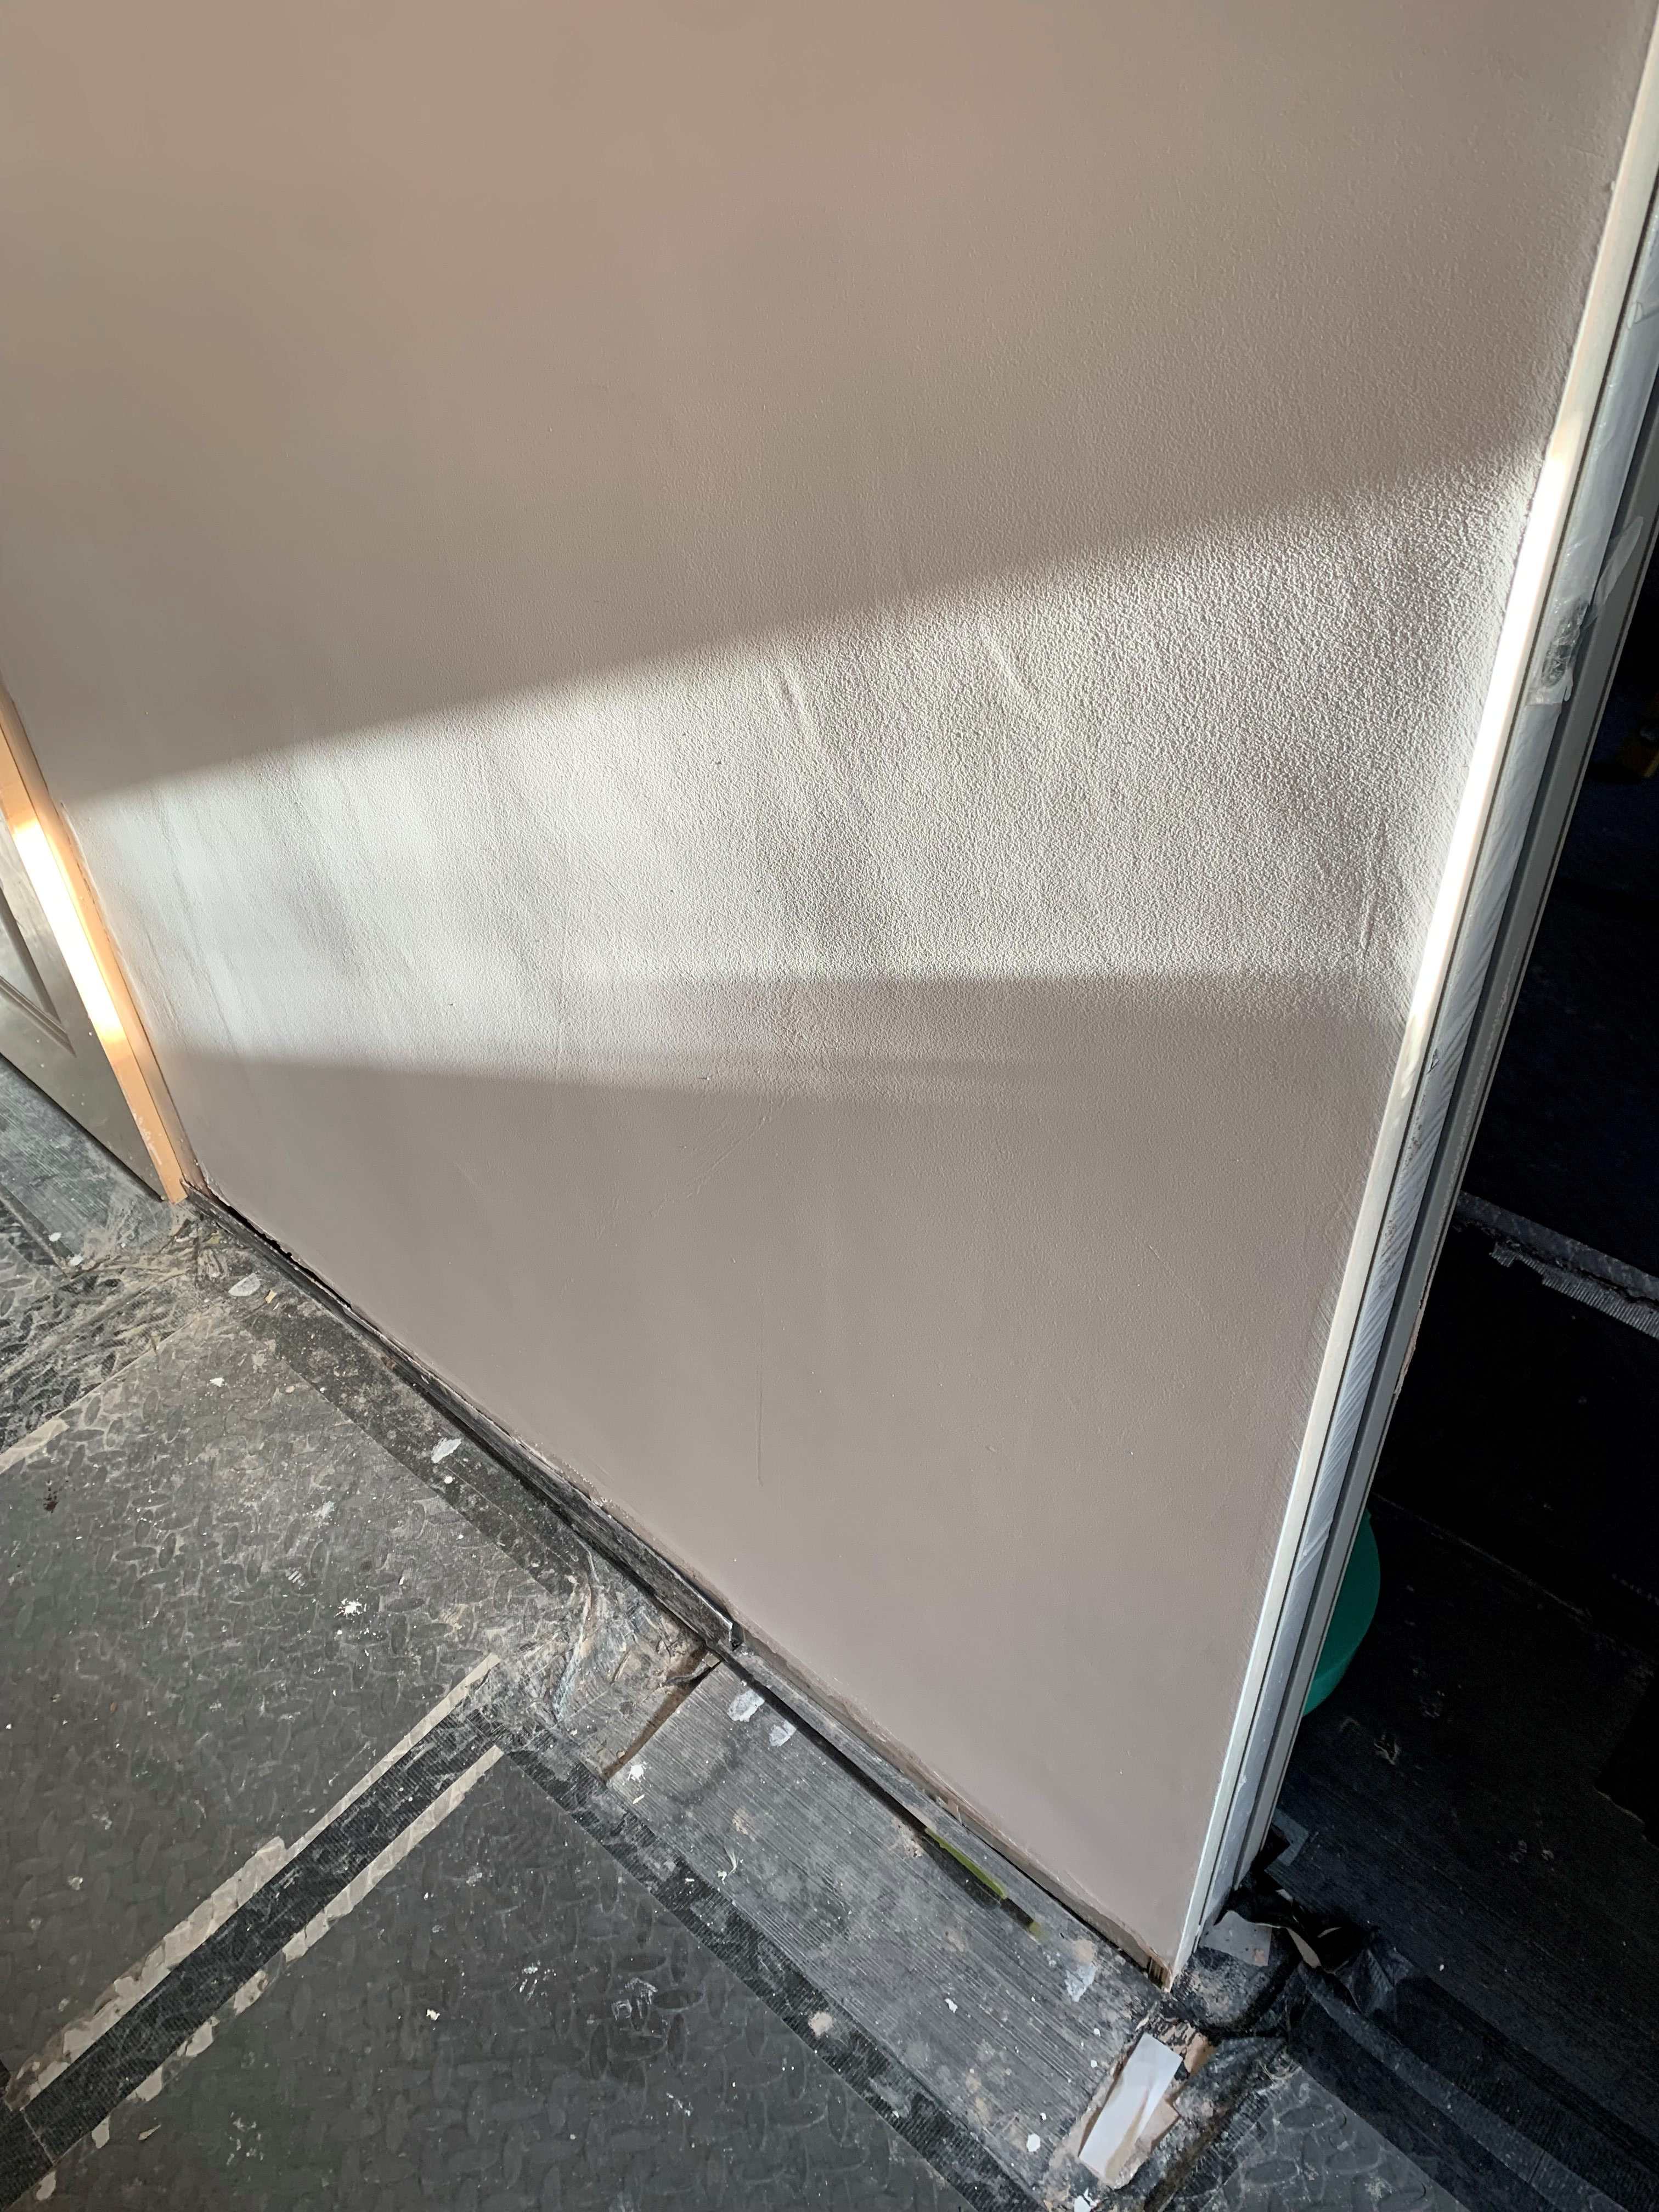
Well walls are largely plastered already - some hardwall, one wall boarded - see pics. They put mesh in at the junction when they plastered the walls. Too late to change plasterers, I already changed once. They have been plastering for 12 years. All I can say is they are better than the original one the builder had. Not perfect, but not as bad. It actually seems quite difficult to judge plastering as the walls tend to look perfect when freshly plastered, only when dry does the odd flaw show up.
-
So we will have no coving in our open plan room. Are there any techniques, tips, advice etc for getting the plasterers to produce good straight lines at the junction between walls and ceiling ? (Almost seems surprising there isn't some kind of bead to assist with this) PS We currently plan to paint the ceiling white and the walls a different off white light shade - not 'elephant's breath', but you know what I mean)
-
Have we been here before ? If we all turn a blind eye to people breaking the law, then we are all the same as the law breaker are we not ? Policing depends upon consent. We can't expect the police or regulator to implement the law if none of us can be arsed to. That weird guy waving a machete out on the road - concerned yes - affect you no - not until they murder your relative or friend. This is on my land remember - what happens when it collapses and a builder ends up badly injured ? (They are building a wall 4m high, so a 2.5m platform on tressels ?) I think I'll remind them of their duty to comply with all H&SE requirements. (Presumably their liability insurance will be invalid if they don't?)
-
Neighbour's builder proposing to build wall by standing on tressels used to create a platform. Should I be concerned by this ? Does it comply with H&SE regulations ?
-
Excellent point. You also see it with the slimmer, perhaps 10mm deep circular plates on the inside of the handrails against the wall. Their shadows extend perhaps 200mm down the wall.
-
It is the only way to be. I actually thought the plasterer was ok this time, but I have naff all experience of plasterers. All I can say is in other light, including the ceiling downlights it looks fine. I can run my fingertips over it and it feels fine.
-
I have been overwhelmed for so long now it has become a way of life. Even the dog passed away. Welcome to the forum. You must be as mad as the rest of us.
-
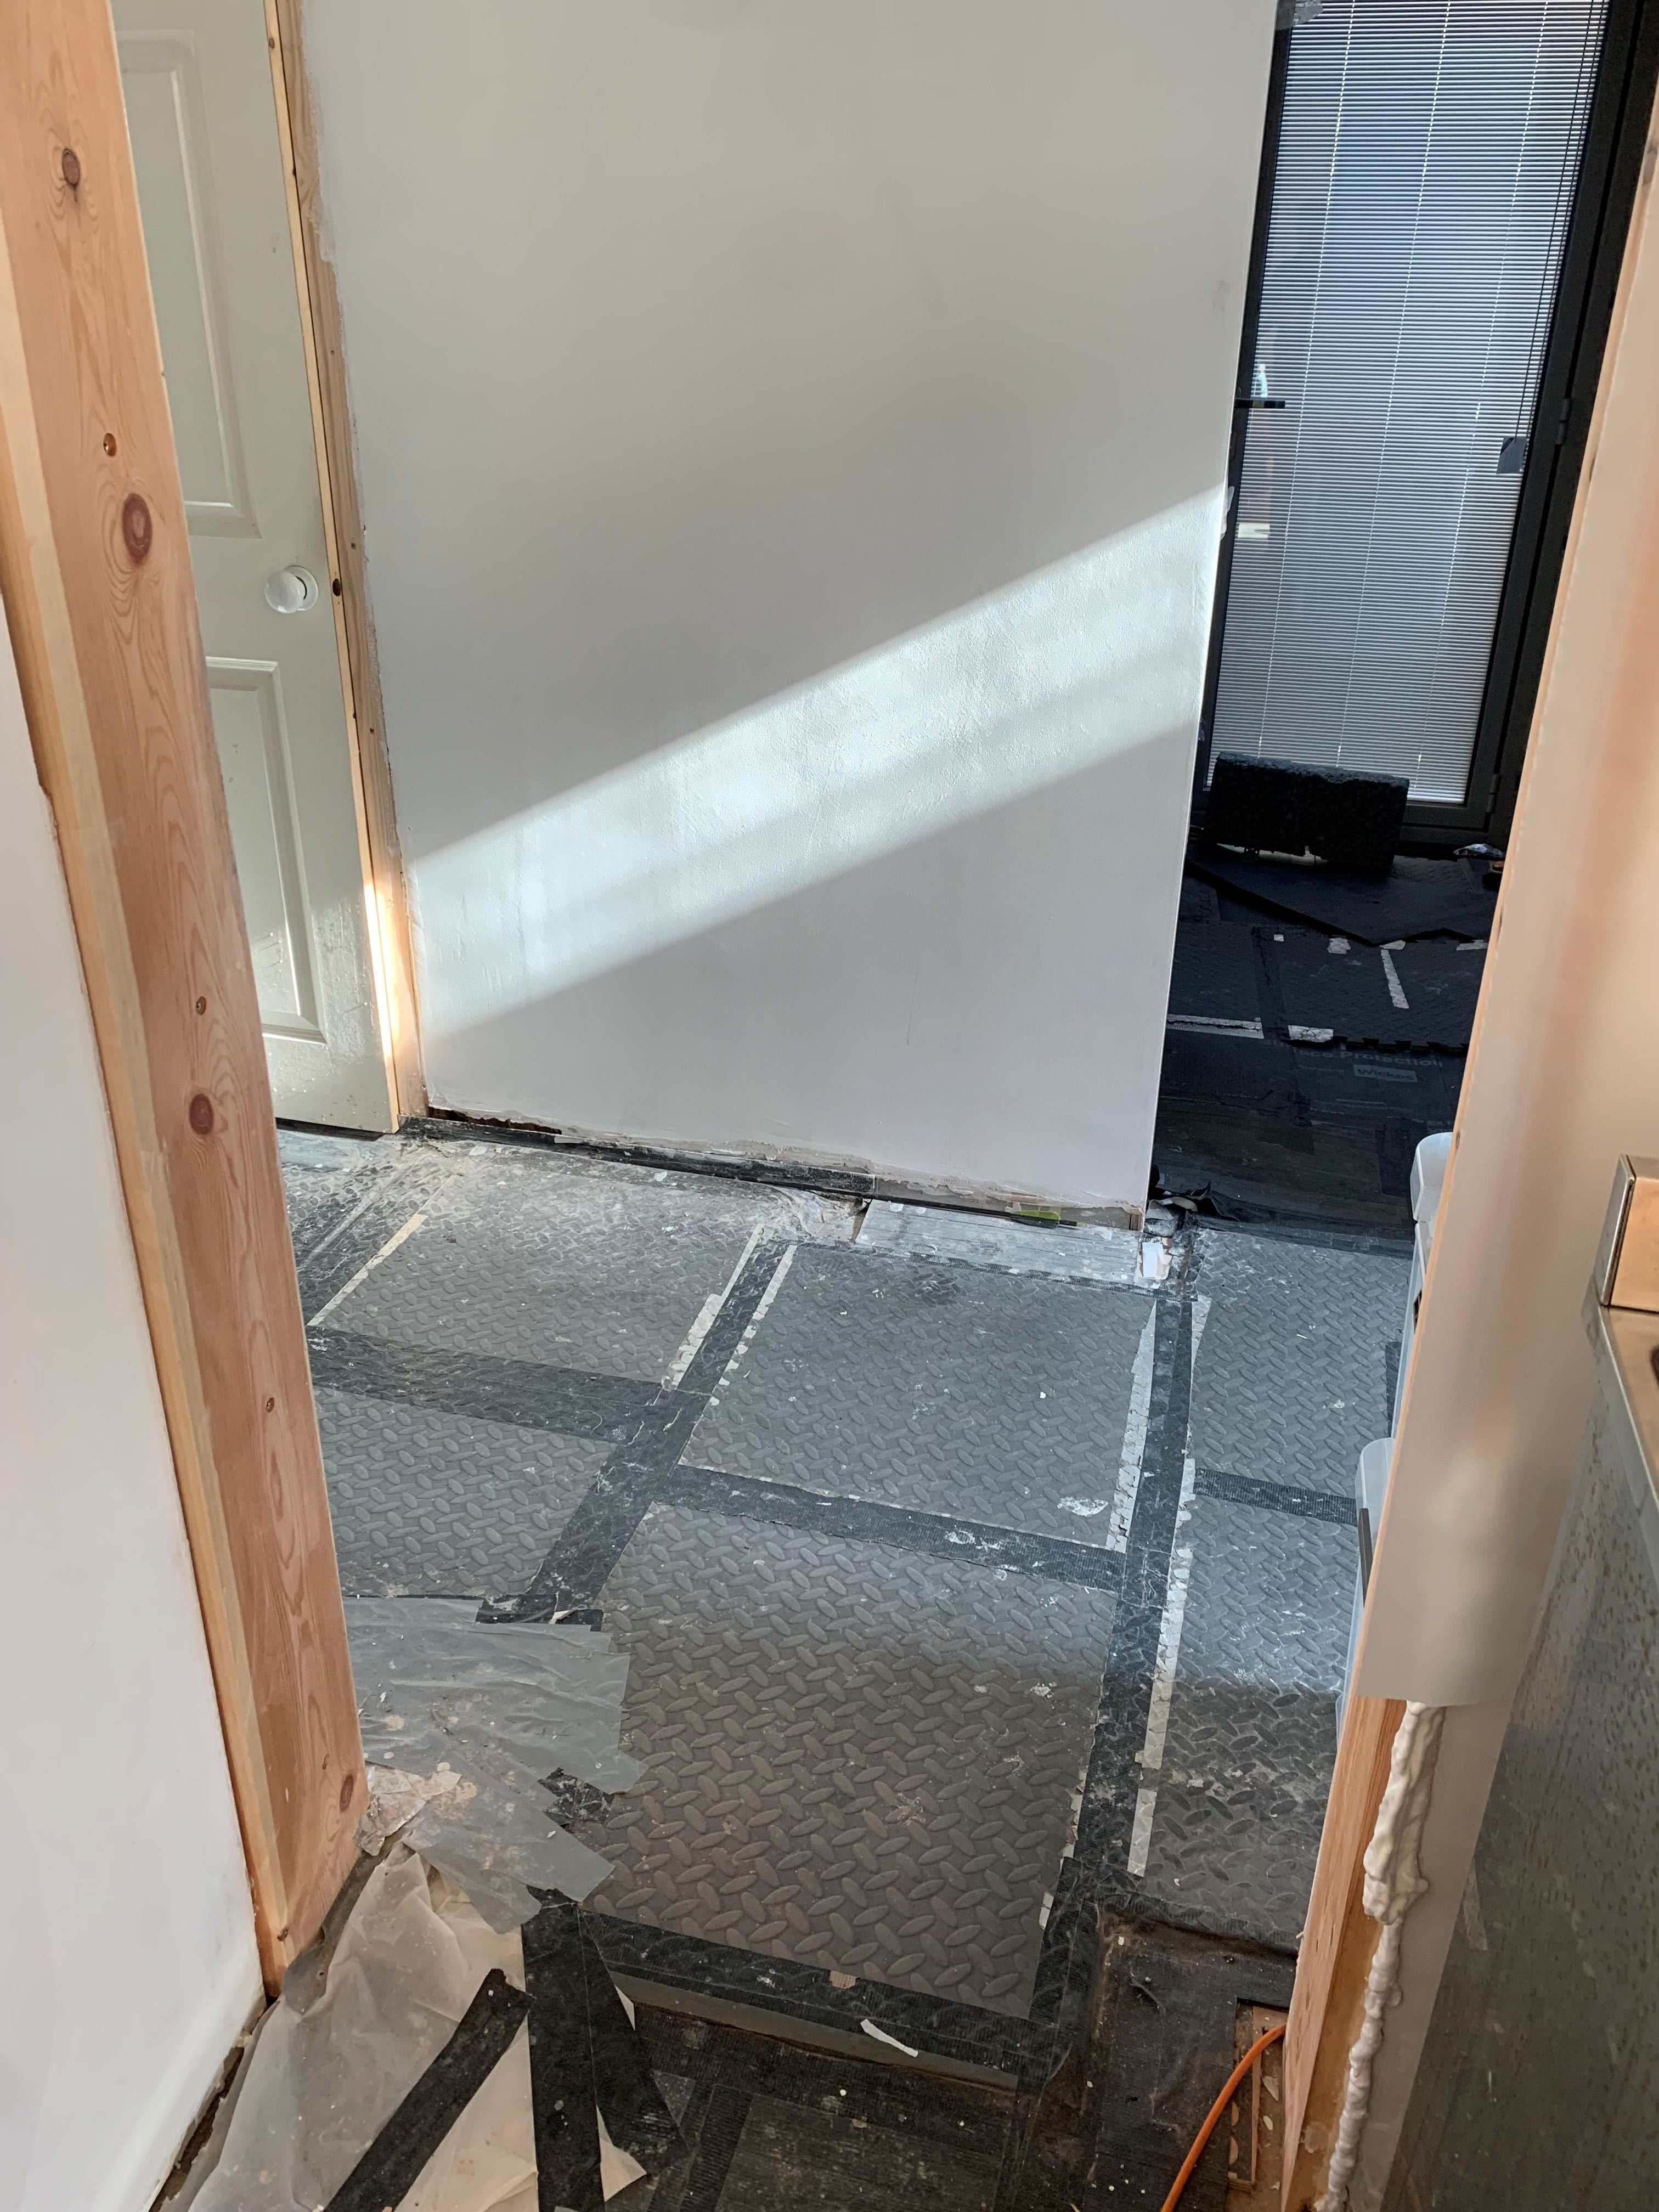
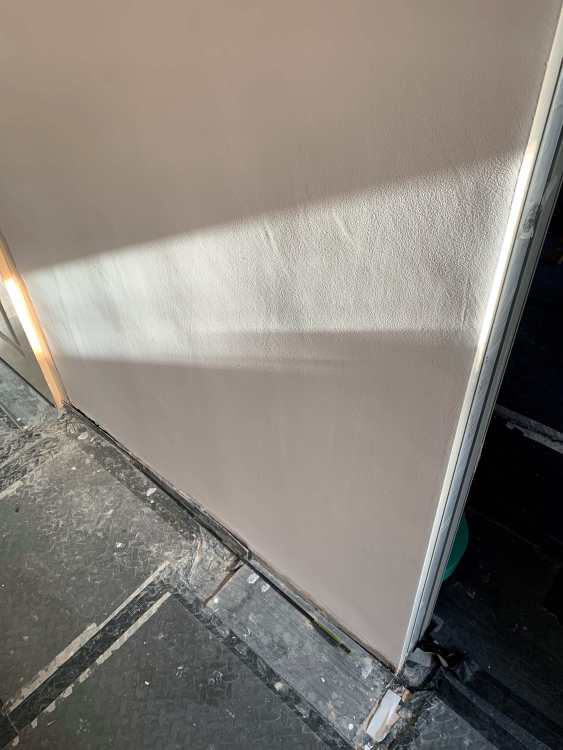
Not sure what that means - only in hot climates ? Yes house is roughly East facing at the back, so we get the morning sun pouring in. Rather nice to see it when you come down in the morning. And one of the nice things about rooflights is having sun beams moving around the room. I also have a rooflight flush with the top of a wall for the lighting effect. Guess I may somehow need a level 5 finish there. The spouse is going to have a lot of sanding to do, and I am going to have a lot of cold suppers. Now googling level 5 and seems debateable whether it is done by a third plaster coat or as part of decorating. Seems difficult to tell how much is down to the thin mist coat crudely applied and the paint texture, and how much is down to flaws. If I could just find an artificial sun I could try experimenting.
-
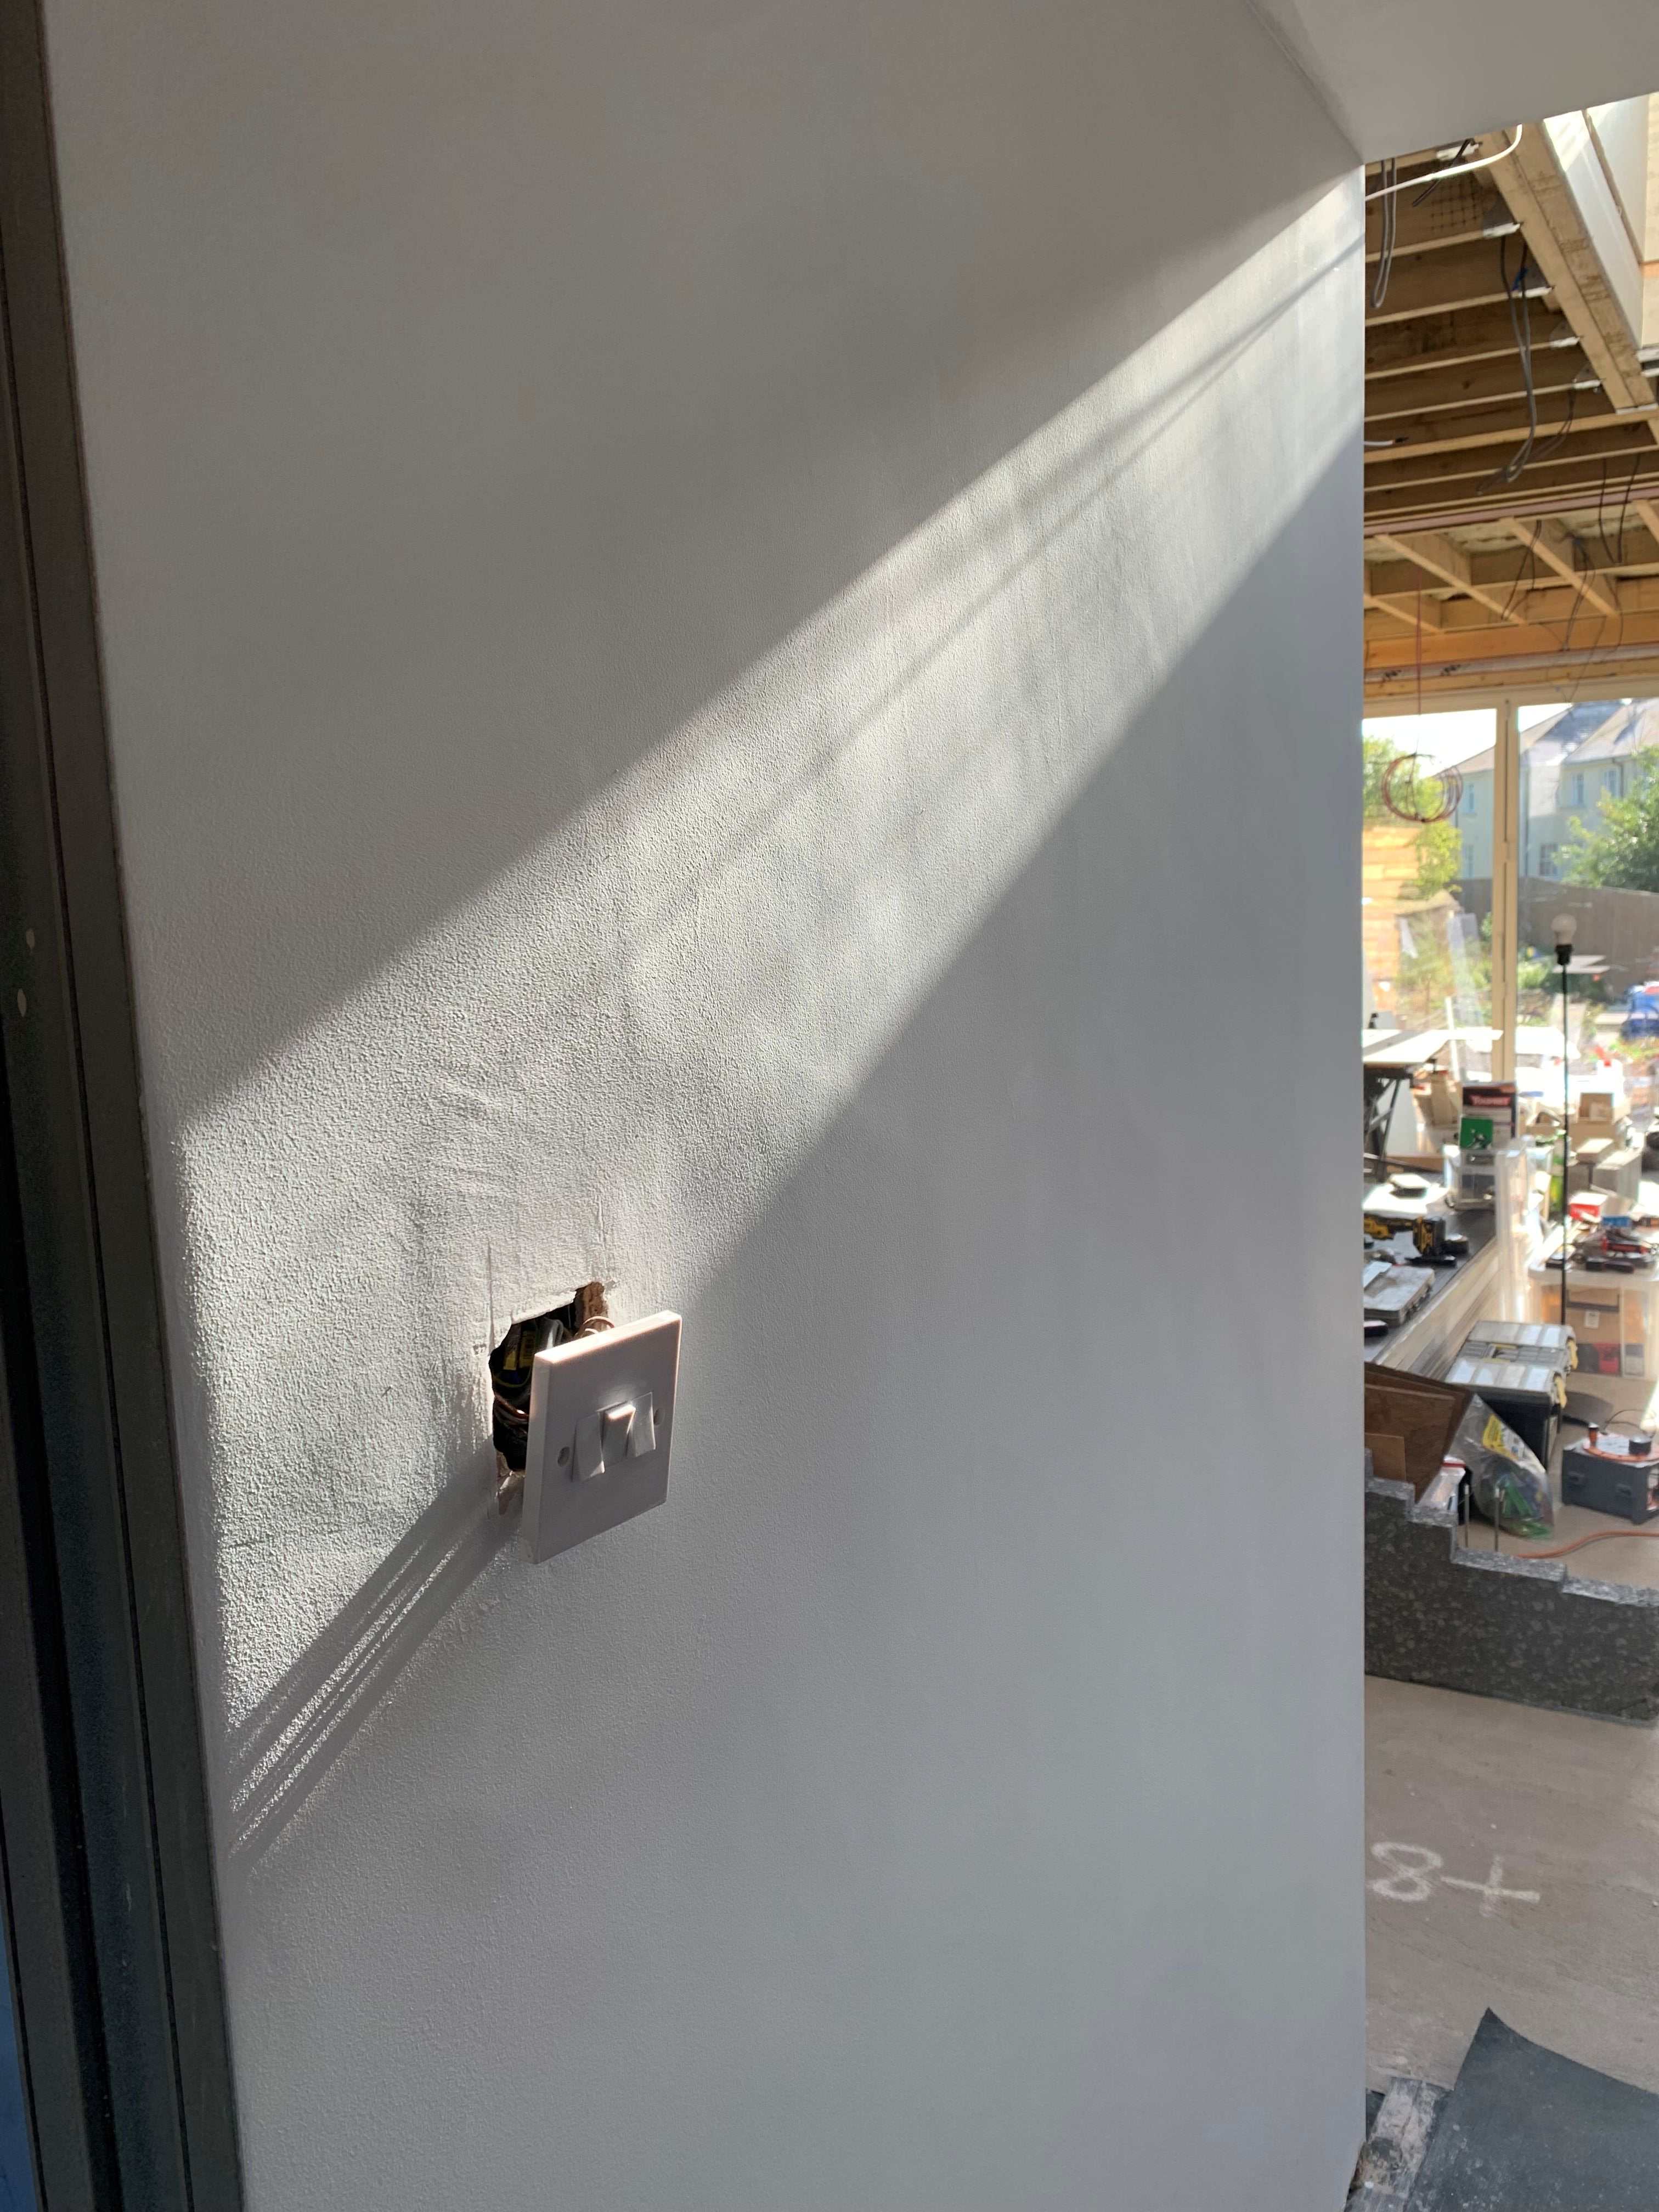
So what type and standard of decorating is needed to deal with shafts of sunlight onto walls ? This is just mist coated at present and looks and feels to the touch perfectly fine in ordinary light. However once the sunlight shines across it flaws and almost vertical striations show up. Will this disappear when painted ? Is something particular required to get a good finish ?


-
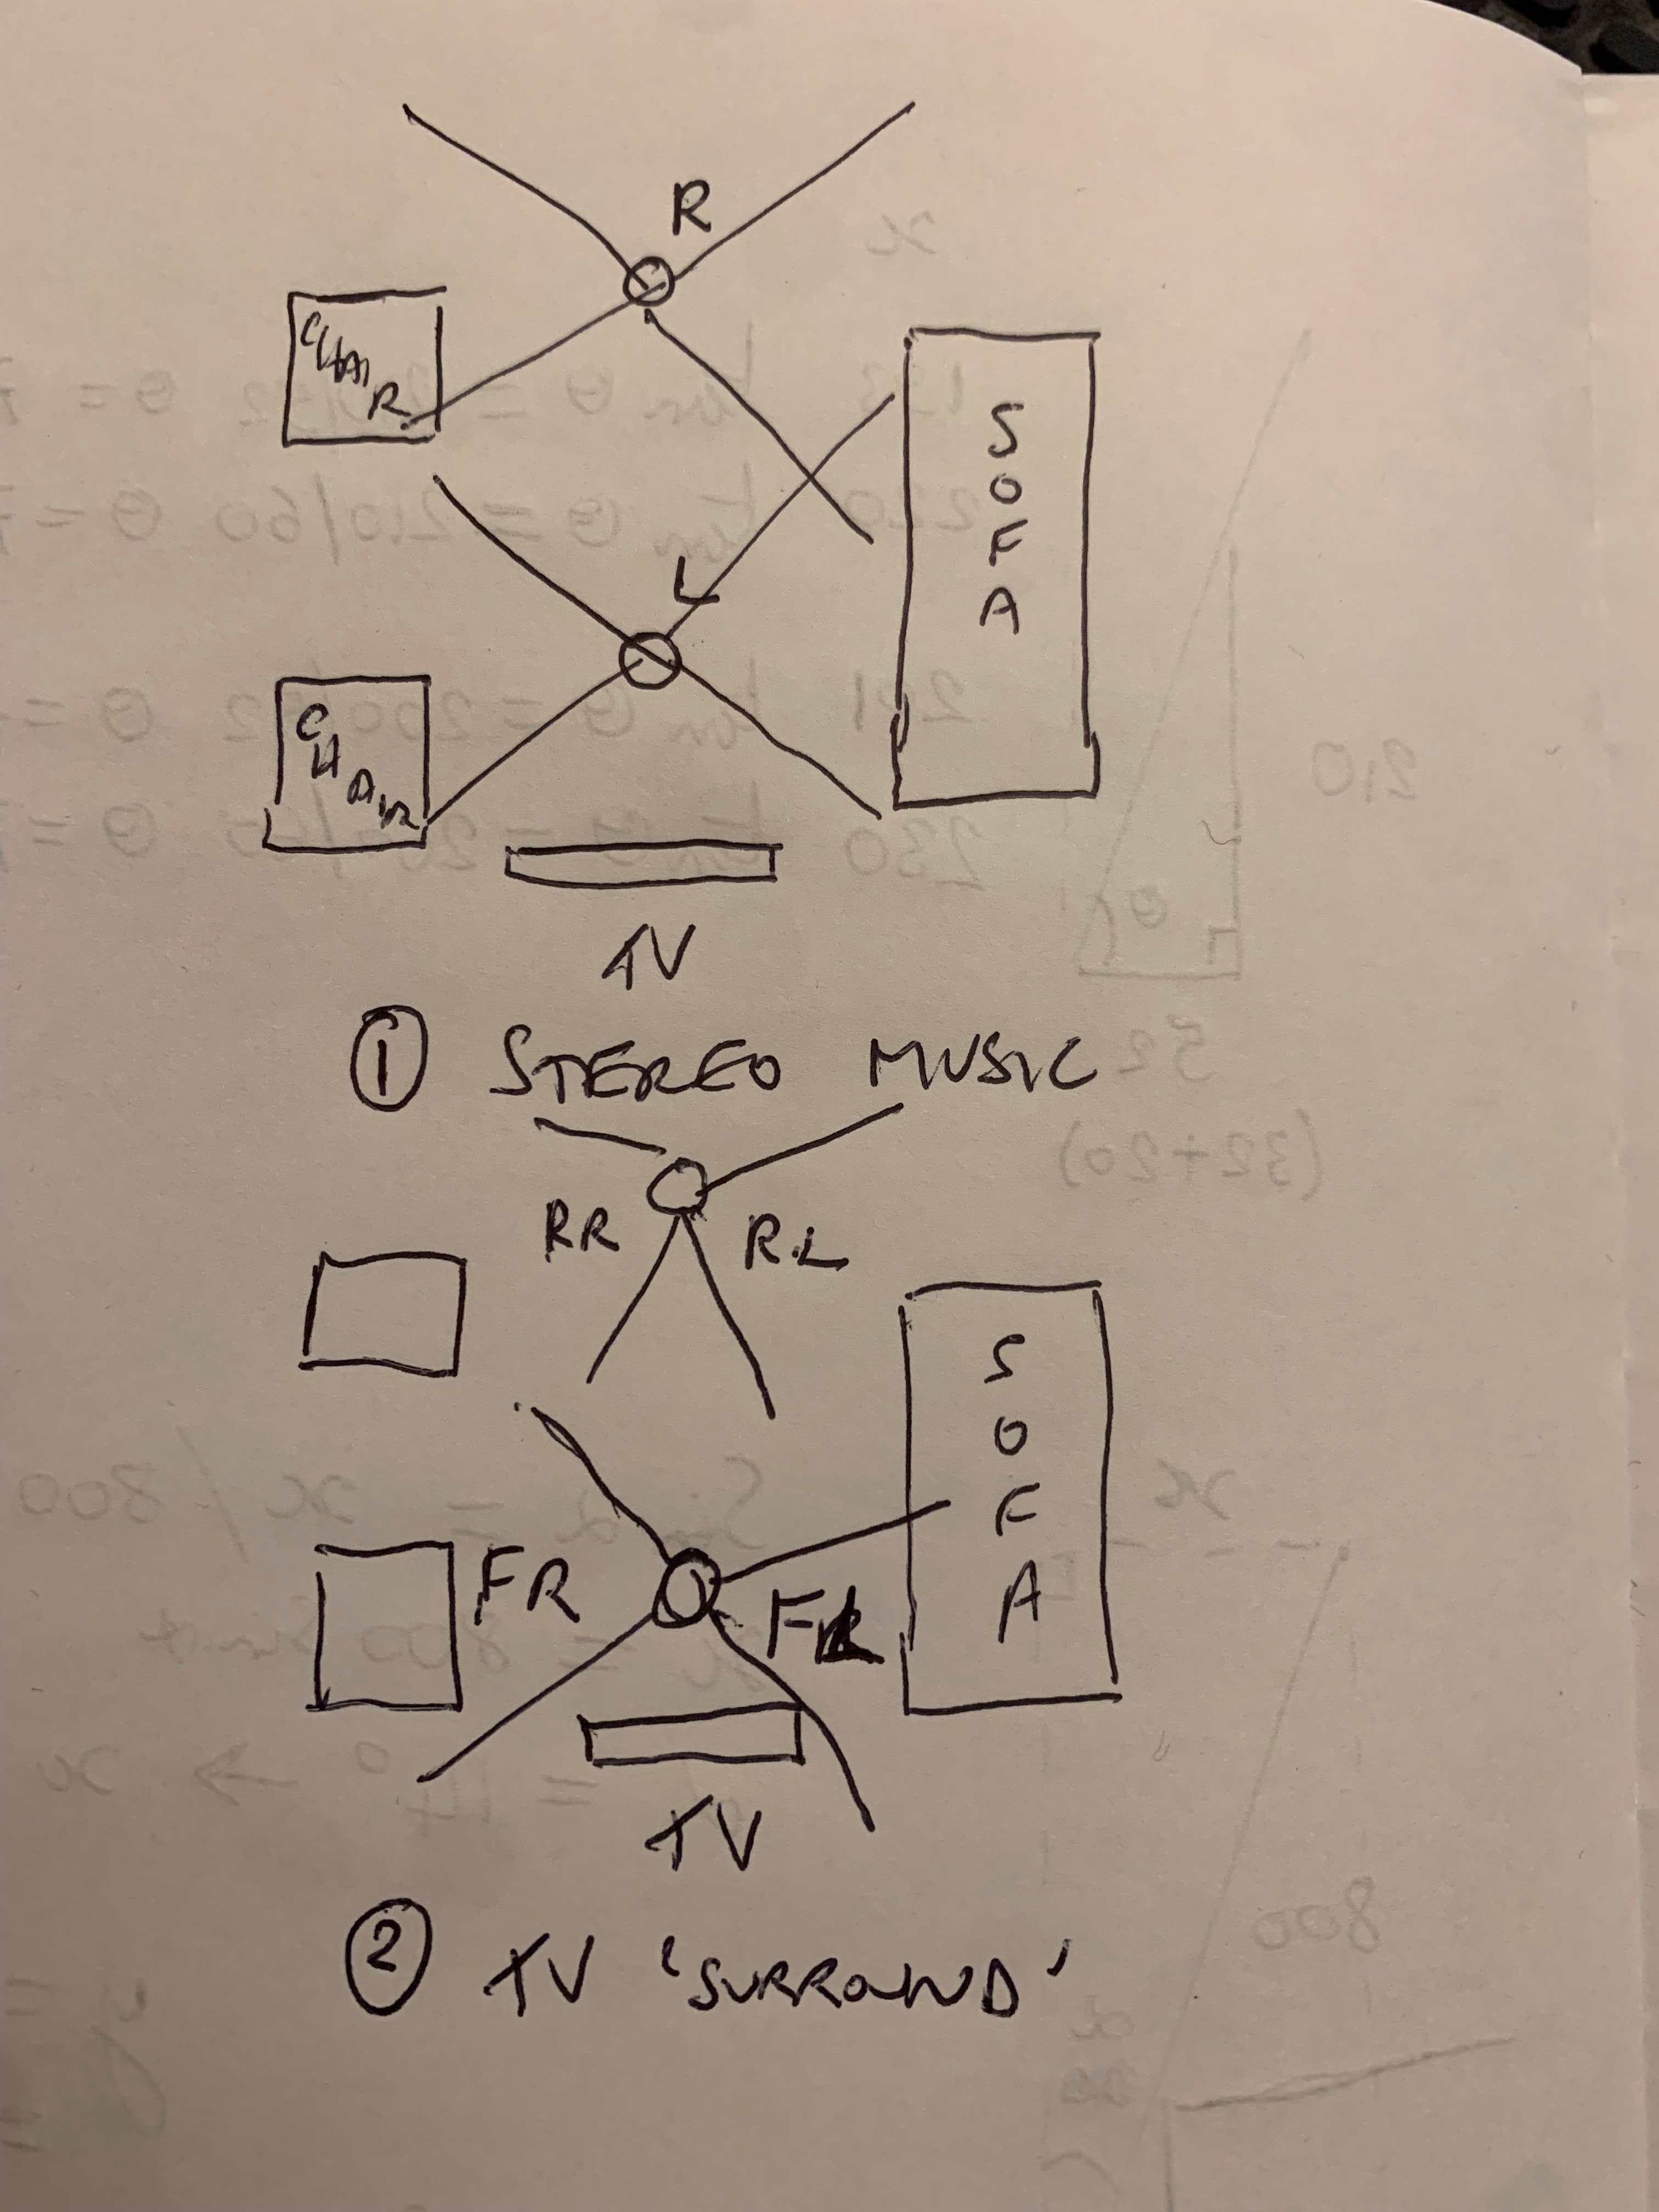
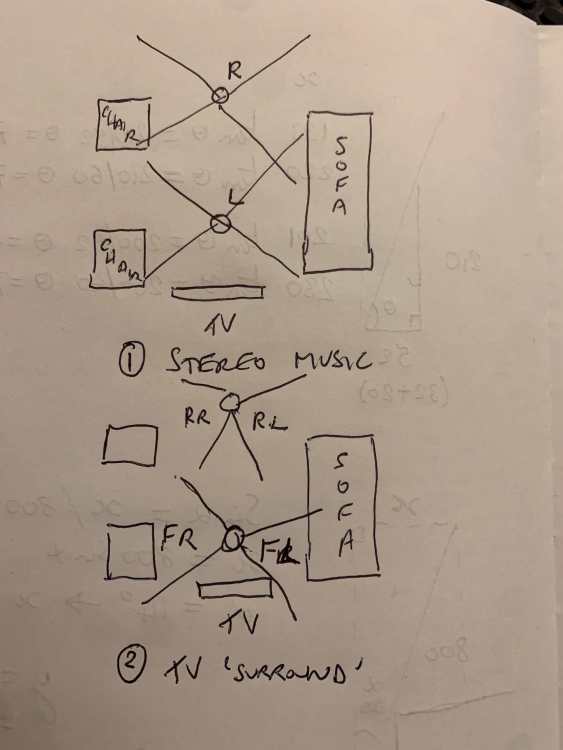
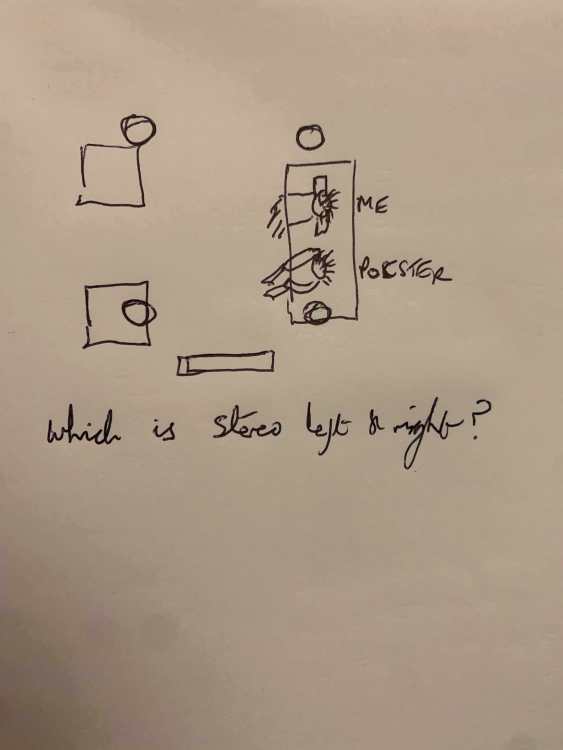
Looks like you have the standard layout there pocster, sofa facing TV, two speakers at the front, two speakers at the back/overhead when you want surround sound. However when the sofa is at right angles to the TV (TV will be on an arm) things seem more tricky. Our furniture layout might well end up as the sofa facing out through the bifolds, and then two chairs in front of the bifolds and opposite the sofa. So now if you want to sit on the sofa and listen to some stereo music, you need 2 speakers left and right side somewhere in front of the sofa. But if you were watching TV then the speaker nearest the TV would be the nearest to 'front' and the other speaker the nearest to 'rear' wrt the TV position. In effect you are kind of facing one way to listen to stereo, and a different way to watch TV. See sketches.
-
Floorplan help for new build
Spinny replied to Sophiesbuild's topic in New House & Self Build Design
ETC has taken out the kitchen bifolds to make the kitchen bigger ok but I'm not so sure. Removes the 'look right through the house' thing. I was wondering why you had the curved wall in your original plan. As you have a large plot, maybe think a lot about how you want the inside/outside thing to work. Looks like you will get afternoon and evening sun from the west into the L shape which seems an obvious place for a patio. Will you be happy going through the diner and sitting room to get from the kitchen to the outside and the patio though ? Do you want a morning space somewhere the other side for breakfast. -
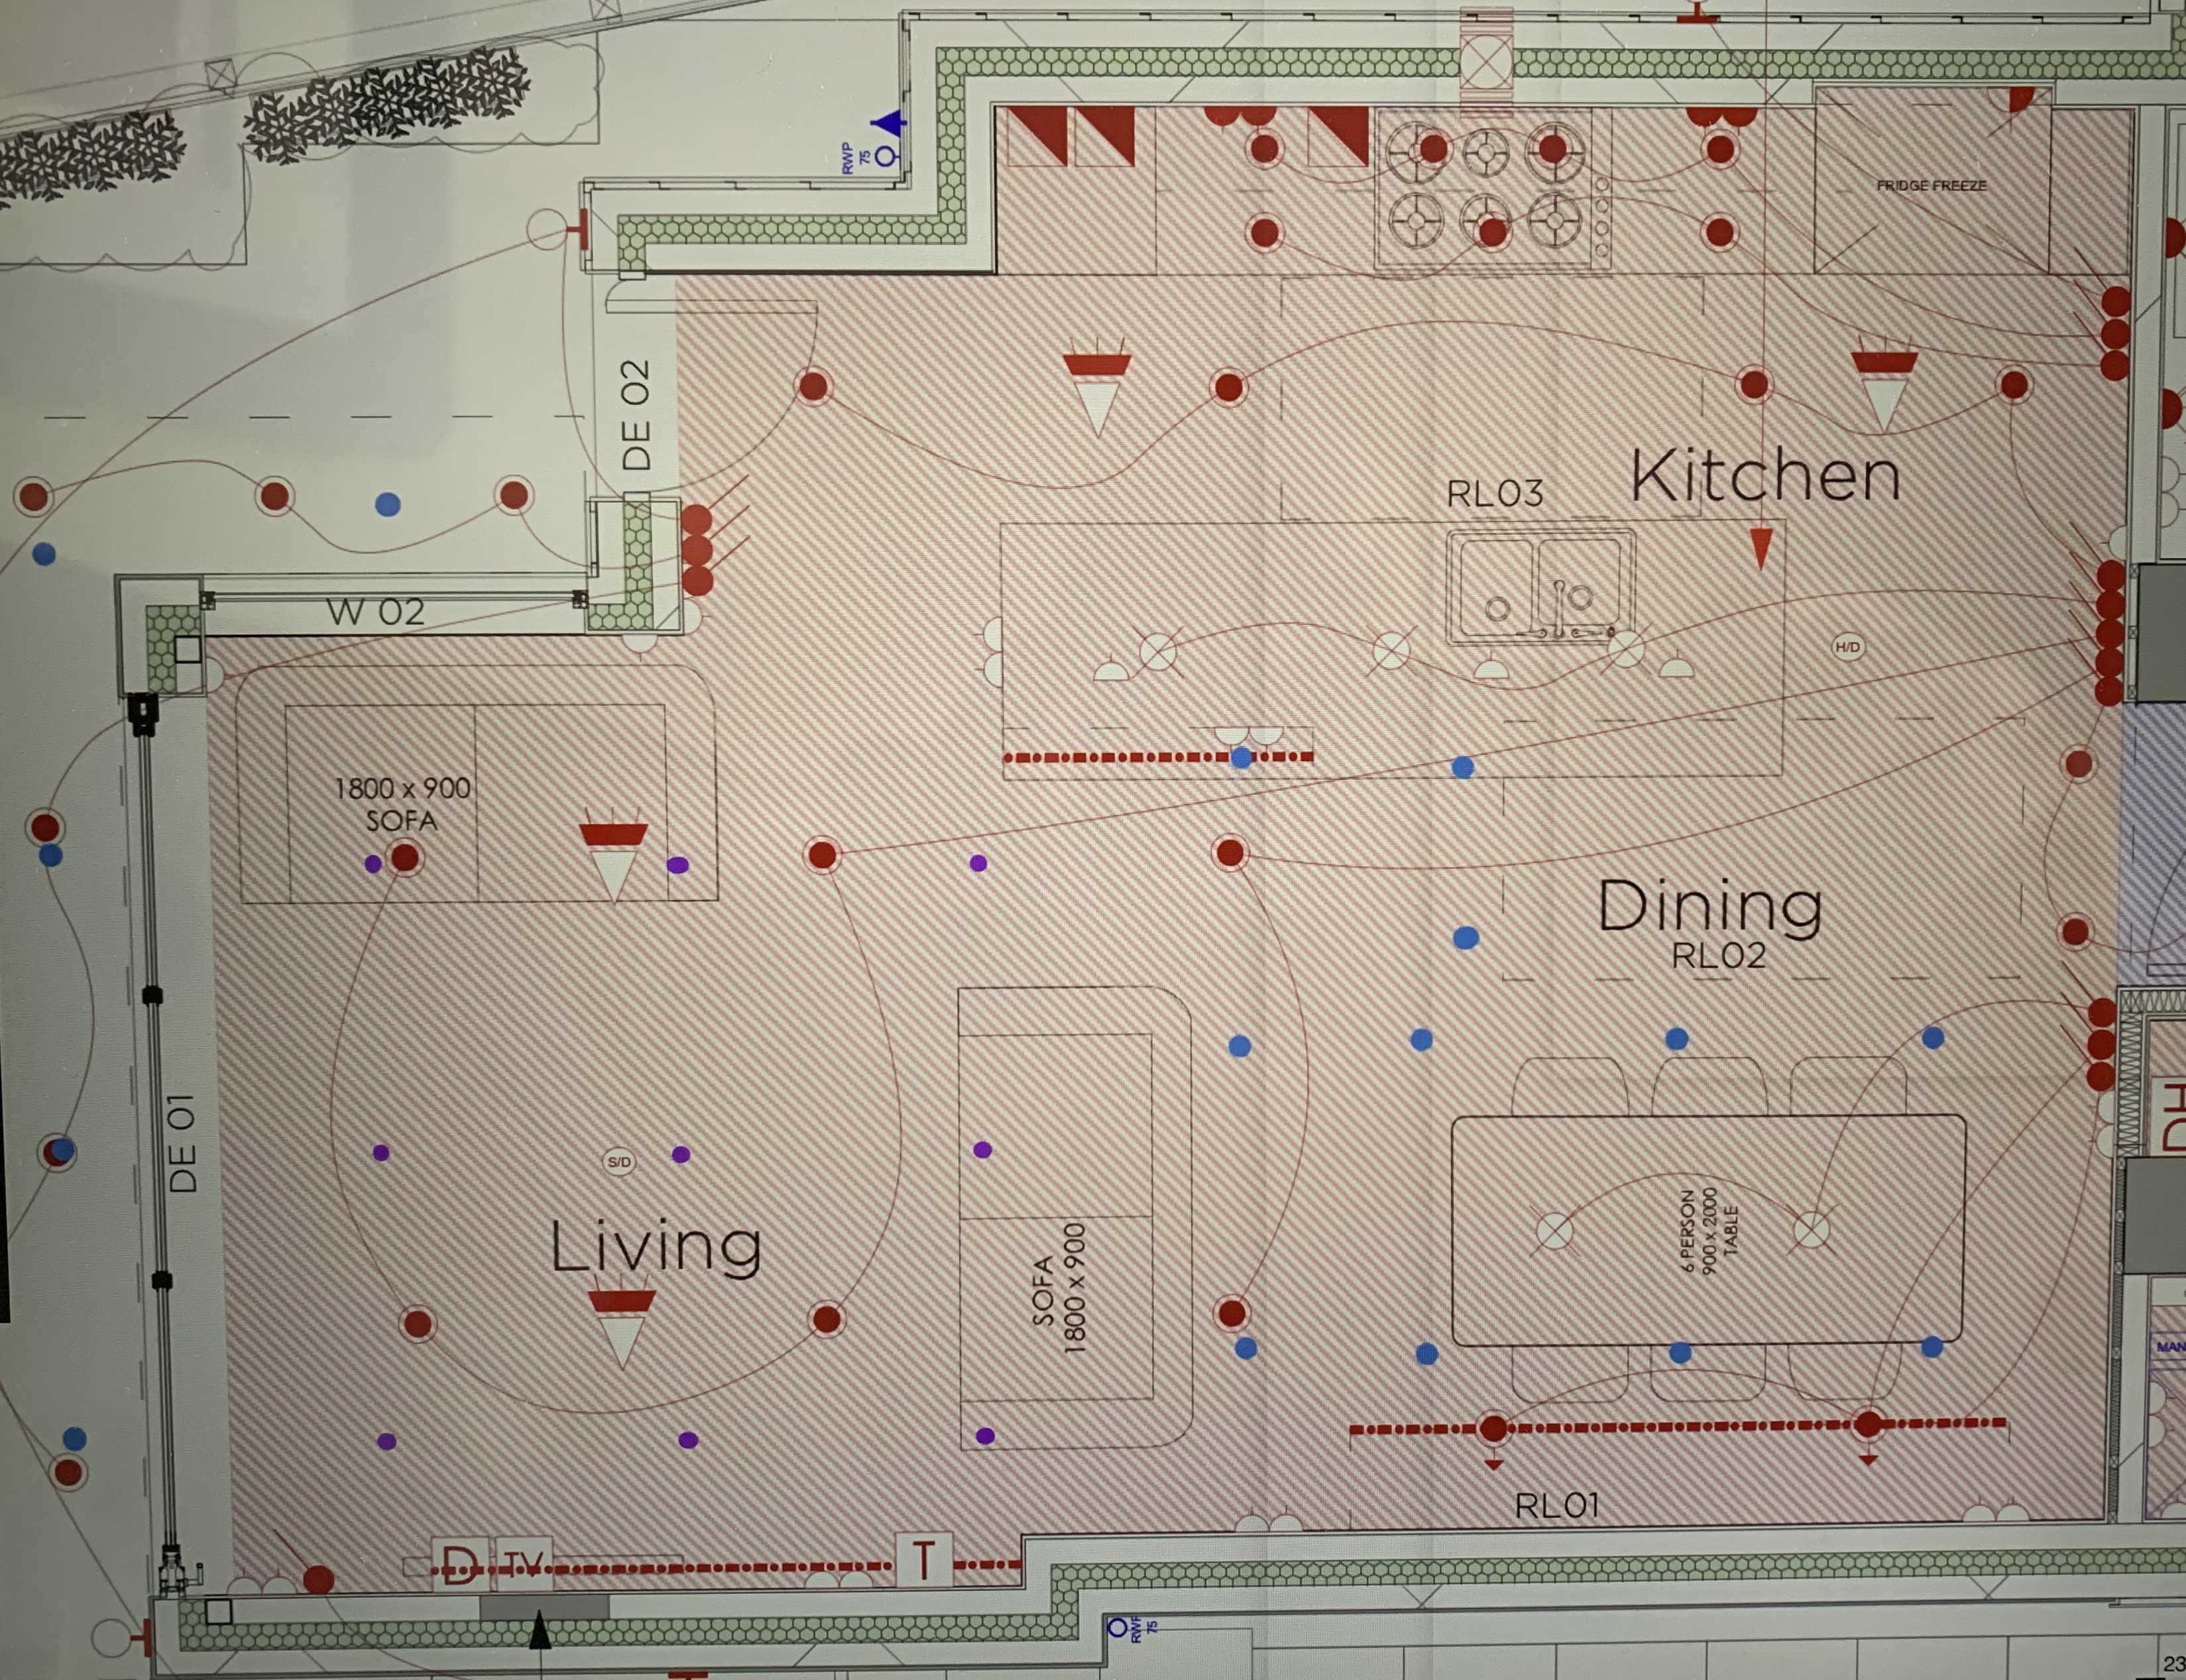
Any AV bods here ? I am just wondering whether I could use two of these ceiling speakers in my extension... https://www.richersounds.com/monitor-audio-c2m-t2x/ As one speaker has two tweeters, one speaker alone is capable of some degree of stereo and takes two speaker cables = one for each channel. I am therefore wondering whether by feeding one speaker(A) with say left channel down both wires i.e. to both tweeters - and then feeding another separate physical speaker(B) with say right channel down both wires - you could thereby run two speakers as a stereo pair. Then if suitably switched you could alternatively send say a front left & right stereo input to speaker (A), and a rear left and right stereo input to speaker (B) giving an element of surround sound. Tend to think 4 ceiling speakers in the sitting area in my floorplan would clutter up the ceiling and much of the time only see simple stereo use. Also the seating layout with a sofa at right angles to the TV is less conducive to a traditional 4 speaker grid anyway. (PS 2 speakers in the kitchen will be mini ones for radio etc while cooking) room length 7.6m and width 5.4m

-
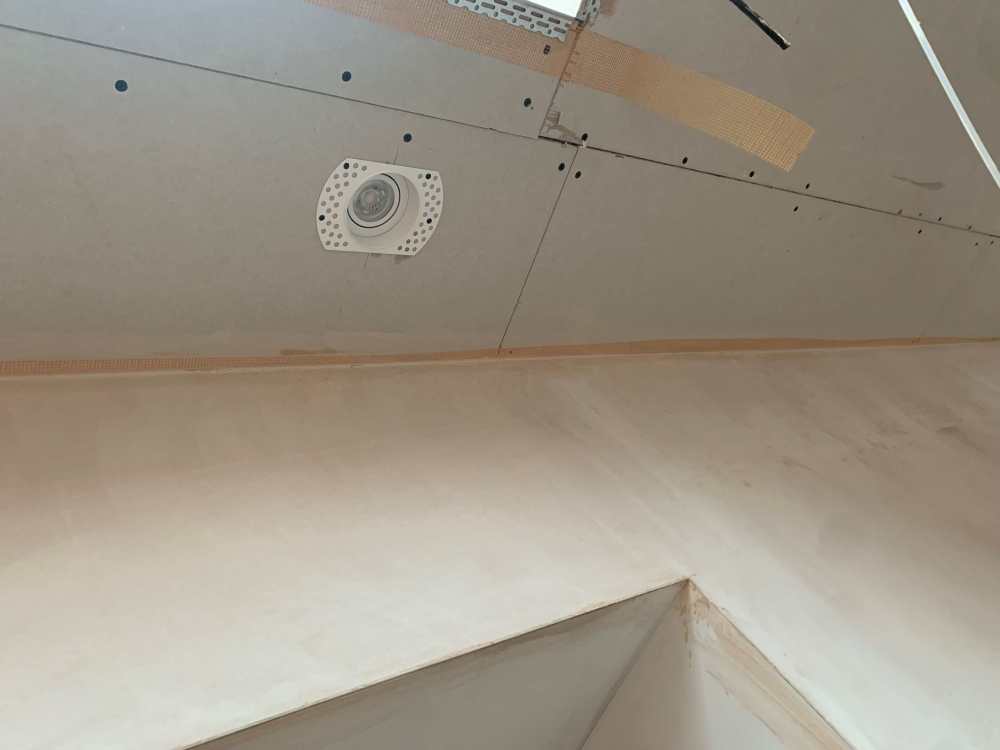
I think the plasterer had the view that cutting the holes afterwards could then lead to a poorer finish with some making good around the holes and may also be concerned that everything in the ceiling ought to be fully located and indeed connected up before he skims. Then if there is an issue or problem the relevant ceiling board can be taken down again to sort it. Whereas if he has already skimmed it becomes a whole bigger problem. It is a valid thing I guess - we had to get him to take one board back down because they had missed pulling through a wire. But then I was measuring and cutting holes out at 10pm so he could skim the following day.
-
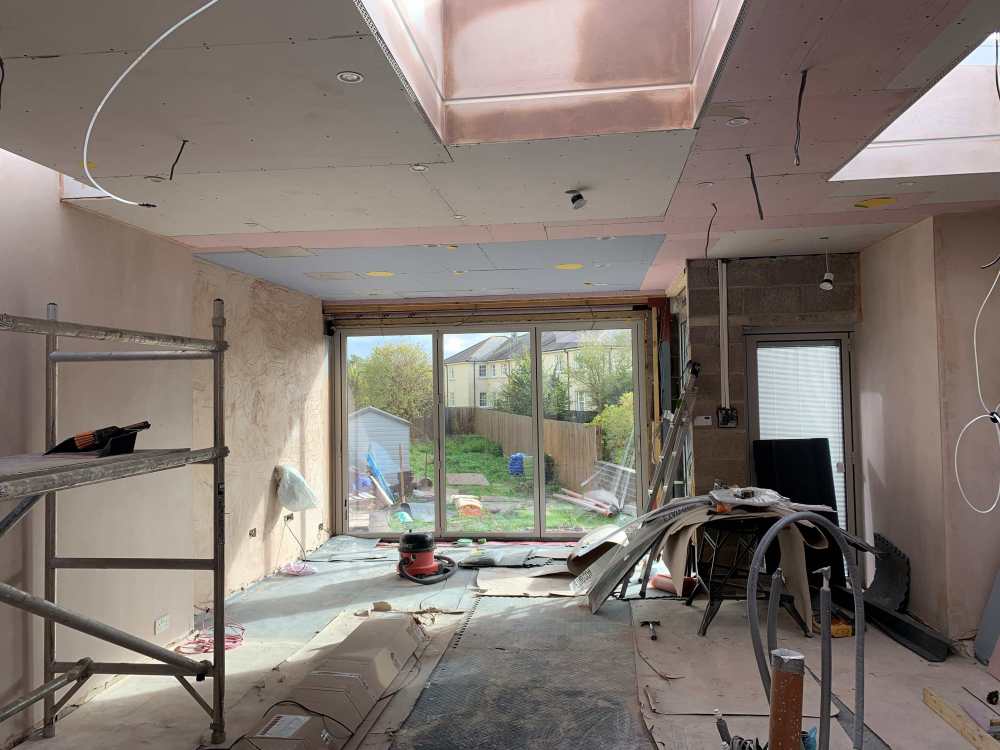
Thanks Nod & Mr Punter. I am getting very worried now. I have a kitchen fit booked for 6 weeks time and mutiple issues: My plumber has cancelled. I am waiting on delivery of blind boxes before studwork and boarding can be done around bifold and window upstand. And the carpenter guy seems too busy with his own renovation to ever turn up to do anything. Extra kitchen cabinet has to be ordered due to enforced design change - no surety of delivery in time yet. Plasterer has proposed boarding and skimming the ceiling to within 12-18'' of the bifold & window, then coming back to skim the edge and downstands after the kitchen and floor are fitted. Claims he can do this and protect the floor. (Plastering is unbelievably messy though) Plasterer wants every light hole cut before he skims (is this really necessary ?) - we still have some lights to finalise and buy. Plasterer wants ceiling speaker holes cut before he skims - but speakers not chosen and position still debatable. Decorator not fully committed. Flooring - suspended floor areas not ready yet - still covered to protect from plaster and damage. Can you partly skim plaster a ceiling, then come back and skim what remains ?
-
Well I just experimented on a spare block. Multitool with a semi-circular grit blade (that came with it) will slowly cut into the block. Once you have 2 cut lines a stone chisel will remove the middle section. Likely to take a bit of time and perhaps unknown number of blades but possible and next to no airborne dust.
-
Just out of interest when peeps talk cost of building a house - are you talking raw build cost, or totally complete decorated, fitted and finished cost ? you can spend anything on kitchen, bathrooms, lighting, curtains, flooring yada yada contingency ?
-
If highest side, could it be ponding on the roof covering, then if membrane piece on top and up the upstand, capillary action between the two pieces of membrane ? Have you got a drainage gap between the decking and the rooflight edge ? I guess if people walk on the glass it might be the seal between the glass units and the frame ?
-
I think the flooring company want to be last in so the flooring doesn't get damaged by other trades. The plan is currently to put levelling compound over the concrete, then fit the kitchen, then come back to latex the LVT down. I guess they may come back to fit the floor while we wait for the worktops to be templated - but not sure how the waterfall end should work. Plank LVT, so there is also the issue of trying to get reasonable lines between the planks, the walls in the hall & kitchen, and the line of the island and kitchen units ? Never ever had a new kitchen before, and not in a new extension. Glass splashback presumably has to be templated after worktops are fitted. Presumably sinks can't be fitted until the worktop comes ? Seems like maybe floorstanding appliances need to be stored in another room and only fitted into the recesses after the LVT has gone down - although you would think fitting them is going to be dangerous for damaging the LVT. Fridge-freezer is integrated - but obviously might have to be removed for any maintenance need - so should that go in before the flooring like a cabinet. Then there is sparky and plumber to come in and out - potentially like windy miller ? I also have plasterer saying he can plaster the ceiling but come back later to fill in strips near the bifolds after the upstand is finished. Anyone got a full order of works as it seems quite tricky ?
-
Is the answer different for LVT flooring ? I am being told by flooring company, kitchen first then they will lay LVT under the edge of the units up to the legs (and in under the floor standing appliance recesses) , then plinths go onto units ? And sorry to hijack a bit. We are having a 'waterfall' end on kitchen island quartz worktop. So waterfall end on to top of flooring, or flooring (LVT) laid around waterfall end ? (A complication for templating)