Nickfromwales
-
Posts
30313 -
Joined
-
Last visited
-
Days Won
295
Everything posted by Nickfromwales
-

Bath Surround / Boxing In, and concealed pipework
Nickfromwales replied to Onoff's topic in Bathrooms, Ensuites & Wetrooms
Yup. And they're always not worth a w**k unless you've spent big bucks on a brand name bath. Multitool them off with real care if they're in the way. -
Wanted: 92.5 degree double branch adaptor (110mm)
Nickfromwales replied to ProDave's topic in General Plumbing
Yes, we should clarify that . Having those pushfit bosses straight after the bends would be fine, or at any other point in the runs. Basically, stick 'em where you like . -
Wanted: 92.5 degree double branch adaptor (110mm)
Nickfromwales replied to ProDave's topic in General Plumbing
Sorry. +1. The boss should be about a metre from the invert so the contents of the pipe aren't doing a loop the loop where the boss is. That's more of a consideration if the soil is coming around a horizontal bend then hitting the boss location, but if you've only got vertical drops to the invert then you won't have any probs having the fitting I linked being the next component directly after the bend. -
Wanted: 92.5 degree double branch adaptor (110mm)
Nickfromwales replied to ProDave's topic in General Plumbing
With 50mm pipe that would simply never happen, I've got scores of private jobs done that way and not one complaint. They're all turbo wastes too so have very high l/per/min discharge capacity ( so 1 1-2" ( 40mm ) waste would not suffice, even on its own tbh for anything other than a very very short run to soil ). NEVER tee the two showers together, these must go on their own runs. Combining those runs with basins is fine, but never two showers on the same pipe afaic. Teeing a bath into a run with a shower and basin is pushing it, but if you have sufficient falls between each item or a good continuous fall from end to end, even that will work with an 'all 50mm' run to soil. Tee off the 50mm with 50mm pipe for the shower, and run 50mm as far as you can before reducing to 40mm, and for the basin, reduce at the 50mm tee to 40mm and run 40 as far as the vertical rise to the basin BEFORE reducing to 1 1/4" ( 32mm ) which will guarantee you never get anything coming out of the shower. If reducing to 32mm at the vertical rise, do so with a 40mm elbow with a 32mm reducer in the top of it. The sooner you upsize the pipe, the sooner you get the 'air break'. Im not a fan of strap on bosses tbh. The ones I linked are all solvent for the wastes ( if you select the one you buy accordingly and ask for the solvent inserts as required ) and push fit on the 110mm side so are very forgiving, easy to fit and no dodgy huge holes to drill and de-burr and then try to line the boss up spot on to. Fwiw I use SOBosses but only where I can get at them, or, if I've no other choice ( like on an existing / retrofit where I cannot get to the pipe to alter it ) but then I want the boss cut into the top dead centre of the pipe. Inwould never design SOBosses into a job where all the connections are under the boards / inaccessible, as the ones I linked are just far better, easier to fit, and far more reliable IMHO -
Hi, and welcome to the forum. We have a few members here who have designed their own homes, so if that's an option and your feeling brave, then feel free to ask as many questions as you like . Just choose from the topics for the one that's closest to your enquiry and start a new thread. @Sensus will no doubt chip in as he's one of the experts in that field who reside here. Regards, Nick.
-
This one is the most problematic I'd say. It looks to have a coat of tanking / liquid DPM on there to me ( the black stuff ). Youll need to hack / scrape the plaster off this area as it's clear they didn't prep / apply with the correct procedures which is why the plaster is coming off in such big chunks. The first question is why the tanking was applied ? Is this an area below DPM level or with built up,ground outside ?
-
Always good to have the heating working properly at this time of the year . If that turns out to have cured it, can you update the thread to wrap it up please . Simple solutions are the valuable ones !
-
Wanted: 92.5 degree double branch adaptor (110mm)
Nickfromwales replied to ProDave's topic in General Plumbing
Never EVER is that a bad move. Beats the shit out of doing things twice at double the cost If you look at the fitting, it clearly has a line dissecting the two halves, and also a number of holes where integral moulded clips spring into to hold the two together. That tells me that this is DEFFO not designed to be used other than with gravity as its friend. Aside from that, I'd just never even consider using that in such an orientation, just from my gut feeling that it would end badly. I'd recommend fitting these and making the waste off with solvent NOT push fit wherever possible. You can happily run a single 2" ( 50mm ) from each bathroom with everything combined. Eg bath and basin combined, or shower and basin combined, as long as the pipe work is of course 50mm all the way from the T to the boss. Air admittance traps on the basins like these anti syphon ones will take care of any issues with the drop from the basin to the invert ( where it meets the soil under the floor ). -
Replies will likely follow your attachment .
-
Agreed. My bad. ?
-
Looks like I'm minus an arse cheek. Sounds like the clock isn't turning ( Friday afternoon on the ars-sembly line ) Buy a new one and should be the end of it, but can you not take it back for a free replacement?
-
Also, can you check that at least one of the black wires is live @230v ( with the boiler supply switched on ).
-
Can you put a multimeter on 3&4 to check the switching action? Also, I take it you've moved the slider on the clock face accordingly ( on / timed / constant ) ? What exactly is the boiler doing / not doing?
-
Bath Surround / Boxing In, and concealed pipework
Nickfromwales replied to Onoff's topic in Bathrooms, Ensuites & Wetrooms
Yup. Use square or radius ( quadrant ) for the horizontal runs, but ONLY use square for the vertical. Where two horizontal radius trims form a corner you get what I call "the dagger", the point at the corner. In a metal trim this is a flesh eater. If you come vertically with the 3rd radius trim you cannot form that corner ( unless you use a pre-formed 3-way junction piece from the same trim supplier ) without it looking like a pigs breakfast. However, if you come vertically with a square then it forms a 90o and marries up perfectly to the dagger point, making it a neat, safe junction. -
Bath Surround / Boxing In, and concealed pipework
Nickfromwales replied to Onoff's topic in Bathrooms, Ensuites & Wetrooms
I'd still recommend sticking with plastic, regardless of colour. There's a lot of complex cuts / angles etc around the room and doing them in metal would even test my patience / skill. -
Bath Surround / Boxing In, and concealed pipework
Nickfromwales replied to Onoff's topic in Bathrooms, Ensuites & Wetrooms
Trés bien Rodney. Youll thank me this time next year . Probably. -
Wanted: 92.5 degree double branch adaptor (110mm)
Nickfromwales replied to ProDave's topic in General Plumbing
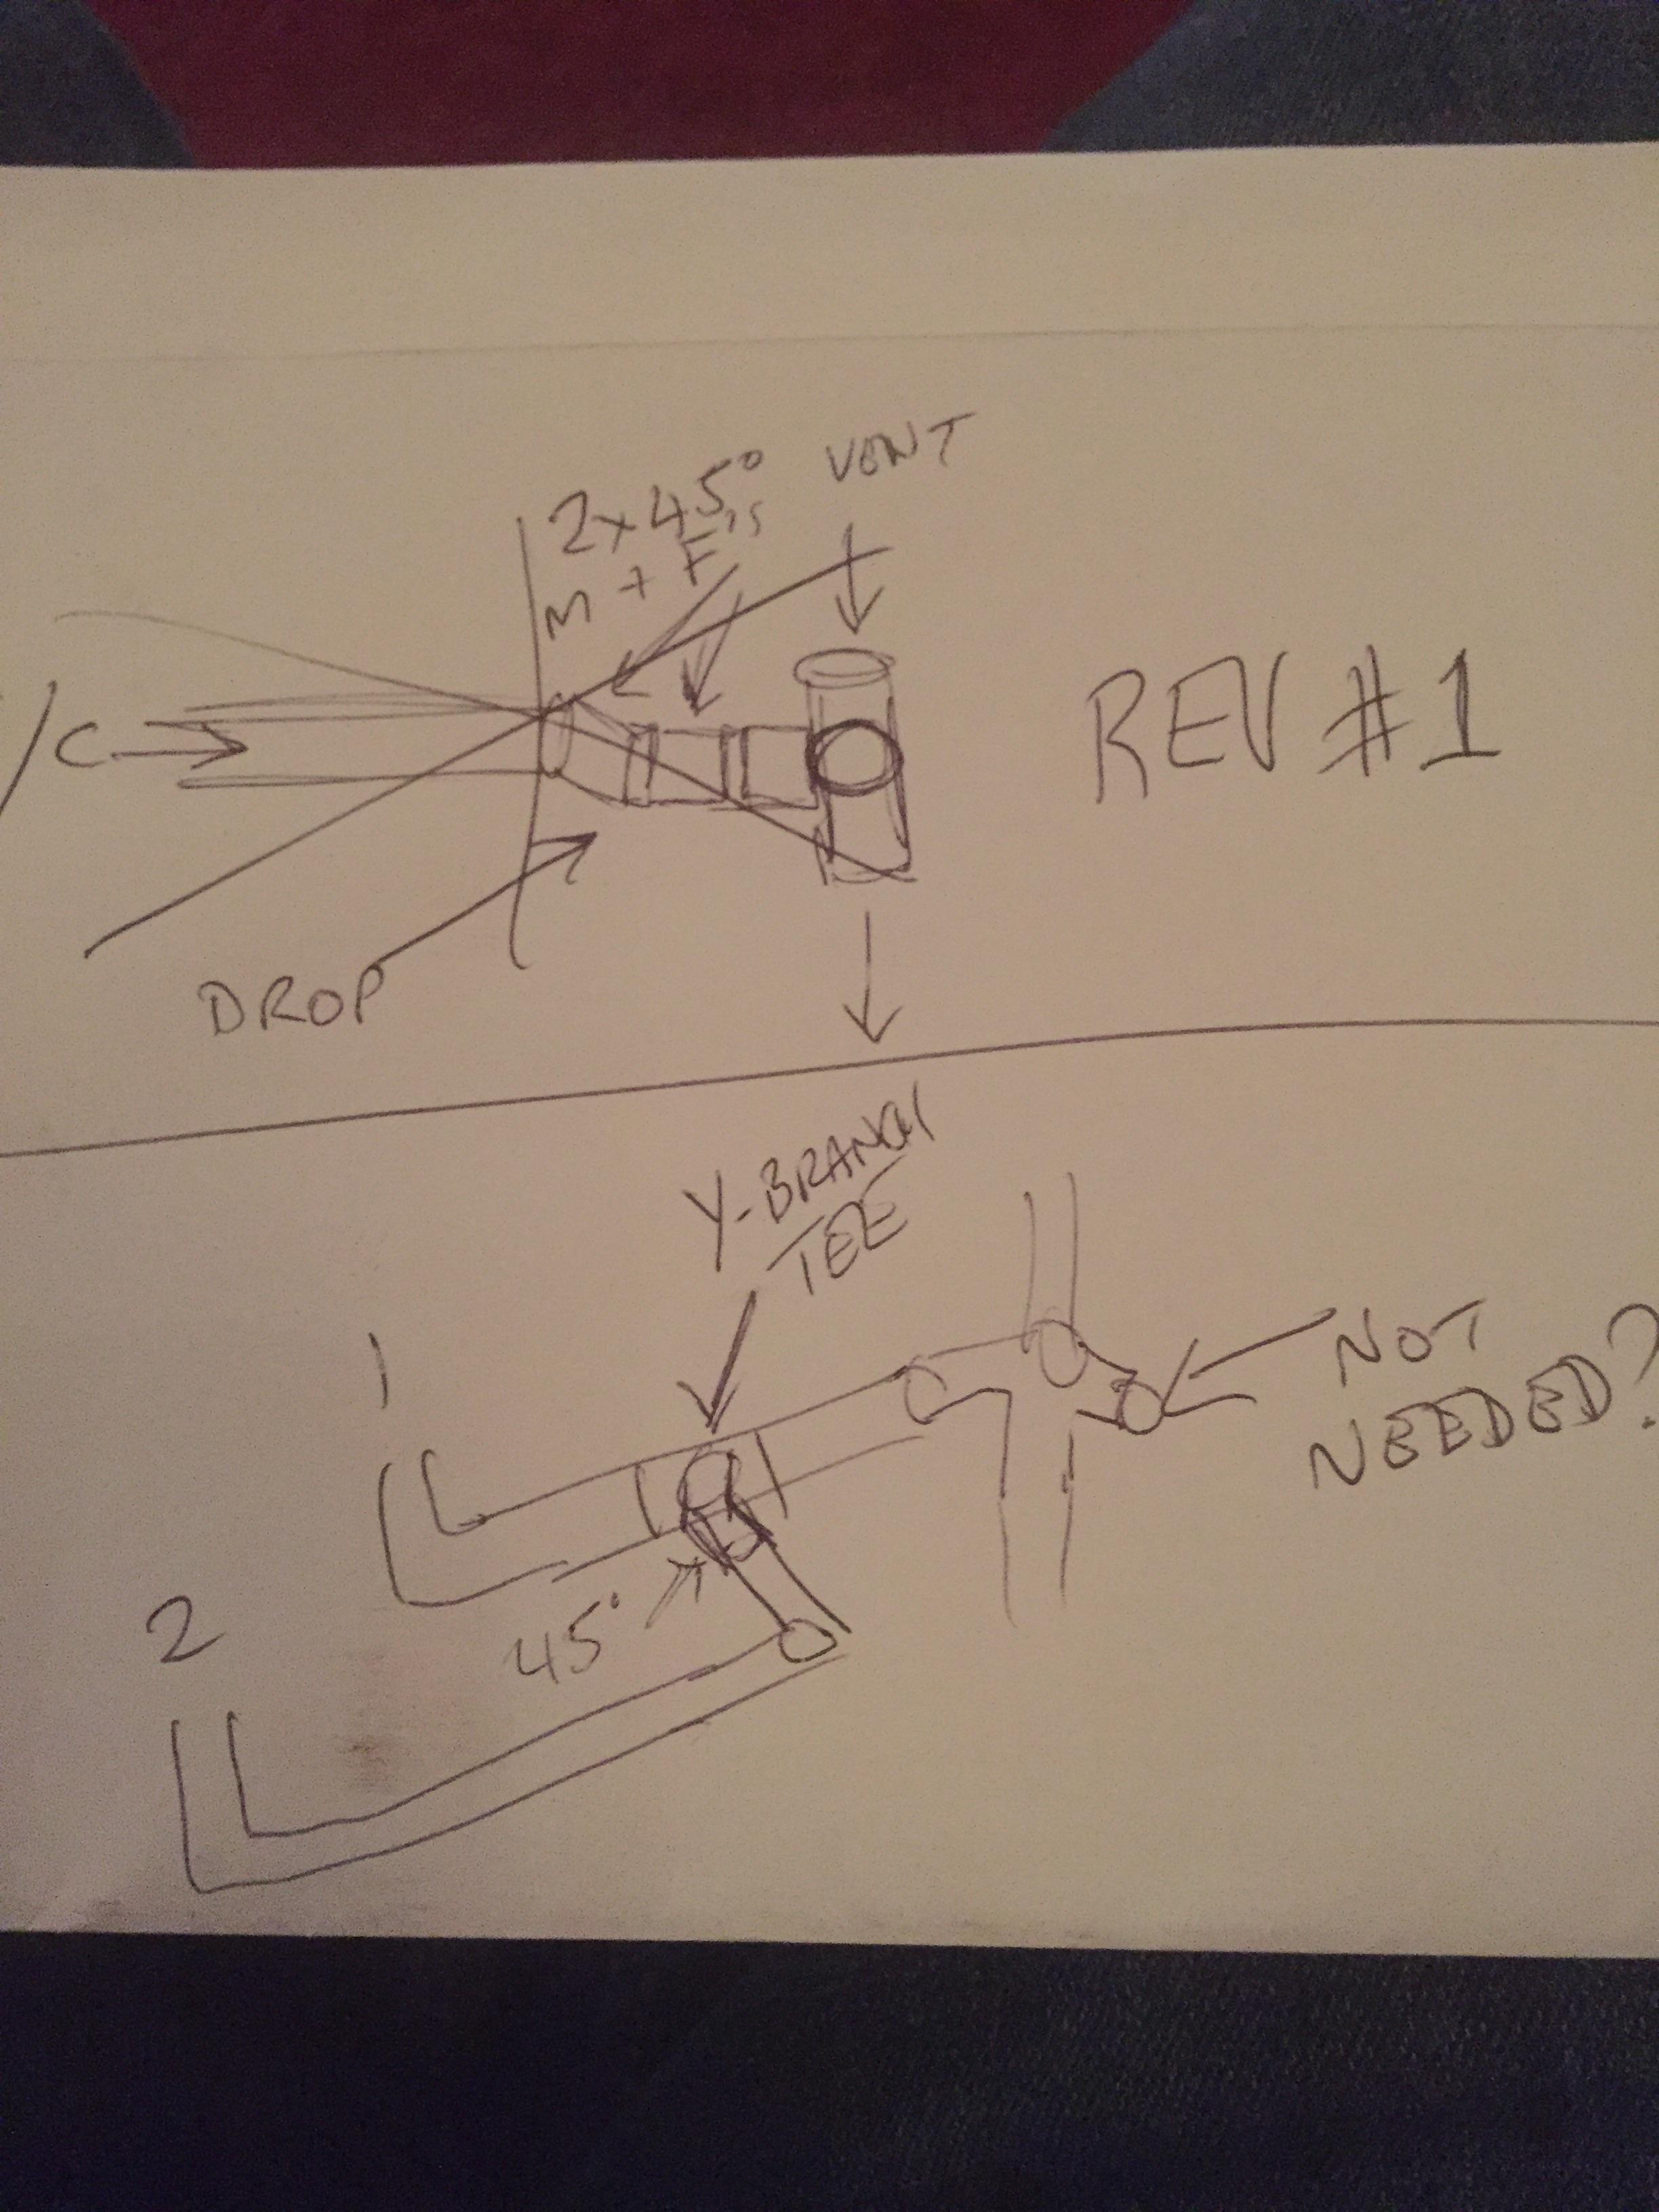
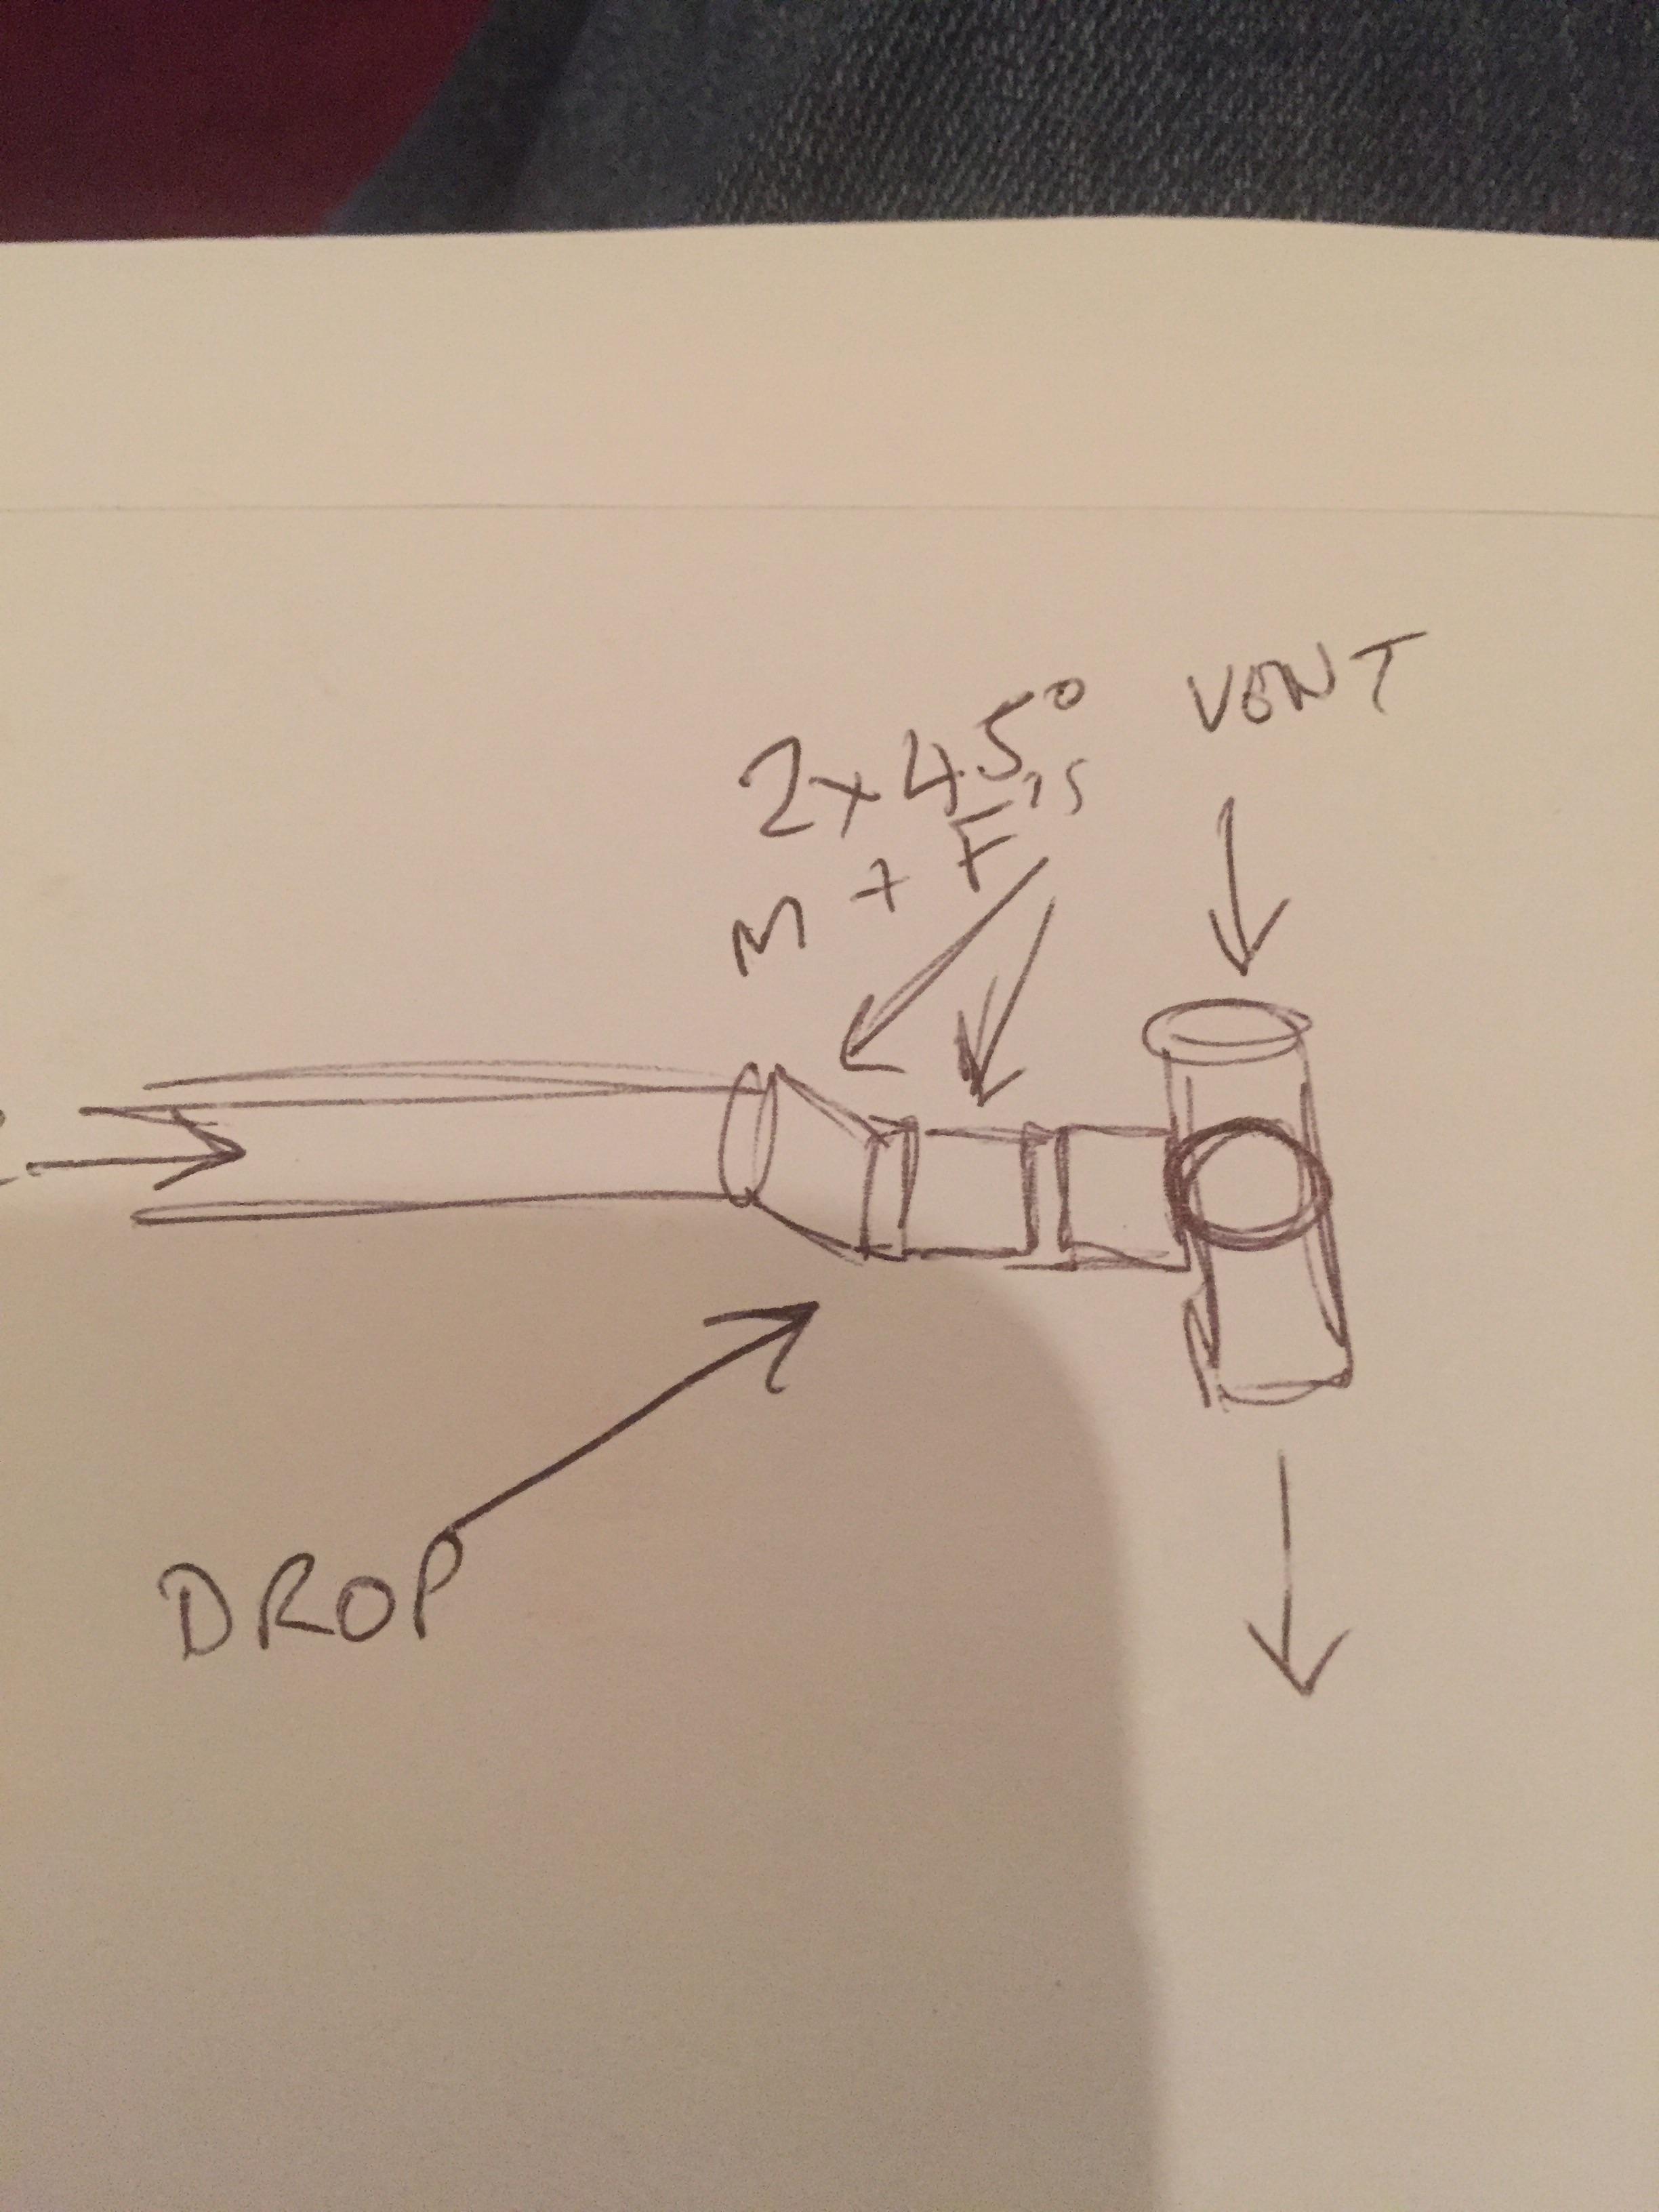
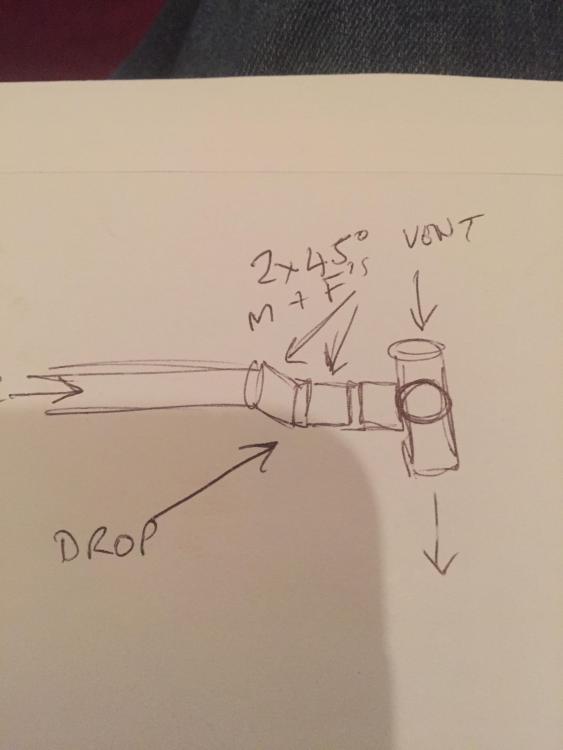
That would work. As long as air can get to the vertically falling slug of water then vacuum deficit would be taken care of. No probs with that arrangement, as long as the branch is a Y with a 45 in it to rectify back to 90o. Essentially your then sending the 'products of nourishment' from pan 2 towards the corner branch, rather than stalling at a regular branch and then relying on the fall ( from the vent ) to direct the flow. -
Wanted: 92.5 degree double branch adaptor (110mm)
Nickfromwales replied to ProDave's topic in General Plumbing
It would never happen. As soon as the slug of water has cleared the first bend you'll get what's called an "air break". That means the water cannot physically occupy the whole diameter of the pipe and therefore cannot create a vacuum. Vacuum issues are typically only associated with vertical drops after 1m fall or more. I believe ( iirc ) BR are happy with a vertical drop ( invert ) of 1300mm before they require an AAV. The T option ( Y-branch ) will work perfectly well. ? -
Wanted: 92.5 degree double branch adaptor (110mm)
Nickfromwales replied to ProDave's topic in General Plumbing
Any reason not to ?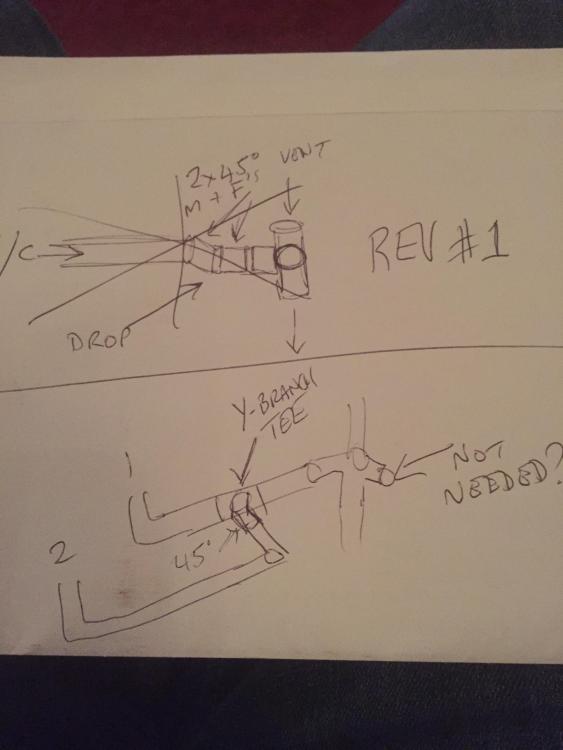
-
Wanted: 92.5 degree double branch adaptor (110mm)
Nickfromwales replied to ProDave's topic in General Plumbing
That'll be fine. And unless the invert is in excess of 1300mm, you really don't need anything for air admittance at the pans, just a vent or AAV at the top of the branch. -
Wanted: 92.5 degree double branch adaptor (110mm)
Nickfromwales replied to ProDave's topic in General Plumbing
Aw.....Shucks "That's 350 quid, plus vat, plus materials, plus consumables, plus fitting, plus labour". -
Wanted: 92.5 degree double branch adaptor (110mm)
Nickfromwales replied to ProDave's topic in General Plumbing
-
Wanted: 92.5 degree double branch adaptor (110mm)
Nickfromwales replied to ProDave's topic in General Plumbing
I was JUST about to say that ? -
Wanted: 92.5 degree double branch adaptor (110mm)
Nickfromwales replied to ProDave's topic in General Plumbing
I think these would do it. Make the branch lower than the soil so you deffo don't get any cross flow. TBH, that issue is more problematic with a 180o offset rather than a corner branch, but if it was me ( and more importantly you have the room / distance ) I'd still endeavour to 45 into it to make a 'sump' at the branch. -
Wanted: 92.5 degree double branch adaptor (110mm)
Nickfromwales replied to ProDave's topic in General Plumbing
Fack knows Check out this bad boy. Come out of this with two M&F bends to rectify back to horizontal and then you'll have no issues with what Joe mentioned ( which is with merit I assure you ).