
Leaderboard


Popular Content
Showing content with the highest reputation on 07/02/16 in all areas
-
(I know, I know...the photos didn't paste in and I will have to do them one at a time...I'll get 'round to it I promise...managed the first dozen, more to come) Part One-Wind And Watertight For Under £6k I'm new to blogging and probably have nothing much in terms of knowledge to impart but some of you might be interested in building on a low budget so here goes. After many years on the waiting list we got offered a plot on the famous West Highland Way about 3 miles north of the starting point in Milngavie, just north of Glasgow. For £4k we get a 20 year ground lease around 100ft square, ground rent is £90 per month and of course membership of the community group that collectively owns the whole estate. See more about Carbeth Hutters here http://www.carbethhu...o.uk/index.html we needed planning permission and Carbeth is itself a conservation area so we kept to the hutters spirit of ingenuity and self-everything and splashed out on some graph paper from the local stationers. We made several models from foam board (thanks JS Harris) and finally paid the fee and waited... I'll add the plans when I find them but permission was granted and we stated work digging the footings by hand. Oh I should say at this point so far we have not paid for one trades person nor used any machines other than a Makita saw and drill and a Hitachi gas nail gun. Many thanks to Dominic Stevens and this website for teaching me all I needed to know about the mysteries of marking out http://www.irishvernacular.com/ In May we braved the rain and pressed on building 14 (dodgy bricklaying) piers one big one using cobble stones the rest using concrete blocks from a reclaimed mono bloc driveway. Our near £2500 load of timber arrived and it was time to see if the 'water in a tube' method of levelling the piers was accurate or not...first big confidence builder-it was bang on level across a 4m span I really wish I had bought OSB flooring as the chipboard got soaked a dozen times...its fine now but we have a few swollen joints that will need attention before final floor goes down. Lots of wet days and rain dripping of noses but a nail gun is a great stress buster for us Social Work types and the wall panels and trusses were complete...time for a big hut raising weekend! The June weather was kind and we got a lot of work done but the tarps had to go back on as the floor was still getting soaked... Magic, frame complete Roof is almost there and again we had 8 volunteers over the weekend...including schoolboy nephews who kept wandering off with tools! Then end of June saw the EPDM roof being stuck on with the stickiest of glues but close to water proof at last. On the odd evening we managed to get the windows in... Got some nice doors from Gumtree for £40 so in they go and by the end of June we are almost there Insulation and building paper on Oh and Gumtree found us some kitchen bargains so shipped then up as its nice and dry inside now *smiley face* Cladding And Lighting Weather was sh#t all July so had to bash on through the rain... Sparrow Fart recommended the Hitachi nail gun and as I'm on my fourth box that's 7000 nails so far! 90% Finished...90% To Go... Nearly there...hearth and fire needed to go in as it was getting too cold to work... Got a reclaimed dance floor 57m for £250 so that went down too. Finished off the ceiling joins with some 5mm ply, looks okay. Finally got the dry toilet finished but not *commissioned* it yet. Put some furnishings in for a trial run. Just some plumbing, wiring and joinery to go. Oh and the view from daughters window... Diy Plans-Graph Paper And Pencil I am putting these images up simply to show that you do not have to employ professional help to submit planning applications. For most of you serious self builders designing the house of your dreams I suspect that this will be the only way to go but my little project is different from the norm in many ways. Firstly Stirling Council (in fact the single planning assistant that deals with the Carbeth community huts) is hugely helpful and happy to talk on the phone and comment via email. Secondly reading through previous applications I noticed that some drawn on foolscap (with imperial measurements) passed first time and the more professional architect drawn submissions had lengthy correspondence in the file. I went with the spirit of the old hutters and splashed out on some graph paper and a sharp pencil. I kept what I could vague so as to allow a bit of flexibility as the build progressed. Eight weeks to the day after submission we got a green light with four simple conditions. Having read some of your experiences out there I feel your pain and hope that ion the future this minefield of a system can be improved and made more consistent…I’m not holding my breath though… Attached Files Planning drawings 1-2.pdf (2.12MB) downloads: 75 Planning drawings 3-4.pdf (2.14MB) downloads: 29 Planning drawing 5.pdf (1.05MB) downloads: 26 Carbeth site plan hut no 3 Jan 15.pdf (254.28K) downloads: 28 Interior Fit Out And Decoration The low tech approach continues as does the re-use and recycle theme. Bought a load of Michelin road maps from the charity shop to make my feature wall background and topped then off with a few nice ones I picked up in Poland during the summer. Probably spent about 20 quid in all. Went to the local mental health wood recycling project (boy, they are not cheap!) and spend 15 quid on an old scaffolding board to make this kitchen unit. Might add some hooks underneath and a couple of shelves on the map wall to complete this corner. I might have mentioned before that around my office Monday is the day that the Council bin lorries come around for bulk uplift. The area is all tenement flats and there is no room for bulk trash in the back court so the local arrangement is you put it on a street corner before each Monday morning. It does make for an Aladdin's cave of goodies and there is a fair bit of 'help yourself' going on before the bin lorry arrives. in fact plenty of stuff is labelled, like a TV with remote control taped and a sign 'saying perfect working order'. Anyhow I helped myself to this worktop and slotted it in next to the beech free standing units from Gumtree to make a little sink unit. Looks okay I think...the rest of the worktop was cut up and kept the wood burner going to keep us warm during the freezing weather outside. Dry Toilet And No Smell Whatsoever Apologies for the pic of the loo, warts and all so to speak... This is the 'seperate' plastic toilet from Sweden that has a front funnel and back void. The thinking is to seperate the solid and liquid waste as it is the combination Of both together that causes the smells we don't like. Urine runs to a soak away and the solids and toilet paper (and sawdust which helps the drying process and Erm...helps the appearance should you peer into the pit!)end up in the bucket below. There is a small fan running constantly which you can just see on the floor behind the urine waste tube. The fan is powered from our 12v battery and draws next to no power at around 0.1 amps. This provides an airflow which removes odours and aids the drying process for the solid waste. Once the bucket is full it can be sealed with a tight fitting lid and left for 18 months when it will be safe to use as compost. Some folk toss it on the fire but not sure I fancy that job. Still needs a lick of paint but all in all very pleased this all works as promised in the literature. As the blog title says there is no smell at all and its really a pleasant smallest room. Balcony, Wood Store, Somewhere Nice To Sit Decided simple was best and to crack on with the decking out front. Rescued some fallen trees from nearby and rested them against a quickly assembled frame of 6*2 treated joists. This gave us a nice deck to work on the roof from... Always keep a tidy site Ebuilders...you don't want a wayward screw sticking into the foot of one of you volunteer helpers who come to play with trainers on! Bit of good luck, we had one 4.8 length of decking left over so fashioned up three nice steps to the front door. Lucky for us 800mm wide was just right. Finishing Touches If you wait long enough, what you want will come along in Gumtree. Seller said they were £100 per metre and I can believe that. 4m of them in the back of the car and the suspension was riding low! Anyhow, had no confidence in grouting these the normal way so borrowed a piping bag from SWMBO and took my time squeezing it into each gap so it was just proud. Ran a pencil around the gaps and hey ho it looks great. Now just some stove paint to buy and a few dozen more jobs before its finished... Exterior views1 point
-
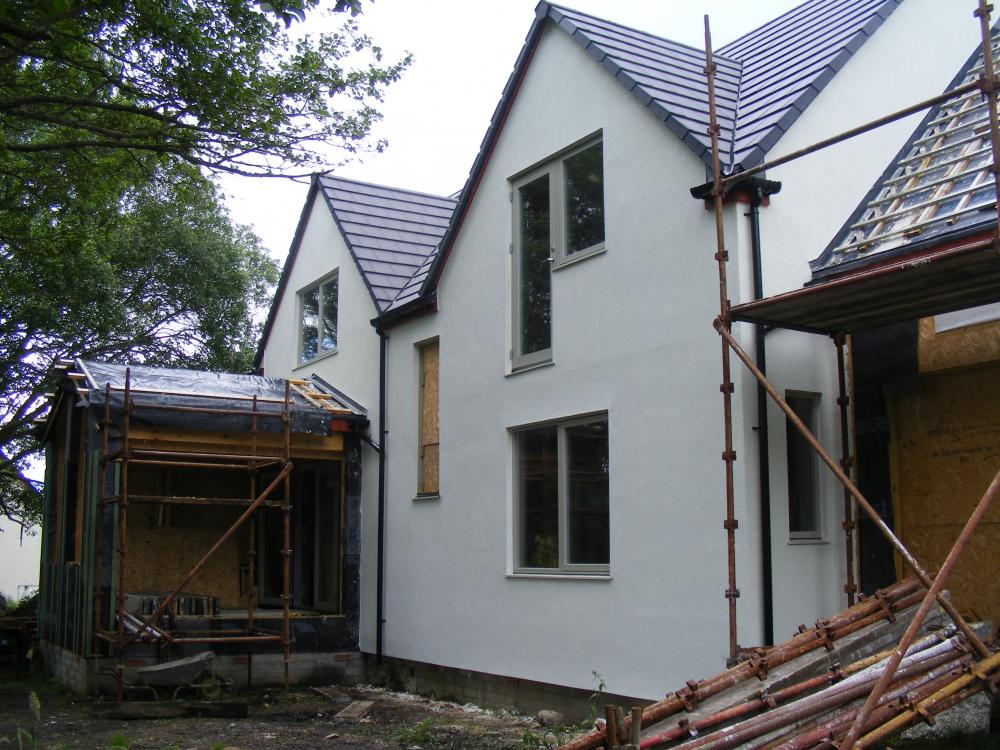
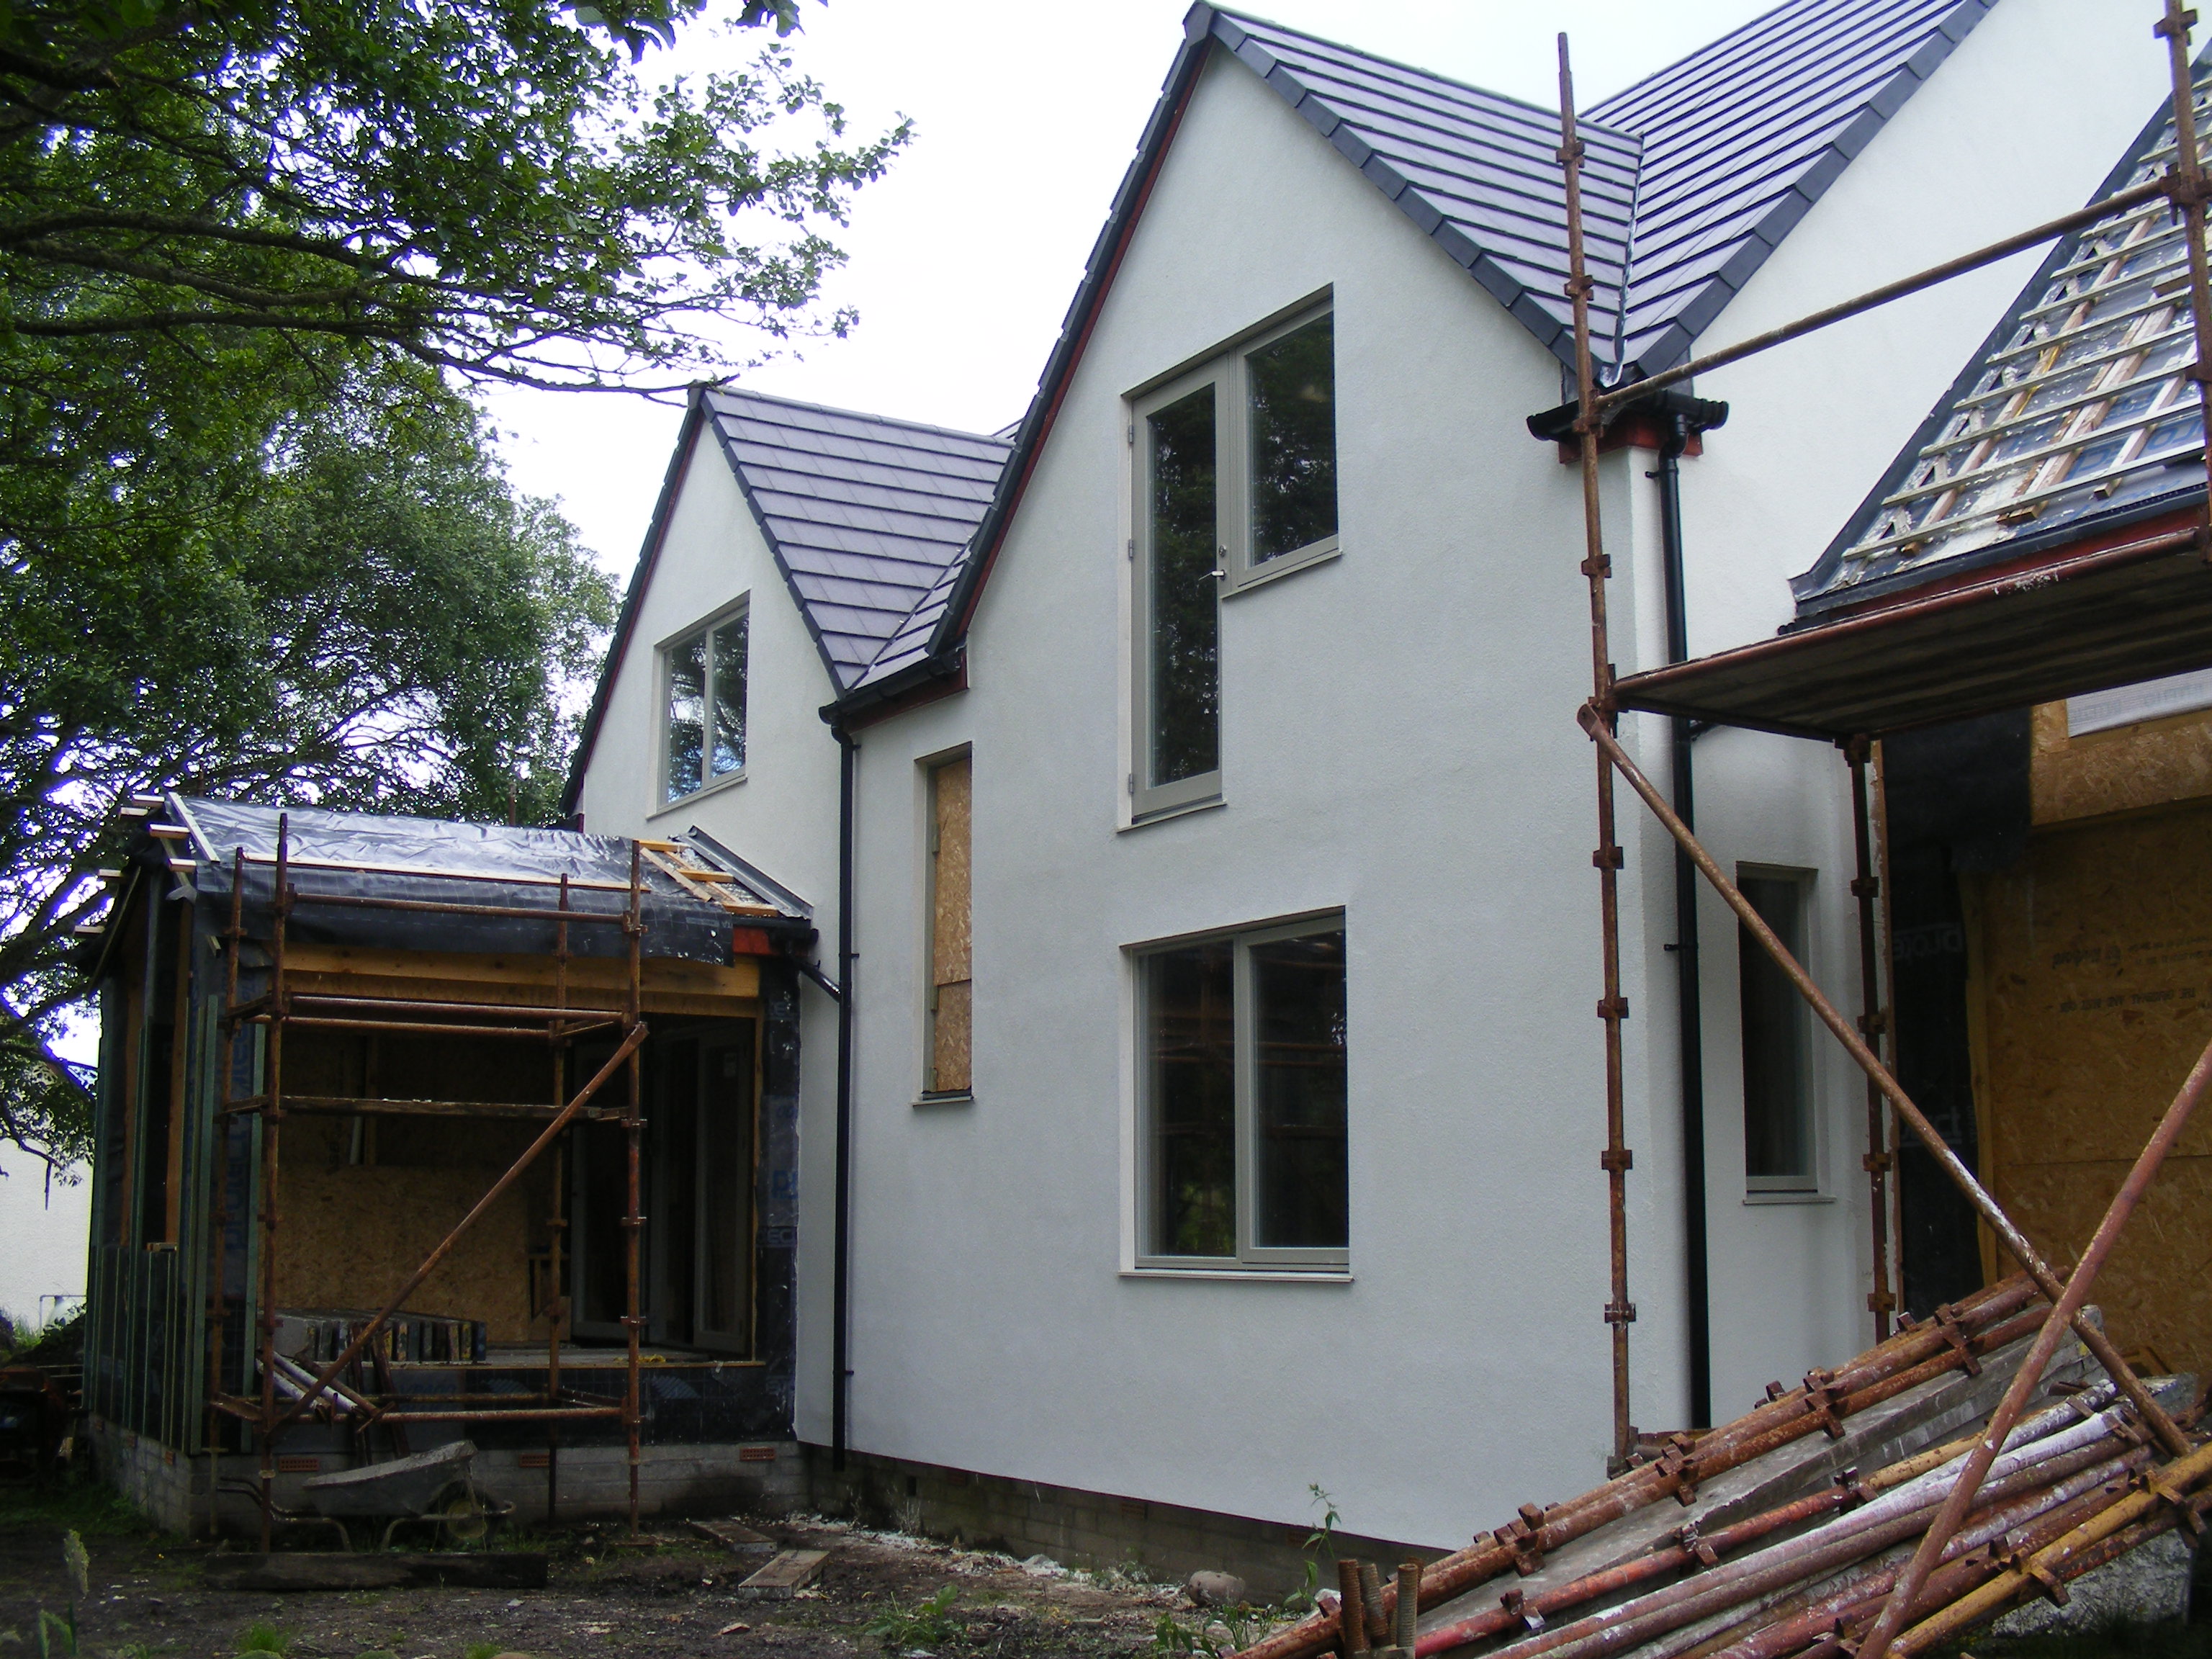
Just finished the cladding and render of the back of the house. More on my blog at http://www.willowburn.net look for the entry "and yet more cladding and render" That's the whole of the house insulated, clad and rendered. Next is the garage, which has the complication of not having a door and a window yet, something I am trying to source without breaking my tiny budget.
 1 point
 -
looks good, just looked up on Ebay - £300 http://www.ebay.co.uk/itm/mini-digger-log-splitter-hydraulic-log-splitter-jcb-8014-digger-grab-/191889187993?hash=item2cad7ca499:g:3cMAAOSw8aNXGUYD1 point
-
BTW, the site that this guys is using is earth :: a global map of wind, weather, and ocean conditions. How to configure it is at around 2:40 into the talk. It's really worth a look at this site!1 point
-
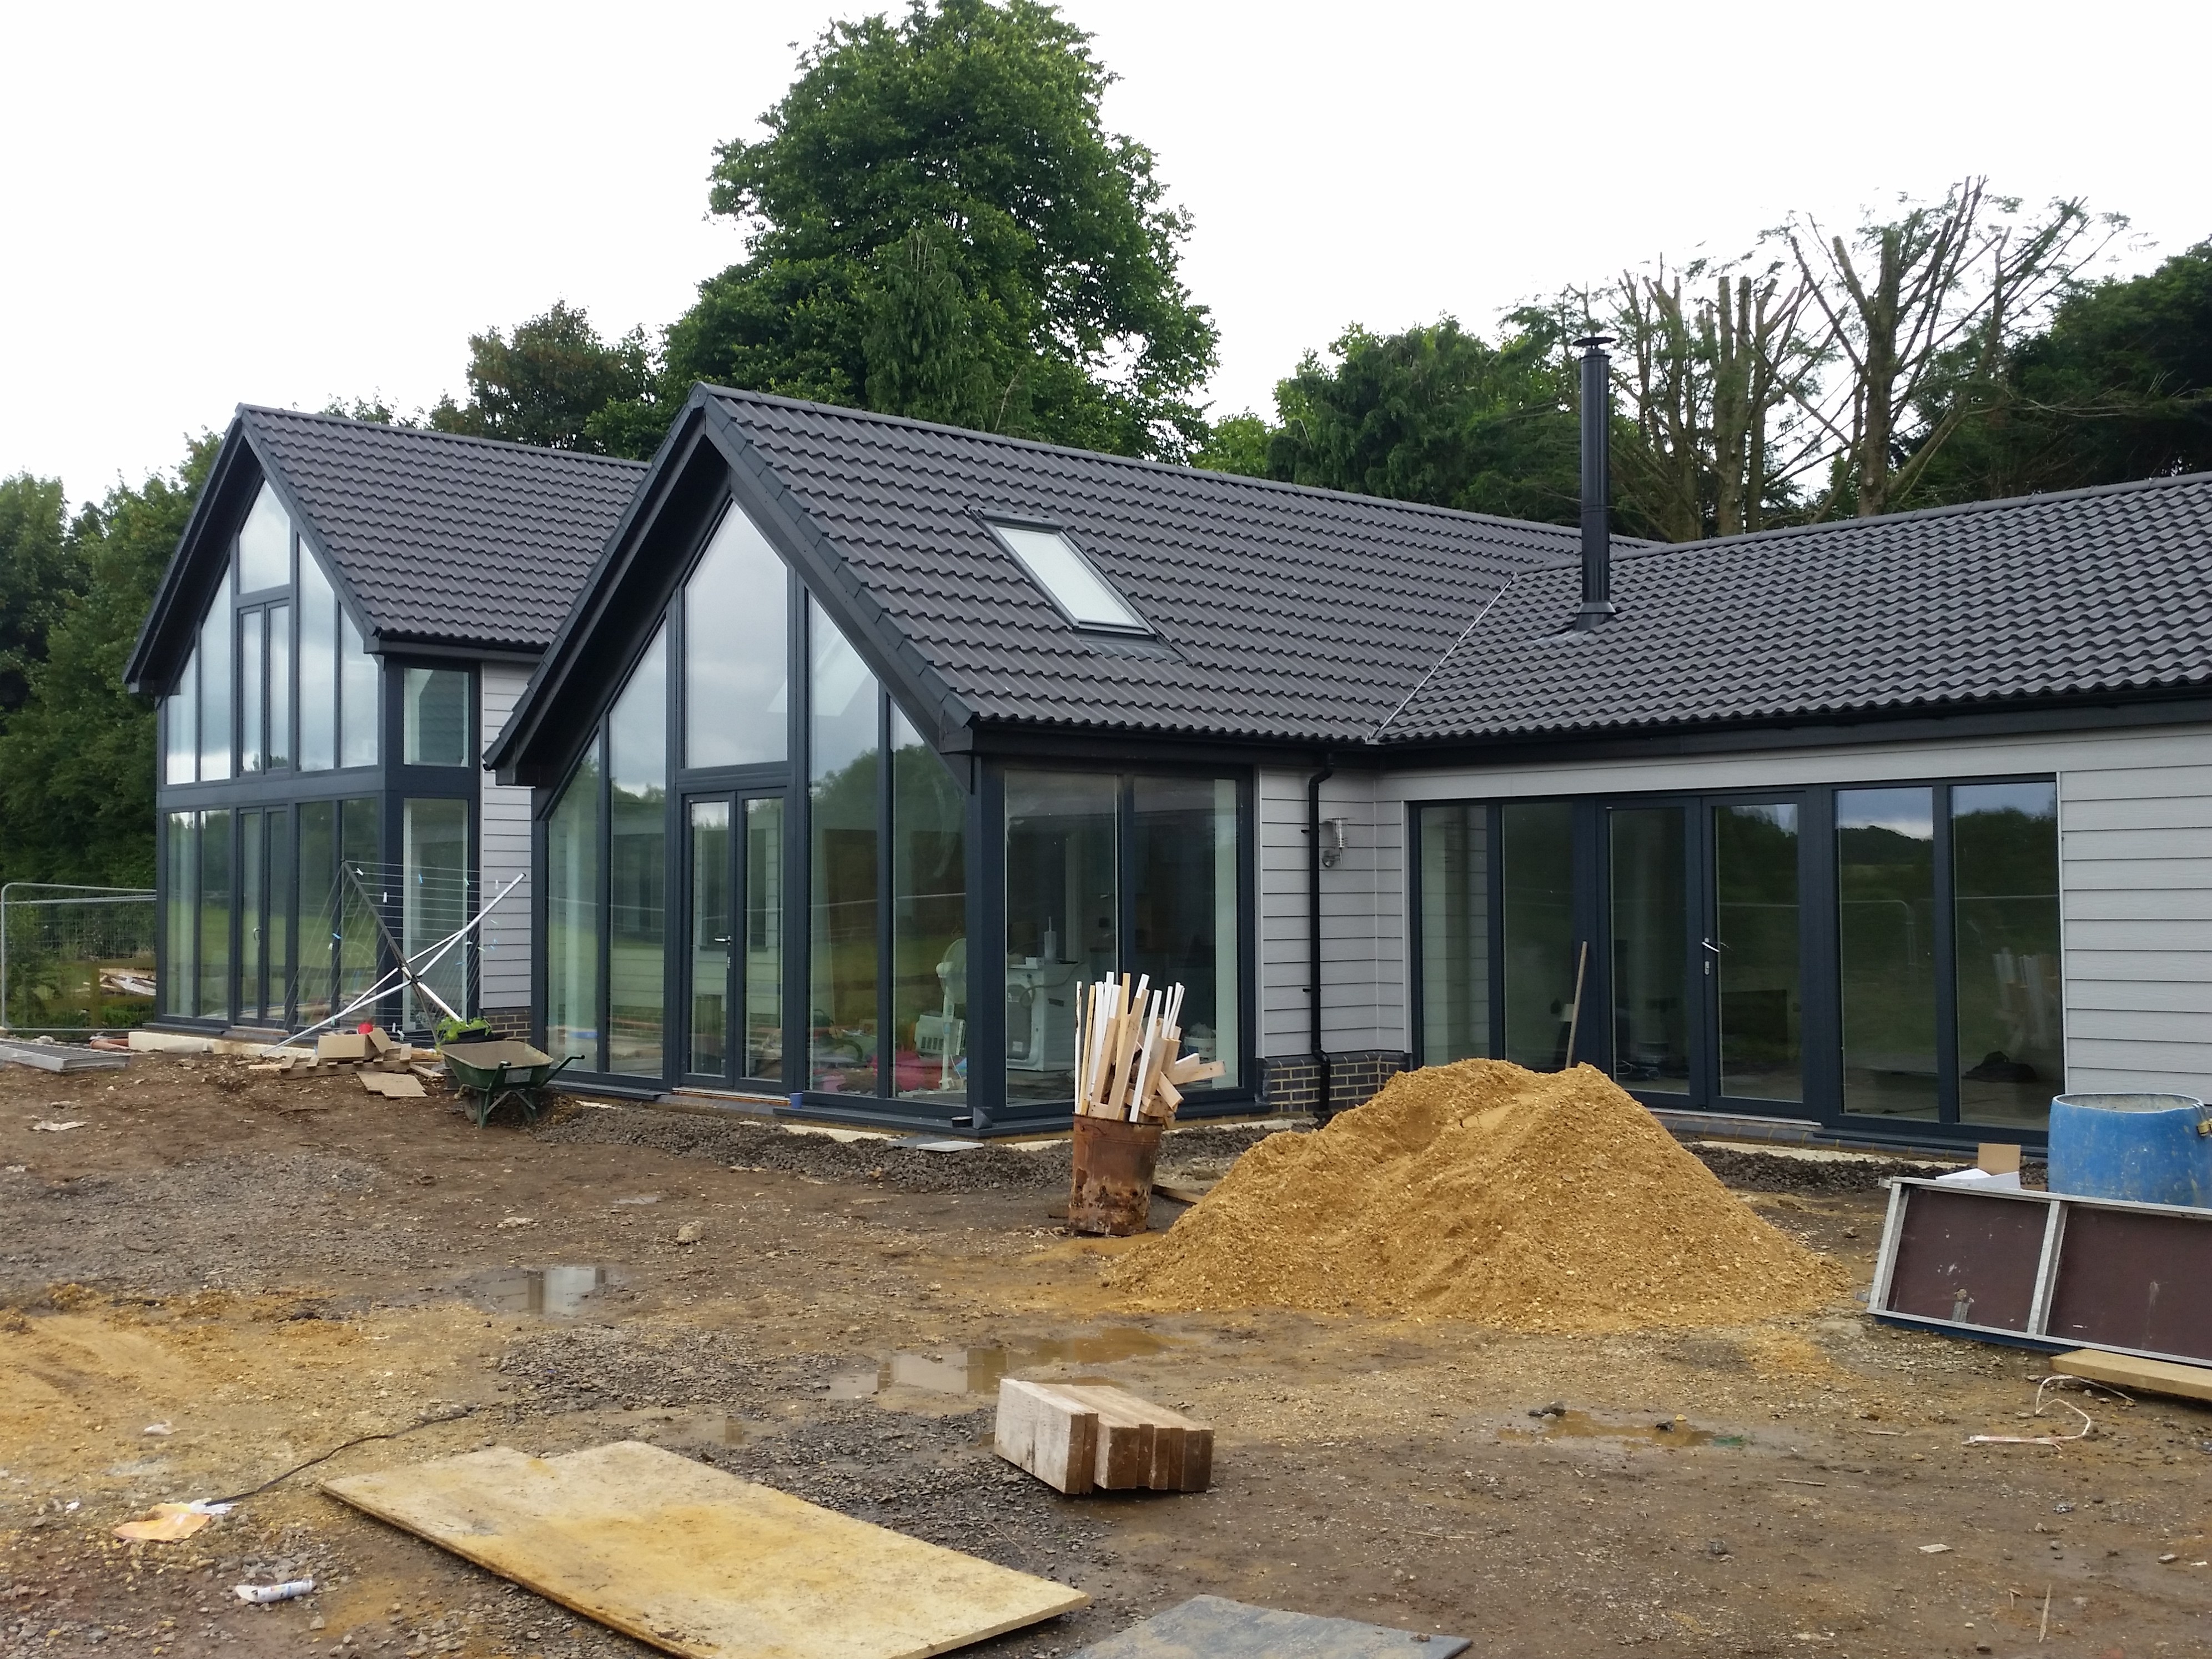
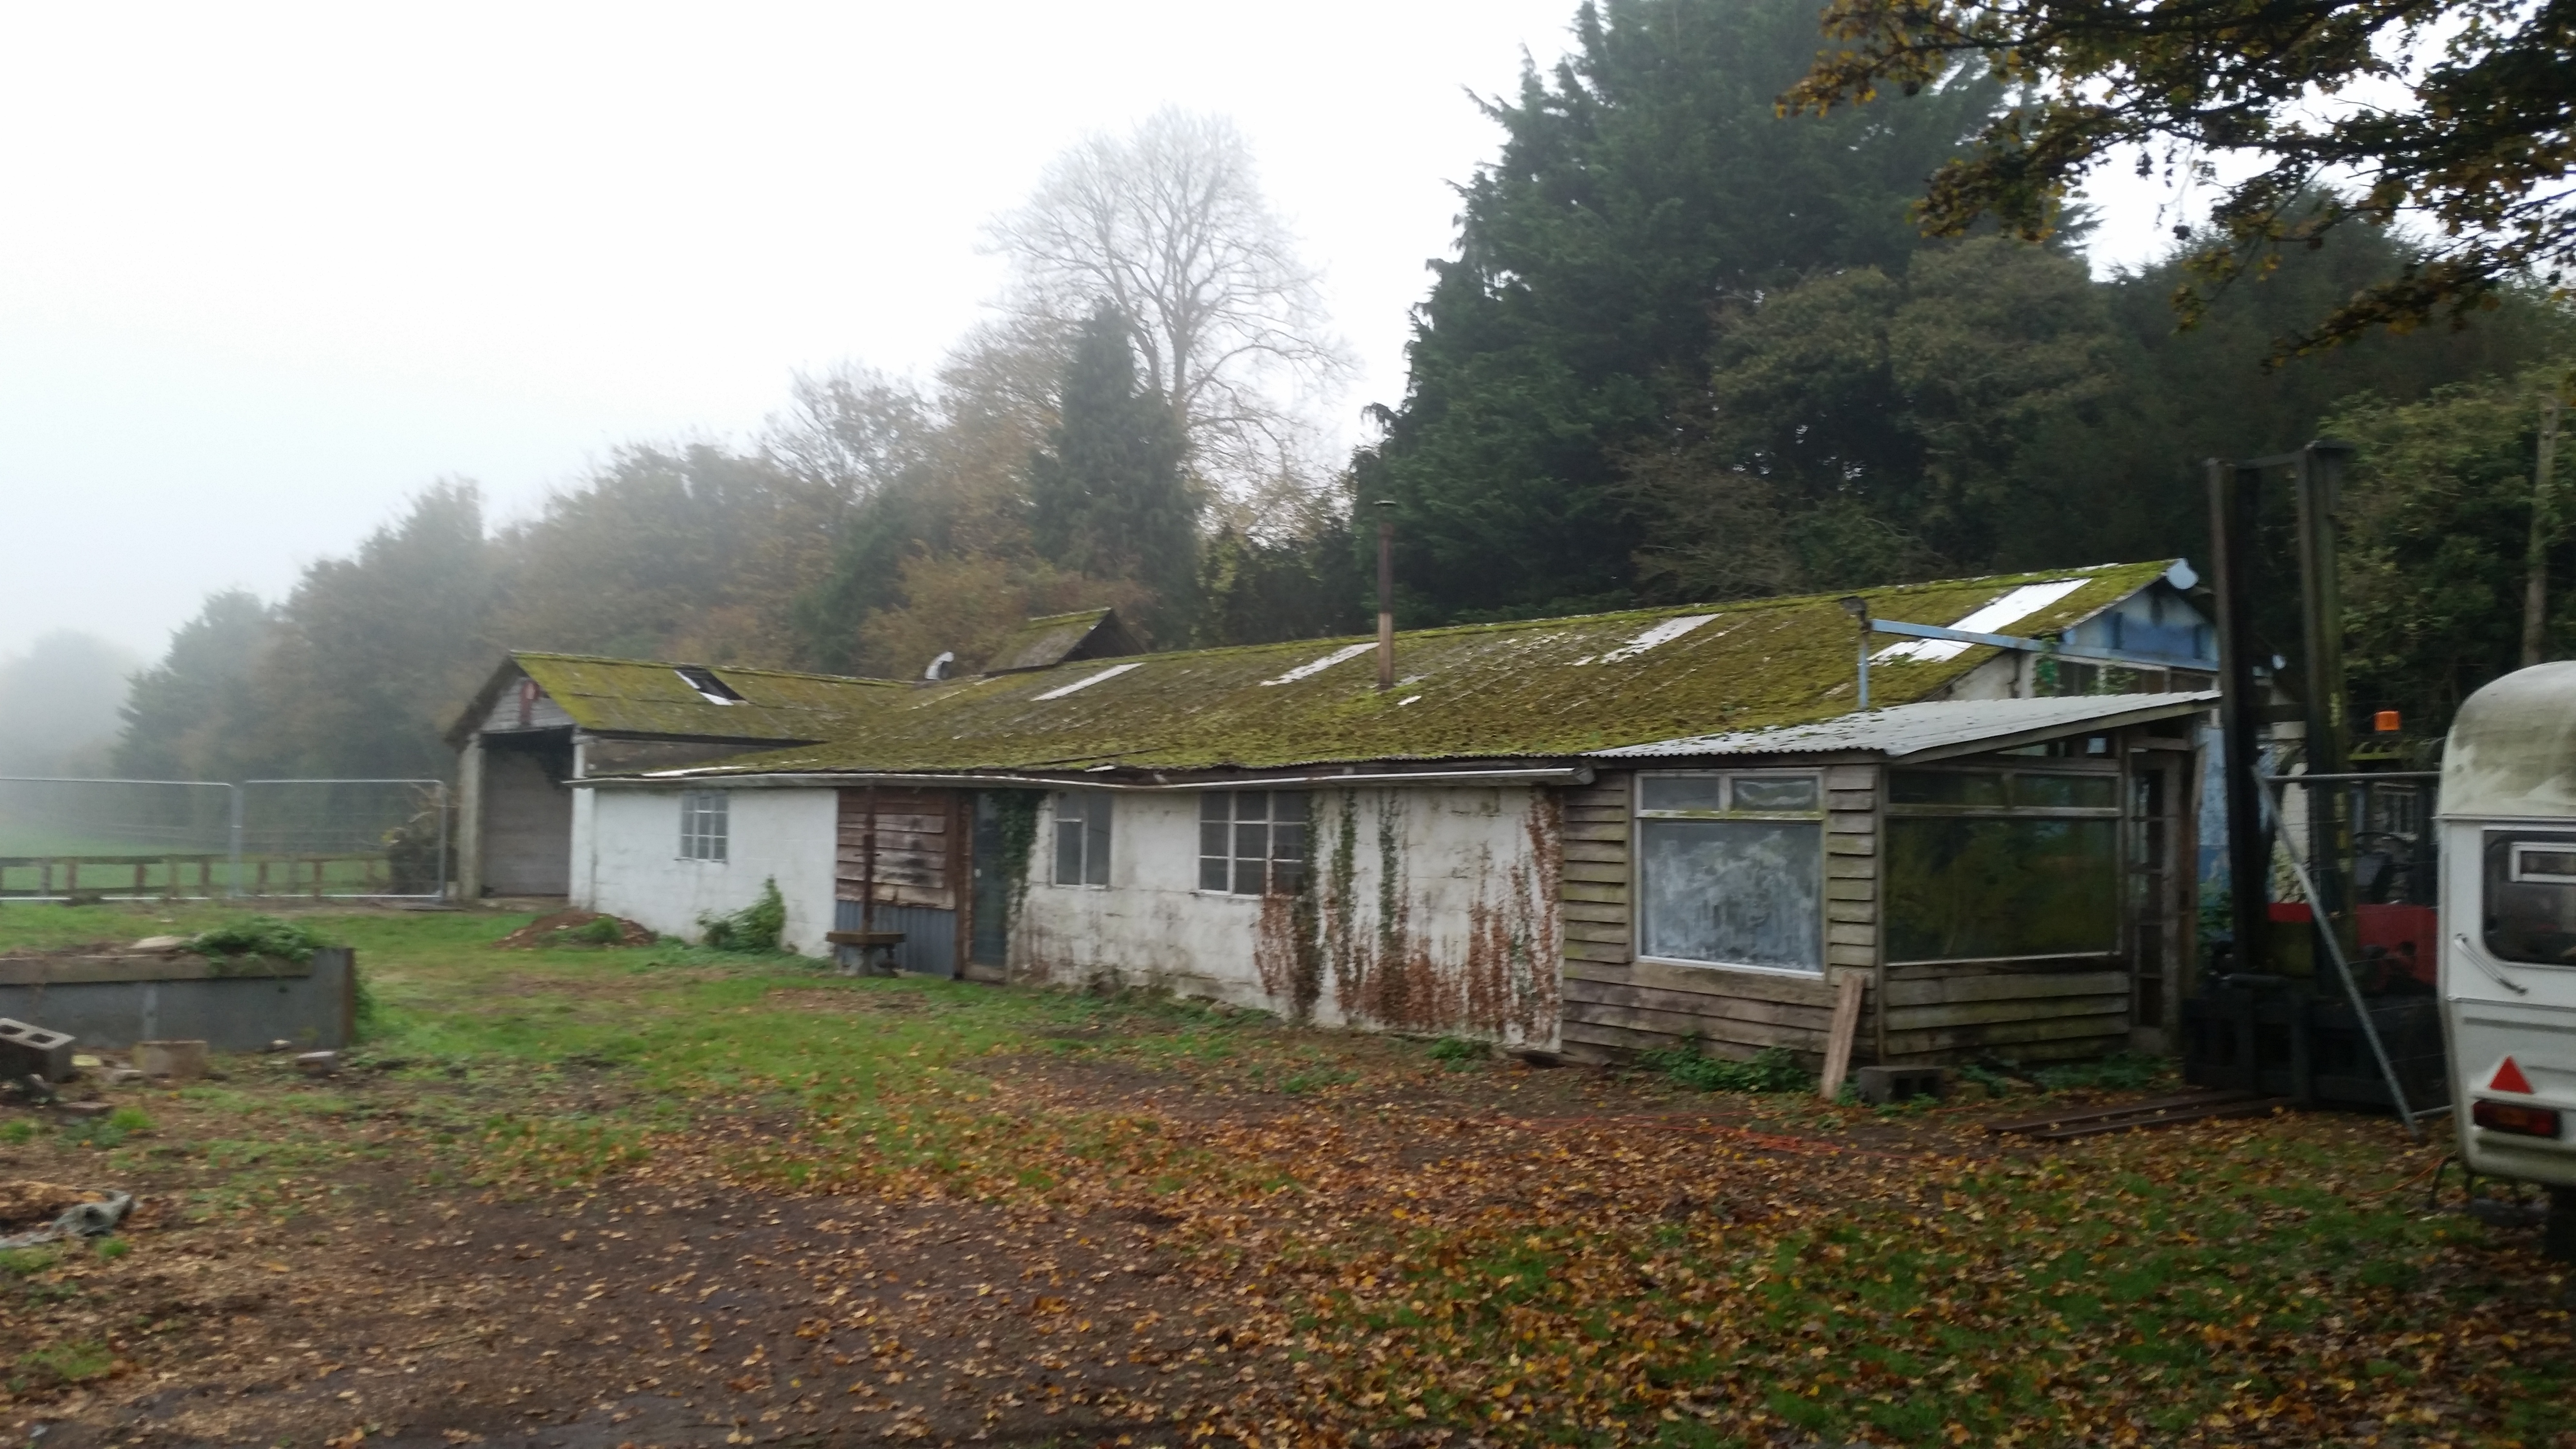
Just wanted to say a big thank you to everyone from Ebuild and Here, the carpets went down yesterday and we spent the first night (on camp beds) in the house last night. The furniture and cooker still needs to be delivered but the caravan went this morning so we are officially living in the new house, there is still some finishing off to do mainly painting internally and the landscaping externally which starts Monday mow the caravan has gone but the end is in sight, 12 months of planning and 7 months of building are nearly at end but it wouldn't if been possible without eveyone help advise and guidance, a special mention to Jeremy as well for taking the time to show us around and talk to us at length about his project and giving us the confidence to become self builders. Here is what it presently looks like and what it looked like at start.

 1 point
 -
Ah, good point about the 'user definable' height with the adjustable frame of the Geberit. The last one I fitted I purposely jacked up by a good 35mm, above normal WC pan height, as the punter had bad knees. There are 'comfort' height floor standing WC pans around, as well as Doc M suites which also adopt a higher pan level. All jokes aside, and believe me I've done well here to fight the urge, you may well find it a good idea to jack the height up a bit for comfort, and the side effect will be the ease of connection for the ground floor loo. Im not sure about where the hang ups are coming from with having a pushfit at the base of the tee, eg a triple pushfit socket tee, as using double socket connectors, bends and 45's etc is commonplace. Amen to that. You get one shot with these.1 point
-
If the pipe's cut dead square and with a slight chamfer on the inside top edge I can't see why there would be a problem with just fitting a normal swept branch on to it. It's nice to have a socket poking up at exactly the right height out of the slab, but my guess is that this is very rare. We have a swept bend, just like the one illustrated above, under our slab. However, because the insulation is 300mm thick and the slab another 100mm thick, the swept bend is way below finished floor level. We therefore had a tall stub of pipe sticking up out of the concrete, with a plastic cap taped on it to ensure it stayed clean. When I came to fit the swept branch at the base, all I did was very carefully cut the pipe to length, making sure it was dead square, with the required external chamfer to go into the fitting and a very light internal chamfer. The pipe abuts against the stop inside the branch which is, by design, fractionally smaller than the ID of the pipe, specifically to ensure that there's no upward-facing lip to catch anything. On one external 110mm pipe connection (the one from the kitchen waste external trap to the inspection chamber) the only way I could fit it was with a slip coupler. These have no internal lip, so it is essential that you cut the ends of both pipes absolutely dead square. I'm sure there is probably a tool for doing this, but I made up a jig, using a bit of 6" x 6" x 1/4" aluminium alloy angle that I happened to have. I stuck it in the band saw and made a dead square saw cut through 3/4s of it, and I then used this to cut all the pipes dead square. I found that this made life very easy, as I just marked where I wanted to cut on the pipe with a Sharpie, put the jig on so I could just see the black line in the slot, duct taped the jig to the pipe (both sides), then used a wide mitre saw blade in a hacksaw frame to cut the pipe. The wide mitre saw blade is better than any other saw blade, IMHO, as it is wide enough to stay square in the jig and has no kerf on the teeth, so doesn't wear the jig away, plus it makes a cleaner cut through the pipe. To clean the inside of each pipe end to get a very slight chamfer I used a self-aligning metal deburring tool (like this: To chamfer the outside of pipes fitting into push-fit connectors I just clamped my belt sander into a Workmate at the right angle, turned it on then rested the pipe in the gap in the Workmate bed and rotated it against the belt. This gave a nice even outside chamfer every time, and only needed a quick scrape with a Stanley knife blade to get the fluffy bits off.1 point
-
I have only just realised who the PM is...1 point


This leaderboard is set to London/GMT+01:00