Search the Community
Showing results for tags 'airtight'.
Found 10 results
-
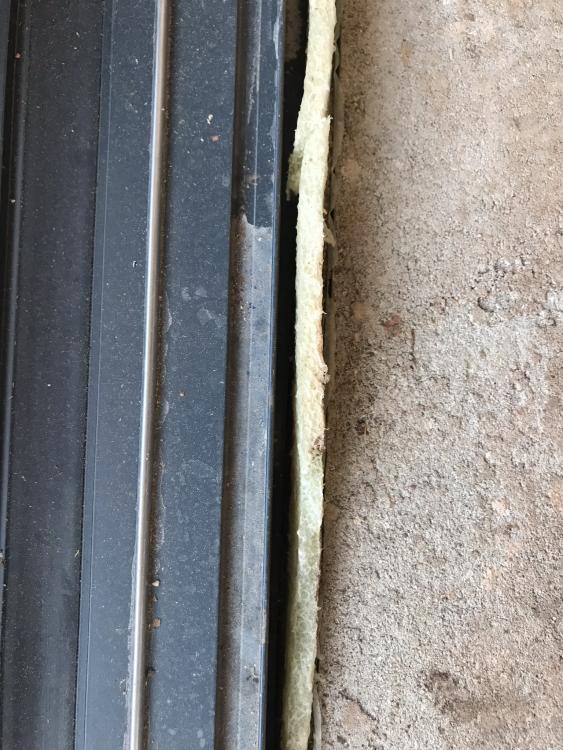
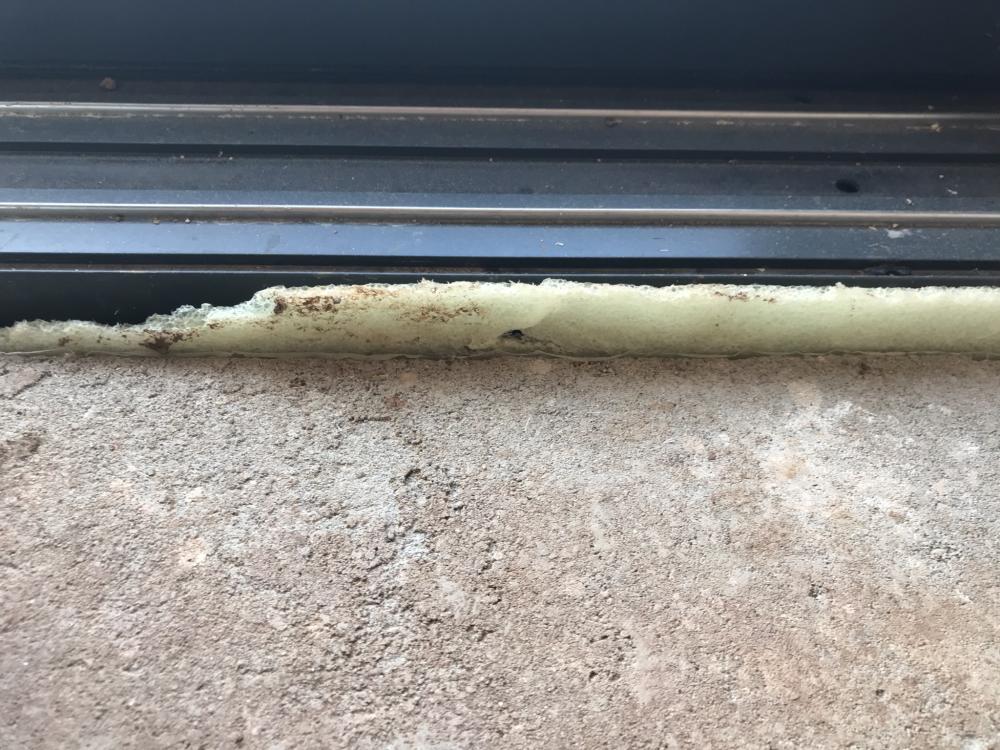
I’ve been going around with an anemometer and have identified a slight draft / air leak coming through the join between the screed / vertical insulation / patio door frame. Just wondering on the best approach to seal this as I don’t want to create a thermal bridge? Will be trimming back the insulation prior to laying engineered oak boards.
-
 I need to install a stove pipe at an angle, out through a timber frame airtight MVHR build wall, and on through 150mm rubble stone, joining 5" flexi-liner fitted in an existing old chimney. The wall make up (inside to out) is not unusual: 12.5 p/board, 45mm woodfibre insulation, Intello+ membrane (the airtightness), 100mm woodfibre, 11mm OSB3, Solitex Fronta roof membrane, 50mm gap, 700mm old stone gable wall with chimneys (flexi liner already in place). My thinking is that in effect, I treat the wall as it were a roof: I get two standard EPDM rubber/aluminium roof flashing boots to fit around twin-wall pipe and tape the aluminium plates to both membranes, leaving a 5-8cm (depending on manufacturer) air gap distance to everything else including the plasterboard? Probably give support/fixing to the first aluminium plate by inserting 2x2 noggins between studs. The outer flashing plate probably can be screwed to the OSB. Finally, cover the decorated plasterboard/skim gap with a shiny oval metal cutout plate you can buy for such eventualities? Local builder who has already installed the flex-liner joined it onto 6" single walled pipe coming through wall into the living room (leaving it for me to build the t/frame up to and around shortly), but that seems to go against everything I have read about stove installations and I assume will need to be replaced. Thanks in advance.
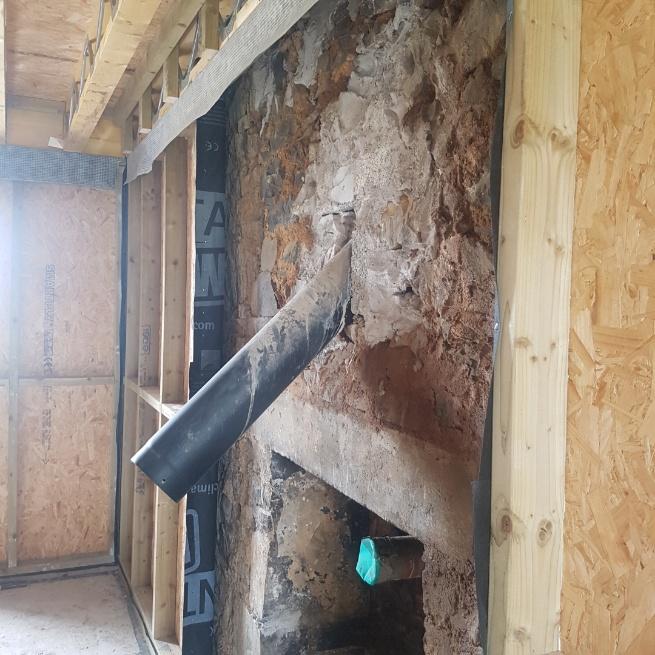
-
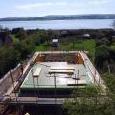
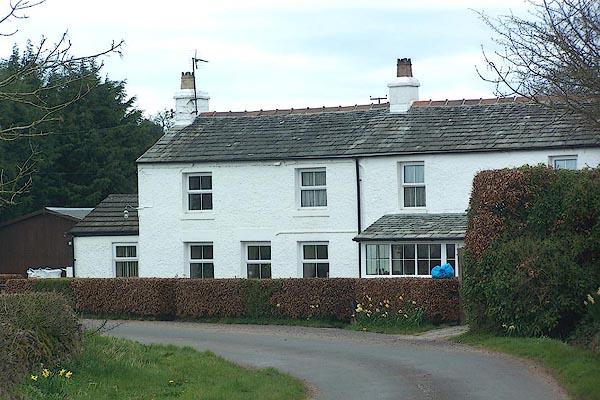
Hi We loved this house and its location in east Cumbria, so bought it and moved in - a week before storm Desmond (2015) laid waste to much of northern England. Near the top of the watershed, we thankfully avoided being flooded by digging a relief ditch from the garden and bailing the patio through the night - what a great way to meet the neighbours! After a year of getting a feel for our new home (damp) we decided to embark on a refurbishment - which has slowly morphed into a full-scale renovation & remodelling project. Ever since buying my first house in Oxfordshire in the mid '80s I've always been renovating and whilst I feel confident in my designs which I know to work well, and being familiar with the concepts of sustainable homes and eco-building, I still feel like a 'newbie' in so many areas of the build process, plus physically no longer can I cope with day-after-day hard labour. So I'm really pleased to have local (younger) neighbours who are builders, and I hope to draw on the expertise I've already seen on this site. We decided to move out whilst the work is done and are lucky enough to be able to stay in my wife's parents' old house - leaving one of the cottages just 'liveable' for me to stay during the working week. It's an amalgamation of two 1850s farm cottages plus 4(!) extensions in a sheltered spot just below the top of a small hill protecting us from cold easterly winter winds but also preventing a view of the Pennines (you can't have everything!). The idea we now have is to demolish the oldest smaller SW extension (little more than a shed yet with '70s planning permission!) and the rear conservatory and build a highly insulated timber-frame extension with an outshut roof to lean-to against the back of the two cottages thereby making their cold rear walls internal. We're retaining the other end extension - just improving its insulation markedly. We're keen to get a mix of modern and traditional by using sustainable methods and materials in the newer parts of the project, whilst reverting to traditional materials in the renovation of the cottages. Whilst applying some of the practices, we don't feel able to attain the standards rquired of EnerPHit but we'll get as close as possible in terms of energy efficiency - insulation and standards of airtightedness. To give you an idea here's a photo from back in 2007 - showing the SW extension and cottage and half of the NE cottage - the Leylandii have all been felled ...
- 5 replies
-
- 1
-

-
- sustainable
- environmental
- (and 2 more)
-
Traditional build here and have given some thought to airtightness. Internal wet plaster is effectively going to create my airtightness. I appreciate the wall/ceiling junction can crack and compromise the airtightness. The issue I have is that through choice in our bedroom block (circa 5.5m x 21m) we will have 34 spotlights. My question is therefore is it worth spending time on airtight membrane to then puncture it in so many places? I will do windows and doors with tape. Please don't send me to the firing squad.
-
 Sometimes you bump into really interesting stuff online..... like this (scroll down to the section headed Wall-Plate) Here's the relevant passage '...In order to make the house air-tight, the wall plates have been installed over a polythene membrane, which is shown tacked down until the construction has proceeded to the point where it can be folded up and over the plywood which will soon cover the ends of the joists. Ultimately it will seal against the plywood decking which will be laid on top of the joists....' (https://edinkist.wordpress.com/diary-of-the-build/) To ensure air-tightness at the wall-plate roof interface, is this method (putting the wall plate on top of a polythene membrane) common? I feel some phone calls coming on.
 -
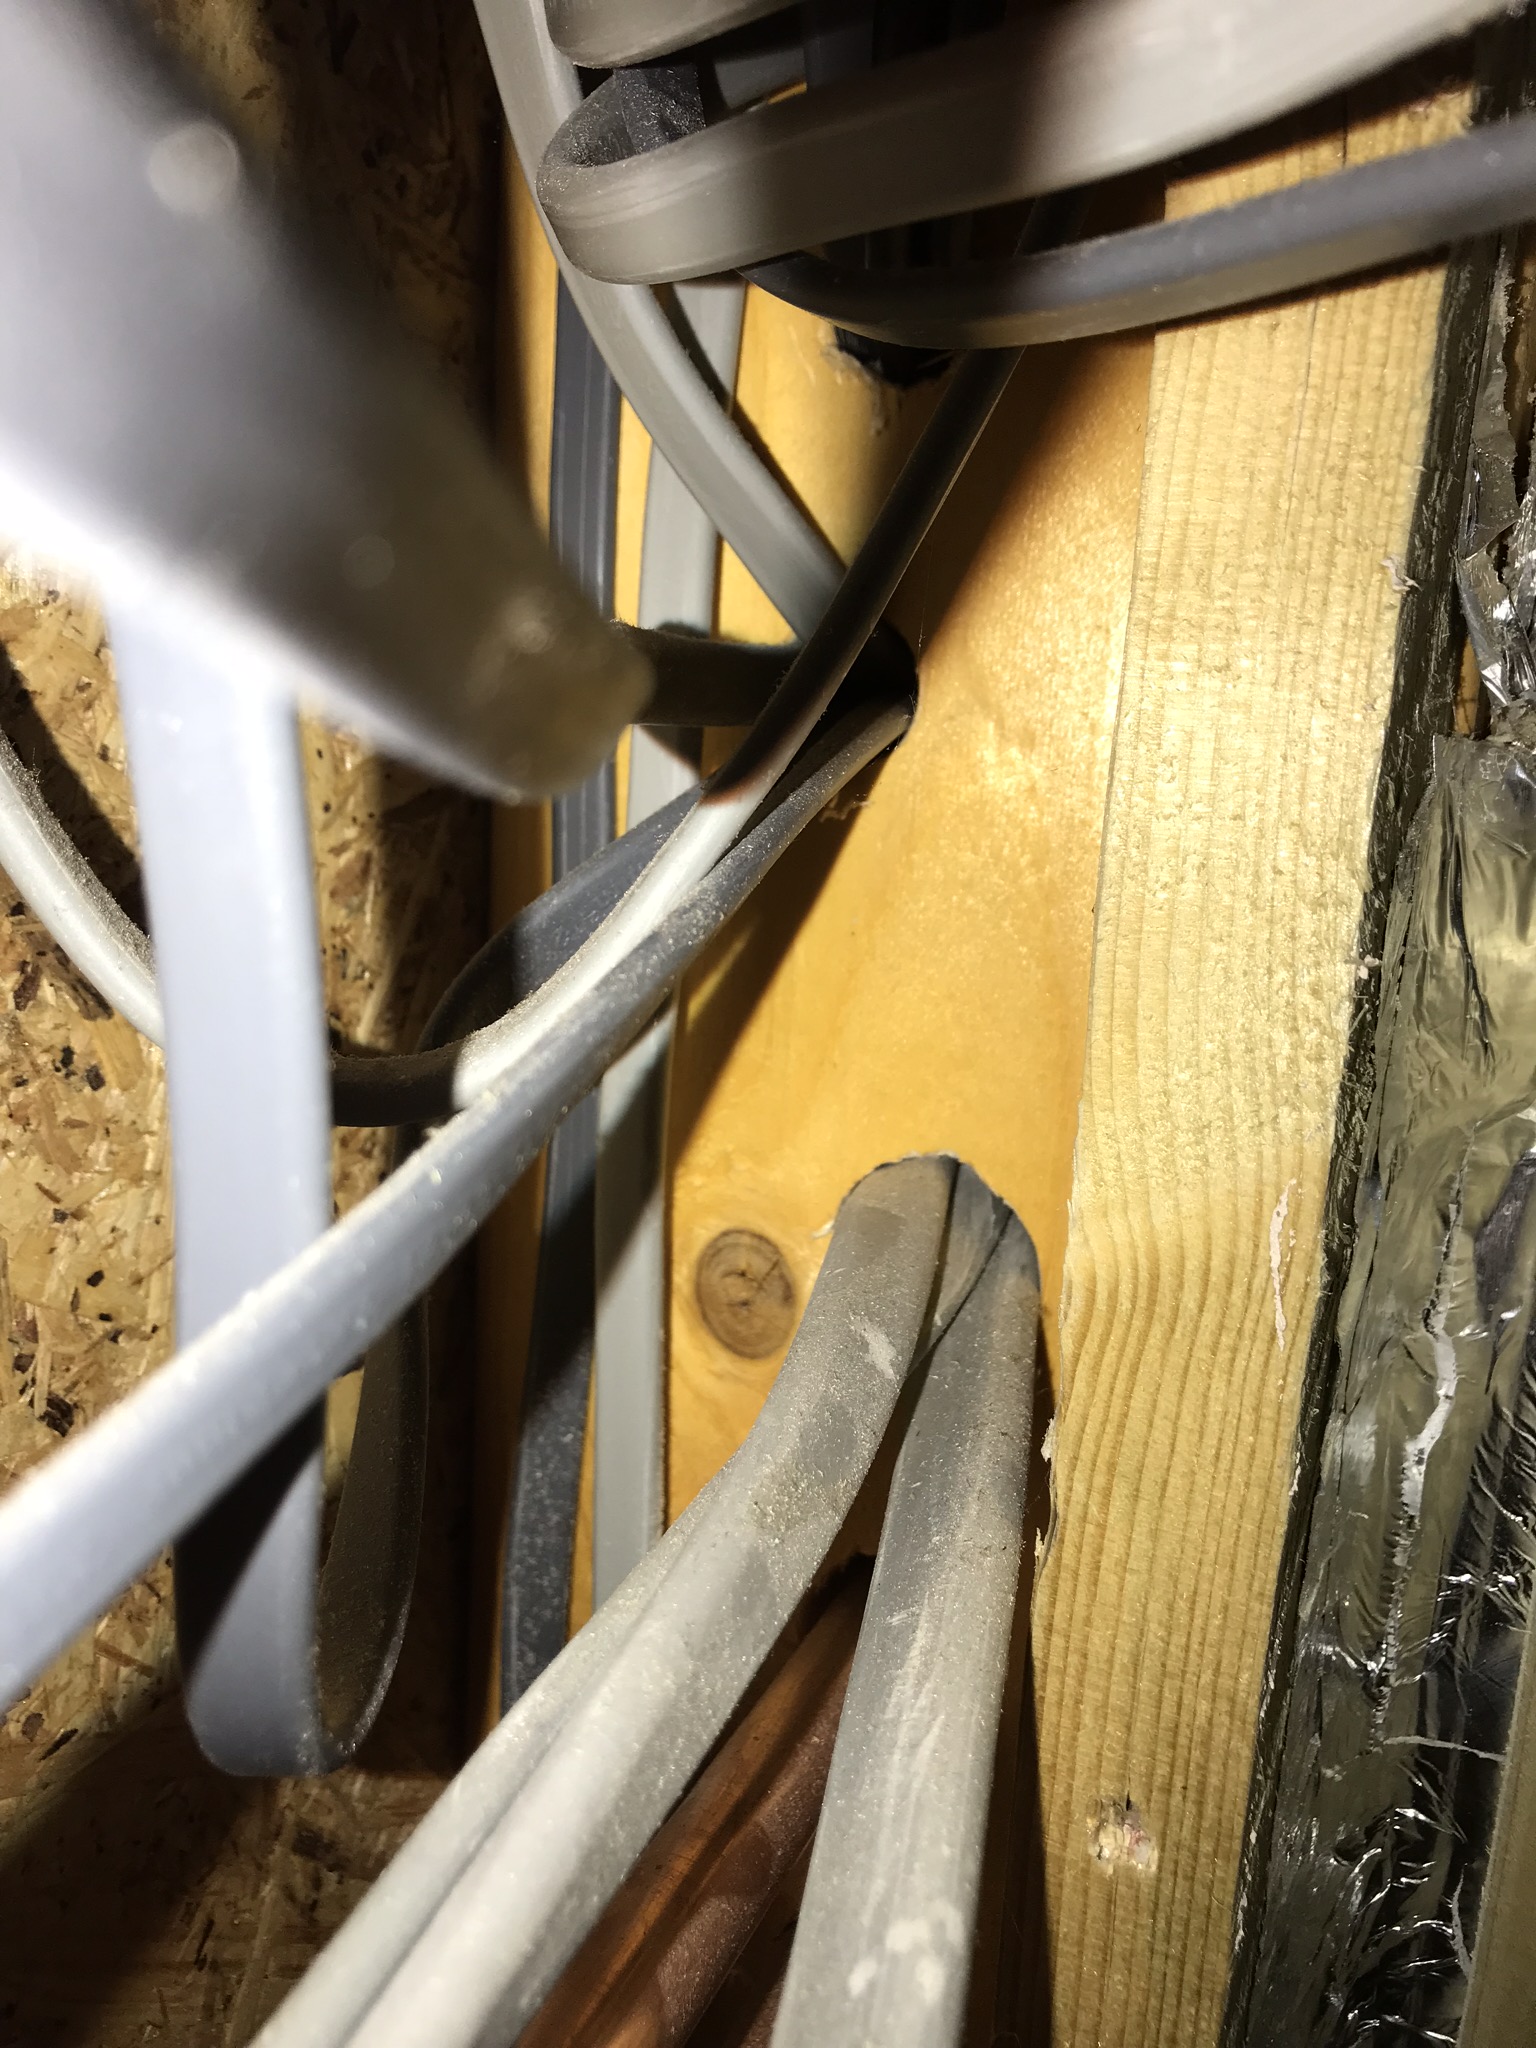
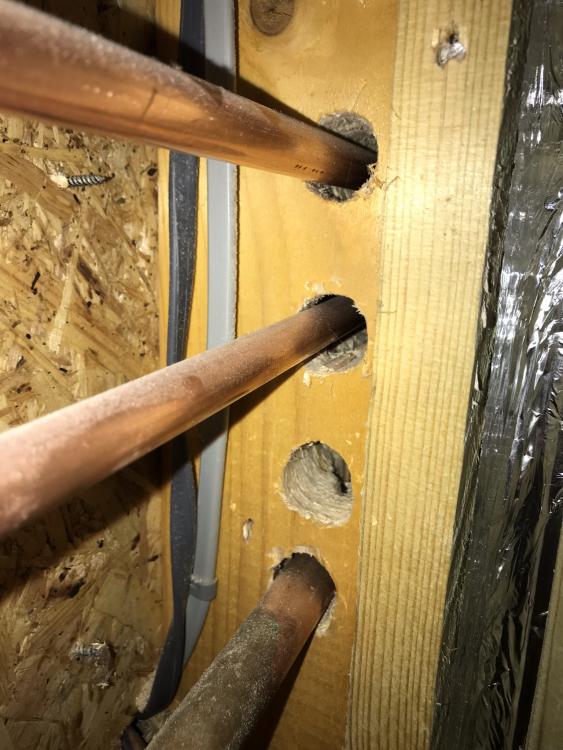
Looking for the best way to achieve airtightness where pipes and cables go through joists. I have used Pro Clima cable grommets elsewhere, but these cable and pipes have been installed already. Wondering about cutting a grommets and sliding over or maybe using Tescon Vana tape? Was planning on puttting some felt pipe insulation in the hole too. Thoughts?

-
At the risk of sounding like I know what I'm talking about, should I dwang my joists? All those in favour say 'Aye', all those against say 'Nay'. Where's he dug that up from then? Here This is the relevant passage. '... The slimmer JJI joists have been plated at their ends and dwanged (horizontal braces) to form a rigid structure. Two thicknesses of 12mm plywood will cover the ends, followed by the green vapour membrane being folded up over to give a vapour barrier. Insulation board of 140mm thickness will be fixed on top of that to bring it flush with the Durisol blocks below.... ( https://edinkist.wordpress.com/diary-of-the-build/)
-
Currently working on improving my house. Will be adding cellulose to the loft but first I'm sealing up all tops of stud walls. I'll be foaming and taping all joins for stud walls and taping any other obvious gaps but I'm not sure how to go about sealing around the lighting cables. I don't have any socket cables feeding down to all the bedrooms which makes it a little easier but still how should I go about sealing these holes around the cables? And for that matter to the lights themselves. I have large insulated covers for both of my single bathroom led downlights and the extraction is from a new mvhr unit so no need to worry about wiring to individual extractors anymore Many thanks James
-
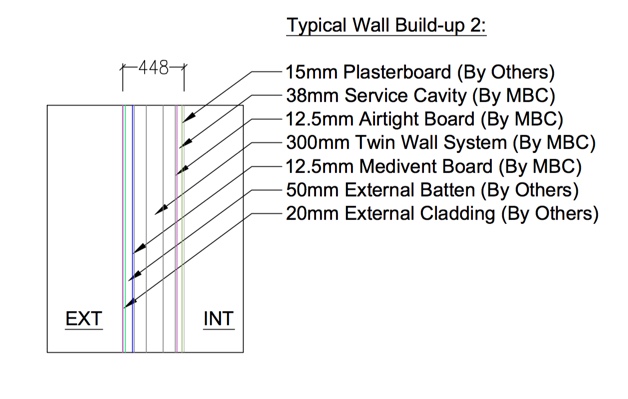
We've got a couple of places where we're having built in wardrobes. In one area the house design is such that the depth of the alcove which will contain the wardrobe is only 570mm which after doors is likely to reduce down to 540-550mm of internal depth. This is slightly smaller than the recommended 600mm depth for a wardrobe (Having said that we have a couple of free standing wardrobes that only have an internal depth of 550mm and a coat-hanger is 400mm wide, so perhaps not a huge issue?). Anyway it got my mind thinking about the 38mm service cavity in the back wall of this alcove. At the moment I don't envisage any services at this point so this is feeling like wasted space which I could recover for the wardrobe. However, does it also act as a ventilation gap (MBC Timber Frame) or provide other benefits (such as aiding airtightness of the frame)? The last line also leads to a further question. "If you place a screw into an airtight board do you compromise its airtightness?". I accept it might to an extent but surely its by a tiny level? Or even nil if a squirt of silicone was applied to the screw thread? Typical wall build up for info:
-
We are considering fitting air conditioning to our MBC build and I’m just working out how best to get the pipework fitted if we do go down this route. It’s looking like the best way is to fit a conduit, make it air-tight around its perimeter with an air tight grommet, push the copper pipe complete with its insulated sleeve through the conduit and then squirt some low expanding foam (or something similar) into the conduit just to improve the seal between the conduit and the pipe insulation. As an approach, how does that sound? And is the low expanding foam idea a good one or not? TIA