


ruggers
-
Posts
335 -
Joined
-
Last visited
Everything posted by ruggers
-
Storage combi or UVC choices for new build
ruggers replied to ruggers's topic in Boilers & Hot Water Tanks
Have you found your top floor doesn't need it and is too warm due to the heat rising? It's a shame your limited to Tado with them being so expensive. The prices seem to range from £100-160 each. Did you choose RF or wired stats, is the wiring centre tado too and does it control actuators or jus tell the pump & zone valve to kick in? -
Storage combi or UVC choices for new build
ruggers replied to ruggers's topic in Boilers & Hot Water Tanks
Chablais, I share your view on the HWRC, if it can be avoided. The 10mm sounds like a good way to avoid this for my furthest outlet. @Adsibob Do you have UFH on both floors, and using the Tado stats, are these still linked to WC or do they replace it? 12 is a lot. -
Storage combi or UVC choices for new build
ruggers replied to ruggers's topic in Boilers & Hot Water Tanks
Thanks guys. I'm surprised with the 10mm providing the flow, I didn't think it would be up to the job, it makes life easier dropping smaller pipes down the wall from upstairs & hiding them, then just step it back up before the sink & add a couple of 15mm iso valves. I work it out as being 2/3's of the internal diameter of a 15mm pipe. I don't have very good water pressure in my current property, not sure if this plays a part in delivery time. If i use 10mm, there might not be a need for the HWRC with bronze pump unless theres advantages to one I'm unaware of. @Chablais @dpmiller Do you have secondary hot water circuit or not required? @Beckside Thanks for the detail. The info when searching has been limited and varying on it running 24/7 and some saying it cant be turned off so it's good to hear from someone who has it installed, I know it's been around a long time but it's still quite rare in the UK it seems for the majority. On off features are a definite no, WC vs load comp are my choices. The log burner choice was decided some time ago as we liked the idea of one & we have about 8 years worth of logs, but i know what you mean. -
Storage combi or UVC choices for new build
ruggers replied to ruggers's topic in Boilers & Hot Water Tanks
I've just had a thought, so a question for anyone with WC. Which does it work best with, UFH or radiators? WC is proactive & radiators react quickly to changes, but the delays in a screeded UFH system heating an cooling would fall behind what WC was instructing it to do. The mixed rad & UFH system would work completely different. Does anyone know if you can use a Viessmann boiler with load comp instead of weather comp? Strangely their website mentions the addition of an indoor temp thermostat coupled with WC, not sure how that works at all. -
Storage combi or UVC choices for new build
ruggers replied to ruggers's topic in Boilers & Hot Water Tanks
@PeterWI think I'll need a HWRC, all outlets would be within 6m of an UVC so fine without one, but the kitchen sink is around 12m away. This will increase if I use a 222-F storage combi due to different location than the tank. If you add a HWRC after the blending valve located at the tank and set it to desired temp 45-47C, would this maintain it's temp enough over a larger HWRC? Are you suggesting to not add all of the outlets to the HWRC? 12-16m in 10mm to the kitchen sink might still take a bit of time, i thought it would give poor flow at that diameter. As an example, I currently have 16m from a combi in 15mm & it take 50 seconds for full temp, it feels like an age. Any reason for the 48c boosted to 65C when using an ASHP but lower if from a gas boiler? -
Storage combi or UVC choices for new build
ruggers replied to ruggers's topic in Boilers & Hot Water Tanks
-I didn't think the pump running constantly would be very efficient or allow it to last long, thought there might be an off period in the night like when your set back temp is on or does the heating come on in the night also? Is it best to set up WC room temperature for the room you want warmest & then reduce flow to the rooms you want cooler with UFH & turn down TRV's on radiators? So if you put the wood burner on, the return temps at the boiler will be detected and turn off or reduce the heating to the rest of the house? I think this is where room/load compensation might suit me more than WC. I can understand WC has great comfort levels, but a log burner or hot kitchen can affect the heating to the other rooms. Thats good to know, whats the best temperature to store hot water so people don't scald their hands at the sinks? I keep seeing mixed info on this and it stating commercial & domestic new build from 2010 require TMV's on baths to comply with part G of the regs. I always thought they had to be within a certain distance of the outlet otherwise the tank seems a good place. -
Storage combi or UVC choices for new build
ruggers replied to ruggers's topic in Boilers & Hot Water Tanks
Sorry for the delay, I follow topic but not getting notifications without checking. I believe legionella has to be considered with new regs for builds for a number of years now. Either the water needs stored at a higher temp than 62C (ish) or set on some timer program that boosts it every 48 hrs/week/month, unsure of the interval. This is why I wanted to find the easiest solution if i must use an UVC. Having TMV at 5 sinks outlets and 2 baths then trying to hide them but also access them for replacement or servicing seems a right pain, I don't know how long they last. So a couple of WC questions on what you've put. -Does the heating pump run 24/7 in winter, or does it just over run for a period after the burner turns off? -Do you still have a program to turn it off at night or in summer. The house inside is often below 20C in summer but I wouldn't want it calling for heat. -Can you set more than one temperature for the day. Eg: My morning temp is set at a lower temp than at 5pm > in winter, then night is a set back. -This ones confusing me...If you set your WC desired room temp at 20C, does that mean every room has to be 20C? I personally don't need my kitchen as hot as the living room for example. If using radiators, I guess you set the boiler for the warmest room & can then turn down other rooms using TRV's. Not sure how that works for UFH though. -What is if you wood burner fitted, WC won't know whether it's on or off? -
Storage combi or UVC choices for new build
ruggers replied to ruggers's topic in Boilers & Hot Water Tanks
I'll look into the cylinders soon, so many types & sizes, solar twins coils, fast recovery ones, Gledhill, megaflo and vitocell, this will determine my boiler size i guess. If designing the flow temps for 50-55C with priority hot water stored lower than 60, how often does the legionella cycle need ran? Are heat loss calcs just each room added up in watts and then totalled together after the relevant conversation factor has been applied based on your DT? I thought my SAP would include the heat losses per room. I was getting my wires crossed with load /room comp & WC. Looking further at WC, you select a flow temp, then a desired room temp, then your coldest day along with a suitable curve & it works with the outdoor sensor to modulate & maintain even temp. But is there an indoor temp sensor, how else can it know what the temp is inside your house and instruct the boiler to turn off once your desired temp has been met if it only has the water flow temp to measure from? Yes most locally don't fit divicons & LLH. Do divicons work with any boiler or viessmann only? I had a look at the mixed ones, do they just fine tune the water temperature as an extra on top of the boiler modulation? I'll size the rads myself but I'll get a company like continel or wunda to do an UFH plan, I was going to go for 150mm centres, someone said I might need 100mm for future proofing for ashp? Out of interest, what size and model tank did you select to go with the W200. -
Storage combi or UVC choices for new build
ruggers replied to ruggers's topic in Boilers & Hot Water Tanks
Thanks @Chablais, I also liked the 222-F for the reasons you mention above. Two showers at the same time is the most we will ever need running, or a shower ran after someones ran a bath so quick refill times are required. I hear varying times for this so assuming I need a fast recovery cylinder. It's trying to figure out an option A & B, because heat engineers in business can't be giving away free advice all day, and not a lot of people locally seem to be interested in anything out of the norm, I'm also in Cumbria. I contacted Viessmann regarding their system & storage combi's and they said their warranty is 5 years but can be 10-12 years if fitted by a trained installer, the closest being 50 miles away. I could do with knowing which other boilers have good modulation & reliability to check out. I will be doing a good job of the air tightness but won't be able to achieve the insulation levels some of you have got. What boiler did you end up fitting with the UVC? I suggested a solar twin coil cylinder to a local plumber with both coils connected to the boiler flow for quicker cylinder recovery but they dismissed it as a bad idea saying it wouldn't work. -
Storage combi or UVC choices for new build
ruggers replied to ruggers's topic in Boilers & Hot Water Tanks
Thanks. Were you not tempted by an ASHP? It seems that everyone using the Viessmann products opt for no zones or stats which I need to look into further, I'm not really understanding how that works, I know it's new tech with Weather comp, but 1 thermostat for a whole house without WC just sounds like how it was done 30 years ago. Are people also doing this in their houses with other brands of boilers? The plus side to having a tank would mean that the house should be set up to swap from gas to something else in the future like ASHP without pulling ceiling in to alter pipes. I do like the sound of the storage combi for the reasons you mention being continuous DHW and the heat loss from cylinder. Although MVHR should recover some from that room. I had a look at an ATAG system boiler but they don't mention any modulation or figures. -
Storage combi or UVC choices for new build
ruggers replied to ruggers's topic in Boilers & Hot Water Tanks
Hi, thanks for your replies, @BecksideAlthough more zones is probably adding more potential failures with the actuators, the reasons I wanted them was for control of both temp & times. Upstairs I have a mancave/office for working from home & I liked the idea of heating just the one room rather than the whole upstairs when I'm in there during the day or late at night if others are in bed and don't want the heating on, or not having the kids bedrooms coming on at 5 & 6am when I need heating on for work. Same for the living room downstairs of a weekend evening when we aren't using the other ground floor rooms. I'd still have a set back temp on as I'm aware that hot goes to cold. I had it planned to leave towel rails & the hallway & landing (core of the house) on no zone so they warm up when other zones call for heat & to reduce any short cycling. I'm not fixated on this way over just having an up and down zone only, but I do like the idea of some zoned rooms. Wunda stats weren't too bad at £30 each. Divicons & LLH are a new suggestion to me which I'll need to research more. As you say not cheap to buy but I've heard cheap running costs. Why did you choose divicons instead of a mixer & pump on your manifold whats the difference? Do you have a rapid recovery cylinder? How do you set your indoor temperature with only an outdoor WC sensor? @JohnMoCurrently haven't started, obtaining quotes again, been in the works a while with some issues, so still able to alter rad sizes or anything else. I'll be installing the UFH & rad system but leaving the plant room to someone qualified. I think ASHP will be out of my budget at the moment but would like to size accordingly for using one in years to come hence why I was wanting to design for 50C Flow (DT20). This is the higher end of an ASHP scale, but if I go too low due to room sizes my rads will be huge & towel rails would need to be electric. The Viessmann 200 system boiler & 222F 32Kw modulates to 1.9kw (1:17) it says. The 222F has a 100L built in storage tank that recovers quickly & can manage 2 showers easily so that was why I found the combi appealing, no UVC to service & storing less hot water should be cheaper, not sure about legionella. without divicons I was looking to have a mixer & pump on the UFH, and on the upstairs manifold, just use the boilers pump, no mixing valve required for this. What were your reasons to choose the combi with buffer tank & not a heat only or system boiler? -
I'm looking for some advice on pro's & cons of each system. I know everyone has their preferences on models too but I'm just trying to narrow down my choices, I was looking at a system boiler or heat only with UVC with good modulation & then I recently discovered the Viessmann 222-F Storage combi. I'm just unsure if the Viessmann 200 or 222F can work with what I wanted, being some zoned areas controlled by room thermostats. Info. New self build with MVHR, SAP levels are high so combi would help more than UVC. Wet UFH downstairs in screed, radiators upstairs on separate UFH manifold for end to end connections with actuators, 2 separate wiring centres. Wunda trade looked good. Also looked at Salus & heatmiser. Radiators sized for a 50 or 55C flow, UFH around 40/45C with room temp at 20C & -3C lowest. Occupants, 2 adults 2 kids. main bathroom bath with separate shower, downstairs bathroom shower within the bath. Could be a mixer shower or an electric one, mixer preferred. Currently manage on 1 bathroom with a standard combi but need to prep for 2 showers simultaneously in future. Usually like 10-12 min showers, don't like high pressure ones. 222-F would suit our needs but can it work with zones & wiring centres? Weather comp, load sensing & priority hot water required if using UVC. Divcons & low loss header has been recommended by an experienced heat engineer. Any other boiler suggestions welcome?
-
Cold bridging at cavity reveals and floor slab detail
ruggers replied to ruggers's topic in Brick & Block
The regs say that building regulation part B requires you to have fire rated cavity closers. Is this something new as some of you have used your own methods, ie: PIR jammed between or premade plastic closers? -
Cold bridging at cavity reveals and floor slab detail
ruggers replied to ruggers's topic in Brick & Block
I'll try & get a sample of some. I was just curious to how long it took to expand once took off the roll and applied to the window frame, and whether or not you apply before or after the fit. A youtube video shown it being fit afterwards but looked fiddly. Is the roll useless once opened? -
Cold bridging at cavity reveals and floor slab detail
ruggers replied to ruggers's topic in Brick & Block
I see what you mean now after looking back, easier method with tapered reveals. Is that a standard window detail or something different (Looks like 2 squares)? I'd not heard of compreband expanding seal adhesive foam. I thought it was just the standard stick on foam strip. Whats the working time on the foam expanding? Did you fit it prior to fitting the frames or afterwards. I was thinking prior would make it too hard to fit air bags between frame and brick work when installing. I just meant my inner and outer skin will be the same width apart, square reveals not chamfered back like yours. the checked reveal shown here does look a good idea but i'm unsure what the frame bears down onto when not using a precast sill as it would just be hovering over the cavity. My UPVC frames were just going to rest partially on to the outer leaf. (No stone sills) I agree with you on this, but with B.C being involved and warranty inspections, I wouldn't get away with a 50mm angle, they even like DPC turned up ends or on the trays to prevent water run off to the sides. As you say, they will just collect all mortar and weep holes could be blocked from the inside. Even the best bricky can't prevent it dropped down the inner.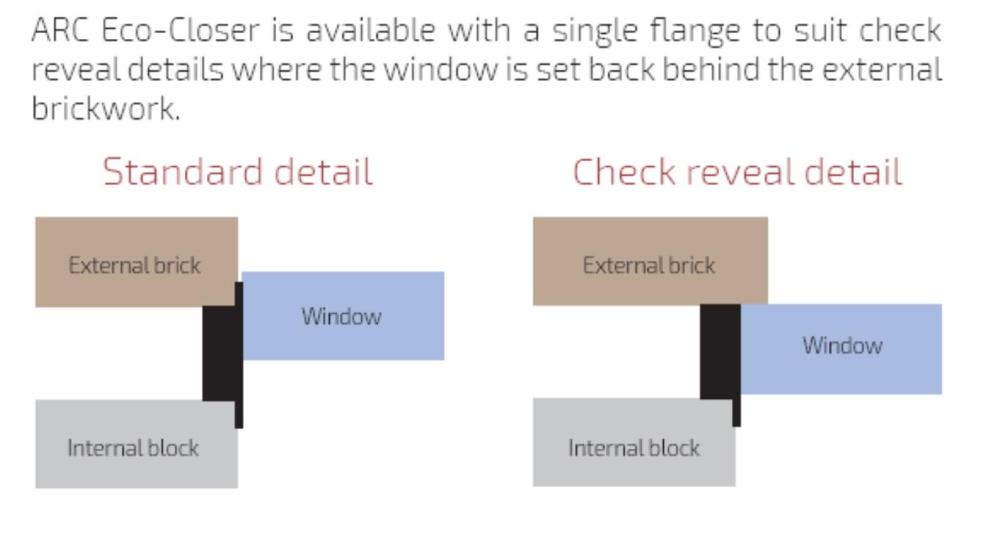
-
Cold bridging at cavity reveals and floor slab detail
ruggers replied to ruggers's topic in Brick & Block
Can you not just seal the board to the frame same as you would using the stop bead. What advantages does the stop bead offer if it's getting a bead of sealant anyway. -
Cold bridging at cavity reveals and floor slab detail
ruggers replied to ruggers's topic in Brick & Block
Good to know they hire them if need be. For the little use I'd need one for but concrete screws probably do the job for me. Very impressive though they can puncture through thick steel or stone. I've got a mate who fits suspended ceilings and i think they might use something similar. -
Cold bridging at cavity reveals and floor slab detail
ruggers replied to ruggers's topic in Brick & Block
@joe90Where did you mean to use the stop bead, the internal or external reveals and would you go both sides and the top? I'm guessing you mean the outside if your window straps fasten to the outer skin so as they'll of needed covered. I'm on the West coast lake district so we do get really battered in winter I've not seen anyone use anything other than timber frame or partial fill cavity @saveasteading i've looked at everything and can't see any noted difference other than radon usually being red or green. Both are 1200 gauge and 300mu. I'm also right on the edge of a red radon zone by map, but a report for some builds around mine the report said no radon present. Not sure how they've checked. Can't imagine any houses that already built checking. @dpmiller Seems like some still use recycled. https://www.plastics-express.co.uk/dpm-1200-gauge -
Cold bridging at cavity reveals and floor slab detail
ruggers replied to ruggers's topic in Brick & Block
@IcevergeThank you for taking the time to add the drawings and detailed reply. Apologies for the long delay in replying, I wasn't notified and only seen them a few days ago. So with so much content, i will ask a a number of questions related. Firstly, what is the purpose or benefit of a the OSB window box rather than just sealing the window to masonry using A/T tape plus A/T paint and applying plasterboard direct over it without the OSB? does the timber close off the cavity better helping air tightness? You mentioned Degrading osb boxes with weather? What is going to degrade them if they are on the inside? Do you fix your window straps to the masonry direct with OSB over the top, or is it OSB direct to masonry, and then then the window straps sandwiched between OSB & plasterboard? How did you fix the plasterboard to the OSB, adhesive or screwed? Why the A/T tape between window frame and brickwork, is flexible sealant not just as good if the gap isn't too big? I noticed you opted for an open cell foam adhered to the external of the frame, what benefits does this offer over acoustic window foam from a gun, something like this... https://www.uksealants.co.uk/illbruck-fm330-air-tight-expanding-foam-gun-grade.html?gclid=Cj0KCQiA64GRBhCZARIsAHOLriKTW9VOqg5cwkyXSigMWuGZFUPsYyJ3RkoUdEYkdELQU9yWbMlMfHMaAsjxEALw_wcB I'll be using flush reveals all round but this shouldn't change too much from your first example but would with the revised version. How were the internal sills fitted, screwed from the top and filled? I've seen it done with angle brackets to the underside and then fastened to the inner face wall so no visible screw heads to be plugged or filled. Good idea but probably destructive to the wall if you ever needed to change them. I was thinking for aesthetic reasons about adding too many layers to the inner reveal can mean the finished plasterboard face ends up close to the glazing which looks terrible. I like a equal distance around all 4 sides bet I can between finish skim and the glazing. My current home I don't like how little frame is left visible on the vertical inner reveals looking at the window. With having building control and warranty inspections, the small angled cavity tray wouldn't be enough, they require stepped DPC or plastic cavity tray built into outer skin and resting against the inner skin with exterior weep vents. I agree on catching mortar droppings landing on the trays. Your drawing looks like the DPC is a course too low on the outside if you've used concrete lintels instead of metal insulated catnics. DPC tray shouldn't come out above the frame or it would be hard to adhere to as you mentioned. Shot fired nails, I had to look these up, do you not require an £800 fixing gun to use these? They just fire into concrete in one shot no pilot hole? -
😡 I replied to this but it never posted. I think theres plenty of info. now to work various options now thanks to all, i'll come back to this with my instal at a later date. @Nickfromwales I get where your coming from on over thinking it, but may not have explained clearly what i was referring to. Imagine a shower trap set in a ground floor, waste pipe passing horizontally just under the screed until it passes through the cavity wall to the outside and then turns 90 degrees downwards via a glue fit elbow and discharges into a gully type drain. If this outside pipe become damaged in in way, you'd need to cut off the elbow which wouldn't leave enough pipe protruding through the wall to glue another one on. So the whole pipe would require changing thats encased under or partially within the screed. A sleeved pipe would allow all to be changed but you'd still need to take up the shower tray to access the trap if set on the floor.
-
Cold bridging at cavity reveals and floor slab detail
ruggers replied to ruggers's topic in Brick & Block
I will look into the blown bead again, I spoke to a firm called Koresystem who supply blown bead who provided a lot of good info. but they weren't pushing it so much once they realised the exposure zone. It's looks a great way to do it, but it makes me nervous, if it goes wrong it's disastrous. wrong as in causing damp or water to track towards the inside somehow. There must be a reason it's not recommended in zone 4 and if it comes down to the type of pointing, flush joints zone 4 but recessed is zone 1 that doesn't sound right the mortar being the decision maker. There also seems to be a lot of cowboys installing it who just wanted the government grants for retrofits so it would need to be a reputable company. -
Cold bridging at cavity reveals and floor slab detail
ruggers replied to ruggers's topic in Brick & Block
Thanks for the link, interesting read, the very last part - 3……Fit plastic covered insulation rebates to the vertical reveals ? I'd have thought that problem applies to blown bead too, not just PIR. I didn't think it would be such an issue if the windows foam filled and taped between frame and reveal. I can't picture L brackets on the external leaf, thought the fixings just went through the frame for external leaf fixing. Was building control involved in your build/renovation? My provisional plans were saying all opening reveals require some type of fire board installed, not plasterboard type. Tony, did you use separate lintels over your openings like concrete ones if they don't bridge? How are the pegs fixed to the outside skin for the window frame to rest on? -
Cold bridging at cavity reveals and floor slab detail
ruggers replied to ruggers's topic in Brick & Block
@BrickieI'd like to ditch the PIR after reading many posts now, but it's most commonly used locally apart from those going timber frame. As mentioned in my first post, we are in a severe wind/rain area on the NW coast which doesn't allow for blown bead unfortunately. I'm aware that PIR can off gas and degrade slightly in performance over the years, I'm hoping to either fit insulation myself & either tape joints or use low expansion foam during installation as best as I can. Builders definitely won't tape it and it's probably not practical since it rains a lot in England. A change of construction at this stage would involve too much time & cost unfortunately. I didn't think I'd need to be so involved but I've learned things from this forum thats been put on my design which aren't good. @SuperPav Thanks for the sketch. When using this method, do you wedge the cut insulation between the outer leaf and the cavity insulation, or between the outer leaf and the inner leaf? I've used closers on my current home years ago but the window was fixed to the outer, then i used 15mm plasterboard to close the reveal off. Cant remember if i used d&d or mechanical fixing into the inner leaf with some adhesive behind. My course heights need to be the same throughout but inner reveals could be set back the thickness of ply board if needed. -
Cold bridging at cavity reveals and floor slab detail
ruggers replied to ruggers's topic in Brick & Block
@tonyshouse I don't really understand what you mean by couldn't see the difference between the reveal and face of the wall? What were the steel pegs attached to or resting on, do they bridge the cavity? Reason i asked about vertical DPC down inside of outer leaf, was same detail as returning blocks but to prevent the wet outer leaf brick soaking into the PIR which it doesn't like. @IcevergeThanks for the image, It looks a good method as you say for taping the reveal to window frame, I presume you had to close this way when using blown bead. Were your inner & outer reveals flush or did you have to set the inside leaf back by the thickness of the OSB? Where does your window sit and fix to? I want to avoid fixing into the outer brick as they can be brittle. With your method i'm thinking the window straps would fix over the ply not behind so the finished reveals don't need ripped off to change window frames in the future. -
Cold bridging at cavity reveals and floor slab detail
ruggers replied to ruggers's topic in Brick & Block
The radon barrier is a red membrane but its still 1200 gauge, I can't see how it offers any benefit over a standard DPM other than satisfying building control. I've made some enquiries & you can test a built house for radon gas but not a plot of land. The radon charts for areas are based on stats not actual houses having it unless someones had a test done when built. So it seems you either hope for the best or add sumps and vent pipes with fans at cost. Beam & block would be easier to vent, can't see how you can stop it with a slab. Cavity closing - I get that the closers can be over priced but why do you say ineffective? I was thinking a partial return of block would give a better fixing to the window if its fixed using the metal brackets that face back inwards, i presume you used these if your window sits back over the cavity? Did you run a vertical strip of DPC between your sheet closer & the inside of the outer leaf?
