Adsibob
-
Posts
3604 -
Joined
-
Last visited
-
Days Won
10
Everything posted by Adsibob
-
-
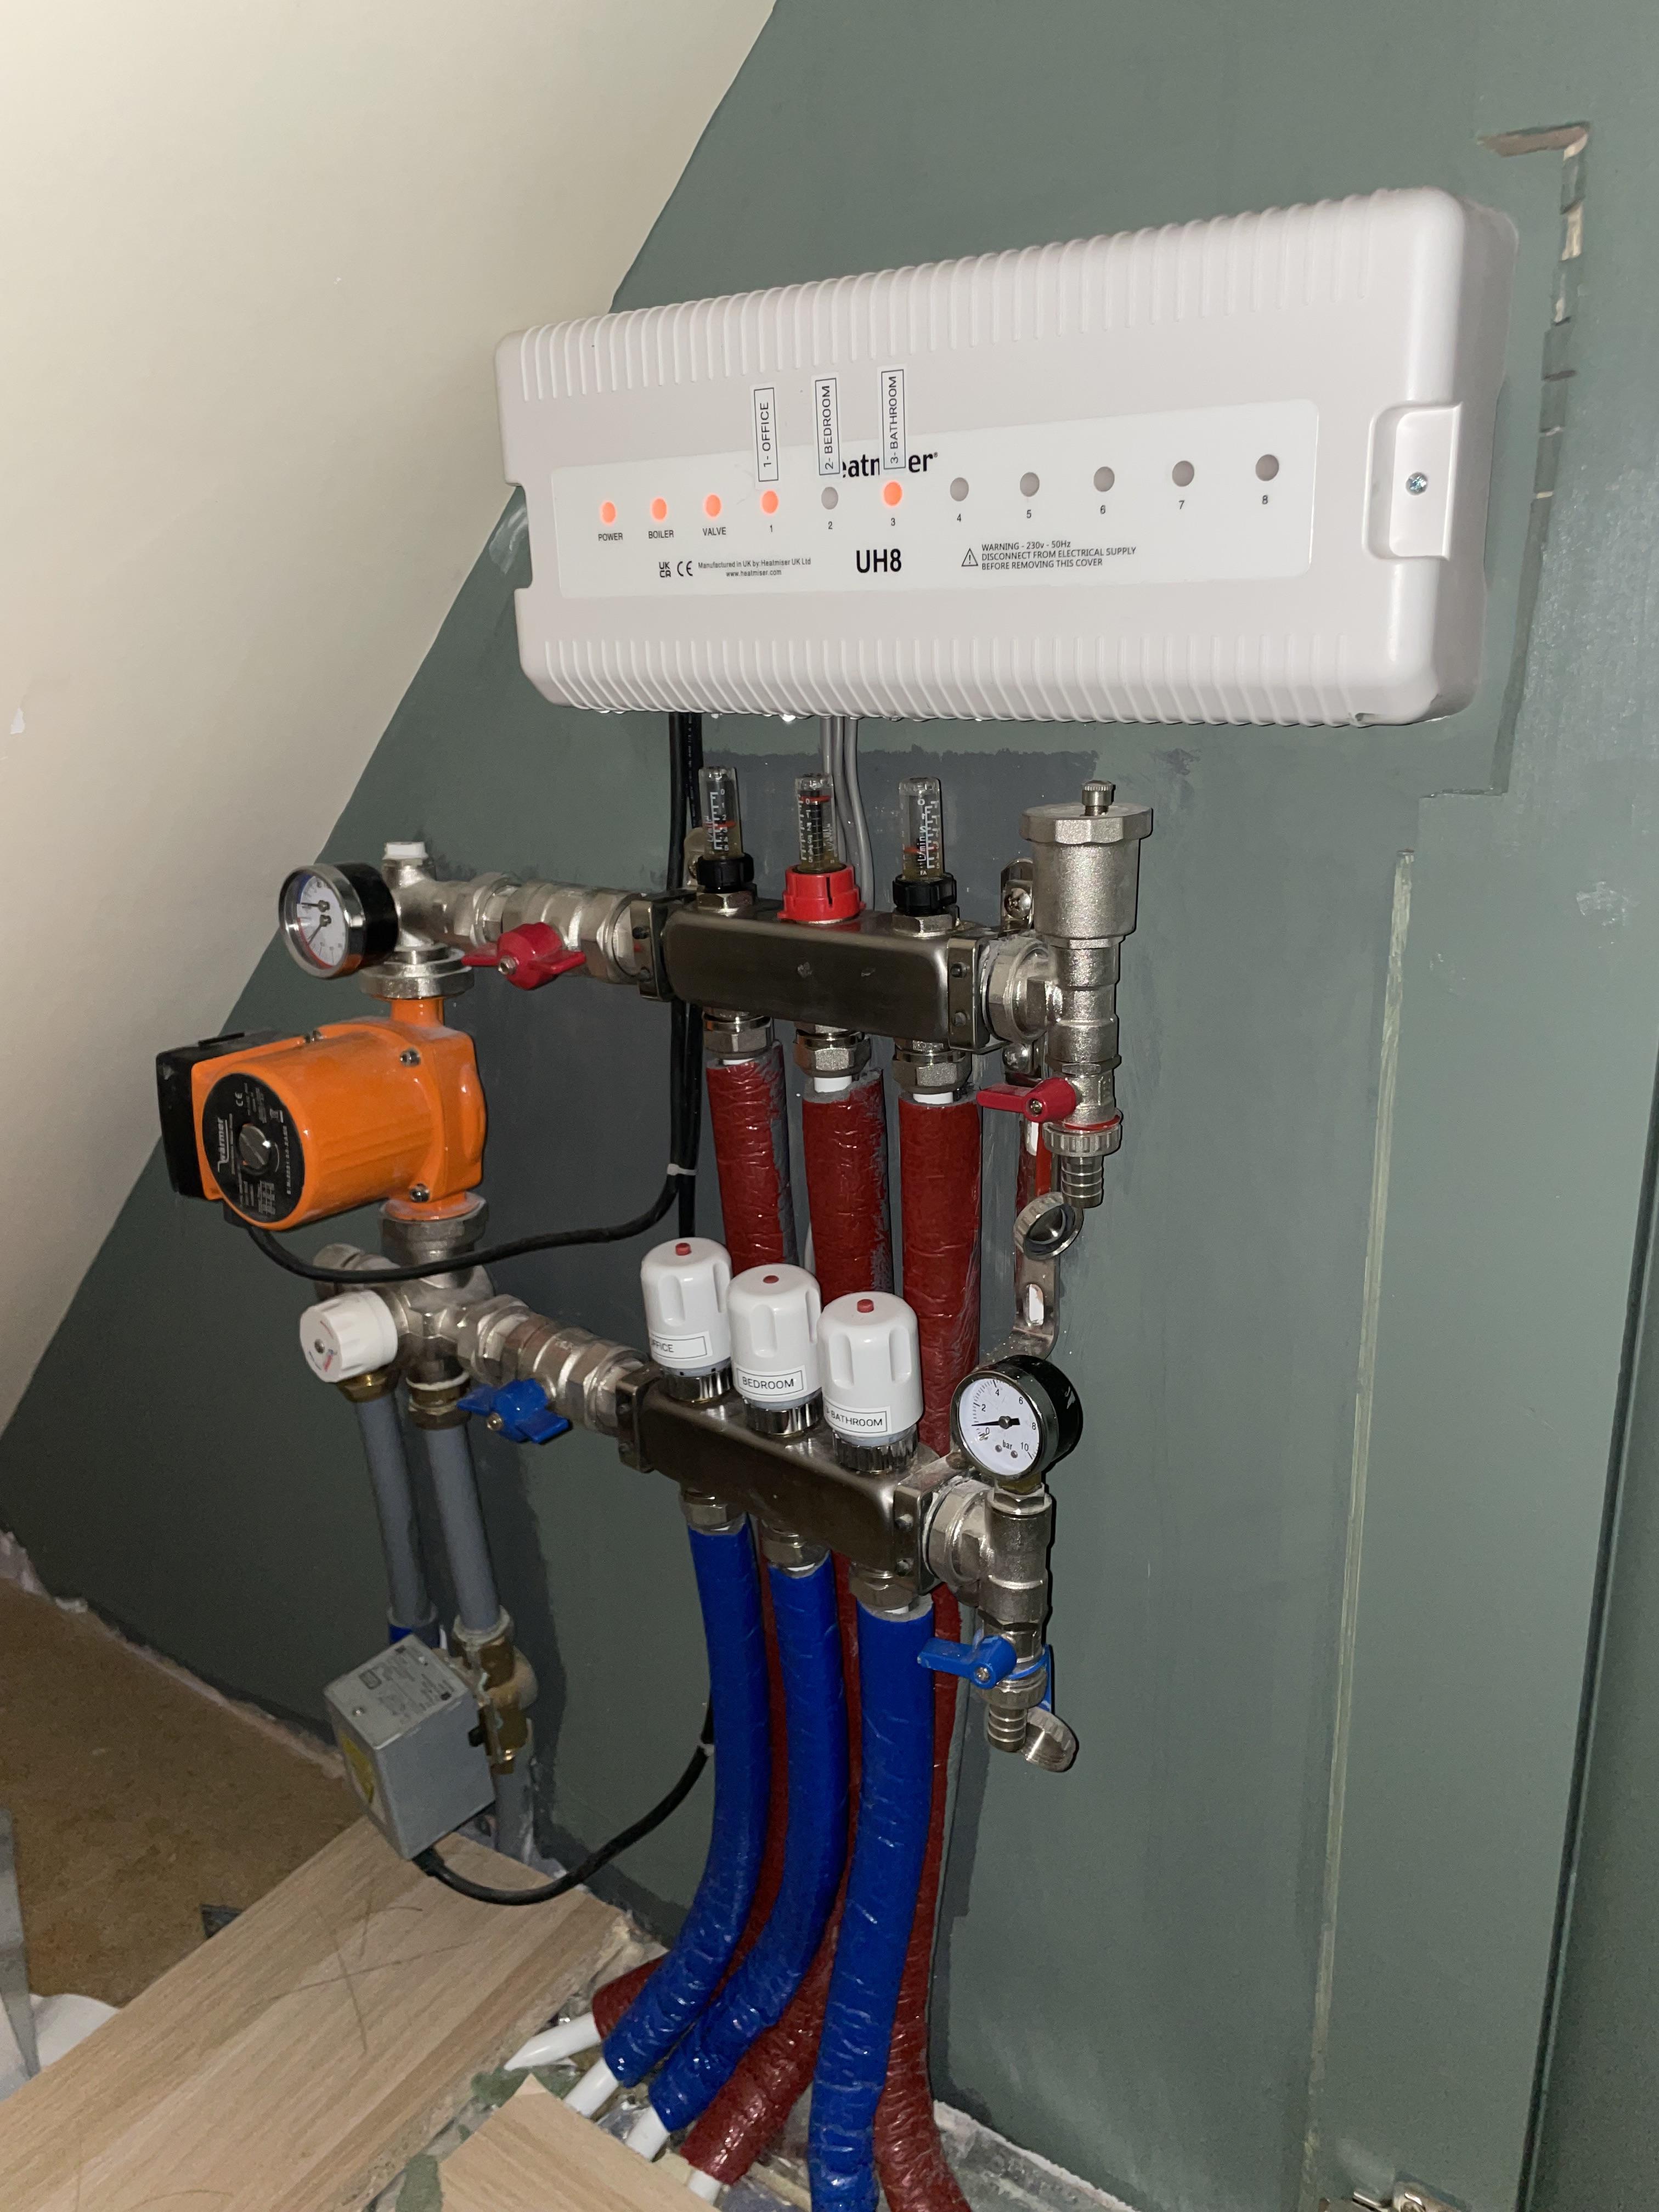
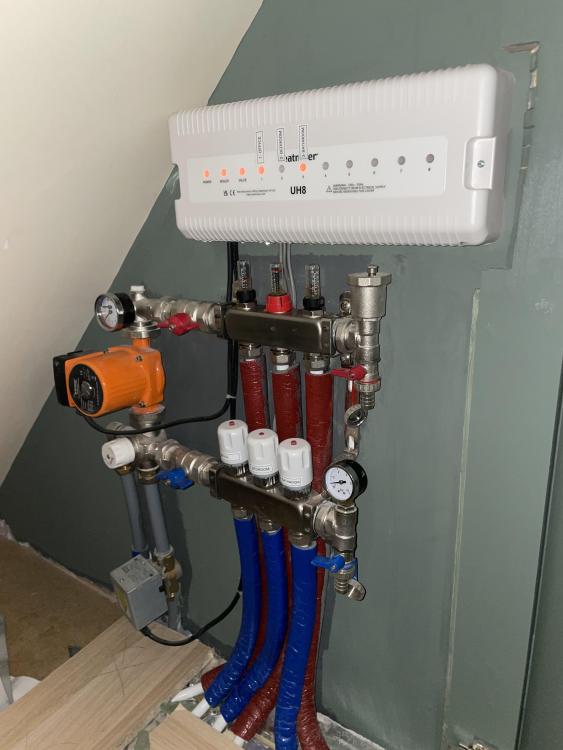
I unexpectedly had to wfh today for the first time in a couple of months. Normally, the heating in my office (loft conversion, now the top floor of an upgraded and fully refurbed 1930s house) works well. It is not that responsive, but that’s the compromise we made with having engineered wooden flooring. We run the water temp at 35C, which is the lowest our budget manifold will allow, and after some initial anxiety that this was too high for the engineered floor manufacturer’s recommendation, it’s worked very well and the floor is fine. This is our second winter in the house. But today, this is how slow it took to heat up: I turned it on at 10:22am when it was 17.9C. It’s been on for the last 11.5 hours constantly and has only now reached 20.3C. The outside temperature at the moment is 4.5C and I think today the max was around 7C or 8C. You can see that before I turned on the heating, the room had already begun to warm up a little from solar gain and heat rising from the rest of the house, so the gradual temperature rise in the first hour at least had nothing to do with the heating being on. When I realised at 2pm that I was still wearing my coat and hat in my office I checked the thermostat and saw were only at 18.3C. At that point I checked the flow rate. It was at 2L. I tried increasing it to 3L. This didn’t really make any difference. About 9pm I tried increasing flow rate further, but turning the nut/valve didn’t do anything. I kept turning it until I accidentally pulled it right off and made a mess of water. Not that much, maybe 200ml or so max before I managed to screw the nut back on. That manifold has two other zones, each with one loop (so three different zones, each one with one loop). I noticed that the shower room on that floor was also failing to get to temperature, but on that flow valve, at least turning the nut increased the flow to 5L, the max on the gauge. But even at max flow, the bathroom took 3h to heat from 19.5C to 20C and we don’t have wooden floor there! So something is clearly wrong. The pressure gauge under my system boiler is showing 1 bar with everything off, and 1.3bars with a few zones on and the boiler running at 30% modulation and also 1.3 bars with almost everything on and the boiler running at 60% modulation. These pressure figures seem a bit low to me (I think normally when in operation it runs at about 1.6 bars) but it’s been ages since I’ve looked, and can’t remember. Any ideas? should I top up the water in my ufh to make up for the lost 200ml or so of water? How do I do that? Is it a tap on the manifold (pictures in further posts below) or just the way of topping up the pressure on the boiler?

-

How easy will it be to replace this broken bath waste?
Adsibob replied to Adsibob's topic in General Plumbing
Yes it can, though i don't have the right type of tool, i think i need a socket wrench, which I've been meaning to get but never got around to doing so. I have had a play around with the waste and manage to free it up such that it is now working again. I think one of my son's toys might have gone down there and caused the blockage. I'm now questioning what might happen in the future and how we've ended up with no access pannel though... we did a refurb at my last place and put in a new bath and that had an access pannel. I'm sure it's my own fault, but I do find it incredible that builders/plumbers/installers who would obviously know to put in an access pannel (imagine them doing their own bathroom) wouldn't think to advise me to install one in this case. -
How easy will it be to replace this broken bath waste?
Adsibob replied to Adsibob's topic in General Plumbing
There are no taps in the bath. This is the only thing in the bath: the waste with intergrated filler. -
I have a Vado waste in our bath that is integrated with the bath filler: https://www.vado.com/wastes-and-fittings-brushed-nickel-clic-clac-bath-waste-with-overflow The bath has been tiled in and there is no access to its underneath. Hopefully not a design/project management error! The filler works fine, but the waste has recently been jamming and not clicking up to open as it used to. It's only been used for 18 months in a house with a very good water softener, so can't be a limescale issue. I had forgotten it was integrated with the filler, and realised when I went to buy a replacement waste and looked up my paperwork. So my question is: will I be able to replace this easily without having to access the underside of the bath?
-
Help with new build design please
Adsibob replied to LaChab's topic in New House & Self Build Design
I certainly prefer @Bozza’s design. So much more sensible. One minor amendment to @Bozza’s design you might consider is accessing the WC via a little passageway that goes underneath the staircase, instead of through the utility. -
Help with new build design please
Adsibob replied to LaChab's topic in New House & Self Build Design
But two other issues I see, and why - again - you really need to draw in all of your furniture, are: 1) where does your sofa go in your lounge area? Not much use having a lounge you can’t lounge in. 2) are you sure your drawing is scaled correctly? the window at the bottom of the kitchen is detailed as 1.2m wide. That would suggest the width of that room is about 2.1m. But if the area of that room is slightly more than 40m2, then the dimensions of that room are 2.1m by 20m??? You really need a professional, or at least someone who knows how to use a tape measure. -
Help with new build design please
Adsibob replied to LaChab's topic in New House & Self Build Design
This is certainly an improvement, but two further changes I would make are as follows: 1) if “cloakroom” is meant to mean a room with a toilet in it, then have the door of the cloakroom open into the utility room, not the open plan kitchen/living room. This will help contain the smells. I would still make the cloakroom 10% bigger. 2) your hallway cupboard looks about 35cm to 40cm deep. Anything shallower than 54cm is going to be cramped for hanging coats, unless you don’t have a standard coat rail, and use hooks or a series of rails which are perpendicular to the doors. -
Help with new build design please
Adsibob replied to LaChab's topic in New House & Self Build Design
Short sighted in my opinion. House design is a real skill and although professionals don’t always get it perfectly correct they can really help you consider pros and cons of different layouts. Maybe it works for you, but I think your layout is really suboptimal and if you actually lived in that space you would possibly regret it, or simply miss out on a much better layout without knowing it. Ignorance is of course bliss, but I still think it would be a shame. If it’s a question of changing the consents you have already, then a professional will have some clever ideas and strategies about how you can leverage the permission you have already and get permission for something better. You are building a forever home. Don’t rush or skimp on the design. -
Help with new build design please
Adsibob replied to LaChab's topic in New House & Self Build Design
I agree. This is so much better. -
Help with new build design please
Adsibob replied to LaChab's topic in New House & Self Build Design
I just meant that your utility room is disproportionally too big compared to your kitchen. I really think you should draw in ALL of your cabinets, and other furniture, your hot water tank, all your appliances. Make it as close to the real life layout as possible. I think once you do that you will realise the utility is too big. I would seriously consider cutting a good chunk out of that utility room and making it into a snug that is open onto the kitchen, or a dining booth. Just seems wasteful to have such a large utility unless you need some sort of insulated workshop. -
Help with new build design please
Adsibob replied to LaChab's topic in New House & Self Build Design
Agree these are my concerns too. Could the utility room be 20cm wider and 135cm shorter? Making it 135cm shorter would then allow you to have a stud wall separating that additional space for the kitchen, and then 120cm wide space for two tall units accessible from the kitchen side, thereby mitigating the loss of 20cm width from the kitchen, as you could but your fridge and oven tall units in that space. -
Keep in mind what size floor tiles you’ll be installing. If small to medium, a bit of floor deflection every time you fill the bath won’t be an issue. If however you are going with large format floor tiles, the deflection could cause one or two of them to crack.
-
What type of bath you installing, cast iron, steel or plastic? And what about its maximum capacity?
-
Draining external taps prior to the BIG FREEZE
Adsibob replied to Adsibob's topic in General Plumbing
We’ve done that, so hopefully we are okay. Nope. To my amazement neither the plumber, the foreman, nor the main contractor thought to provision for this. I had intended for one of the two pipes to run within the house and therefore largely be insulated, with only the tap outside, but I wasn’t on site when the pipes were laid. I always knew the pipe for the other tap wouldn’t be within the thermal envelope, as it’s halfway down the garden. I could still insulate it now, but I’m not sure this is really a solution for anything other than a very short spell of freezing temperatures. The insulation can’t retain the temperature of the pipe for ever, particularly given it’s hardly used in winter. -
Last year my builder showed me how to drain my two external taps. He shut off their water supply from a lever/tap that we have internally, then, next to that lever there is an inlet that he connected a rubber tube to. He opened the external taps all the way and blew into the tube. This pushed some water out of the taps. The plumbing (which is all Buteline) survived the winter. According to Buteline’s website, “cold water is less likely to freeze in plastic pipes than in metal pipes when exposed to very low temperatures. Note last time I checked, most ice cube trays are still made of plastic, so I didn’t read in too much to what the Buteline website says. I therefore tried to blow out some of the water from the two taps but failed miserably. (joint between my jaw and skull near my ear started hurting so I stopped as better a burst pipe than a burst part of my head!) According to my MVHR unit it is currently 0.6C outside. Forecast is that it will drop to -1 quite soon, and then to -2 between about 2am and 4am. Temperatures should rise above freezing by 9am. Are my pipes done for, or do I have tomorrow to go and buy some sort of pump?
-
Sliding patio doors - tolerance when fitted??
Adsibob replied to Cecil's topic in Introduce Yourself
Are you sure? Everything has some degree of deflection. Even 3.6m of metal carrying just the weight of the roof will deflect a little. Our beam was about 4.3m and even without much weight (ie before the build was completed) but carrying a few courses of bricks we measured its deflection at about 2mm. -
Sliding patio doors - tolerance when fitted??
Adsibob replied to Cecil's topic in Introduce Yourself
I panicked because the installers ended up installing the doors a couple of mm higher than planned, so our gap was only 6mm, but engineer had specified 8mm deflection. Its been in for two years and all fine. It is annoying to end up with a 45mm surprise, but you will soon forget it. Agree you should move on. In future, insist on signing off on detailed drawings before handing over any money.- 18 replies
-
- 1
-

-
- doors
- sliding door
- (and 5 more)
-
Blum Aventos HK-S Stay Lift mechanisms/hinges
Adsibob replied to Adsibob's topic in Kitchen Units & Worktops
Query whether this is the restrictor: https://www.debonairjoineryproducts.co.uk/product/blum-75-opening-angle-stop-for-aventos-hk-20k7011-restriction-clip/?gad_source=1&gclid=CjwKCAiAvJarBhA1EiwAGgZl0PPXd7UteZVQc8iz1lCyhBYX8RupyqO9hEE-FcnfHEDeZtXOG-6xhBoCfFcQAvD_BwE -
Blum Aventos HK-S Stay Lift mechanisms/hinges
Adsibob replied to Adsibob's topic in Kitchen Units & Worktops
Yes, but either that screw is broken or - as I suspect - the installer installed the wrong hinge, as this one doesn’t appear to be strong enough to hold open the weight of the door. -
I have a kitchen unit door that is meant to open by lifting upwards. The hinges fitted is of the Blum Aventos HK-S Stay Lift series, but it's not working. The door just doesn't "stay" up. I'm pretty sure that it's because the "Power Factor" sometimes also described as "LF" (which maybe stands for Lift Force?) is too low and so I've found the next model up which has a greater Power Factor that should meet the requirements of my door. There is a helpful formula for working this out. But I spotted that on both the existing hinge and the replacement I am thinking of buying, the "opening angle" is stated as 107 degrees. I only have space for 88 degrees or so, as there is an obstruction once you reach 88 degrees of opening. Could another reason my existing hinge isn't working because I'm not opening it up to the max 107 it is designed for, or are these hinges variable such that you can configure them to different opening angles? The replacement I'm considering is this one: https://www.debonairjoineryproducts.co.uk/product/blum-aventos-hk-s-stay-lift-set-lift-mechanism-pair-20k2e00-02/
-
Council Tax Blow!
Adsibob replied to richo106's topic in Self Build VAT, Community Infrastructure Levy (CIL), S106 & Tax
Ditto here. -
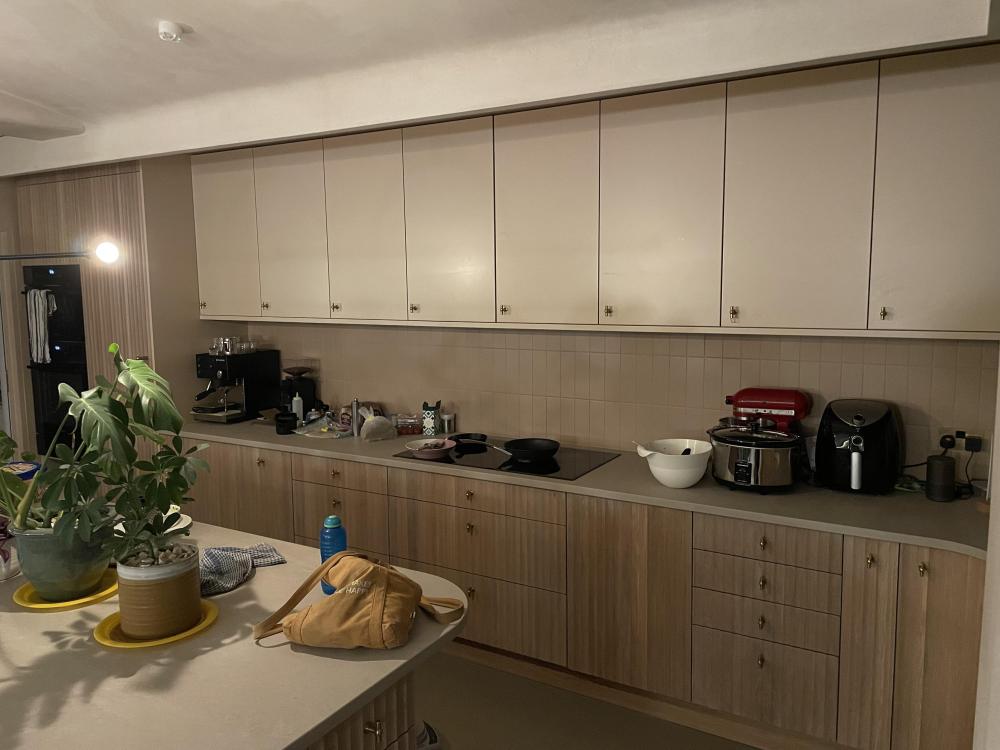
Yeah something like that, but because the wall units are only about 33cm deep and the tall units are full depth, they are on different planes, so you hardly notice. In our case, you never notice because they are two additional measures which conceal this: 1) although all the carcasses are from diY kitchens, the base units and tall units are finished in a different finish (oak) to the wall units (painted finish); 2) additionally, that top area is recessed behind a decorative bit of ceiling - difficult to explain but maybe this picture can explain: That ceiling slopes down from the apex of the roof to about 10cm in front of the tall units, above which the ceiling is flat. I really like this sort of our kitchen at it enables us to fit lots of almost concealed downlights as well as creating architectural ambience.
-
We installed it so that gap between bottom of pelmet and worktop is 58cm. The DIY kitchen standard pelmet is about an inch high, so cupboard must be 605mm above worktop. We are really happy with the height. could also work a bit lower. I think our hob, which is AEG requires a minimum of 560mm. Just pick a couple of hobs and see what their requirements are.
-
Just watch out for creating mould traps. Niches are notorious for this, unless It’sa noche in an internal wall (or a very well insulated external wall) and you have MVHR in which case you should be ok.