Thorfun
-
Posts
4889 -
Joined
-
Last visited
-
Days Won
36
Everything posted by Thorfun
-
not got them yet as we're not out of the ground yet, but I will be getting Warema blinds from Corner Star (https://cornerstaraluminium.com). Depending on where you are there might be a Warema seller closer to you but I've been impressed with Jon @ Corner Star so far in my dealings with him. but the proof is in the pudding as they say and I won't have them installed for quite a few months so I can update on my dealings with them more after that.
-
the vast majority of our windows/sliders have external blinds and where they don't we will have a brise soleil so we should be able to control the heat getting in nicely when combined with the proposed Loxone HA system. we had a TM59 Thermal Analysis Report conducted and they concluded: "Most assessed areas would not overheat according to the TM59 methodology, some rooms may experience short periods of elevated temperatures, however, these have a low enough occurrence to be not considered as overheating." So I'm not sure that active cooling would be necessary. I presume we could 'bolt on' the comfopost post installation if required but that's a question I can pose to Enhabit who have designed our MVHR system. I was just thinking I could run a couple of extra pipes from the ASHP for possible fan coil units at a later date during the build. even if they're never used they're there just in case. hope you get in to enjoy your new house soon! ?
-
Hi @Dan F. are you finished and in yet? just wondering if you had any sort of update on the ComfoPost with the recent hot weather we're having? we're having a Zehnder MVHR unit and wondering if the ComfoPost does enough or if I need to think about fan coil or AC solution. Cheers.
-
Cheers. The reviews mention the blade is a bit thin and the bottom of the cut can be not square. Are you finding that?
-
Don’t suppose you could link to those blades could you please? I’ll have a lot of PIR to cut in the next 3 months and reducing dust would be great!
-
I think it was in reference to the timber frame moving/expanding/contracting etc but if people have first hand experience of flat green roofs being laid on top of GRP and they've not had any issues then that's a pretty good indication that it's ok to do! ?
-
we're having a couple of flat green roofs and the roofers I've spoken to have said that on timber frame GRP has been known to crack and would recommend single ply for a green roof. (random hit from Google for single ply solution https://www.bauder.co.uk/roof-systems/waterproofing-systems/single-ply) comments?
-
hi all. I've been doing a bit more reading on basement airtightness and vapour control (I know the thread subject heading is about airtightness but I think that airtightness and VCL seem to go hand-in-hand) and it looks like with insulation on the outside of the basement a VCL shouldn't be used in the basement. this article: https://www.buildingscience.com/documents/digests/bsd-103-understanding-basements says: "If basement wall systems are designed and constructed to dry to the interior – regardless of where insulation layers are located – interior vapor barriers must be avoided." so, can anyone who is much smarter than me confirm or deny this? it seems to me that I can wrap the ends of the block and beam flooring in airtight membrane/VCL and then stick that to the basement concrete walls and NOT take it any further down the wall. The external Type A waterproofing membrane won't let moisture in and so the basement is, afaik, designed to and constructed to dry to the interior and, therefore, no VCL should be used on the basement walls. comments on this please?!
-
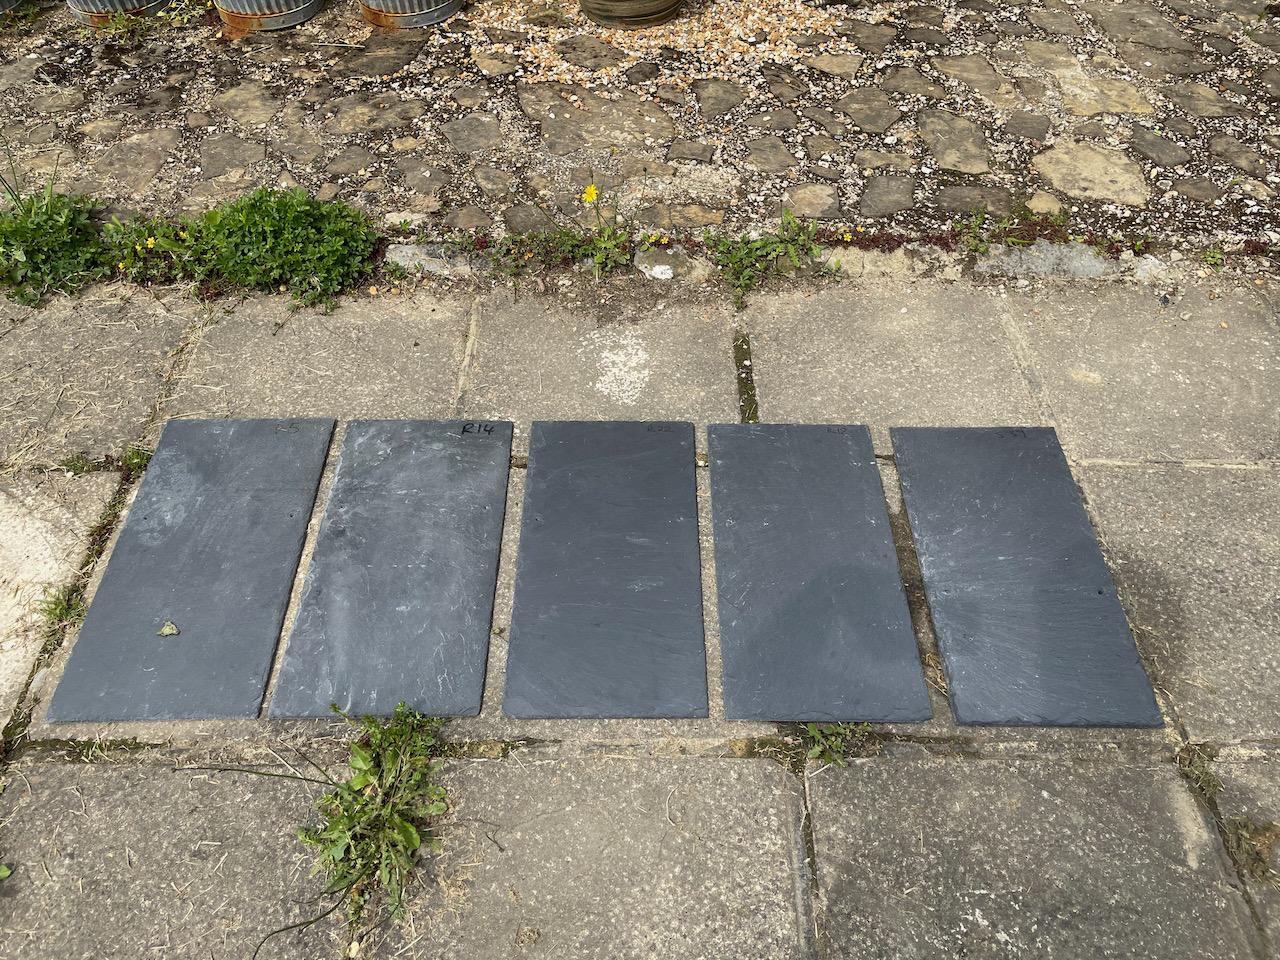
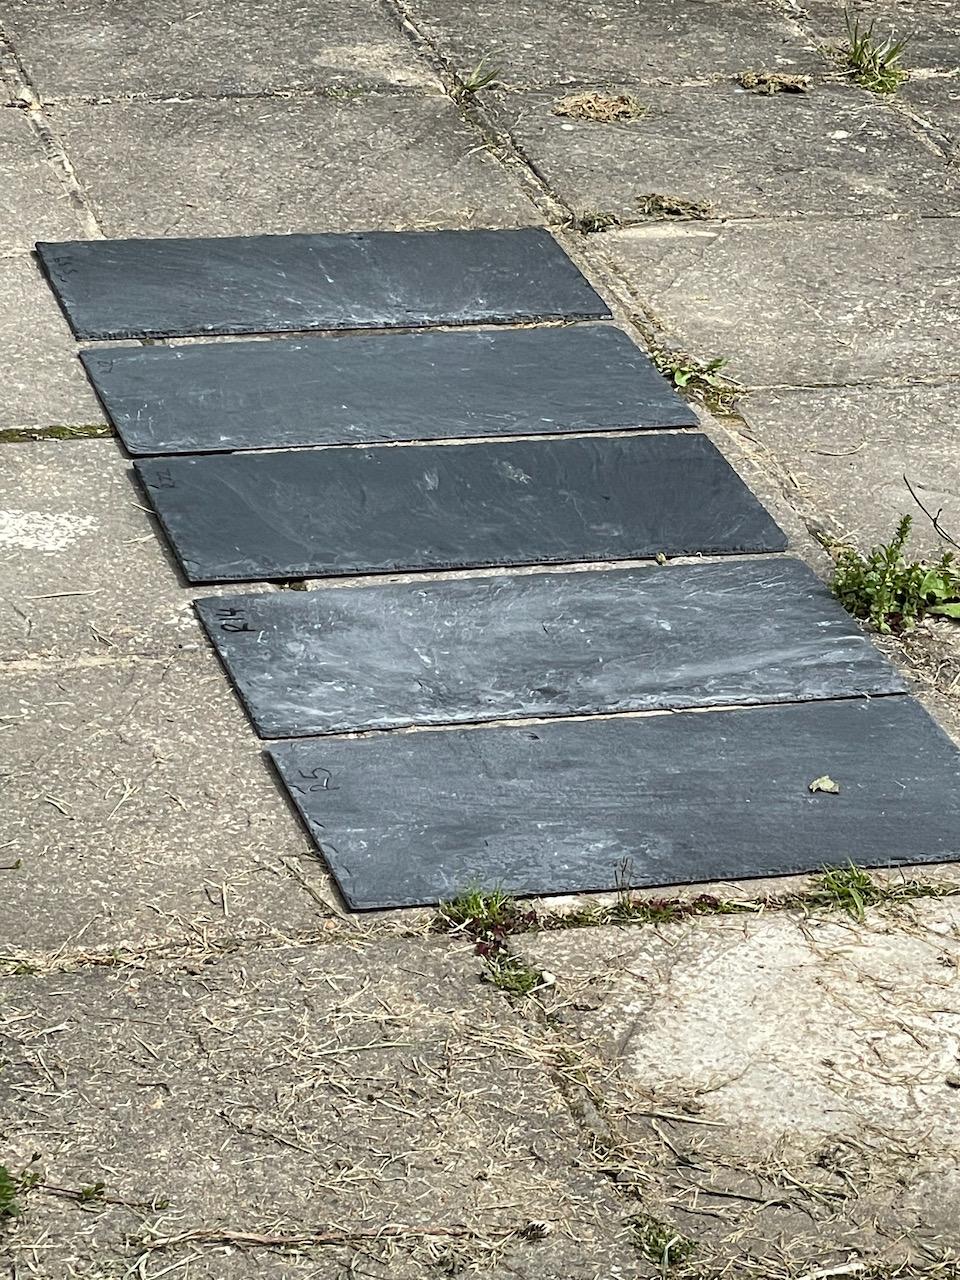
we're only looking at Spanish slates.
-
4 x Cupa and 1 x Siga. I wasn't that enamoured with the SSQ samples and they seem more expensive as well.
-
if the solar panels are guaranteed for 25years then a 11-12 year payback period sounds good to me as that means a further 12 - 13 years of free electricity! and yes, I understand that the inverter might need to be replaced and maintenance may be required but that will be the case with any form of energy, right? yearly gas boiler servicing for one example. for us the payback period is irrelevant as it's worth it for the warm fuzzy feeling but I am very happy if we can get that payback in the period you suggest. and we're also going for a battery system as I want to be able to use all that free electricity (once it's reached payback period) at night once the sun has gone down when we need it to run the lights, TVs, electronic device charging etc. There are definitely 2 camps on this forum about Solar PV and battery storage and if they're 'worth it' from a financial point of view. some say 'no' and others say 'it's more than the money'. both camps are right in their own way and everyone has to make the decision on what is important to them.
-
we've decided to not go for the black solar panels as they're a little less efficient and we figured that we'll never really see them! so the dark tiles to make the solar panels 'disappear' aren't really necessary. We also agree that we need a contrast to the black cladding and despite me preferring the tiles in the middle that's not the one we've decided on. (caveat that our choice could easily change by the time we get to ordering! such is the way with self-building I'm finding)
-
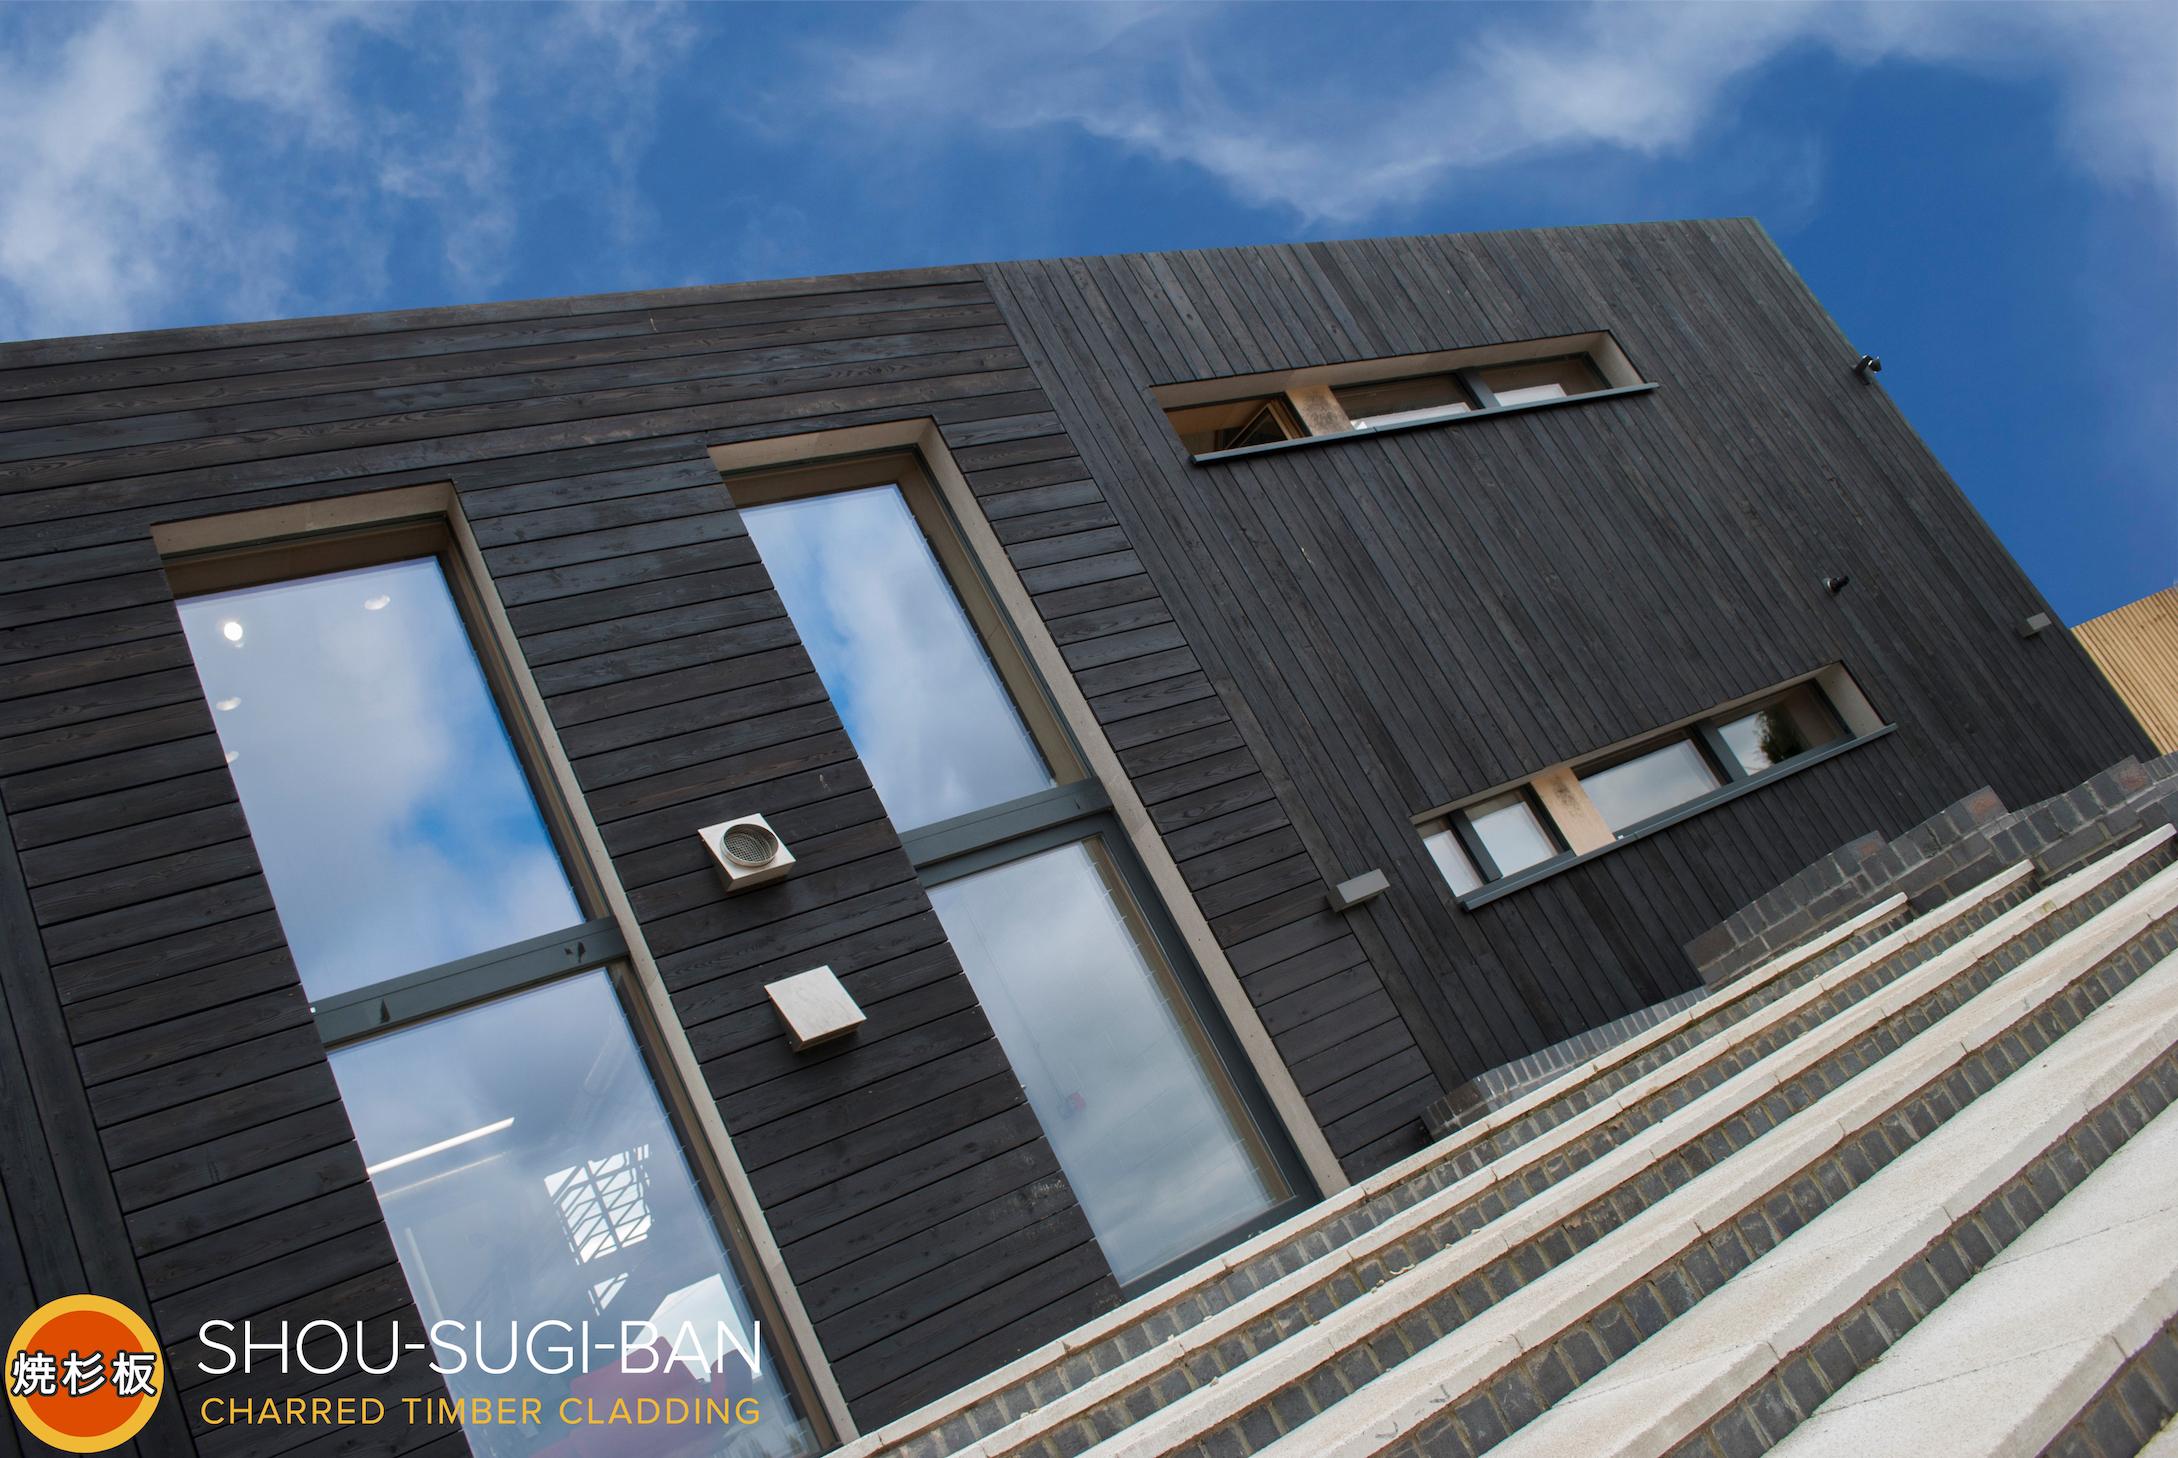
we're deciding on our choice of natural slate and have the following samples: I know which we've chosen. I wonder what you would choose? just for completeness our cladding is shou-sugi-ban charred larch (example below taken from https://shousugiban.co.uk/range/charred-larch-cladding/) on the main house and normal Siberian larch on the other 'arms'.


-
Confused by Triple Glazing Justification
Thorfun replied to MortarThePoint's topic in Windows & Glazing
it wasn't about complying with building regs later down the line it was more about having to compete with new build houses with triple glazing if we only had double. I was more than happy to pay the 10%-15% uplift for triple glazing to 'future proof' the house which also has the added benefit of reducing our heating costs etc now. -
it's a great idea but is anyone really that organised that they know exactly where all the plumbing waste is going to be BEFORE the first floor walls are up? pretty sure I won't be.
-
that's a great option.
-
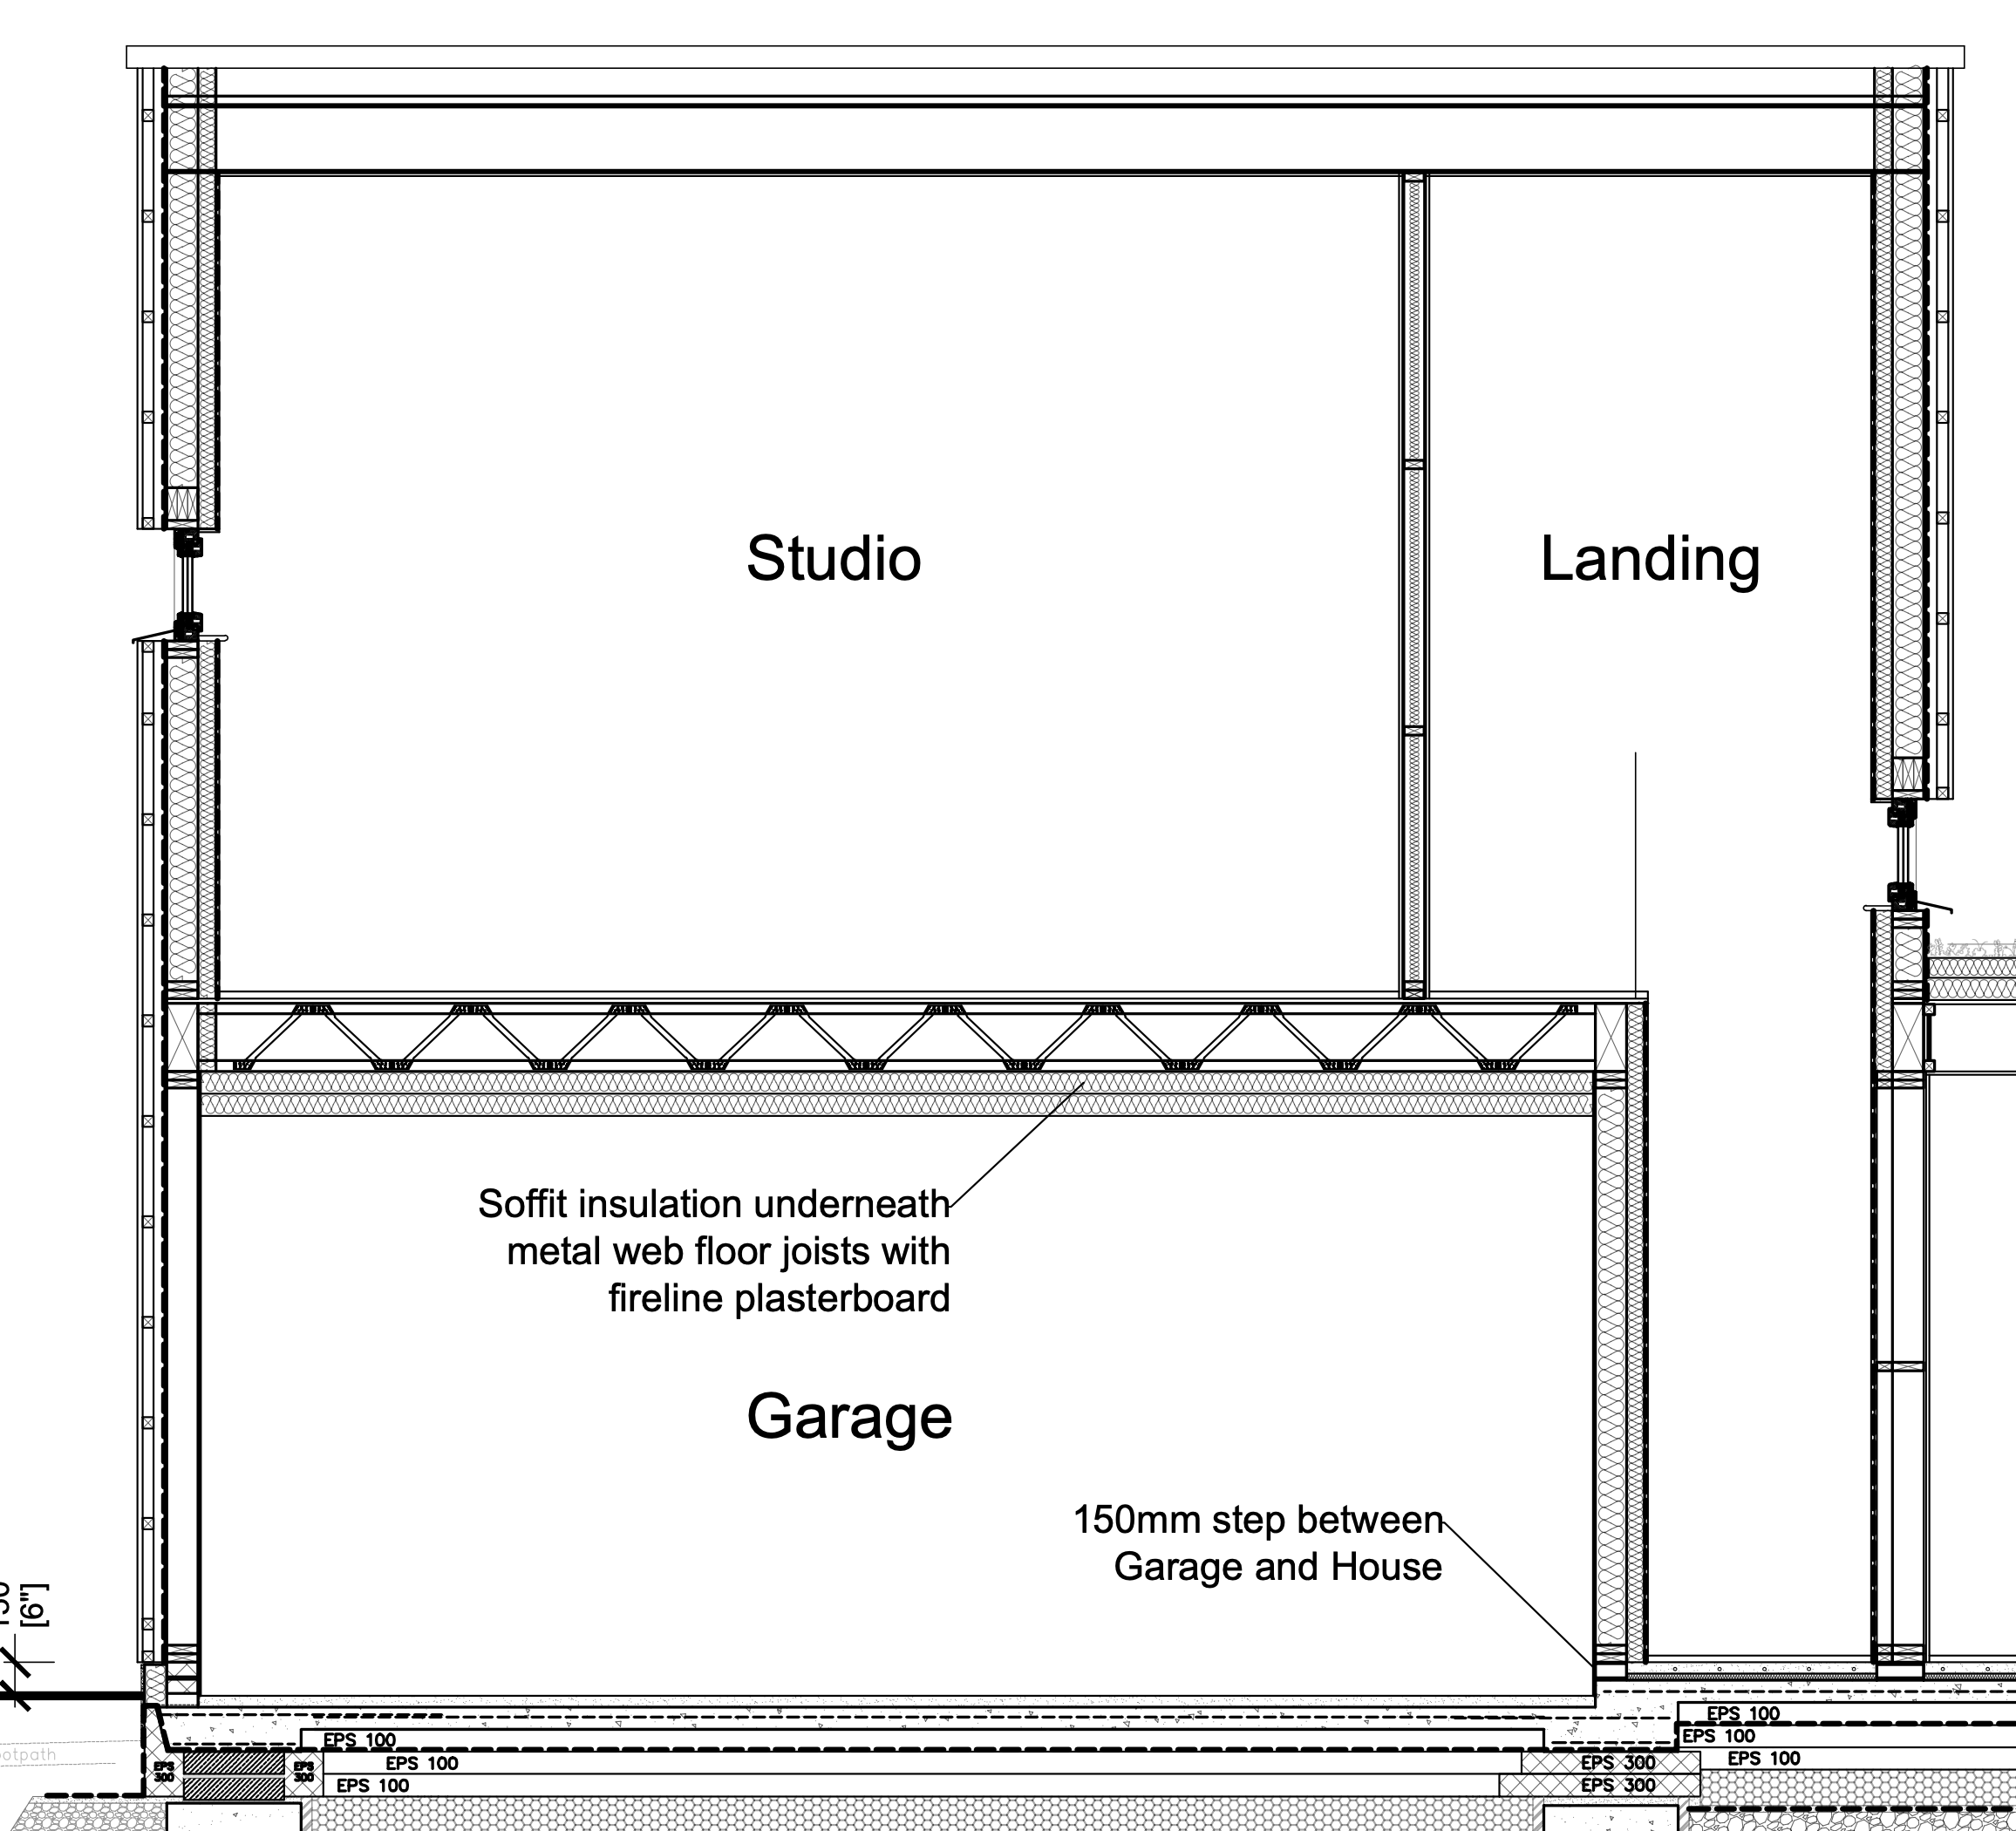
just to concur with @AliG our architect has specified insulation below the joists in the garage for the room above as per this drawing: definitely the logical approach. ?

-
guess that's decision made then! ?
-
? it is a sump for the land drain and the courtyard drainage. the water then gets pumped out to, eventually, an inspection chamber and then discharged.
-
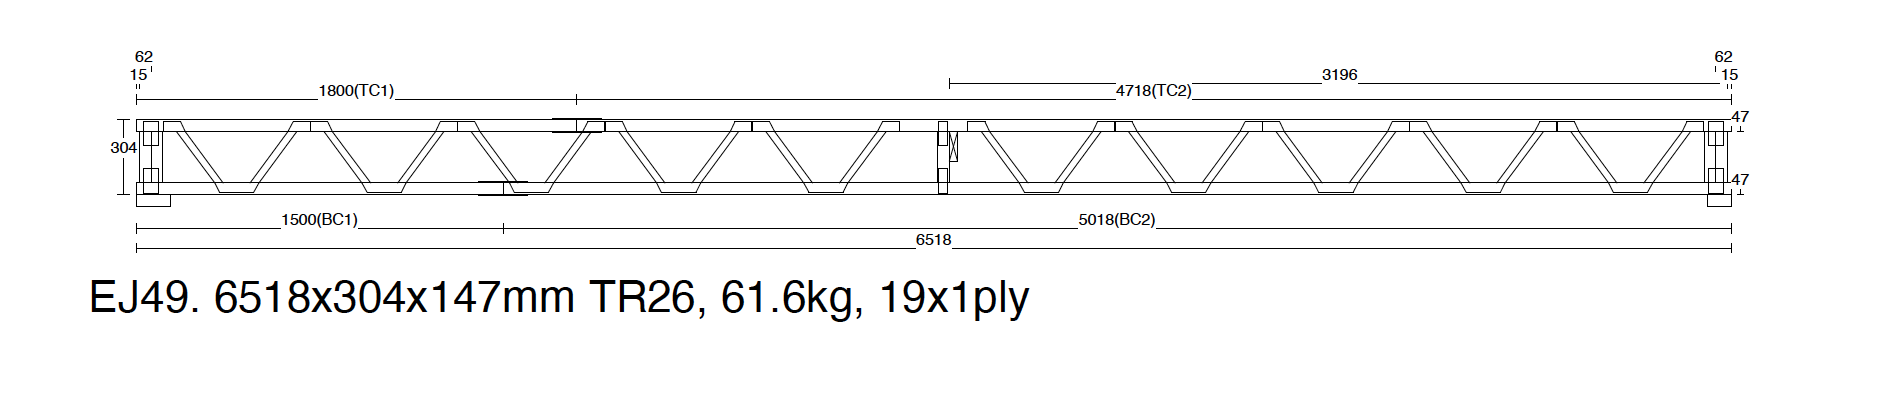
what's the length of that span? we have 6.5m spans in our master bedroom and I requested a maximum deflection of 8mm and they came up with 300mm spacing and 304x147mm TR26 pozi-joists they're not doubled up either. obviously it's a bit late for you now they're in but doubling them up like that does seem rather excessive. I am also a bit concerned about the 300mm spacing which will leave about 153mm between edges of joists but the timber frame company said running pipes and utilities etc shouldn't be a problem and the floor will be rock solid. I guess I'll find out in a few months when the TF is up and I have to install the MVHR system! good luck and let us know how you get on.

-
yep, the horizontal membrane goes up the outside of the wall a bit and is overlapped by the vertical membrane on the walls enclosing the whole basement in a membrane. with regards to costs the waterproofing section on the quote is around £10k which also comes with a 25yr insurance backed warranty. it's a cost I'm happy to pay for peace of mind.
-
Weeks 4 and 5 of the build saw our basement slab being poured. it was a major milestone for us and we're really happy....well, apart from the section that was too high and they needed to grind it down of course, but apart from that we're really happy. ? We have 200mm EPS300 specified for under the slab and this was laid by using a long telescopic rule from the profile board strings 4m above at ground level. We are supposed to have a 200mm toe outside the slab and luckily I was outside when the basement contractor's engineer came for a site visit to set out for the slab and I asked if it was square and was told it was a bit off in one corner. a bit off turned out to be 70mm. now, in my mind if a structural engineer tells me that the 200mm toe is needed to take the 45° load from the walls above then you really should have a 200mm toe and 130mm just wouldn't cut it. you'd think that wouldn't you? but, it turns out that unless I was there to ask them to move the insulation so that I had the correct toe all around it it wouldn't have been done as the corner points had already been marked. I got a few huffs and whinges about 'but we've already set out' but there was no way I was letting it slide and made sure I was happy with the toe widths. This just goes to show the importance of living on-site as I pop out every hour or so to get a break from my desk to see what's been going on. if I didn't do that I wonder what else might get missed and just covered up? Anyway, after the corners were set out the FIS waterproofing membrane (http://www.fisproducts.co.uk/product/maxiprufe-plus-2/) was put down on top of the EPS300 as this will then join the same membrane on the walls to form a waterproof wrap around the basement to ensure Type A protection and with the Type B waterproof concrete that will give us our 2 forms of waterproofing. Following that was the formwork, steel bar and mesh, hydrophilic strips (http://www.fisproducts.co.uk/product/cemflex/) and kickers and then we were ready for the concrete. The day of the slab pour came and we were extremely excited. It was though, as I’m sure it is in most cases, a very last minute dash to get ready for the pour. The contractors were let down by a couple of extra pair of hands on the morning of the pour so they were rushing around finishing off bits in between lorry loads of concrete. it all worked out ok in the end though. We took loads of photos as well and here are some for your enjoyment. The waterproof membrane on the EPS: Formwork almost complete: Steel mesh: kickers almost finished. the final ones in the courtyard (to the right) were done on the day of the pour: The shuttering for our sump in the courtyard: first lorry load: almost there: finished: sadly the weather turned a bit for the worse during the pour and the finish isn't perfect so we'll probably have to put a self-levelling screed down but we can cross that bridge when we get to it. the next morning: After they struck the slab formwork they made a start on the wall rebar. it's only now that I see it up that I realise how bloody high the ceilings will be! 3m was the request and that is what I got. painting them will be fun. ? I did create a video for these last couple of weeks but as all the work was predominantly down at the bottom of the big hole and the camera didn't really catch it all I've sped the footage up quite a bit. Still, I think it's a pretty good watch and you can certainly see a large portion of the work that was done. (Please note that the music has explicit lyrics so you are forewarned) This week they’re starting on putting up the formwork for the walls and we’re hoping to get a pour in towards the end of the week which will be great. I was told that the walls should take about 3 weeks in total so we should really see some great progress over the next few weeks. As always, thanks for taking the time to read our journey.
-
makes sense as I wanted OSB anyway so combining the two seemed to make sense. only small concern is the osb would be good for screwing things in to the wall but I'd be worried about penetrating the airtight board whereas OSB over a membrane would give a little extra potential protection from making a hole in the airtight layer.
-
thanks. I'm still thinking about using the airtight board instead of fabric to be honest. the architect has detailed for the airtight board as I said I was going to use it but I can easily swap it out for normal OSB if I choose to go with the membrane instead. will need to run the costs in a spreadsheet for that one but will definitely have the membrane between floors.
-
thanks, that's good to know. it seems that airtight membrane all seems to do a very similar job and it's hard to know if the really expensive Proclima stuff is worth the extra cost over the cheaper alternatives. more research is required!