


Onoff
-
Posts
21126 -
Joined
-
Last visited
-
Days Won
206
Everything posted by Onoff
-
She rarely gets 5 minutes to herself what with sorting kids and elderly parents. Maybe when the bathroom's done she can lock herself away with the Veet.
-
Tbh I should have probably let HER do the tiling!
-
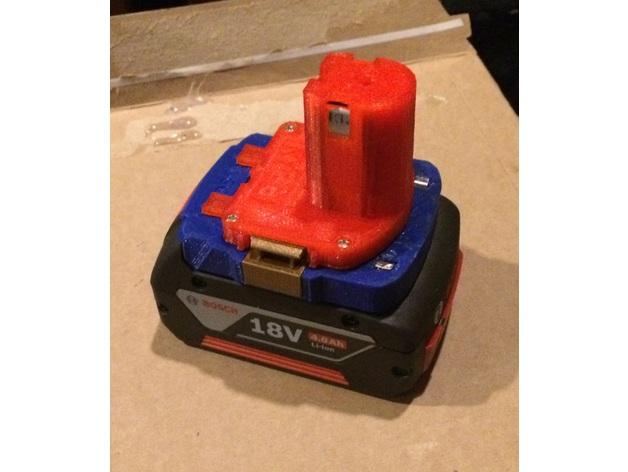
Revamp those old 18V cordless tools to take Parkside Lidl 20V Li-ion ones: https://www.thingiverse.com/thing:3005395
-
Could be the answer to my prayers a generic Makita battery adapter. https://www.thingiverse.com/thing:2156290 Thinking I could take the top off of the "no name" 18V tool batteries and bolt the 2-piece adapter to that.
-
Mine too. 100A incomer. 25mm concentric. Good for about 120A.
-
I was half eyeing up the Balco one from Aldi: https://www.aldi.co.uk/balco-3d-printer/p/086887240233900 £299 is a bit more than I'd like to pay. I'm also assuming there's clones of the Balco available cheaper on eBay etc. Tempted to go the route @Temp has and order the same one on the basis he'll know all the issues with it. Aldi filament reels btw online at £12.99, 1.75mm, 1kg, PLA
-
Can I ask what program you model in? In fact what are the stages in all this. Never heard of Cura or the "slicer". Ta.
-
Haven't looked tbh. On 2010 here.
-
Anyone suggest a good piece of free software to convert an AutoCAD model to an STL? Cheers.
-
Not exactly the Replicator is it. 8.5hrs...even SWMBO could make the tea in that time! Do you have to be keeping an eye on it during that time? Does it smell also? Interesting ref the hollow/solid thing, never knew. I can see me buying one I think.

-
SWMBO, by her own volition, has stated my grouting is "smoother" than hers. Couldn't bring herself to say better! She's asked whether her's could be "filed" or otherwise smoothed out. Can you add grout to grout?
-

Bath Surround / Boxing In, and concealed pipework
Onoff replied to Onoff's topic in Bathrooms, Ensuites & Wetrooms
The 2000th reply? There's no prize btw! -
Bath Surround / Boxing In, and concealed pipework
Onoff replied to Onoff's topic in Bathrooms, Ensuites & Wetrooms
Only got 6 conduits for the SELV stuff. Originally planned 4 up the side and 2 on the end. Don't really want to squeeze 2 leads up one etc. I need to say "No more!" and step away. -
Bath Surround / Boxing In, and concealed pipework
Onoff replied to Onoff's topic in Bathrooms, Ensuites & Wetrooms
No more plinth lights. Agreed with SWMBO none at the end. Tbh the LED strip should compliment the 5 (if set on blue). Maybe solder that all up / fit tomorrow. Going to sit and eat a pomelo and wait for the snow! -
Just been buzzed by a mosquito.
Onoff replied to epsilonGreedy's topic in General Self Build & DIY Discussion
In the Guardian the other day (bought by mistake) there was a bit about 30 odd Dakotas will be flying out of Duxford to celebrate D-Day. https://www.theguardian.com/world/2019/jan/28/parachutists-to-fill-skies-over-normandy-on-75th-anniversary-of-d-day -
Indicative only but how much to make one off battery adapter (the blue bit) similar to this?
-
You could be making a rod for your own back here, offering such services....you'll have to create an STL file first though!
-
Love it! ?
-
Pretty sure I read somewhere that EPS, even though it's closed cell can potentially absorb 6% water by volume IF SUBMERGED FOR A YEAR. To do with micro cracks in the surface. I'd take those odds under my slab all day long. The fact it's generally laid anyway on a draining aggregate makes the argument against pretty null and void. Interesting further reading in how some worms and beetle larvae can happily live on EPS and that their droppings are safe as a fertiliser. Could be the Passive house version of the termite!
-
You just know that something good is going to happen, they've the freshest moves you've ever seen...
-
Bath Surround / Boxing In, and concealed pipework
Onoff replied to Onoff's topic in Bathrooms, Ensuites & Wetrooms
Was going to do the deck lights...didn't: Didn't realise the front plate needed a bigger hole! Out with the tile file: A horseshoe of silicone; All baby wiped off. Stuck the riser thingy up too: And put the flush plate on as well. YES I know it's off centre. Realised it would be pretty early on during tiling. -
Help fitting an old GGL 4 Velux window NOW SOLVED
Onoff replied to ProDave's topic in Skylights & Roof Windows
Found a bit of a discussion here; https://www.diynot.com/diy/threads/velux-window-wont-open-fully.80555/ -
Fill to the top to simulate water + 1 person? (Or 2! ) Am I better leaving the bath full whilst I silicone around where the bath sits on the tiles? Am I aiming for a filet against the bath lip / tile or should the lip be sitting down in a bed of silicone? Cheers
-
Ta. Got some exterior stuff that should do for that.
-
Do I run a very small bead of silicone around where the tiles meet the ceiling? (I forced grout in here on the walls I did. SWMBO didn't). As an aside, I am going to run round this edge with a radiator roller / paint shield and re paint with the Dulux Matt Diamond.

