Onoff
-
Posts
21126 -
Joined
-
Last visited
-
Days Won
206
Everything posted by Onoff
-
I'll quite happily drill one arbour at 9.5 and one at 10 to go with the 9 I've already done and post but it seems a bit mad. You can get a cheap vernier for a couple of quid: https://www.ebay.co.uk/i/153593884476? Spend a tenner and you'll get a full stainless one. Aldi and Lidl often do them.
-

Scolmore Click backboxes : Ah jus' luuurv em honey, but ...
Onoff replied to ToughButterCup's topic in Power Circuits
You can also cut bfo rectangular or circular holes and edge with grommet strip: https://www.tlc-direct.co.uk/Products/GRS3.html? https://cpc.farnell.com/hellermanntyton/ps1/grommet-edging-1-2-x-5-0mm-75m/dp/CB15699? etc -
It's a dilemma. House was here first. Previous owners had the garage built. All above board with pp yet it's forward of the house, nearer the road albeit off to one side.
-
Well the Chinesium bits did their thing. Make that Chinesium BIT as in I only used one. Forty two 25mm holes in 5mm 304 stainless plate aided by the odd squirt of finest Machine Mart cutting fluid from a Lucozade bottle. It's still SHARP FFS! Bench cleaned up and the plates all degreased in the kitchen sink when SWMBO wasn't looking: Pity I should have drilled 44...
-
It'll never get done if you all keep taking the pi$$!
-
Scolmore Click backboxes : Ah jus' luuurv em honey, but ...
Onoff replied to ToughButterCup's topic in Power Circuits
Say you have a 16mm hole but you want to put a 20 in, or a 20mm hole and want a 25. Yes, I know cone cutters / step drills etc but they go blunt. Starrett have the "OOPS" allowing holesaws of two different arbor sizes to be used but no good for the smaller sizes:But for using two of the smaller sized arbor cutters together........I think I'll call mine the "FOOKIT". First, get yourself a 1/2" UNF 20tpi x 2 1/2" long bolt and cut the head off, file neatly and de-burr:Then screw on a couple of Starretts:Job done. Needs a 13mm chuck so I've turned down the plain shank down to 10mm so I can use in my right angle drill too. You can do the same with a bigger dia UNF bolt to couple two of the larger Starretts and again you need to turn down the shank. Make up these homebrew adapters either side then you can mix & match big/small Starretts to your heart's content: Edit: Poxy Photoshop! -
Scolmore Click backboxes : Ah jus' luuurv em honey, but ...
Onoff replied to ToughButterCup's topic in Power Circuits
Yep go for it. Nice sharp 20mm Starrett cutter. -
Backfill? Best get up that forest with your wheelbarrow and do some reverse fly tipping! ?
-
Quite seriously we were taught to rub a pair of nylon knickers up and down plastic conduit like you're spanking the monkey to generate heat and aid bending. So you've a head start there! ?
-
Bottom line is there is no agreed proper drawing with levels stated. There's very little to work to other than that fag packet sketch. You reckon there was about a foot of concrete poured for the footings? Concrete should have been poured to the height of pegs banged in with the level marked. A foot doesn't sound deep enough to me. Again depth of footings should be on the drawing. Who wins if the trench isn't as deep as it should be? Less digging, less time, less diesel. Not you. Who wins if there's less concrete? You might be paying for Xm3 of concrete but they've only supplied Ym3 etc. Again not you. And how do you know the BCO isn't their mate etc. You've made your own bed I'm afraid. In all honesty there's two storey builds still standing built hundreds of years ago on footings less than a foot deep if at all. Loads of compacted hardcore and a slab poured should allay your fears over the soil from the side of the house eroding. You'll keep whinging, it'll get done somehow. See if the BCO is happy (tomorrow?) and raise your concerns with him.
-
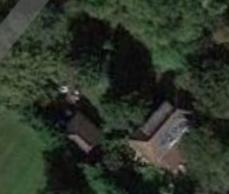
Thinking to build a car port. Nominal 6m x 6m. Something like this: Shallow pitched roof. 4 posts each side. In an AONB. Reference pp, there are I believe restrictions on how far forward of the dwelling these things can be. But the garage is already in front of the house albeit to one side. Crap screenshot but garage is the single hip end building to the left, road is the grey strip top left. Car port would go on the hip end of the garage to the NW.
.thumb.jpg.b0a9365fd5c86666832ee51d128f733c.jpg)

-
It is very unusual in my experience not to see the reference "FFL" on a section drawing as in "finished floor level" and a datum of some sort to reference it to e.g. ground, exterior paving etc. In my day job it's all X metres above sea level for finished slab levels and "SOPs" - setting out points from which to work. The thing is there's no guessing or dispute when it's all considered, agreed and approved beforehand.
-
It's cos you're special! ?
-
Really? @pocster, you're slipping!
-
How much do you need? I could give you a length.
-
I'll line 'em up, you knock 'em down. Wtf do you get 4 years from? And the rest. Anyway, I think the results prove the method in my madness! Seriously though I learnt so much from doing it thanks to all on here.
-
I could make him a scale model... ?
-
BFO drill bit, wiggle:

-
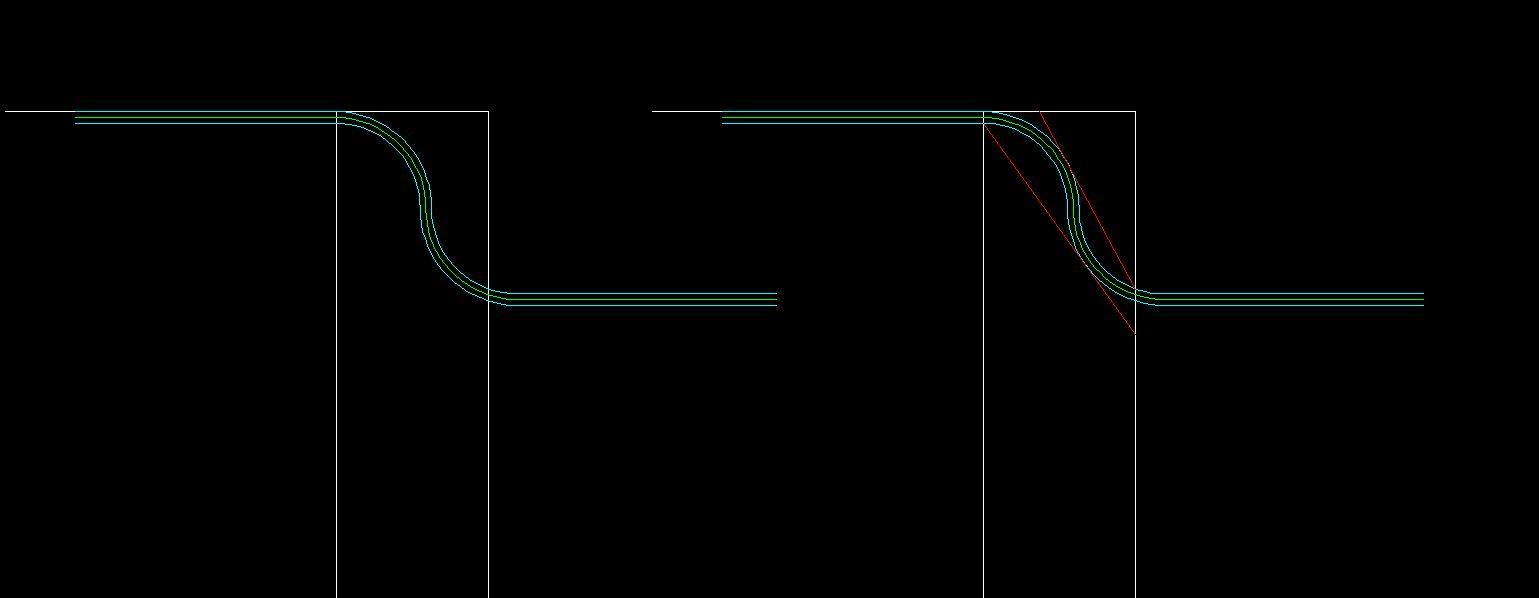
120mm radius: tgl-coshh-tech-hep20-performance.pdf
-
Just draw rectangles to represent the various tray options and overlay on your CAD drawing which will have the UFH pipes shown exactly. ?
-
If that wall is "cold" couldn't you just redo in insulated pb? You'd need some back box extenders for the electrics. Probably not what you want to hear as a suggestion...
-
If it's not leaking...don't worry but keep an eye? That's as you say more of a twist rather than a kink. Weird how that happened.
-
So in your wall buildup you don't have actual vcl? Your relying on the parge coat for air tightness?
-
@phatboy, was there any sign of mould before the MVHR?
-
Pissing people off's OK though is it? There's ways of getting your point across. Stating your disinterest in other people's opinions or feelings isn't going to win you any friends on here or have them want to engage with you. As an aside i personally think a badly maintained MVHR system could be a very serious health hazard. On the for side there are people on here who's chronic health conditions have much improved I believe due to well designed MVHR.


.jpg.0f163ab47845182cf0ac9f059c149292.jpg)