vivienz
-
Posts
1378 -
Joined
-
Days Won
15
Everything posted by vivienz
-
No, I haven't managed to sneakily bury the wayleave officer somewhere on site! This post is for the other electricity cable on my site, namely the one that directly supplied the previous building and will supply the new one. This comes onto the site via an overhead cable and a post and stay that are very close to the new building. Entirely safe but very ugly and certainly won't fit in with the lovely garden that we're planning. So, from the outset, we've planned to bury this supply as much as possible and today was the day. Burying the supply has involved putting in a new post right on the boundary with my neighbour's garden, through which the cable runs from the nearby transformer. The existing cable was then attached to this one and the supply cable runs down it, through a trench and eventually reaches the garage. The trench was dug last week and blinding sand laid along its length. Simple enough, but it's a really long trench, something in the order of 50 metres all told, and we got through the best part of 4 tonnes of sand to line the base of the trench. In digging out the trench, an old land drain got smashed up as it ran directly parallel to the long run of the trench, and at right angles to where the trench turns in to the garage. I'm really glad that it was dug last week and not this as it was lovely and dry last week. This week, I'm well on my way to having a moat as a result of the broken land drain. This is looking back towards my neighbours' cottages and where the new pole will go in, against the fence. The pole to the right of the cottage on the right is where the supply runs in from. And this is around the corner, looking towards my garage. At the end of the trench, there is a duct that MBC put in (there are a few others, too) that allows the cable to come into the garage from under the slab. There will be a whole bunch of kit going into the garage, including my sunamps, so this seemed like a good place to run the supply in. Because it's such a distance between the new pole and the garage, the first 30m of the supply cable had to be a very heavy duty one. About 3/4 of the way along the long trench, there's a fancy looking connector that links the heavy duty cable with a normal one, which continues on into the garage. As well as running the new cable into the garage, whilst my back was turned, the meter fairy arrived and my electricity meter that was previously located on the old pole near the building magically re-appeared on the wall in the garage. Useful things, these meter fairies. When I rang my electricity supplier a couple of weeks back and asked when they might be able to move the meter, the earliest date they had available was mid December, which would have been disastrous. Thankfully, the forces of good prevailed and the meter is now where it needs to be. My site seems to have a natural affinity for augurs and drills. Back at the start of the build, a rig was on site taking soil samples. This was followed in due course by another rig drilling holes for all the piles and now we've had another one, this time to drill a hole to put the new pole and stay into. As usual, the augur came up caked in clay but the soil was still dry at depth and it came away nicely. Here's the augur going in for the pole. And here's what it drags up. I really should consider a pottery business. Just a final pic of the pole on the van: The guys from SSEPD made the job look very easy, but a reasonable amount went on and there was a fair bit of equipment on site including the cherry picker, drilling rig and the ubiquitous land rover, with 4 guys in total. They finished just before 1pm and worked efficiently and were a very nice bunch of guys. A couple of them will be back in due course to do whatever is deemed necessary to the poles carrying the oversailing wires, but that may be a little while off yet. I have an electrician coming onto site tomorrow to put some connections into the house. I wasn't planning to get this done until at least another week's time but it needs to be done this week as MBC and Norrsken (windows) are back on site next week for remedial work and they will need to get plugged in for all that. Once the snagging work is done, the next big push is to get the various roofing jobs finished off so that the building will finally be watertight; my parapet walls may look lovely, but they are leaking like mad right now, so I shall be relieved to get finished there and let everything start to dry out. I'll also get the trench back-filled as I don't really want a moat and certainly not that close to the building. It does serve to illustrate very well why a soakaway wouldn't work, though.
-
Do you want some of mine? Happy to share! Buyer collects, mind you! Flint work is such a lovely finish for a building.
-
How to make best use of the budget?
vivienz replied to Nick1c's topic in General Construction Issues
Find out lead times for things that are critical to the flow of work on site as delays to deliveries can mean extra expense elsewhere if you miss timeslots with other things, as well as over run costs on things like scaffold hire and site insurance. -
I wouldn't even have attempted the amount that I do without BH. There's just so much scope for problems to occur even without being hands on.
-
I had a physio review yesterday and was measured on a few strength tests. Despite not having got to the gym much since my last review due to a frantically busy period on the build, I aced a couple of the tests and this is purely down to shinning up and down scaffolding ladders and temporary staircases for much of the time I was on site, so self-building isn't all bad!
-
A brief update on my inward leaning gable that I posted about recently. Just to recap, I spotted that the gable section of my west facing bedroom wall was leaning inward at an angle and made it look as though there was a problem with the window, which turned out not to be the case. Over the last couple of days I've been liaising with my timber frame company, MBC, and my window company, Norrsken, to see what needs to be done. I've taken plenty of photos to illustrate the problem and the MBC team will be on site week commencing 22nd October to put things right. They would have come earlier but I have some other things that are scheduled for next week and need to get those done first, so I requested the slightly later date and they were happy to oblige. It's clear enough from all the photos that the problem lies with the timber frame but it's still very reassuring that MBC haven't argued or quibbled over anything and have been positive from the start, agreeing that it does need fixing and setting about organising it. Because of the position of the section that is out of line, the window will first need to be removed. The Norrsken team were due to come back at some point to go through the snag list and they, too, are happy to come back that week so that as well as sorting out the snag list, they can assist with the removal and re-installation of the bedroom window. It has to be said that with the weather that we've had this year, I've had something of a charmed run on the build so far and given how complex and large a project building a house is, I'm amazed at how few problems I've had to date. Even so, I've always been prepared for something going wrong at some point and my view is that it was almost inevitable. What is less predictable is how the parties involved respond to the problem to get it sorted out. In this case, I have been really pleased with the responses. Pretty much as soon as I contacted MBC and brought the issue to their attention, the response has been to get it fixed. At that stage, they couldn't say what caused the fault and until they see it, they can't be sure. What they have been emphatic about, though, is that they will get it sorted and before the next stage of works are due to commence on 5th November. Norrsken also deserve a special mention as they haven't hesitated to co-ordinate and make sure that MBC can do what they need to do whilst the windows are taken care of. All that remains now is to see just how the Leaning Wall of Bagber will be rectified; it doesn't look like any easy job to me and I'll be interested to see how it gets done and greatly relieved once it is done.
-
I was very open about our intentions for our plot when I met the planning officer. I was anticipating some difficulty as we knew that we wanted a very contemporary house when there is nothing comparable in the area and he deals with many of the conservation type projects. It turned out that he had no problem with modern buildings and preferred them to stylized pastiche designs and we had zero objections or alterations to our submitted plans. We even put a pond into the PP request due to its size, as well as greenhouses on the agricultural part of the land. No problem with any of it.
-
I'm in site this afternoon so I will get some more photos and detail then.
-
Thanks, Nick. I will investigate tomorrow.
-
That looks good, Onoff. I will take some measurements and see what volume I will need. Quite a lot, I suspect.
-
I did think about the sage glass but 4.8k of that cost is the suplly and install of the brise soleil that's been a design feature from the outset and that we would have had anyway, so the addition of the blinds isn't quite so painful. I agree, though, that any of these things need to be thought about as early as possible.
-
As it stands, Russell, I haven't approached MBC because I dont think that they can do much, short of dismantling the roof. If performance isn't compromised and the building won't fall apart then there isn't a problem to solve, as such, other than the potential issue with cladding. I shall draw it to their attention, however, in case they there is any action they want to take.
-
The floor is going to be something like amtico, so about 5mm plus adhesive.
-
Thanks, chaps. Just love all the little TLAs (three letter abbreviations).
-
Pardon my ignorance, but what is SLC?
-
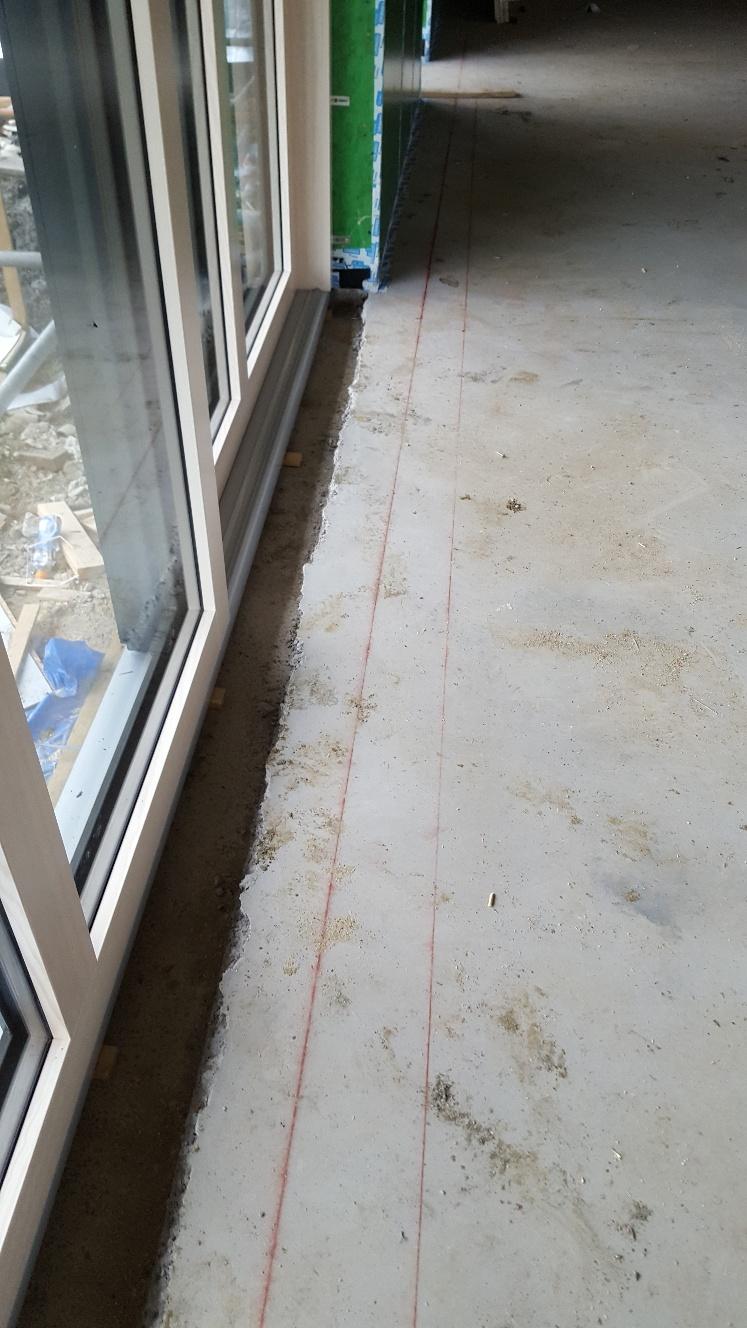
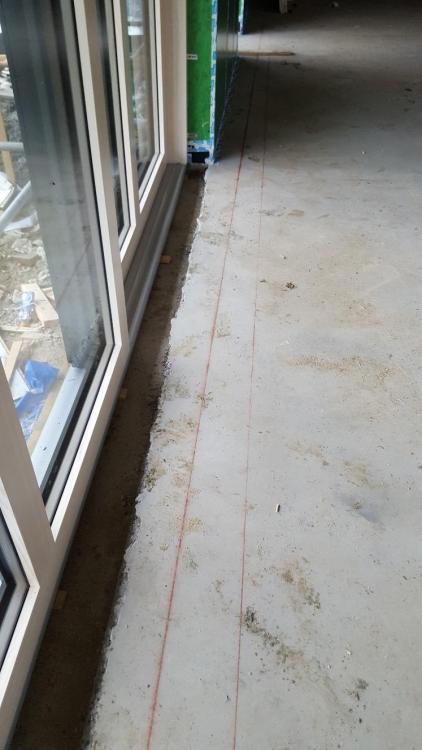
It's been a little quiet on site over the last 10 days or so which hasn't been a bad thing as I had a nasty cold last week so it gave me an added incentive to stay at home and get some more forward planning done. One of the downsides, though, is that I only today spotted an issue with the west facing upstairs gable that's only really visible from the top scaffolding lift. When I first saw it, I thought 'oh bugger, another window problem' and promptly got on the phone to the guys at Norrsken to ask what they thought of the photo I'd just sent them with a clear image of the problem. This is what I sent: And this is what it's meant to look like: Can you spot the difference? You're buildhubbers, so of course you can. In the first photo, the apex of the triangular window sitting on the French doors and side panels clearly protrudes by some distance. It's about 3cm. At this point, and as before, what I most need to know is a) is it a problem? and b) how do we fix it, if it is. And at this point, as before, Norrsken were hot to trot and the installations manager, Mark, along with his very bright and shiny new spirit level, did a swift dash up to north Dorset to come and see for himself exactly what the problem is. I should explain that this window consists of 3 elements. There are the central French doors, a glazed panel each side of the doors and then the triangular window that sits on top of all this. When fitting, the installation team set everything up with a laser to make sure it's all dead on, and they took great care to make sure everything was right. Because of this, I wasn't entirely surprised when Mark from Norrsken established quite clearly that the fault isn't with the windows, but with my MBC timber frame. Directly above the triangular window, there is a steel with an apex in it, that is then boarded over. You can see in this picture from a previous entry how these are put into place by MBC, and this is the section that has caused the problem on the west side: So, first off, is this an issue? This was my first question to Mark and, in particular, does the fact that the window frame is so proud of the wall compromise the thermal properties or insulating quality? Thankfully, he assured me not, so I'm happy to accept this. The next issue, is the physical problem of the top of the window protruding by about 3cm from the timber frame exterior wall. It's fairly standard practice to have 25mm counter batten on the exterior, to which is attached whatever outer skin is covering the building. Fortunately for me and MBC, I have planned all along to have 50mm battens on the outside so that a decent sized service cavity is created to run any exterior wires and cables through. It's possible that I could have got away with 25mm but I preferred to spend a bit more on the larger battens and make life a bit easier when installing stuff on the outside. This means that the slate cladding on the upper floor will be able to largely cover the error, but it will quite probably be tricky to get a decent finish between the window and the cladding as I had been planning to use powder coated aluminium to do this job and it won't be the easiest thing to fit with such a variation in the gap. I'll tackle that when I get to it, but any suggestions are welcome. Okay, so all in all, it's not a disaster but a pain. I am, however, annoyed because MBC didn't know that I was planning 50mm battens and, aside from anything else, it's really disappointing that having done a good job on the vast majority of the build, this error slipped through. There were enough spirit levels on site throughout the build that it shouldn't have been so difficult to run one up against this fairly fundamental section of the build, particularly as there was a whopper of a window going into this wall, to make sure that everything is true for the parts of the build that follow on after. In the meantime, a few other things have gone on at the build. A start has been made on putting in the ducting for the MVHR and shoving some of the UFH pipes and manifold towards where it will end up. The UFH manifold for the upstairs is going up into the loft section. In the original plans, the upstairs landing was vaulted, but the decision was taken early on to board this out and create a loft space that could then be used to stash away all the MVHR kit and other ancillary equipment, including the upstairs UFH manifold. There is another bit of kit going in there that is a heat pump but used to cool rather than heat air going through the MVHR system and thus provide active cooling in the summer to complement my shading from the brise soleil and exterior roller blinds on the south facing windows. Here's a photo of the MVHR ducting and UFH pipes coming up through a cut-out section in the floor and up into the loft space. The stud wall that you can see divides the landing from the en-suite for the master bedroom; it is planned to be a twin stud wall and so, once done, all the pipework and ducting will be hidden in the cavity of the twin wall. More of the same: The plenums for the MVHR will sit at the far end of the bedrooms, i.e. near the windows. The idea is that this will achieve a proper through put of fresh air through the entire room, rather than just circulating around the door and landing areas. You will see that the plenums are quite a bit lower than the central glulam beam supporting the vault. The plan here is to introduce a central flat section along the ridge, low enough to cover the ducting and the glulam and the plenum will then just pop out of the plasterboard. Whilst this means extra cellulose being required for the increased volume of the roof section, it will make detailing it and covering it in far easier for MBC when the time comes to do that, so there's a decent quid pro quo there. A major benefit of stuffing the MVHR ducting into the ceiling section that will be filled with cellulose is that the pipes up there don't need to be insulated, which would normally be the case. The ones for the ground floor are currently getting their NASA-style coats and I'll show some photos of those in the next post. This also means that it's given a reduction on the cost of all the MVHR kit as the insulation for the ducts isn't particularly cheap. Aside from the window/wonky frame drama, it's currently a time for figuring out and juggling details. My flat roof guys should be back in a couple of weeks and I really need to get the parapets and east balcony finished off as until these are done, the main house won't be watertight. I need to check with the team at County Flat Roofing, however, as I also have my balustrade to go onto the balconies. The balustrade has posts that are fixed onto the parapets by way of a square/rectangular base plate, about 10mm thick. These can go either on top of or underneath the roofing membrane, but I need to check which will give the best finish and then press the button for whoever goes first. I know that if the plates go under the membrane are too thick, it will look bumpy and not very nice but, more importantly, might not give a good seal. I shall check and report back, but I suspect that we will end up putting the plates on top of the membrane and sealing it up again afterwards. Although the balustrade hasn't been installed yet, I've been chatting to the guys at Balustrade UK, including the lovely Trevor, and they've been very understanding with my needs for flexibility on timing, so all is okay there. Moving onto brise soleils, who would have thought it would be so difficult to track down a firm to do these? Certainly neither me nor my architect. We tried a couple of local firms, including one that is on the same industrial estate as me and OH, but it was like tumbleweed blowing down mainstreet in an old cowboy film. Nada. In the end, I contacted another Birmingham firm, Vincent Timber, who mentioned them on their website. In the event, the only supply the timber for them rather than the whole thing, but they passed my enquiry onto a firm in St Albans, Contrasol Ltd, and they came back with a fully specced brise soleil for the stairwell window which is just the thing. Not cheap, mind, but not far off what I thought it would be. The metal supports will be powder coated aluminium (RAL7016, of course, the same as any other bit of metal on the building) and the fins will be red cedar that will be allowed to silver. When OH and I originally discussed this, we were hoping to get something that would retain its colour but this has proven to be tricky and we have no intention of painting anything on the brise soleil fins every 8 years or so to retain its colour. It can go grey with dignity, just like us. I was out on site today getting the trench dug for the re-routing of our electricity supply cable. Currently, it comes in via an overhead wire and a dirty great pole that's right next to the building. We've planned from the outset to have this buried and the SSE guy, Dave, will come along next week to lay the cable and, in due course, run it into the garage. It's a long old trench, mind you. It took just under 4 tons of sand to put the blinding layer down and it won't take much less than that to cover the cable once it goes in, before back filling. Still, another job to tick off the list. I need to get another couple of bits of groundworks done in the coming weeks. First off, I need to get the spec from the Highways Agency as to how they want the new driveway onto the lane to be constructed. My sunamps will live in the garage and it will be very tricky getting them in through the house as they're hefty things, so I may as well crack on and get the driveway done. The only slight hitch is that there is some scaffolding in the way right now, but I'm hoping that by the time we get around to making the new opening, I'll be able to do away with a fair bit of the scaffolding. The other groundwork task is to start digging out the pond. OH has decided on the shape and size and I used a couple of cans and left over EPS to mark out the perimeter this morning. Before anyone asks, these are the answers: no swimming, no fish, no fishing, no duck shooting. It's a wildlife pond and that's it. But it is a bloody big pond and I'd like to get it dug before we get some serious weather in as we can then start to get a feel for just how well or not our clay soil will retain water and start to plant up the margins once we have a better idea of what we're dealing with. It's hard to see the line marking, but this is the view from the top lift of the scaffold. That's all for now, the next post should hopefully have a bit more interior detail and a lot more roof action. Stay tuned.
-
I have some recesses in my powerfloated slab that were put in when it was poured. These were to allow the lift and slide windows to sit in the recesses and make the frame level with the finished slab and, indeed they are. However, I now have 2 lift and slide windows where I need to fill the space not taken up by the window. Any suggestions on how to go about this?
-
FWIW, my solar gain mitigation is going to cost just over £7.5k (ex. VAT). This is for two fairly large external motorised roller blinds and a whopper of a brise soleil running up the floor to roof window in front of the stairwell window.
-
I sympathise entirely! I've been caught out with waiting times on a couple of things recently, particularly my roof windows and a fire rated door to go between the garage and utility room. I confess, it hadn't even occurred to me that the architect or BC would need to sign off on a staircase - is this normal? The imposed downtime has given me useful forward planning time, though, and enough time to catch a cold and get over it without having to be snuffling around on site for a week. It's life's little luxuries that count, isn't it?!
-
My experience of SEs and piles is that they tend to over engineer, often without a thought to cost constraints so never be afraid to question them. The formwork looks great and it's coming on at a pace. Lovely job.
-
Fingers crossed for you.
-
These days, trusts are more instruments of control rather than tax saving vehicles and they inevitably make life more complicated. It's lovely that your parents are keen and that you can do this for them. Your comments on the big lounge issue rings true with me. OH and I briefed the architect from the outset that we didn't want more rooms (3 bedrooms) but we did want much bigger rooms than our current place, and that's exactly what we have now.
-
Just when you thought it was all over. You must be the most resilient of people, Lizzie, I think I would have killed someone by now.
-
Haha! F&B started out in industrial paint and were a company local to us. Somehow, I can't bring myself to use their paint in the house!
-
We used to paint the concrete floor in our factory with F&B paint.