Spinny
Members-
Posts
579 -
Joined
-
Last visited
Everything posted by Spinny
-
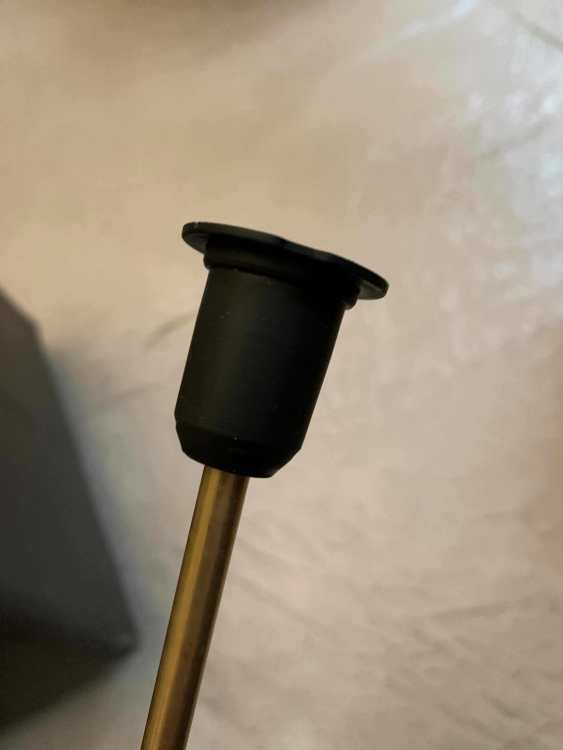
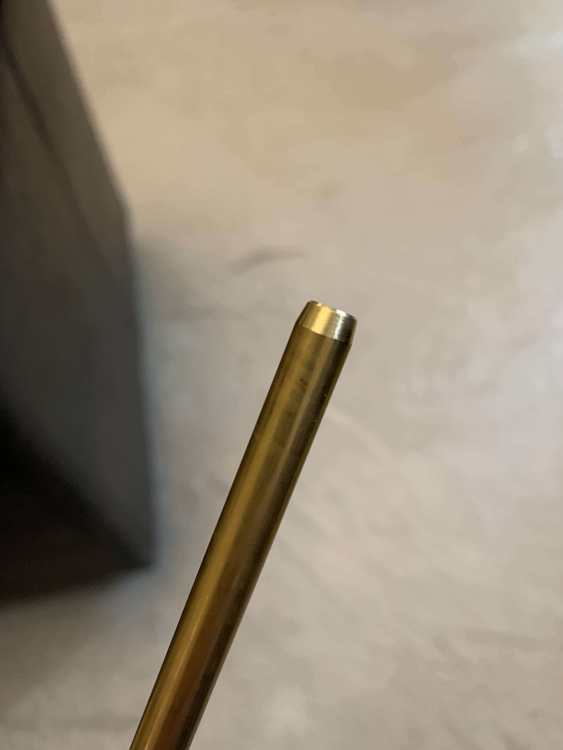
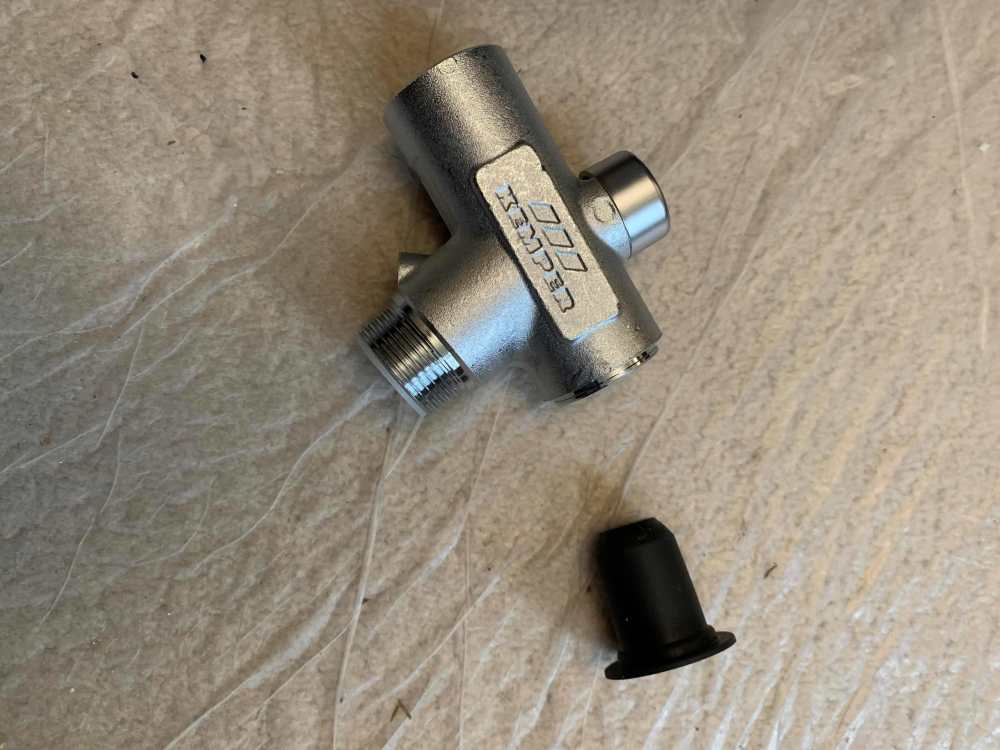
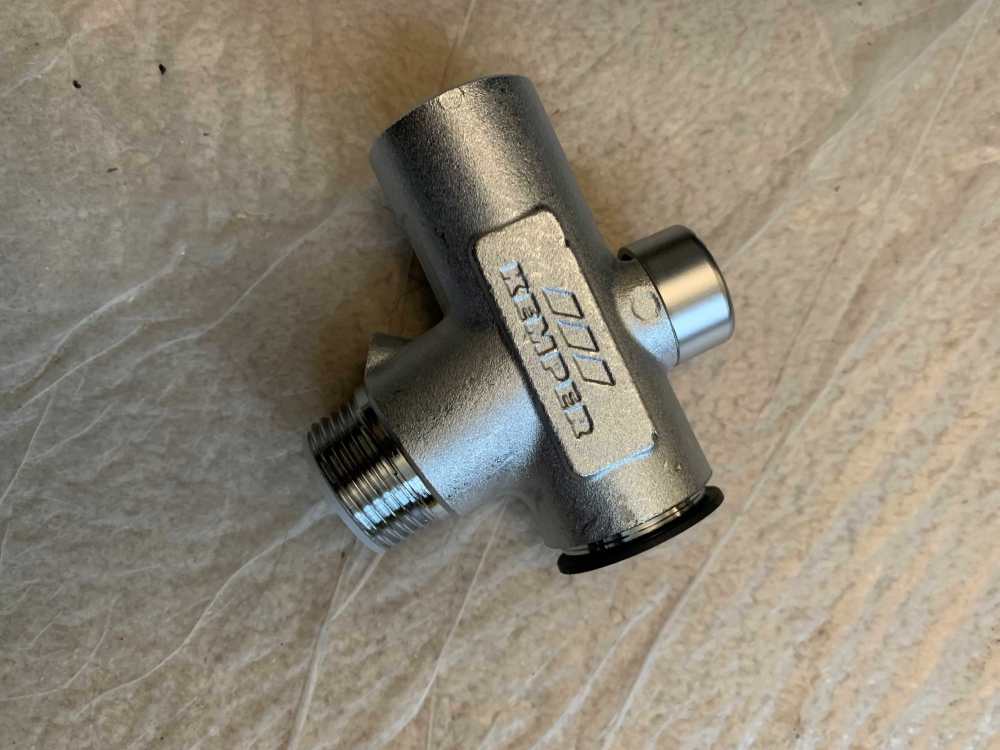
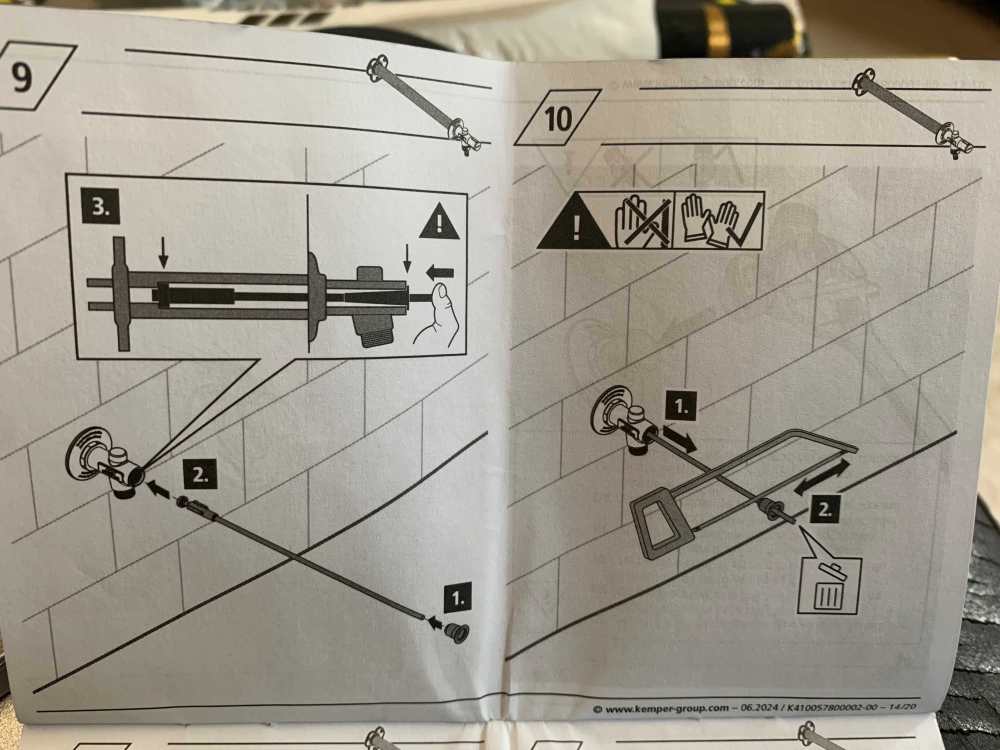
Not sure I follow because the black bit will not fit on the end of the rod and slide down it - as shown in this video... Yes I can measure the length of the black bit (which is designed to to seat against the outside edge of the tap block), then mark the position of the outside edge of the tap block onto the rod, then measure down the rod by the length of the black bit. Or I could widen the hole in the black bit so it will fit over the rod. The measurement option is prone to measurement errors. It seems odd that they would supply a thing to make sure you can measure the rod length precisely, but then not have it actually fit the rod. The rest of it all seems to go together very well and is carefully engineered. So makes you wonder a lot when something like that just doesn't fit. There is a small chamfer on the end of the rod which fits the hole in the black bit, but it won't slide down beyond that. You can't achieve what is shown in the inset diagram labelled 3 or on the video. I notice the valve end is spring loaded, so I suppose there is room for error perhaps, but getting the length spot on presumably maximises the spring compression and the strength of the seal.
-
Low points: and how to get out of them
Spinny replied to ToughButterCup's topic in General Self Build & DIY Discussion
Never enjoyed this time of year. The festive period is over but still a long drag until warmth and daylight comes - UK can sometimes be getting snow in early April. The constant flow of problems can seem overbearing - one of our plasterers cut his hand badly before Xmas - now the other one has badly sprained his right hand/thumb on scaffolding. Not on our job, but just stops them working on ours. FIL just diagnosed with dementia. Spouse is really struggling. At my time of life I have concluded the only approach is the stoic one - keep pushing the rock up the mountain however little gain you make and however much it keeps rolling back down... https://youtu.be/i-GD7R82y9Q?si=S_YVPJ3poHzILnbK I like to keep thinking of each day having more daylight than the last. -
@Russell griffiths and all So I am cutting my Kemper Frosti tap down to the correct length. On the instruction leaflet it implies that a black plastic piece can be slid over and down the inner valve rod in order to mark the correct cutting point for the valve rod. However the black plastic piece does not seem to fit over the rod because the hole in the center is too small to slide over the rod. Anyone else that has fitted a Kemper Frosti had this problem ?
-
So every time the heating comes on we get pipes creaking under the landing and bathroom. Doubtless this is the copper pipes used in this part of the house expanding as the hot water heats them up. So what is the best fix for this ? I think maybe there is some kind of plumbers felt which can be slid under the pipes where they contact the joists to take away the friction ?
-
New technology is always the big hope. If we imagine a world with abundant energy from fusion, and a world where we are able to manufacture and reprocess materials new and old, things could look very different. When we think of the astonishing technological achievements of the last 100 years, and the accelerating pace of change, mankind will hopefully be in a different place in another 100 years - the blink of an eye in climate change terms. This video shows the astonishing developments now to come in bio technology and man made protein design for example... https://youtu.be/KbDvQgsOI-E?si=eW3ukpS1dLkhsGvA
-
Looks like the sparky has left us with a lighting cable for a locally switched wall light which is too short for where we want to site it. How can the cable be extended these days ? Is it acceptable to use some form of in-line connector buried in the wall ? (in the safe zone of course)
-
Except the other major issues are (1) cost, (2) environmental impact, and (3) intermittancy. 1. There is huge disagreement on the actual costs of renewable energy with people using different calculation methods and huge tax payer subsidies in place now. Subsidies not only being direct but also via paying producers to turn off wind turbines and cut off power feeds - effectively paying for no power. So we then have energy storage costs. We also have the cost of power cabling. 2. Environmental impacts extend from being a blot on the landscape, to killing wildlife, to felling rainforests, to catching fire, to falling over, to child labour in cobalt and lithium extraction, to interfering with radar, to loss of farm land. 3. Intermittancy means no energy security without huge scale energy storage, either centrally, or in a distributed fashion where everyone has to install a battery in their house. Renewables is not a free lunch or without very real issues.
-
I believe we will be very soon on range, cost and fire safety - I guess you are not following the developments in battery technology - try youtubing sodium batteries.
-
On the Medieval Warm Period - I did not make any claim as to whether it was hottest or not - I used a ? Your claim was - since humans left Africa - seems to be variously attributed to between 60,000 and 125,000 years ago. Your graph covers 12000 years only, but I do see that as we are on the back end of an ice age, yes it is warmer than it has been for some roughly 120k years. Nothing whatsoever strange or man made about any of that of course. We call it climate change - way outside of human control. Looks like it will be getting rather cold over the next 25,000 years - I'll buy a thick winter coat and some long johns :0). Looks like humans might be rather glad of some higher temperatures in that period - methane generators all round perhaps. So we are heading towards a new ice age, I'd be far more concerned about the impact of that on the future of humanity, rather than scaring half the planet into not procreating.
-
Nope, still wrong. What you say would be somewhat true for a single location if 100 year events became say 10 year events. But that is not what I said, and even then would depend upon whether 100 years was actually a meaningful timeframe anyway relative to long term fluctuations in the earth's climate. By definition a 100 year weather event is only statistically expected to occur once every 100 years. If you monitor a thousand different locations around the globe for 100 year weather events then you might well find 10 in a single year.
-
That is not actually true. The point was about 100 year events, not all time record events. What nonsense is this ? I don't think so. Medieval Warm Period ? Got any actual data to back that up ?
-
https://brightonjournal.co.uk/investigation-uncovers-allegations-of-fabricated-data-at-uk-weather-agency/ https://wattsupwiththat.com/2025/12/20/government-minister-steps-in-to-defend-met-office-as-fake-temperature-scandal-escalates/
-
Certainly not that. And don't confuse climate change - the climate is always changing - with anthropogenic CO2 as 'the' cause of a climate 'emergency'. Every year there are 100 year events in different places on earth - because there are rather a lot of places on earth, so somewhere is almost always having a 100 year event. 50 years ago you wouldn't have known, now every extreme weather event is seized upon by an army of climate activists and the globally connected internet and media and pushed out as propaganda. A good deal of that propaganda is provable lies. Once you zoom out, look at the actual long term record, it has all happened before. This year's hurricane season was below normal, there is no dangerous decline in the AMOC etc https://wattsupwiththat.com/2026/01/21/storm-goretti-was-not-worst-since-1703/
-
Yes I think we are all aware the days of UK peak oil & gas are over. That is not a reason to abandon what remains, and you never know when new reserves are going to be found. I am quite happy with mixed and diverse sources for UK energy. Let the people, and the market try them all and use them as and when they suit. They all have pros and cons. I don't think hacking down rainforest for balsa wood to make wind turbine blades is a great idea, nor chopping up sea birds and birds of prey, nor child labour digging for cobalt and lithium, nor covering prime farm land with solar farms. It is far from as simple as the virtue crusaders think. On energy security and national security I am old enough to remember when we had a proper focus on energy security and national security infrastructure - bourne out of the experience of 2 great wars. It was all abandoned when the Berlin wall came down. We are in our 4th decade of treasonous politicians of all hues doing their best to destroy our nation and it's security. We can barely even make any steel any more, have willingly prostituted ourselves to the totalitarianism of China, sold 50 Billion of gold at one twentieth of today's value, wasted vast sums on covid nonsense, have hacked the armed forces back to embarassing levels - there is an endless list.
-
But that is not the situation. It has been 20 years since Al Gore released 'An Inconvenient Truth' and the first COP meeting was in 1995 over 30 years ago. The end is nigh they cried but all the portents of doom have not actually occurred. And we definitely have people being paid to try to keep a failing narrative going, and people in school taught that opinon is fact, and organisations like the Met Office and the BBC obviously lying, censoring, and misrepresenting climate concerns. How do you know when a politician is lying to you - their lips are moving.
-
On the 'pick one' stuff, I am generally against false binary decision making. The best decisions under uncertainty are often to hedge your 'bets' and recognise the role and pros cons of alternatives - some of each please.
-
'Appeal to authority' as an argument is fallacious anyway. The truth is not determined by any 'authority' no matter his position or the number of letters after his name. Neither is it determined by popular vote, nor by the vote of those paid to promote narratives regardless of objective truths. Nature is as she is. As Rutherford said 'All science is either physics or stamp collecting'. I'd argue physicists generally have the most objective and questioning perspectives. They grow up with the motivation to find truths - nobody can really work as a physicist without both a capable mind and a passionate curiosity for truth. Climate science is more of a job - barely existed 40 years ago - now massively expanded as a result of climate alarm - turkeys don't vote for Christmas. We miss him still... https://youtu.be/OL6-x0modwY?si=vYOWFRolyMaOzxvQ
-
A juicy target in a hot war, especially if in port.
-
Europe stores gas of course, gets them through every winter. The Rough facility is off the coast of East Yorkshire, and accounts for about half of the capacity the UK has to store gas. It was closed in 2017, but then partly reopened in October 2022 following the energy crisis triggered by Russia's invasion of Ukraine. Even the US has a strategic oil reserve. And you can follow summary of the gyrations and commentary on natural gas supply and demand here... https://tradingeconomics.com/commodity/natural-gas
-
Energy storage seems to be coming. Would seem best to wait for sodium batteries made in the West rather than enable China's oppression. Also avoids the fire risk of lithium. (I remember buying an early flat screen TV - within 18-24 months you could buy 50% larger for almost half the price.)
-
According to ChatGPT... "No — there’s no credible evidence that John F. Clauser is paid by the American Petroleum Institute (API)."
-
I didn't actually say it cost a fortune to install a heat pump in a new build - where did I say that ? And the poor don't generally live in new builds. We are talking about older properties and going around ripping out existing central heating to replace it with heat pumps at great TOTAL cost to the tax payer. Think victorian terraces of flats and high rise buildings, cheek by jowl, little parking, no gardens. When someone from government (Millipede) arrives and says 'I am here to help you' - run for your life as fast as you can. The history of centrally planned economies is not good for anyone.
-
You seem not to understand the point I made. You cannot in one breath push for and bring about the destruction of the UKs indigineous fossil fuel industry (in the name of CO2 emmissions and climate emergency) AND then bemoan the low levels of UK energy security because of the need to import fossil fuels. You cannot claim the lack of UK indigineous fossil fuel industry (which you have acted to destroy) as a reason to destroy all fossil fuel use. There is only 1 reason there - you want to destroy use of fossil fuels in the UK to achieve net zero - it is 1 reason, there is no 2nd reason regarding energy security. You are using tautology and not recognising it. Smoke and mirrors. We are going to be using fossil fuels for many decades to come whatever is done. The UK cannot go net zero in any short timescale, so we will be happily burning gas for many more decades, like it or not. Energy security has many solutions including building gas & oil storage facilities, building nuclear power stations (large & small), building clean coal solutions. Batteries will eventually play a role. etc. Mr Millipede has just announced a new package of mad policies to ban gas boilers in new builds and spend a fortune installing heat pumps for the poor (who often live in accommodation for which they are unsuitable). Fortunately there is no industry capacity to achieve his policies on the scale he proposes, and thankfully he will be out of power within 3.5 years now. IMO, the country does not need mad crusading zealots leading us into self destruction like Chicken Licken.
-
There is a scientific theory yes - a hypothesis. In physics we look to establish the veracity of theories using experiment with independent repetition. The experiments aim to show that the predictions of the theory occur in practice. To my knowledge no actual experiments have been done as it is clearly difficult if not impossible to replicate a mini earth and atmosphere to experiment on in the lab. For the theory which does exist there are also strong counter arguments e.g. that (1) atmospheric effects reach a saturation point beyond which more CO2 no longer significantly impacts temperature and (2) that the impact of water vapour and clouds - present in vastly greater amounts than the 0.04% of CO2 - drown out any CO2 effects. One theory was even based on variations in cosmic rays impacting the nucleation and formation of cloud cover. Lots of things impact climate - many cyclical. In the longer term records there are clear disgreements over whether higher CO2 is actually a cause of higher temperatures, or indeed is itself caused by higher temperatures. Looking for simplistic dependencies in complex systems can be misleading. I am not saying it is wrong, I am just saying it is not proven and is open to question. Unfortunately too many people would rather engage in personal attacks, cancellation, and spurious appeals to 'authority', over actual engagement in scientific debate. Certainly I have studied Physics. Presumably you are aware anthropogenic climate emergency is questioned by at least one Physics nobel prize winner. But I think we get off the point, which is really just an appeal for recognising uncertainty and doubt, and not charging around like just stop oil fanatics insisting on net zero extremism.
-
If only that were still true. In today's world academics get monitored and ranked by papers published and citations. Lots of junk journals and journals with biased editors etc. Academics can often engage in mutual back scratching, reviewing, citing, and naming each other on papers for mutual advantage.


