Spinny
-
Posts
921 -
Joined
-
Last visited
-
Days Won
1
Everything posted by Spinny
-
What Liquid Damp Proofing before applying Tile adhesive ?
Spinny replied to Spinny's topic in Waterproofing & Sealants
It is only a small area. A physical DPM is going to interfere with getting a good bond. Not very likely to get any damp but would prefer to use something rather than nothing. People must want to liquid damp proof floors and then use tile adhesive all the time - what do they use ? Mapelastic AquaDefence ? -
I have sunflex bifolds installed by ID Systems. I think it is very important that installation is done very precisely - everything needs to be exactly plumb - that takes time and extreme care by experienced installers. ID Systems did provide that. I don't trust a builder to do that TBH. All my window seals are very good. I did have an issue with a seal at the bottom edge of a door but it was put right. I did have some issues with wrong parts being supplied, and with my builder screwing up the opening, but that is a different thing. Drop on your doors could be install issue, or might be a 'design feature'. Yes I was told to open them as you describe, doesn't seem too much of a problem. Mine do slide right across the opening to hang at either side. I don't have a any cut ends exposed. Opening was surveyed by the fitters and dimensioned manufacturing drawings then provided for buy off before manufacture.
-
So I want to use tile adhesive on a horizontal surface after applying some kind of damp/waterproofing to it. (Yesterday AI recommended DryBase Liquid-Applied DPM saying I could apply tile adhesive while it was still tacky. Today it says the Drybase has to dry completely and then I may need a primer. Useless thing) What can I use and still get a good tile adhesive bond (Using Mapei Super Flexible Tile Adhesive - powder S1) ?
-
Build has descended into a xxxx show
Spinny replied to flanagaj's topic in General Self Build & DIY Discussion
@Andeh What exactly have you used as your soffit material, it looks very good. Is it actual timber, or something man made ? -
Not sure how Open can have any right to dig up the neighbours drive without his express permission. Would have thought to do so would be criminal trespass and damage.
-
@Alan Ambrose Another retrofit smart window sensor I happened across here... https://shop.siegenia.com/siegenia/en/Smarte-Systeme/Smart-Home/Smarter-Sensor/SENSOR-SET-RAL7005-GRAU-K1/p/ZUFS1000-0J9010 Interestingly they also do smart window handles that can be automatically locked and monitored and also tell you if the window is open or not... https://shop.siegenia.com/siegenia/en/p/ZHSM0020-002011
-
Insulation upstand when not having skirting board?
Spinny replied to flanagaj's topic in General Flooring
Why insulate the slab, are you heating the garage ? -
Insulation upstand when not having skirting board?
Spinny replied to flanagaj's topic in General Flooring
Dot & Dab brings the plasterboard off the blockwork anyway. 12.5mm plasterboard with 2.5mm skim = 15mm. Dabbed off the wall by 10mm and the front of your finished wall is circa 25mm off the block work. Why no skirting board ? People do use flush skirting with shadow gaps and stuff - is that what you mean ? We have a 25mm upstand but levelling compound and flooring will cover it. Laying the top part of the screed to cover the top of the upstand could be one answer. Yes creates a small thermal bridge between floor and wall but does this matter much ? -
Yes agree also. Council budgets are overwhelmed with care requirements for the ageing baby boomers. Funding for planning and building control therefore seems to get stripped back. No doubt the desire to automate and go more electronic is borne out of this - i.e. cutting council spend and cutting planning and control services. In addition the previous generation of baby boomer planners with many years of experience and knowlege are disappearing to be replaced by youngsters on low wages and little to no actual planning knowledge and experience. And they struggle to even recruit these youngsters with constant staff shortages. Planning officer I dealt with had zero knowledge of all the issues around building at boundaries - party wall act, boundary dispute law, trespass law, right to light, etc. You won't solve this by thinking you can reduce it to a monkey pressing a keyboard on 'the system'. The planning system is poacher and gamekeeper. If you reduce the gamekeeper to a monkey on a keyboard you are going to get huge amounts of poaching, bad buildings, and huge public dissatisfaction with planning decisions. (And I strongly suspect this is like so many cost cutting initiatives I have seen, which actually amount to just transferring work from a department out to the user of that service. Moving the work of using the system from the planning and control departments to the planning applicant will be a disaster for the planning process - some planning applicants do lie and deceive their way through the system you know.
-
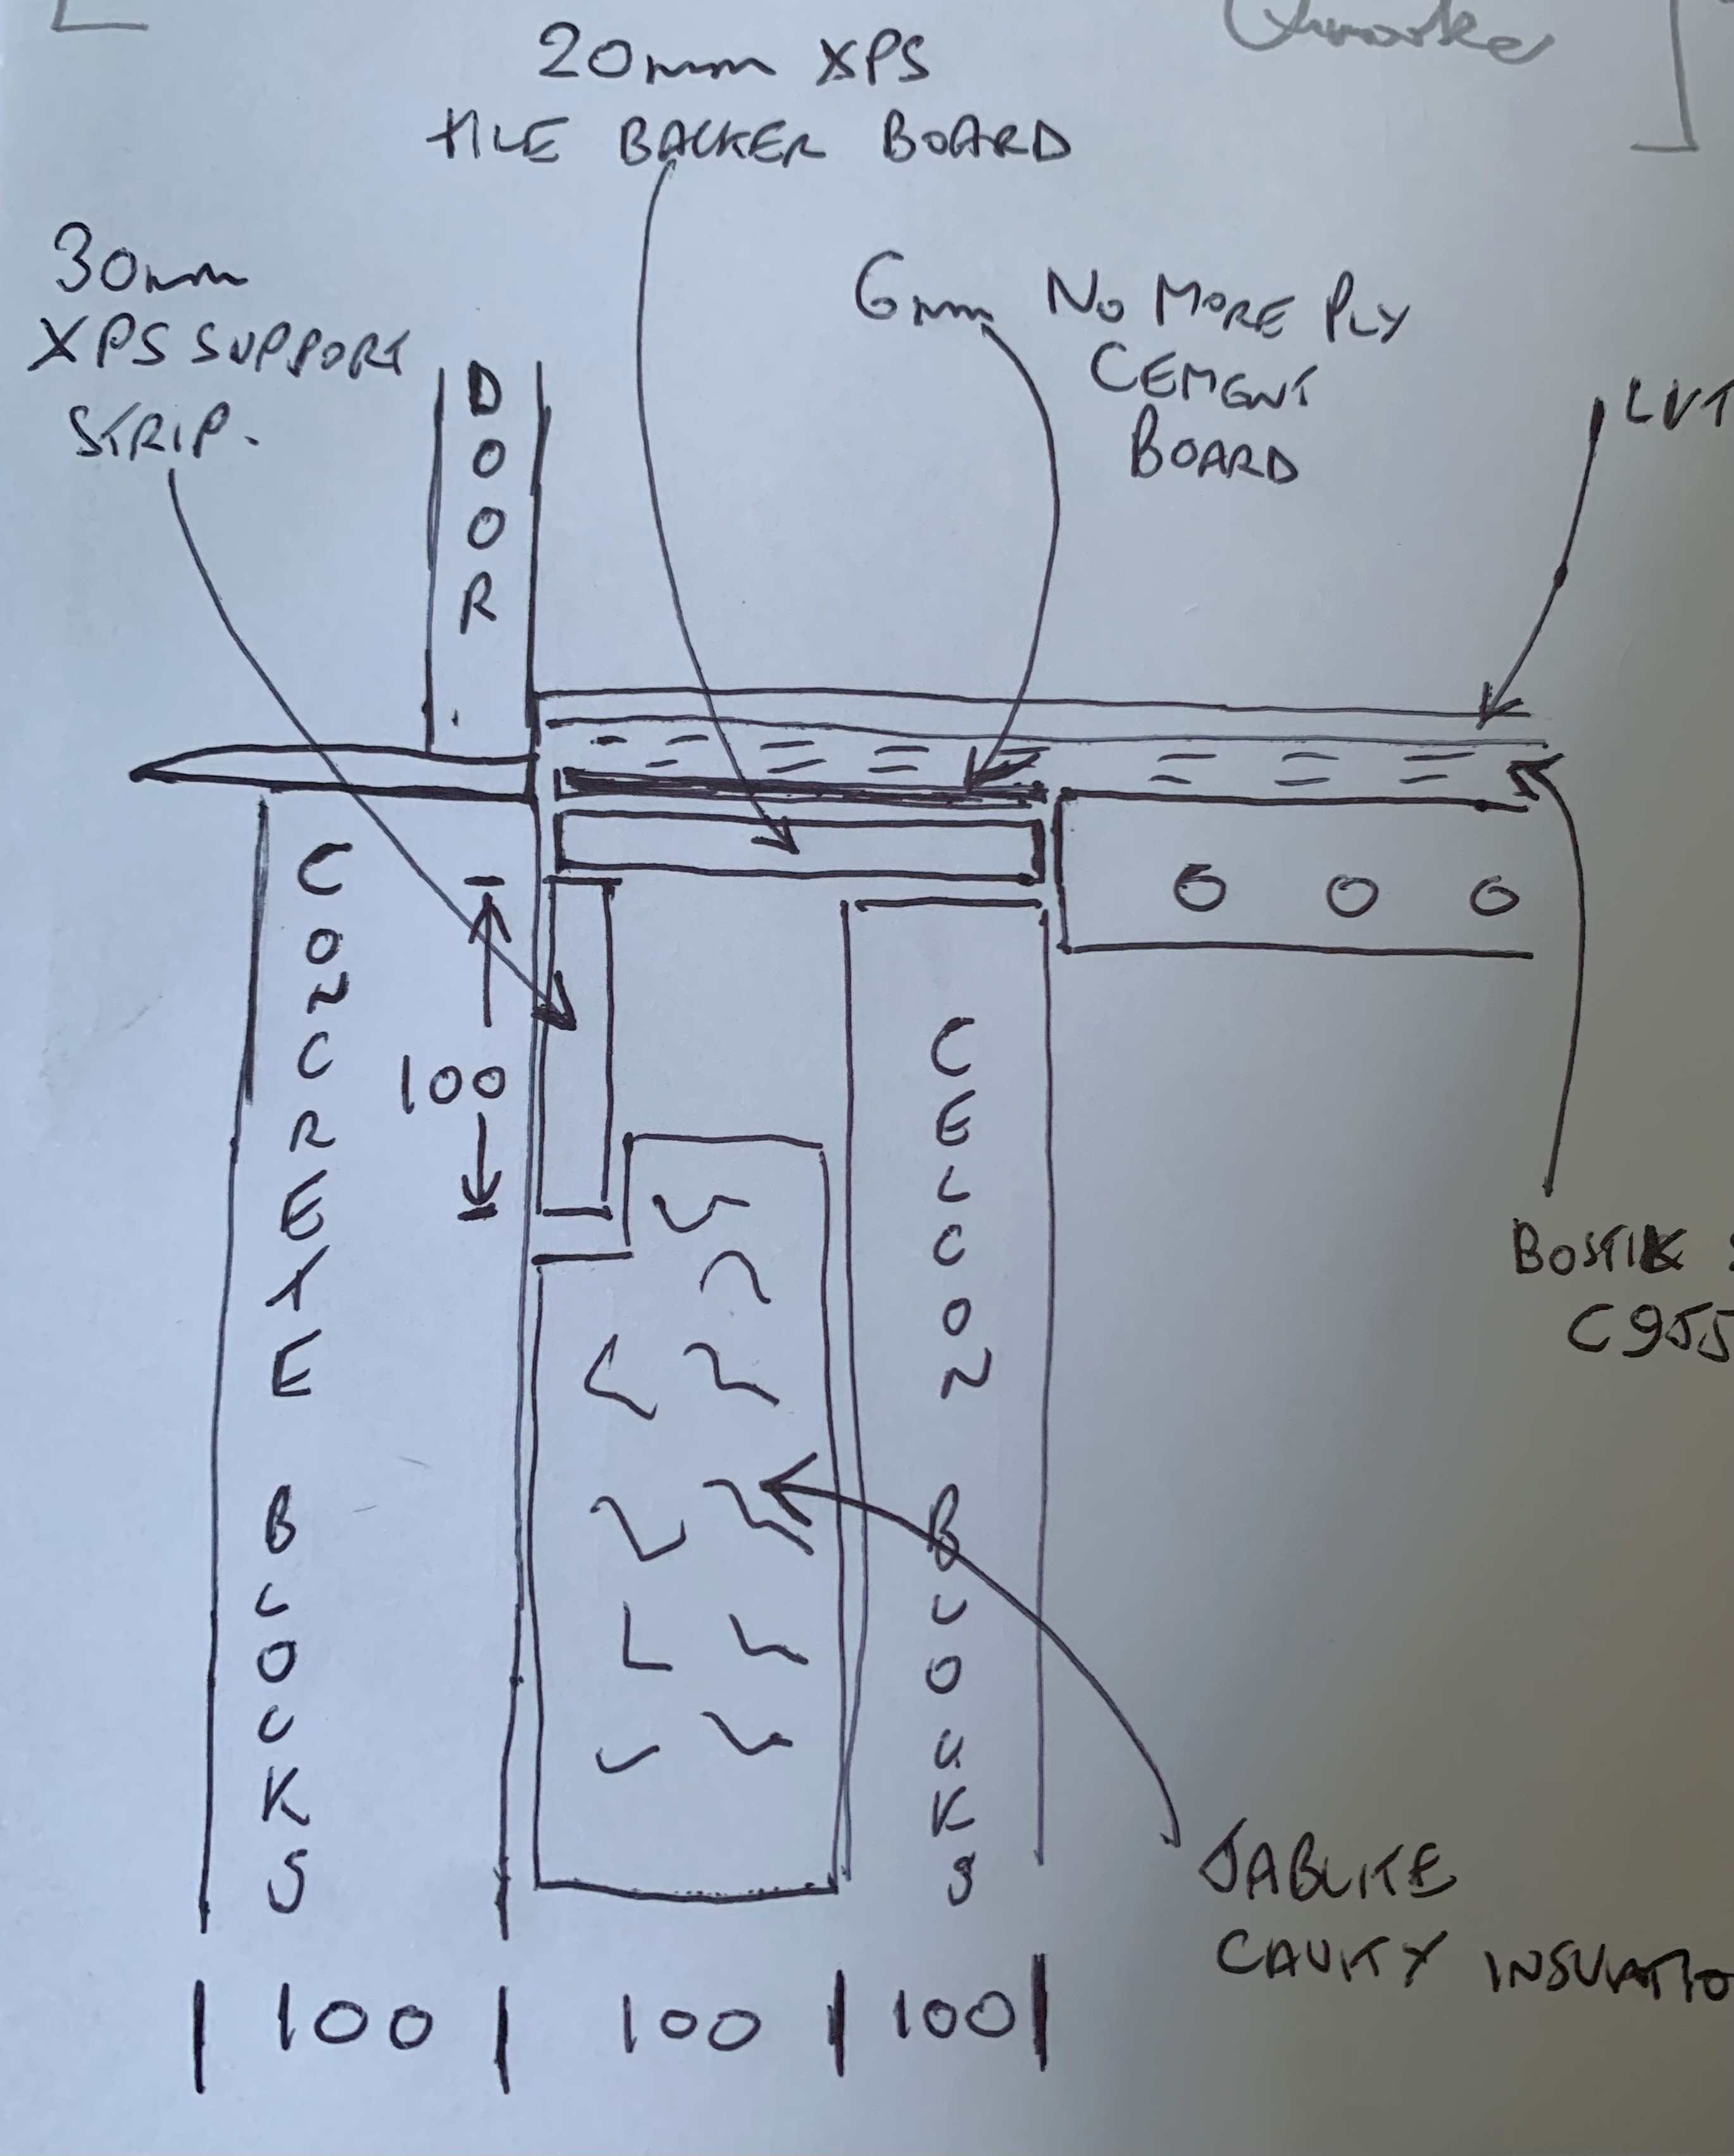
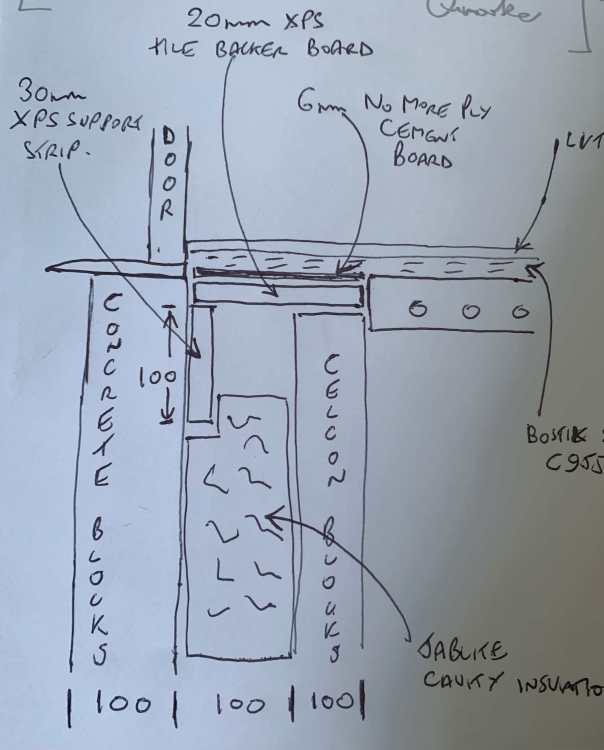
Hi @Nickfromwales and all, I get that you want me to fill the cavity with concrete. But have some concerns that mean I don't really want to do that. The DPC is above the bottom of the door cill and has been stepped down to run under the door cill. Note the door is only a single door so the reveal is 890mm wide only). So the cavity wall below the floor level is below the DPC. It has grey jablite type insulation in it. I was able to pull one piece out to have a look and found there was some moisture at the bottom of the cavity there when we had very wet weather. Clearly some moisture from the ground/hardcore outside the door can work it's way through the outer leaf to the bottom of the cavity when it rains a lot. The jablite was used at that level rather than PIR because it can cope with any moisture better. So I don't want to remove the inner celcon leaf (which would be complicated now the rest of the floor is in now anyway) because it would remove the cavity 'protection' from damp, and the jablite insulation. The inner leaf is also thermal blocks and provides a point of support for closing the cavity with a board over. The cavity is also probably 450mm deep there so would be quite a bit to fill with concrete and have dry. The fundamental problem is the lack of any support on the outer leaf side of the cavity, and the fact this is difficult or impossible to access with power tools because there is only the 100mm cavity to fit any tool into. Therefore my proposed approach of bonding a support piece to the outer leaf, which also has to be insulative. To deal with the stilhetto issue I am now thinking I could put 6mm No More Ply cement board over the 20mm XPS backer board to provide more rigidity and spread any point loads. (Not sure on the best thing for bonding the two together ? No more ply adhesive ? flexible tile adhesive ?). Then the. cementitious floor leveller should go on the top of the cement board quite happily. New diagram attached. On my test piece I bonded the XPS support strip to the concrete outer leaf with Rawlplug bonded anchor R-KEM 2. Chat GPT is suggesting there might be better alternatives to use for bonding XPS to concrete - thoughts. The biggest risk would seem to be this support debonding down the line. (I have some metal angle brackets but there is no way to screw them into the outer blocks.) More thoughts comments please as I need to close this out nowish.
-
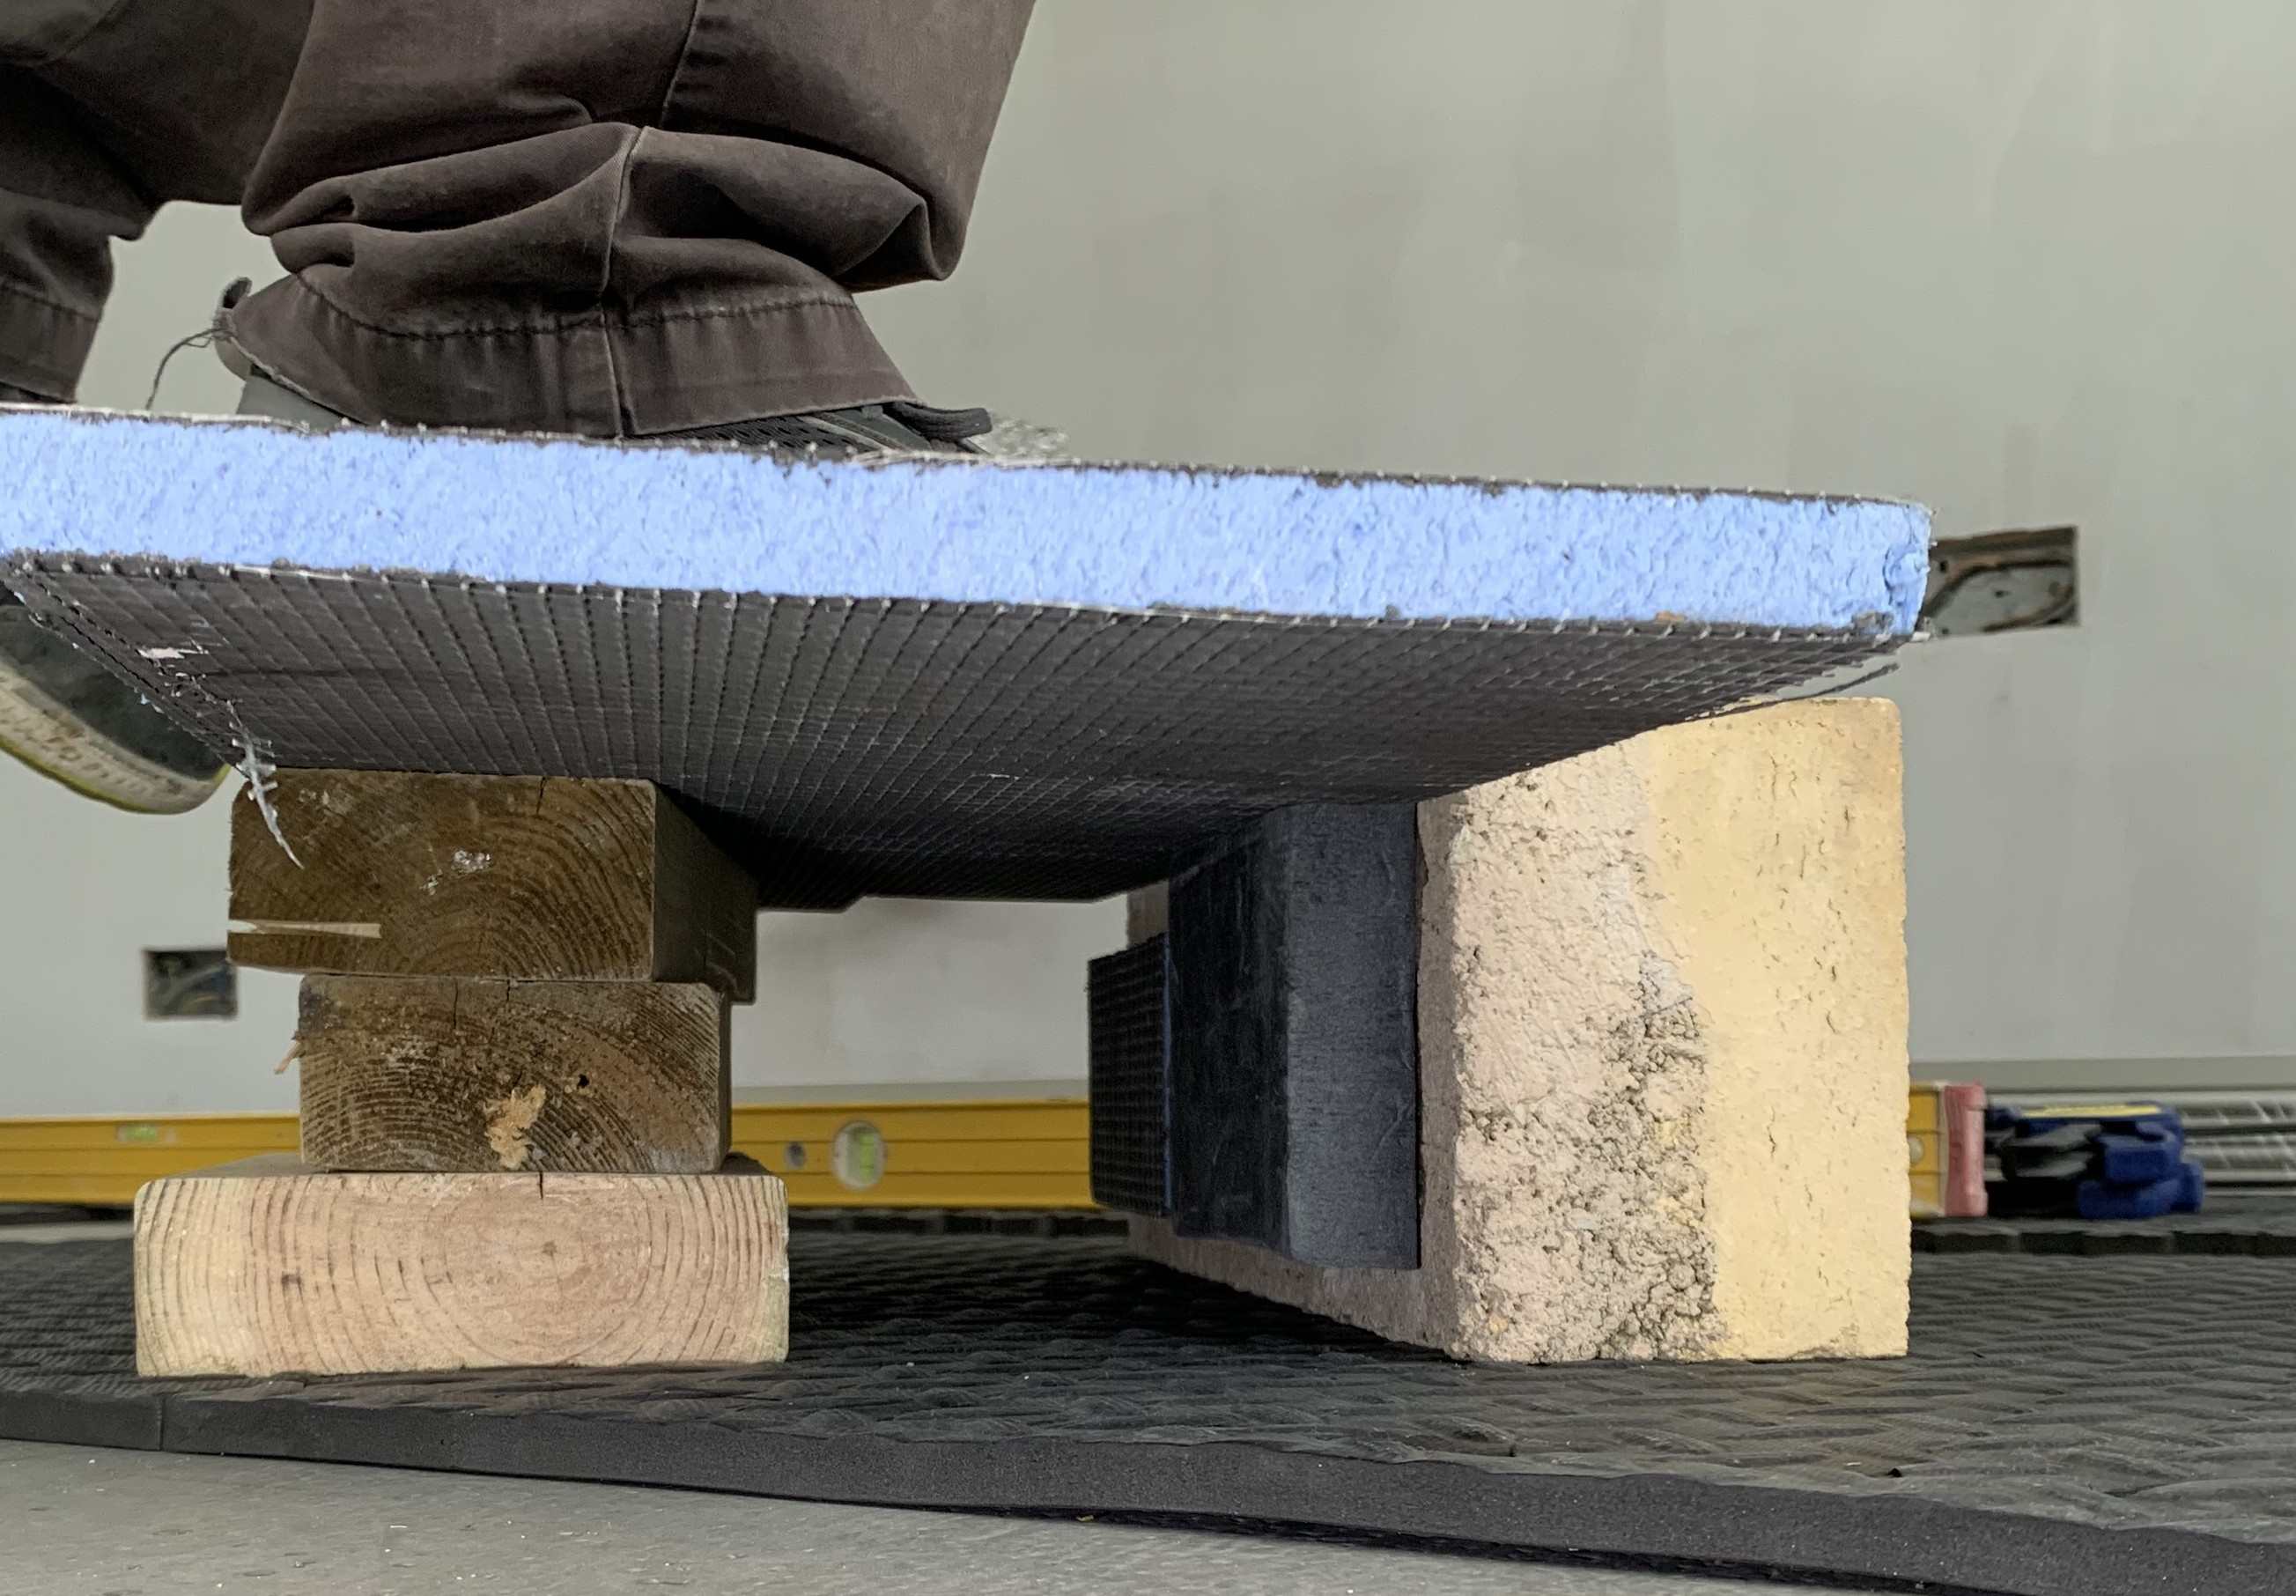
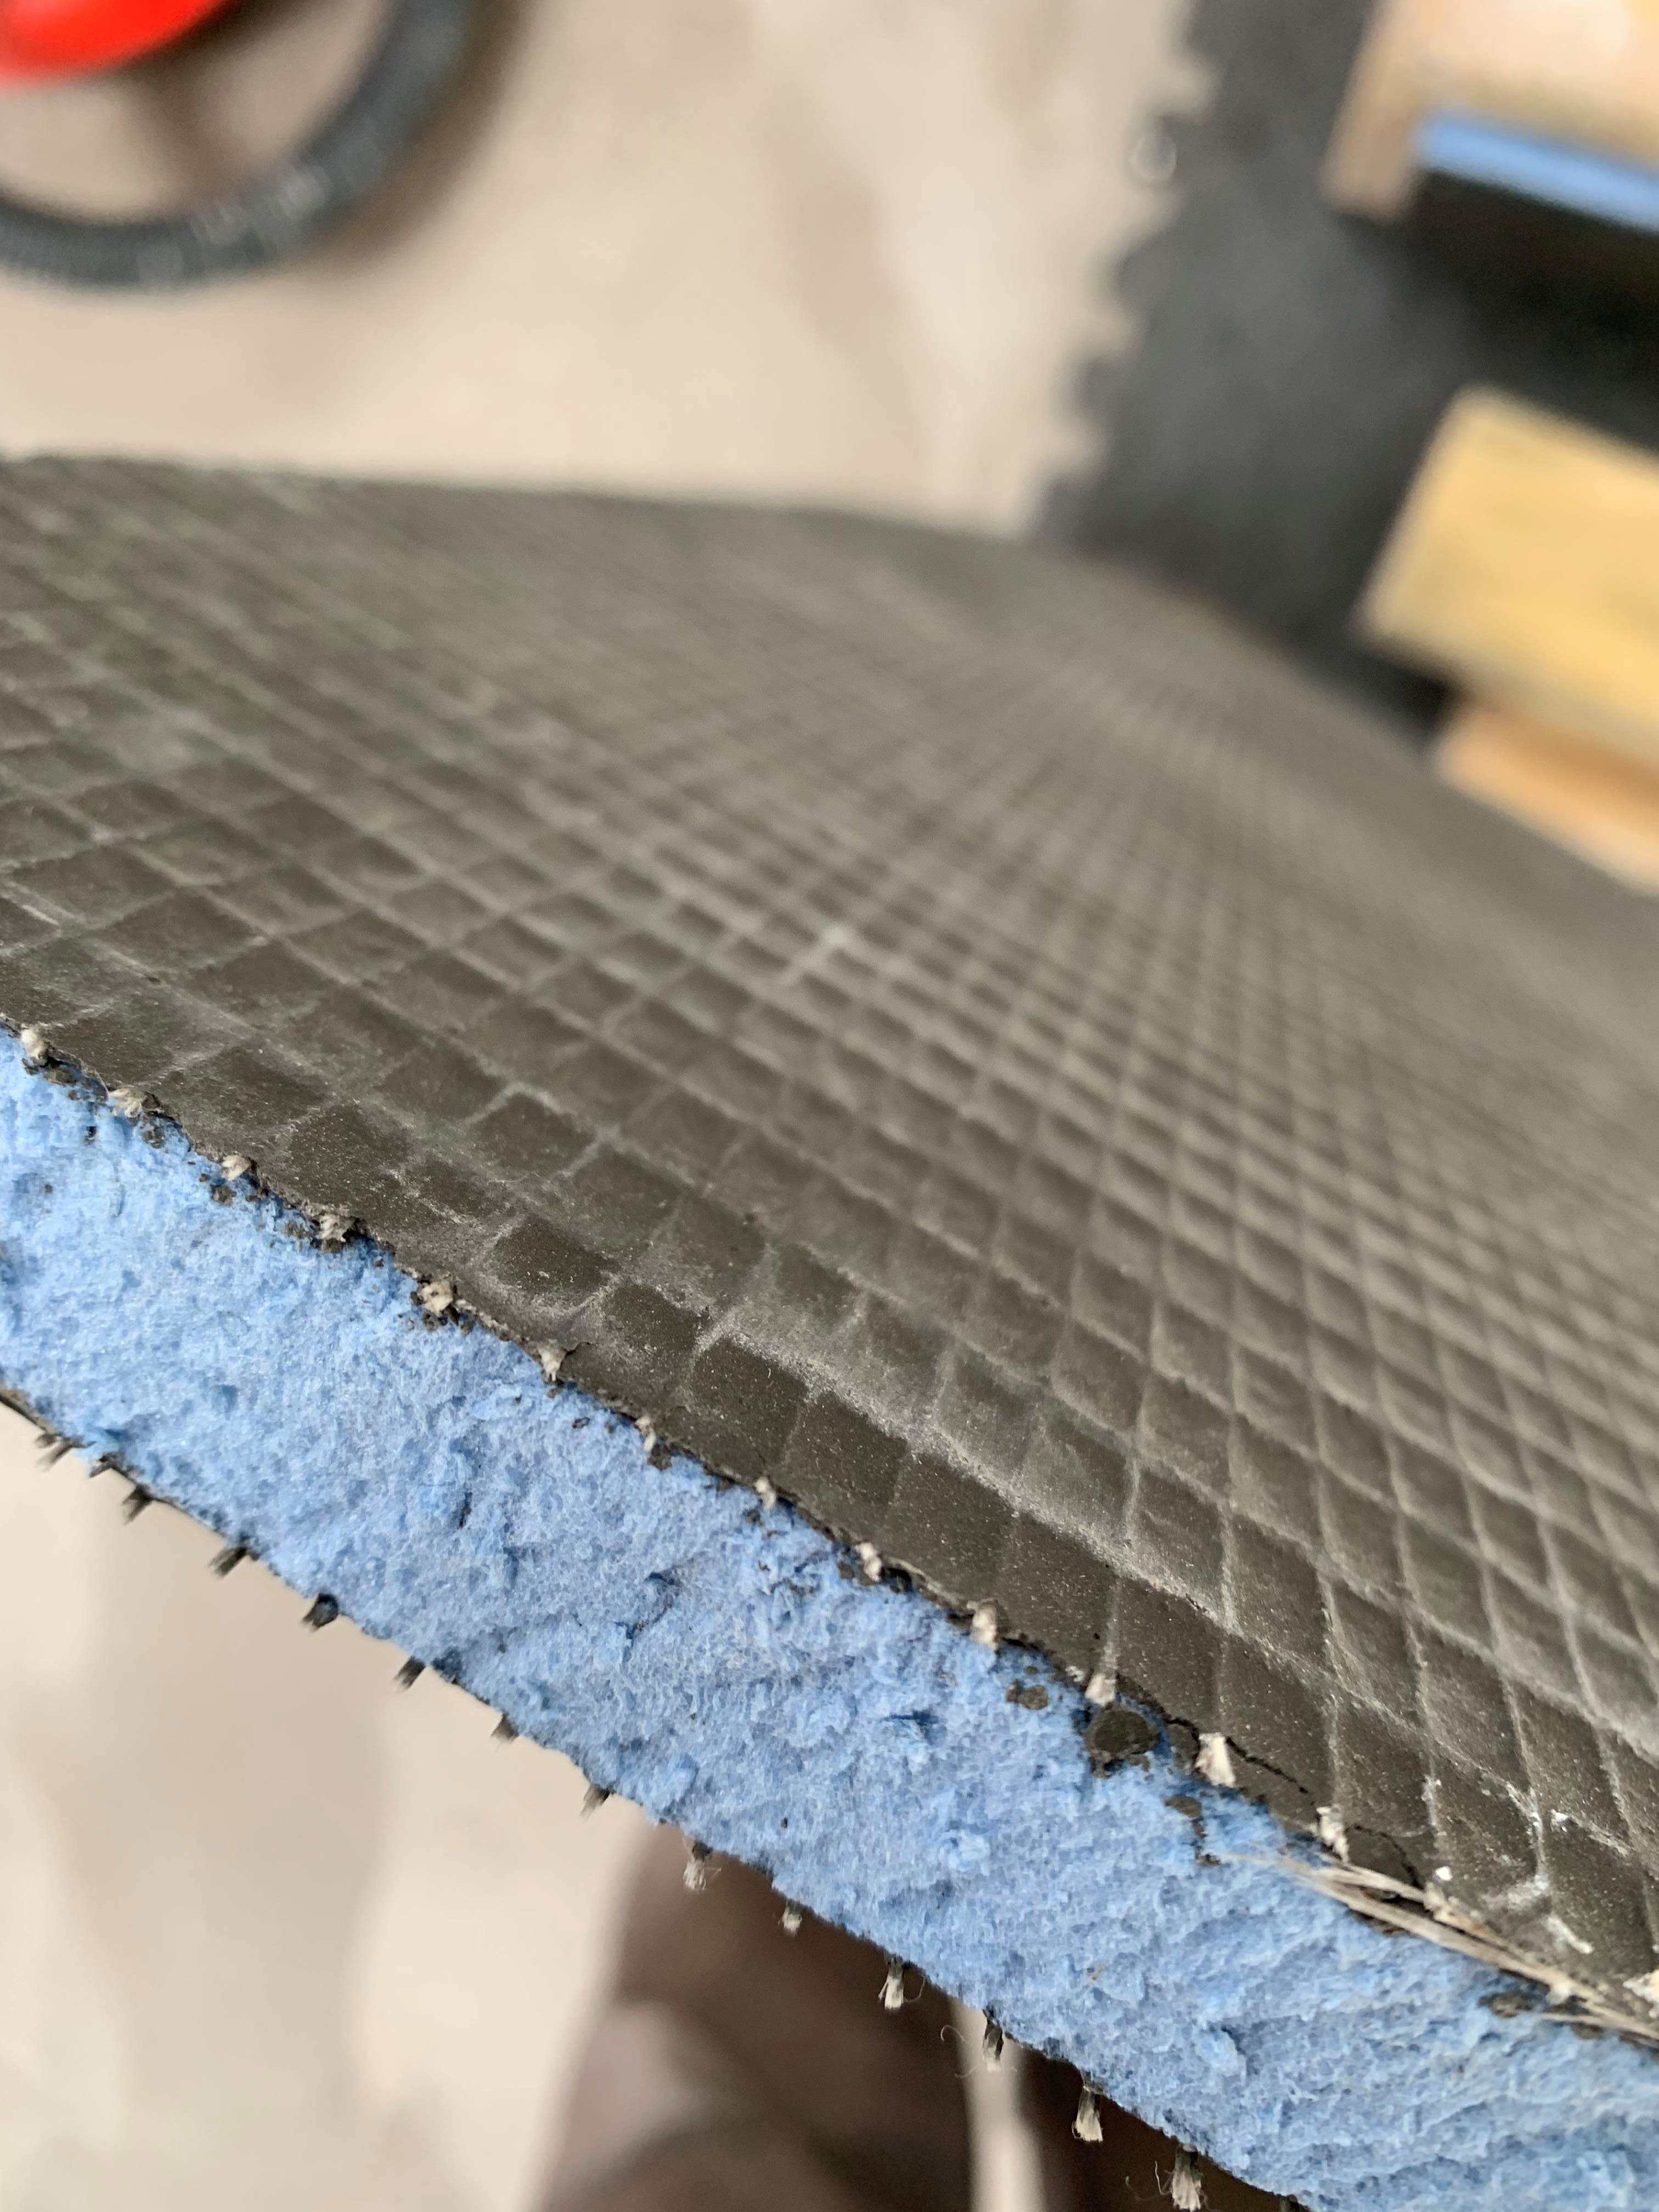
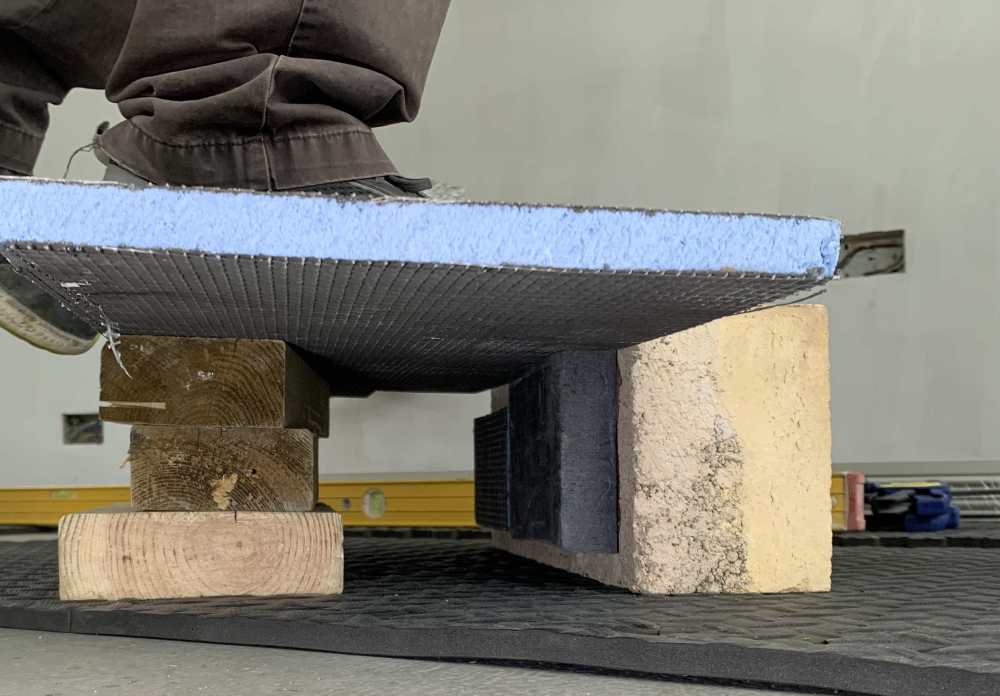
I thought my test piece was fine - see photo with a wider span than needed and no leveller... I thought people used this stuff under screeded underfloor heating pipes on suspended floors ?? I am thinking that with 15mm plus cementitious leveller on top it would have good compression strength and seems nice and stiff compared to thinner backer board. The stilhetto test seems pretty extreme (I havn't seen a man in stilhettos since a trip to Key West). I could stick 10mm backer board to the bottom of a piece of 12mm ply I suppose ? Never seen or used compacfoam so not sure what it is really like ? Polystyrene bears loads but not point loads. Come on England ⚽
-
Supporting a sink with two bowls (1.5) ?
Spinny replied to Spinny's topic in Kitchen & Household Appliances
Wow, Thanks Nick. They did say the sink will be adhered/sealed to the underside of the worktop, but no mention of any tabs, or doing this with the quartz upside down. We are looking to have both the kitchen sink and the utility sink with no overhang at the edges because both will have accessories that fit over the sink. So the join line between worktop and sink will be visible and need to be very tidily finished and sealed with an appropriate colour of sealant/adhesive. Templating has been delayed until mid July as they insist the kitchen is fully finished with it's missing pieces first. Especially as our quartz colour was discontinued 18 months ago and they found some of the last slabs at a place in Scotland for us back then. So any cock-ups on the cutting and the whole job will be screwed. Happy with that as a temporary panel fitted by the kitchen people has already been knocked out of place slightly by the sparky. Come on England ⚽ -
Supporting a sink with two bowls (1.5) ?
Spinny replied to Spinny's topic in Kitchen & Household Appliances
Yes, undermount sink, quartz going on top. I notice the sink has a couple of bracing pieces attached across the bowls at the side, but still sags under it's own weight. I think the fitter's idea was it could be adjusted forward/backwards as necessary., but fill the bowls with water and what would happen ?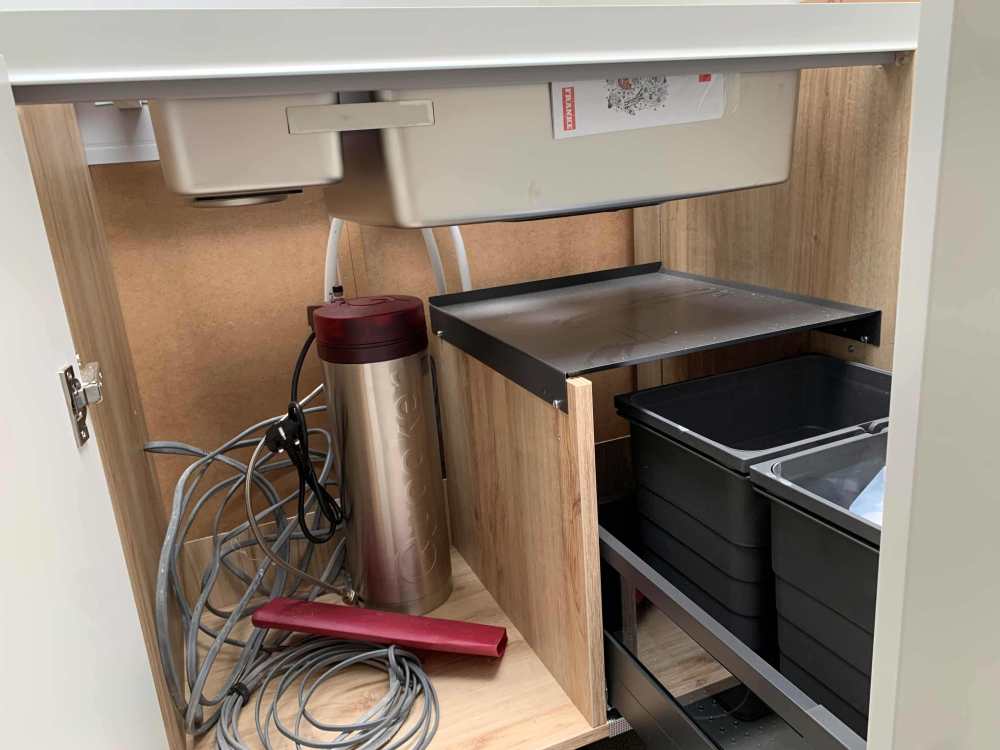
-
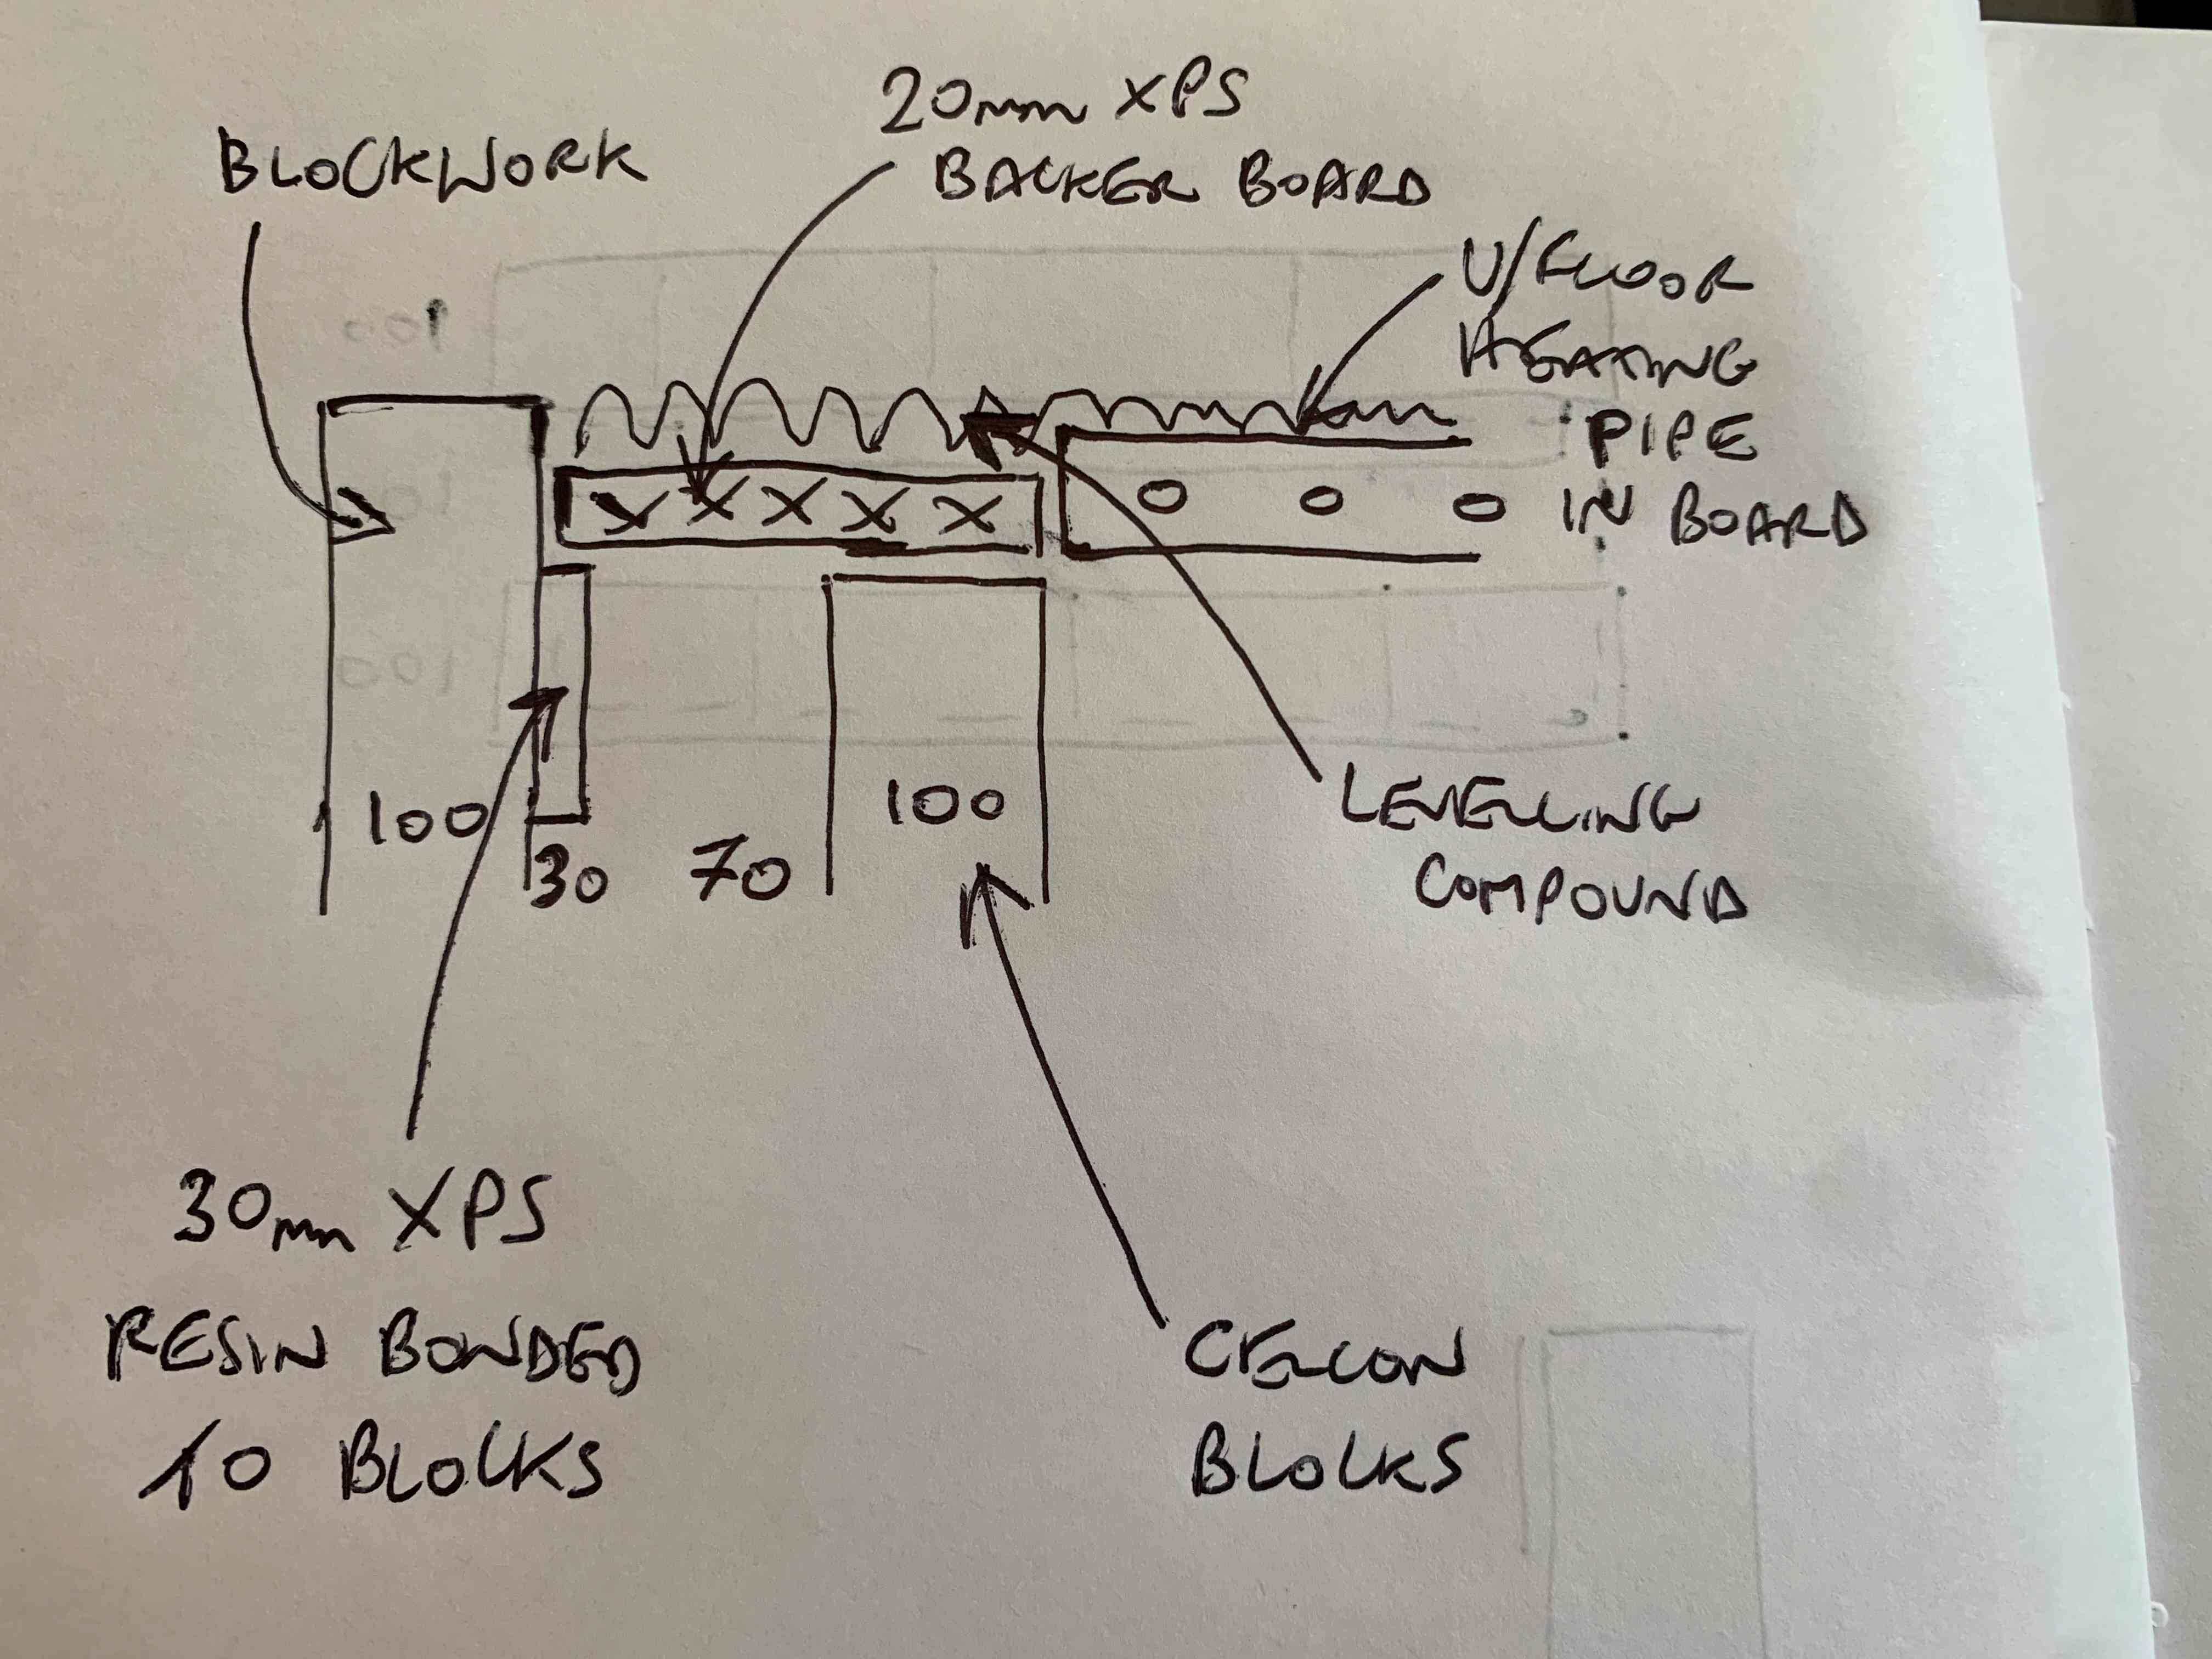
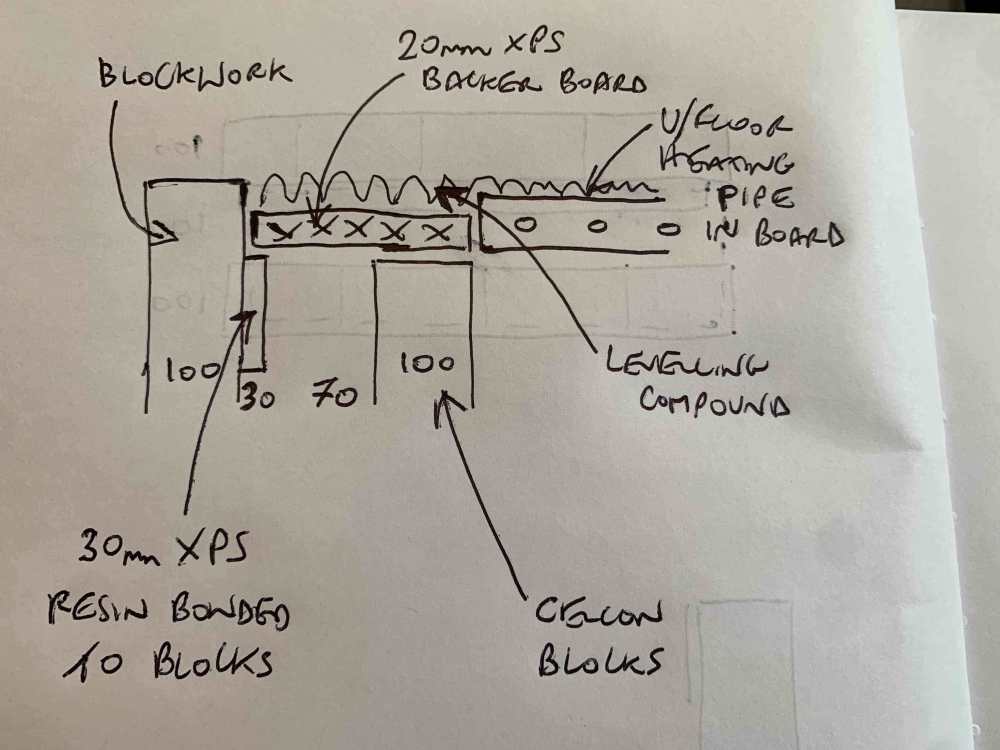
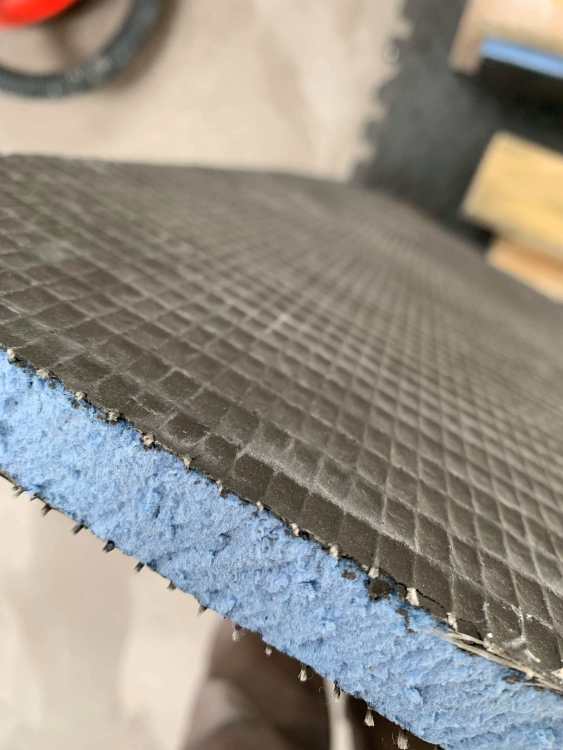
Patching in floor at a doorway. All prepped and now the flooring guy says it won't be strong enough. Was using a strip of 20mm thick XPS backer board. Advice please - is he right or wrong ? See sketch. Backer board strip 200mm wide supported on one side on celcon blocks 100mm wide, and on other side by 30mm XPS resin bonded to blockwork. The XPS backer board is to have levelling compound applied over to about 15-18mm thick. Flooring guy says it won't pass the stilhetto test, and the XPS must be replaced with solid board ? Flooring will be LVT.
-
Supporting a sink with two bowls (1.5) ?
Spinny replied to Spinny's topic in Kitchen & Household Appliances
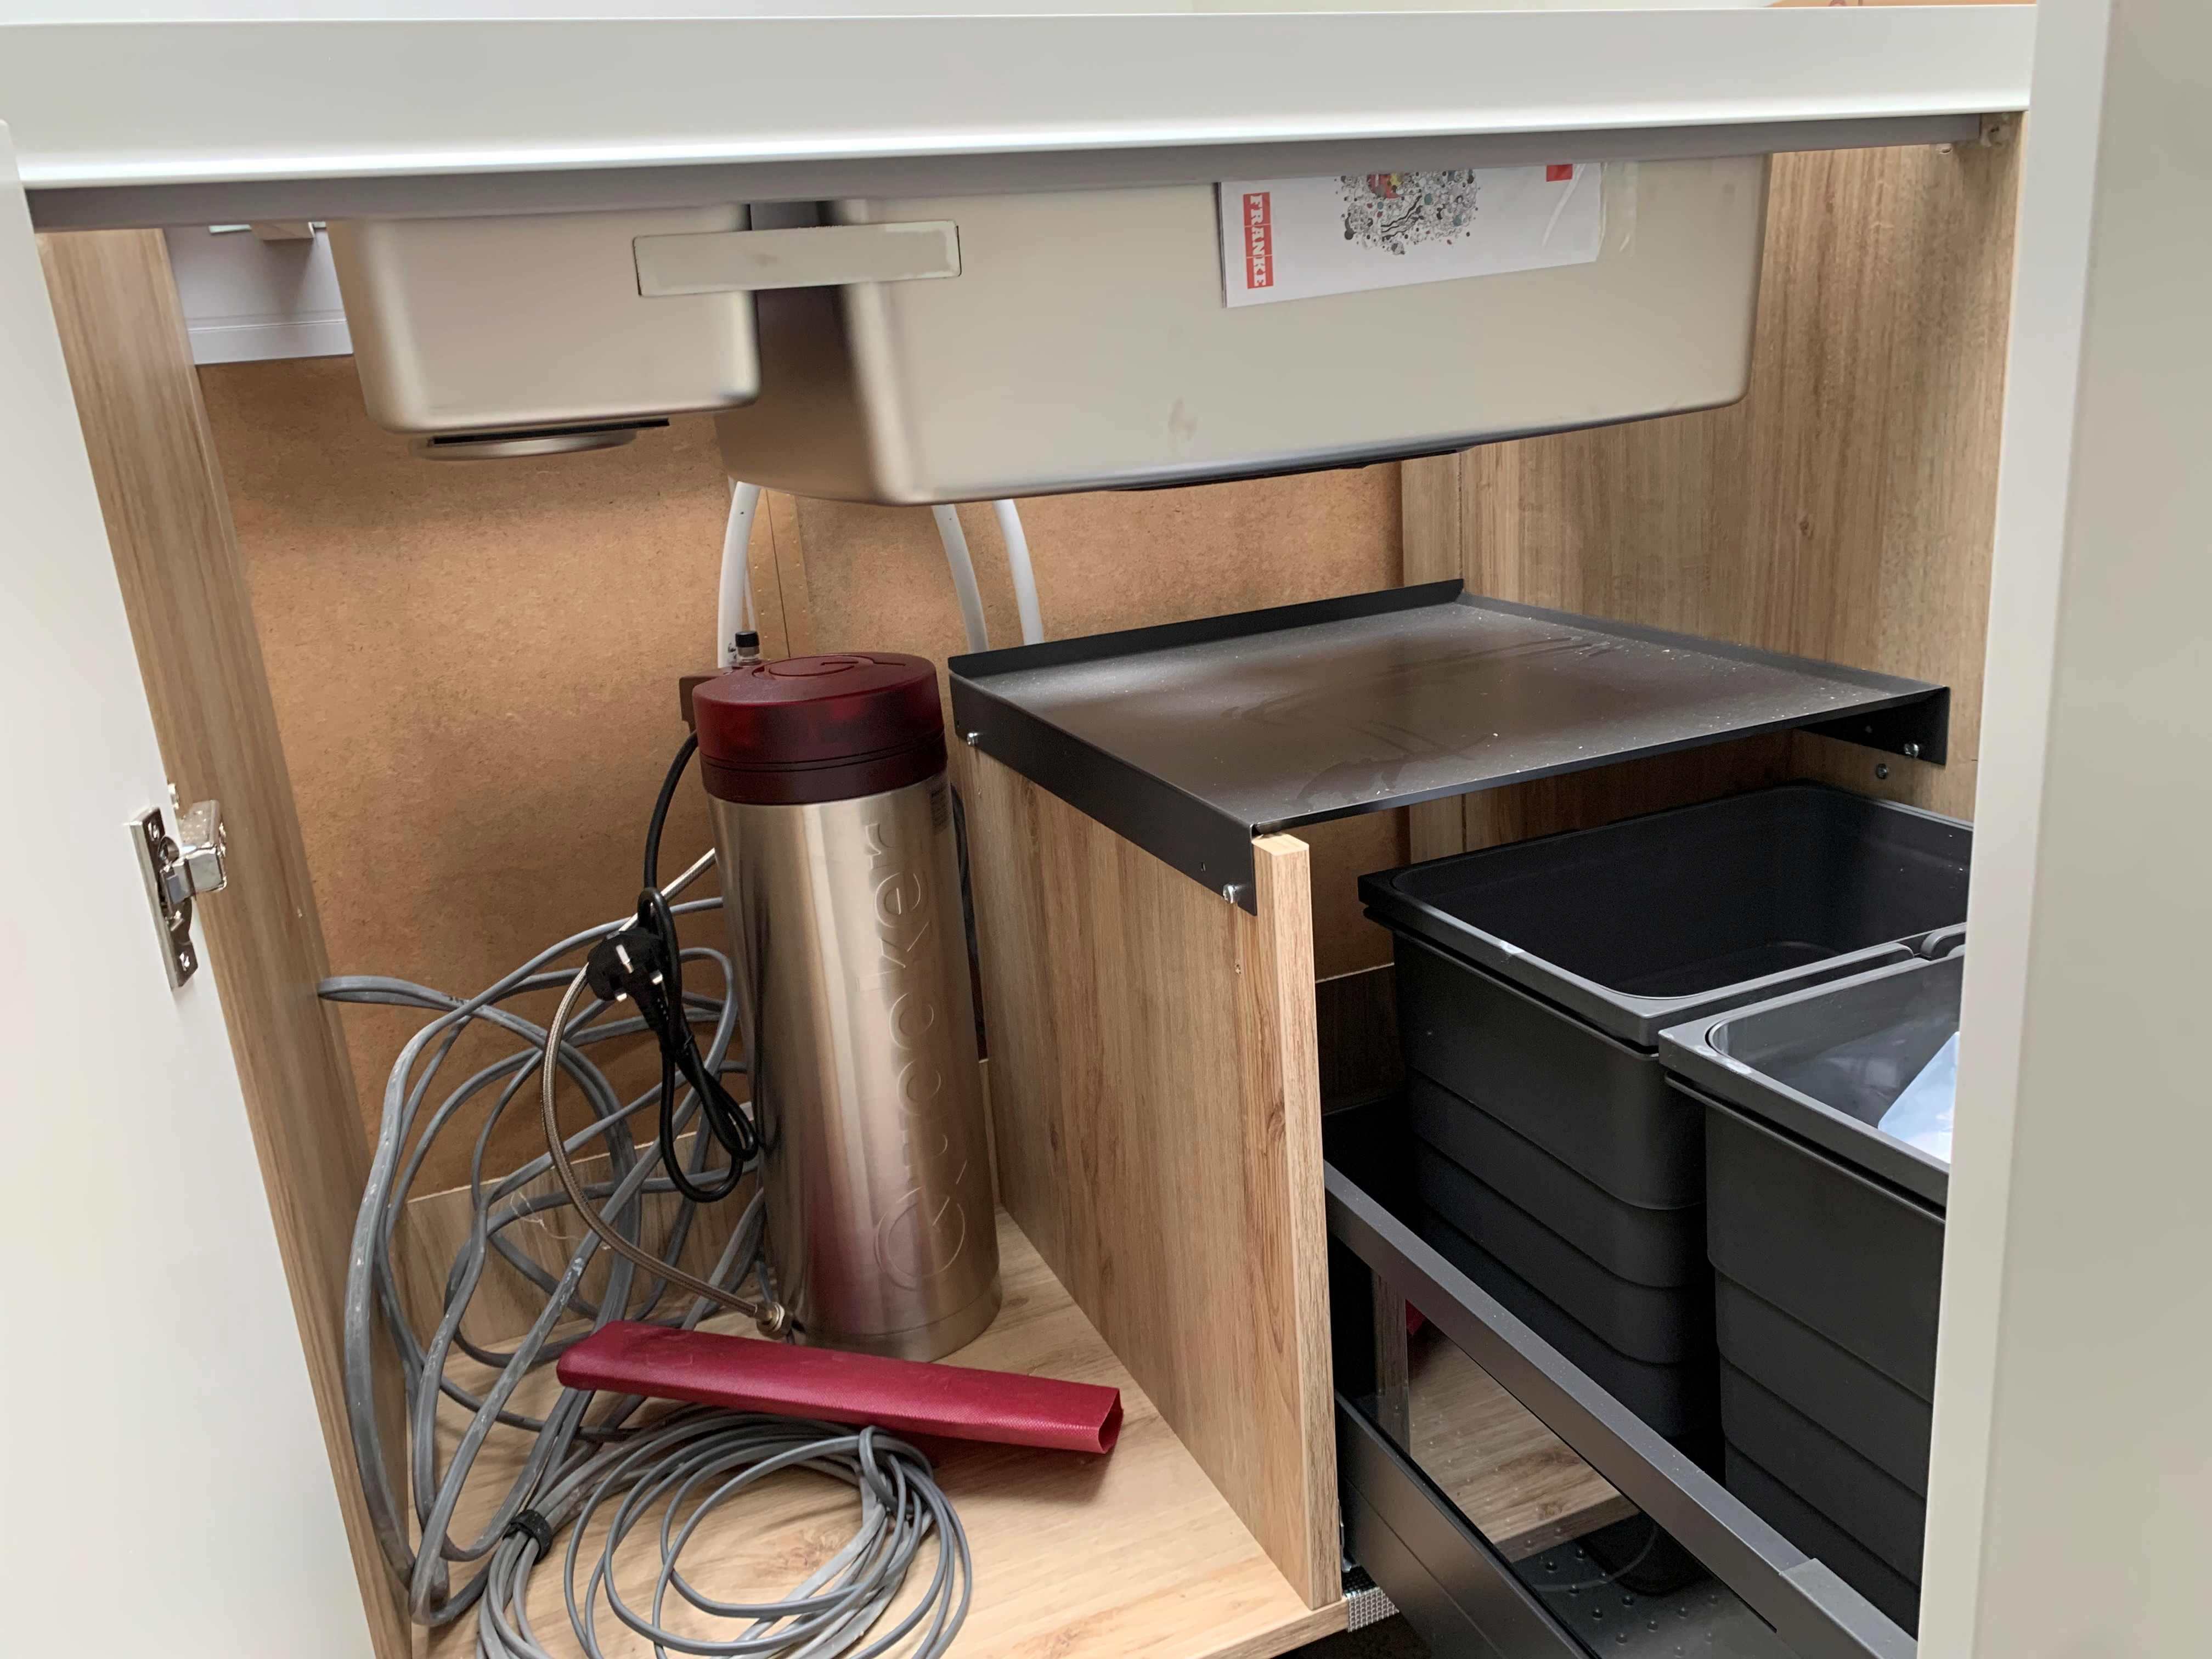
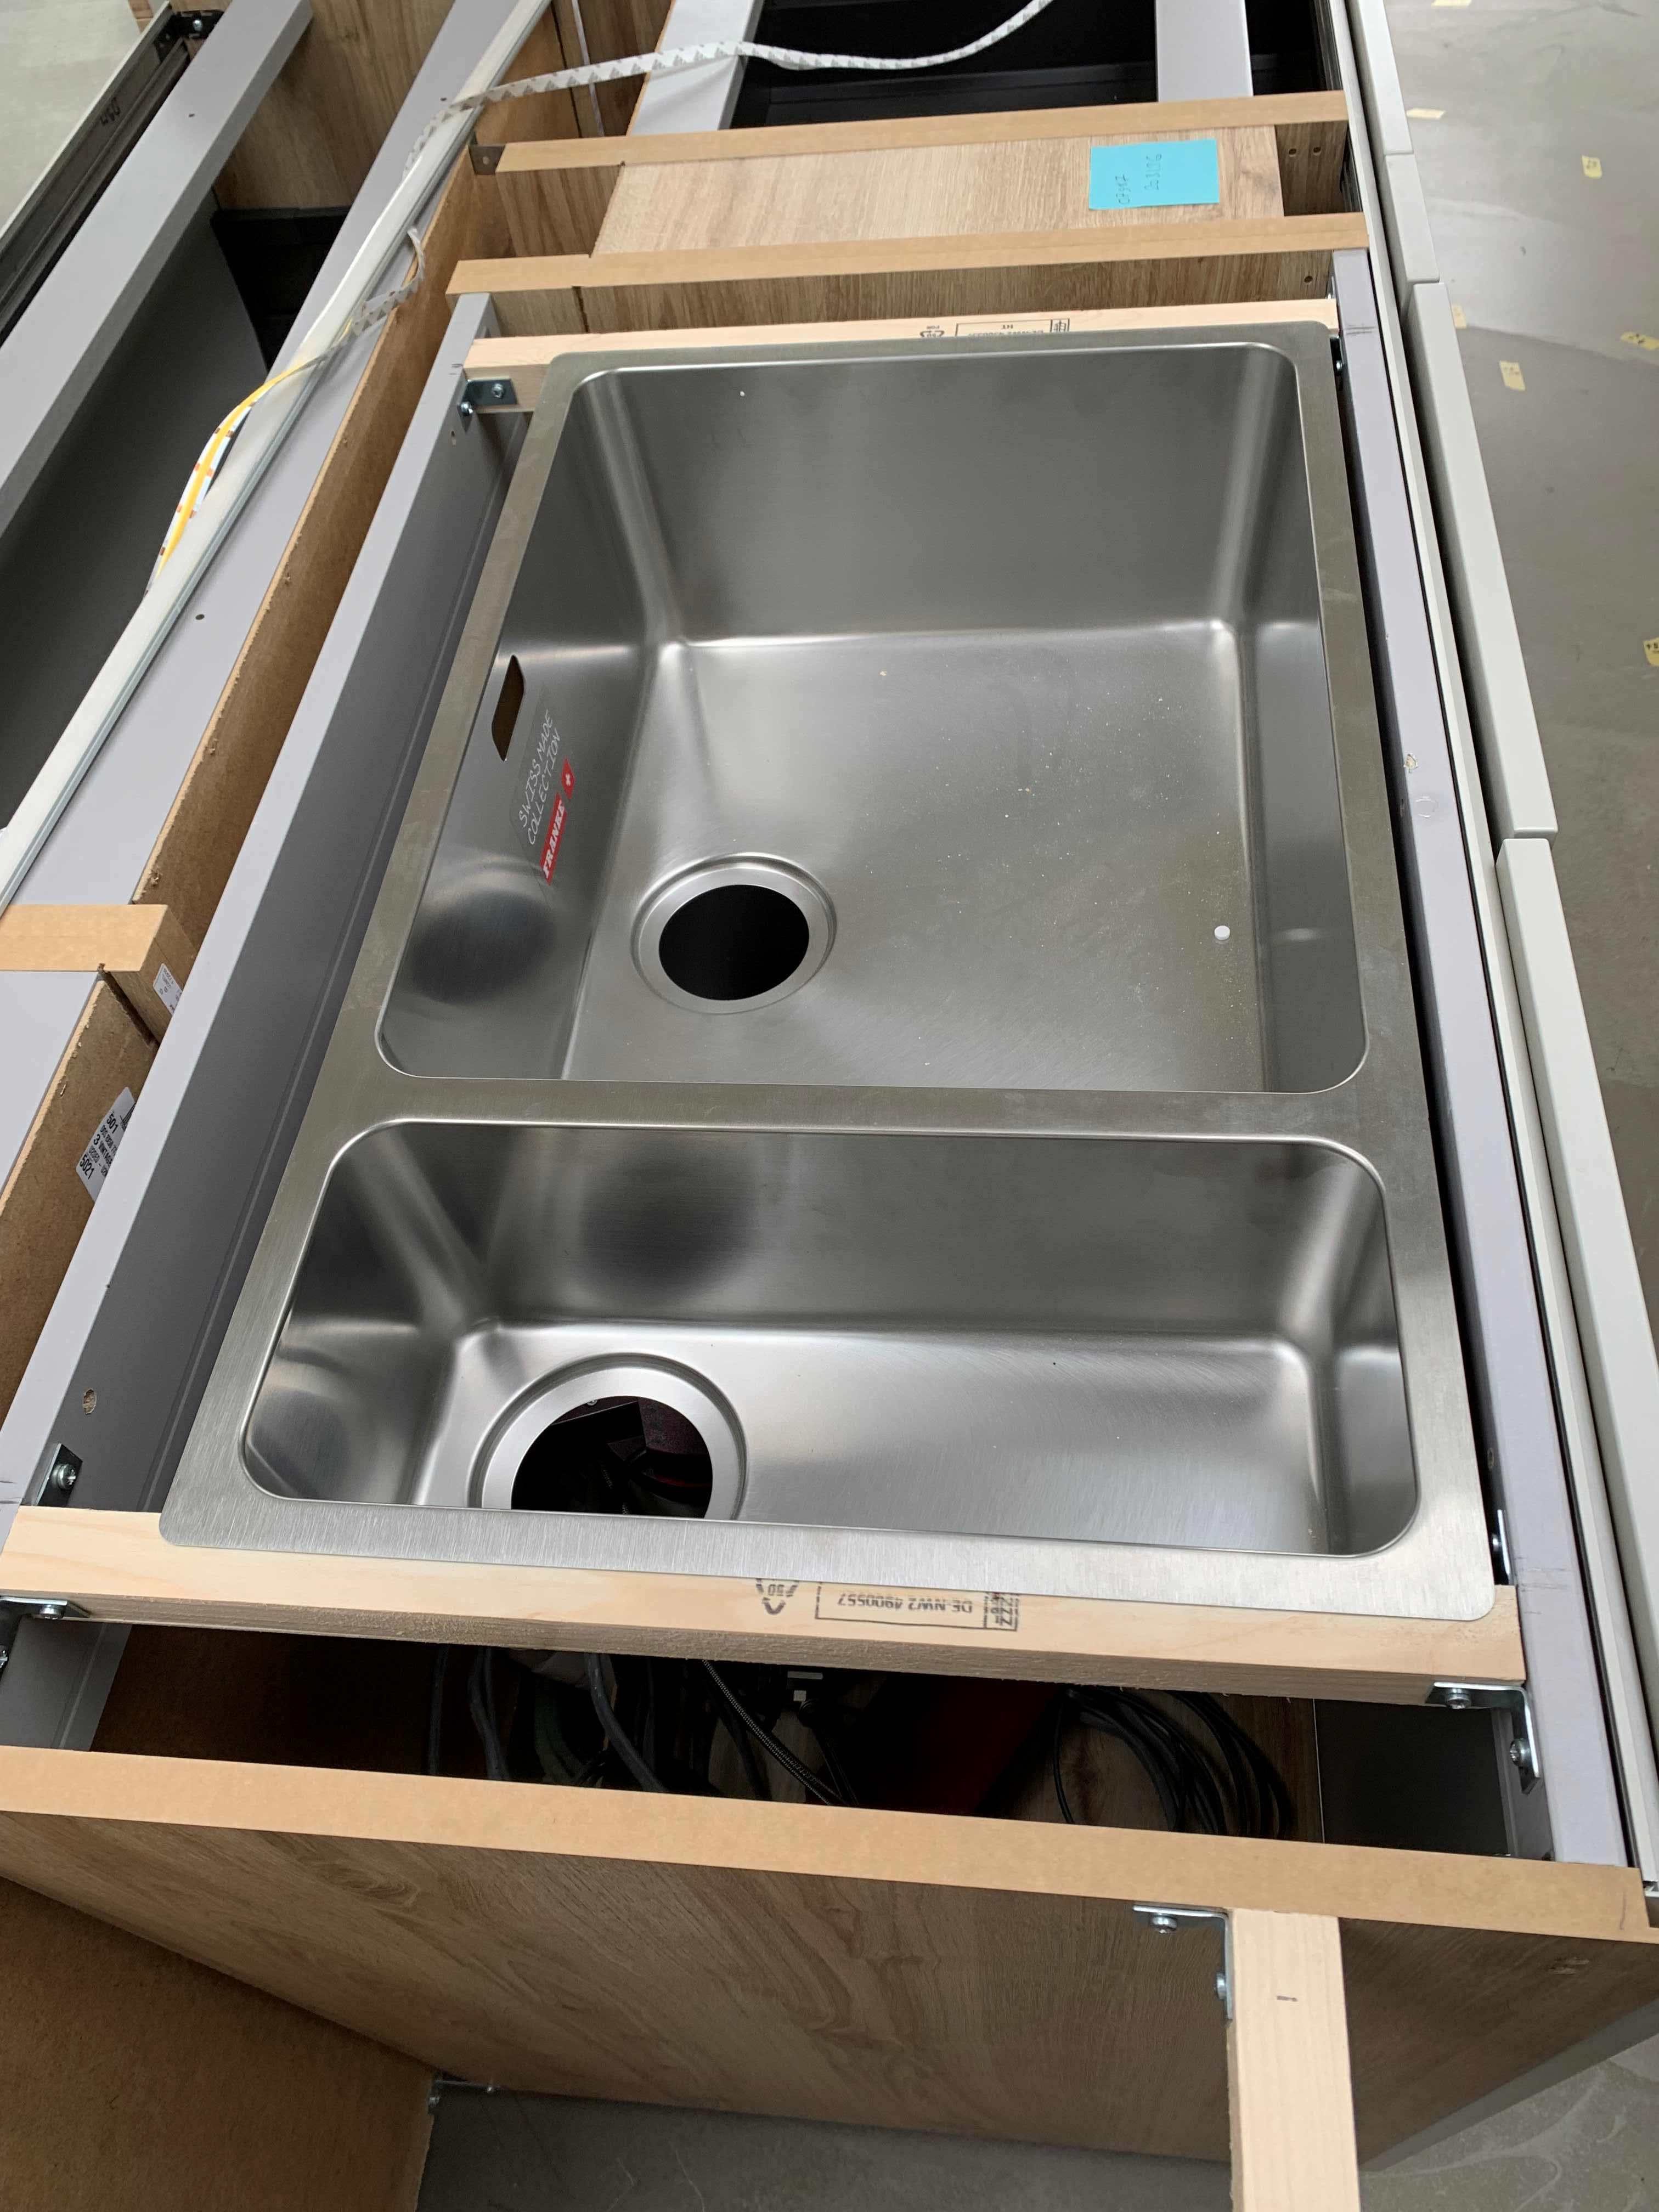
Photo. It is Franke brand. I don't find it too impressive that they manufacture a sink that deforms under it's own weight when supported at the ends TBH.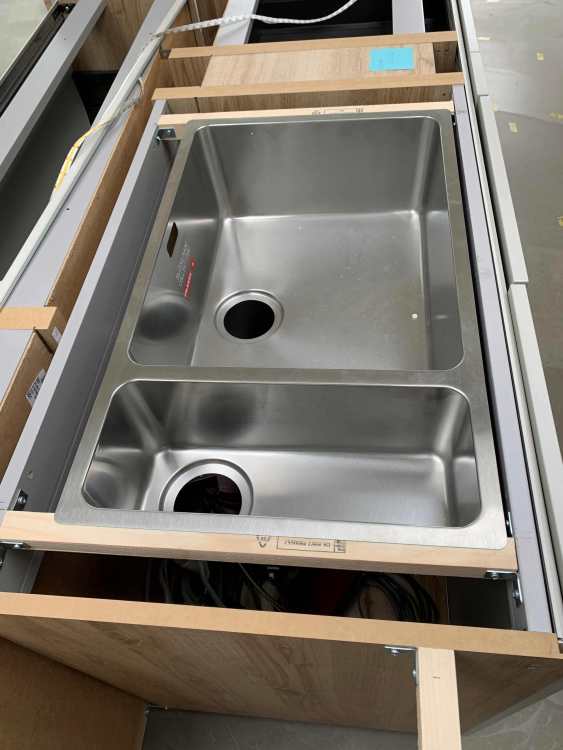
-
Our stainless steel sink is currently supported at each end only. I notice it is sagging at the divider between the main bowl and side bowl under it's own weight. Doesn't seem good. Should such sinks be supported underneath between the two bowls ? (We will not be having the worktop over the divider)
-
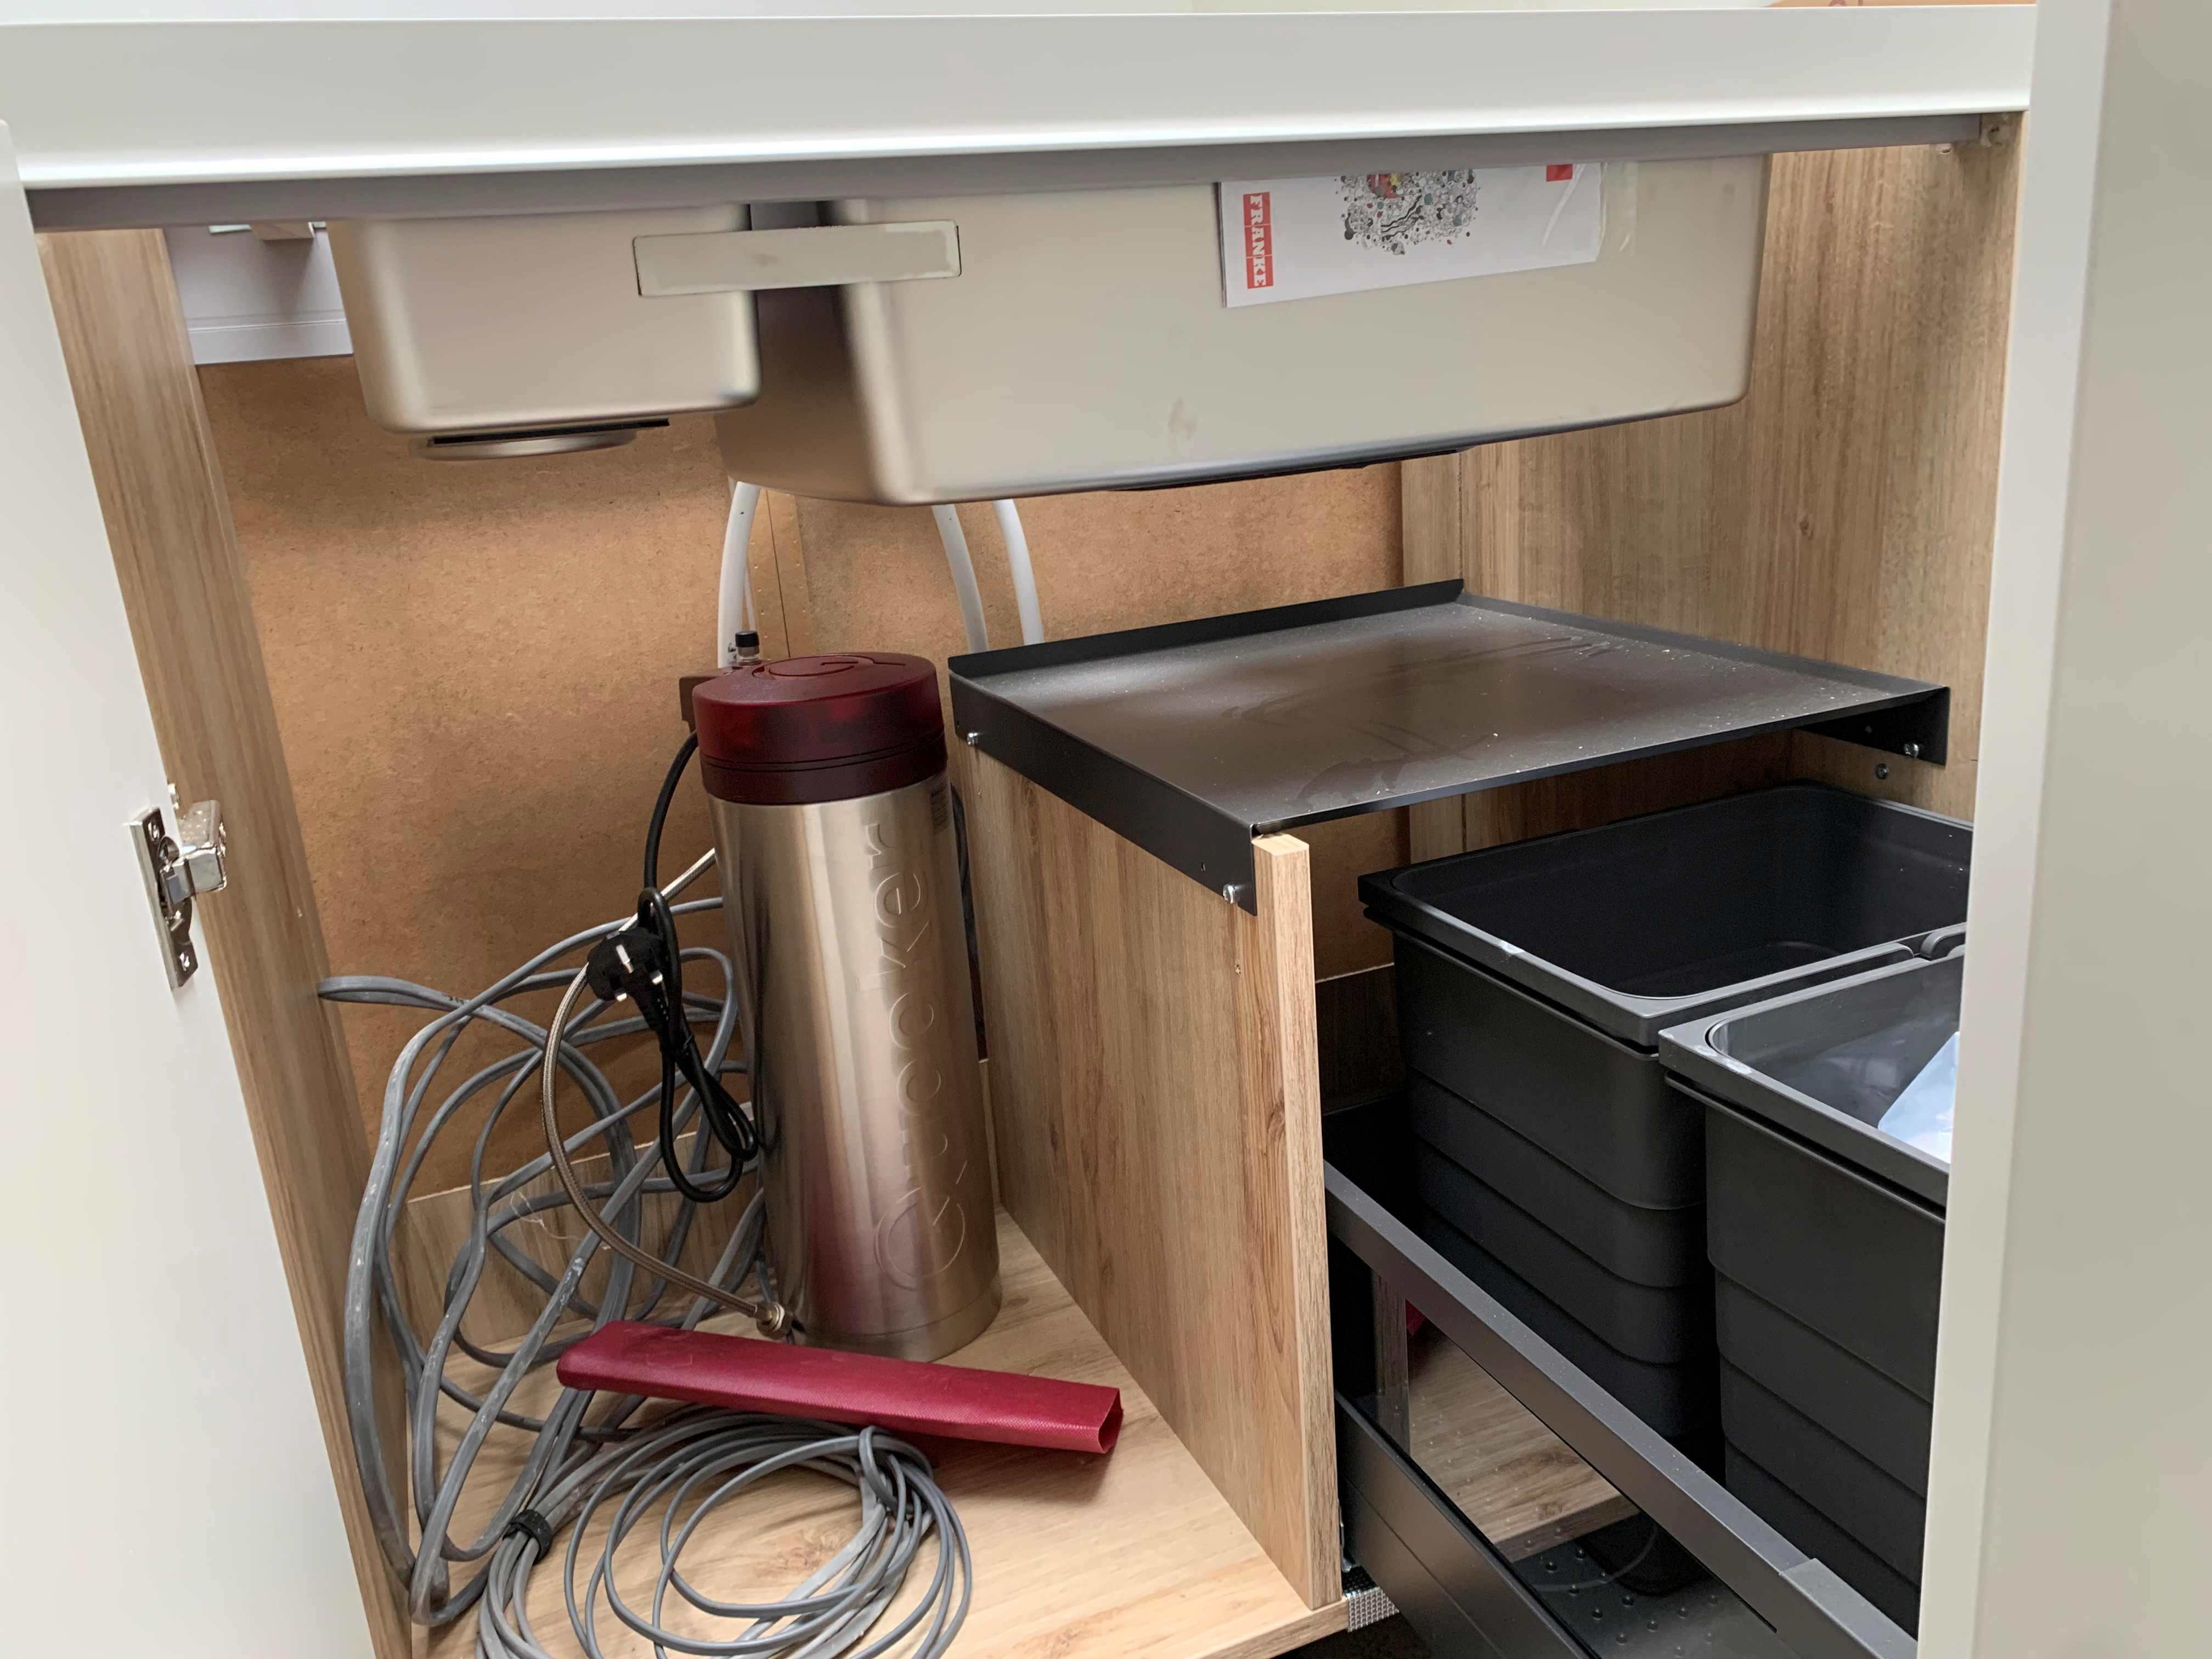
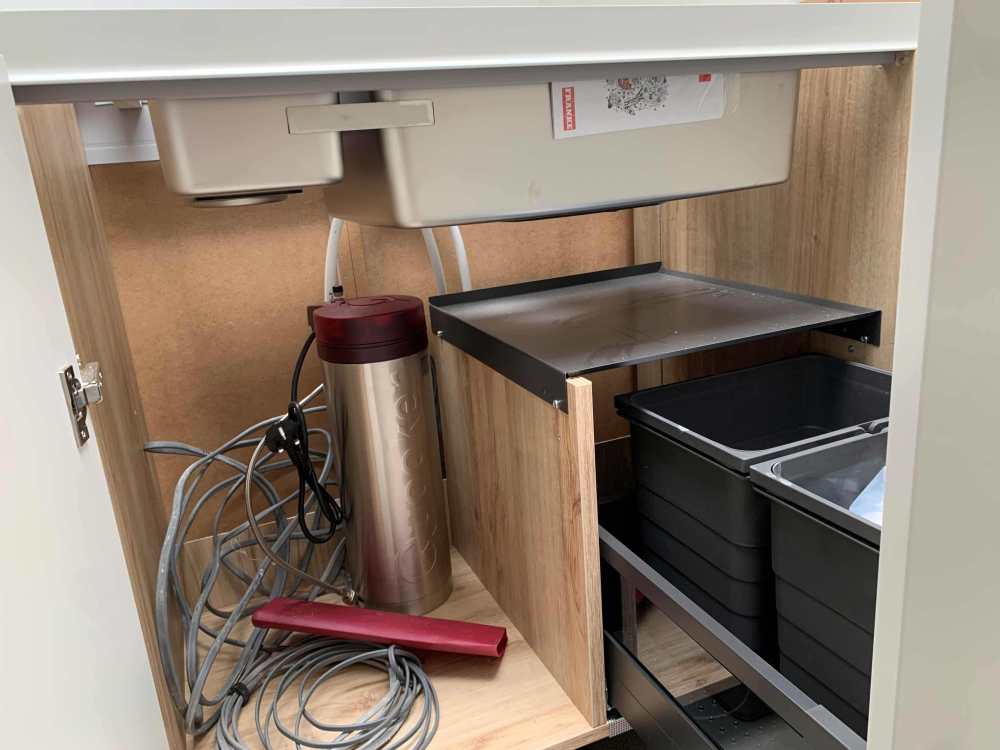
No havn't got an especially deep sink, just wanting to maximise the remaining cupboard space because IMO you can never have enough cupboard space. Kitchen company have now said there is a metal shelf to be installed which they normally cut to fit around the quooker tap. We are having a boiling water only tap, and have been supplied the pro 3 tank and the quooker descaler. However we also have a whole house water softener and have both mains cold hard water pipe and softened cold water pipe available at the sink unit. Should we use the quooker descaler and connect to cold hard mains ? Or connect to softened cold and try to get money back on the descaler ? It does seem as though the descaler does not add sodium to the water, so maybe we should do the former just for lower sodium ? How exactly does a descaler work then compared with an ion exchange salt water softener ? What have you all done and why ?
-
quooker boiling water only tap with Pro3 tank. Plumber mentioned some people cut a hole in the base of the cupboard and install a dish in the hole so the tank can sit lower into the plinth space. Anyone ever seen this, done this, point me at the metal dish people inset etc ? Anyone actually have a shelf in the same side of a cupboard as the tank and cut around it or in front of it ? In fact if anyone has a photo of an installed quooker in a kitchen cabinet it would be helpful. Looking to work out best positioning for tank, and socket etc
-
I'd have thought by suitably placing the PIR (e.g. on the side panel) it will be triggered by the movement of the doors themselves without having any visibility through any crack between the doors. A lot of these things just seem simpler using the smart home approach. Then you can move the wireless battery powered sensor around until it reacts as you wish, and choose whatever logic including delays, conditions etc to control the light. Lots of LED strip controllers available with wireless smart home integration. The following sensors readily available... PIR Contact sensors Tilt sensors vibration Sensor presence sensor lux sensor I always wonder why have the LED strip at the back of the shelf rather than the front. Things under a shelf are illuminated by reflected light incident from the front, and can just get silhouetted when lit from the rear. Unless you are going to open the cupboard in a dark room you could use a lux sensor inside the cupboard to detect the increase in light when you open the cupboard doors.
-
Yes but no, Post & Beam. I have had people willing to be fast and loose with such details, and then over a cup of tea show me photographs on their phone of the elaborate mm perfect TV unit / fish tank / patio slab work etc that they have done at their own home. It is things like this where if you are around at the time you can catch and correct, once it is done it becomes an issue to move. Had similar with boiler flue position through the roof which I had marked weeks before they eventually put it in. Plumber was going to forget or ignore that and run it straight up which would have put it too close to an adjacent wall. As I was around I overheard a conversation with the carpenter and politely got it cut in the right place. I still have a drain which needs moving by 6 inches to be under the rainwater pipe - a detail I didn't notice when the groundworks were done. For a lot of us we don't get the luxury of big houses like the yanks have, all the endless acoutrements of modern life have to be squeezed in somehow. Sometimes 20mm on the positioning of a door opening makes the difference between fitting an ikea wardrobe in, or not. A big chunk just goes with the territory because building is something that needs planners and doers. If you are in the trades you kind of need to be a doer. Both to be commercially efficient, and also because it is the nature of the job. Doing an occupation that conflicts with your personality type and likes and dislikes for decades is going to send most of us loopy. Doers need to do, and feel happier doing - planners need to plan, and feel happier planning. A house 'planned' by a doer can look like dogshit, a house 'built' by a planner will always be finished next year. Seems like a popular sentiment, was ever thus and ever thus will be... SURROUNDED BY IDIOTS
-
Let's go deep sea fishing... https://youtu.be/QH4NRIDjRjk?si=3G--x1TkCMqr86U-
-
Good idea. Gonna try it.
-
TBH it is not the clients role or responsibility to be 'a supportive presence', whatever that might be deemed to be. The client is paying for the work, and is the only person that ends up holding the (sometimes deformed) baby afterwards. To me it seems to be as common for being supportive to be seen as 'weakness', as it is for it to be in any way appreciated or reciprocated. People vary, everyone is different - personality, objectives, world view, work ethic, competence, lived experience and attitudes. That needs to be respected on all sides. Leave the pig headedness and the ego at the site gate. Builders often seem to work with strict heirarchy. I am boss, the site leader is next, all employees and trades are subservient and to 'follow orders' - the 'lower' the skill group the more so - from labourers, ground workers, brickies, plasterers, carpenters, plumbers, up to electricians. More akin to the armed forces than so called 'knowledge worker' type companies of inter co-operating thinkers with equal specialisations. It can be difficult to know who to talk to, and whether it will make any difference. I have had individuals listen and adjust something, I have been ignored and fobbed off with lies, I have seen individuals over ruled by site leader or builder for showing any degree of independent thought or for listening to a client. I have seen people fail to stop work even when it is obvious they have a problem. The relationship between builder and worker can be multifarious - employee, partner, sub-contractor, 20 year drinking mate, day rate, piece rate, job and knock, personally liable to fix any issue arising with their work for free - or not. Generally everyone is rowing their own boat and will often advise you based on what suits them - can't be done, nothing wrong, next trade will sort it, too late now. Lettered professional opinion is normally listened to - structural engineer, architect, QS, BCO. Client not necessarily even when they are saying exactly the same thing as the lettered professional. You need to find the good people which you only know if you have experienced their work and approach. I have been told people were the best person in the top building firm before they joined the builder, everyone is said to be excellent, worked for King Charles, a brickie AND a carpenter etc. Often a warning sign. Some clients may actually know little about whether their builder or tradesperson is actually good or bad - many clients likely don't own a spirit level or know a steel screw from a stainless one etc. There is a reason good businesses let you see your car being worked on, have a window into the kitchen, show you the shop floor etc. You can't ask for trust, you can only earn it.
-
PS Found yet another hidden bodge today which doesn't help my paranoia. Top board on the omnie u/floor heating fitted by our original builder - was sticking up vs adjacent boards, so took it up - turns out the board was wrongly cut so the pipes didn't match with the routing in the top boards. Whoever screwed it down must have known - but why give a shit when you are being paid to work on someone else's house eh. Don't have a router or a spare board, so chiselled out a new groove to put it right.
-
Yes OK thanks. However what bugs me most is that you can clearly see the pattern in the surface colour in the first two photos from the floor mats and their joins. You would think this would be due to greater drying out where the mat joins were. Therefore removing the mats would see these areas gradually dry to the same colour. The surface of the floor has been at 24-25C for periods because that has been the ambient temperature, and the doors have been opened to create air flow over the surface. In fact when sunlight somes through the rooflights or bifolds the sunlit floor surface temp gets up to 30/31C. What the temperature is lower down in the slab I have no way of knowing. What I don't want is to turn the u/floor heating on at 45C when winter comes, producing a floor surface temp of 26C, but driving moisture out of the floor leveller causing cracking and ruining an LVT floor. That could be £10k and more down the drain and a ruined room.