


Iceverge
-
Posts
4462 -
Joined
-
Last visited
-
Days Won
32
Everything posted by Iceverge
-
 In lieu of a rant about UK housing policy I'll try to stay on topic. Have you committed to MVHR? A demand controlled extraction ventilation with humidity controlled through wall vents may be a second best option. You could use an ESHP like @Thedreamer
 -
@Mike Can you run an intake pipe up the external wall to above the level of the offending smells?
-
Alternatively you could just do nothing. It'll rot out of it in a few years.
-
Ah, if there's no other reason for the warranty I think you're probably just buying yourself a placebo. I just did a Google of "nhbc forum payout". It doesn't make very reassuring reading. Yup that would work practically. There's certainly advantages with sticking to locally used building methods but surely timber frame isn't considered unusual anywhere now? Good systems like MBC are excellent but some cheap ones are poor. Personally I would ditch NHBC and just ensure its build properly by a competent and conscientious builder. You'll have far more comeback in reality.
-
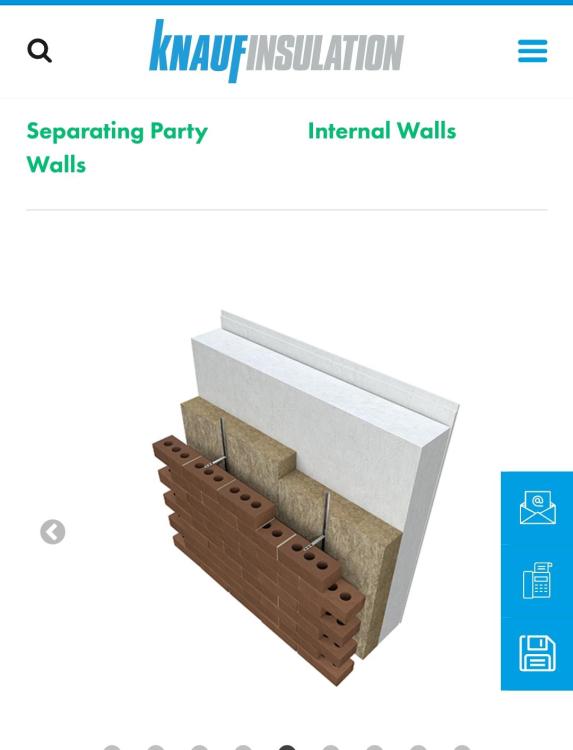
Knauf do a partial fill detail as do Rockwool. Personally I would always prefer to spend my energy making sure the job was done properly rather than spending money on a warranty that may or may not pay out later. Perhaps it's needed for the lender.

-
How an MBC WarmSlab Has Actually Performed based on 6 Years Data
Iceverge commented on TerryE's blog entry in The House at the Bottom of the Garden
@TerryEYour example should be a case study for doing it right. I've bought an A2A ASHP to keep costs down. Currently supply half our 3100kWh via expensive day rate electricity with a simple resistive heater that has zero thermal inertia. Had we used your approach the case for the A2A would have been much slimmer. However in 50 years time we will have probably used 4 A2A HPs with all the hassle of replacement and your slab will be still working perfectly. -
I would stick with what you're at. Have a look at the denby dale video's for best practice. Its a very good series. We're 250mm full fill here (I would do more if I had the chance again!) with EPS beads in the SW of Ireland, so plenty driving rain. No issues so far. EPS beads are the norm here. However we're rendered (sand+cement) throughout. I would just get your plasterers to do a simple coat of render behind the stonework contigious with the rest of the render if you're bothered. Practically speaking, if your stonemason points the stonework properly you'll be fine. Overall take care of the detailing around windows ( permanently flexible sealant done well ) and use a good paint and some brick cream/waterproofer and I wager you'll have zero rainwater making it past the first mm. If you build with a half assed mason, leaving open perp joints, balled up insulation that gets wet in construction and cavity trays that are covered in mortar ( AKA mass housing estates) of course you're inviting trouble.
-
A wire cutters would have it removed in 60 seconds. Patch it up with some wire the.
-
Unrelated to this but 100mm insulation looks a bit slim. Can you boost it at all?
-
Have you had a look at the floor and the ceiling? Is there any ventilation etc installed as is?
-
Scan Home Self Build in the West of Ireland
Iceverge replied to Mikegibbons's topic in Introduce Yourself
Congratulations on getting planning. That's a lovely design. 12 months will pass quickly and you can have lots done before then. I would get cracking on a shed or garage if you can. You can get all your water and electricity into the shed and take it from there to the house. Likewise you can get your connection to the sewage or else septic tank done. You could order and store a kitchen/bathrooms,tiles, appliances etc too. Have you done the passive or super passive and what heating are you opting for? -
Scan Home Self Build in the West of Ireland
Iceverge replied to Mikegibbons's topic in Introduce Yourself
Fáilte go dtí an forum! I'm quite a fan of scanhome (I assume that's the company you're using?) Which model have you opted for? -
I assumed there was a cavity here for some reason. My bad.
-
You could blow EPS beads into the side with a cavity wall.
-
Most cost effective way to get to passive standard using block
Iceverge replied to CalvinHobbes's topic in Heat Insulation
I should clarify. It will be 100W extra heating needed only when it is cold outside. Not in summer. Cash payback is only a part of the equation but it will certainly pay someone back over the lifetime of the house, maybe even your kids or theirs. -
Most cost effective way to get to passive standard using block
Iceverge replied to CalvinHobbes's topic in Heat Insulation
Not quiet. You'd need an extra 100w running continuously (all day everyday) to maintain the extra temperature. For example of you got an old incandescent bulb and left it on or a large TV that would make up the difference. Otherwise the house would cool down. Ok ballpark payback is 15 years I'd say. Proper plan. You could use seconds PIR to make it cheaper. -
Most cost effective way to get to passive standard using block
Iceverge replied to CalvinHobbes's topic in Heat Insulation
It depends on whether your insulation will be below the water table and will be permanently saturated. If it is I'd suggest you have greater problems. I ensured this won't happen by surrounding our house by a french drain. It may be an option for you? Before @SteamyTea pops a gasket I'll try to get my reply in....... 100W refers to the power needed by the boiler to maintain the house at a certain temp on a cold day. 100w * 24hrs =2.4kWh. If you could reply with the following I could make an educated guess: 1.how many cold days you expect per year 2.What you expect to pay for energy 3.how long you expect to stay in the house 4. When you plan on dying I'm being facetious but at current energy prices payback is lightly to be in the 10-50 year region. If you plan on selling it ASAP and don't care about the next guys and assume energy usage won't be a factor in the house sale you'd be better off putting the money on a fancy sink and not bothering with any insulation. -
New Member from Cork Ireland building ICF House
Iceverge replied to Blynchy's topic in Introduce Yourself
Sorry I missed your post. Maybe use the quote function or the @ to tag me. We're in Ireland too. Passive standard build. Moved in in 2021. We used a raised Heal trussed roof, We have a cold loft with 450mm blown cellulose. It's a sealed roof as per the Tyvek manual with ventilation over the membrane via battens and counter battens. We stapled and taped an airtighess membrane under the trusses and returned it to the inner leaf of plaster on the external walls. The membrane oversailed all inner walls to minimise risk of leakage. We used two layers of 44*47mm battens under the membrane to run our MVHR pipes and wires. Then a layer of standard plasterboard and skim. We had only 5 wires into the attic. I used a small square of ply instead of the membrane and I drilled one hole for each wire and sealed with airtight sealant. I bought an airtight attic hatch too but nothing gets stored up there. Time over again I would change 2 things First use just a single layer of 20x70mm battens for the wires only. Then run the MVHR in the attic, it'd be much easier and as I was doing the airtightness I could be confident I'd have sealed them properly. Second use a double layer of plasterboard. The house is so quiet that we can hear the wind through the 450mm cellulose. Either that or a layer of 11mm OSB as sarking, it'd stop the membrane flapping too. Or maybe both.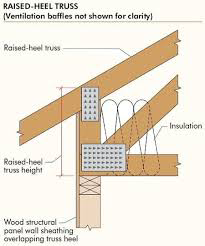
-
I'd say you're on the correct path with a lime mix. I'd be tempted to put in a bit of cement for a small bit of strength. It'll be a compromise between not trapping moisture in the wall and putting something in that isn't too weak.
-
If you want something slightly tidier Cut a square of timber the width of two planks and larger than the hole is all dimentions out first . Trace around it and cut out an identical hole in the roof. Then place a backing piece of timber above the hole and screw your "patch" into place. A small bit of filler and wood stain and you're finished. TBH, if you're pulling if down I'd just go with @TonyT suggestion,
-
New Member from Cork Ireland building ICF House
Iceverge replied to Blynchy's topic in Introduce Yourself
Hi @ConorB Welcome. It does depend on what you need. Unfortunately it's a piece of string question so maybe you could narrow it down!. Do you have a sketch or plans for your roof? What are your airtight requirements? How available are good carpenters? Is noise lightly to be a factor? What are your planned roof coverings? What U-Value is needed? Are you on an area that gets prolonged heat waves? -
Most cost effective way to get to passive standard using block
Iceverge replied to CalvinHobbes's topic in Heat Insulation
Can I ask have you a design of the floor and wall currently or are you yet to get that far? What kind of performance are you targeting? -
Most cost effective way to get to passive standard using block
Iceverge replied to CalvinHobbes's topic in Heat Insulation
Sorry, I was working on a basic assumption of a 50m perimeter and a 20deg delta just to get a feel for the difference. -
Most cost effective way to get to passive standard using block
Iceverge replied to CalvinHobbes's topic in Heat Insulation
Out of interest, here is what would happen if you took a more BREGS approach to the junction and forgot to use Aerated Concrete blocks and put in standard dense blocks everywhere. About a 100w difference in heating the house on a freezing day.
-
Most cost effective way to get to passive standard using block
Iceverge replied to CalvinHobbes's topic in Heat Insulation
Remember that once you have a "very good" detail you can spend a lot of money to get to an "excellent" detail for little benefit. I would use number 4. The benefit at the junction to increase to option 6 is only 0.0034 W/mK. For a freezing day with a house of perimeter of 50m you would only be using an extra 3.4W to heat the house. Even for passivhaus it's off the scale of a small difference.


