Nickfromwales
-
Posts
31378 -
Joined
-
Last visited
-
Days Won
346
Everything posted by Nickfromwales
-
Hi. How much is astronomical? People have very different ideas of costs etc in my experience.
-
I’d go level -3-5mm as your target, and then SLC each room to get it spot on, if you insist on DIY. Or pay a liquid concrete company to do the pour and admit this is a huge undertaking to get flat first time as a DIY project. Some battles you can’t avoid, others you can pick and choose. Professionals will pour this in one go and get it pretty damn near perfect for you, with zero stress, plus the onus is on them to get it within their stated tolerance.
-
Better to use bits of batten going floor to ceiling with white paint and a datum marked on it? Can use a full length attached to the ceiling timbers and then cut and wiggle free just as the concrete goes hard enough to take foot traffic over walking boards? EPS marker blocks will likely gets smashed / knocked off as the pour goes ahead, with zero time / opportunity then to reset them. Once a pour begins, you ain’t stopping it! Battens are then going nowhere, so with that and the perimeter insulation set up as datum’s the stress should be somewhat removed. Don’t do this, always have this higher than the pour, with a fat permanent marker line drawn on it from a laser line, and then cut off the excess later. If the pour happens to spill over the top (accidentally) then it’ll drop down and bridge your original DPC. Where your original DPC is, I’d black jack the area, 100mm below, and 100mm above as insurance, as once you’ve poured there’s no going back. Use a 75% water / 25% mix of liquid DPM product to prime the areas that you intend to then brush the liquid DPC on to, as brushing onto friable masonry that has not been ‘sized’ will be a pita and it’ll pull off very easily. Priming will allow the product to soak into the surface, providing an excellent key for the surface applied layer(s). A good few £££ to go on this, but I’d be doing this if it were my place. You might find that the dilute mix will go through a cheap electric HVLP gun, like one for spraying fence panels with preservative, which would make life a lot easier. If that works, just make a larger amount of the diluted mix so the gun is constantly ‘wet’ and you can refill without having to measure the solution each time; if the black jack begins to cure in the gun you’re fecked. If you set this job out, and prepare yourself, you can likely do this in one sitting, but if you’re 10% off in the prep and sequencing then it could very well go 2 pairs of tits up. No need for 100mm, just use 25/30mm PIR and then the expansion perimeter / edge insulation either side for your expansion relief. That edge insulation towns corners just fine, so aim to have the middle of the PIR directly where the door will reside. No need to install the conduits afaic, and I’ve been doing these jobs for decades. All you (actually) need is simple foam up-stands there, but they get battered during a pour. I’d say stick with the block of insulation there and use that to get the doorways poured cock-on, (as you’re DIY’ing).
-
 Ok, and has it blocked yet, eg you’ve had to rod or jet it? At nearly 50% stagnant water you’re not yet In need of replacement drainage, as this can be lifted and reset to remove the depression, but you’ll likely need to take up the concrete at the width of the gate to allow you to excavate (by hand) the soft crap our and backfill with new, MOT sub base, and then replace the path. If it’s still useable then you can put this job off for a while but obvs not forever, but as the survey stopped short of the connection my fear is this may now be weighing on the connection to the sewer / manhole and that will eventually just shear off. If you act sooner than later the pipework could possibly be saved. Not megabucks saving to be had but pointless wasting more money by delaying further, if you have the spare beer tokens to fix it now. Plus, the last of the weather is with you vs having to do this in the worst of it, if it then fails completely. That day is coming, btw. The concrete can be disc cut to minimise damage to the surroundings, but are you sure the rest of the concrete hard standing is not on the move too? Disconnecting the path from the surrounding concrete may relieve some of the burden on the pathway, so that could be a long term insurance against the surrounding continuing to settle and the path not (possibly) following suite again.
 -
I think those star shaped heads, on the valves where the pipes connect, are possibly hand-tightened cover caps. If these are like other weird & wonderful manifolds that I’ve encountered over the years then you remove those to expose an Allen head grub screw to adjust the flow. I could be wrong, and they may simply be the tap heads used directly to open / close. Only one way to find out…….can the OP try turning one and see if it comes off? There are isolation valves on the supply (one blue tap and one chrome knob type one alongside) if you want to shut down and isolate before explorations begin.
-
How long has it been like this?
-
Balancing my daughters Rads.
Nickfromwales replied to Big Jimbo's topic in Central Heating (Radiators)
Hydraulic resistance is a law of physics though? -
Balancing my daughters Rads.
Nickfromwales replied to Big Jimbo's topic in Central Heating (Radiators)
Sorry. This is poor advice. Hydraulic resistance, aka the path of least resistance, play a huge role here. Leaving them all wide open will leave the issue to remain. It needs to be balanced, end of. I suggest the OP tries my suggested cure and reports back. -
Membrane thickness for biscuit/PUG mix
Nickfromwales replied to Crowbar hero's topic in Underfloor Heating
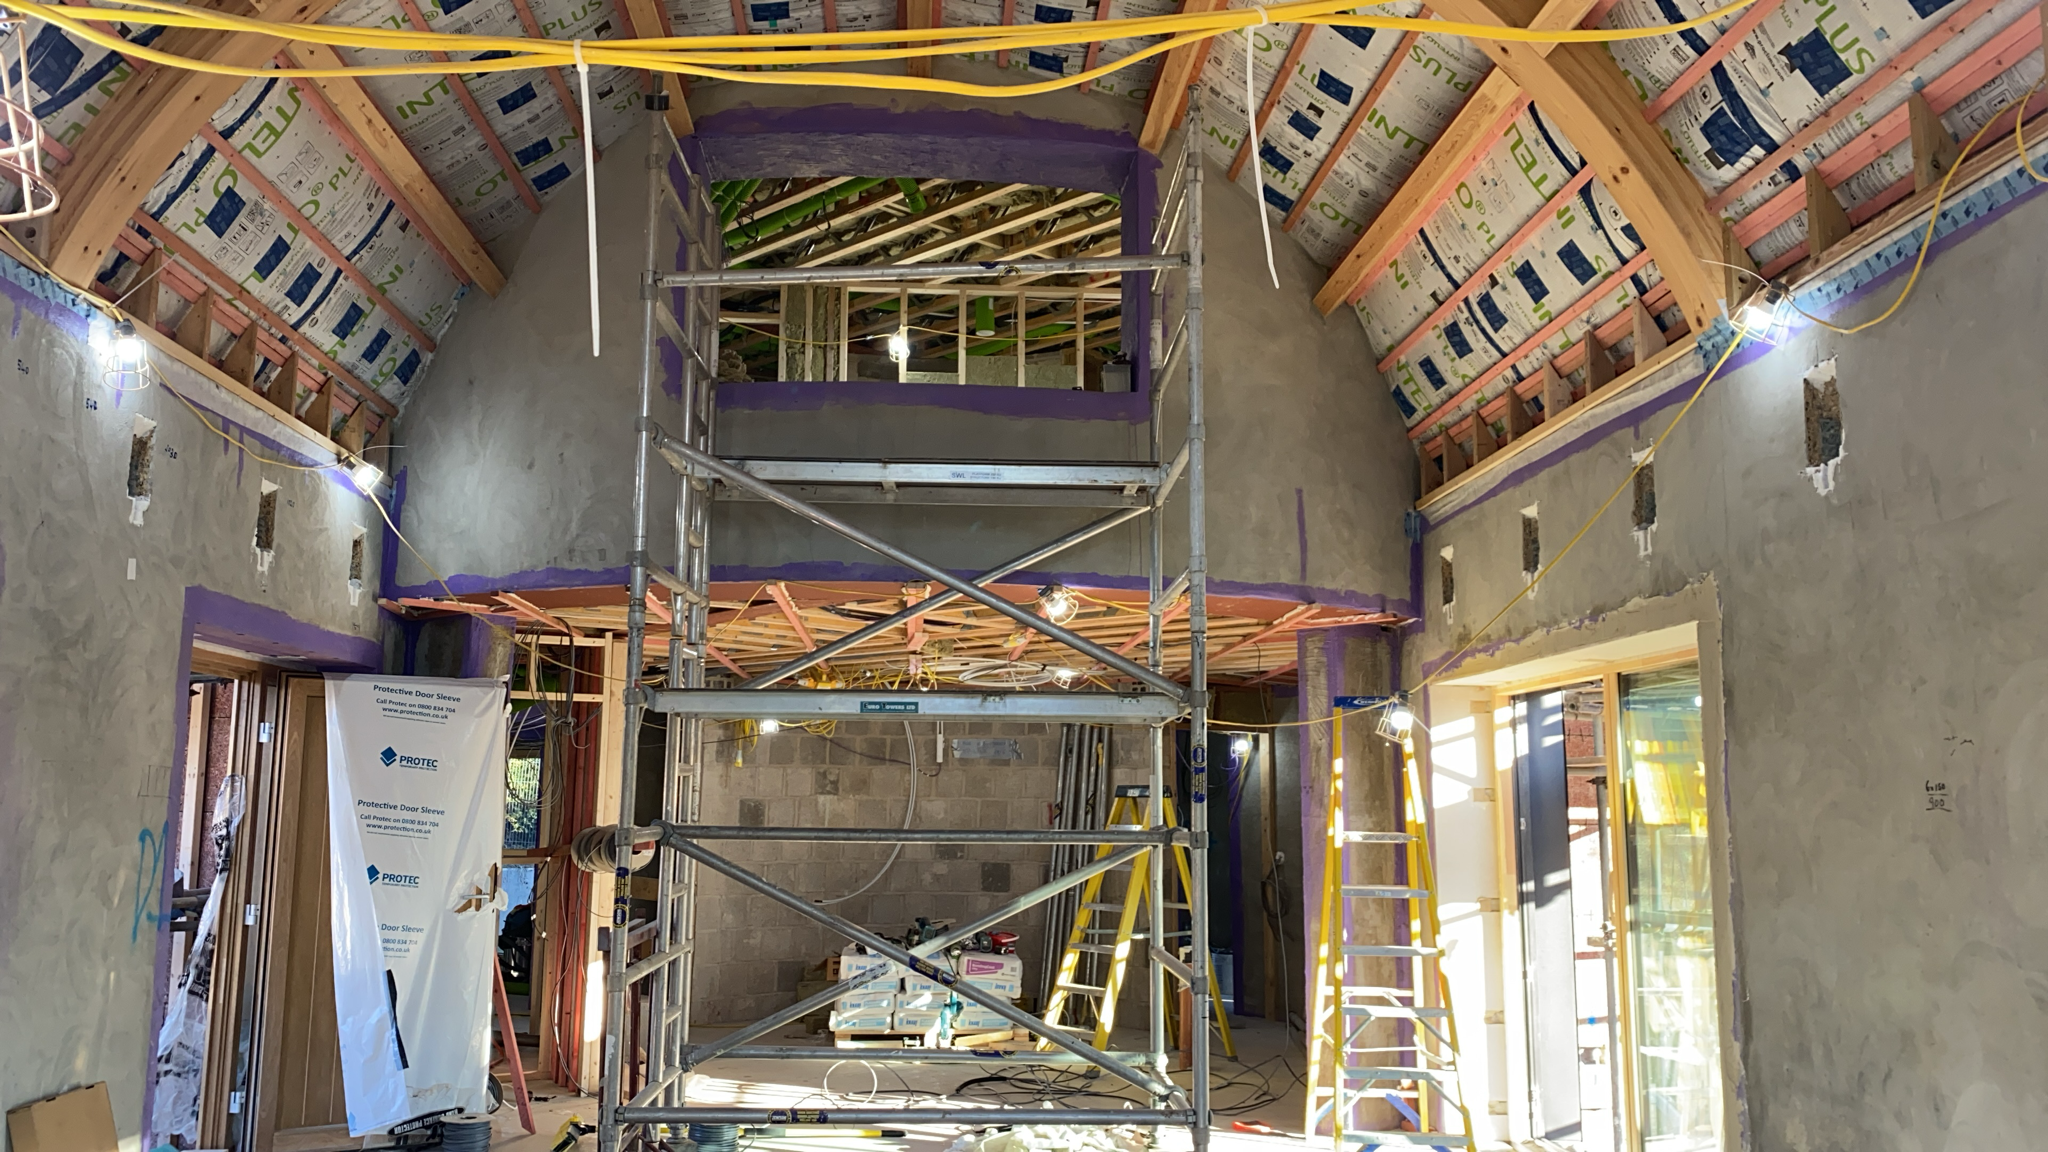
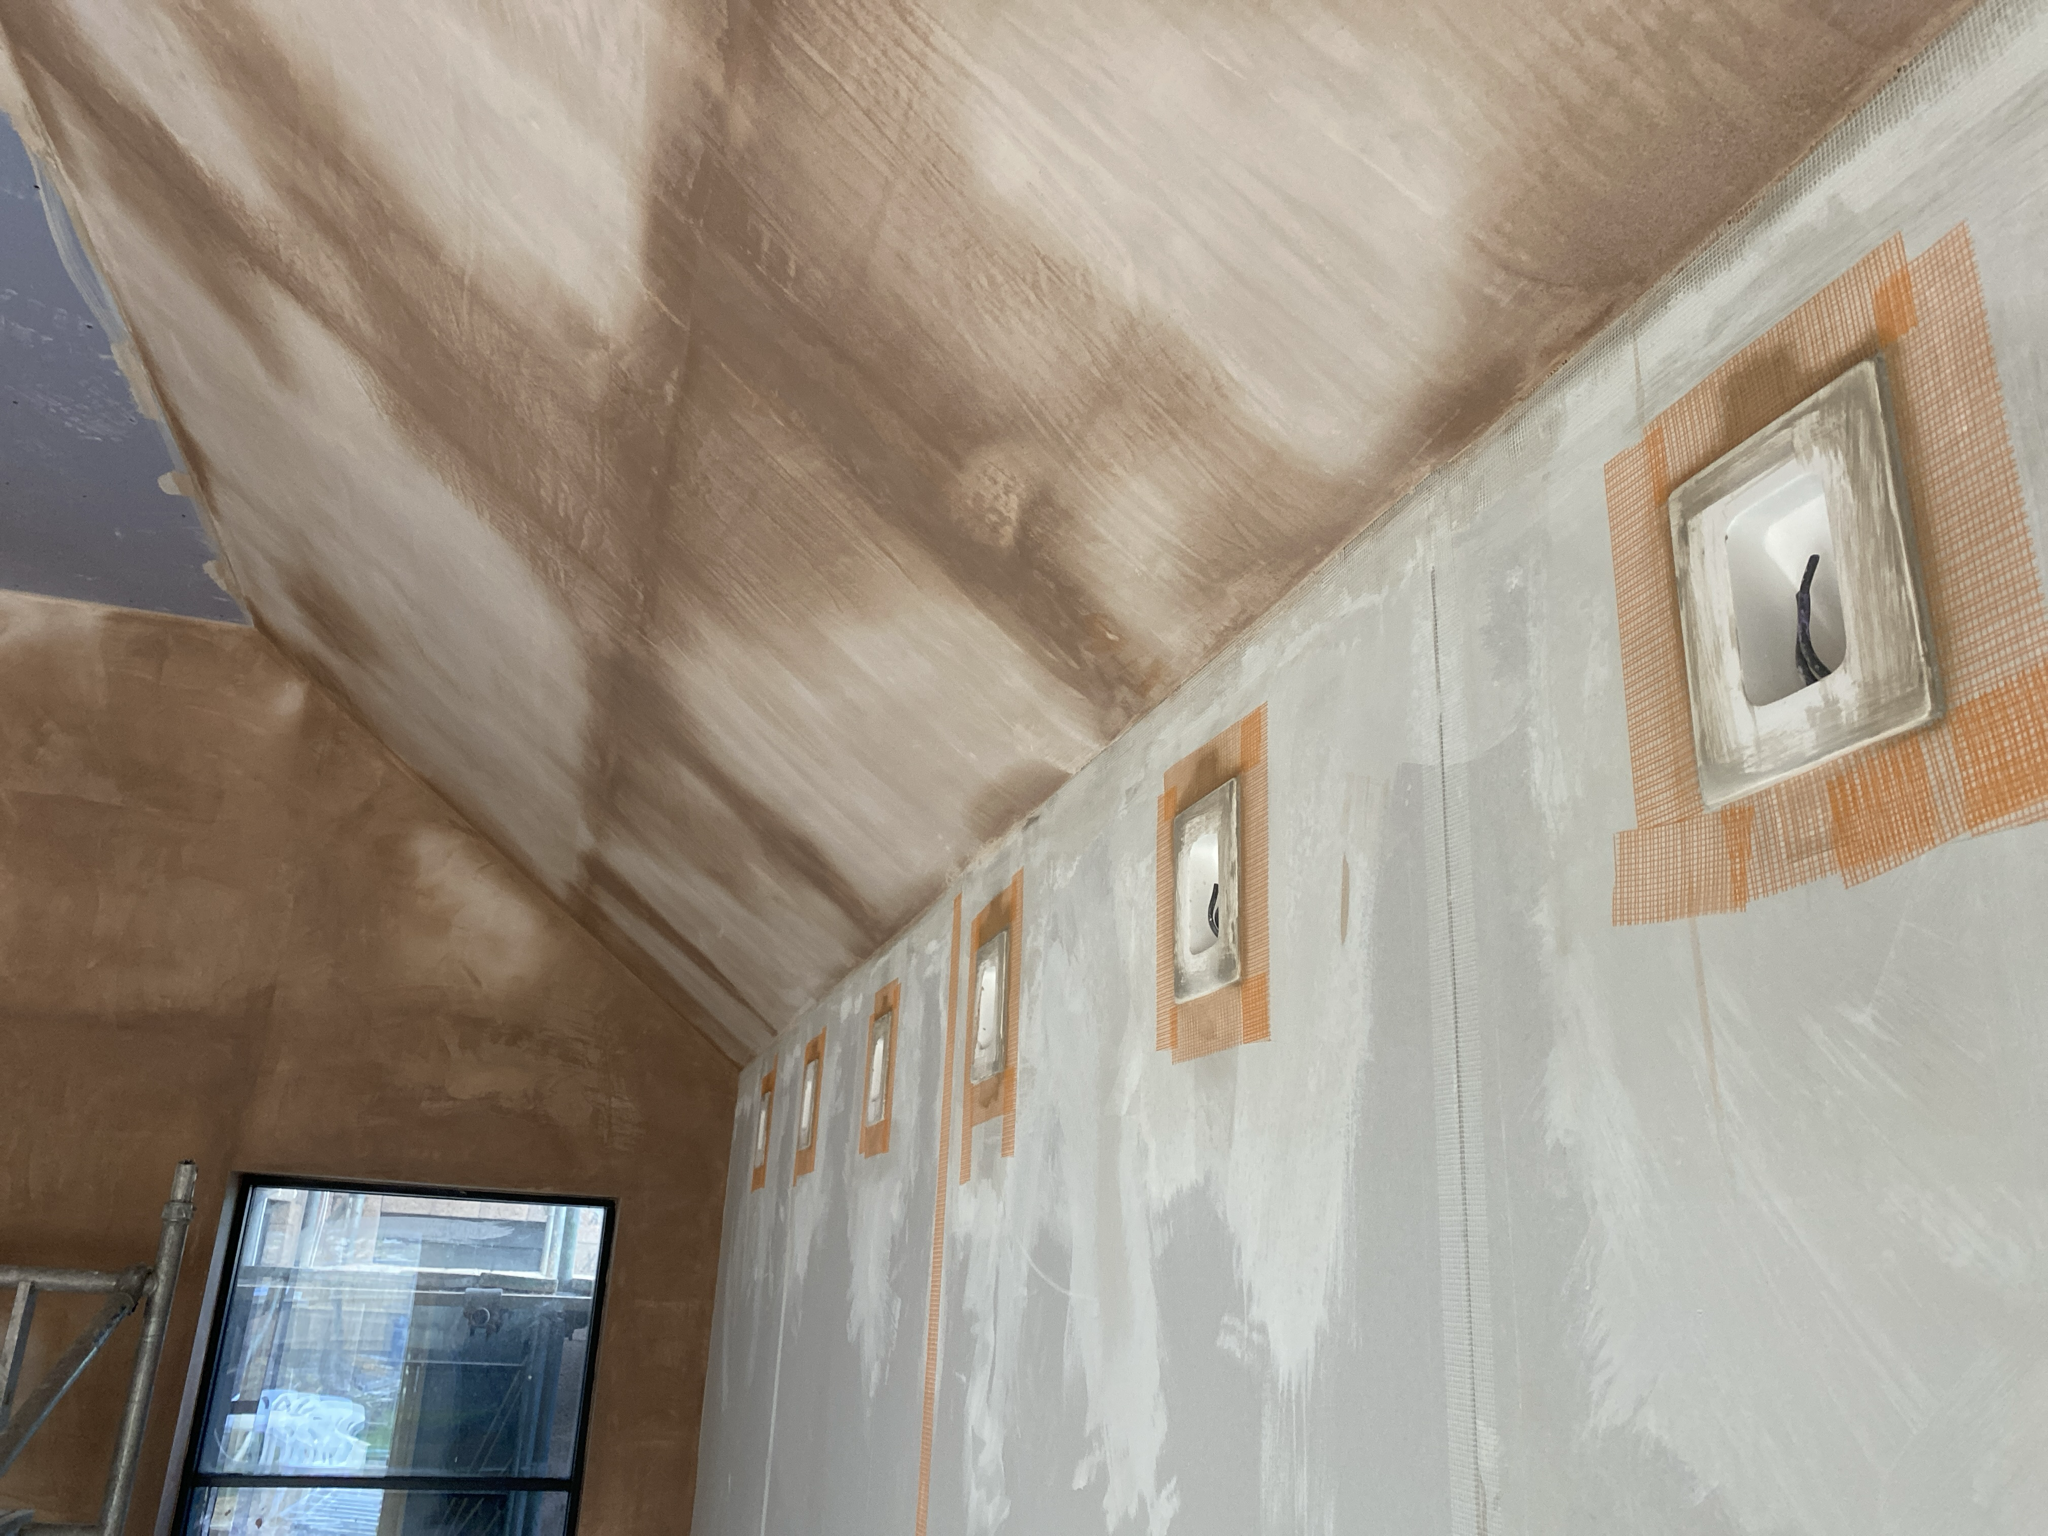
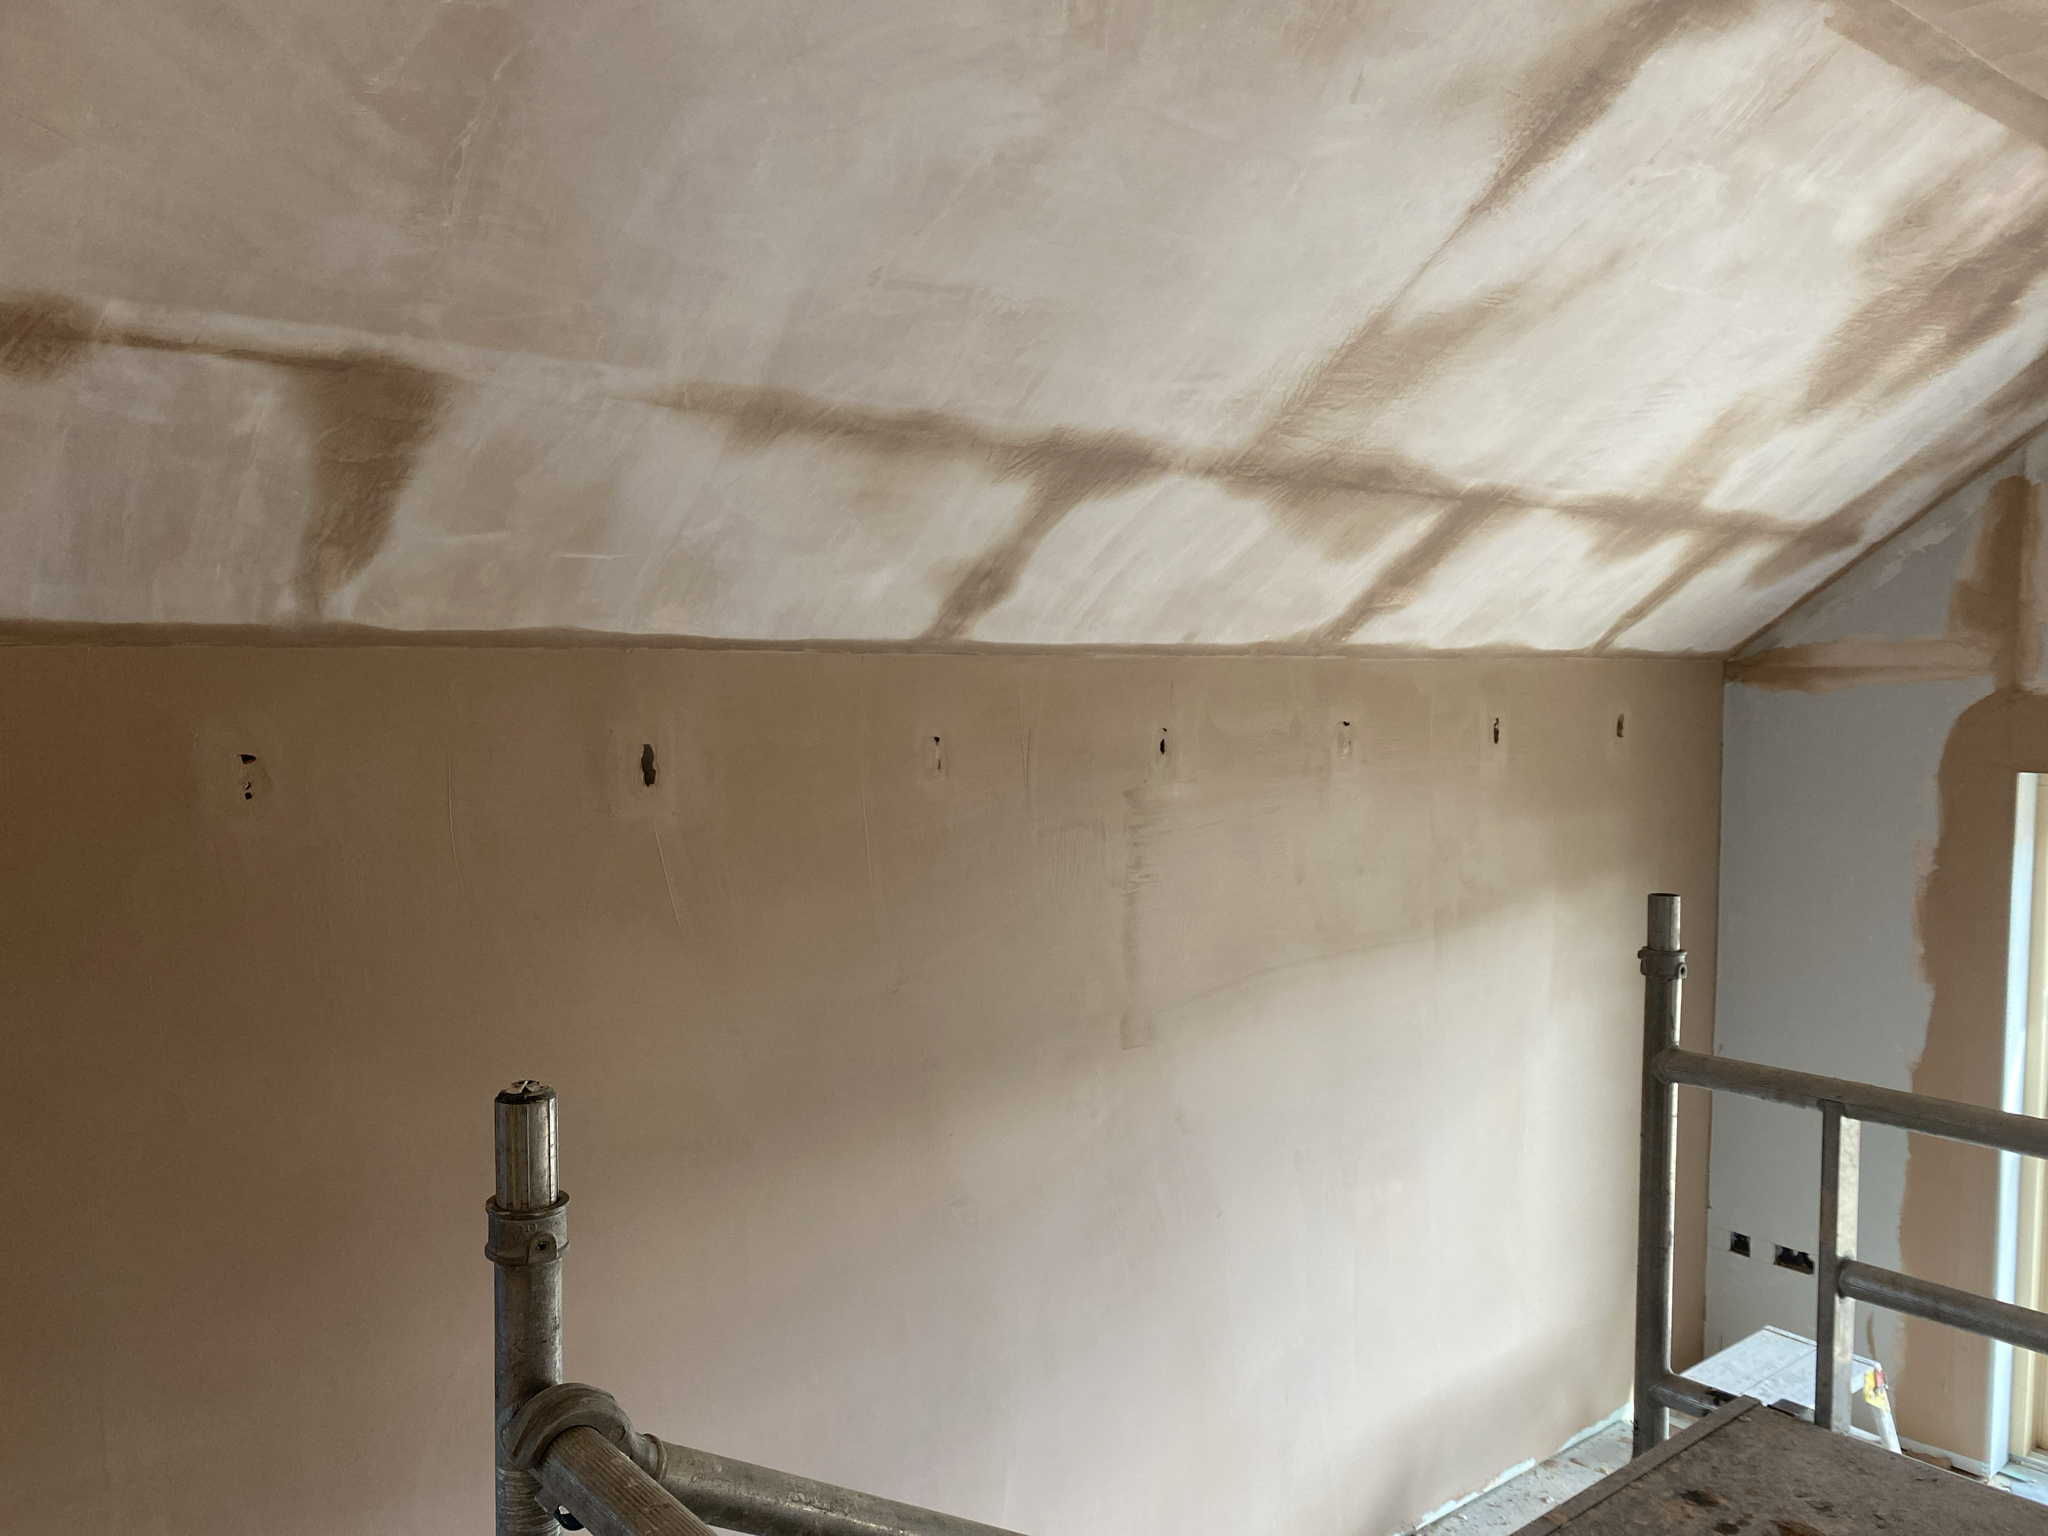
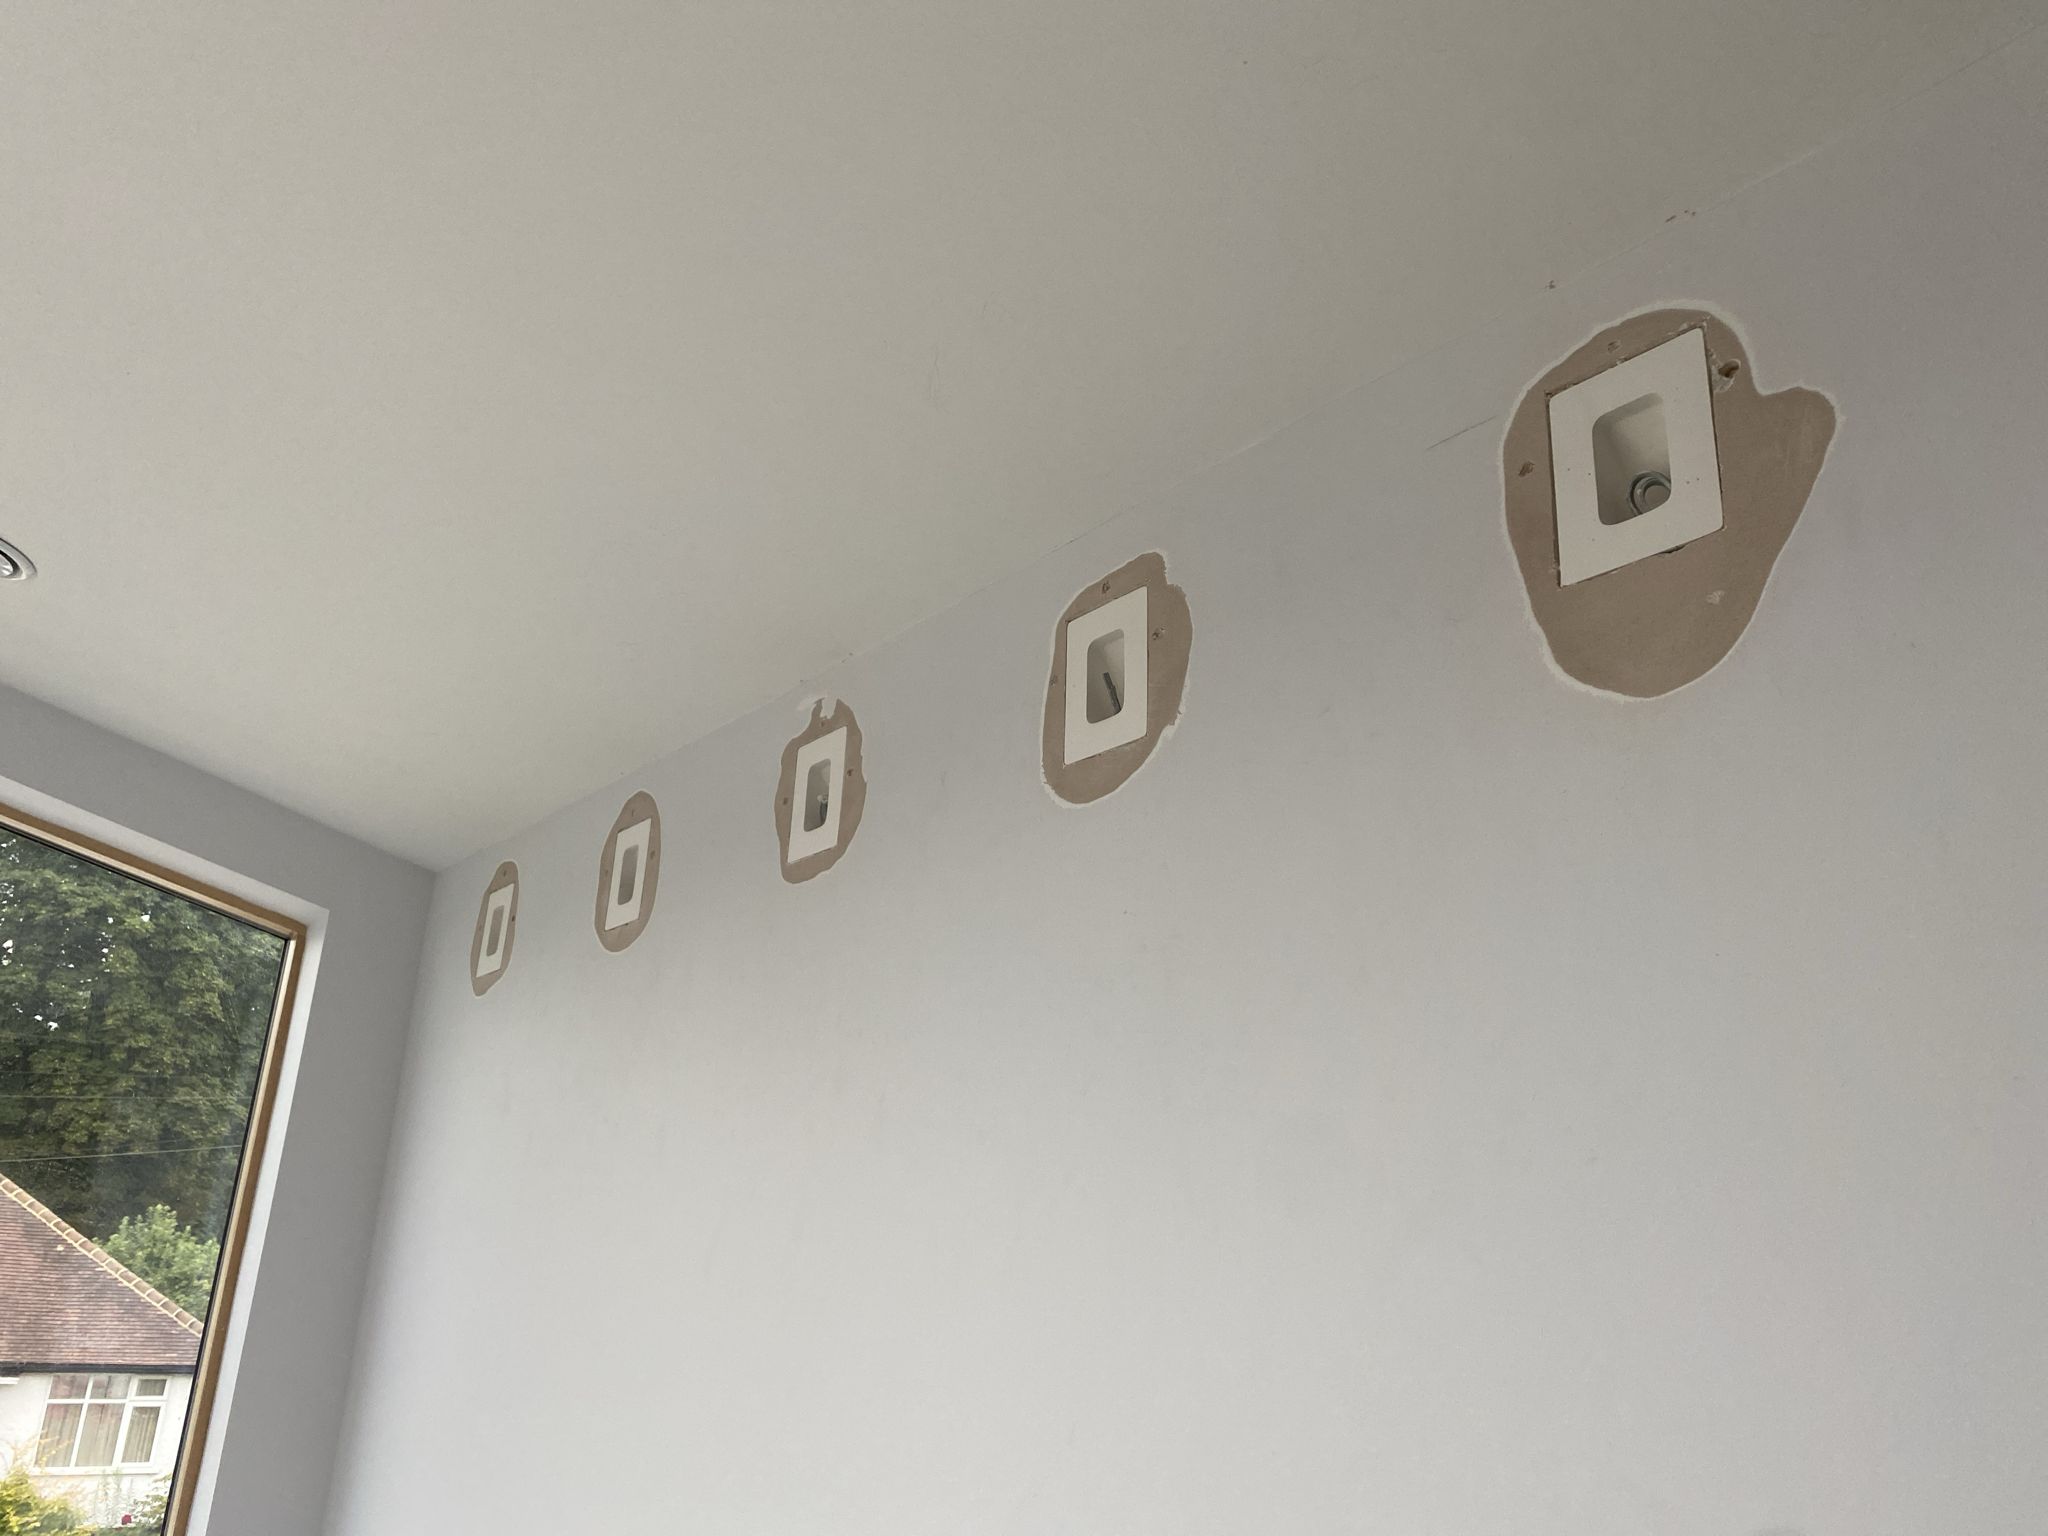
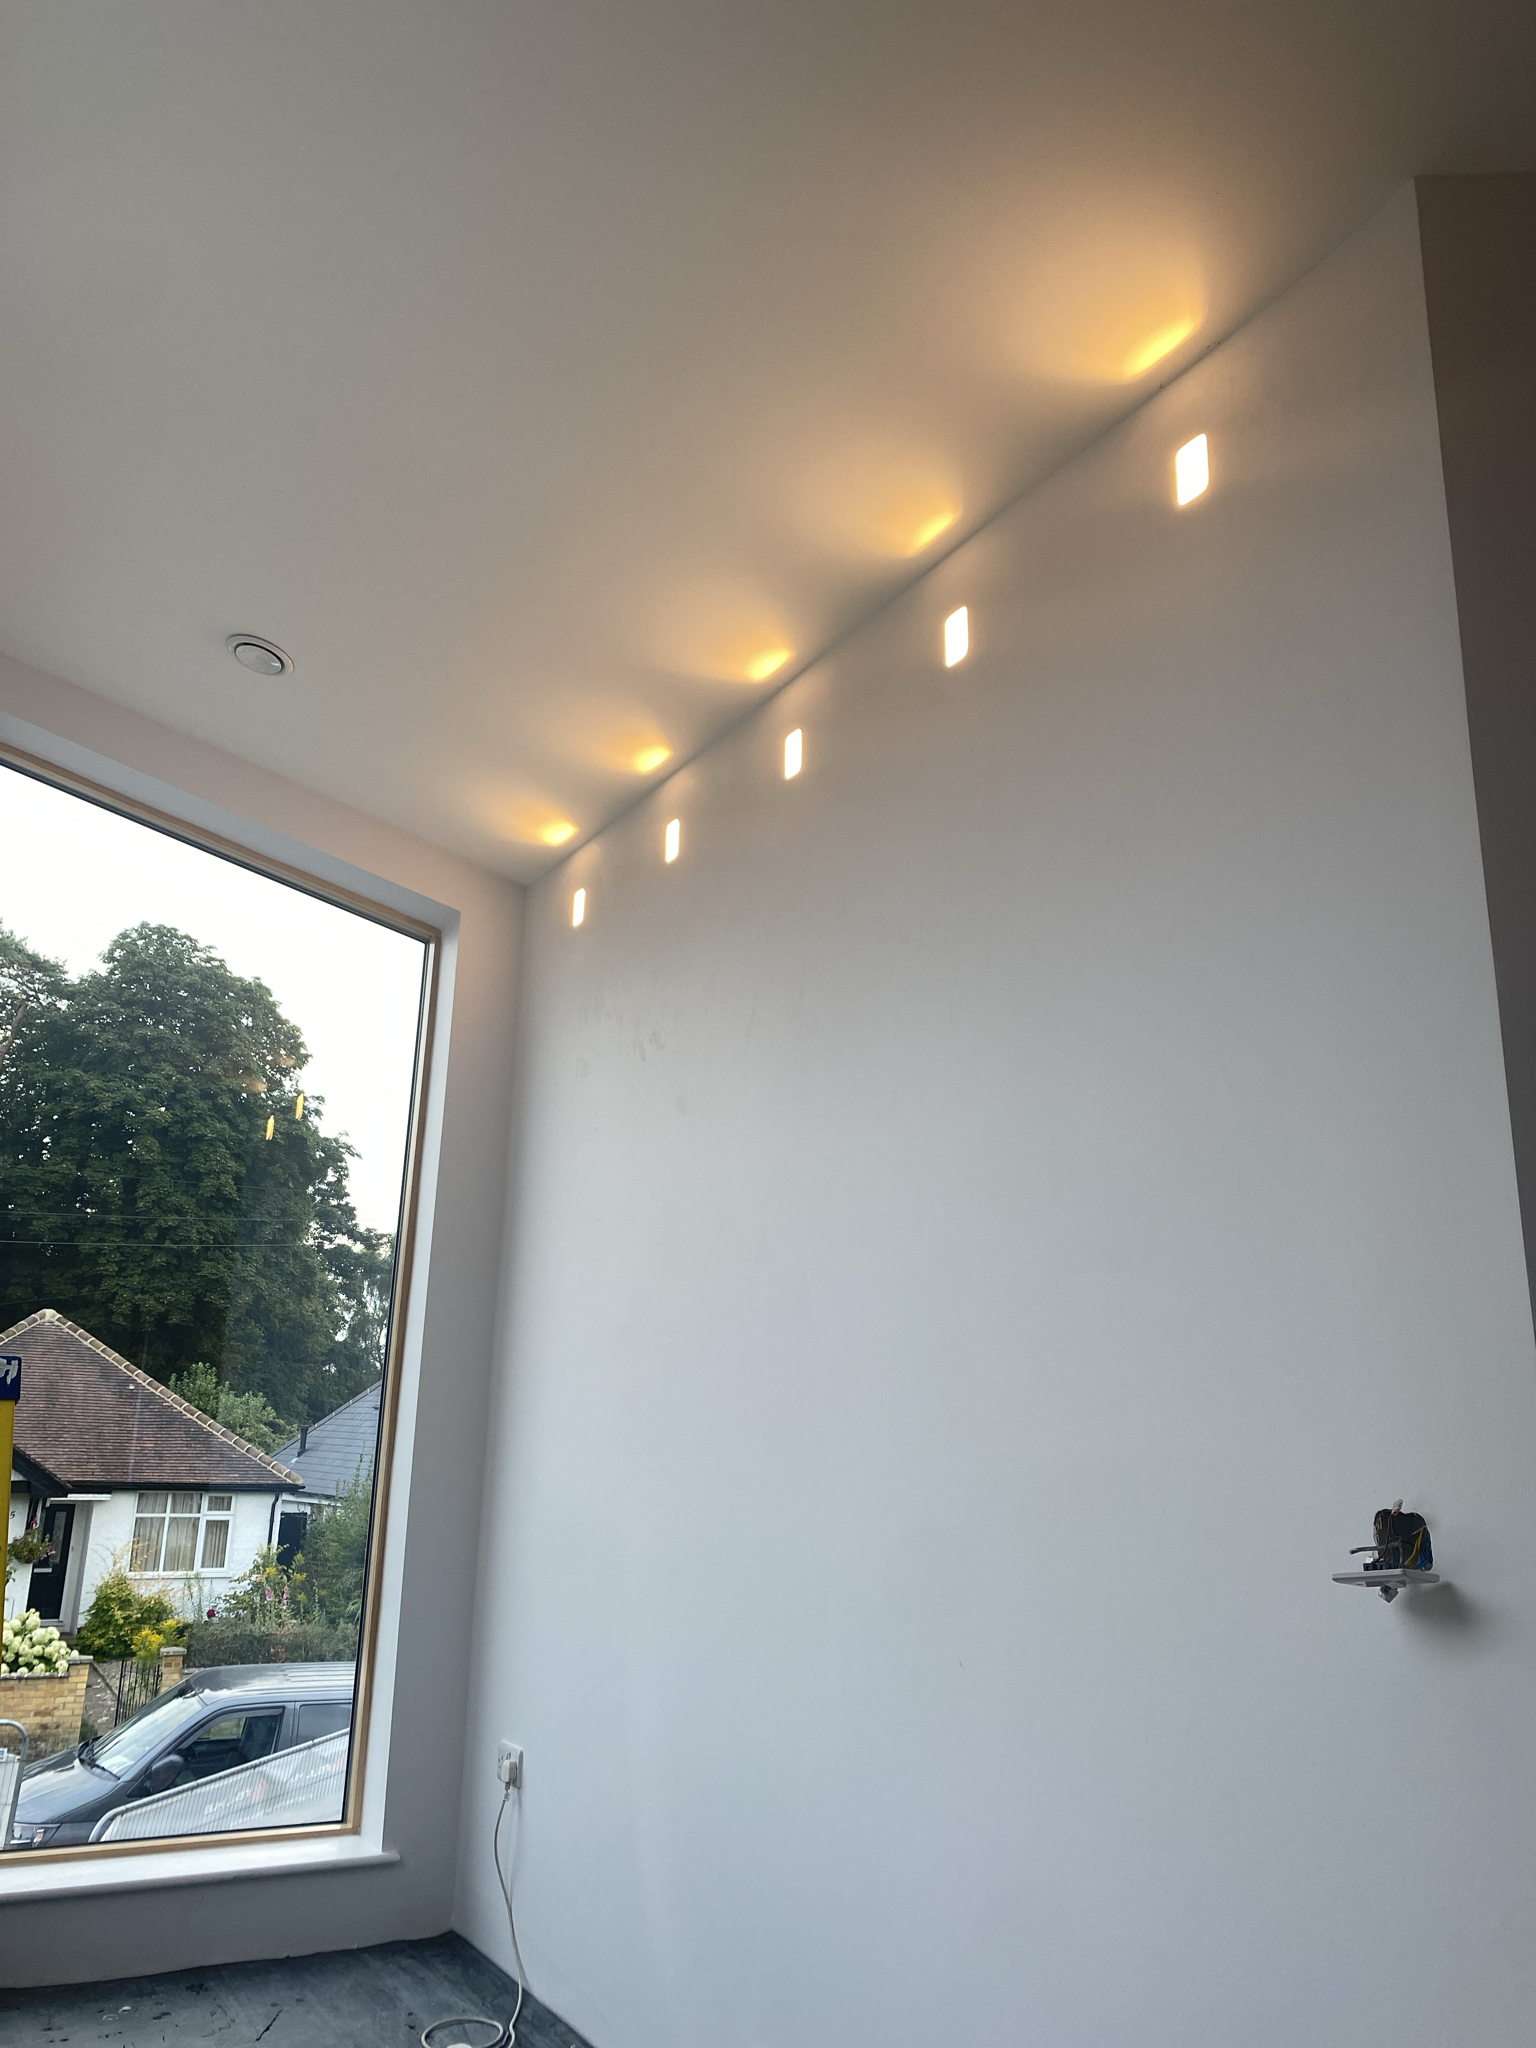
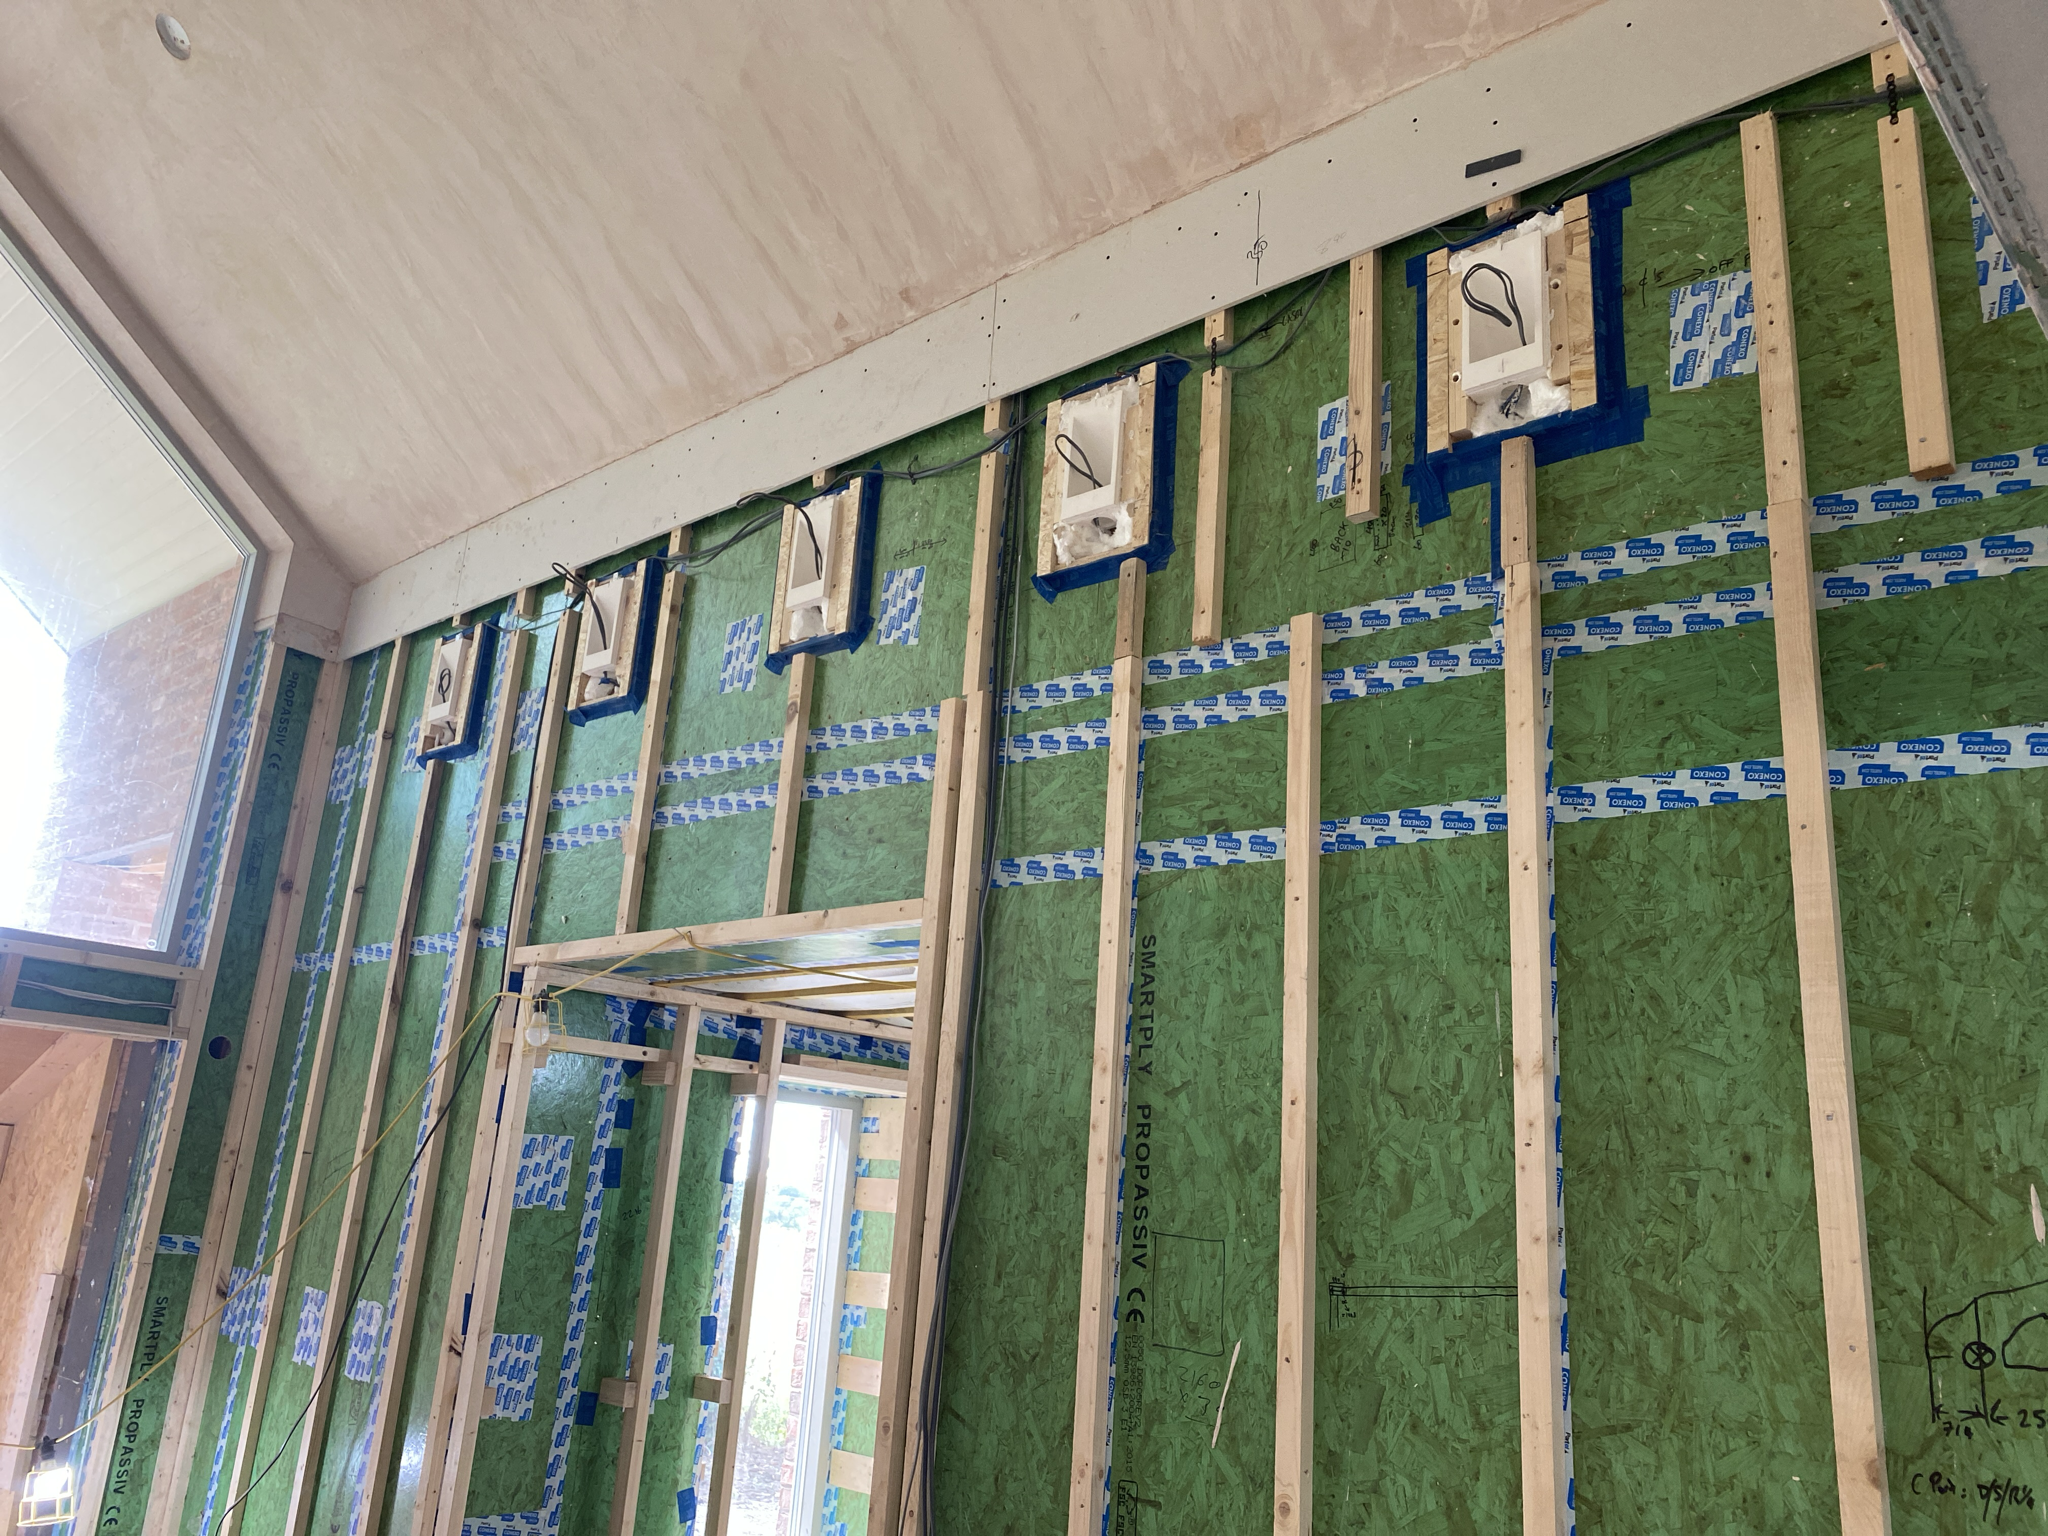
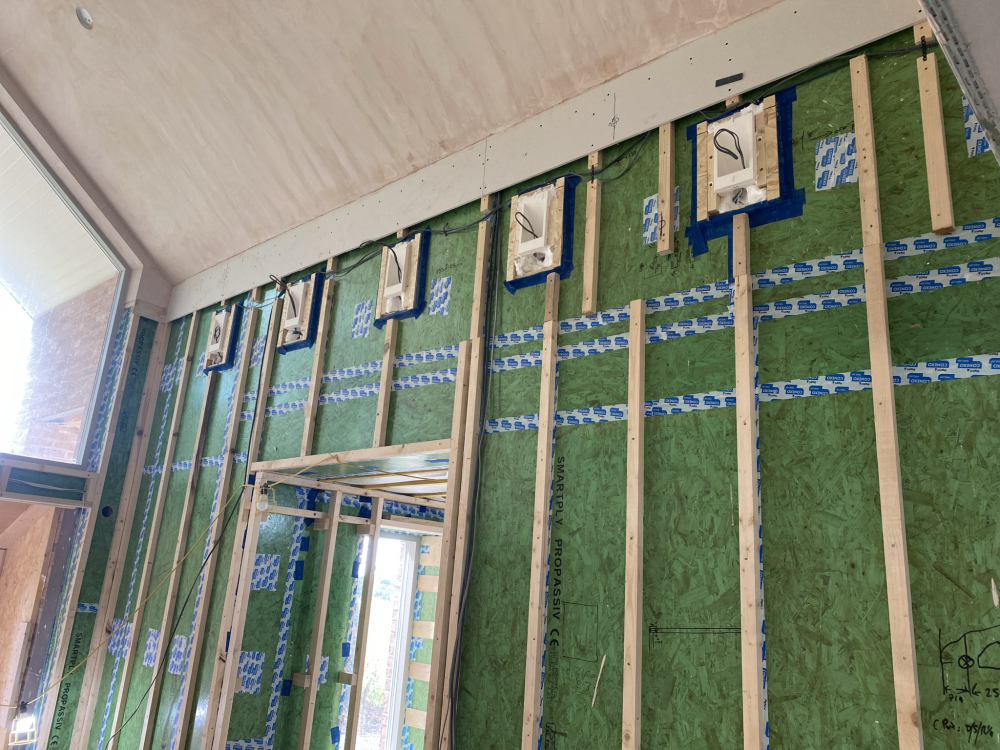
I’ve done a few projects with these cathedral type aspects, and have supported the clients with lighting design / electrical installation etc. Check out plaster-in up lights; I’ve used Tornado lighting and the results have been great. Lots of light but no obvious source or offending lightbulbs to stare directly at. For this client I installed 4 small surface mounted uplights at the base of each ‘spine’ and then you’ll see the pockets along each wall which is where I fitted the plaster-in units. Some other examples for your information.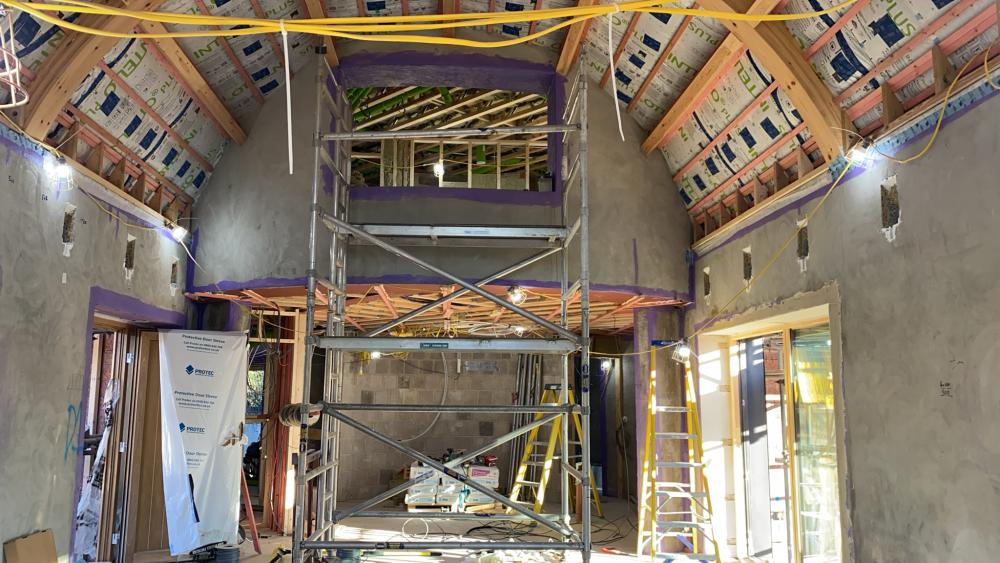
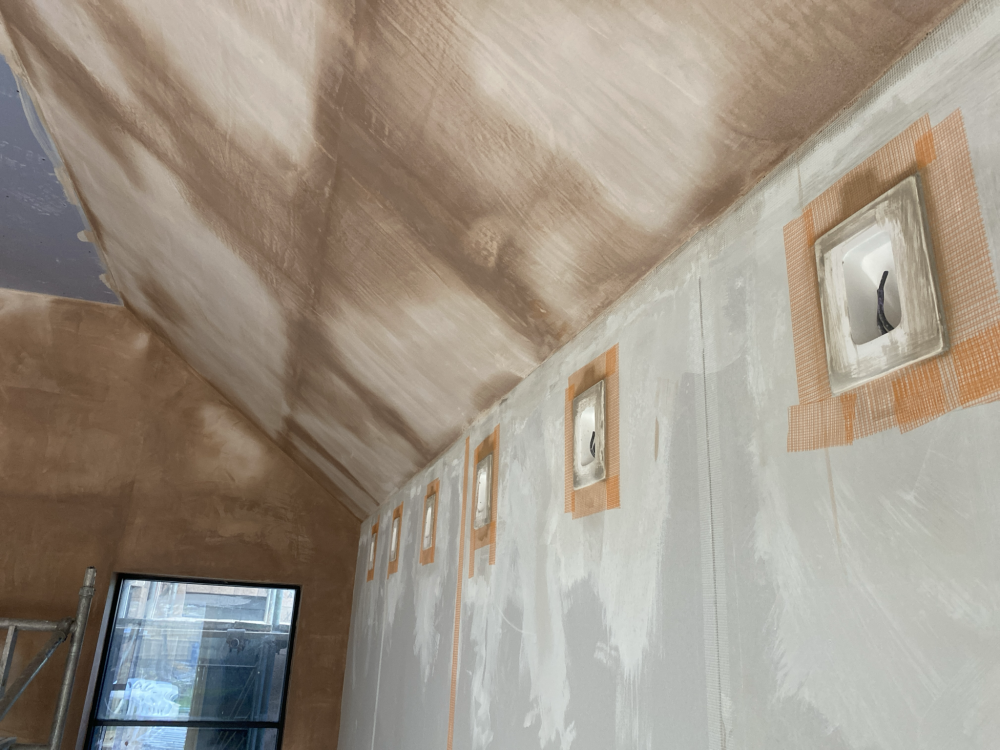
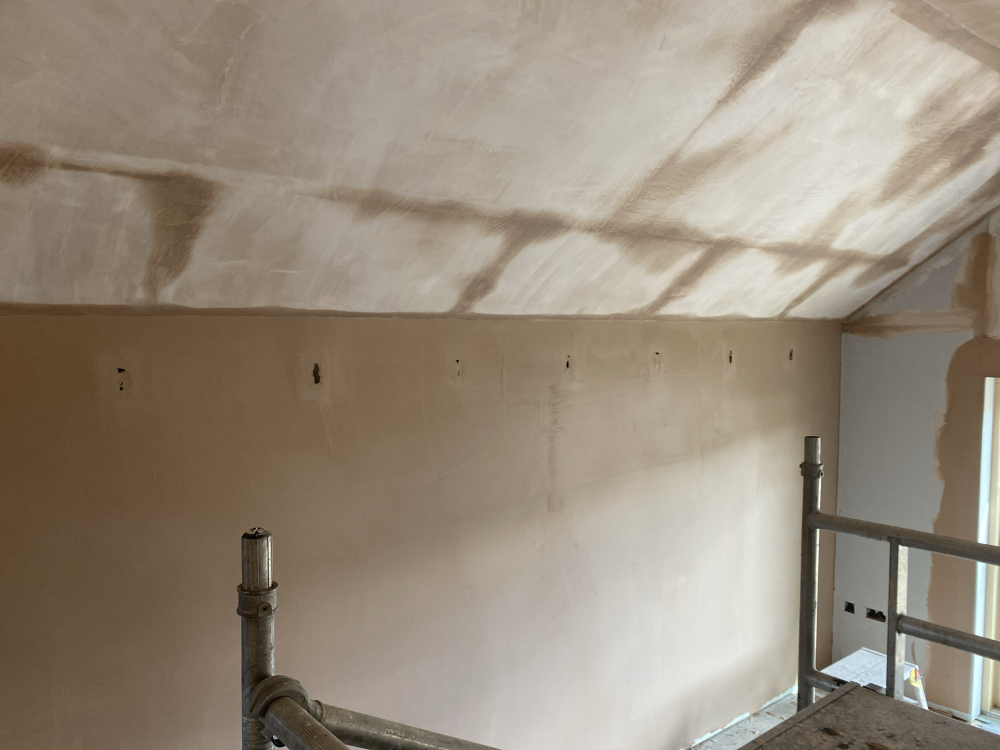
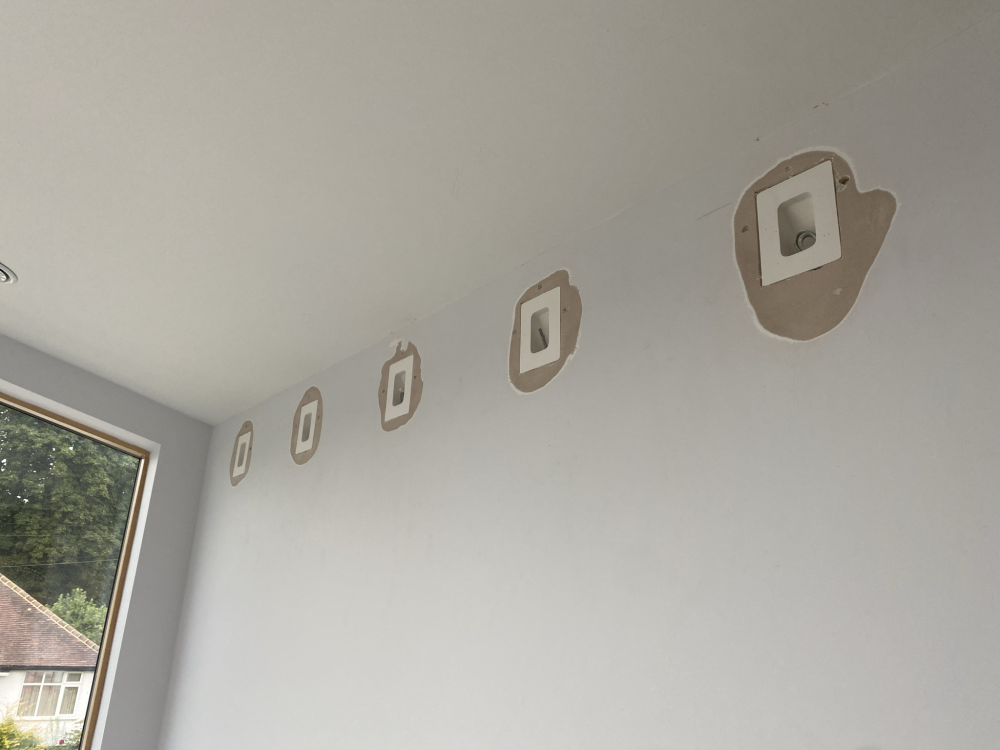
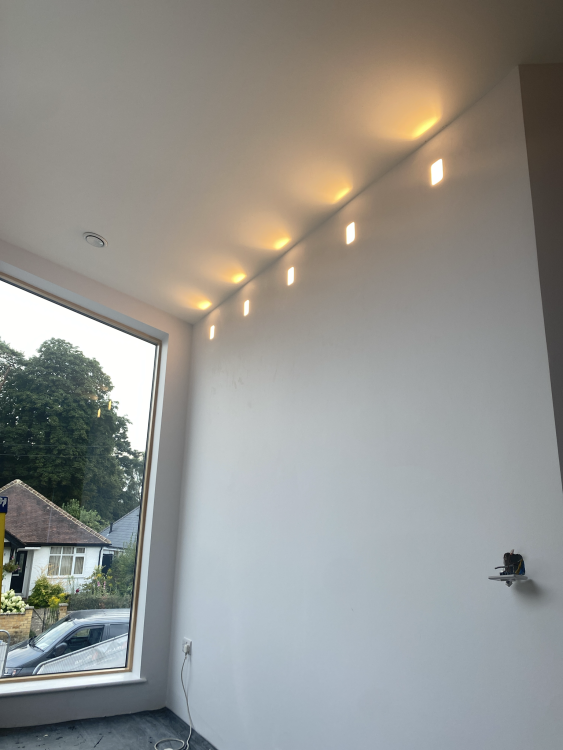
-
Pre-cast concrete staircase
Nickfromwales replied to flanagaj's topic in General Self Build & DIY Discussion
@Gus Potter Just got to the hotel, pint of Neck Oil slipping down a treat. Thanks again for providing my bedtime reading. If I can stay awake…..hell of a long day today but getting there now, thank feck! -
Happy days
-
Stainless from Telford, ditch the hideous suggestion of sacrificial anodes (🤢🤮) and enjoy a long happy life, you and your UVC. I’ve only ever seen one stainless UVC ‘pop’ catastrophically, and that was installer error. Your installer is a wise man, reward him with hot bacon and cold beer.
-


-
Cut some strips of XPS to give some thermal break? https://gb-home.co.uk/products/insulation-boards-xps-under-floor-heating-thermal-6mm-10mm-20mm-30mm?variant=39814976995405&country=GB¤cy=GBP&utm_medium=product_sync&utm_source=google&utm_content=sag_organic&utm_campaign=sag_organic&gad_source=1&gad_campaignid=21193699419&gbraid=0AAAAApWtJjx38HziVW3HhIEbeXyiDe0yZ&gclid=CjwKCAjw_fnFBhB0EiwAH_MfZngO4IA5zvonhpp8uS3AgAxJJrg1r7kJT4xwhIwhEav0kHkFrMzqVhoCR-IQAvD_BwE
-
If the WC pipe drops down, and then disappears underground, then you may have to provision for rodding access at the rear of the WC, if the BCO is the most pedantic git on earth. Just tell then the lid to the boxing in is removable and you can rod down there, by using a T with a rodding eye at the outlet of the pan instead of a bend. Then box the lot in and enjoy your life.
-
B Regs will tell you that you 100% defo do NOT need an AAV, if the invert is <1300mm from the pan outlet to the bottom of the manhole it connects to. Furthermore, you wouldn't benefit from fitting one anyways, as the long horizontal run is a natural air break; this means no vacuum can occur so no air needs admitting.
-
Balancing my daughters Rads.
Nickfromwales replied to Big Jimbo's topic in Central Heating (Radiators)
Just close down the 2 or 3 rads nearest to the boiler, by around 20%, and see what results that yields. -
Timber frame internal vapour layer up wall onto warm roof?
Nickfromwales replied to hotnuts21's topic in Timber Frame
Ah, yes! I read it as they are creating a warm roof, but you're right it's already warm. Well spotted chap!! 50 lashes for me. -
Week 15 - UFH, screed, and render base coat
Nickfromwales commented on Benpointer's blog entry in Contemporary build in north Dorset
Tried moving them about on my phone. Will tidy later on the desktop 👍 -
Because I am super-amazing. You can thank me with beer. 🍻
-
Delete it and put an AAV on that stack. There’s a deviation you can call upon, if your BCO is amenable, for 1:5 or 1:10 rule, where if you have neighbouring properties which all vent the network to atmosphere, then you can be given a green light to not have to also vent the network. The SVP isn’t for you, it’s to vent the network btw.
-
How to finish off cavity and floor heights
Nickfromwales replied to Jacko994's topic in General Construction Issues
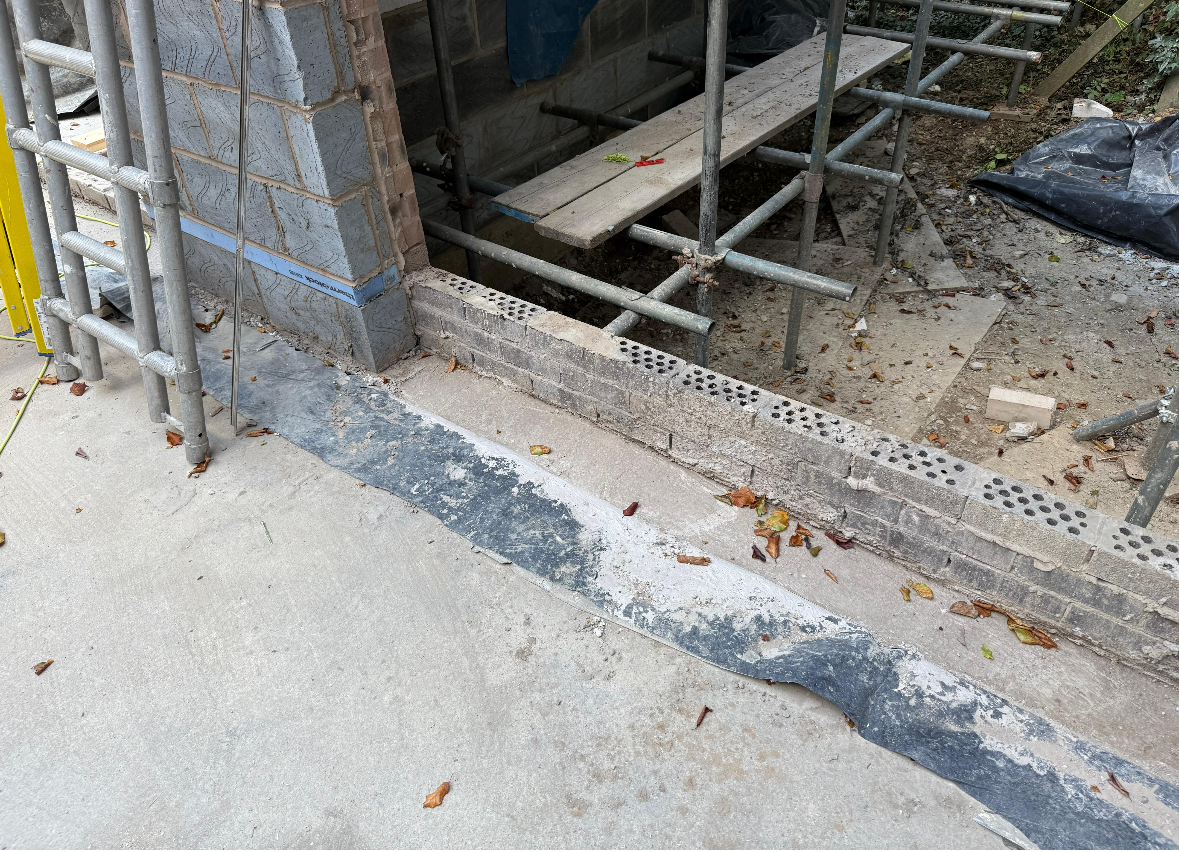
You delete that DPC and run the DPM up the face of the skirt insulation upstand. Basically just treat the job as if that inner leaf of masonry had never existed. Remove the lot, down to the same level as the B&B deck, and fly the insulation all the way in to meet the outer leaf of masonry. If UFH, don't forget the 'thermal' expansion skirting that goes on to absorb expansion of the screed. -
How to finish off cavity and floor heights
Nickfromwales replied to Jacko994's topic in General Construction Issues
Similar to this job.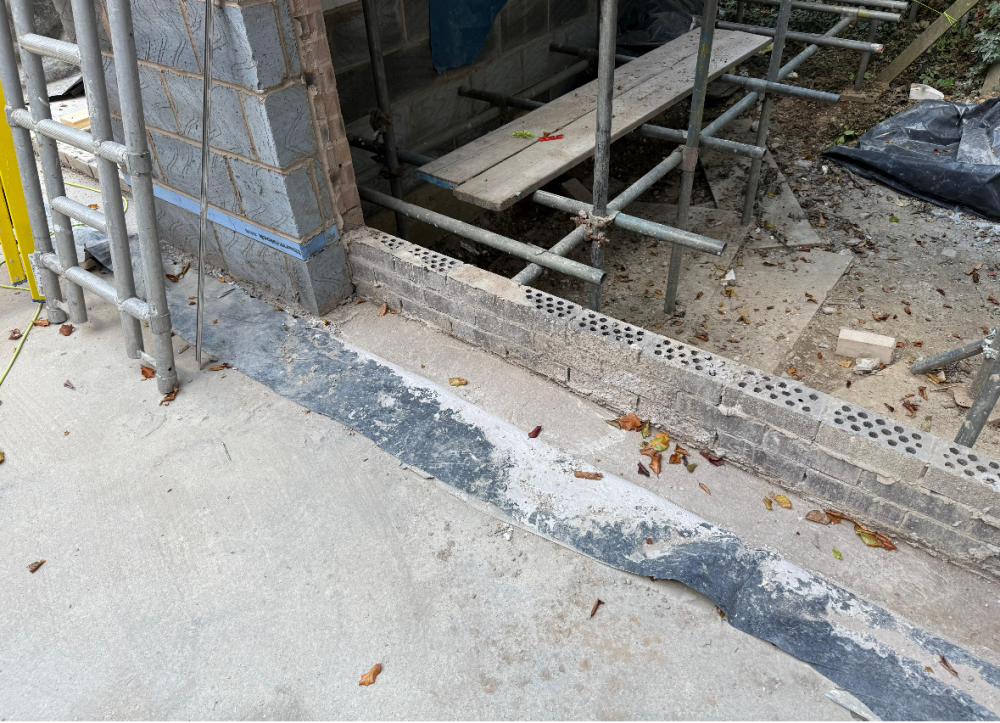
-
How to finish off cavity and floor heights
Nickfromwales replied to Jacko994's topic in General Construction Issues
You remove the inner course of blocks. Place insulation vertically up against the inside face of the outer course of blocks (as an upstand) and then run the insulation and screed to meet the upstand. -
22mm T&G first floor install advice required
Nickfromwales replied to ruggers's topic in General Flooring
5 screws per 600mm board along the joist, so with joists at 600mm o/c you'd be using 20 screws per 2400x600 board.