
Leaderboard


Popular Content
Showing content with the highest reputation on 05/28/16 in all areas
-
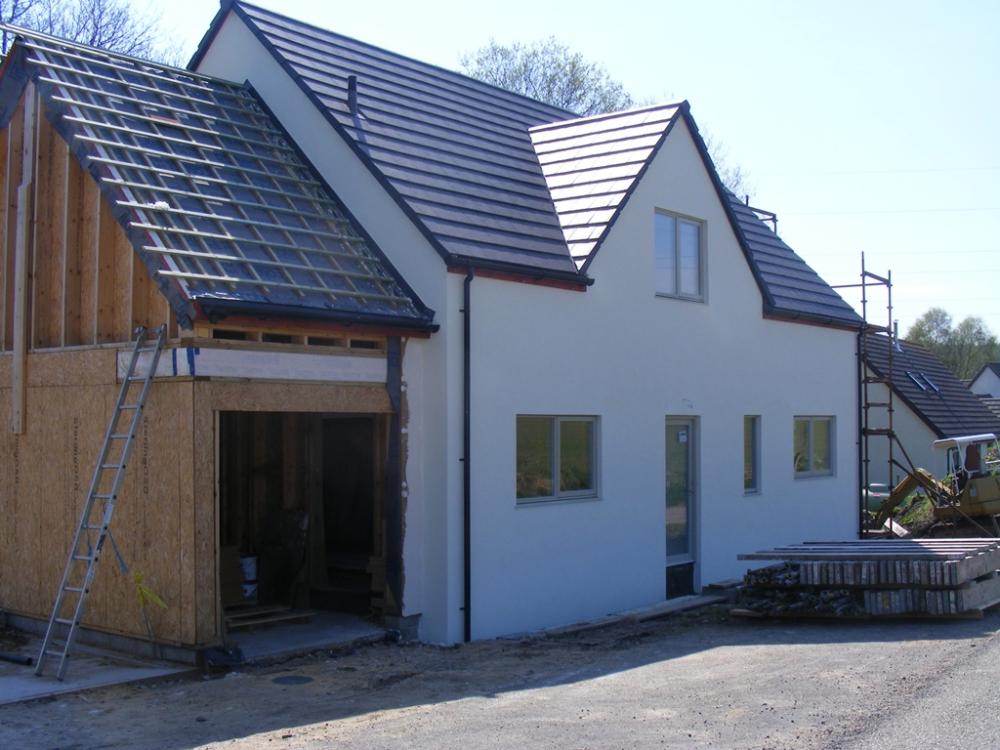
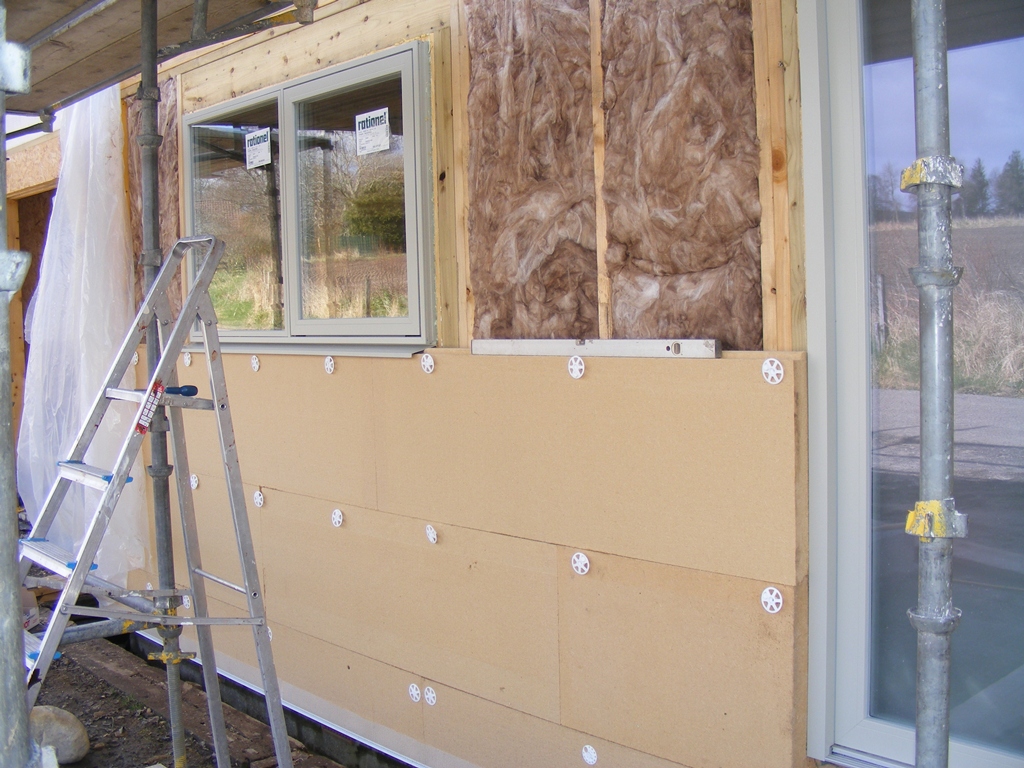
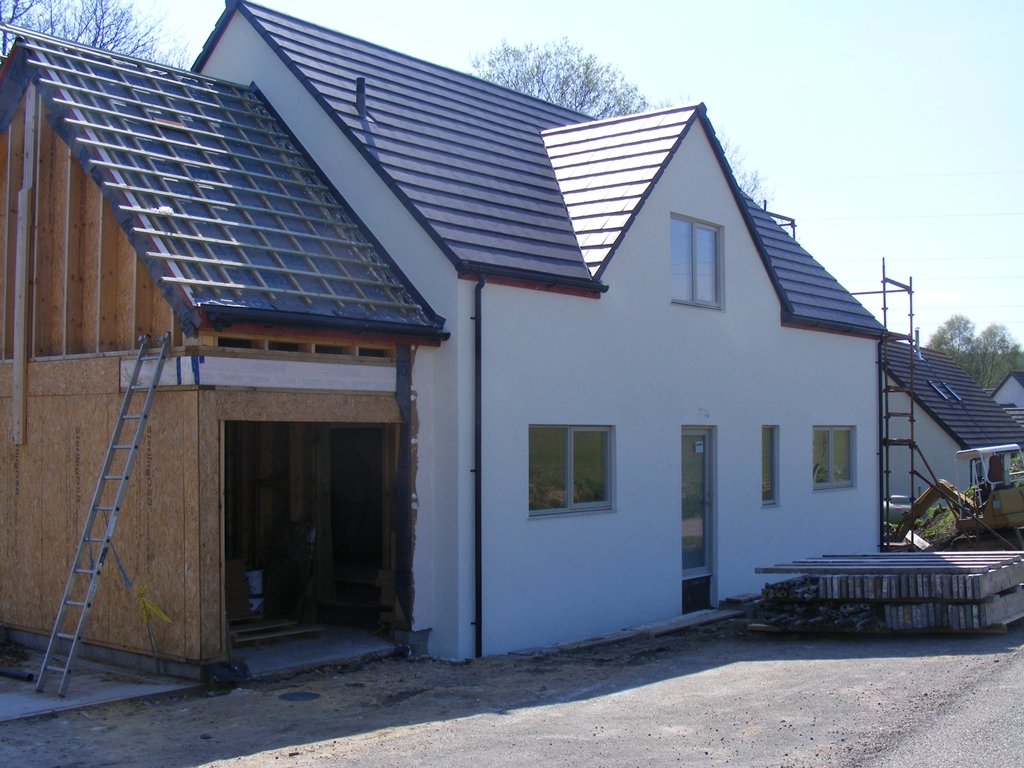
A lot of people ask me about the detail of how my house is built so I thought it worth a thread to explain things. First off, I didn't want an "ordinary" timber framed house with a cavity then a brick or block outer skin. That outer skin just costs a lot of money and adds nothing to the insulation of the house, it's just an expensive rain shield. I still wanted the traditional Scottish look of a white rendered finish but I want all elements of the wall make up to add to the insulation and air tightness of the property. The solution is a timber frame, clad with 100mm thick wood fibre external wall insulation boards (I used Pavatex, but other makes are available), and the render goes straight onto the wood fibre board. Here's a picture to make it clear: In that picture I only have a few of the fixing screws in place. A lot more were added and then driven fully home. The board is fixed to the frame with long screws with big plastic spreaders to stop the screws pulling through the board. There are a few twists to the frame however. First thing you will notice is that it is not an "ordinary" timber frame. For a start it's built with much thicker timbers than normal to allow more insulation in the walls. But secondly people keep telling me i have put the frame up "inside out" The OSB racking layer is on the inside of the frame. That's done for vapour permeability reasons with the least vapour permeable layer on the inside. With this build method you can either fill the frame with blown in insulation from the inside once the wood fibre cladding is fitted, or in my case I have chosen to use Frametherm 35 as it's less than half the cost of blown in insulation but gives the same U value. So I am fitting the insulation from the outside as I fit the wood fibre cladding. Insulating only that bit of frame I expect to get clad in that day as I don't want the insulation left exposed to get wet if it rains. The render is a lime based system from baumit.com. It has 3 layers, a base coat that is mixed from dry powder, then a primer that is painted on, then the top coat comes pre mixed in tubs. A fibreglass mesh gets pressed in to the base coat before it is dry. Overall benefits of this approach Vs an ordinary timber frame with blockwork outer skin: Simpler foundations (no need for provision to support the outer brick or block wall) More insulation for a given wall thickness More of the job can be DIY done, perfect for self builders. And an unexpected one, because there is no cavity, there is no need to pepper the wall with weep ventilators, so you get a clean render finish with no "warts" And here is what the finished and rendered front of the house looks like.

 1 point
 -
And so the sagas continue. Luckily not our house this time. Sister's house; electricians started on Wednesday after weeks of waiting. The company they went with has contracted the work out to someone else because they are too busy (without any prior agreement or notificiation). They have just went on site this evening to find 4 holes drilled in the joists of the attic trusses, the whole way up the middle of the house. What now??1 point
-
i literally just picked my iPhone up to say I haven't forgotten about this thread. Just it needs a proper looking at and this week has been hectic meeting a deadline for today. Just sitting down with a grolsch with the kids going nuts up the garden and the bbq is stuffed with the entire contents of old macdonalds farm........so as soon as they're all fed and darted I'll have a look and get some ideas for you just as I was enjoying a post-graft Coors, the phone went with 2 bathrooms and a kitchen, which i thought weren't coming off, and guess what.....they all asked me "how soon can you fit us in, we're ready to proceed"............ the joy of self employment ??1 point
-
Dads all over the world do this job.1 point
-
Feeling the man love for this!1 point
-
The pipes will go in the eave spaces. Couldn't be easier. Can't understand why they didn't do this for the wiring tbh. If it wasn't a new build I'd say not to get too panicked about it as I've seen much worse, but as it's a new build then you have warranty and BCO issues so will need to go by the book. Have you / sister paid any money out for the electrical,work yet?1 point
-
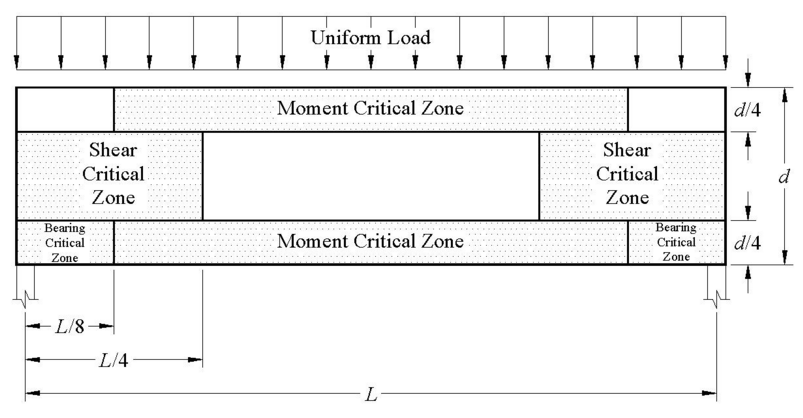
I found this on the subject out of interest: The diagram in my old IEE Guide To The Building Regulations suggests that the holes in the zone between 0.25 & 0.4 can be a CONTINUOUS SLOT without detriment. BUT.....in the new (yellow) OSG it shows separate holes (in the 0.25 - 0.4 zone). Will have to dig out some old OSGs as I seem to recall the same "old" diagram in a previous edition showing a slot .....
 1 point
 -
Hah all the information I gained was on a need to know basis. It has now been erased from my mind and been replaced with the theme tune from Mickey mouse clubhouse and old mac Donald1 point
-
We are planning low temp UFH so I'm not anticipating huge issues in that regard. We had ceramic tiles on our bathroom and utility floors in the last house without issue (albeit no UFH). I suspect in the end, the issue is moot as tiles will be chosen according to what we my good lady likes the look of...1 point
-
OK I will be good. But I tried it once and it didn't suit me so no promises.1 point


This leaderboard is set to London/GMT+01:00