
Pocster
-
Posts
14368 -
Joined
-
Last visited
-
Days Won
29
Everything posted by Pocster
-
Boom ! Free juice for humans ! I can’t store it all ! . Even EV is now full ! Boom again!

-

Is there a reliable and fool proof occupancy sensor for WCs out there
Pocster replied to MikeSharp01's topic in Lighting
In all seriousness a cctv camera will give a perfect solution in a toilet …. -
Do I have Efflorescence on my walls?
Pocster replied to ennogs's topic in Bricklaying, Blockwork & Mortar
Because to build it the way I suggest would show great skill . The crowd is not to be followed ! -
Do I have Efflorescence on my walls?
Pocster replied to ennogs's topic in Bricklaying, Blockwork & Mortar
How do you know the original photo isn’t the correct orientation? I. E wall built with bricks on end vertically? 🙄😁 -
Do I have Efflorescence on my walls?
Pocster replied to ennogs's topic in Bricklaying, Blockwork & Mortar
Looks like it too me . Can be difficult to get rid of in my experience -
Feel like silly questions but may not be.
Pocster replied to MikeSharp01's topic in Networks, AV, Security & Automation
Nah - grow a pair . What will electric cost in 12 months ? . I don’t know . But it will be more than today . Get some installers in and quotes . -
Feel like silly questions but may not be.
Pocster replied to MikeSharp01's topic in Networks, AV, Security & Automation
It’s the way to go ! -
Feel like silly questions but may not be.
Pocster replied to MikeSharp01's topic in Networks, AV, Security & Automation
Convoluted madness ! But it works ! -
Feel like silly questions but may not be.
Pocster replied to MikeSharp01's topic in Networks, AV, Security & Automation
Yes - for a motion sensor ‘ reading a book ‘ might be an issue . But if you had cctv ; you could set the sensitivity much more finely to trigger ( keep on ) any lighting . Had the same issue with my external front light . So through the software ( blue iris ) map the ‘ trigger ‘ zones - with sensitivity set appropriately to trigger Java script url to home automation to set z wave switch to turn light on . -
Feel like silly questions but may not be.
Pocster replied to MikeSharp01's topic in Networks, AV, Security & Automation
Automation in my opinion should be something that largely ‘ just happens ‘ . Lights come on / blinds open etc . -
Feel like silly questions but may not be.
Pocster replied to MikeSharp01's topic in Networks, AV, Security & Automation
Ffs ! . Touch / iPad etc to control lights / music / open the front door . Get boss onside now ! -
Feel like silly questions but may not be.
Pocster replied to MikeSharp01's topic in Networks, AV, Security & Automation
You’ve got an iPhone yeah ? -
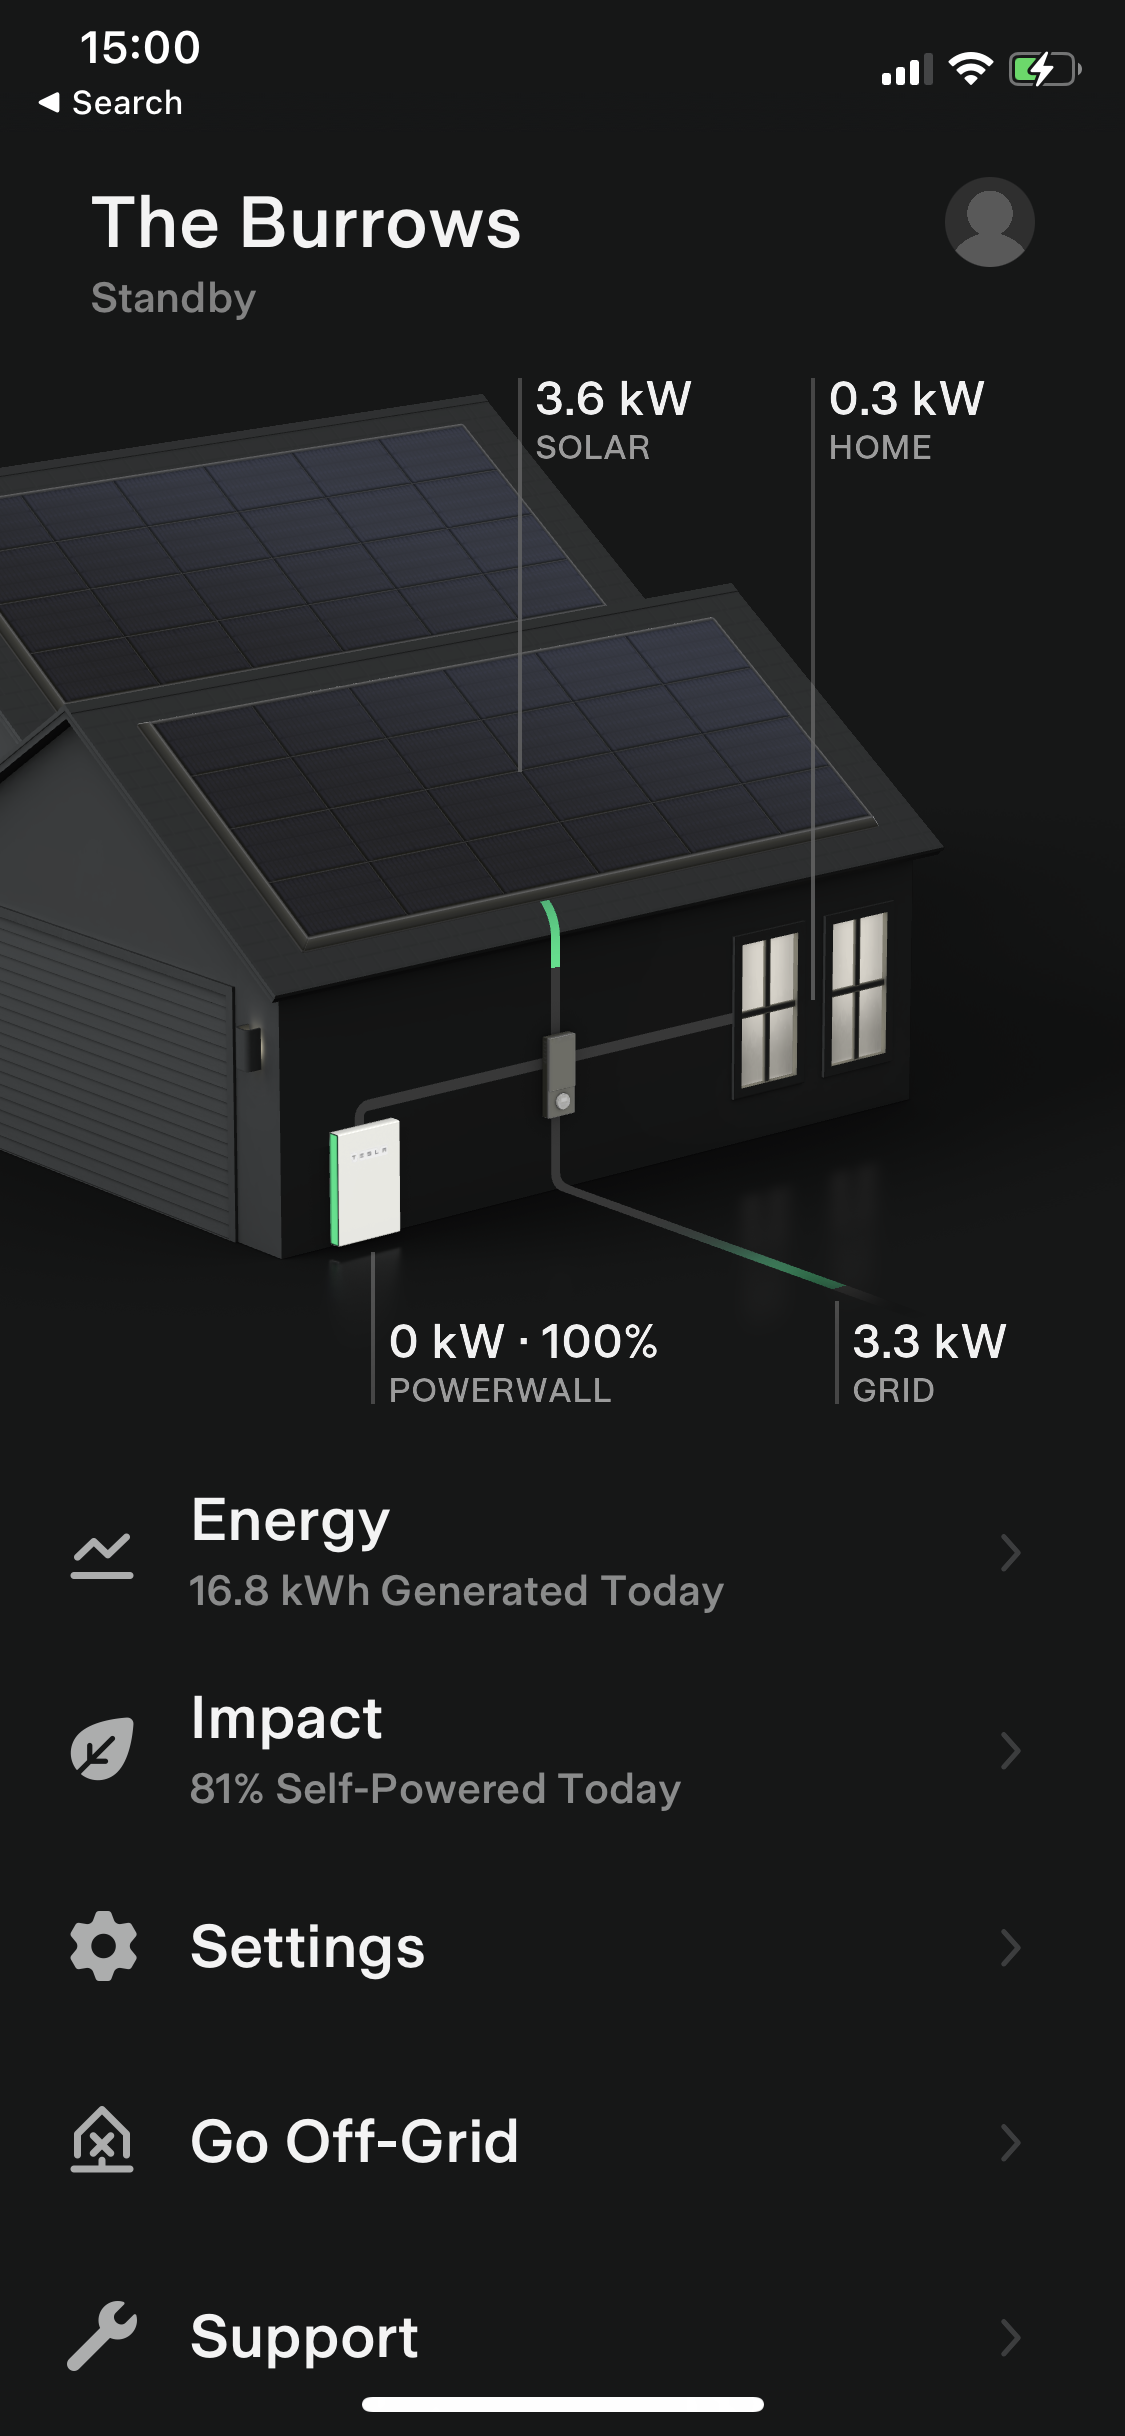
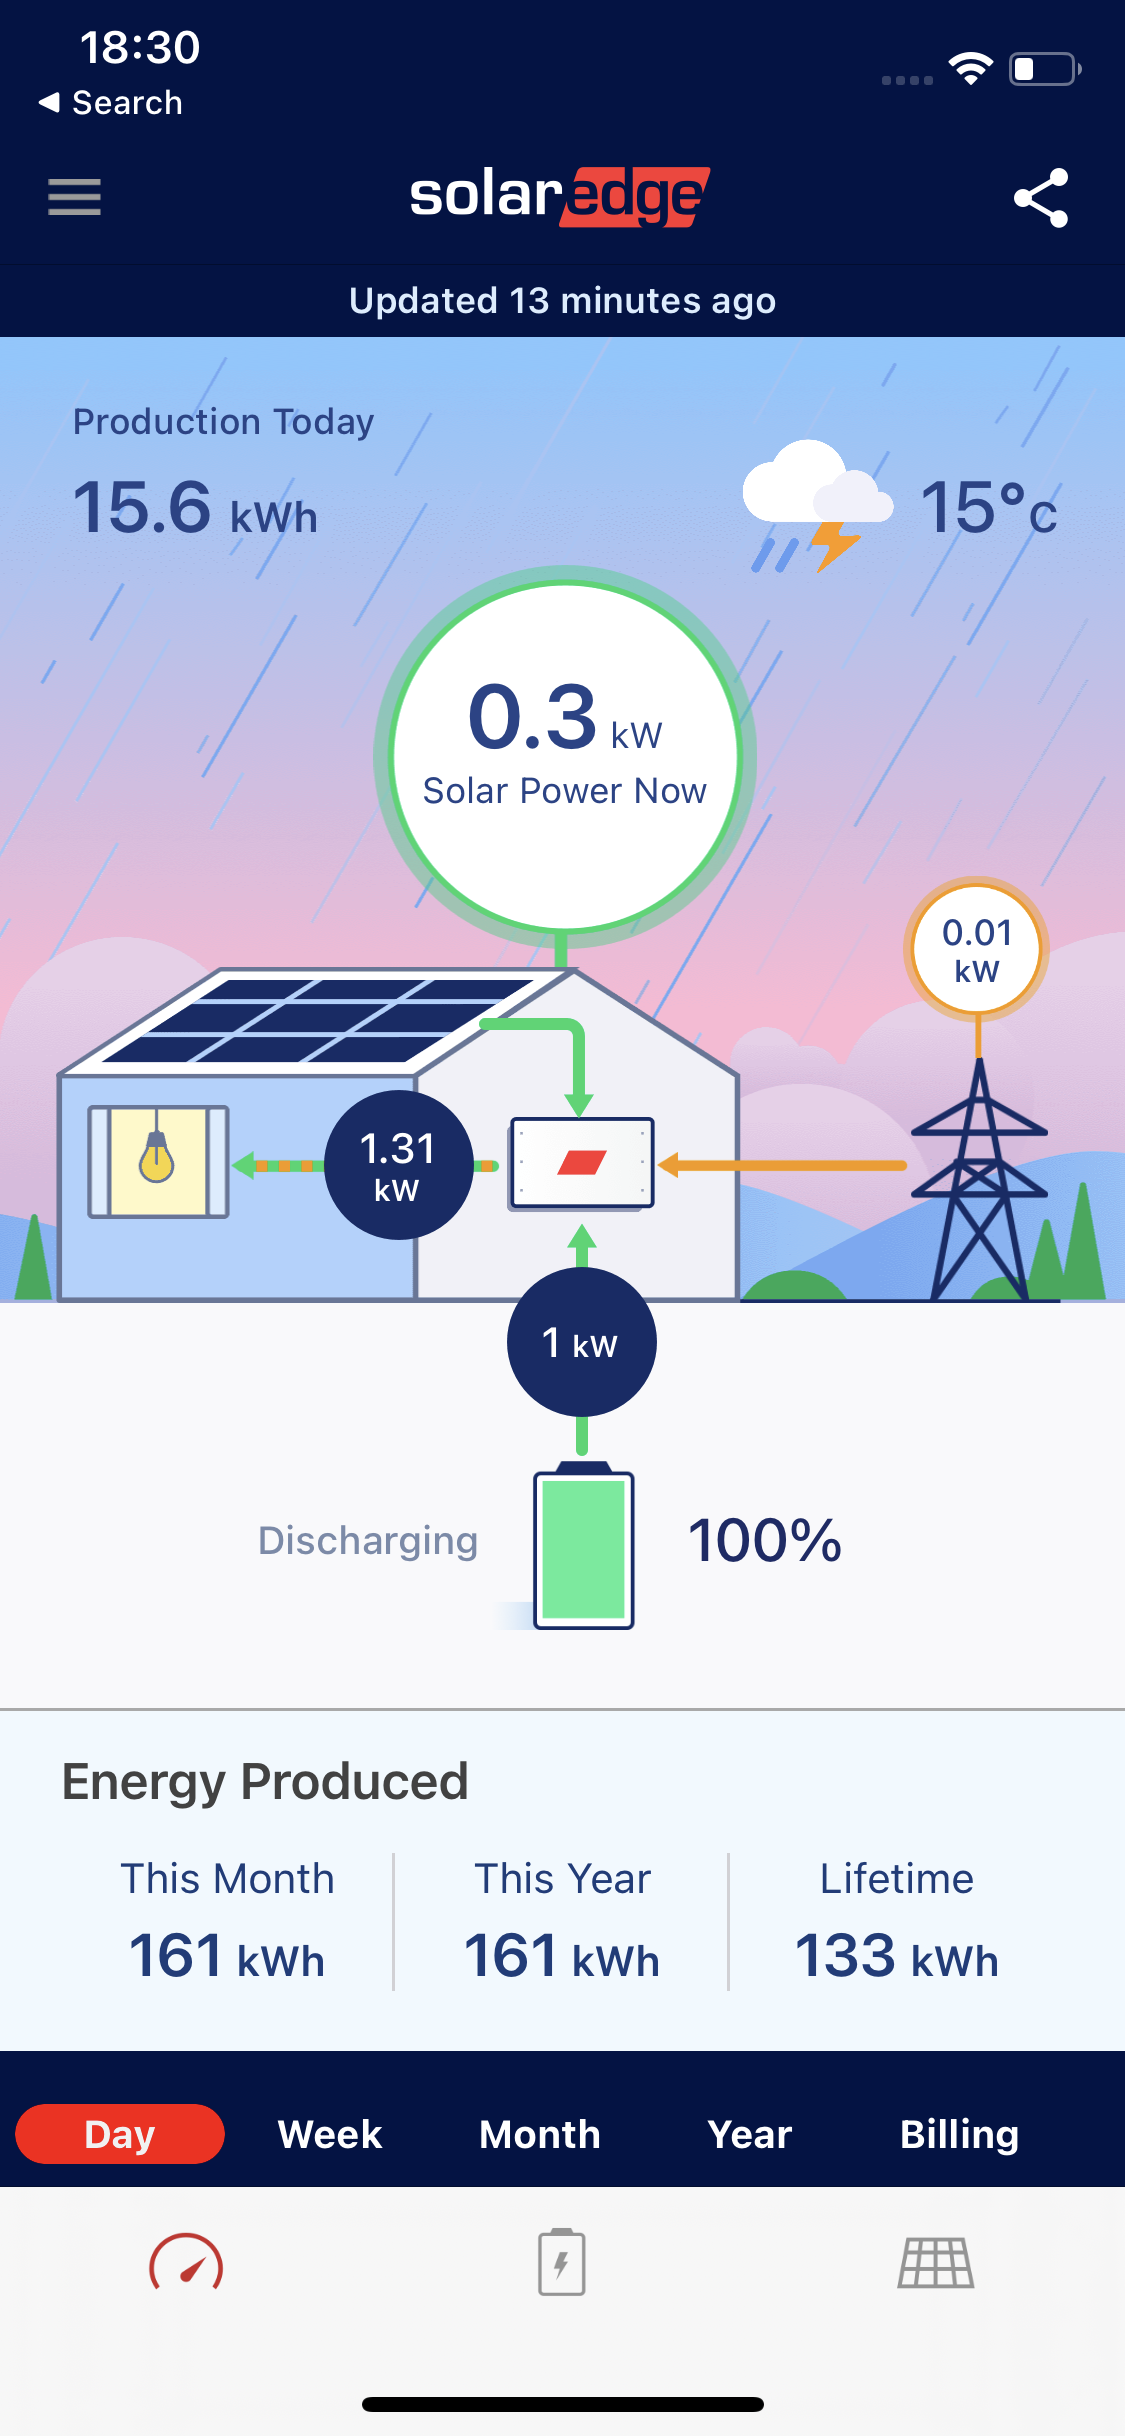
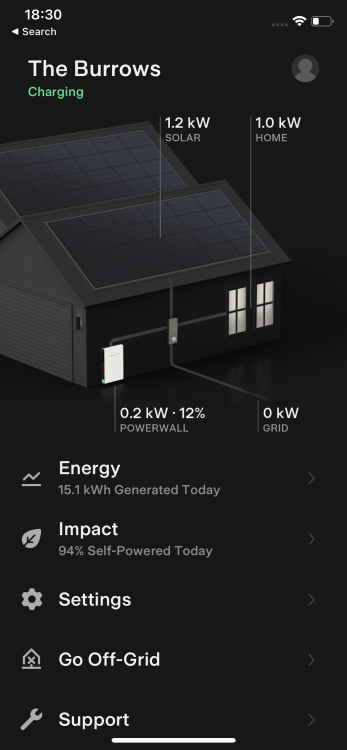
This is what throws me ! SE full - very little Pv Pw thinks it’s all solar …. So Tesla app ‘solar ‘ is only real solar when SE full , otherwise it’s ‘solar ‘ is solar + SE discharge . Real PV is what SE app shows . Both apps show grid import ( though measure it differently ! ) regardless of who imports .

-
I think that is exactly what happens . SE fills first ( but it would / it’s on the PV side of the inverter ) . I *think* PW will only get PV when SE is full . DNO wouldn’t give me anymore . 3.68 on inverter AND a PW ( effectively an inverter also ?!????! ) . In my locality you wouldn’t get that now . Tbh - export I don’t care about .
-
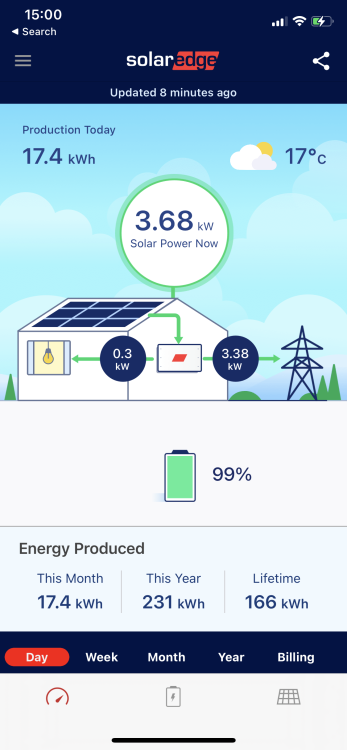
I shall answer my own question! My new array can generate more than 3.68kw . So in a Tesla world any generation greater than that would be clipped . As the SE is DC it can take generation above that . So clipping will only occur when SE is full and generation is greater than 3.68kw . If I wait patiently someone will be along to spoil my understanding.
-
My mum told me “ don’t trust a man that won’t show you his pants “ . I’ve not seen yours so I don’t trust your comments. Photo of pants first please .
-
I’m confused about ubiquiti
Pocster replied to Adsibob's topic in Networks, AV, Security & Automation
Circumcised? 😂🙄👍 -
As usual I started it all serious and helpful . Then @Onoff came along 🙄
-
Suck on this - bitch
-
What's wrong with my Extension?
Pocster replied to Lift span's topic in House Extensions & Conservatories
Sorry , mis understood the title … -
Feel like silly questions but may not be.
Pocster replied to MikeSharp01's topic in Networks, AV, Security & Automation
Yes . For the sake of a cable you can leave under the island Id do it ! -
6.4 is better than none . In summer when you aren’t using what you generate, battery full you’ll be exporting . Then as night sets in; swmbo , kids , will eat through 6.4kw in minutes !
-
You were always my favourite!
-
12k ( the invoice doesn't break that down ). So that's an additional 4k PV with optimisers, new inverter, SE 10k battery, scaffolding, labour etc. ( no vat of course ). Also of course I have my original PW and PV costs. Installer told me wait for a Tesla is 18months and SE 9 months. They accept the deposit but can't guarantee the price; so if in 18 months time the price has inflated ( which we can assume it will ) then you get your deposit back. Equally, they can't guarantee stock that far in the future. Personally I'd find an installer - pay the deposit and wait ( to save!) at least you are in the very long queue.
-
Yes one thing that confuses me ; I’ve gone from a 4K pv array to 8k . Yet my pv generation is clipped at 3.66k ( due to inverter I assume ) . So what’s the real benefit of 4K over 8k in this situation? . Naturally my understanding is probably the flaw 😁🙄