MortarThePoint
-
Posts
2294 -
Joined
-
Last visited
Everything posted by MortarThePoint
-
Painting timber windows for new build
MortarThePoint replied to MortarThePoint's topic in Windows & Glazing
One of the £26k quotes is for fully painted, but not so keen on their design unfortunately and 8 weeks is a long time to wait to check a sample is OK as they don't have an example of the flush casement design we are after. -
We've specified flush casement timber windows and are pulling our hair out. I think normally we'd be touring various companies and looking at their options and buying with the confidence of having seen the windows. Covid19 makes that difficult. We've ended up with suppliers that seem to fit in to two categories, those that compete by having a good product at a good price and those that have a good product with a high price but a major sales and support offering. The price difference seems to be around £26k vs >£40k. One of the companies we are most drawn to has a really nice looking product, but they don't supply them paint finished, only supply them primer coated, treated or bare. Has anyone had a go at painting just primered windows? I can see the exterior surface and interior surface may be easy enough, but painting in with the mechanism seems like a nightmare. There would be a lot of painting to get done.
-
Structural Truss Noggins at Ceiling Level
MortarThePoint replied to MortarThePoint's topic in General Construction Issues
Without the packer I can pull it down if I hang on it -
Structural Truss Noggins at Ceiling Level
MortarThePoint replied to MortarThePoint's topic in General Construction Issues
I've only got a 2m straight edge, but I'll give it a try. I'm not clear how the remedy would change though as it's the same net effect isn't it. -
Oops wrong thread, sorry
-
Structural Truss Noggins at Ceiling Level
MortarThePoint replied to MortarThePoint's topic in General Construction Issues
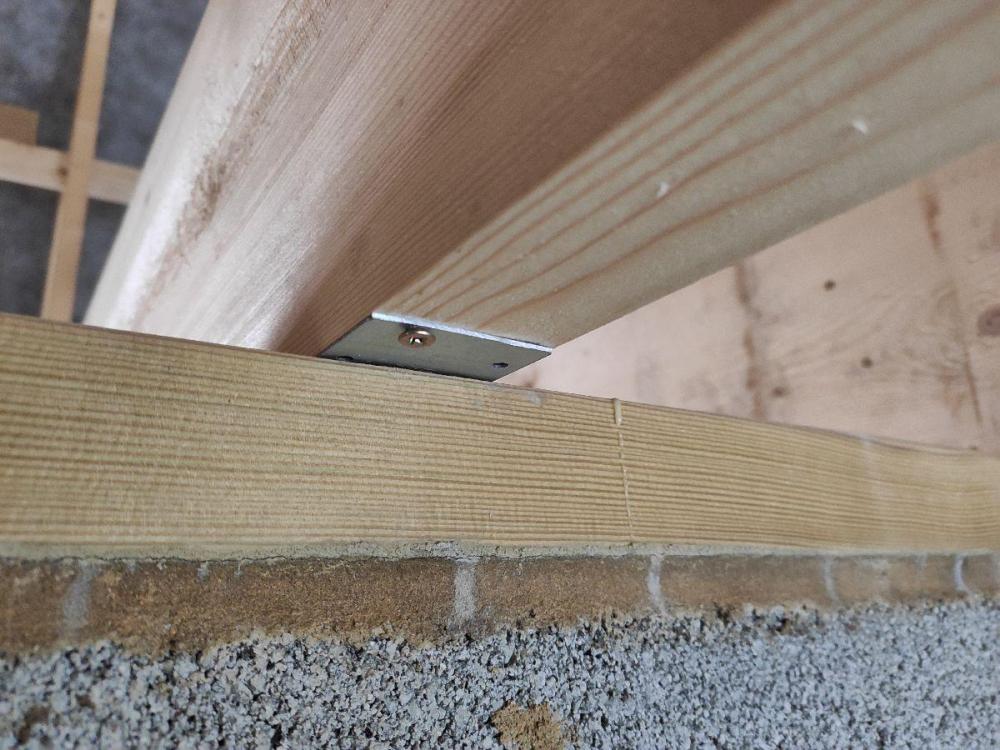
I have a supporting wall close to midspan (62%) and all the trusses look to be resting on it well except for one. This one is about 1mm above and deflects down onto the wallplate if I hang my weight from it. In the photo I've slipped a piece of galvanised steel between the two. Is this a good idea or should I do something else?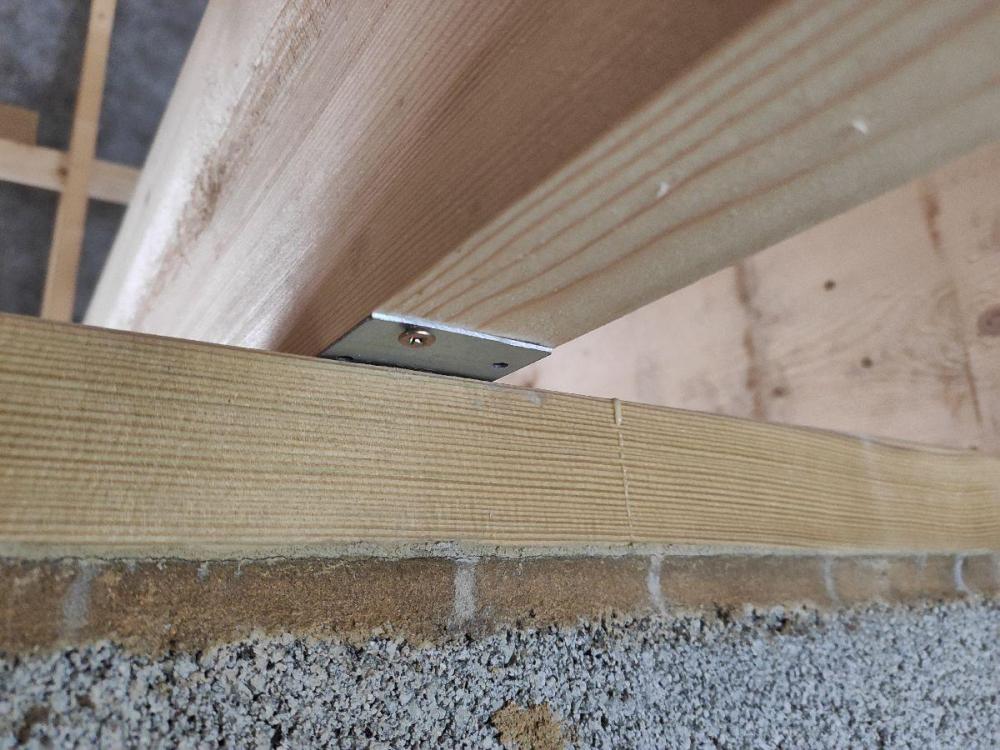
-
I have a supporting wall close to midspan (62%) and all the trusses look to be resting on it well except for one. This one is about 1mm above and deflects down onto the wallplate if I hang my weight from it. In the photo I've slipped a piece of galvanised steel between the two. Is this a good idea or should I do something else?
-
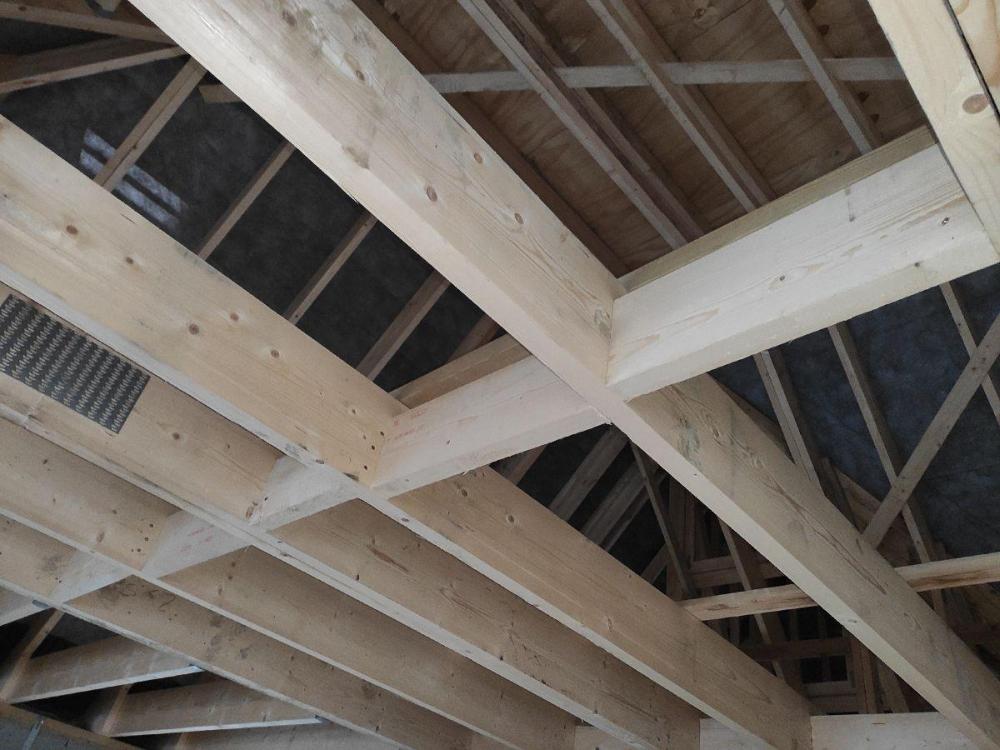
? I have got one, hand for knocking the noggins in
-
I did wonder about hiring a Paslode, but screws are petty easy and only dropped one noggin on my face so far.
-
I've heard of people using construction adhesive with a flexible component in order to stop squeaks. That's the only reason I'd consider it. As you say it doesn't have to be pretty, but I really want to avoid squeaks.
-
Interesting. I had wondered if anyone ever glues and screws noggins.
-
I was wondering about your approach to framing (stud partitions, joists, noggins etc). I haven't tried them, but GoldScrew Plus look interesting as they have the drillbit like feature that Spax have. No idea if it really makes a difference or is just marketing.
-
Naughty to resurrect an old thread, but @Onoff and @PeterW do you still drill and countersink?
-
Structural Truss Noggins at Ceiling Level
MortarThePoint replied to MortarThePoint's topic in General Construction Issues
That's kind of what I was thinking too as things have gone very wrong when the screws would pull out of shear damage. What about floor stiffening to reduce bounce, that won't just be compressive will it? -
Structural Truss Noggins at Ceiling Level
MortarThePoint replied to MortarThePoint's topic in General Construction Issues
What size of screw do people tend to use for this? I am running in two 5.0x90 and one 5.0x100 per noggin end. Should I be using some 6.0x100 screws? The joists are 222x47 @ 600mm centres and the noggins are 222x47 or 172x47. I'm mostly able to screw though the joist into the noggin (staggered configuration) but there are some double trusses that need skew screws. -
Plasterboard noggins at joints
MortarThePoint replied to Pocster's topic in General Construction Issues
Another useful piece of advice from the plasterer was don't plaster a ceiling until you have finished adding weight to the space above. -
Plasterboard noggins at joints
MortarThePoint replied to Pocster's topic in General Construction Issues
A plasterer asked what centres our trusses are, which are 600mm. He suggested using 4x1 counter battens (aka 'brandering', thanks @Hobbiniho) at 400mm centres screwed underneath the trusses to screw the plasterboard to. What do people make of this suggestion? It's a lot easier than noggins. It eats in to the ceiling height but only be 22mm. -
Fitting PVC guttering to reduce creaking noises
MortarThePoint replied to MortarThePoint's topic in Roofing, Tiling & Slating
Lots of the installation guides use silicone spray and I thought that was more for ease of installation. I've also heard of people using vaseline. But as Joe90 says it could make for an annual ritual. -
Fitting PVC guttering to reduce creaking noises
MortarThePoint replied to MortarThePoint's topic in Roofing, Tiling & Slating
That sounds great. If I follow you, you are cutting where I have circled below? I guess it's a trade off with making it too loose that it's not secure. Did you fit long sections of guttering (e.g. 4m)?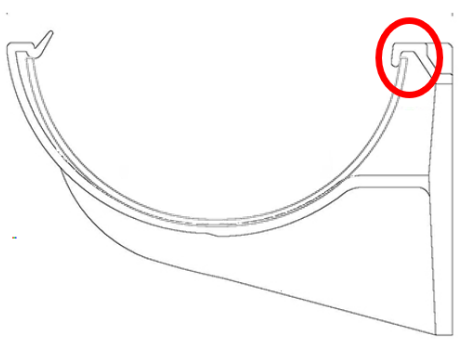
-
Beam on Padstone Bearing
MortarThePoint replied to MortarThePoint's topic in RSJs, Lintels & Steelwork
Was it quite a dry pack mix you used? -
My main concern with plastic (PVC) guttering and downpipes is the creaking noises they make as they heat up and cool down. That made me wonder if anyone here new of was to minimise the chances of such noises? Do the creaks generally come from the gutter brackets and the downpipe clips? One thought that occurred to me is around the lengths of sections. Before I thought about creaking, I thought fitting as long sections as possible, but I now think that could make the creaking worse. You can get 5.5m downpipes long enough to do the whole vertical. Given expansion gaps are at the ends of sections, the maximum movement will be proportional to the length of the section. PVC has a thermal expansion coefficient of 50 ppm/C [1] which means as 5.5m section will expand 2.75mm per 10C temperature change -- CREAK! ☹️ If you were to make up the same distance in 4 sections then the maximum expansion would be reduced by a factor of 4 (0.7mm per 10C) and hopefully less creaking ? I can't imagine wanting to use sections of gutter less than 2m long so they would still expand 1mm per 10C. Still makes for a lot more unions though. [1] https://www.engineeringtoolbox.com/pipes-temperature-expansion-coefficients-d_48.html
-
Structural Truss Noggins at Ceiling Level
MortarThePoint replied to MortarThePoint's topic in General Construction Issues
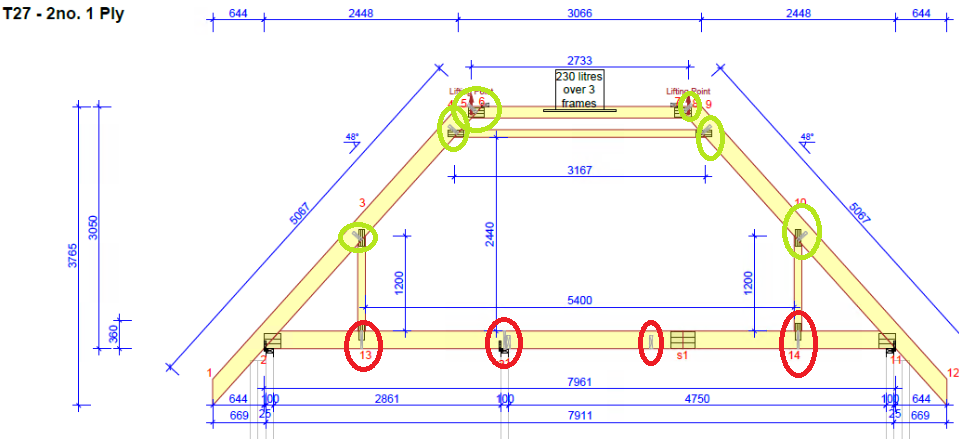
Just spoke to the truss designer and he said that the noggins at nodes 2, 3, 4, 7, 8, and 9 aren't needed. That's good as the large blue noggin will therefore be more than what's required. I'll still fit noggins at nodes 2 and 9 as it will provide support for the plasterboard. -
Structural Truss Noggins at Ceiling Level
MortarThePoint replied to MortarThePoint's topic in General Construction Issues
They aren't actually water tanks as we won't have any. They are just a form of additional loading capacity. It's a flat roof at the top because the planners wanted the ridge height reduced. An advantage of a flat roof (aka crown top) is that it divorces the depth of the house from the ridge height. The 222mm noggins at the top (shown blue in previous post) should meet the requirements of the top two 150mm noggins shouldn't they? That only leaves the noggins at the top of the vertical members (side walls). I'll ask, but I was expecting it would be OK to shift those noggins down off the nail plates which is good for the reason you mention and would provide plasterboard support. -
Structural Truss Noggins at Ceiling Level
MortarThePoint replied to MortarThePoint's topic in General Construction Issues
The truss designer has incorporated noggins at each of the joining plates (circled green in above post), 150mm which is less than 75% of the top chord 222mm. Is that OK? I asked for the top chords to be increased from 197mm to 222mm and he may have forgotten to revise the noggin timber. In terms of the higher up noggins, all but a couple of gaps have 220mm vertical noggins right at the top (shown here added in blue). I might install a 150mm noggin at the lower position shown here as a plasterboard edge noggin.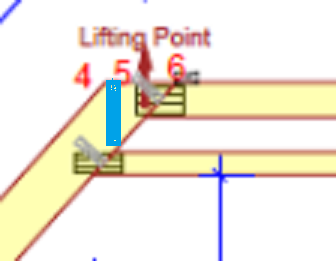
-
Structural Truss Noggins at Ceiling Level
MortarThePoint replied to MortarThePoint's topic in General Construction Issues
Yes the wall is a 100mm load bearing and that helps a lot with the span. Like you I was confused as to why the noggins were above that and not shifted off to split the two spans. There are 4x1 bracing timbers in currently, but they will get in the way of the plasterboard so I expect to replace them with the noggins that are shown circled green here. the lowest ones are where you are suggesting purlins aren't they? The truss designer dotted water tanks all over the place for good measure. The manufacturers have given me a cheat sheet as to where I can drill, but I hope to avoid it as much as possible.