MortarThePoint
-
Posts
2168 -
Joined
-
Last visited
Everything posted by MortarThePoint
-
Sewage Treatment Plant self install
MortarThePoint replied to MortarThePoint's topic in Waste & Sewerage
I wondered about mixing myself as takes the time pressure away and I can have a nice dry mix. The tank's installation manual says 500mm of backfill (i.e. concrete) all round so the volume becomes huge. Would be a lot to mix by hand, 10cube. -
Sewage Treatment Plant self install
MortarThePoint replied to MortarThePoint's topic in Waste & Sewerage
That is the rate I can get a 6T digger for including transport and insurance. About double that for a week, which I'd go for as I have other jobs I need it for and will consume the spoil and would get a dumper for. That's efficiency I haven't factored into the costing though. The dry mix is a concern, but I'd expect anyone would pump given the location. Ideas welcome how to address that. I think the tank's installation manual sets out a maximum water fill height above backfill, but will check. -
Sewage Treatment Plant self install
MortarThePoint replied to MortarThePoint's topic in Waste & Sewerage
Clay, stiff below 1.25m. the ground workers didn't have any issues with shear sided trenches. As this is deeper, would be better to have angled edges. -
There are two reasons I am tempted to do this myself: I'm a self builder and I like a challenge Cost Has anyone else here installed their own STP? I've had quotes for installing just the STP tank and controls of £10-15k which feels like too much for what is involved (that's with me doing all the pipes to/from). At the bottom of this message is a rough costing I have done based on my understanding of what is involved. I expect the installation company to make a profit, but not £5k+. Have I forgotten some costs? I see it as a day of work on site. If I could find a digger driver that has done STPs before it would massively derisk the operation. I have a couple of IBCs that I would fill with water near the hole to then fill the tank during the concrete pour. A hose pipe alone couldn't cut it as I'd need to supply 4,800 - 6,500 litres in an hour. Need to check the concrete pump flow rate. Costing (all ex VAT): Assuming a 3.3m x 3m hole 2.5m deep and the tank 2/3 surrounded by concrete. 10 cubic yards of concrete: £1,000 + £90 = £1,090 [inc additional hour on site] Concrete pump up to 60m inc operator: £530 20tons of 10-20mm gravel: 20*£30 = £600 Digger hire (1day): £323 Experienced digger operator: £250 (guestimate) Dirty water pump: £55 [Sparkie option to wire up: £400] INSTALLATION TOTAL: £2,848 +£400 if Sparkie needed TANK COST (INC CONTROL): £2,500 GRAND TOTAL: £5,348 +£400 if Sparkie needed
-
Any ideas how to hide the Graf One2Clean control?
MortarThePoint replied to DownSouth's topic in Waste & Sewerage
@DownSouth How have you found the One2Clean system? I am considering the 7PE (or 9PE for future proofing) for our build. -
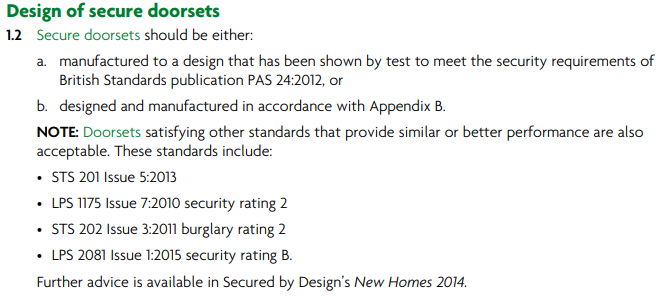
A while ago, I started a thread about Part Q Front Doors. As the first part of a house that you interact with, I like the idea of having a door I 'made'. Since then, I have identified a PAS24 certified, door (FlameBreak) which has good thermal properties and I could dress with timber to make the sort of door I want. Problem solved if I just wanted a door in a door sized hole in the wall. Unfortunately it isn't so easy as I want to have a glass side light panel either side, AKA a vestibule frame: I'm now left with the complication of the door frame and surrounding glass as I can't find a frame that is PAS24 certified. Not that PAS24 is required, but it demonstrates Part Q compliance. I am happy to build the frame and fit glazing units myself, but need to be confident I'm meeting the requirements of Part Q. I have copied the relevant sections below, but as I understand it, I would be compliant if I built the door frame and side lights consistent with Appendix B and that means: Timber section minimum dimensions 44mm but can be rebated down to 32mm. Appendix B only really sets out dimensions for elements of the door itself, not the frame, but using that dimension would seem a good approach. Glazing unit would need to incorporate P1A glass. (would need to be toughened and have a suitably low U-value too, but that's not part Q) The side lights would each be about 540mm wide, so wider than 230mm. Am I being optimistic interpreting the panel requirements as not applying to glazed elements? Has anyone else navigated these waters? ------------ ---------------- .......


- 1 reply
-
- 1
-

-
Sorry, should have mentioned that Screwfix sell it: https://www.screwfix.com/p/harosecur-strip-42500-fitting-strips-clear-500mm/742fn
-
Have you ever removed a toilet that is stuck down with CT1? I can't think why, maybe if broken or something. Is it possible to remove without trashing the tiles?
-
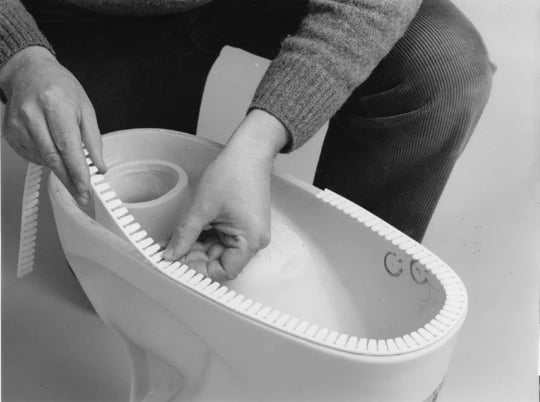
If doing that, I'd be inclined to trace round the bottom on the pan with a pencil, move it to the side and put the silicone down onto the floor and the place the pan back in position. Pencil line would then get covered by the later silicone bead finish. I'm may use this approach in another room where I can't drill the floor, but tempted to use CT1 for sticking the pan down. Same approach though.
-
@Nickfromwales when you screw down toilets to a completely tiled floor do you use this stuff, pop some silicone between the pan and floor or just sit the pan straight onto the tiles? Definitely needs a bead of sealant around afterwards but wondering if anything between pan and tile?
-
You still need to apply a bead of silicone around the joint when done with this though so I think it's more about avoiding the ceramic on ceramic contact if that is indeed a problem
-
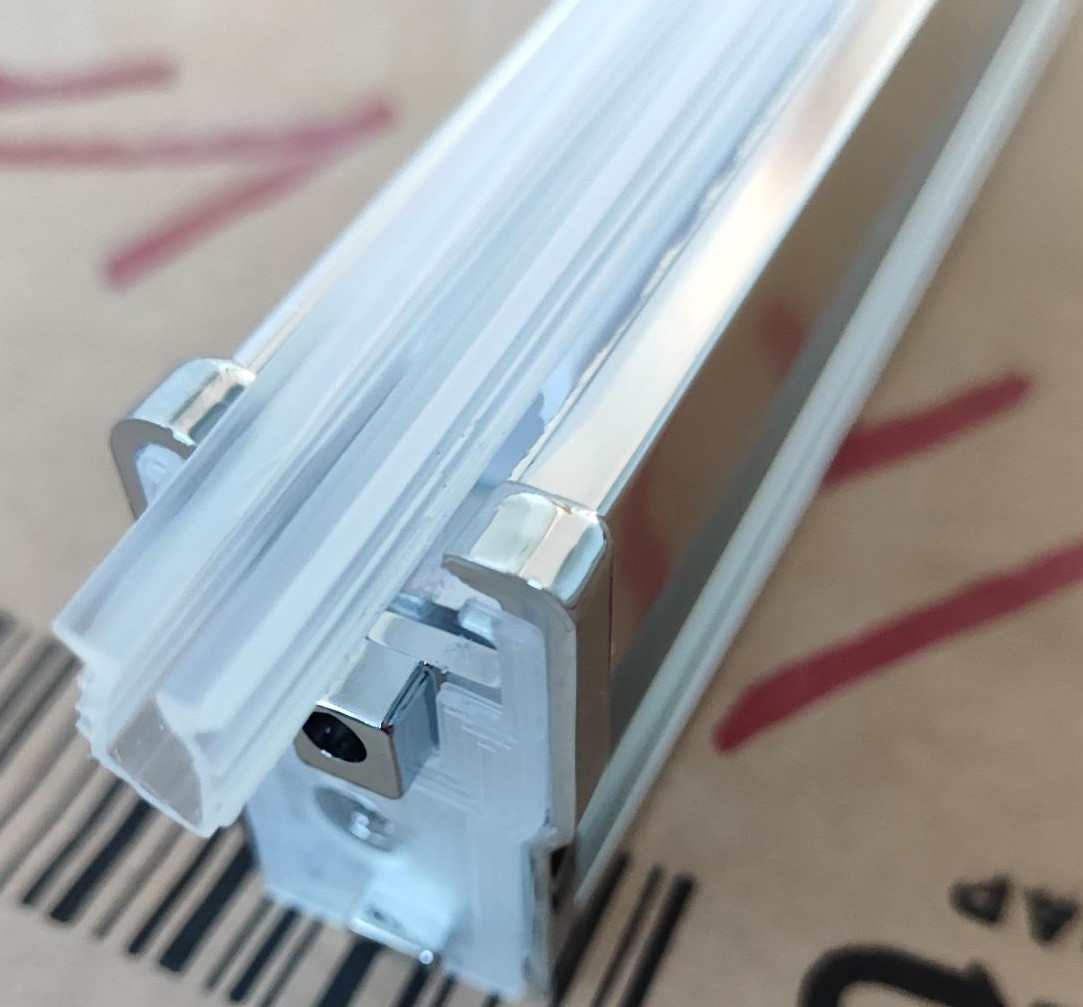
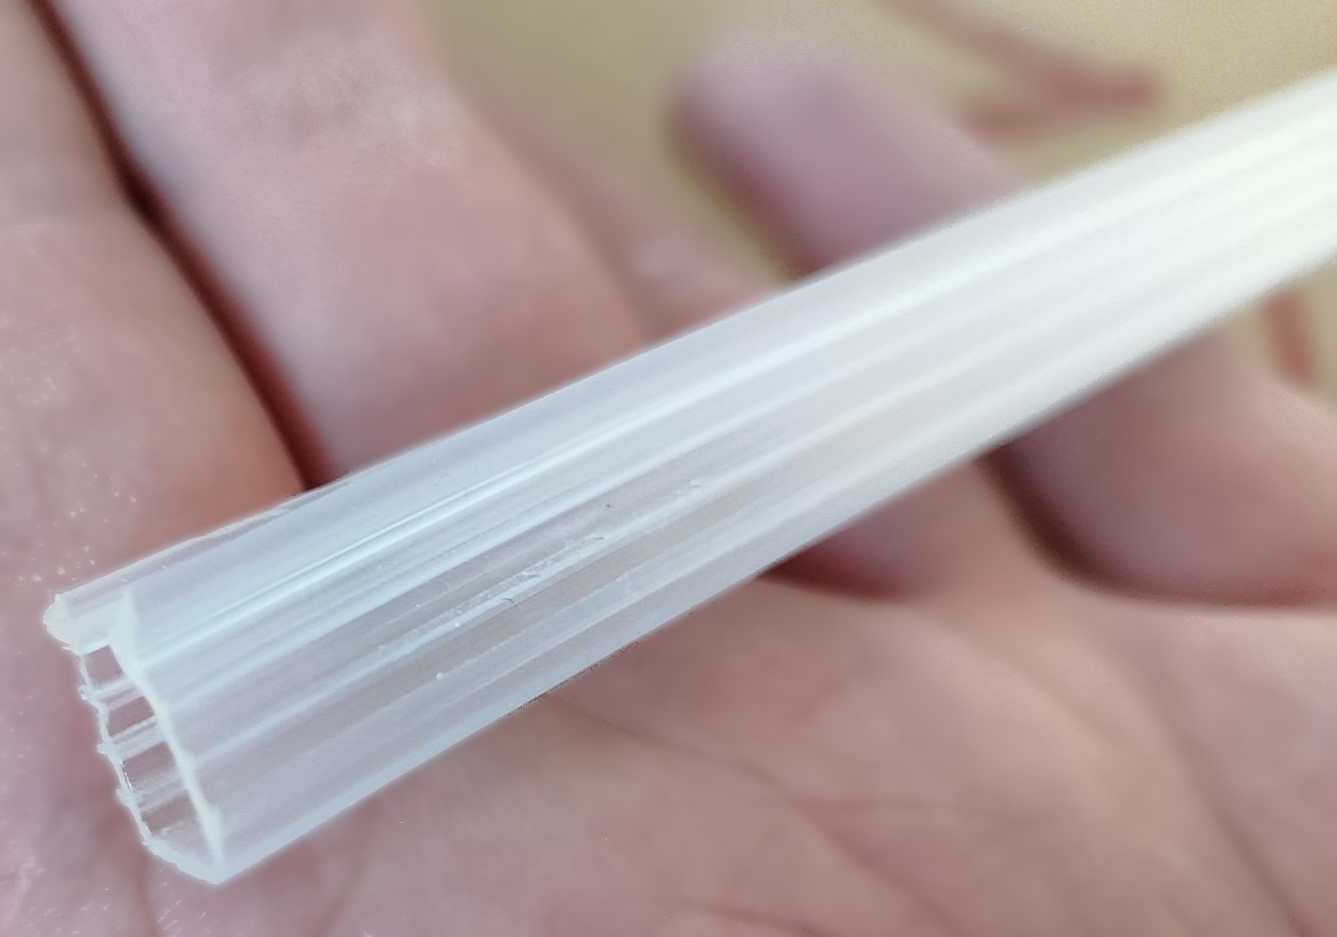
I've just discovered this plastic strip product that you can put between ceramic surfaces. It sticks to one of them and conforms to the other. My main use would be below floor mounted toilet pans. Has anyone used it or have any thoughts about whether it's worth it?
-
Trick to installing shower enclosure seal
MortarThePoint replied to MortarThePoint's topic in General Plumbing
Heat isn't so good as yesterday it softens it but it can warp it too. May be possible to optimise the temperature but I ended up using lubricant gel. Still lots of colourful language though.
-
Trick to installing shower enclosure seal
MortarThePoint replied to MortarThePoint's topic in General Plumbing
Yes, it makes me nervous apply the force. There's no chance of getting the glass in with the seal in the channel unfortunately I think the hot water is a good idea to try, thanks. -
I'm struggling to get the glass into the groove on the shower enclosure 'hoops'. It's a Bathstore Atlas 1100x800 Offset Quadrant Enclosure. The groove has a removable barbed silicone insert that gets put on the glass before pushing the glass into plastic receiver in the 'hoop'. I've tried pushing really hard but no joy. I can get it part in (i.e. on one side) but not all in. I haven't tried it yet, but all I can think to try is some fairy liquid to see if it lubricates it a bit. Is there a trick to this? Similar, though I don't have to trim mine to length:


-
braviken-sink-white__AA-329234-12-100.pdf
-
@CalvinHobbes sorry to come back to this, but does this sink (Braviken 100cm) gain support by sitting on something or does it bolt to the wall?
-
Yes, pretty sure. Also, they're from Wolseley so should be good hopefully. Previous installation only dropped a little when holding a static load. I'm using the compression coupler as a slip coupler having cut out the stop in the middle. I've marked each pipe so I know plenty is in the fitting.
-
I used the same compression coupler in the other bathroom and it leaked at first so I'm keen to rule that out
-
I've got too many branches etc to do an air test I think. What I'd like to do is block the 40mm with something and do a water test as that would test the trap too. Is there something I can use to block the 40mm having been inserted through the tee?
-
I've got a bit of 40mm waste before the stack that includes a straight coupler (compression), tee, elbow and shower trap. I want to test all of this is ok, but not sure how to. I could easily check similar in another bathroom where the stack wasn't installed fully and I used a stop end in the partial stack. Here the stack is installed all the way to underground. The pressure will be too much to block of the stack at the bottom. Is there a sensible way to test it just in the 40mm pipework? Photo attached

-
Posi joist - This install feels rubbish, thoughts?
MortarThePoint replied to boxrick's topic in Roofing, Tiling & Slating
I don't know what the correct method for bearing a sloped beam on a pad stone is. I can imagine welding or bolting a steel 'wedge' under the end of the beam, but would be interested to know what the answer is. Has the SE now provided a detail drawing? -
Posi joist - This install feels rubbish, thoughts?
MortarThePoint replied to boxrick's topic in Roofing, Tiling & Slating
I know very little about renovating, but careful since if you replace the wall the U-Value may need to improve which couldn't be achieved in just the cavity. I guess you'd need insulated plasterboard. BCO may not be fussed though since the wall area is so small, but may be worth getting a verbal confirmation first -
Carrying wood on top of van roof.
MortarThePoint replied to gavztheouch's topic in Building Materials
I'm surprised this would be worth your effort cost. If there are dual carriageways/ motorways involved there is logically a closer option. It'll cost you about £30 of fuel I'd have thought. Easy to get that timber <= £0.85/m. You'd need to be getting about 500m of it for free to make it worth it (Inc time cost). That would weigh about 500kg which is way over that the roof capacity is likely to be. Roof capacity might be up to 250kg so 250m, even that feels pushing it. Assuming £20/hour and £30 fuel you'd be paying about £0.52/m just for collection. -
Posi joist - This install feels rubbish, thoughts?
MortarThePoint replied to boxrick's topic in Roofing, Tiling & Slating
I've always defined Stress as Pressure without Control. Well done, you've taken control and soon this will be behind you. Sort everything now as it wears on you otherwise, but it looks like that's your plan. Cut corners compound, so you're right to be taking things back. In the first picture from last night (unreturned wall), the lintel over the exterior door looks to have less than 150mm bearing. You're probably already on it, but do check. It would be another example in your catalogue of evidence if needed. Strange collection of block types in that wall too. Good to hear you're taking it down.