Onoff
-
Posts
21061 -
Joined
-
Last visited
-
Days Won
206
Everything posted by Onoff
-

Help with kitchen renovation/ 1st house.
Onoff replied to zoothorn's topic in Bathrooms, Ensuites & Wetrooms
You'll want: - self adhesive tape (T'station 61291 £3.65) - a wide filling knife (T'station 25000 £5.39) Next day free delivery at TS over £10 btw. - joint filler (Gyproc Easi-Fill for example). Shop around. Can get ready mixed or powder. I splashed out on the Mirka sanding kit at Toolstation. It's excellent. Attached to a Hoover and is virtually dust free. Lidl occasionally do a cheapo version. -
@Nickfromwales, page 1 of this thread: The top of the timber for the pocket is 366mm from the datum i.e 378 - 12.5. NOT 378 as @Construction Channel kindly picked up on. Still processing your words of wisdom!
-
Help with kitchen renovation/ 1st house.
Onoff replied to zoothorn's topic in Bathrooms, Ensuites & Wetrooms
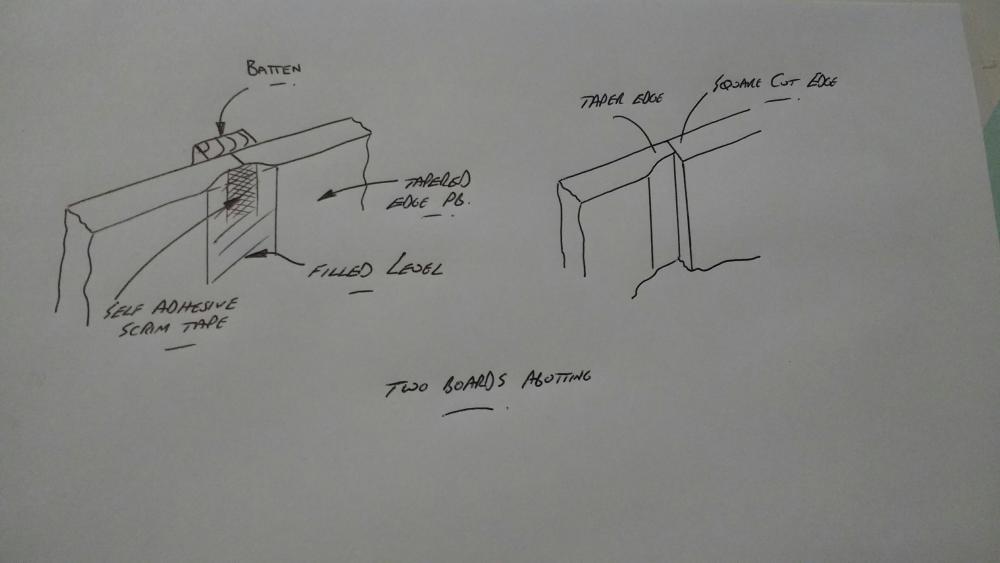
Because you don't have a depression where the boards meet, if you taped then filled you end up with a shallow "hump". The skill is then feathering this out so it's less noticeable. Sorry, I really don't know what it would end up looking like! Or as Peter says fill and use lining paper but that's more faff/time etc. Try it I guess if only a small area. I wonder if you should be running a bead of No Nails type stuff where the boards meet...? Someone else will dive in shortly... I hope! -
I wonder if you could fill the cracks with say molten solder then seal over the top...
-
Wade through this from the beginning, enjoy! https://flic.kr/s/aHsk23FYzd
-
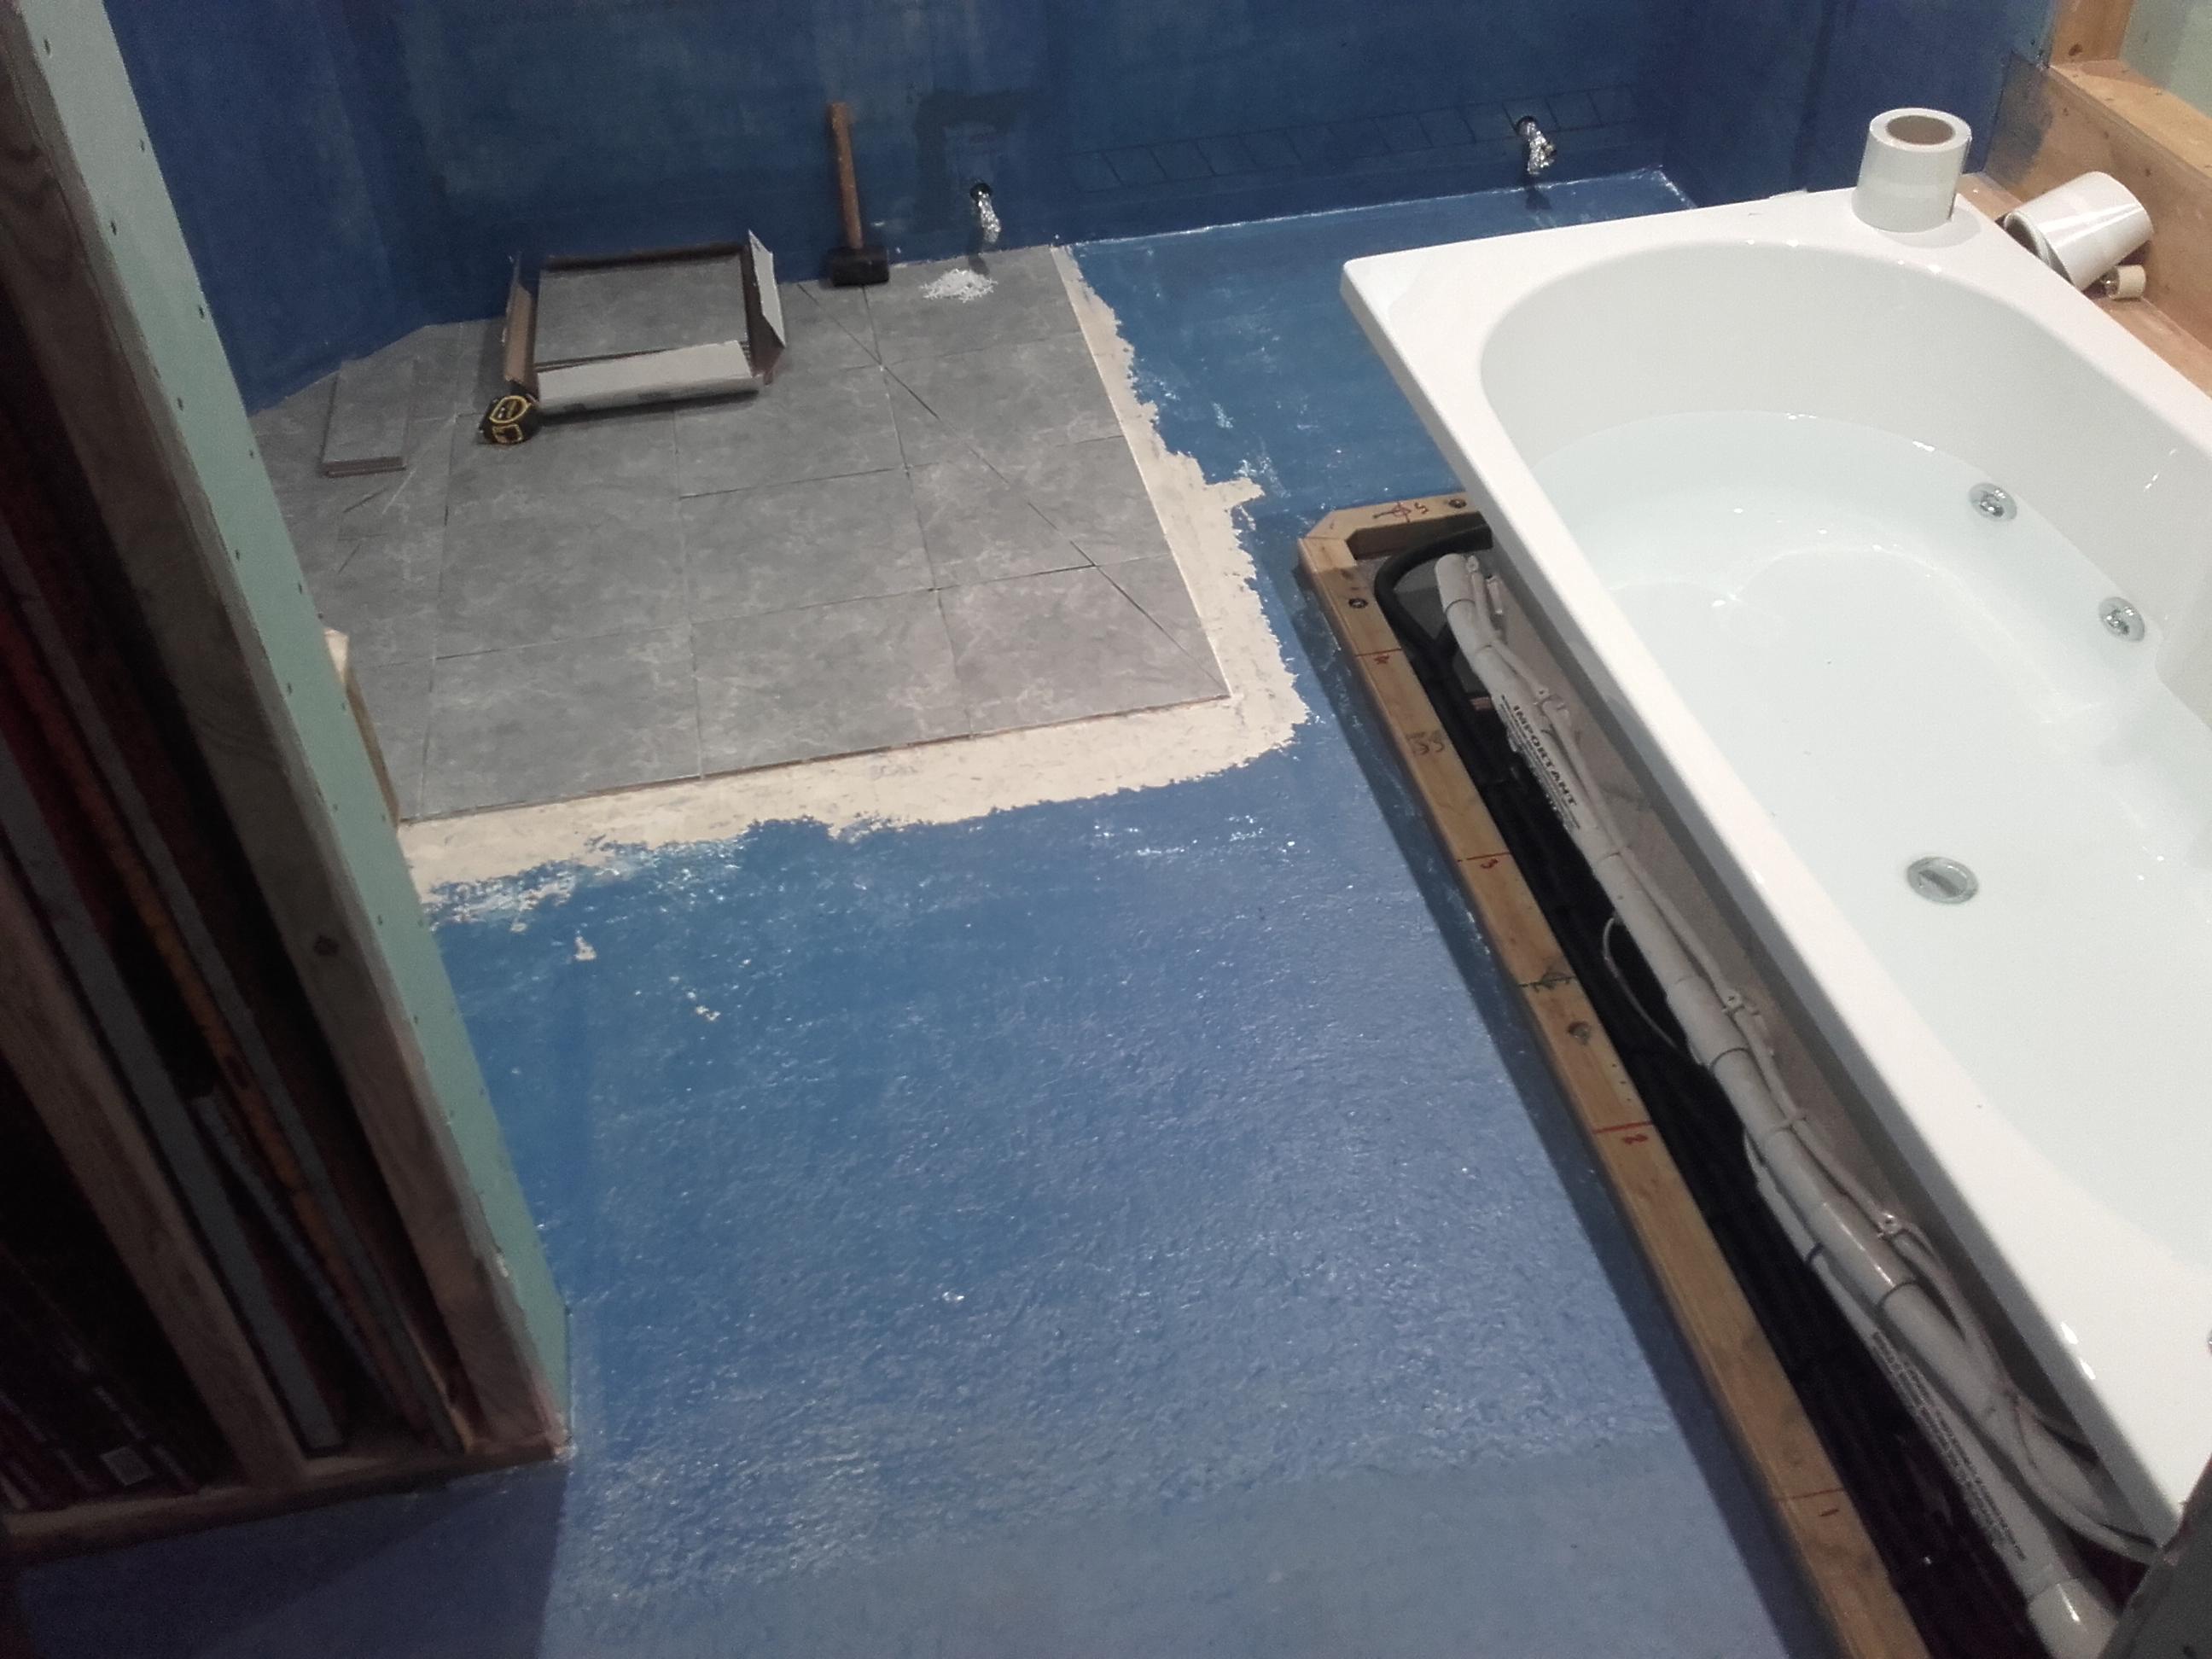
I'm getting there I think. Looked this morning at the bit I did last night and happy enough. Interesting how a tap on the setting tiles last night rang a little "hollow" but this morning they seem rock solid. Like the adhesive has sucked them down or something? One bit tonight then out the door Weds night hopefully. GROUT Grouting Thursday night so what do I need? I have buckets & sponges. Think I've a grout float in the shed though God knows where it came from or how old it is. Must have been from my last foray 30 years ago! I've been looking at it for years trying to figure what it is, photo later. Any tools, rubber spreaders etc that'll make this easier? I have time to get anything. Mop head. Came across an abandoned, dusty, traditional mop head. If I can sneak it through the washing machine I wonder if it'll be of any use? WALLS Probably popping to the tile place later this afternoon. Figuring to get another primer and a couple or 4 bags of adhesive and maybe one grout. The Laticrete 335 is seemingly OK for the walls. Not sure if I trust their data sheets tbh, coverage seems more like half that stated. Maybe it's if you don't back butter is the figures they're giving? Whereas previous stuff I read termed a large format tile as >300x300 I came across this on their site: "Back butter large tile >200 mm x 200 mm to provide full bedding and firm support if required". My wall tiles are 400x250 and will be laid horizontally. The 335 has a 30 minute open time. Loads of questions keep popping into my head! I presume to start "one tile up" or maybe even just under the pockets to ensure they look spot on then cut the bottom tile against the floor... Got a 6mm and 10mm trowel, which is better? How many rows can I lay without it slipping? Drilling big holes in them...for pan inlet/outlet... Sorry Nick, it ain't over yet!
-
Help with kitchen renovation/ 1st house.
Onoff replied to zoothorn's topic in Bathrooms, Ensuites & Wetrooms
Didn't I sketch what a tapered edge board looks like? And write "tapered"...with an arrow...28 July? If I pm you my address can you send me some of whatever you're on?
-
Out of interest can you extend the set time of rapid set tile adhesive with cream of tartar?
-
I did ask if I could have the sieve for recycling and sifting blast media! -What really pi$$es her off is... - taking what I thought was the old washing up bowl for engine/gearbox oil changes, - nicking her cheap crappy plastic brooms / dust pans (and breaking them). Along with "loading the dishwasher" / "folding the towels" the wrong way...."not filling the water filter up"..... The list is endless tbh...
-
Why not, more absorbent?
-
Yep. Bed on the floor, trowel held at 45deg. Then buttered the back of the tile in the opposite direction. Laid with a twist!
-
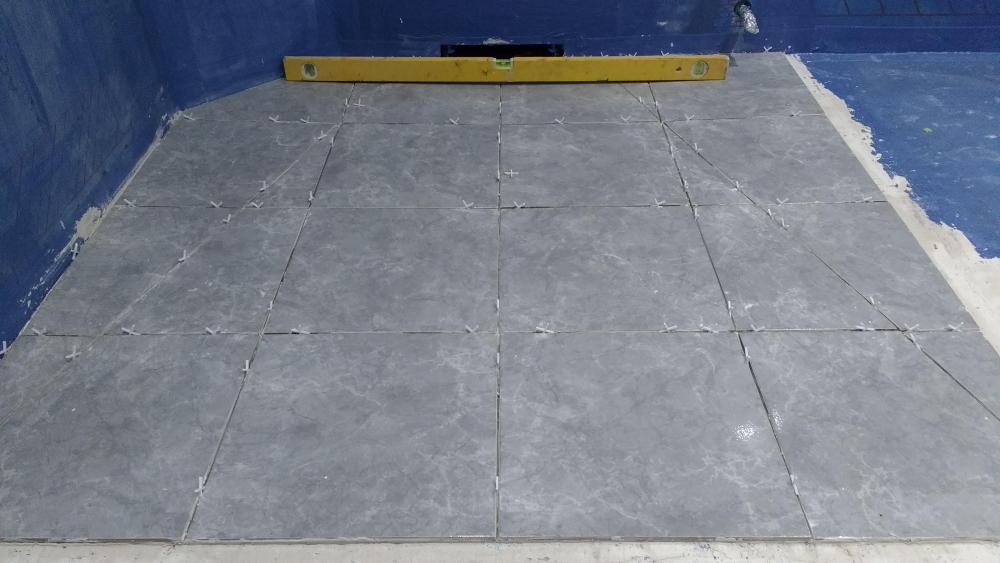
Just did the bit under the basin area tonight. Buttered the tiles. Felt "better" laying them. Also a couple under the wc with last of the muck: Found a method to get shot of the excess adhesive too. I laid all the tiles with spacers. Then removed them and wiped the faces with a sponge. Used a 1" paintbrush in the joints to get rid of the excess. Another go over with the sponge and then put the spacers back in. Used a 4' Stabila level and "knees" to level across them.
-
Help with kitchen renovation/ 1st house.
Onoff replied to zoothorn's topic in Bathrooms, Ensuites & Wetrooms
If you've bought tapered edge boards you can tape and fill the joints. You'll have to get creative around the reveal as said earlier. Near the door.....let's see what gaps you end up with. Better fit = less filler. -
Water valve was missing on the TWO that @Onoff bought in that case. Weird. Same private seller, still in the original boxes & unused.
-
@ThePoplars, you might find this document useful should you go for the UP200 cistern. Page 8 for instance gives the Kappa flush plates available. Typically SWMBO liked the ones from the Sigma range. Seeing as I got two new cisterns and frames for £100 she was having Kappa flush plates and liking it! Picked the flush plates up I think for £25.00 a piece on eBay. "115.228.something" in chrome are the ones I have. Geberit_Flush_Brochure.pdf You might also find you need to buy the water connections with valve like this. About what I paid I think: https://www.ebay.co.uk/itm/Geberit-water-connection-with-stop-valve-for-FM-cisterns-Art-240-269-00-1/173201397850?epid=2255554737&hash=item28539b985a:g:orkAAOSwJEdaoBUO
-
So tonight these two areas abutting the wet room corner. If I butter both floor and tile now won't I just have more adhesive ooze out / to clean up?
-
Help with kitchen renovation/ 1st house.
Onoff replied to zoothorn's topic in Bathrooms, Ensuites & Wetrooms
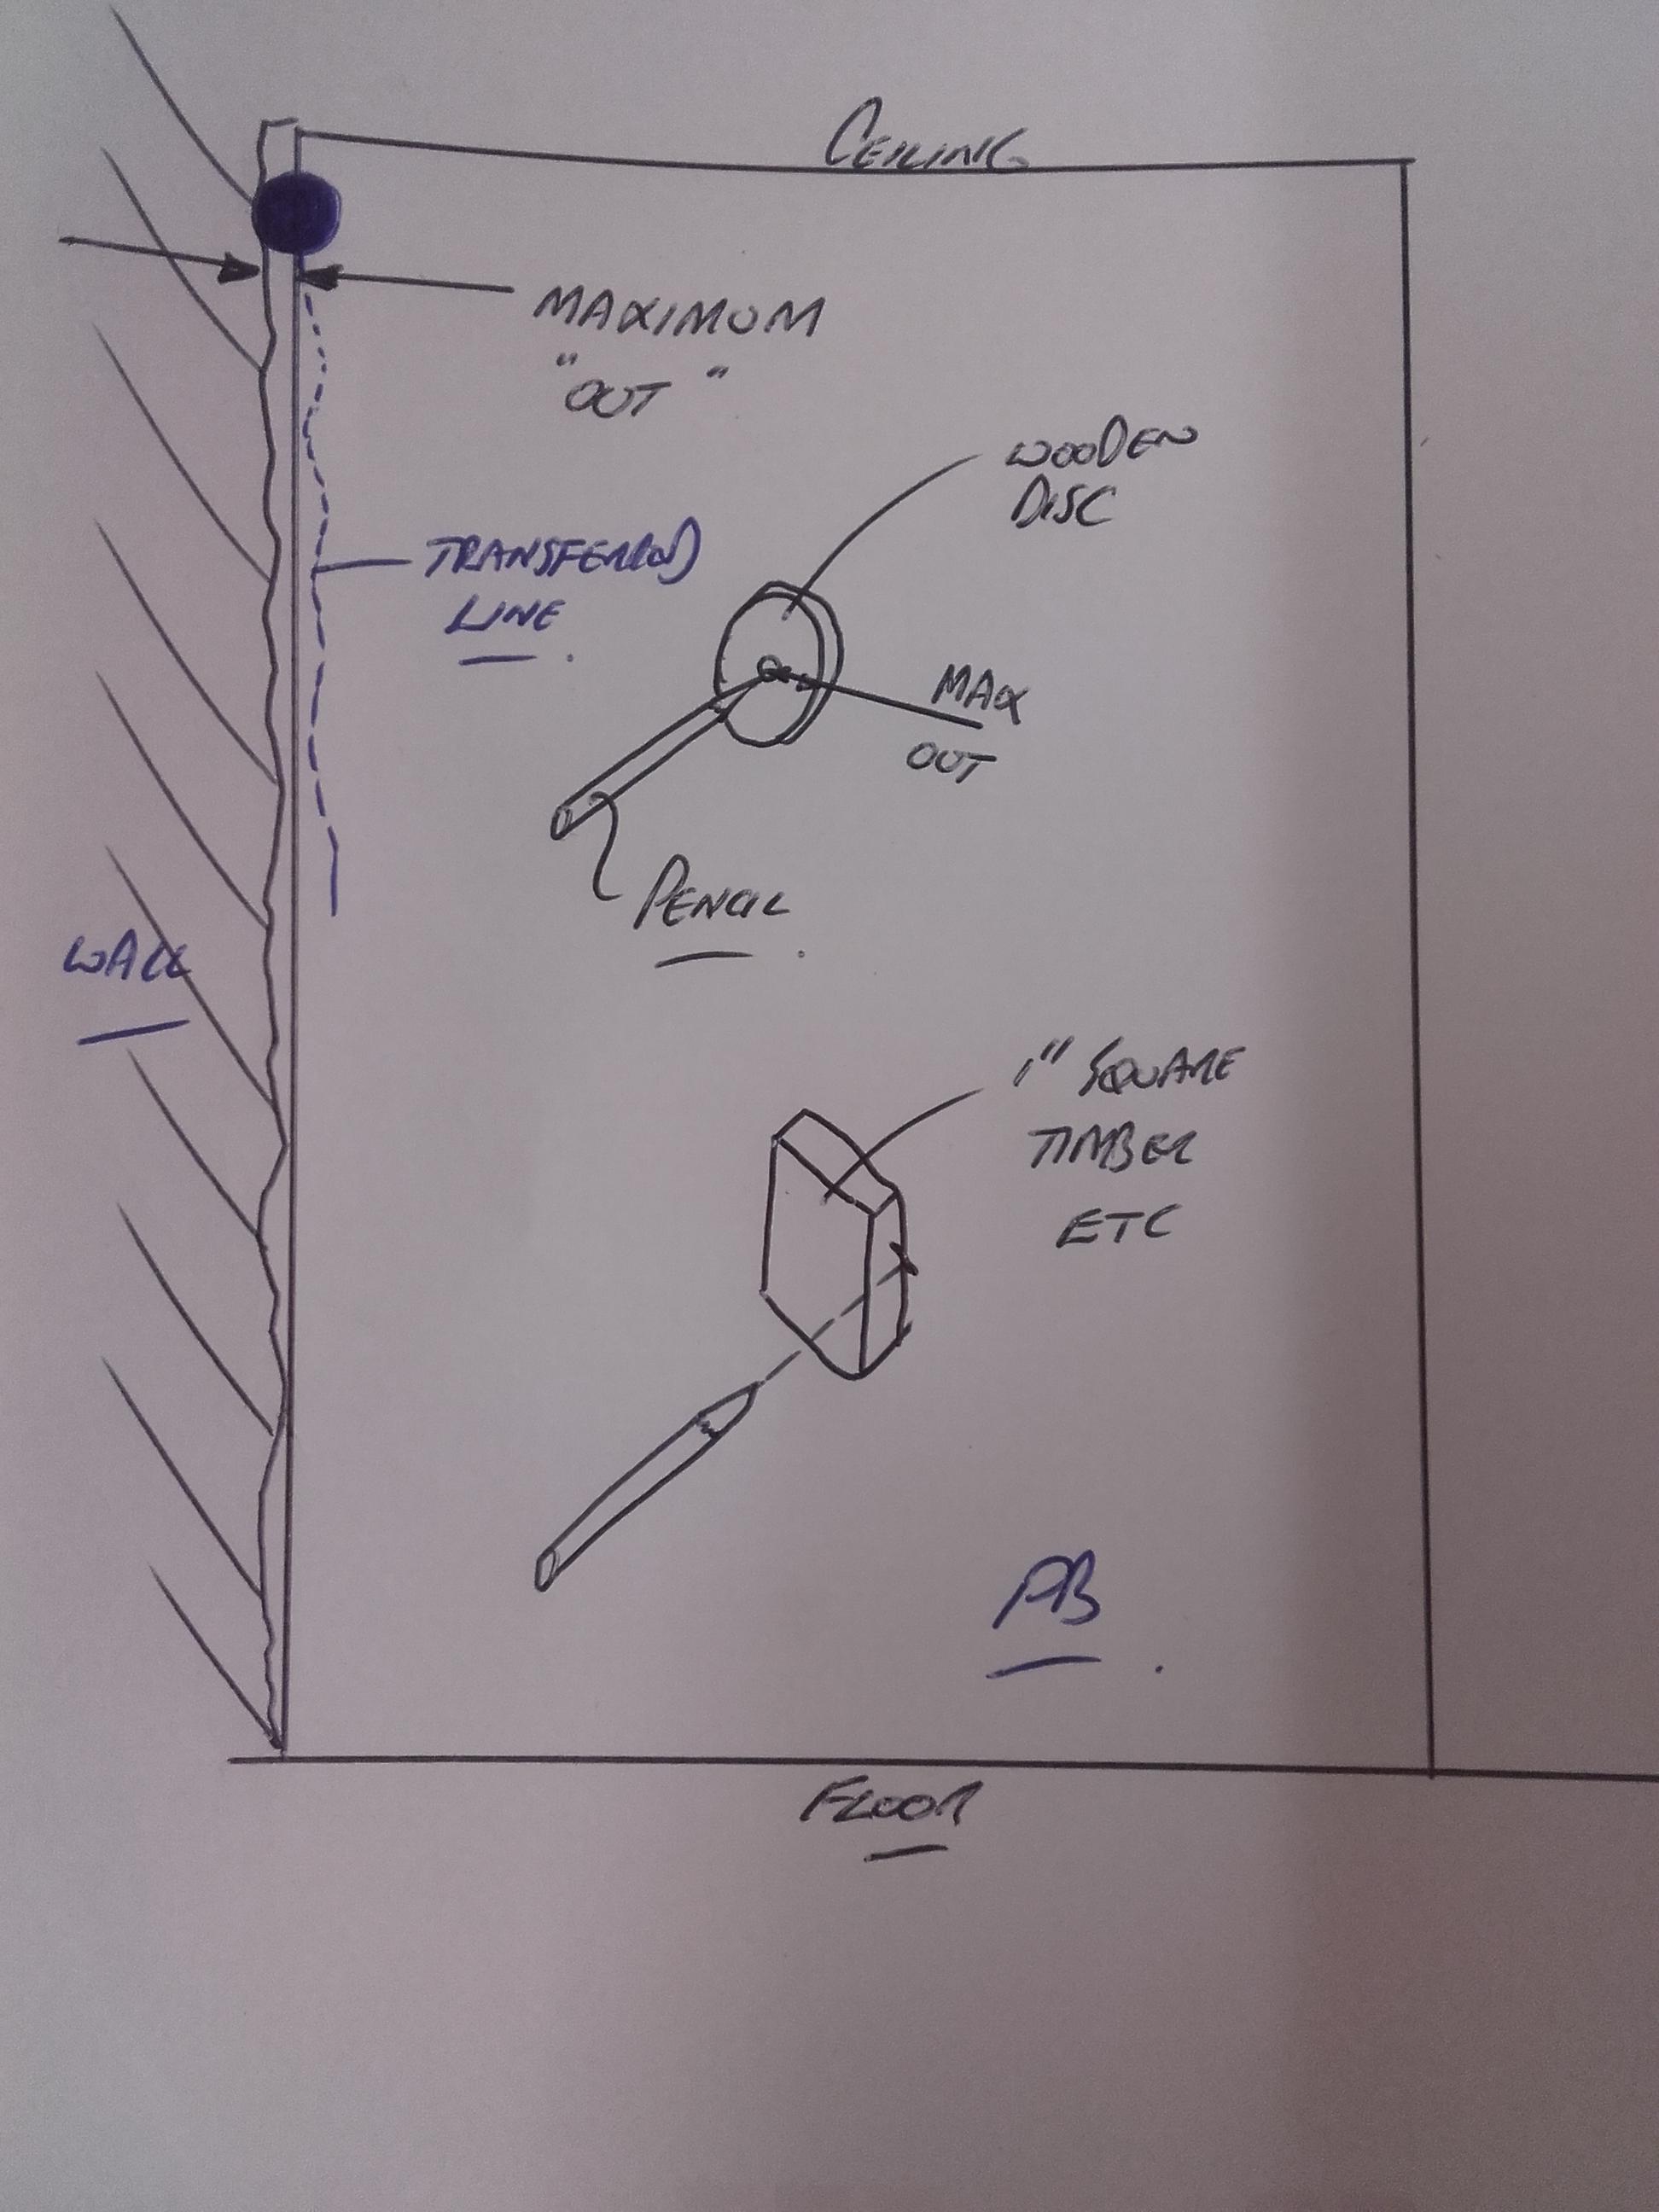
Pretty sure someone said something similar earlier I think....NO I'm not going back to find who/when! Butt your board up to the dodgy wall. Measure the maximum that it's "out". Cut a disc with a hoke in the middle. The appropriate sized hole saw would be ideal. Run it down the wall/board and you'll get the near exact profile of the dodgy wall transferred to the pb. Alternatively use a small block of timber and do much the same thing. Or just a straight edge if the outs are long, straight sections. Then cheap plaster filler etc which you can get in a tube. This dries semi hard so you can sand it: https://www.screwfix.com/p/no-nonsense-instant-plaster-filler-white-310ml/72591? Or even cheaper caulk. This is a bit more rubbery: https://www.screwfix.com/p/no-nonsense-decorators-caulk-white-310ml/57568
-
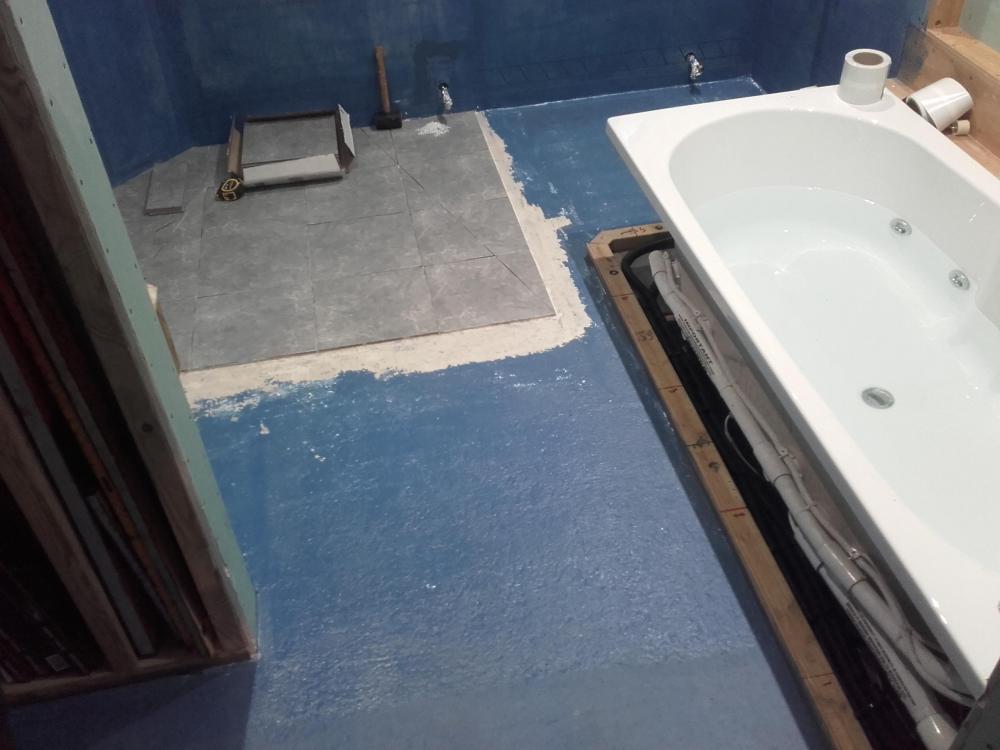
@Nickfromwales, not wishing to agree with SWMBO here but why can't I now do the section where the basin will be to the right in this picture? It's about 1m2 so not too much for me to get into trouble. THEN from the bottom of the picture to the stub wall. When that's dry the bit in the cupboard & out the door? Ta.
-
Help with kitchen renovation/ 1st house.
Onoff replied to zoothorn's topic in Bathrooms, Ensuites & Wetrooms
Sides go between will and header bits. Keeps the ends of the sill down and the ends of the header up! The small person was to mark with a pencil the cut out required for the pb whilst I pushed the pb against the battens. Shouldn't be any need to hold the C'tex in between the battens with anything unless it's well loose. Push it in and low expensive foam any gaps. Not too much foam though you only want it at the sides not behind the Celotex. Less is more, easier to add foam later than cut away. -
So if apply tile adhesive to the floor in one direction I should butter the tiles going down in the other direction?
-
I found the wacker plate in the shed yesterday. I might get my lad to make the single to 3ph converter whilst he's off from uni. If he's not too busy gaming like when I was doing the tiles last night!
-
Resin topped coffee table to start with...
-
Help with kitchen renovation/ 1st house.
Onoff replied to zoothorn's topic in Bathrooms, Ensuites & Wetrooms
For the reveal I think now. -
Help with kitchen renovation/ 1st house.
Onoff replied to zoothorn's topic in Bathrooms, Ensuites & Wetrooms
Have you started boarding yet? You need to decide how you're going to finish the reveal where the pb meets the insulated pb. I was tiling so everything gets covered. Quickest is probable some form of L trim be it wood, plastic or metal. If you look at mine I fitted the insulated pb in the reveal first. I measured the deepest bit of the reveal from batten face to window. I then cut 4 strips from the insulated pb to that width making best use of the insulated pb. If the window is less than 1200x1200 then it's 4 strips off the board width ways and a nice square bit left over! Cut the sill bit to width, slide into the reveal then put a straight edge across the battens either side and draw a line on the piece. Cut to that. Do the same with the top and sides. You should then have 4 bits of insulated pb that fit the reveal and come level with the battens. Fit these with low exp. foam, screw at the front and bricks to weight down a bit, sticks to keep in place. If you don't have a small, willing child to fit the reveal and mark the cut out the you CAN if you want cut your pb once on the wall assuming it fits height wise! - Screw the pb to the battens as aforementioned. - Measure from face of insulated pb on the left to the rhs of the board you've just put up. Do it at the sill and header positions. - Transfer those dimns to the front of the board. Add marks 3mm to the right of these and draw a straight line down. - Do the same for the top and bottom adding 3mm. A big square is useful here. If you're not sure where your cut line will end up you can drill some holes with a 2mm drill to find the corner where the lhs and sill bits meet. - Cut with the Stanley and clean up the edges with the surform plane. -
I assume it must be self levelling to a degree? If you can DIY a resin drive it must be possible to do a resin floor imo.