Onoff
-
Posts
21125 -
Joined
-
Last visited
-
Days Won
206
Everything posted by Onoff
-
 I couldn't agree more.
 -
The YMCA?
-
Sure it's not handrail yet to be fitted? ?
-
Update: BG coming on 18th Dec. Rang them on the 7th, day after fitting the hatch. Call centre in South Africa by the sounds of things. Only other date was the 24th or the New Year.
-
The BBC will be along shortly with specially selected contributors to balance things up.
-
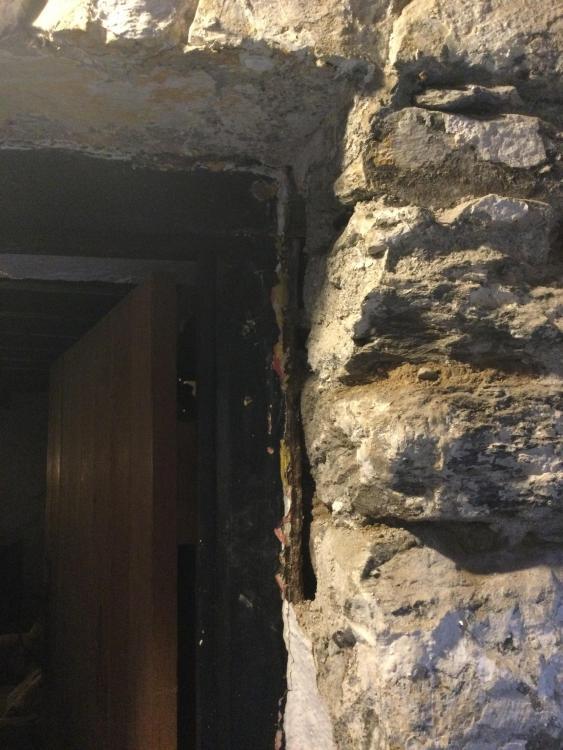
Guessing you might mean this? Do you have some better pictures maybe showing a bit more, taken further back etc? A vertical strip of black wood against the jam might work. You'd get that "clean" edge the jam side then the infilled "organic" look the other.
-
Anything's better than two achers...
-
At least there'll be more cheap labour here to unpack the lorries when they get here. Probably will have hitched a lift on the same lorry in all the confusion!
-
Broom handle? ?
-
-
Have you a name for your lair yet? Apshai might work with the whole dungeon thing? SWMBO vetoed me naming the house Göttwood. Told her it was in deference to my German great, great grandfather...
-
Gentle ribbing is all. It's all coming together, looks really good.
-
I found the chisel style multitool blade pretty good. I've even ground a sharp edge on some blunted serrated blades.
-
So basically SWMBO plumbed the bath in? ? How come that bit of wall on the right is unfinished? Won't access for grouting be a pig with the bath in place? Oh hang on.....test fitting was it?
-
You're repointing not rebuilding! If you remove all what's in the mortar joints you well might get stones fall out. I'd dig out no more than a couple of inches deep. Try and ram solid what's left in the gap with a bit of timber. Then the ready mix lime mortar over the top. Clean a stone face at a time picking off all the old render. I really would have this as a feature and not repaint. Could look fantastic. I Googled "Welsh cottage wall repointing" btw. Picked at random but how good does this look? http://gwyneddrestoration.co.uk/re-pointing-stonework-brick-lime-mortar/ Where the exposed stone wall comes up to say a corner or frame you could always add a bit of timber to separate the two visually and "frame" the nice stone feature wall. And it'll breathe!
-
Are you sure they're not alpacas?
-
You sure, late 70s maybe?
-
Right you are PET.
-
Quite right. There's always somebody who'll try and slip one in.
-
They like to have a night off from censoring your posts all week! ?
-
Just amazed it took so long!
-
I'll arrange a visit through our normal back channels then?
-
You just think you escaped. He probably surreptitiously inserted a tracker you're unaware of..... or possibly a Mars Bar.....
-
In praise of three companies I love to hate.
Onoff replied to ToughButterCup's topic in Building Materials
I've spare wall anchors too as I didn't use them to fix mine. Instead I used resin fixed studding. Yours if you need them.