
Super_Paulie
-
Posts
831 -
Joined
-
Last visited
-
Days Won
3
Everything posted by Super_Paulie
-

Smart thermostats - Nest thermostat losing many features
Super_Paulie replied to JohnMo's topic in Other Heating Systems
Nest has been effectively ruined since it was taken over by Google. Thankfully I have the 3rd gen units but they still cant be fully controlled by Google home, you have to use the nest app. It's like they've been forgotten about. -
Imprinted concrete - Grandad has been ripped off
Super_Paulie replied to diyenthusiat's topic in Driveways
Too hot for tops, but the thickest bell bottom jeans. The 80s just crept into the 90s. -
Same. Looked at the seconds & co option and there were too many little things like delivery criteria, sizing "alternatives" etc. I just thought sod it and bought exactly what I needed. Each to their own I guess. I bought from Pinks in the end, they essentially just have it delivered from a local supplier they have a deal with as it had Newcastle on the delivery note.
-
2 layers for me. Cutting 50mm compared to 120mm was an absolute dream. Meant I could double secure for air tightness as well as I did that between the layers.
-
Interconnected smokes, junction box?
Super_Paulie replied to Super_Paulie's topic in Electrics - Other
The only function I would expect from it is a notification to our phones. You can set it so that a notification will be sent based on the relay trigger on a 240v input on the switch side. Other than that it serves no other function and isn't anything safety critical. Id imagine the heat alarm would sound (and thus notify) before the electrics tripped but again it's more of an experiment than safety critical. Put it this way, if the house is going to burn down it will whether I get a notification or not. But if I do I'd be given maybe a few minutes extra to phone a sibling to investigate/phone the fire brigade. -
Interconnected smokes, junction box?
Super_Paulie replied to Super_Paulie's topic in Electrics - Other
I'm not in a position to test but I assume it puts out 9v on "interconnect" when the alarm triggers so you could put a relay on that which trips the 240 smart relay, thus providing the smart/digital trigger. -
Interconnected smokes, junction box?
Super_Paulie replied to Super_Paulie's topic in Electrics - Other
It is actually a heat alarm I have down there to be fair. I've got a smart relay in every light switch with triggers from doorbell, automatic velux, Google home etc, just seemed like it might be interesting to do. Add it to the rainy day pile when I'm bored. Small relay that trips via the interconnect which in turn trips the smart relay and a routine to send me a notification. Meh, it'll never happen. -
Interconnected smokes, junction box?
Super_Paulie replied to Super_Paulie's topic in Electrics - Other
It's more to note that the missus is burning the dinner... -
Interconnected smokes, junction box?
Super_Paulie replied to Super_Paulie's topic in Electrics - Other
Having done the job now, did you ever go with what you suggested Mike? For no other reason other than "just coz" I was wondering if I could rig a smart relay to the system so I get the notification when the relay switches. I guess this would be dependant on how the interconnect works, I'd imagine it puts a live on that line when triggered, but I doubt it would be 240v. All fairly pointless, but just a thought. -
Underfloor heating in a plant room
Super_Paulie replied to Lincolnshire Ian's topic in Underfloor Heating
My "plant room" is under the stairs and it's damn toasty where everything converges. Basically it has UFH as a by-product of such. -
Ceiling Extract with Inline Fan (insulate?)
Super_Paulie replied to MortarThePoint's topic in Ventilation
Nope. I did initially design it with a condensation collar I think they are called in the system which just sits in line. Can't recall why I didn't go with it in the end, think I was trying to evacuate the trap to the eaves, but as the run is insulated and so short the 10 minute over-run seems to deal with it. Been in over 2 years now and shows no ill effects, and I enjoy a good long 20 minute shower every evening. I'll likely revisit the whole thing when I pull out the bathroom to make it all a bit more serviceable, I was in a rush for the install as the builders had made my bathroom "windowless" for a short time with the wraparound extension. -
Ceiling Extract with Inline Fan (insulate?)
Super_Paulie replied to MortarThePoint's topic in Ventilation
I did. Used rubber I found at work but it's nothing out of the ordinary, just cut it down to go in each corner. My initial plan was to suspend the whole thing on bungee cords from the rafters but I thought I'd just try it as it was and it was totally fine so I didn't bother. -
Ceiling Extract with Inline Fan (insulate?)
Super_Paulie replied to MortarThePoint's topic in Ventilation
i did exactly this. Was tricky to get the tubing correct as the vent was "too close" to the motor but with some fancy angles it was pretty straightforward. I insulated by wrapping with 25 or 50mm and then aluminium tape all round to stop it from falling away. ps, in the first photo i used duct tape which was useless and fell off half an hour later. Use aluminum tape all round is my advice. really? the only noise i hear is the sound of the air getting sucked up, the fan itself is so quiet you cant hear it running from any other room but the loft. Thats why i use the run-on timer as people just kept forgetting to turn it off and it would run all night, non the wiser..thumb.jpg.cf627c28a903b39f294262ed59134aca.jpg)
.thumb.jpg.53b29de77626c883b022b0f220afa298.jpg)
-
what outside vent?
Super_Paulie replied to CalvinHobbes's topic in Mechanical Ventilation with Heat Recovery (MVHR)
nope, renovation is not that grand. Need to vent outside to please BC in this instance. -
what outside vent?
Super_Paulie replied to CalvinHobbes's topic in Mechanical Ventilation with Heat Recovery (MVHR)
out of interest Nick, why non-silicone? im about to put a vent in for my downdraft hob this summer so will be in a similar situation. -
Fire protection of steels
Super_Paulie replied to Post and beam's topic in General Self Build & DIY Discussion
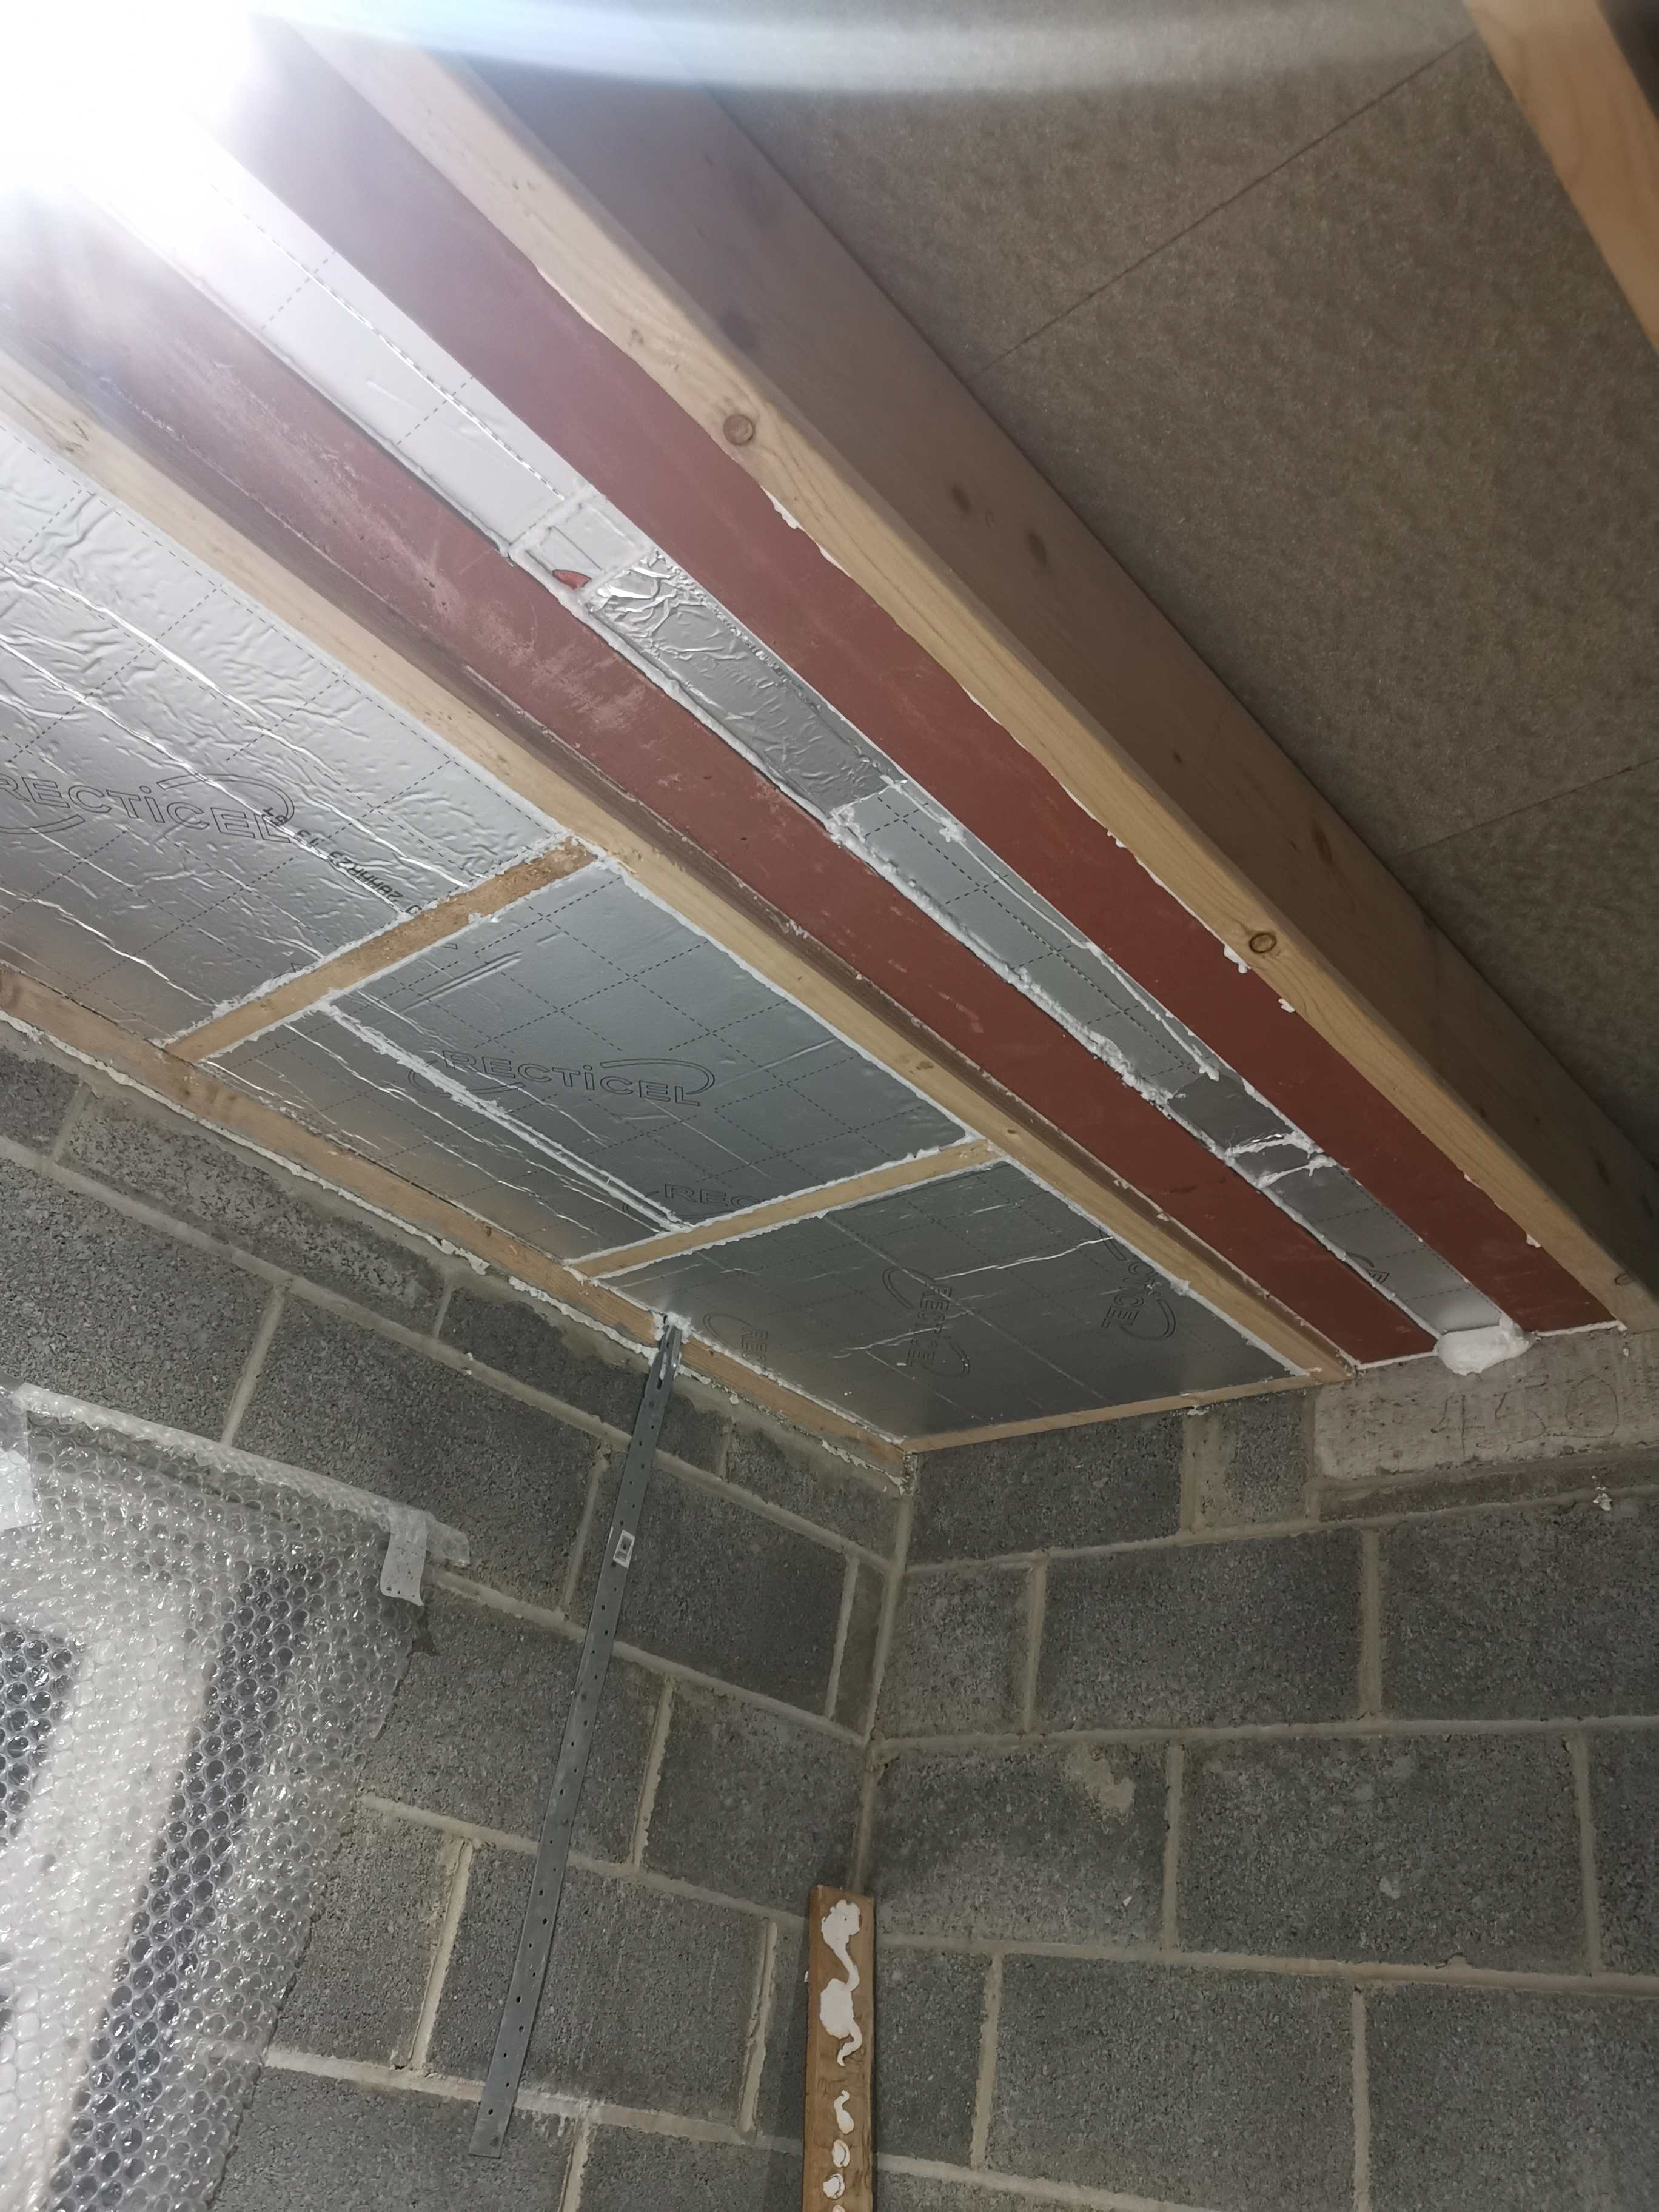
yeah its wool in the cavity. I could have filled between the steels with wool but i had PIR so just used that and with wool on top/around it and foamed it in. I think i used a 15mm PIR underneath the beam to bring it flush to the bottom of the joists. You may be right. I was just following the guidance of my BCO, see below extract. Im in the North East of England if that has any bearing: Afternoon Paul, Given that the subject beam will be set above the ceiling level, without any down stands, I can confirm that a standard single 12.5mm plaster board would be deemed satisfactory in terms of providing the required fire protection. As such, you can use either approach of an additional strip of plaster board or placement of insulation. Regards.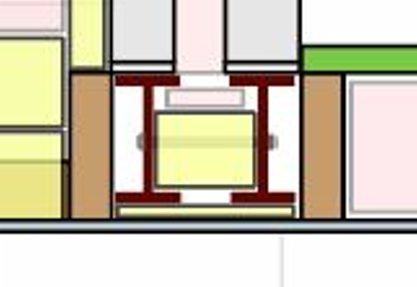
-
Fire protection of steels
Super_Paulie replied to Post and beam's topic in General Self Build & DIY Discussion
It's a twinned steel which I insulated between with PIR. The timber is joists on the inside and I guess a wall plate on the outer. Steels support the cavity wall above, pitched roof to the front, room to the rear. -
Fire protection of steels
Super_Paulie replied to Post and beam's topic in General Self Build & DIY Discussion
For what it's worth, my BC said I can just fly over my beam with standard plasterboard because it's within the ceiling void. Nothing else required for him to give it the old ok.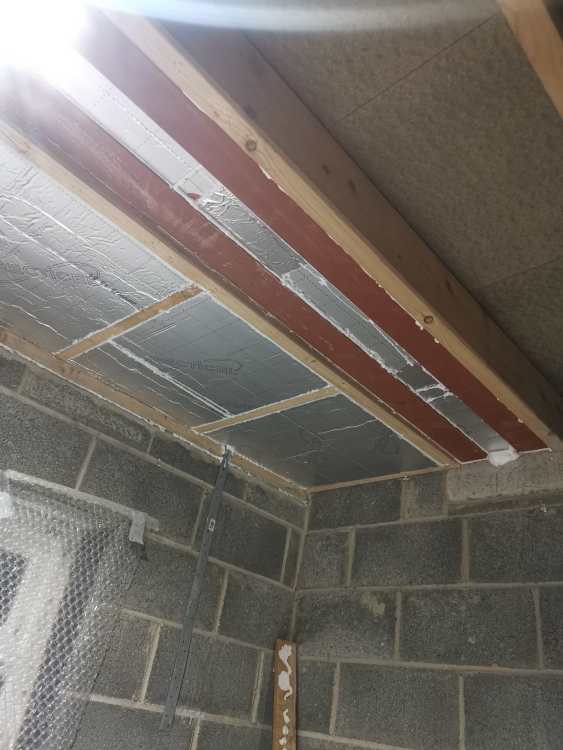
-
Wall ties question- slanted or level, does it matter
Super_Paulie replied to ab12's topic in Bricklaying, Blockwork & Mortar
You want any liquid to run towards the outer leaf so you'll be alright. My ties had a double dip in the centre anyways to stop moisture travelling all the way along them and back to the inner, but if they slope down then water isn't going to travel up! -
i have a beam over my doors similar and yes it bridges out to in. I have insulated board underneath it attached with CT1 and the beam itself packed with PIR and wooden uprights to attach the plasterboard to, used foam along the inner edge to insulate it where i could. Doesnt seem any colder than anything else, happy with it.
-
CAD software recommendations?
Super_Paulie replied to Great_scot_selfbuild's topic in New House & Self Build Design
im a 3D tech and i use Sketchup for room designs, Rhino for architectural stuff and Fusion for things with moving parts. No idea on cost but id imagine the order i wrote them will also be the order of cost from low to high. -
Hob extraction under decking?
Super_Paulie replied to Super_Paulie's topic in Kitchen & Household Appliances
Length wise I'm only looking at 2m on the horizontal until I hit the outer wall. Might do that and get BC sign off before I build my deck... -
People's experiences of Quinetic-type wireless switches
Super_Paulie replied to Bancroft's topic in Electrics - Other
During a refurb I just can't see the point. I did think about these though for the bedroom, like a light switch either side of the bed as we haven't decided on the final bed position yet. In the end I just decided to go with a wireless ZigBee switch that controls a smart relay at the actual switch. -
Evening you fine people. Not sure if this should be in this or ventilation, but here goes. The external ventilation from my downdraft hob. Would it be acceptable to bring the vent out under my bifold doors and thus under wooden decking (not built yet) I can't really see a way to get it up a wall as the rear of the house is pretty much all door...
-
not an expert by any means, but if it was my roof i wouldnt have any issues throwing a few 20mm holes along the centre line in advance of the insulation.

.jpg.0e2da28f63616841f1bad912be5776bf.jpg)
.jpg.1833e4d5998158833939fa21847ed5b5.jpg)