Digmixfill
-
Posts
204 -
Joined
-
Last visited
Everything posted by Digmixfill
-
I've almost finished with the joists for our landing area and P5 is next. We have minimal detail for our stairs other than the opening size, turns etc., so have been looking around at landing construction. I'm still unsure if I should lay the P5 to the edge of the stairwell trimmer or leave a gap at the edge for landing nosing and the like?
-
Cutting slot for masonry hanger in old brickwork?
Digmixfill replied to Digmixfill's topic in Barn Conversions
Resin is just a convenience thing. I'm already using resin to secure wall ties, so easy to use resin for hangers when I next insert ties... I could do that for some of the joists. A few joists be sat on brickwork where there are openings above them. I'm favouring masonry hangers for the remainder at the moment. I've also considered pocketing. I could punch through from the other remaining room that doesn't have joists in place yet, and feed the joists in from there. -
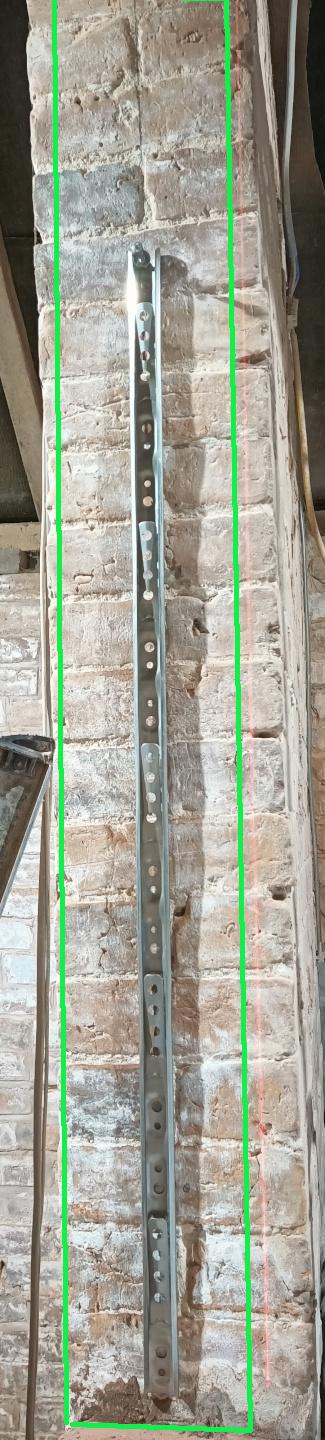
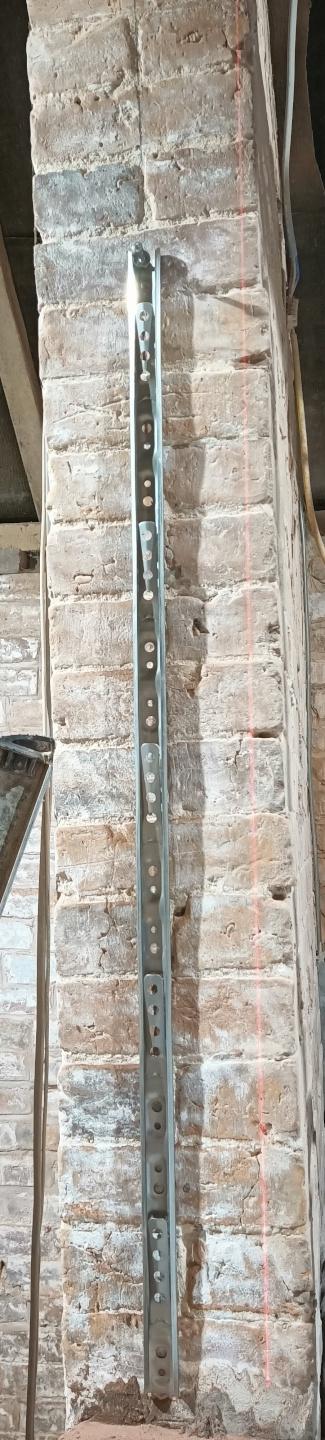
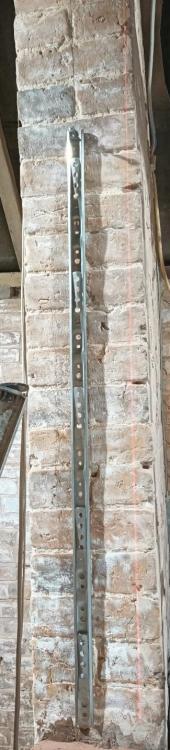
I've been marking out the floor level in one of our rooms and looking at where the tangs for joist hangers will sit. Almost all of the holes will be cut close to the edges of bricks, no holes are usefully close to the mortar beds. So far I've thought of four ways to cut the holes for the tangs. Grinder - messy, holes will be much wider than needed. Chain drilling and plug chisel - ok, but not the neatest of slots created. Probably break the bricks. Armeg SDS TCT brick chisel - never used one, but I expect a slightly neater hole that with the chain drilling. Again, probably break the bricks. AS160 saw with plunge blades - the best solution, but I would forfeit too many pies and beer with the purchase cost. How would you cut the slots for the hanger tangs? A secondary question. Is it ok to resin the tangs in place rather than mortar them in?
-
I could have, yes. Having started I decided to carry on with the boards. ?
-
I'm a good way through putting up my internal walls and creating a cavity against an existing outer wall and I agree with @Johnny Jekyll it's been a pain. I'm the brickie, so no problems with me re-laying blocks umpteen times, or removing deformities on the blocks to get things as straight as I can for the PIR boards, but truly a pain. Beads or injected/poured PIR if a ever get the silly idea to do this again.
-
Bricking/blocking up against a wall with a lean?
Digmixfill replied to Digmixfill's topic in Bricklaying, Blockwork & Mortar
@PeterW Does the green outline I drew in the picture above match what you had in mind for the optimum line? -
Bricking/blocking up against a wall with a lean?
Digmixfill replied to Digmixfill's topic in Bricklaying, Blockwork & Mortar
Laying blocks on their side is 25mm off the wall width. Close enough?
-
Bricking/blocking up against a wall with a lean?
Digmixfill replied to Digmixfill's topic in Bricklaying, Blockwork & Mortar
Something like this? The blocks will pretty much start off at the bottom left edge of the wall and stop at , or close to the top right edge.
-
Bricking/blocking up against a wall with a lean?
Digmixfill replied to Digmixfill's topic in Bricklaying, Blockwork & Mortar
Hopefully wet plaster on either side of the wall. It may end up being dot n dab. -
I've started to look at bricking up an internal opening this evening. Basically closing up a wide opening to doorway size. Couple of lintels to go over the doorway opening, and a tiny triangle of bricks above that to the apex. Marked a line down the centre of the existing bricks and screwed the top fixing of a crocodile in place. Let go of the crocodile after marking the lower fixing points and watched it swing away from centre. It's got quite a lean. Picture attached with a laser level on it to give an idea of the lean. Ancient existing bricks are 240mm wide. I'm planning to use dense concrete blocks on their side, so new bit will be 25mm shy of the existing width. I'm not sure what to brick to with this. Pick a side and follow the current lean? Half the lean and try to straighten out a little? Ignore the lean and go vertical? How would you do it?
-
Inspection hatch in P5 - how do you do it?
Digmixfill replied to Digmixfill's topic in General Flooring
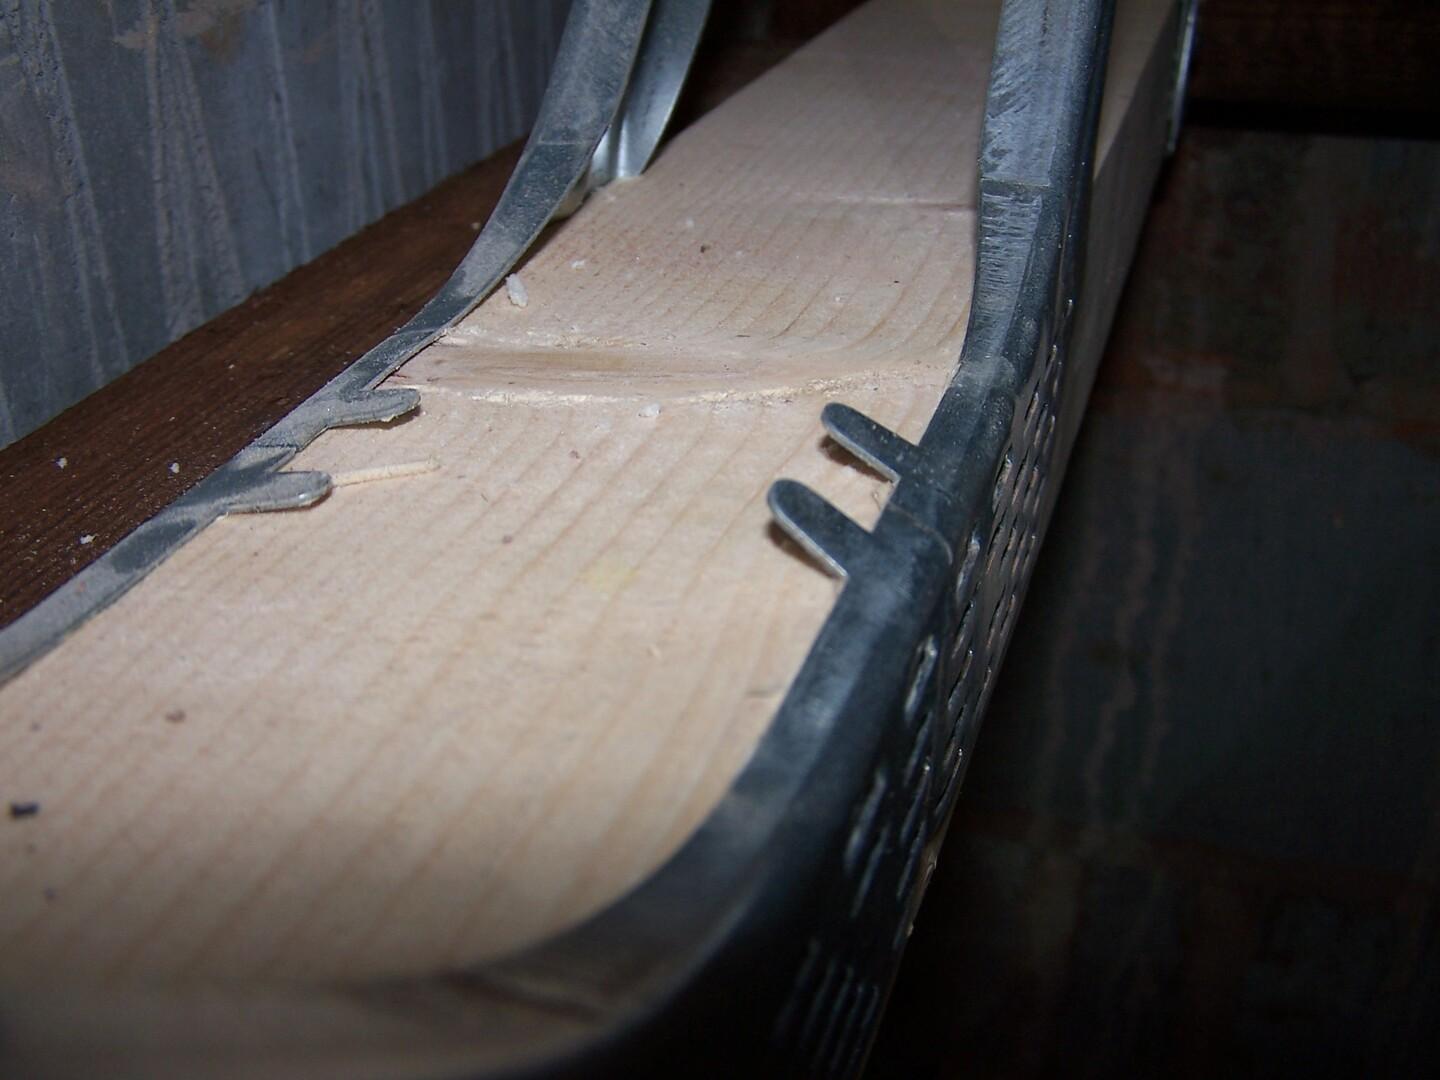
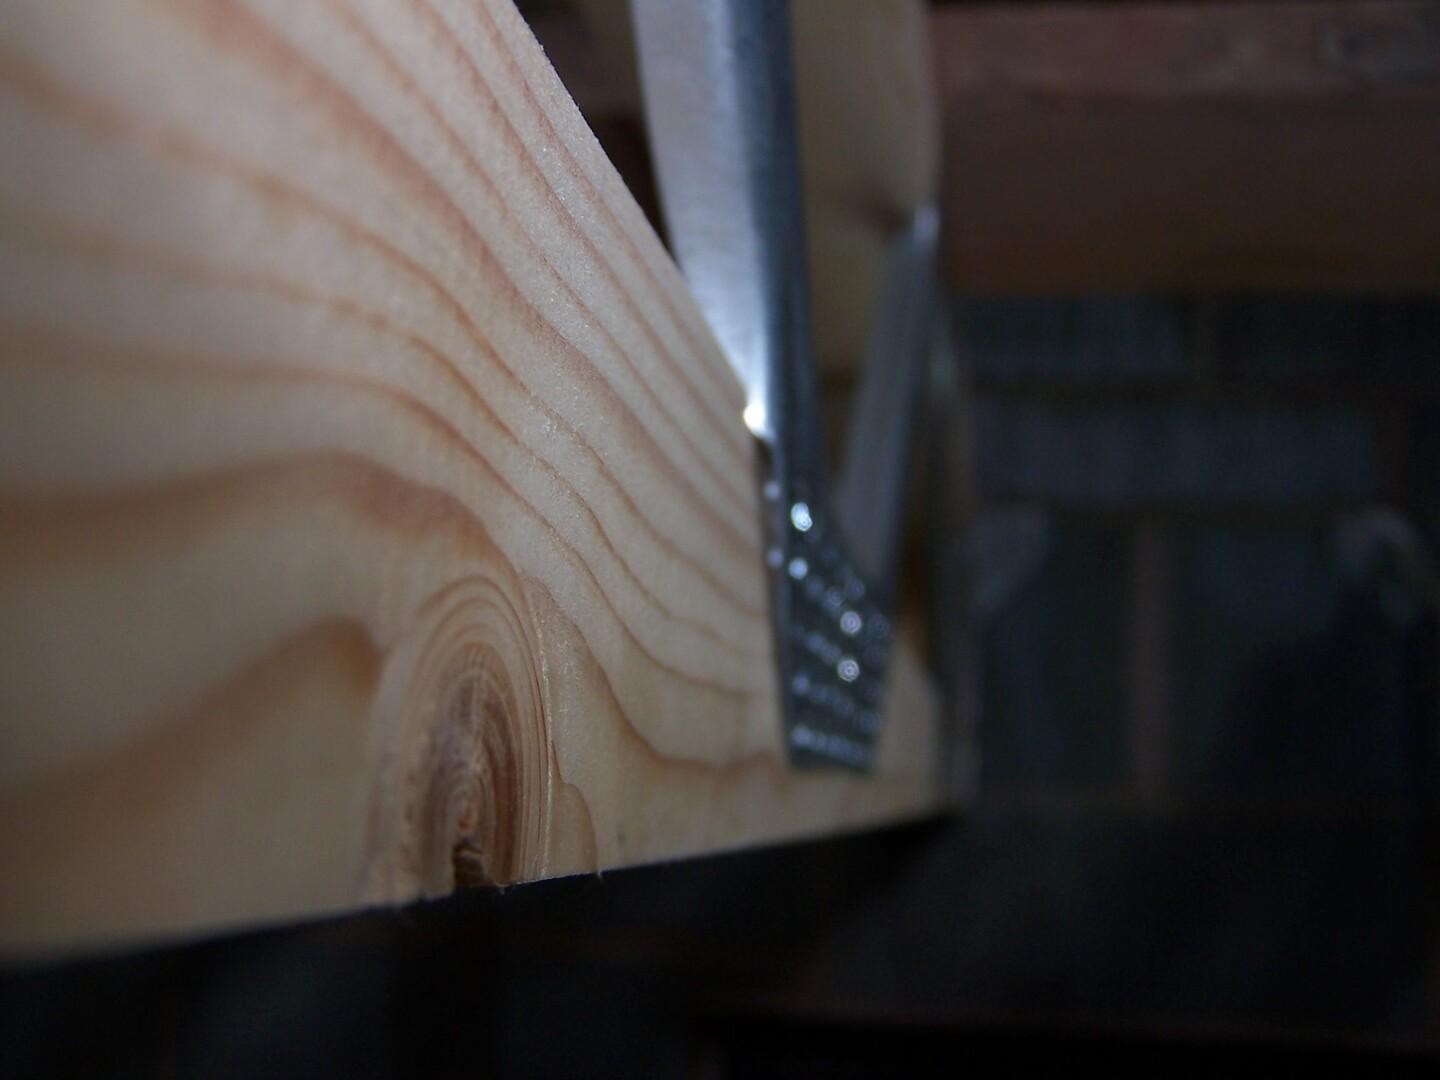
First part of flooring is in place. In case it helps anyone else in a future search the hatches are like this: And to aid lid movement I chamfered the front edge of the lid: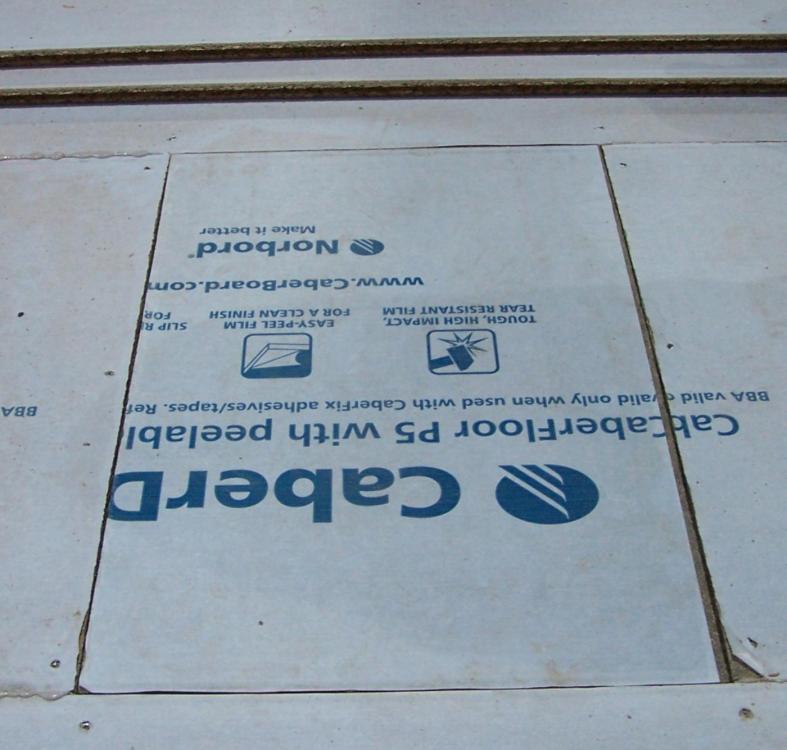
-
Inspection hatch in P5 - how do you do it?
Digmixfill replied to Digmixfill's topic in General Flooring
That makes it clearer. Thank you. Started carrying the boards up the ladder to the first floor tonight. Will get to creating the first hatch soon. I'm favouring somewhere central for it. Any reasons not to have it centrally? -
Inspection hatch in P5 - how do you do it?
Digmixfill replied to Digmixfill's topic in General Flooring
I was hoping that was the case and not me being rather thick and not understanding. -
Inspection hatch in P5 - how do you do it?
Digmixfill replied to Digmixfill's topic in General Flooring
Do you mean cut the lower half of the groove side off? I can't quite see how removing half of the tongue helps in lifting the board. I'm thinking that after the plaster board is on the ceiling I'm bound to realise I need to route something else under the floor. A hatch in each room should allow me to fish things through. -
I'm wanting to put an access hatch/opening in my P5 flooring in each room. As each board is going to be glued and screwed I'm wondering how best to implement the hatch. Do I cut out the hole before fitting, or omit some glue and cut a piece out later?
-
I'm measuring up to fit the first of my P5 flooring. The room length is 4250mm, so 50mm larger than 7 boards. 25mm gap at either end and no slicing boards in half. What is the maximum expansion gap you would accept before you decide to start slicing boards?
-
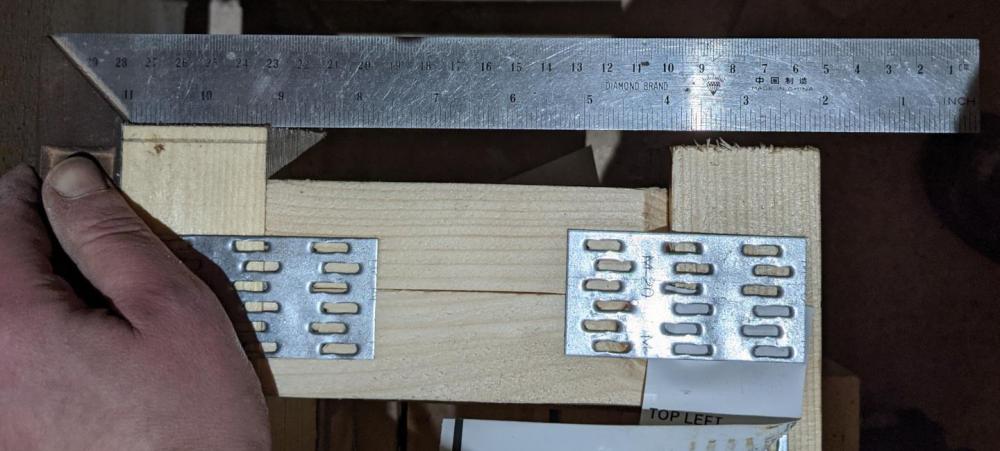
I'm not stressing about this. I've squared them up, sorted for best match to length required and they're in place. The individual chord lengths were within the +/- 1mm length, but top and bottom chord on some were offset by > 5mm. Do you think it unreasonable for me to expect a joist to have at least on square end?
-
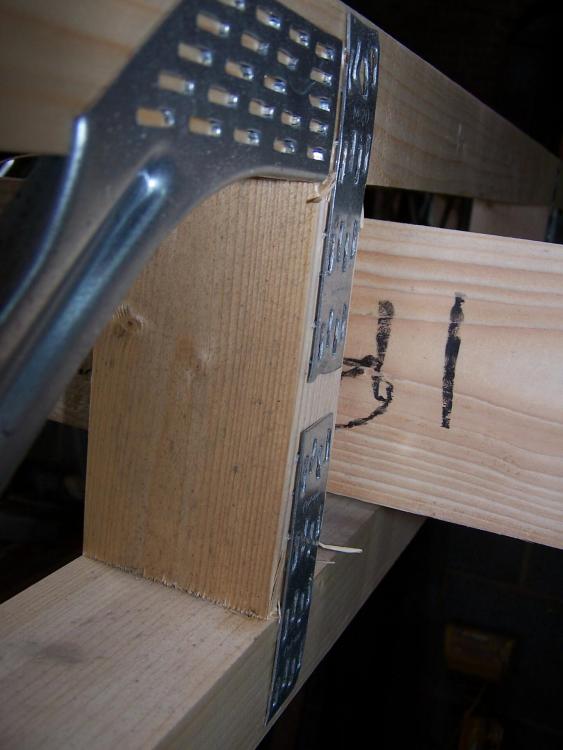
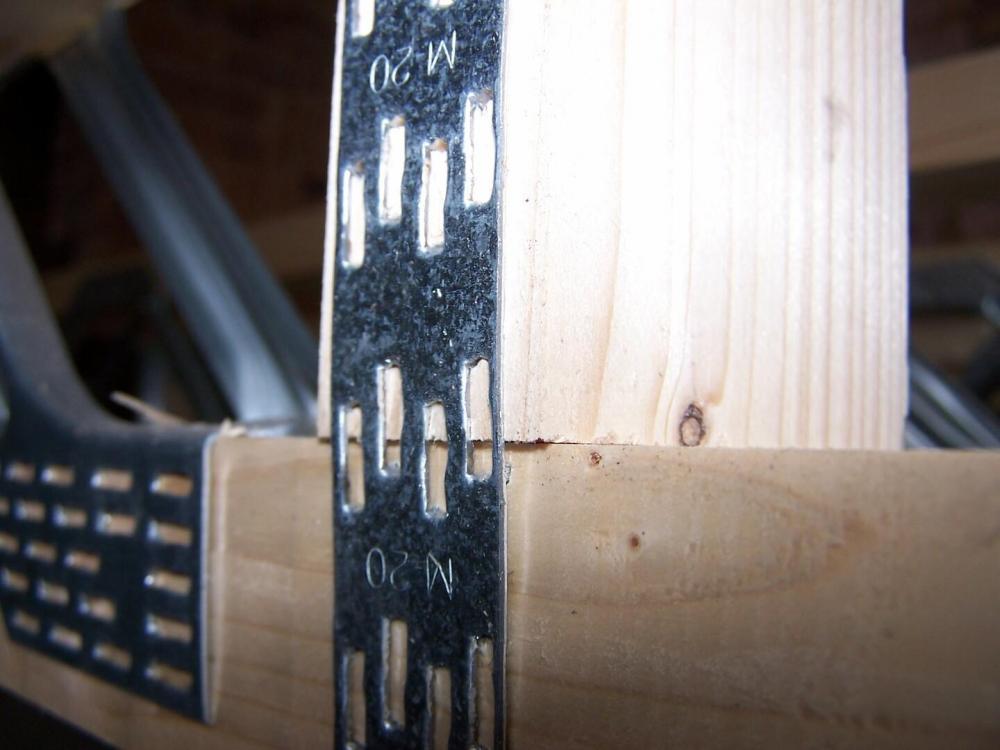
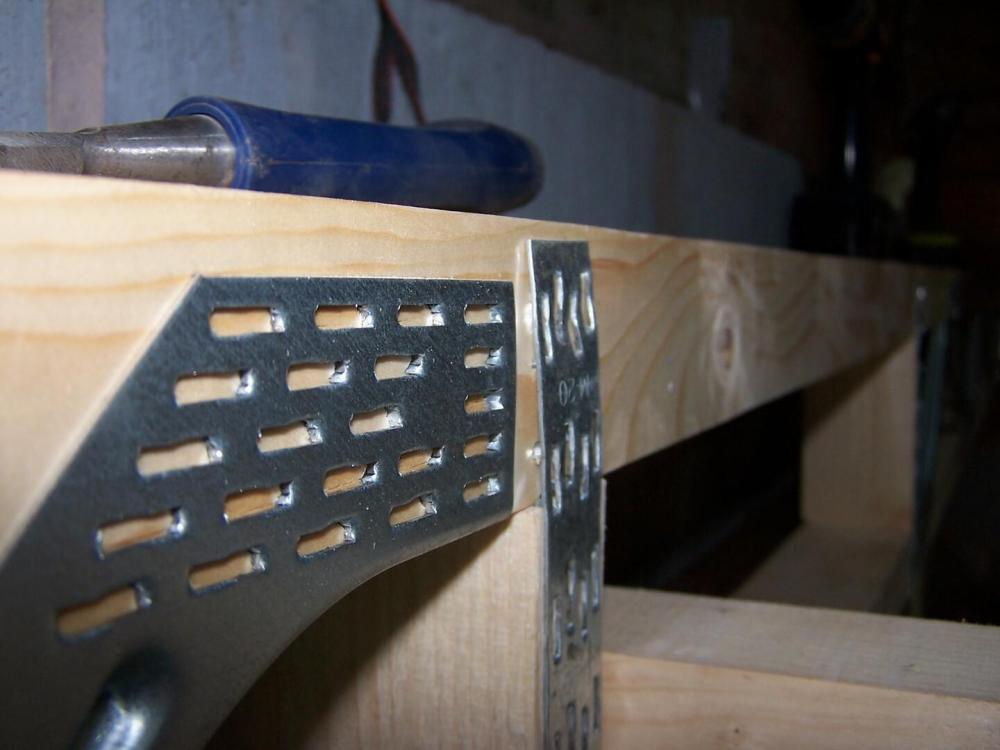
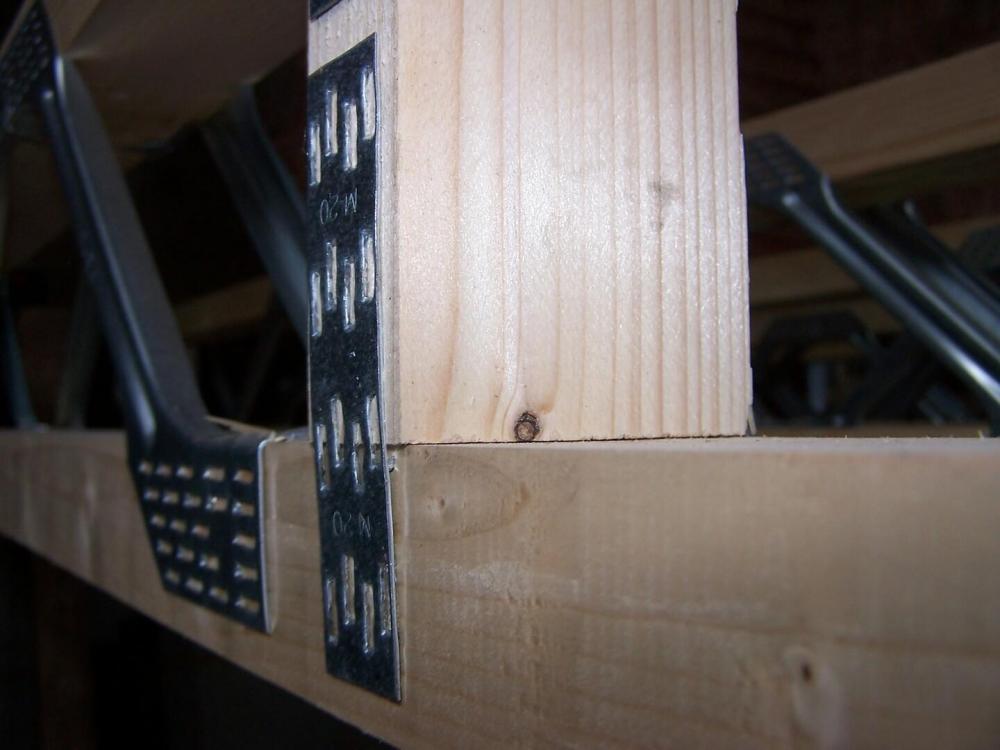
The strongback isn't nailed to anything at the moment. I'm running noggings wall to wall at 1/3rd span. Then I'll add the end chord restraints with zclips. After that i'm going to place noggings in the lower chords to fix any joist twist. Finally I'll nail the strongback in place. Overkill I know. Caberdek, screw and glue after that. Yes Mitek. Long before I ordered the posis I asked Mitek what their tolerances were. An engineer replied back to say +/- 1mm for length. Most of the posis here arrived as parallelograms, way out of tolerance. At the masonry end they are fixed with Simpson FMS straps, so even if Mitek offered to replace them all it would be a pain to remove them.
-
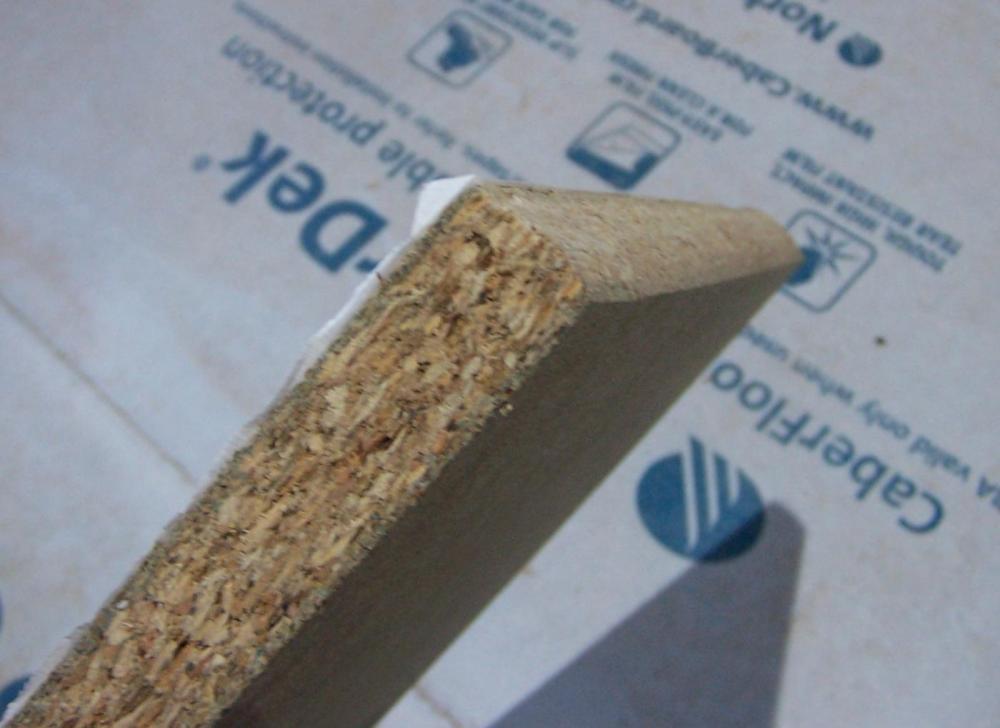
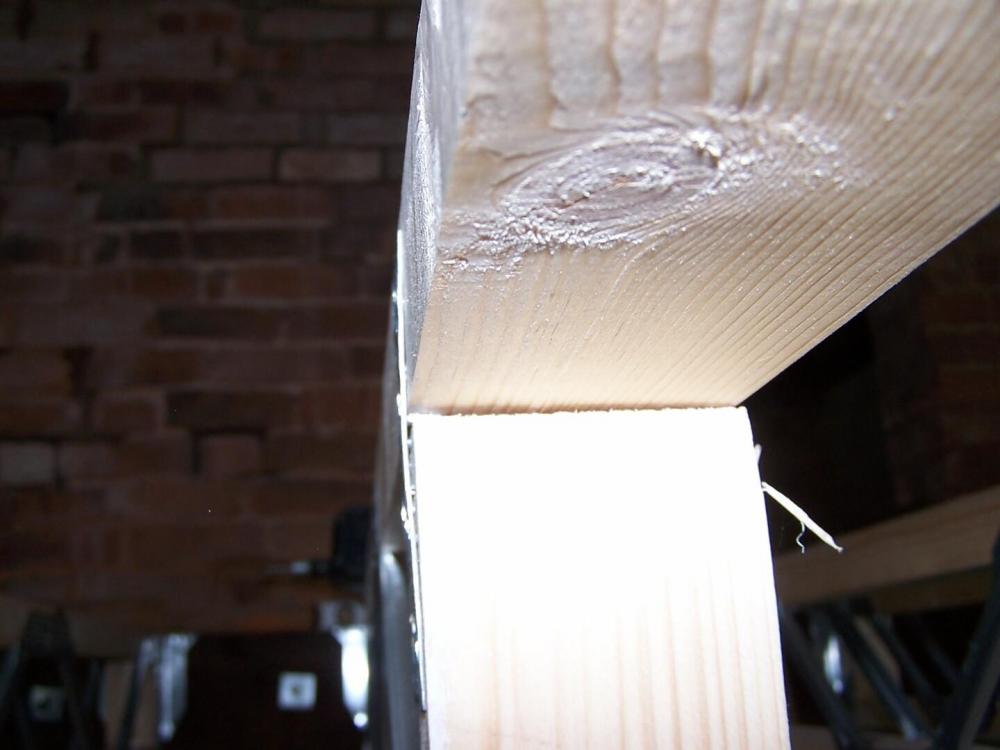
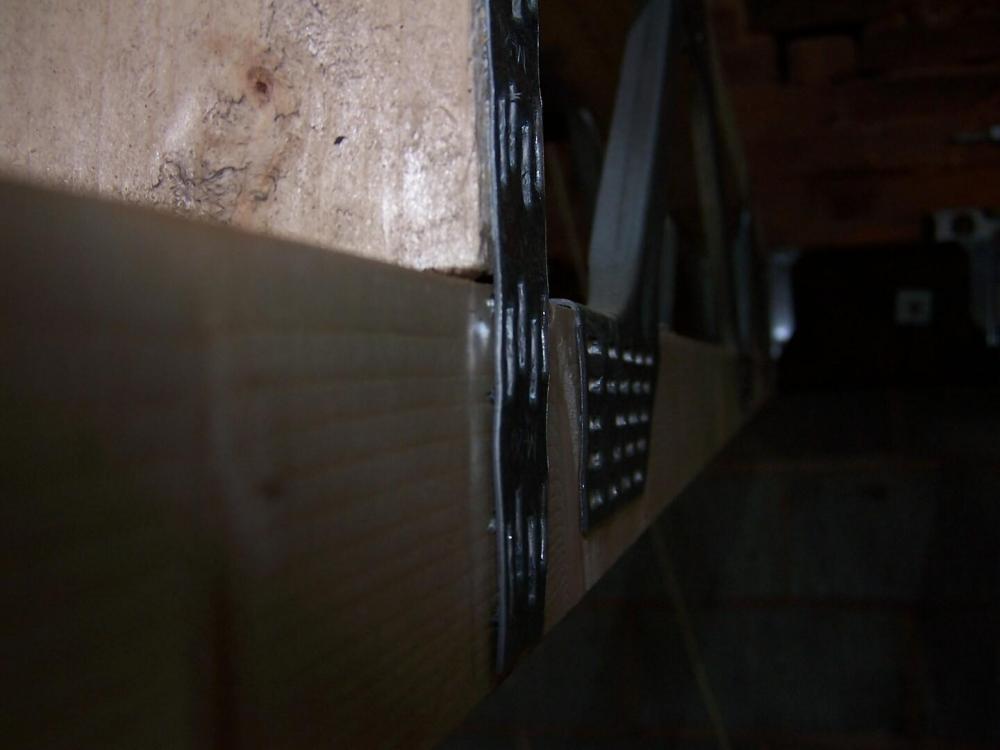
Here are a few examples of what I consider imperfections. The camera doesn't show them to be as stark as the eye.


-
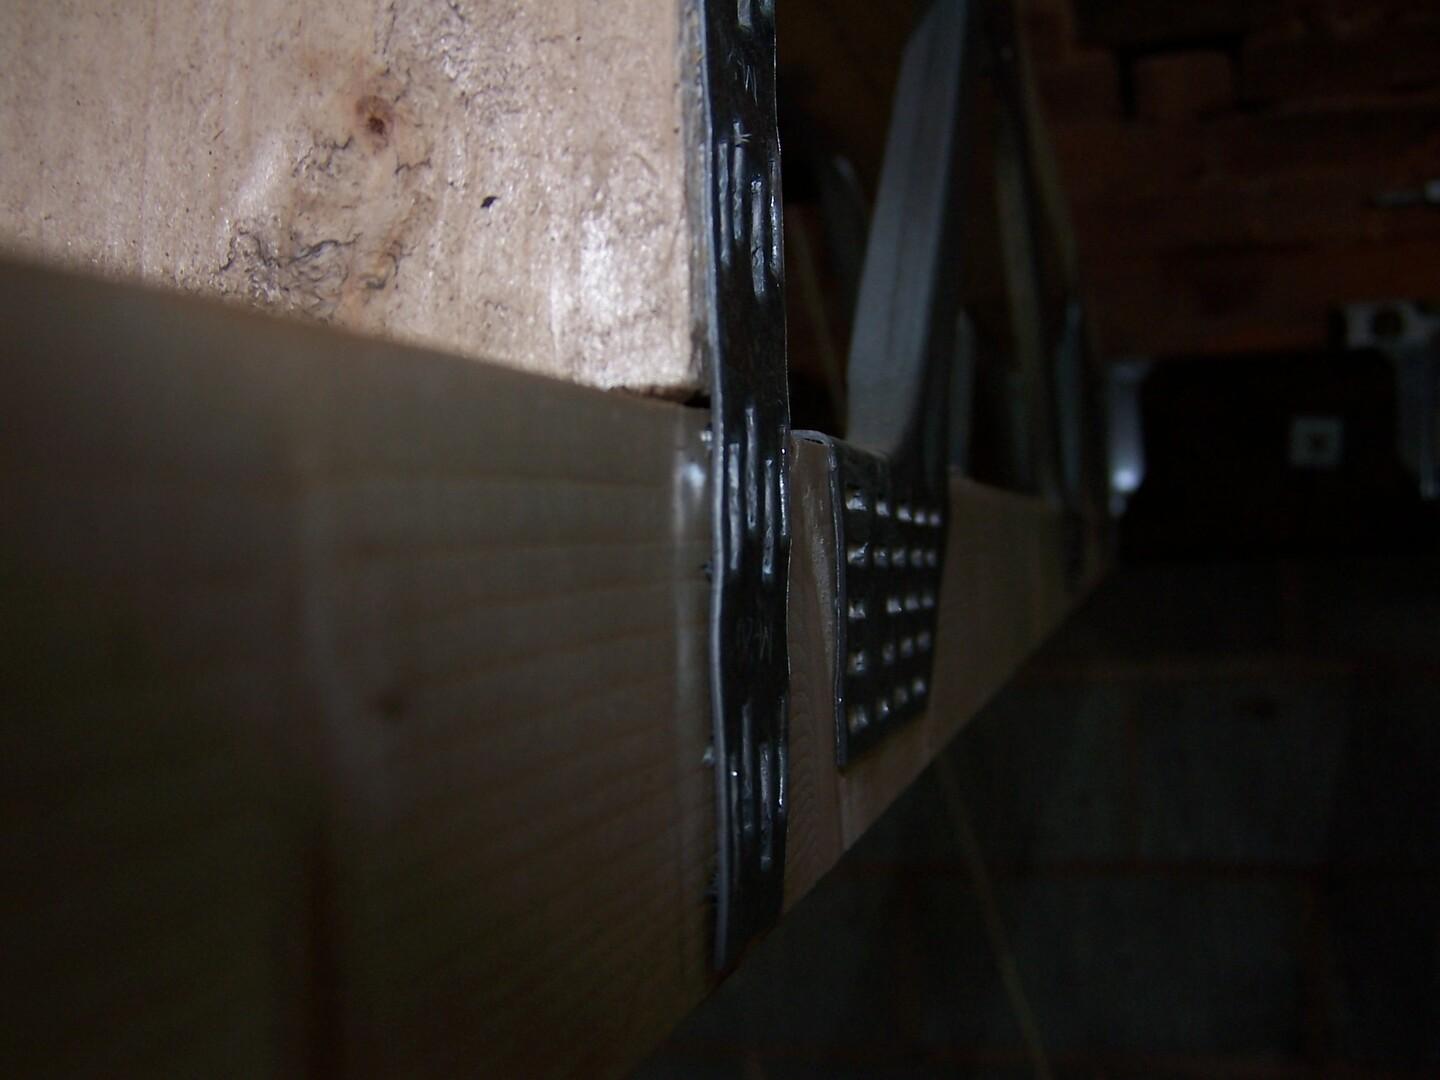
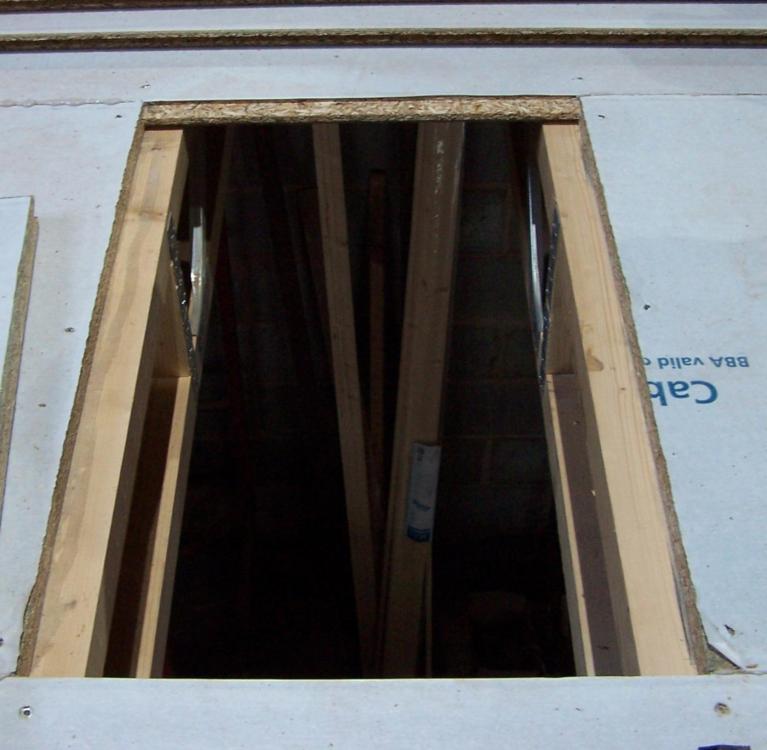
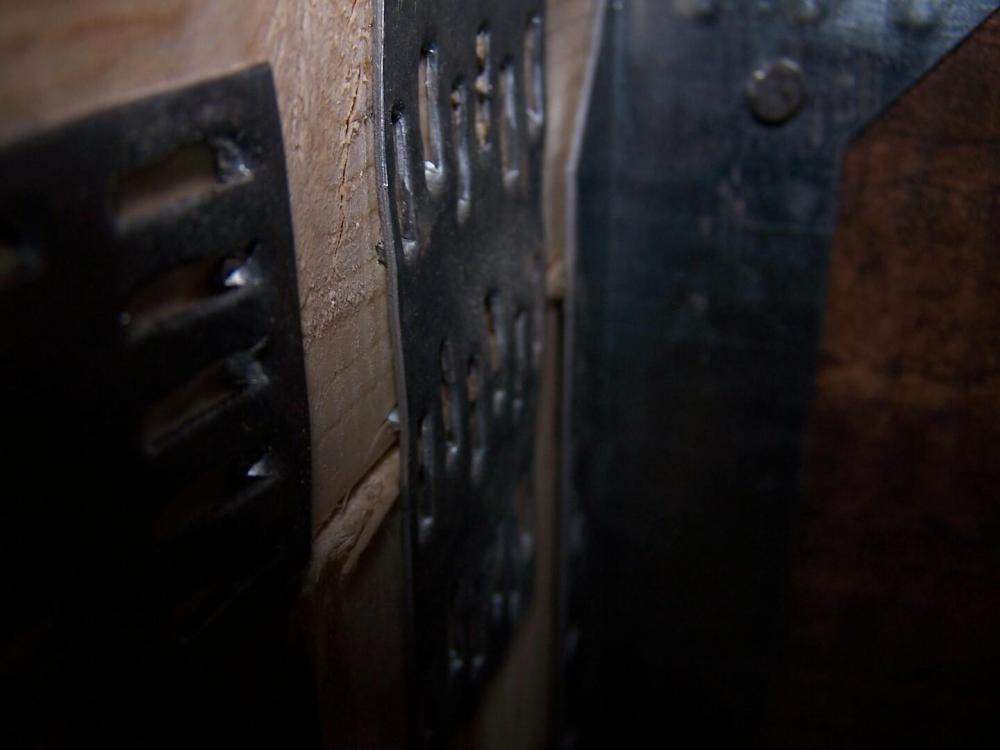
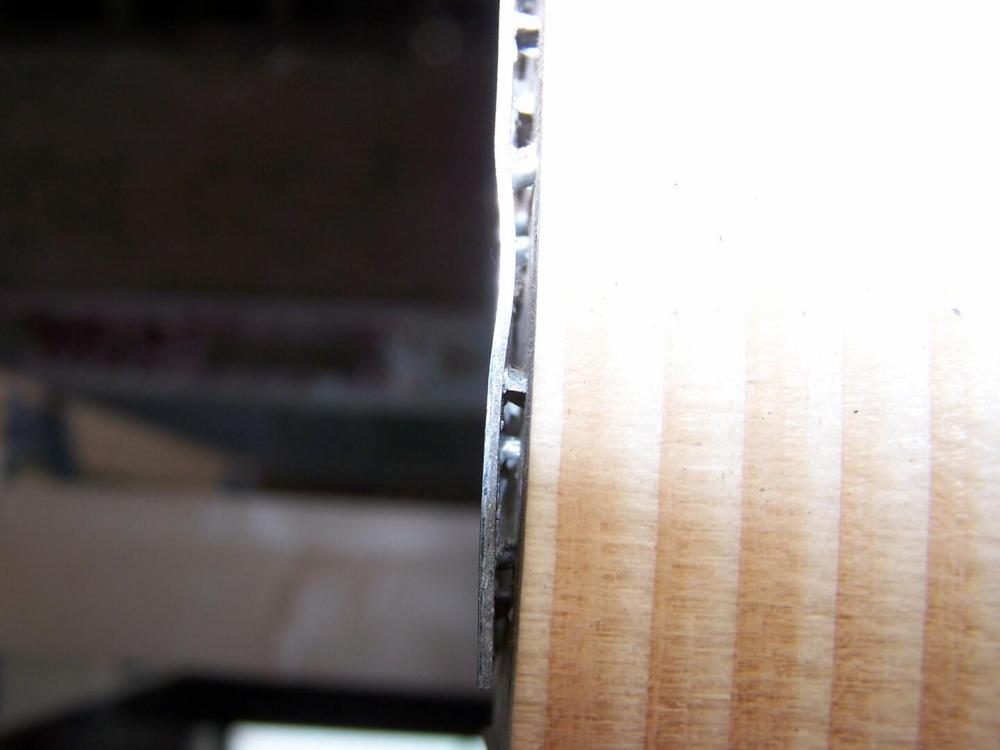
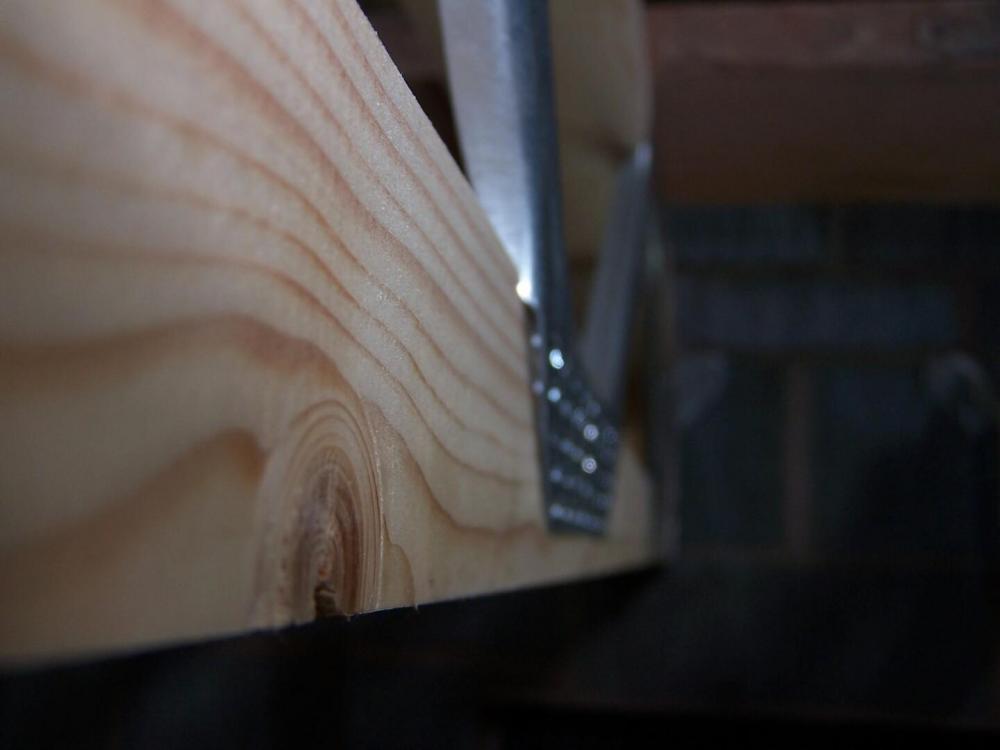
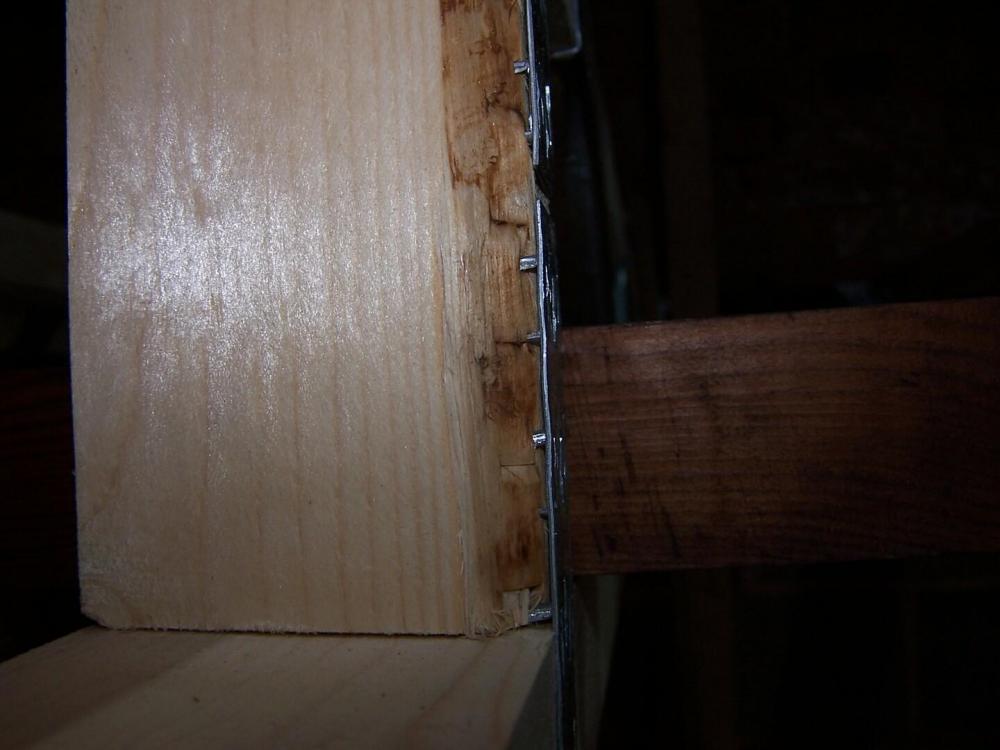
I sent over pictures and simply asked if the fixings were ok. His reply was that it's really difficult to get things perfect on their machine. My understanding there was that he thought they weren't perfect. Here are pictures showing the upward bow in joist 3. Joist 2 in these pictures is the corkscrew. I've numbered the joists in the pictures to indicate when I switched direction. Some pictures of the fixings shortly.


-
Slightly more reassuring to hear that it's not just my set of posis that are cattywompous. Is there a general rule of thumb for nogging placement when trying to straighten joists out? Start at either side of the room and work in, start in the centre and work out, etc? Some of the fixings on my posis where not as affixed as I expected. When I questioned them with the maker, their production manager said they were ok and that it's really difficult to get things perfect on their machine. ?
-
Everything has been stored inside, as instructed with the paperwork that came with the posis. They were trimmed, dropped in the hangers and left for a little while. I didn't check the second room to see if they are behaving the same. I'll check tomorrow and take some pictures if I remember.
-
I have had mine sat loose in their hangers for a little while. This evening I've been measuring and cutting noggings for under the restraint straps and to my surprise the joists are anything but straight. I'd expect this kind of mayhem from timber joists, but engineered? One of the joists is trying for a corkscrew. Another is bowing upwards in the centre by a few mm. I don't think any of them have parallel sides (mostly this is because of lazy construction by the supplier) Those of you who have fitted posi-joists, how have you found them when in situ? Wonderfully straight and true, or all over the shop?
-
Telescoping mitre saw at Aldi - 30th May
Digmixfill replied to Digmixfill's topic in Tools & Equipment
After a little UPS snafu the saw and stand have arrived. The saw is a rebadged Scheppach HM80MP. Comes with a 40 TPI multi material blade installed. Out of the box the bevel adjust lock stops required adjustment and the laser alignment required adjusting. The dual slides for the saw feel nice and smooth, no free play in them. I've done a few test cuts and it seems good enough for what I need it to do. -
Telescoping mitre saw at Aldi - 30th May
Digmixfill replied to Digmixfill's topic in Tools & Equipment
I've taken a punt on the Aldi one. I'll post observations when/if it arrives.