Digmixfill
-
Posts
204 -
Joined
-
Last visited
Everything posted by Digmixfill
-
I tried searching for details of allowable overhangs, offset joints etc, but didn't find any wall plate rules other than minimum 38mm deep, must be lap jointed and the 3m/3 rafter span minimum length. If overhangs and offset joints are acceptable I'll experiment and pick the option that is the least offensive I'm going to be the chippie, I hope. The new inner walls are equal heights, but with the building itself not being fully square they aren't parallel. Only two birds mouth per rafter, but I won't be able to template and copy.
-
Re-roofing with new deeper rafters. They are going to be notched on to the wall plates.
-
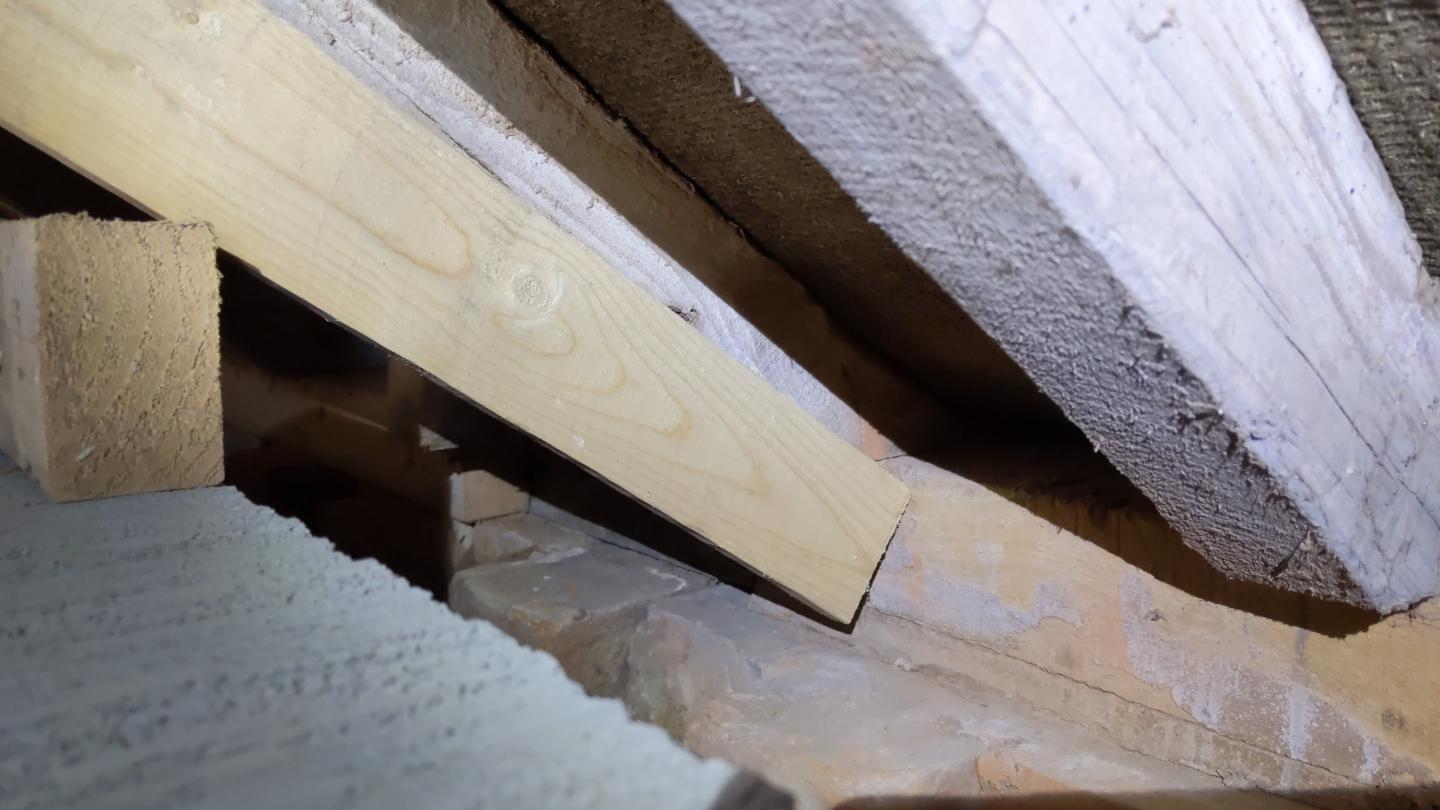
Hello everyone, I've been dry fitting wall plates and have one niggle to deal with. It's an artefact of my wonky walls When I built the new inner leaf it was stepped back from the existing walls to form the cavity. All of the other junctions are fine, but one junction across an internal wall has an offset of ~ 15mm. If I place the 75x100mm wall plate straight across here I get an overhang. What is the best way to deal with this?
-
Really? It would make my life much easier if I could use a small plate under the valley rafter alone and then step up to different level on the other side of the wall. The thing that steered me away from that is "Wall plates should be a minimum of 3m or extend over at least three joists". The valley rafter wall plate would fail all of those requirements. The small wall part might also fail those. I don't think I can get three common rafters on it at 600 spacing unless the first rafter is tight up against the wall.
-
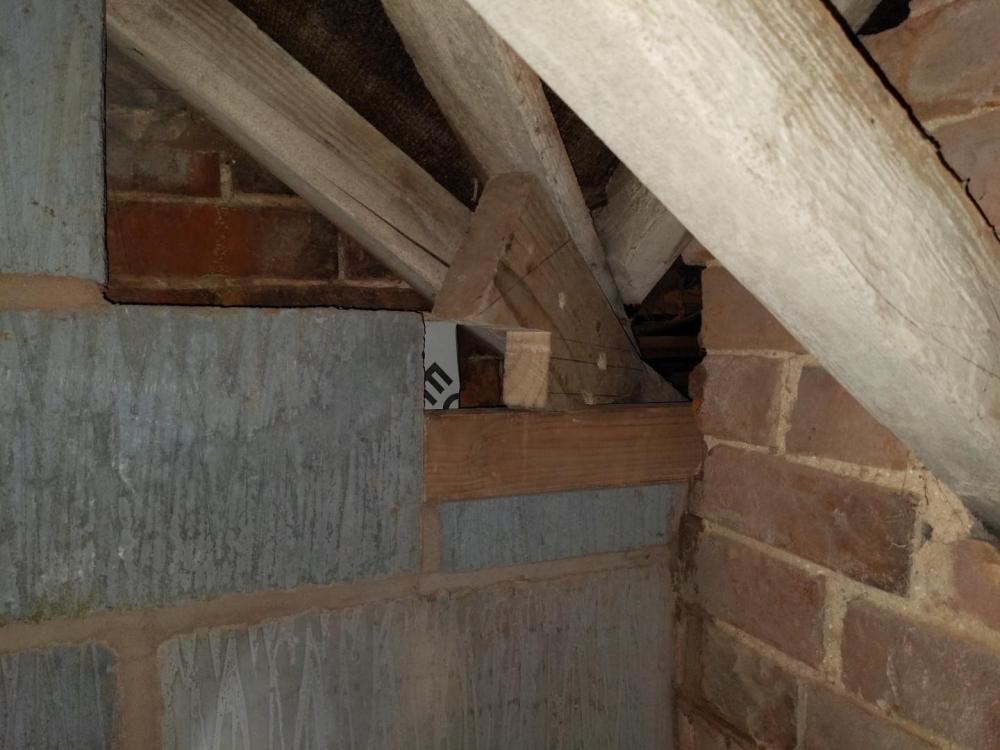
It's not clear from the images I posted earlier, but the block wall in the picture is short. It provides a cavity to the outside wall up to perpendicular wall of the single story room on the other side. I would get two or three common rafters on the double stacked wall plate and the valley rafter on singe depth end of it in the room to the left. New common rafters would continue in the existing wall plate position to the right.

-
If I build up the masonry where the common rafter is it would make the wall plate timber under the valley rafter very short. Probably 300mm long.
-
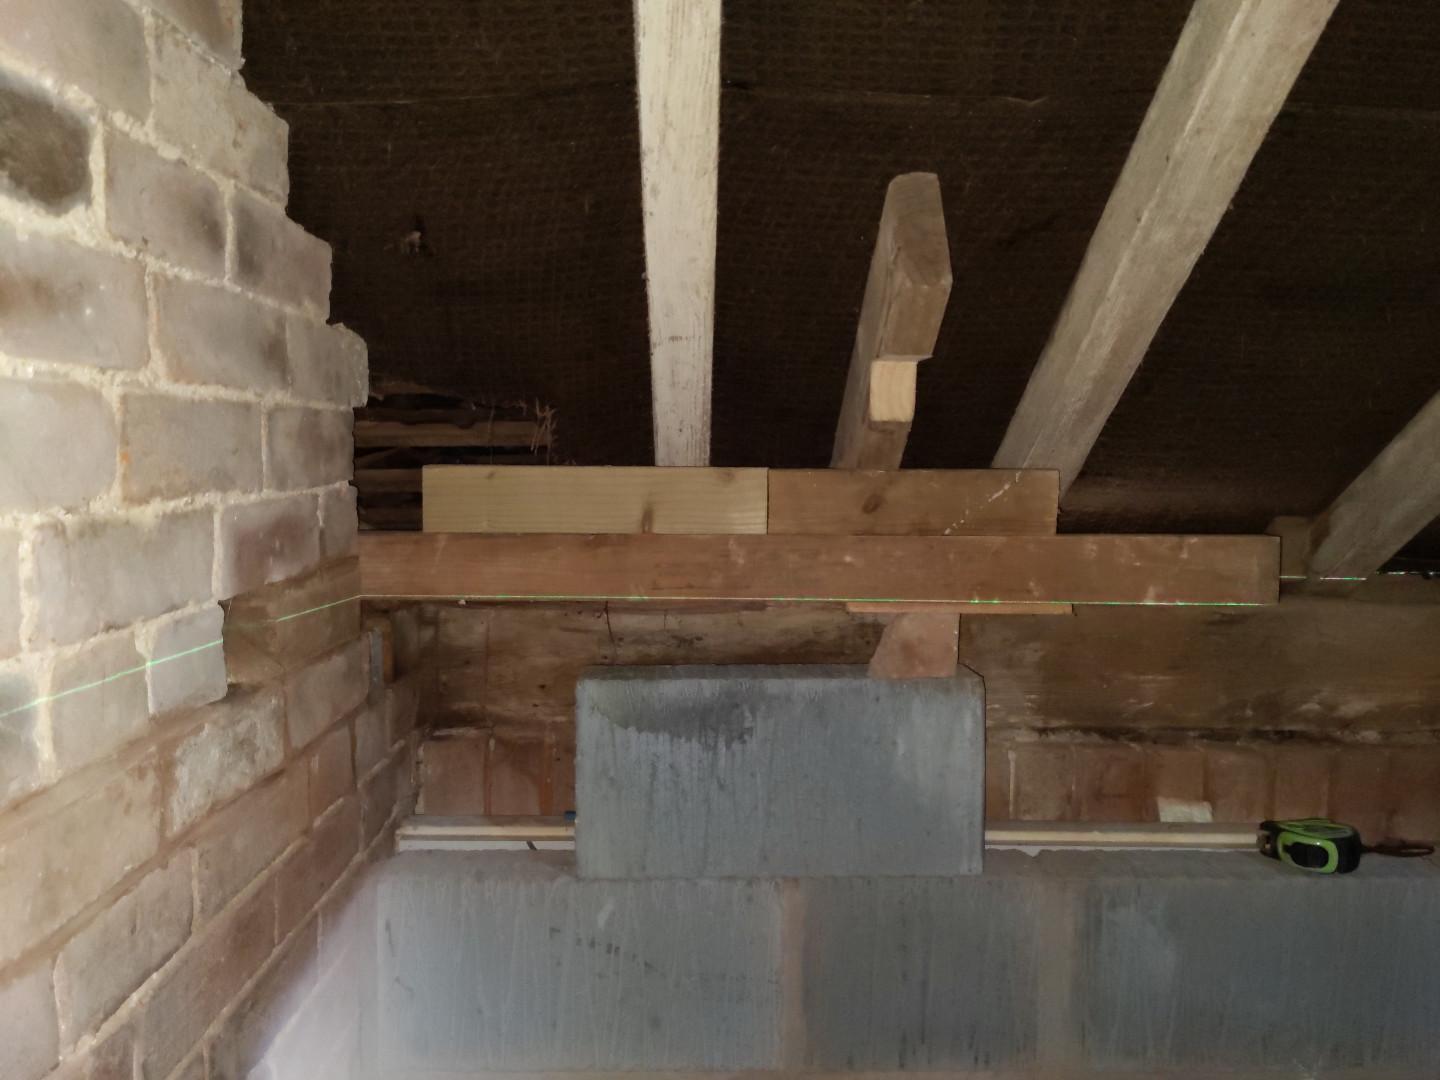
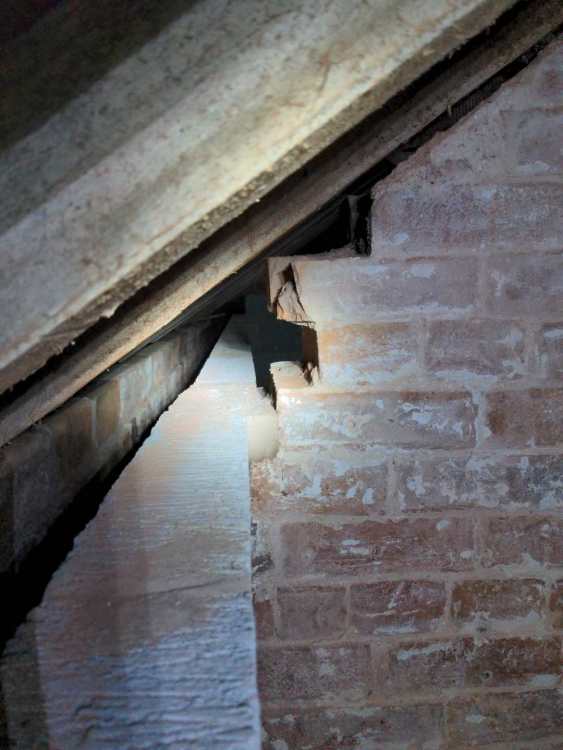
Ladies and gentlemen of the jury, New internal leaf stepping back from original walls is causing a height difference between the west and east wing of our L shaped building. Is it acceptable to stack timbers in wall plates? In the mocked up example I have a stunt valley rafter sat on a 75mm wall plate in the outer corner of our L shape. The wall plate is around 1.6m in length and passes through to the south wing, and has another piece of timber above it to take up the extra space beneath my stunt common rafter. Laser level is set to the masonry top on the west wing.

-
Vaulted roof insulation over dividing walls?
Digmixfill replied to Digmixfill's topic in Heat Insulation
This was part of my thinking. It worried me that I couldn't find a single instance of someone insulating over a masonry internal wall. -
I have a few dividing walls that go up to roof level between rooms. They all need some attention. The whole top floor will be vaulted (thanks @George) and the roof will have insulation between and under the rafters. I've been thinking about how to fit the insulation and VCL at these wall points. Do I shorten the wall a little and run the insulation and VCL over the wall? Do I take the wall up to the rafter level and insulate under the rafters up to the wall and VCL a down stand at the wall? My google fu has failed. I can't find a similar circumstance.

-
AFDD needed for HMO and recommended elsewhere
Digmixfill replied to Temp's topic in Consumer Units, RCDs, MCBOs
I like the idea of AFDD but "very reassuring when you look inside the AFDD"? There are electrolytics in the example AFDD. That's not reassuring to me. What do you think the longevity of that AFDD will be? I'd much rather see polymer capacitors in something that I wish to rely on. -
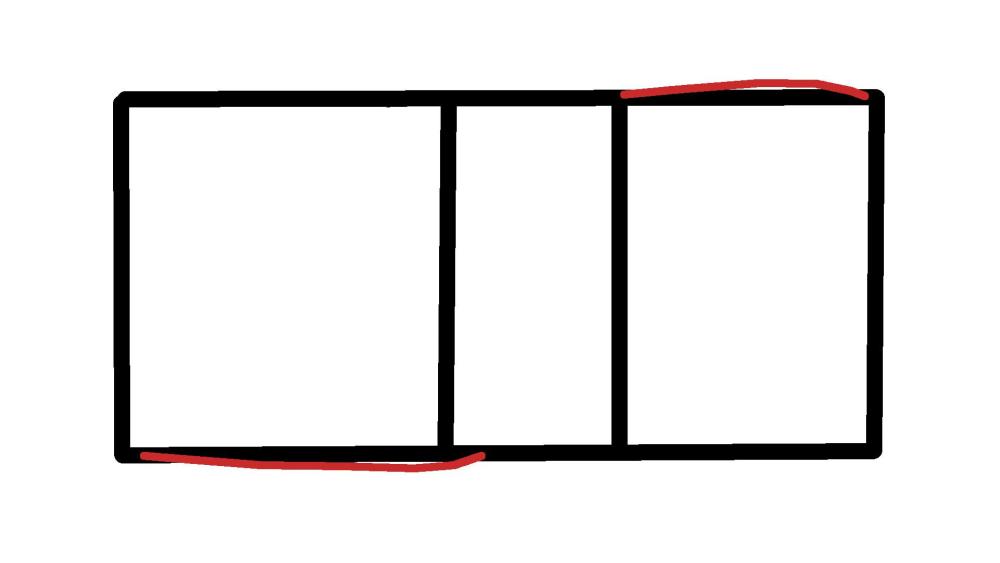
A plan view crudely indicating where the bows are. Black = solid 9 inch wall. Red = rough line of bows. End to end is approximately 14m. Top to bottom approximately 4.5m.
-
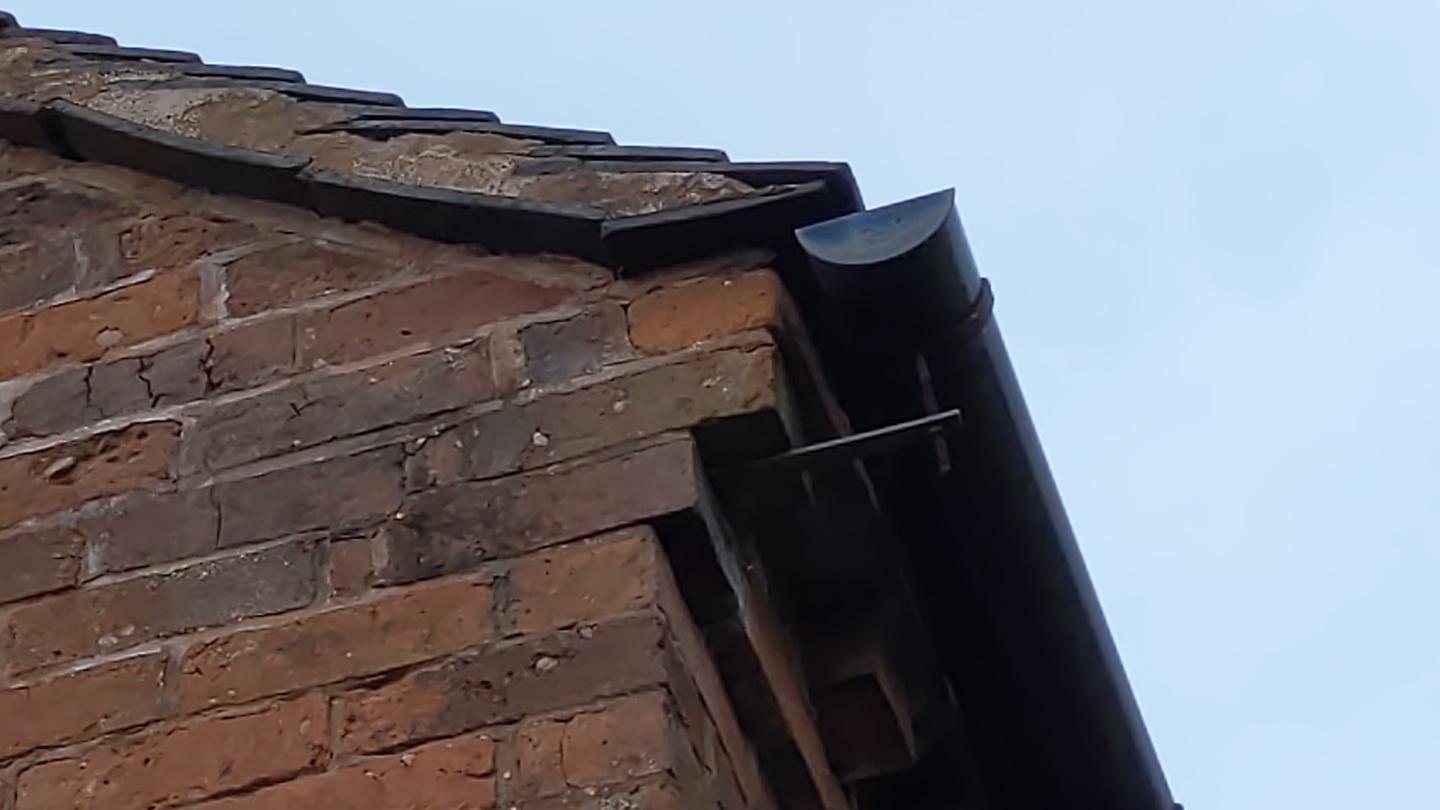
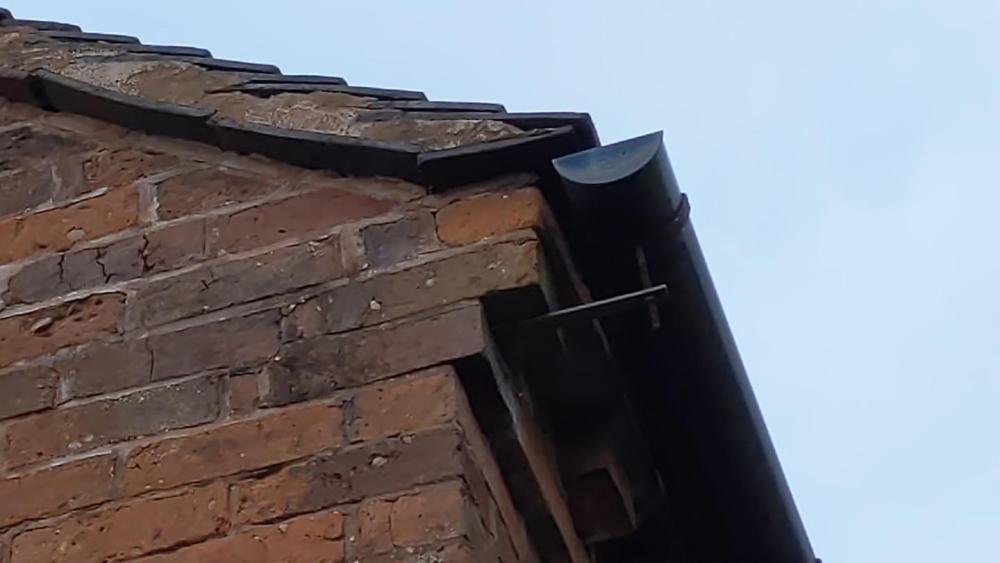
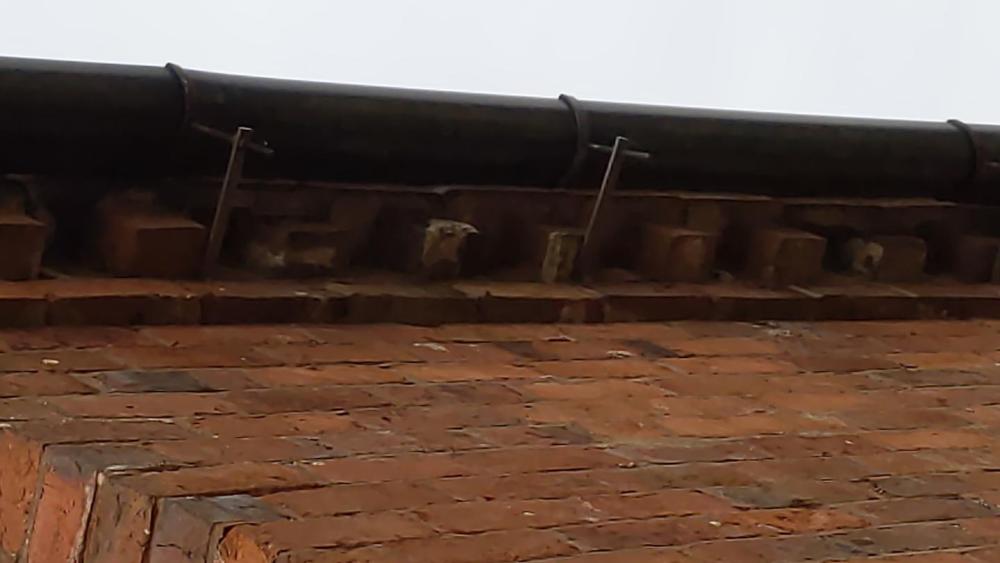
The rafters terminate in the wall cavity. Nothing protrudes through to the outside.
-
That would fix the bowed section and raise the other section accordingly. Would I just plane down the rafters that would become too high?
-
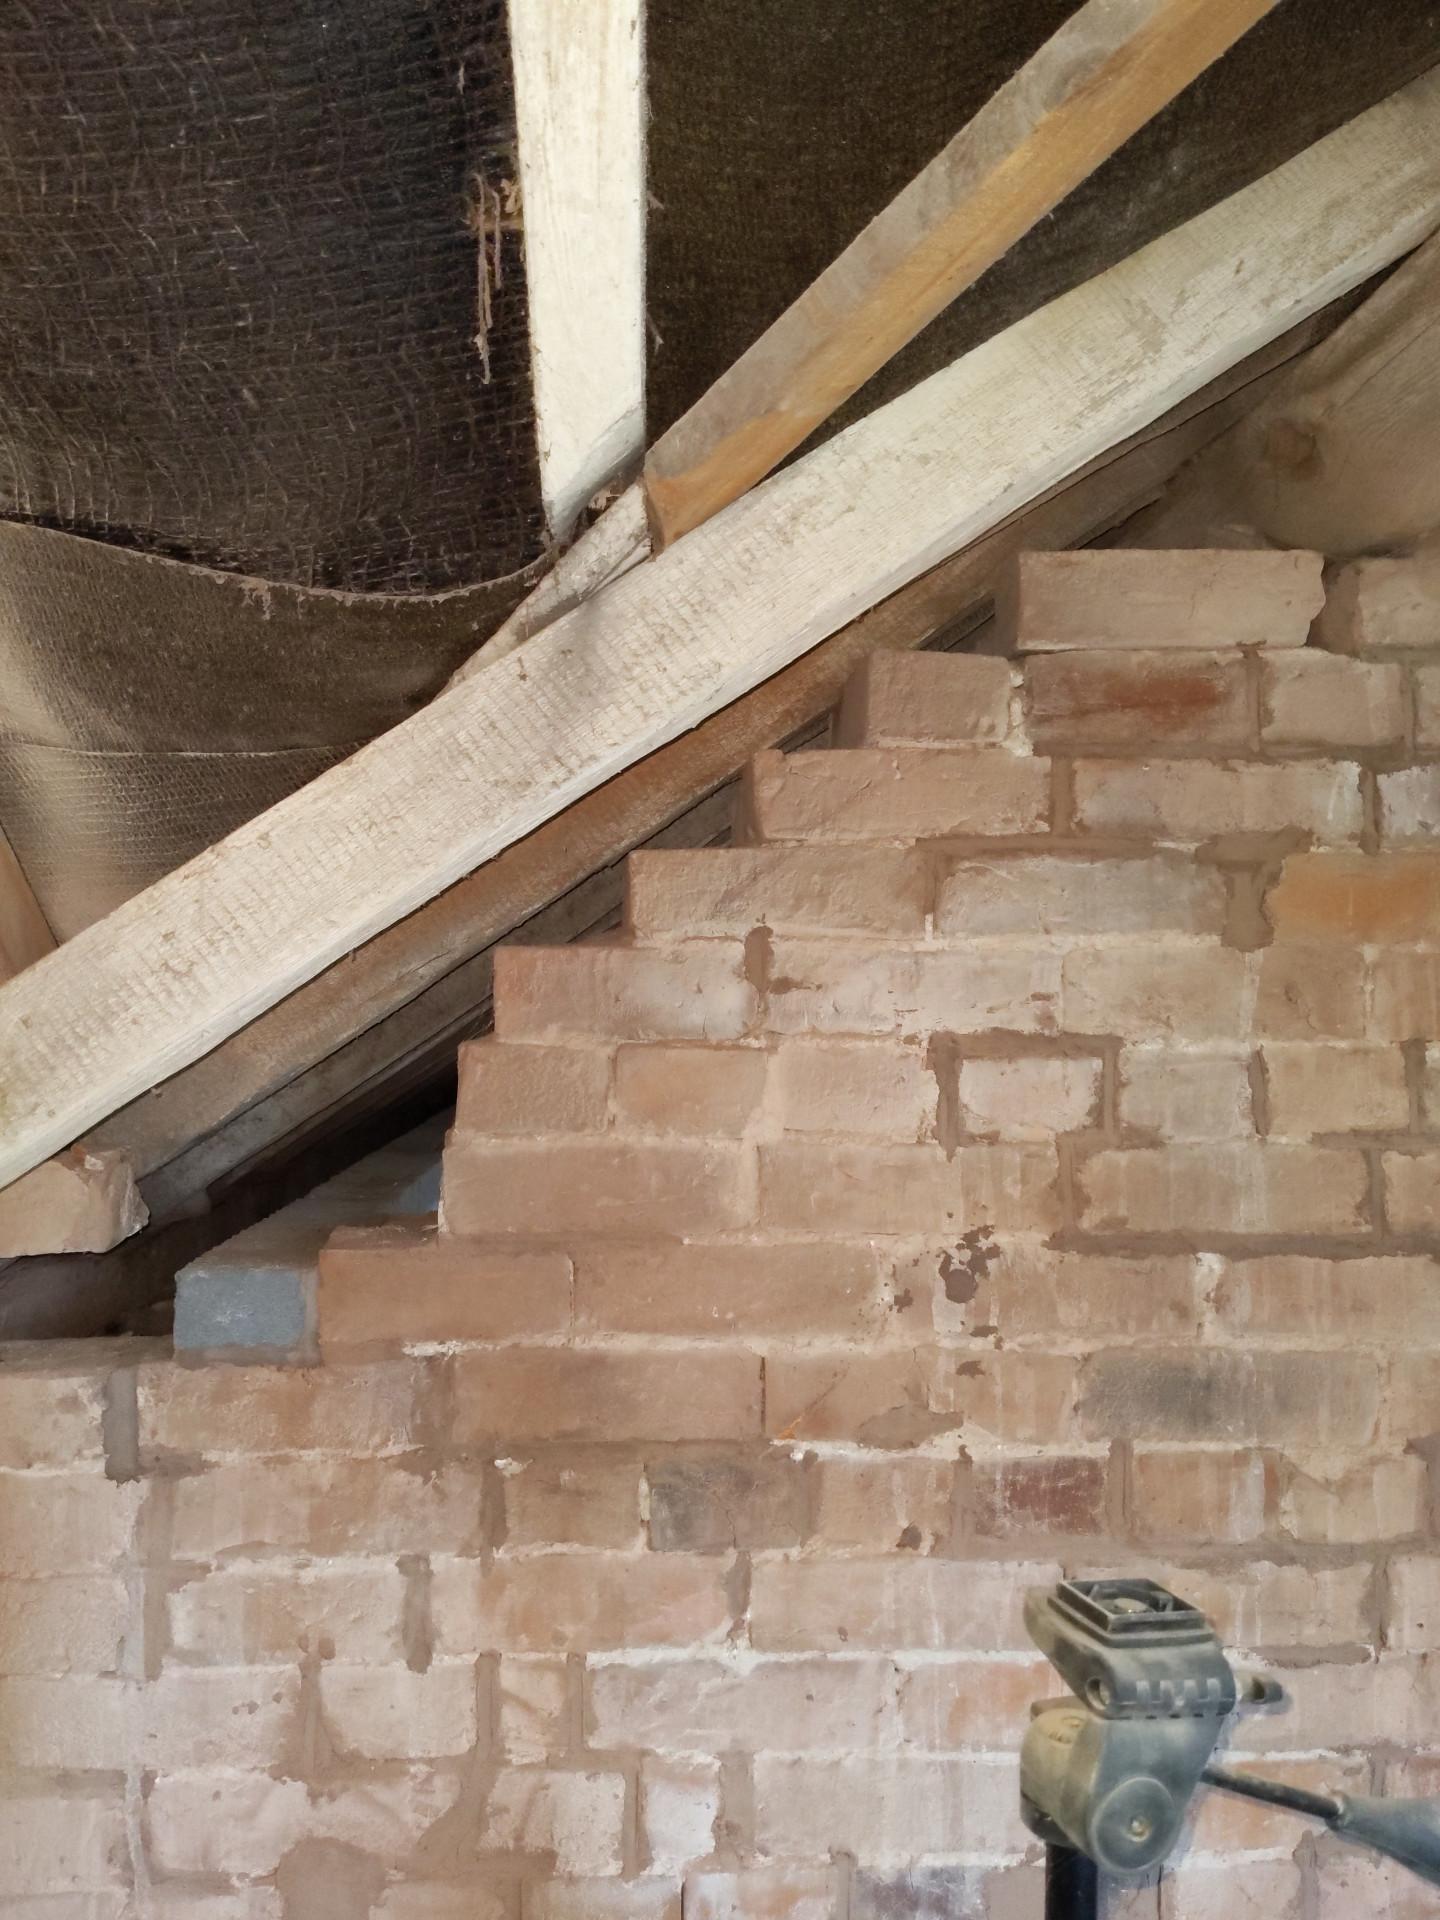
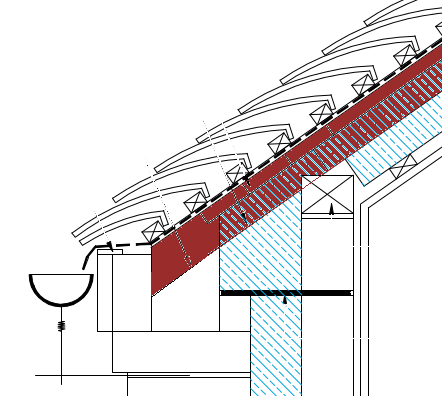
If everything was true the rafter position would be like this Hopefully the pictures show enough detail. This is the short side. The gap between the inner leaf and the old wall plate is 240mm. This is the longer side. The gap between the inner leaf and old wall plate is 305mm. The bits of new timber aren't in the correct positions, but are relative so will hopefully be a decent visual representation that the larger gap will cause the rafters to terminate much lower in the void behind the corbelling.


-
Cut roof. Currently with purlins and ridge board, but will probably become ridge beam with purlins removed.
-
I have new inner leaf with cavity against an external 9 inch solid wall. When I fit the new roof the ridge will be level and the new wall plate on the inner leaf will also be level. With the rafters sitting on the new ridge to wall plate line the gutter line on the bowed wall will be quite a way off on some places - up to 100mm bow. The building has suffered roof spread in its past and some parts of the spread have been repaired. Structural engineer didn't seem too bothered by it so it is how it is. When re-roofing a building where the eaves, wall plate and ridge don't line up how does one tweak the eaves end of things? I'm making the assumption that I can't just make the wall plate cock-eyed and call it done.
-
Any downsides to removing purlins and using ridge beam?
Digmixfill replied to Digmixfill's topic in Roofing, Tiling & Slating
Just quickly checked and I can fit 150mm rafters without any issue. Because the outer shell is anything but straight the space between the current roof and the new inner leaf varies and in some places I could fit 200mm. This reminds me to post another thread about how to deal with this... -
Any downsides to removing purlins and using ridge beam?
Digmixfill replied to Digmixfill's topic in Roofing, Tiling & Slating
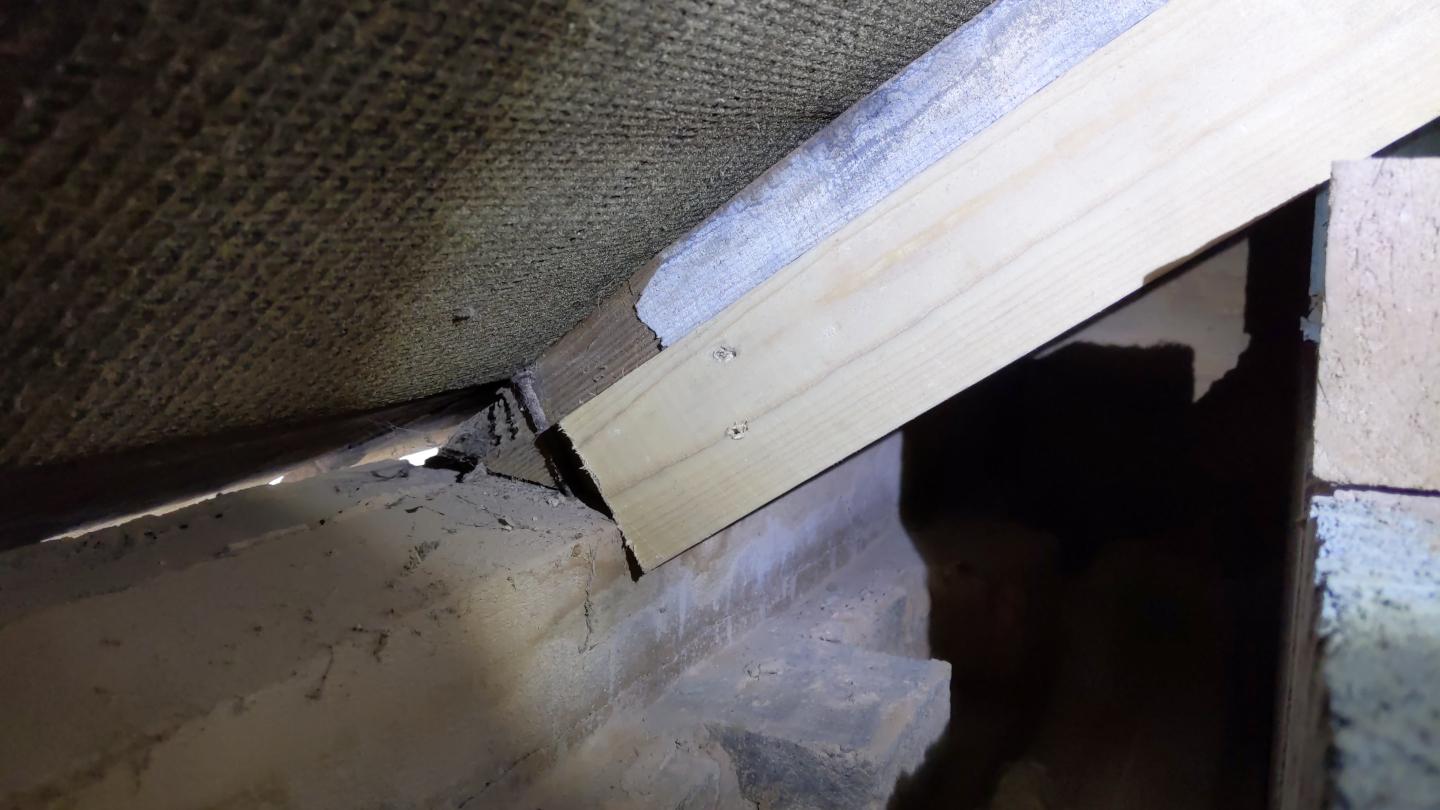
To keep increasing the rafter height and lowering the ridge beam position, at some point I will need to start chopping into my new internal walls to lower the wall plate. I can carve the nose of the rafter to fit into the space behind the corbelling, between the external brickwork below and the tiles. -
Any downsides to removing purlins and using ridge beam?
Digmixfill replied to Digmixfill's topic in Roofing, Tiling & Slating
Our rafters terminate in the cavity behind corbelling. I would think there is a limit where lowering the ridge beam height to accommodate the deeper rafters would cause the end of the rafter to kick up tiles. All of our second floor is room in roof and head height is limited in what will be a shower room. I can play with the space available to see what I can get in. Still no downsides to the idea though -
Any downsides to removing purlins and using ridge beam?
Digmixfill replied to Digmixfill's topic in Roofing, Tiling & Slating
Building control will be checking everything, as usual. Like most on here I plan to over insulate It's already designed to be a room in roof, so no storage space to lose. -
Hello all, I've currently got 3.25"x2" rafters and purlins with a ridge to wall plate span of a little under 3m. I'm considering upping the rafters to 125x47mm and installing a ridge beam. I can only see advantages with the change. Then I think - If that is the case why aren't all room in roof ridge beam and not purlin? Are there disadvantages that I should consider?
-
Purlin span table that covers 4.5m?
Digmixfill replied to Digmixfill's topic in Roofing, Tiling & Slating
Thank you very much, that's perfik. 2x47x300mm span 4.65m@C16 and 4.85m@C24 at my spacing for the higher weight dead load. -
I'm hunting around for a span table that will give me some purlin size options for a 4.5m span with purlin spacing at 1.5m, and so far turning up empty. My plans say "existing" for the purlins. I have a mishmash of sizes currently and if I'm going to replace them all I may as well standardise them. The existing purlins for the 4.5m span above are 250x75mm these seem a bit on the svelt side. Anyone have a span table that covers 4.5m? TIA.
-
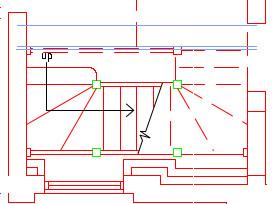
Laying P5 to edge of stairwell - leave a gap or not?
Digmixfill replied to Digmixfill's topic in Floor Structures
This is our stairwell edge It's this kind of detail that has me thinking about the entire edge of the stairwell.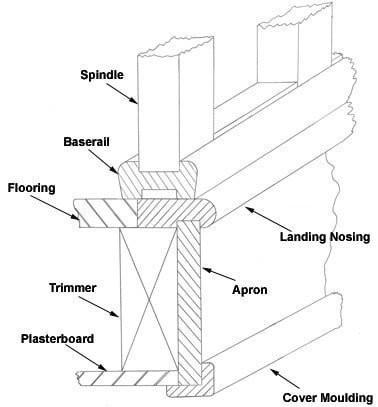
-
Laying P5 to edge of stairwell - leave a gap or not?
Digmixfill replied to Digmixfill's topic in Floor Structures
Glue and screw everything except the trimmer edge. Cut back if required and glue and screw the edge just before installing the handrail. I like this idea. We've only looked a rough ideas for stairs. What we end up with will be heavily determined by how much budget we have left overspent All of the P5 boards will be end on to the stair opening, and connect through to the adjoining rooms. If I went with this option I'd probably be better not installing the boards just yet. Thanks for the suggestions. I'll think about them whilst fitting the noggins.