zoothorn
-
Posts
4774 -
Joined
-
Last visited
-
Days Won
3
Everything posted by zoothorn
-
But the point I was really making was, why if my system presently doesn't have an extra huge 1m x 0.5m tank, should a replacement system have one? Also my other point was, if they'd given me the details of the proposed hardware which didn't include this damn huge extra thing needing to go inside... why is it suddenly appearing as deeming needing to be fitted ? I told them due to the noise of their hardware in the bedroom, under no circumstances will I be having the new box/ anything at all in this bedroom or any bedroom. For obvious reasons. If it has a circulating pump in, & this wretched thing is solely to do with the very overnight frost mode situation that caused me so much grief... then the last place I want it, is anywhere near bedrooms. As then Im in the very same boat again! So proposing I just get them to place it in the very spot, the problem spot, where the old problem unit was... is completely counterintuitive/ redundant as any idea ever was. And being so huge, there is nowhere else in the small cottage it can go, apart from the loft.. which they say is not possible due to maintenance access to it. This damn frost cycle!! The bain of my bloody life.
-
Hi chaps. After a 1.5 year fight with Vaillant about a dreadful, intrusive noise from a frost protection mode ( emanating from a hydraulic unit box absurdly placed in a bedroom ) during the small hours, a situation Ive outlined on here before, Vaillant accepted the hardware 'flaw ' & finally agreeing to replace the whole system. A huge victory for me, & vindication of my long fighting them ( not any installer ) about a hardware flaw of theirs. Agreed in november. A new installer then to innitiate a visit to oversee the replacement ( another 3 month wait). The replacement: a ' monoblock ' ashp, mine with the problem bedroom ' box' is currently a ' split ' ashp. I have no idea of the difference, but, the choice was carefully chosen by them. So far so good. Huge apologies/ promises my findings passed to German designers no less, to re-design ascociated software. Before they agreed the redo, I had the opportunity to pore over all emailed aspects of the new system info... specifically what the new ' box' is/ how it might differ or similarities/ its size, & where WELL AWAY FROM BEDROOMS it could go. Perfect spot chosen, even a card box made to simulate its size. Once I was promised it wouldn't be as noisy as the one before, & agreed it can be located away from bedrooms, & lastly where I specified I wanted it... THEN I could agree/ give the go ahead/ with thanks etc. All boxes ticked, t's crossed, i's dotted. Diligently, over a year of effort. The installer comes. Need to put a buffer in. A what I say? A buffer. A huge 1000 x 500 extra tank. I had no idea of. I have no clue of. Why if there isn't one now, should there be need for one in a replacement system. Why wasn't I told of this. Q after Q. All my plans scuppered, as I donot have room fir such an extra tank, let alone furious any extra huge hardware vessel should even be needed: the more there are, the more the likelihood of noise, let alone taking up small space I have in a 2 bed up/ 1 down cottage. Ifit could go outside.. unhappy but ok. But it can't. I mean FFS. Can anyone advise? I am furious about this as now ai cant accept/ have the replacement. Vaillant emailing saying I'm lucky they would be paying for the wretched thing. Lastly, to add insult, the bloody thing is to aid the ' frost protect mode' the very damn mode that's caused me all the grief & the year+ fight. Thanks for reading, zoot.
-
That's generous Onoff thanks. Yes missing out a tile centre back... hmm I think this is the way. You see Im wondering if my alternate idea, using standard thickness tiles (8 mm or so) which I found enough of here & teracotta couloured... might not be suitable from a heat pov. The quarry porch ones Im 1 short of, are much thicker giving me the ideal heat barrier, plus the added height I want too.
-
Good points, choice as simple as I guess. Ok Ive now got a new idea to make this easier ( annoyingly 1 quarry tile short = a compromised job if I use these). Ive found some 10"sq normal thickness tiles here. Enough to do the hearth top -and- cover the 3x upright faces/ sides. Neat look. So as my timber/ ply frame is solid as heck.. can I just go familiar way, tile adhesive on the ply & grout? Ah just thinking though: Would standard tiles actually be sufficient for a stove hearth-? Thanks zoot.
-
Great that's a plan, ie no nails & grout.. mind you now can possibly use 4 old terracotta 440mm pavers, but my quarry tiles would look better, a visual link to my stove hearth in main room, & porch too.. but infuriatingly I'm 1 short. Whatever I use, I lastly need to consider how to cover the front 3 timber edges. Im really a little big with the hearth as it is (800 x 800 the back two long sides) so I dont want to add any thickness of ' cladding ' to these 3 edges. I just need to finish off these edges ok enough. Any ideas? Tannalised timber of course. Thx zh
-
Hi there Onoff. This stuff is a different idea, Ive obviously not heard of it. What I have in mind now, is same tiles as my porch/ 1" thick jobs. Will save me £20 on 4 pave slabs which won't look too nice. Im one short but will have to compromise. A faff of a job grouting etc which I hate. But with new this idea in mind, would it be usual way, tile adhesive/ grout onto the ply? Thanks, zh
-
Hi John. One nog's a fraction not straight. The shame. But making up for it with a marine ply top! If I go pave slabs ontop, seems likely/ cheapest.. would it be mortar to use on the ply? Fwiw Ive pva sealed the ply top. Thanks zoot.
-
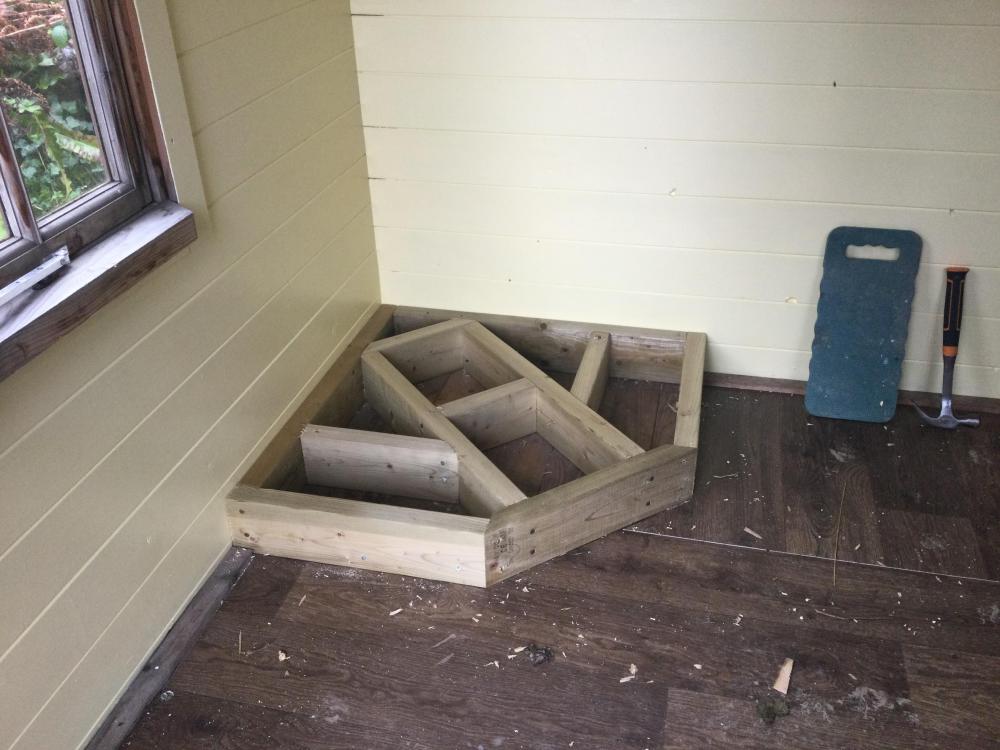
BC aren't to know about this job/ no need them aware of it. Here's my base..
-
I understand what your idea is here now/ clever, so the hearth flush with floor. Lino tho so not laminate. If I don't make hearth too big it shouldn't intrude too much, big enough to be safe enough tho. thx zh
-
Hi ProD, it's lino over the t&g timber flooring. Is that laminate? Im not sure. But easy to take up which is what Ive planned: Ive got my 5x2 timber today, to make my plinth frame tmrw. Ply top then slabs on for a hearth.. will be 7" H or so. Its stupidly low as you can see as it is, so defo needs a step up. Those interior walls btw.. terribly waterstained, so a major effort to get painted like so! Thanks, Zooter
-
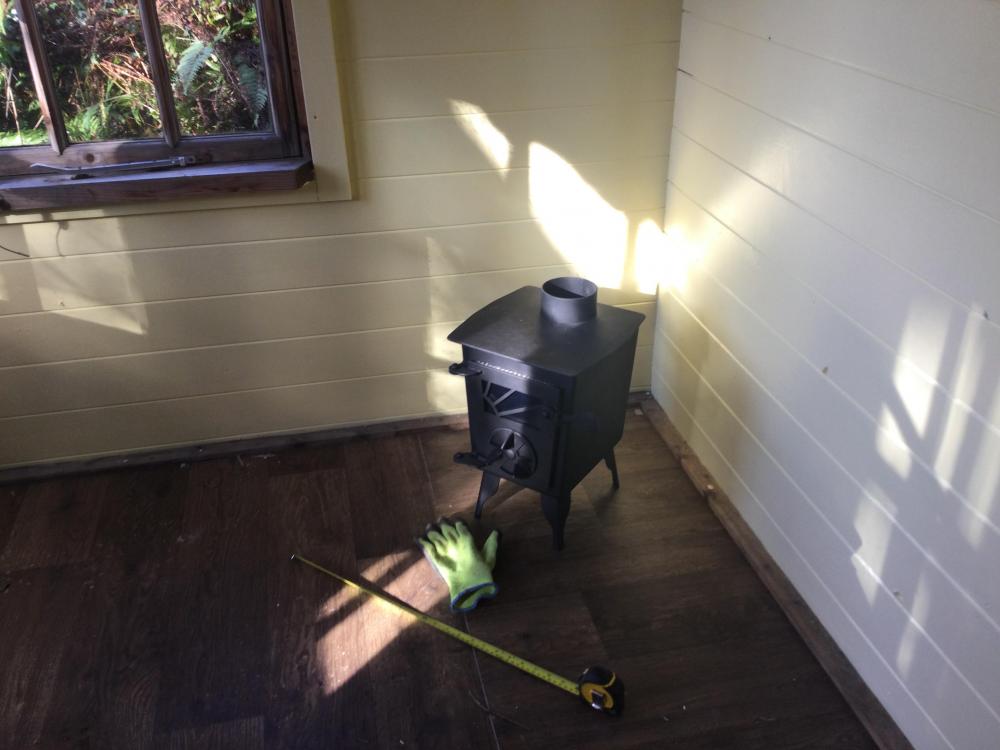
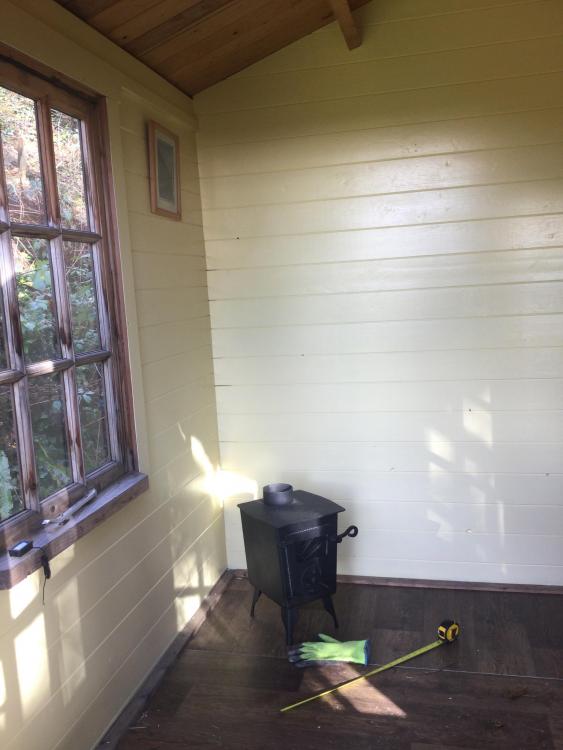
Here's my set up.. so Im thinking a 7" or so plinth/ hearth. You can see how low it is like so! Then its 1450mm to ceiling from stove top.
-
Hi ProDave, yes bingo! That is exactly my stove.. or the next one up/ but this is an ideal pic to work from. Even the hearth shape: every inch of it matters as will take away from ' living space' already at a minimum. So just like this but raised up I dunno 8" or so. I'll make the timber 'plinth' roughly from my clip example in #1, top it with ply then come back.. a nice but if slate like so though a premium. Looks great though. More likely 'fake slate' pave slabs, tho the contoured top will inevitably mean a wobbly stove to sort out. Fantastic find that... was it somewhere in the facebook ' website' ? ( like you I refuse to jump onboard with social media). Thanks, zoot.
-
@jamieled great pics thanks Jamie. Small windy smithy stove! I likes the sound of that. Actually lookslike my stove is based on this design. Just a diddy window added. A tad smaller maybe, yours looks to be a 5" flue at a guess? So your idea here, ie far from building regs/ ideal safety parmeters etc, is morelike my thinking tbh. Although taking on board some very good points from Peter & ProDave. So I might go halfway between, pull stove out a bit more. Spurs me on though! Cheers, zH
-
Good points re. the flue: now I do plan on just going with a single lined 4".. but take your points on board: if it does seem too hot then I'll have to line this adjacent corner behind the flue, as only a short distance to ceiling of maybe 1.4m from the stove. I might just pull the stove out a bit in lieu of what you say here though. I was thinking a simple single lined flue would be useful to add to the heat into the space, over an insulated one. Hard to judge what heat my diddy stove might be capable of throwing out. Thanks zh.
-
Hi Dave, no sorry that doesn't seem to work (I'm with you re Facebook.. I only joined it to buy the stove: seems websites are a bit oldskool now). Bow Mill Stoves, simple as/ manual.. it's not quite that sort of seller.
-
Hi there Peter, glad to have your thoughts again. Stone paving is a great idea. So Im thinking make a smaller frame roughly as per my clip, board the top.. & yup some paving slabs ontop. Cheapest way surely. As the cabin's all wood then I guess it's not necessary to have heatproof timber for the frame, maybe glue on some slab slices to cover it to make a plinth, the slab hearth top just overhanging say 2". The flue is only 4", & 2x1m of this is cheap. Its the wider steel roof standoff section, & chinaman hat thing on top the costlier bit, but I don't think too much. I hope it'll be half the stove cost say £120 for the hearth & chimney made & fitted tbh. Thanks, zoot,
-
This is great info/ I recall you put this pic up before on my cabin build thread. Ideal eg to go onwards from thanks. So approximately this size hearth, the width can be a bit more as its to go in a corner, & say a few inches more fwd. But if I could get it similarly compactly into the adjacent walls, pulled a little further out perhaps.. but as in a corner helping matters.. that should be fine. So I just need to design the timber raised bit, & choose a cost effective but decent enough looking hearth. Slate.. way too expensive. Weight might need consideration: the floor is only a timber t&g affair so can't deal with a huge ammount.. but then if I can stand in the corner then I guess that is weight tested enough. Thanks, zoot
-
I can only point you to his Facebook page, & the model I have Cadet 2.5kw. https://www.facebook.com/page/1430247350562911/search/?q=Cadet Thanks, zoot
-
Hi Jamielad, this is basically what I was thinking. The wall shield board is n/ a just for now, this bit is surely the easy bit last. The hearth, or rather raised area below the stove is all I need to consider firstly. Now I have limited space in my small 3 x3 cabin, I can basically just lie down in it a few inches to spare. So I can't have the stove pulled super far out, or, have a super wide hearth. It neeeds to be minimum in size yet sensible enough. And same with distance to the corner/ the stove's position. Can you tell me what your size slate hearth bed is? And do you have any pics of the timberwork under it? Thanks, zoot
-
Hi ProDave, thanks for this, very sensible which is critical I agree. Thing is there is no such info with the stove, its a tiny 1 man handmade company the only thing I got was details on the baffle plate inserting really. So it's reallya case of looking at photo eg's on his site of customer's own installs & taking approximate dims of H from back walls, material that might consitute a ( raised ) hearth. Better still Id think glean pro info like the clip I put up? thanks zoot
-
Hi chaps, happy new'ish year to all on BH. I have a diddy 2.5kw stove, to install in my 3x3 log cabin, now the inside painted ( was badly water-stained before): quite a job, took many layers. As stove is so small/ low, I 1st want to put it up onto a hearth area. I've seen this timber idea ( usa ) which could perhaps be scaled down. Then a hearth layer of some sort on top. Is this the right sort of approach I wonder? Like this its to go into a corner. Opinions would be great, thanks Zoot. '
-
It was more to do with whether emulsion is suitable for wood walls. So the undercoat primer, is both a waterbased general primer, & some patches of it overcoated again with zinsser. Sort of a mishmash undercoat. It does tend to have wide ranging temps being an outside thin walled wood cabin, winter cold to very stuffy hot in summer. Can emulsion cope I wonder.. It'll be a heck of a job to redo it. Thanks for reading, zoot.
-
Mike I wonder if you could voice an opinion. Ive used the Zinsser BIN stuff over my bad water stains, showing through like dark muddy areas after I'd primed my pine log cabin walls with a waterbased ( no nonesense ) primer. It said on tin the primer was for wood, seems to have gone on fine.. bar the muddy stains. Great results with the zinsser stuff, perfect, almost all stains covered over whole 4 walls with 1x £20 tin. So it seems even if this stuff is meths based (? clean up told is meths, inside walls smell methy) it went onto my waterbased primer just fine. Now, top coat. Would you know if I can use an emulsion? I mean if my primer is waterbased, surely the topcoat would follow on better.. if it too was waterbased. I can only think therefore, of emulsion. But never known it being used on wood before. Thanks, zoot.
-
Thats good to hear. Good ok I might get myself out of a pickle with this then. Ive never heard you see, or known of ' mixing' layers of one layer being solvent based, then the next water based. Or in my case vice versa. Thanks Mike.
-
Anyone know if " Zinsser B I N" would work painting onto my water- based white primer coat? https://www.screwfix.com/p/zinsser-b-i-n-shellac-based-primer-sealer-1ltr/29661?tc=ZB6&ds_kid=92700052136101425&ds_rl=1243321&ds_rl=1241687&ds_rl=1245250&ds_rl=1245250&gclid=Cj0KCQiA-qGNBhD3ARIsAO_o7yl5PHVPdnr1qHXtAB7ASGPjpnRLBwpuy5KttRzHKK9O4oFkH88QT5MaAm_MEALw_wcB&gclsrc=aw.ds It is shellac based, but if folks use it often for ceiling stains (youtube clip shows, & glowing screwfix comments etc) , surely that's applying it onto water-based emulsion.. which I think mine effectively is. Only difference being a plasterboard ceiling, to my knotty pine cabin walls. Thanks, zoot.