zoothorn
-
Posts
4752 -
Joined
-
Last visited
-
Days Won
3
Everything posted by zoothorn
-

Help with kitchen renovation/ 1st house.
zoothorn replied to zoothorn's topic in Bathrooms, Ensuites & Wetrooms
Urban-backcountry-chic tap. Or get another one. Its in my face as I fanny about in me sink doing stuff, being too cool&BIG. godam tap. Tip top tap tipped for tip in top tourist trap. -
Help with kitchen renovation/ 1st house.
zoothorn replied to zoothorn's topic in Bathrooms, Ensuites & Wetrooms
"If you want it to not move, sand the edges lightly to get rid of the oil and then mark the angle of the end of the unfixed portion - assume you know how to do this ..?? " Here onoff.. its the moving/ bowing the worktop spiel that came with it says is sorted -with- oiling. Also the spiel shows pics of clamping/ bolting (kept placcy wrap on tops until only today to protect- spiel is underside of pretty pics facing out) so still feasable maybe.. & nothing decided upon until I come to do a job: the circular clamp c/o I could do with one of these cheapo holesaws I just got + chisel.. & a trench with a router.. IF that is, this is the very best method. If Peter's idea is as good, with the square ply bits, then I'll go that easier route.. but again damp issue- ply is very prone to moisture/ warping. It needs extra care/ consideration working with wood here. Do it once/ do it as best as, taking silly time if that's what it takes (it is & some!) is my way I know likely infuriating to you experienced chaps. -
Help with kitchen renovation/ 1st house.
zoothorn replied to zoothorn's topic in Bathrooms, Ensuites & Wetrooms
Yup homebase acacia tops. Ok understand all you say Peter, bar this ^.. & I read on the spiel they come with, that lots of oiling etc esp edges, to prevent bowing/ warping & water ingress. But you say no oil-? nothing? it surely needs something as the surface is very 'unfinished/ raw' as it is, &, the most pressing issue here: the area is -extremely- damp, I mean you get your (dry) post & it feels limp/ moisture laden. Constantly (bar this weird summer). Clothes always feel never quite dry.. you just get used to it, affected my lungs to begin with, but it is extreme. My Howden's back door -mdf clad in 1mm veneer, then coated copiously by me- bowed in a few months & expanded drastically too it jammed time after time/ complete cr*p tbh. On the other hand a new basic pine (internal) solid wood door near back door.. seems fine. Which is why I said yes to the tops.. but I must do ALL I can to seal from moisture, even 3x coats of xyz I'm happy to do due to the weird climate. -
Help with kitchen renovation/ 1st house.
zoothorn replied to zoothorn's topic in Bathrooms, Ensuites & Wetrooms
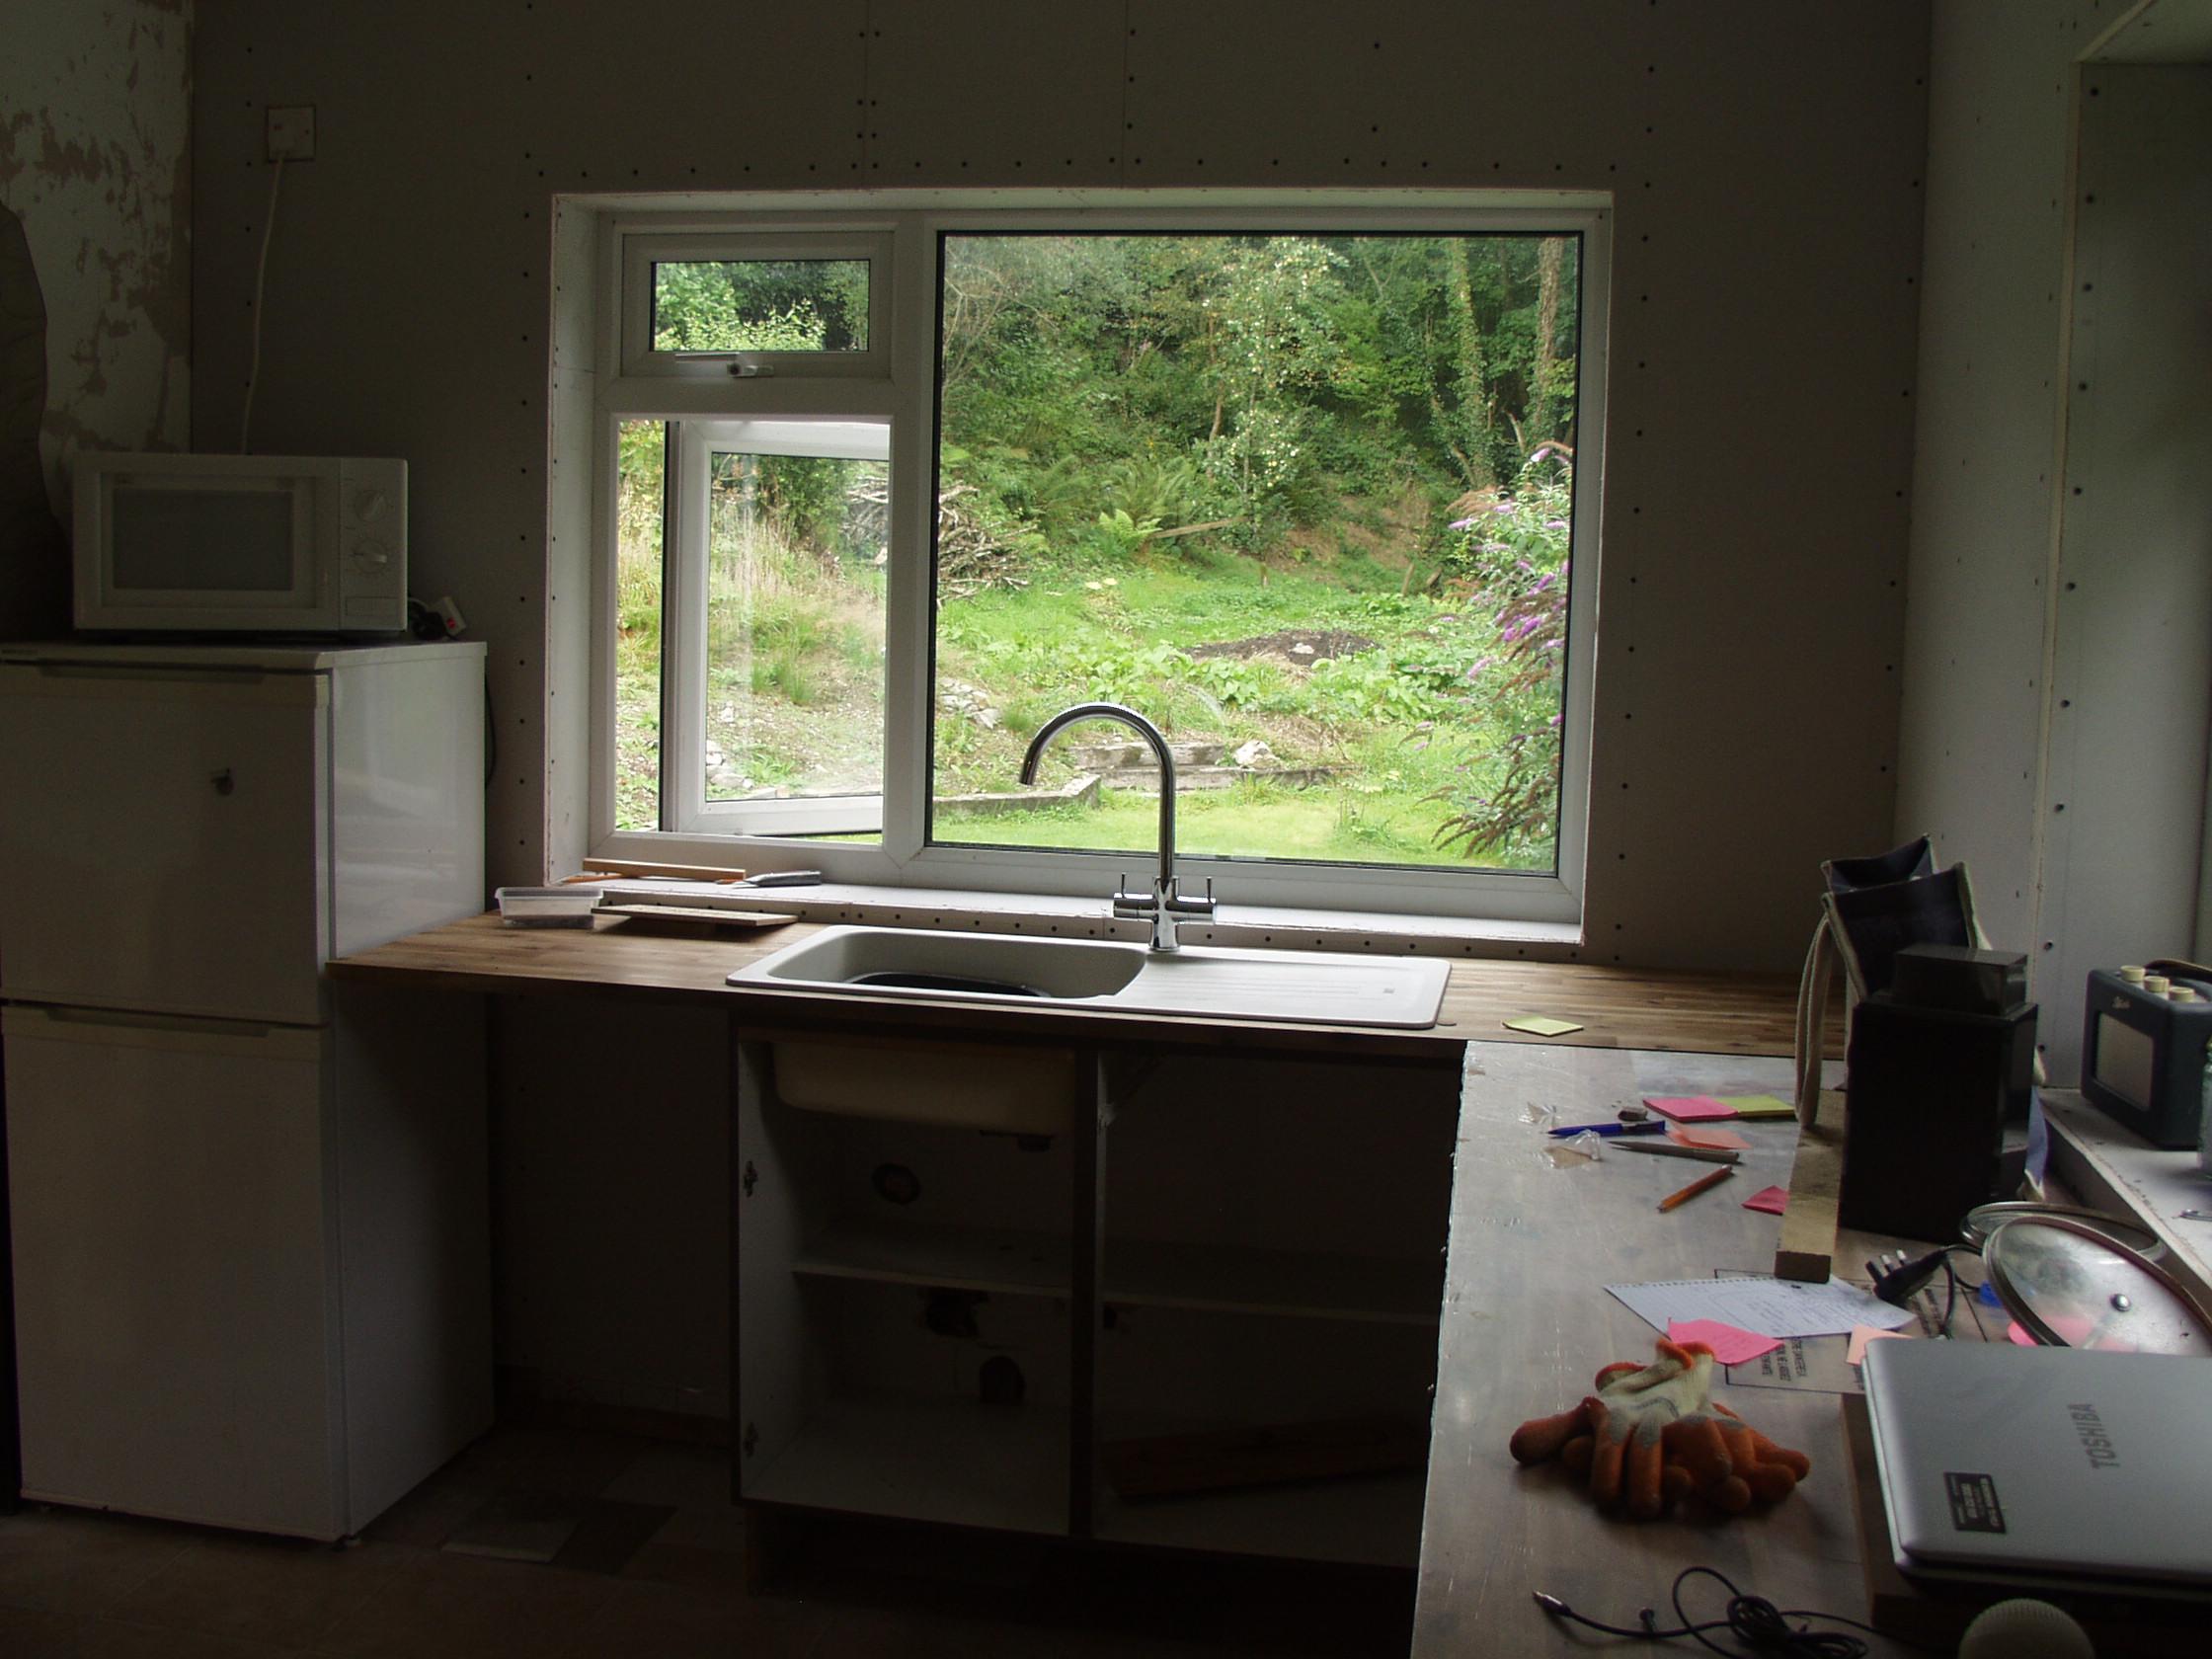
Actually the damn tap is too big.. for the kitchen being on the small side, esp moreso now, & spoils the view of the garden: old mixtap was a low squat job which didn't 'go into' the window area from this ^ pov. buggerit. -
Help with kitchen renovation/ 1st house.
zoothorn replied to zoothorn's topic in Bathrooms, Ensuites & Wetrooms
Now, the connectors are top RHS & the overflow thing.. advice on what placcy waste bits to get if you would chaps. Smart n tarty.. tap's rather IM A BIG SHINY TAP though..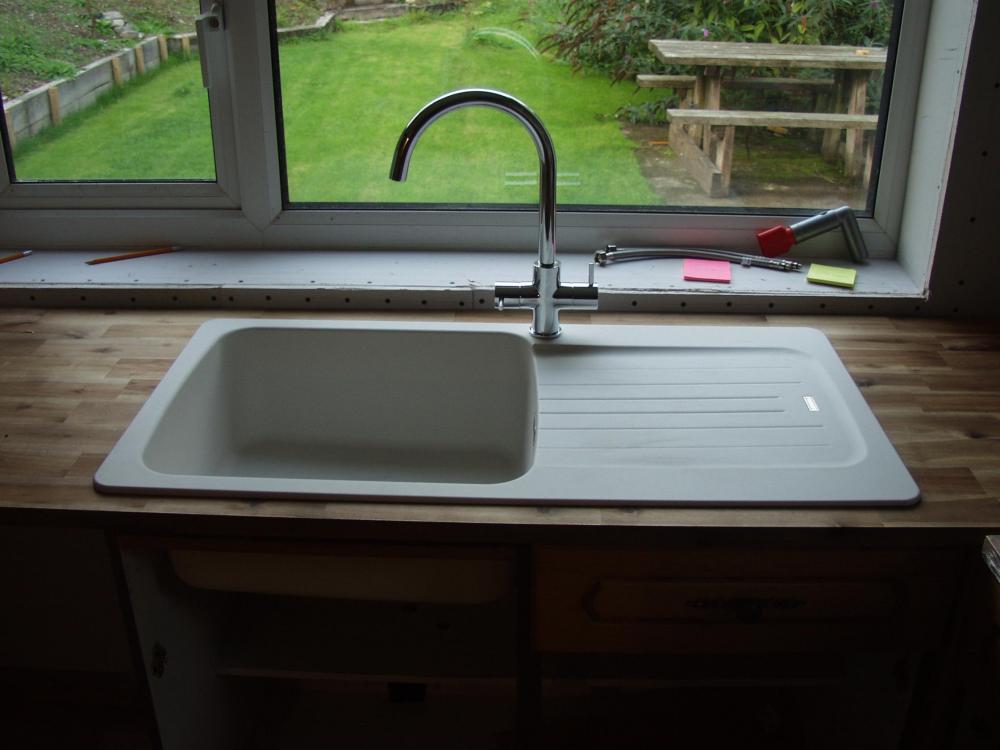
-
Help with kitchen renovation/ 1st house.
zoothorn replied to zoothorn's topic in Bathrooms, Ensuites & Wetrooms
..but by god a tricky top c/o due to sink siting with only mm's to spare L to R, & Back to Fr, in the cabinet.. took me 3 hrs to mark top/ check/ redo/ mark/ check, check check......... cut with major fingers x'd. Top c/o perfect.. jeepers, stressful. 35mm hole to be safe/ cheapo cutter ideal for job. Tarty tap on. Nothing connected yet.. I just read the 2 damn tops to join, need 3x oiling 1st with "Wood Oil". Now what the dickens is that? So all held up due for a day for these 3 coats to dry just when Im on a roll. Then I need to consider joining, both with biscuits & 2 clamp thingys. And the plumbing bits to buy/ confirm (Ive got the waste pipes, including an overflow to think of (plus to confirm the water pipes Hep2o bits to get). -
Help with kitchen renovation/ 1st house.
zoothorn replied to zoothorn's topic in Bathrooms, Ensuites & Wetrooms
Thanks for comms JSH! you've helped alot yourself. Satisfying 2 days (no www)..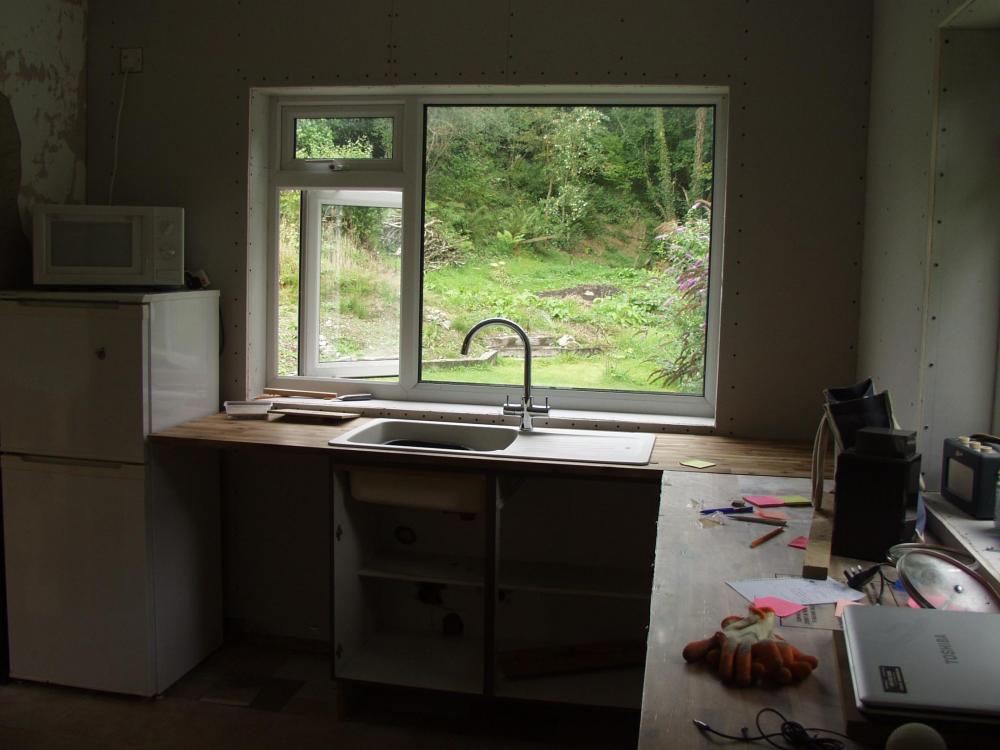
-
Help with kitchen renovation/ 1st house.
zoothorn replied to zoothorn's topic in Bathrooms, Ensuites & Wetrooms
i can't find any info on what size hole to make for my mixtap. i know 35mm was discussed, but how can I be certain? it seems very close to the washer ring internal dia. Nothing on the tap info, or its pdf tech sheet, nothing on TP site or the Co's site. -
Help with kitchen renovation/ 1st house.
zoothorn replied to zoothorn's topic in Bathrooms, Ensuites & Wetrooms
Cor blimey lucky me.. the bigger sink -just- sits in the cabinet between the side & the drawer rail.. by mm's. And from back to front.. by mm's. A very tricky one to get the top c/o at exactly, mm perfect, the right place. Sheesh. -
Help with kitchen renovation/ 1st house.
zoothorn replied to zoothorn's topic in Bathrooms, Ensuites & Wetrooms
Right now hard bit done..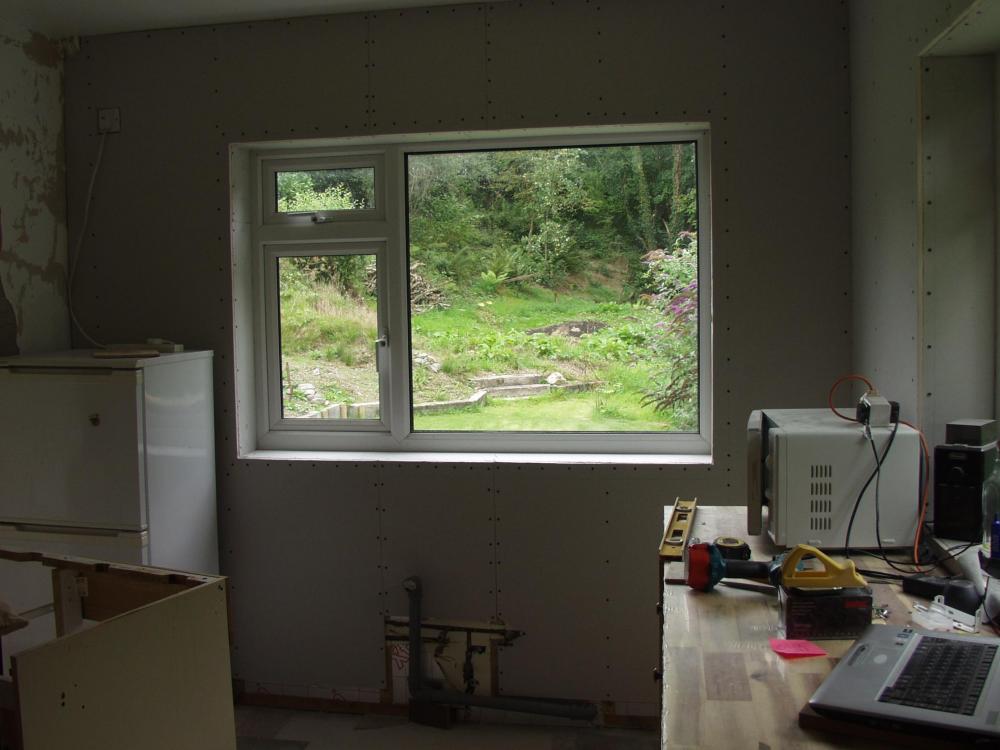
-
Help with kitchen renovation/ 1st house.
zoothorn replied to zoothorn's topic in Bathrooms, Ensuites & Wetrooms
Ok best I leave the electrics for another thread I think, it only gets you annoyed which isn't ideal! its last job now/ to separate. What I'll do is print off your info & give to my spark that'll be best idea. If I can just ask you on the plumbing, & the other stuff, I'll leave the electrics to only the finger plate addition, & the extension boxes. I'm on the downhill now/ done the hardwork (I fKN hope!) so should be generally rewarding from now on putting it all back together! Big thanks- zoot [look mods can we just scrap pgs 1-20 already? :-] -
Help with kitchen renovation/ 1st house.
zoothorn replied to zoothorn's topic in Bathrooms, Ensuites & Wetrooms
Ok if you say I have not even the basic knowledge of domestic electrics & make it clear its a firm step up just to test if I have a ring main or not.. then I've no choice but get a spark in. This may take a long time here.. so I have to proceed leaving this to last. I think on the insulated flooring stuff, with the logistics involved in shifting everything out ( I can't do it 1/2 room > 1/2 room : too much stuff & the it can't go back on one side w'out lino or it'll rip), I can't do it. I've a suspicion it might only make a mite of difference too, plus be a spongey feel/ too much 'give' for a kitchen. Thanks zoot. -
Help with kitchen renovation/ 1st house.
zoothorn replied to zoothorn's topic in Bathrooms, Ensuites & Wetrooms
Onoff that's flippin marvellous.. thanks (your drawings are great btw). Forgive me for asking a daft Q.. but how could I drill through the back of the socket, using leccy if the leccy's off for this work? battery drill? I think maybe I need an electrician for this job.. but mine's n/a for end of year. How would I establish if its a ring main.. only a spark can know the answer-? -
Help with kitchen renovation/ 1st house.
zoothorn replied to zoothorn's topic in Bathrooms, Ensuites & Wetrooms
I think that's the right idea newhome.. £130 even if it makes a slight difference, would be probably worth it. I'll see what the reviews say first though- it has a heck of alot of competition to contend with re. cold coming up/ Ive never know any floor like this: it feels like a solid concrete slab onto (damp area/ very cold below) ground with a dpc it seems thankfully(!), but with absolutely 0 insulation. -
Help with kitchen renovation/ 1st house.
zoothorn replied to zoothorn's topic in Bathrooms, Ensuites & Wetrooms
Interesting link thanks/ great idea. I'll pass it onto my carpet/ lino chap see if he can lay lino on: I don't think ideal if it makes a 'spongey' kitchen floor tho, which it might if the two together ~ 6mm. -
Help with kitchen renovation/ 1st house.
zoothorn replied to zoothorn's topic in Bathrooms, Ensuites & Wetrooms
[Mods- could the thread start from pg 20, so I can look back easier- & then its a normal ~15 pg thread.. so I don't look such a jessie-?] thanks zootH -
Help with kitchen renovation/ 1st house.
zoothorn replied to zoothorn's topic in Bathrooms, Ensuites & Wetrooms
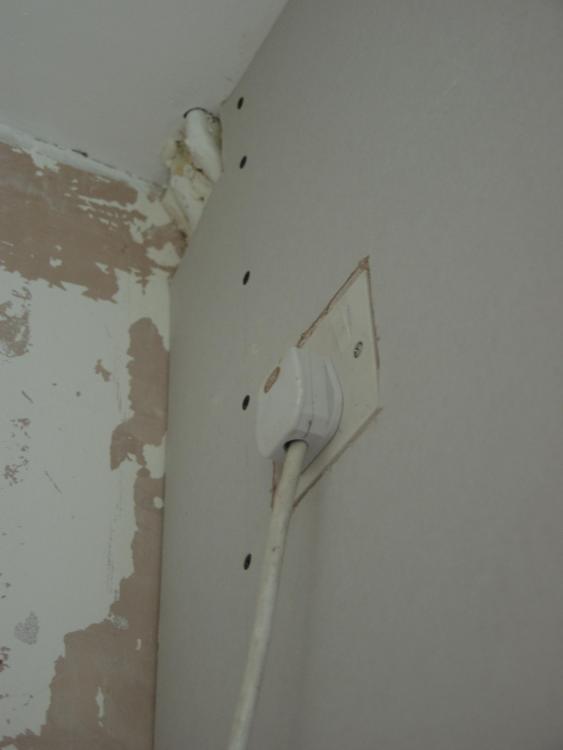
I could only take a pic of my 2G socket, as it is Peter. Onoff's idea was to drill a hole outside, behind, connecting an outside socket from this 2G socket (the 2G I was going to have to extend fwd). If this Ext socket addition is done, does it mean the prior 2G socket is now n/a? (& so no front plate on or thru the pB).. or now its a 1G (as the 2nd is now taken up by the added external).. or maybe it can remain as it was, as a 2G (with a "3rd" addition going out thru the wall behind it). ?? There's no other way I can explain my Q. A pic of a sketch would only complicate. -
Help with kitchen renovation/ 1st house.
zoothorn replied to zoothorn's topic in Bathrooms, Ensuites & Wetrooms
Ok that's what I thought likely would be ok- good. Ok last pB bits done this AM.. then onto the next stage. I think this might have to be the outside socket, from the 2G socket, so I can go back & complete pB3.. as much as I'm resigned to it! Will this negate this 2G into a 1G going backwards/ outside? or split into a new 1G inside or something? (or an addition, that keeps the 2G inside-?) -
Help with kitchen renovation/ 1st house.
zoothorn replied to zoothorn's topic in Bathrooms, Ensuites & Wetrooms
I can certainly grip glue some C'tex sheets under before I put the facia strips on.. not a bad idea that. Ive totally overdone it with 2-1/2 sheets left over. And a whole sheet of pB. Muppet I think I didn't subtract the window area, or included it to be extra safe so I didnt run out. but newhome what do I do with the 'raw' pB that'll be behind the cabinets below the worktop line?? apply someting to it? leave it? -
Help with kitchen renovation/ 1st house.
zoothorn replied to zoothorn's topic in Bathrooms, Ensuites & Wetrooms
But why prime & paint below the worktop line, if this area's unseen behind the cabinets-? is there any reason to? my point being.. I've never used pB before you see. I don't know what the normal way is with it, once Ive got to the state I have it in. I realise there's some sort of pink plaster stuff to do, which is why ive bought a huage bag of it, but Ive no idea where this will be used, whether it needs a primer before, or not, whether it needs something applying to it in areas that are always to be unseen. Like behind the cabinets. I have no idea. -
Help with kitchen renovation/ 1st house.
zoothorn replied to zoothorn's topic in Bathrooms, Ensuites & Wetrooms
No I mean it'll be pB'd under the worktop line (right the way down to the last tricky pipes bit I'm leaving a 40cm sQ area free of pB here).. but was wondering if the pB below this line needs treating/ applying with something I've no idea.. or can be left as is? -
Help with kitchen renovation/ 1st house.
zoothorn replied to zoothorn's topic in Bathrooms, Ensuites & Wetrooms
Hey that's great.. diedre show me how now now! (or brian- we must not assume, nowadays, its WRONG to.. m'kay?) [vagazzle her nails! what if it is brian though, co*kjazzle? I'm so confused already] yes worktop, jigsaw, holesaw things ready. But can I leave the pB as is under the worktop line? or does it need treating/ sealing or something 1st..? -
Help with kitchen renovation/ 1st house.
zoothorn replied to zoothorn's topic in Bathrooms, Ensuites & Wetrooms
I was thinking of the work needed rather than only a few quid.. I'd need to undo all the wires etc, unless I'm mistaken? I get the idea tho, & would look neat (tho it is on the cock quite a bit as it is mind you). Another job maybe last on list then. Tmrw I need to go get the Hep20 bits. So with the iso valves I've got (I assume I'm leaving these as is ) can you remind me now: its 6x elbows, 1x section of 15mm pipe, & 2x connector end things for the flexi hex pipe to fit onto.. what are these called- sorry did I ask this before? I'm hopefully going all guns to get the sink in this wknd if the pB behind can be left as is.. is this the idea, I mean below the worktop line-? thanks, zootH -
Help with kitchen renovation/ 1st house.
zoothorn replied to zoothorn's topic in Bathrooms, Ensuites & Wetrooms
Is it not ok as is then onoff-? -
Help with kitchen renovation/ 1st house.
zoothorn replied to zoothorn's topic in Bathrooms, Ensuites & Wetrooms
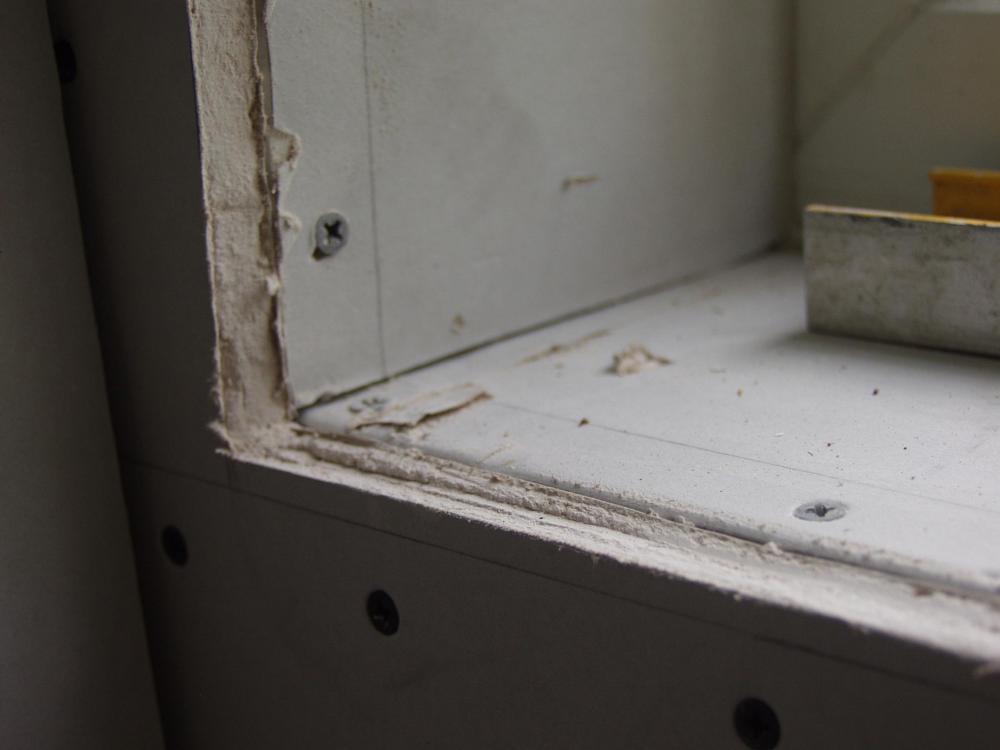
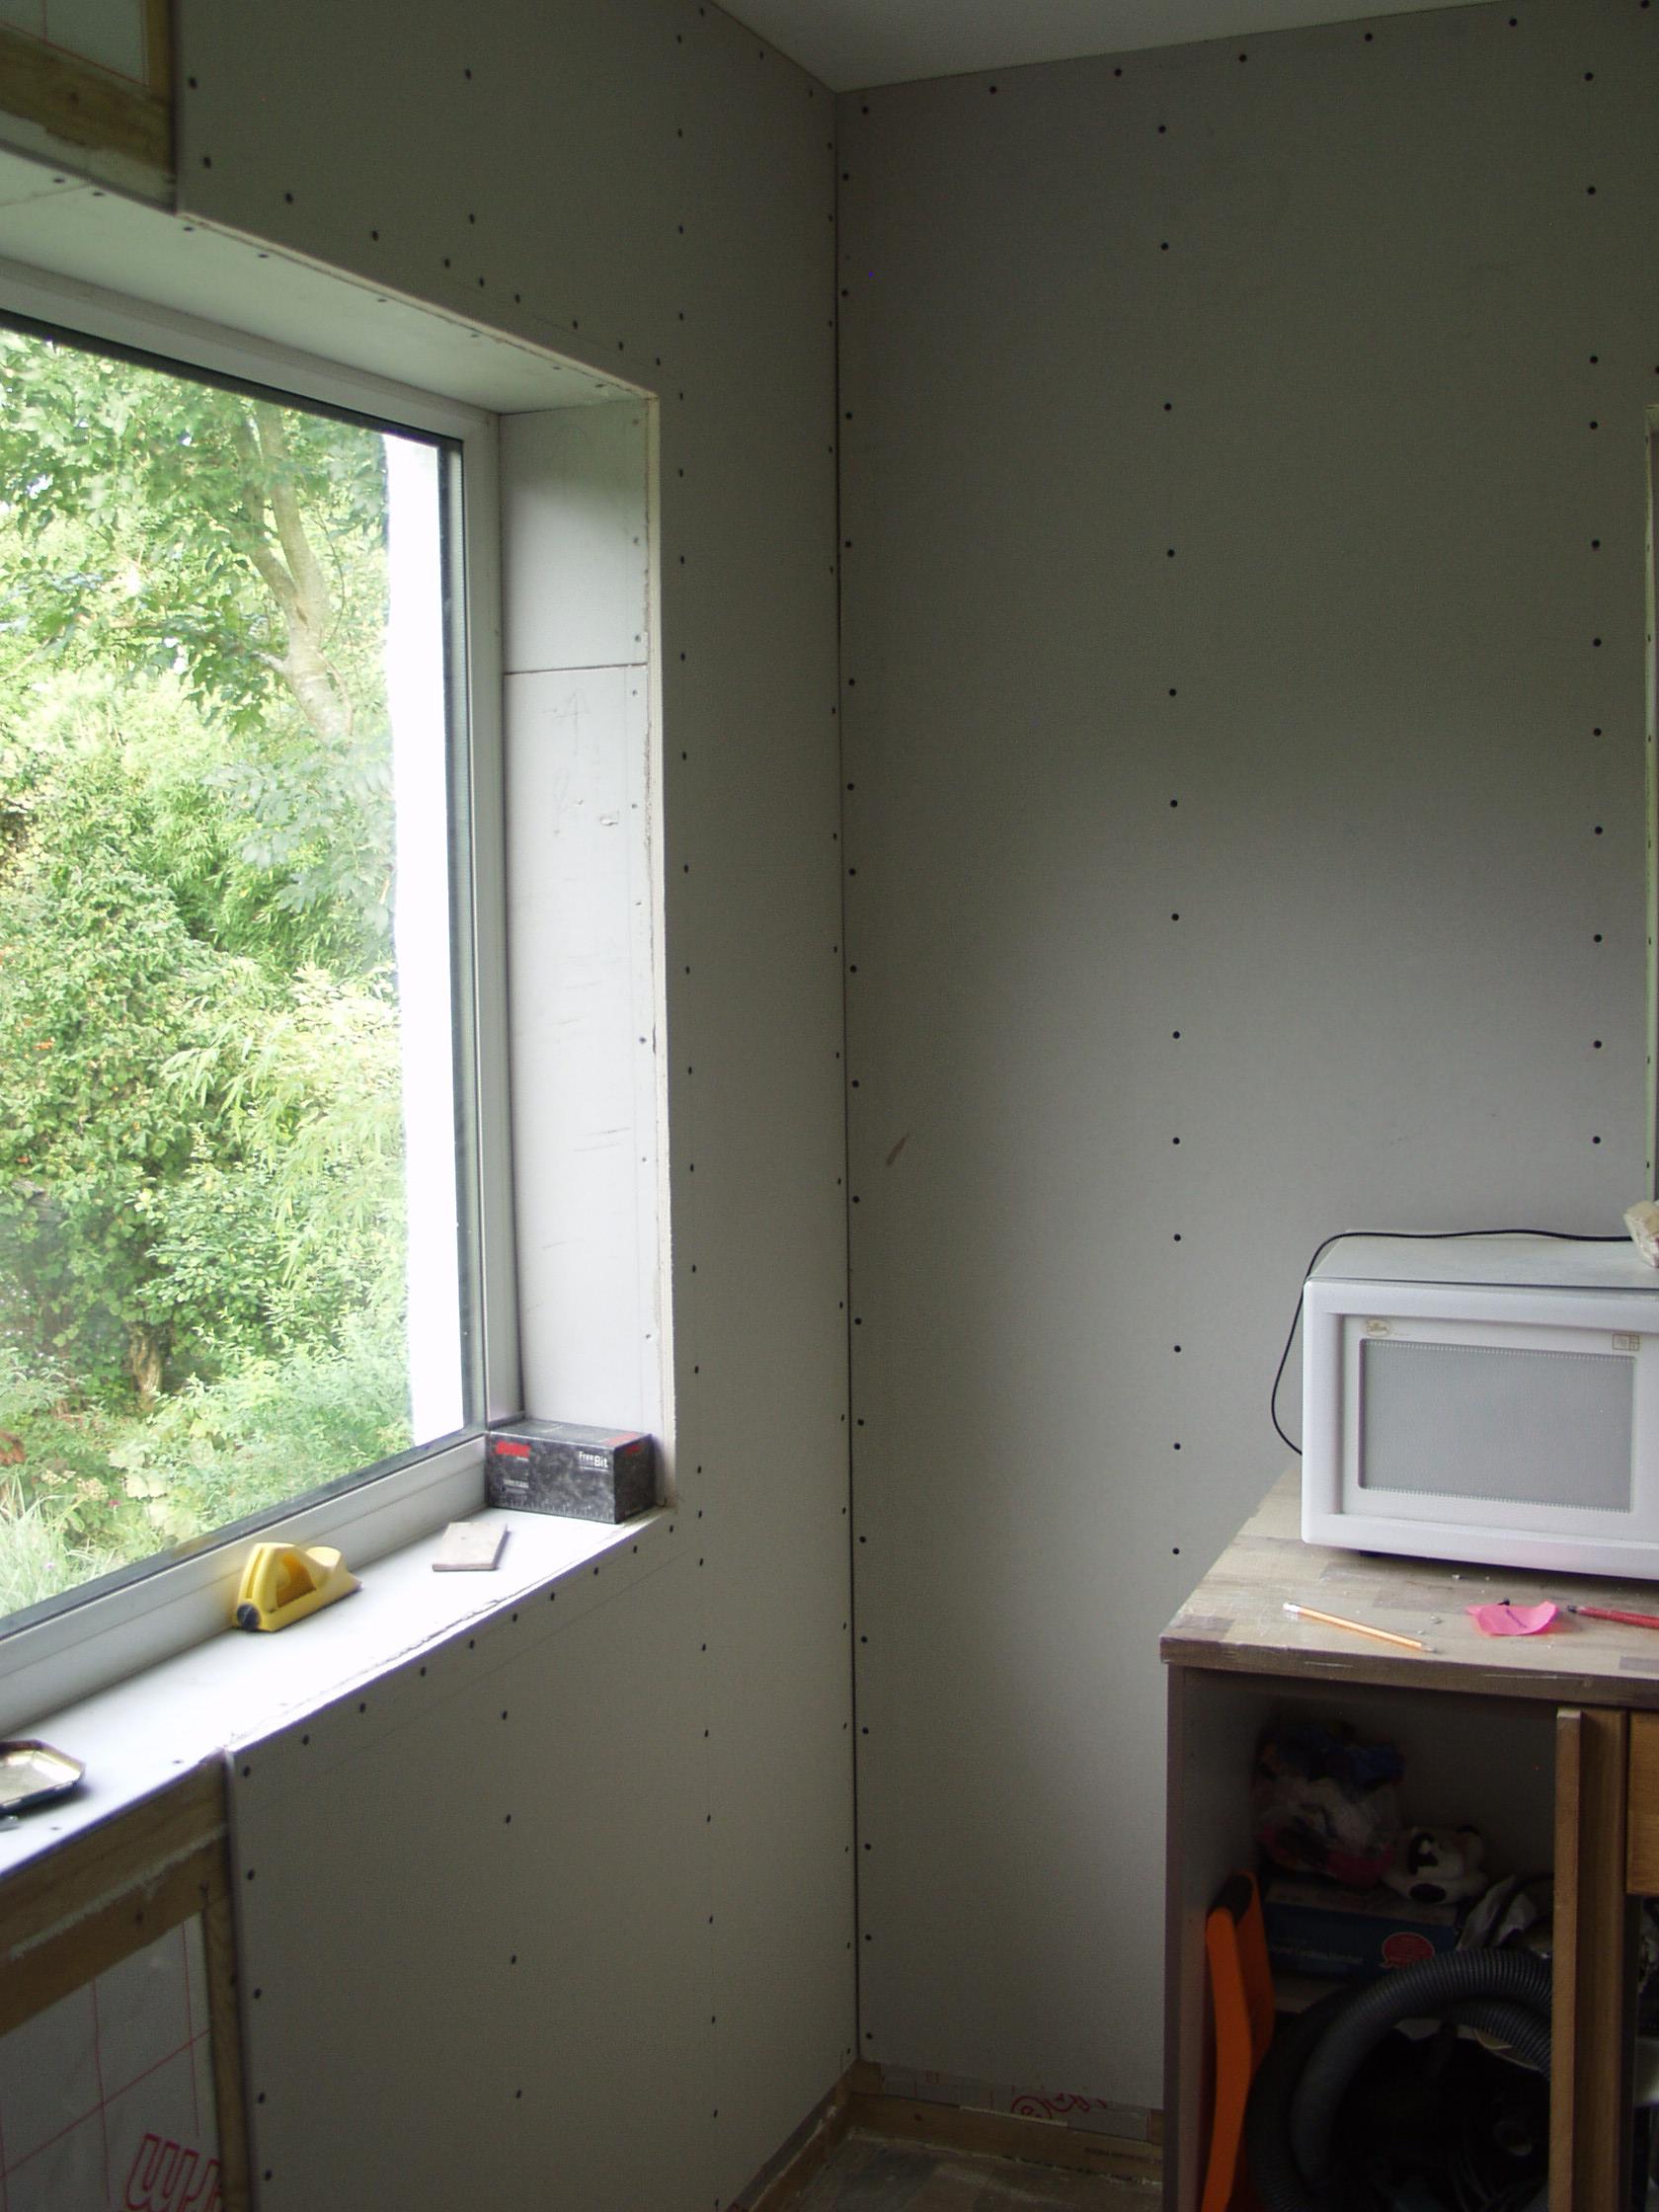
Some bits untidy.. edges of reveal c/o (driving me starkers/ lost patience), & a bulge out on one side reveal section (had to do in 4 bits due to poor mistake), but pleased with this corner join gap of only 6mm max, gaps to ceiling mostly good too, & the socket's useable altho its slightly countersunk by 3mm's 'behind' the pB (I'm hoping this is ok)..