zoothorn
-
Posts
4752 -
Joined
-
Last visited
-
Days Won
3
Everything posted by zoothorn
-
Hi Declan, I recently swept it.. it did this issue the very 1st fire afterwards. Yes I have a thermometer, as I mention its fairly ok once up to speed @ 350*C or above. The issue isn't once its up to speed (tho not great even so) its everything up to this: which means worst is 1st load once innitial small kindling plus smaller load ontop ie 1 or 2 logs slplit into 6 or 8 small bits piled ontop of the kindling. Now if I start just kindling (a log behind & to the sides always) open & load with small split logs once kindling charcoal.. then the smoke is appalling/ I cannot do this. So I have to start it with kindling + a fair stack of small split logs already ontop (+ my large log behind + to eithet side too) IE a good load to limit the ammount of times I have to open door to reload to get it up to speed. But even so I need to add 2x loads between the innitial load's burnt down & it up to speed. That's twice, minimum, each time I use it, smoke pours out/ alarm goes off/ I have to open all doors windows to clear smoke.. a hopeless situation if its cold outside. thanks for your input- zoot
-

Help with kitchen renovation/ 1st house.
zoothorn replied to zoothorn's topic in Bathrooms, Ensuites & Wetrooms
Hi Ed, thanks for that. One thing I don't understand though.. you say leave the RHS Live junction place in the ceiling rose, unconnected. If this Live junction therefore has -only- the red wire coming in from the lamp itself, & nothing connected to it.. how does the light work-?? -
Hi folks, I have an issue that's now requiring a solution, so bad it is. I have a 10 kW (efel/ nestor martin harmony 1) multifuel stove which has caused endless problems, the single most infuriating currently is smoke pouring into the room when loading it. So much it kicks off the fire alarm, get in your lungs, & causes the house to smell permanently of a veil of smoke. That bad. I have to load up as fast as possible, door a small a gap as possible.. but even still it pours out the front, top (I almost have to wear a mask now). Not so bad once up to speed @ 350*C + due to smoke being burnt off.. but heaven knows what Co its belching out: albeit the Co alarm has never sounded once, thankfully. Once up to speed it works pretty good though. I cannot establish why. I have good draw (visible to see & established so by my very good, very experienced builder). I use all the open functions to aid draw for refueling. Whacking in a new stove is n/a until why has been established.. as it might just do the same. To be honest the stove is a dreadful design, & replacement parts for it terrible quality.. but even so it should -not- belch out smoke like this. My n'bor has a small cheapo chinese horrorshow & a chimney 2/3rds my height.. but not a sign of any smoke coming into room on refueling/ zilch/ just as it should be. Thanks, zootH
-
Help with kitchen renovation/ 1st house.
zoothorn replied to zoothorn's topic in Bathrooms, Ensuites & Wetrooms
Could someone help on my tiling plan.. I've looked at www info, centrelines etc/ perfectly simple for the cooker area.. but my config for this awkward sink side "L" shaped corner worktops + 2 window areas, doesn't tally with anything 'standard' afaict. What I plan to tile is.. from the RHS of the sink sill: 60cm H of this corner area + the thin strip under sill 2. Thanks alot zootH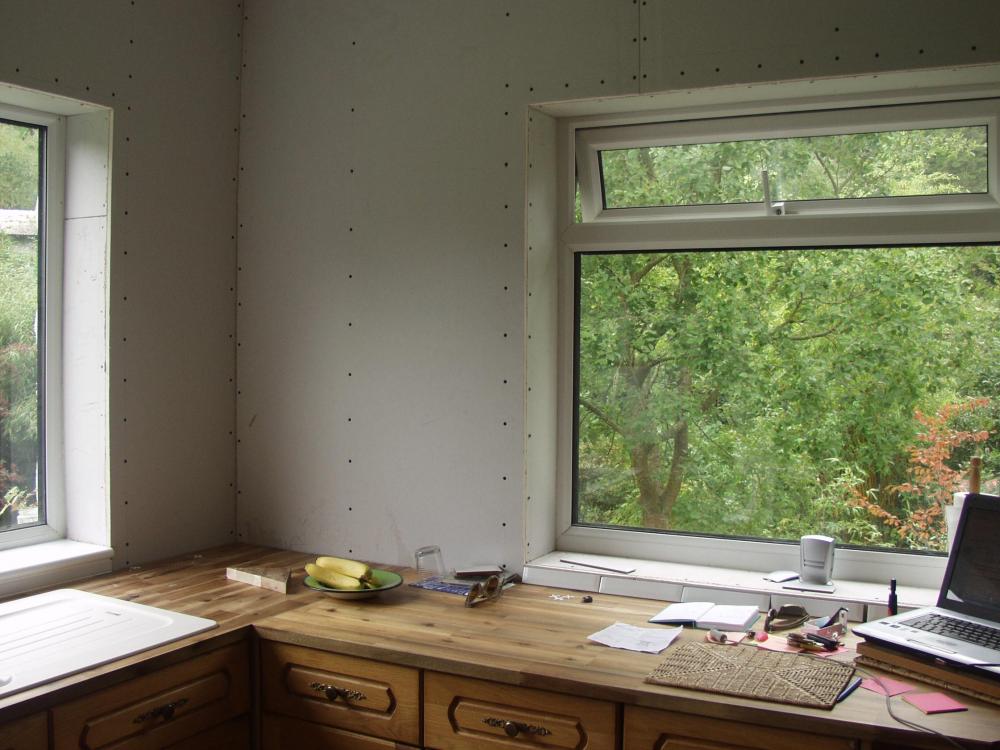
-
Help with kitchen renovation/ 1st house.
zoothorn replied to zoothorn's topic in Bathrooms, Ensuites & Wetrooms
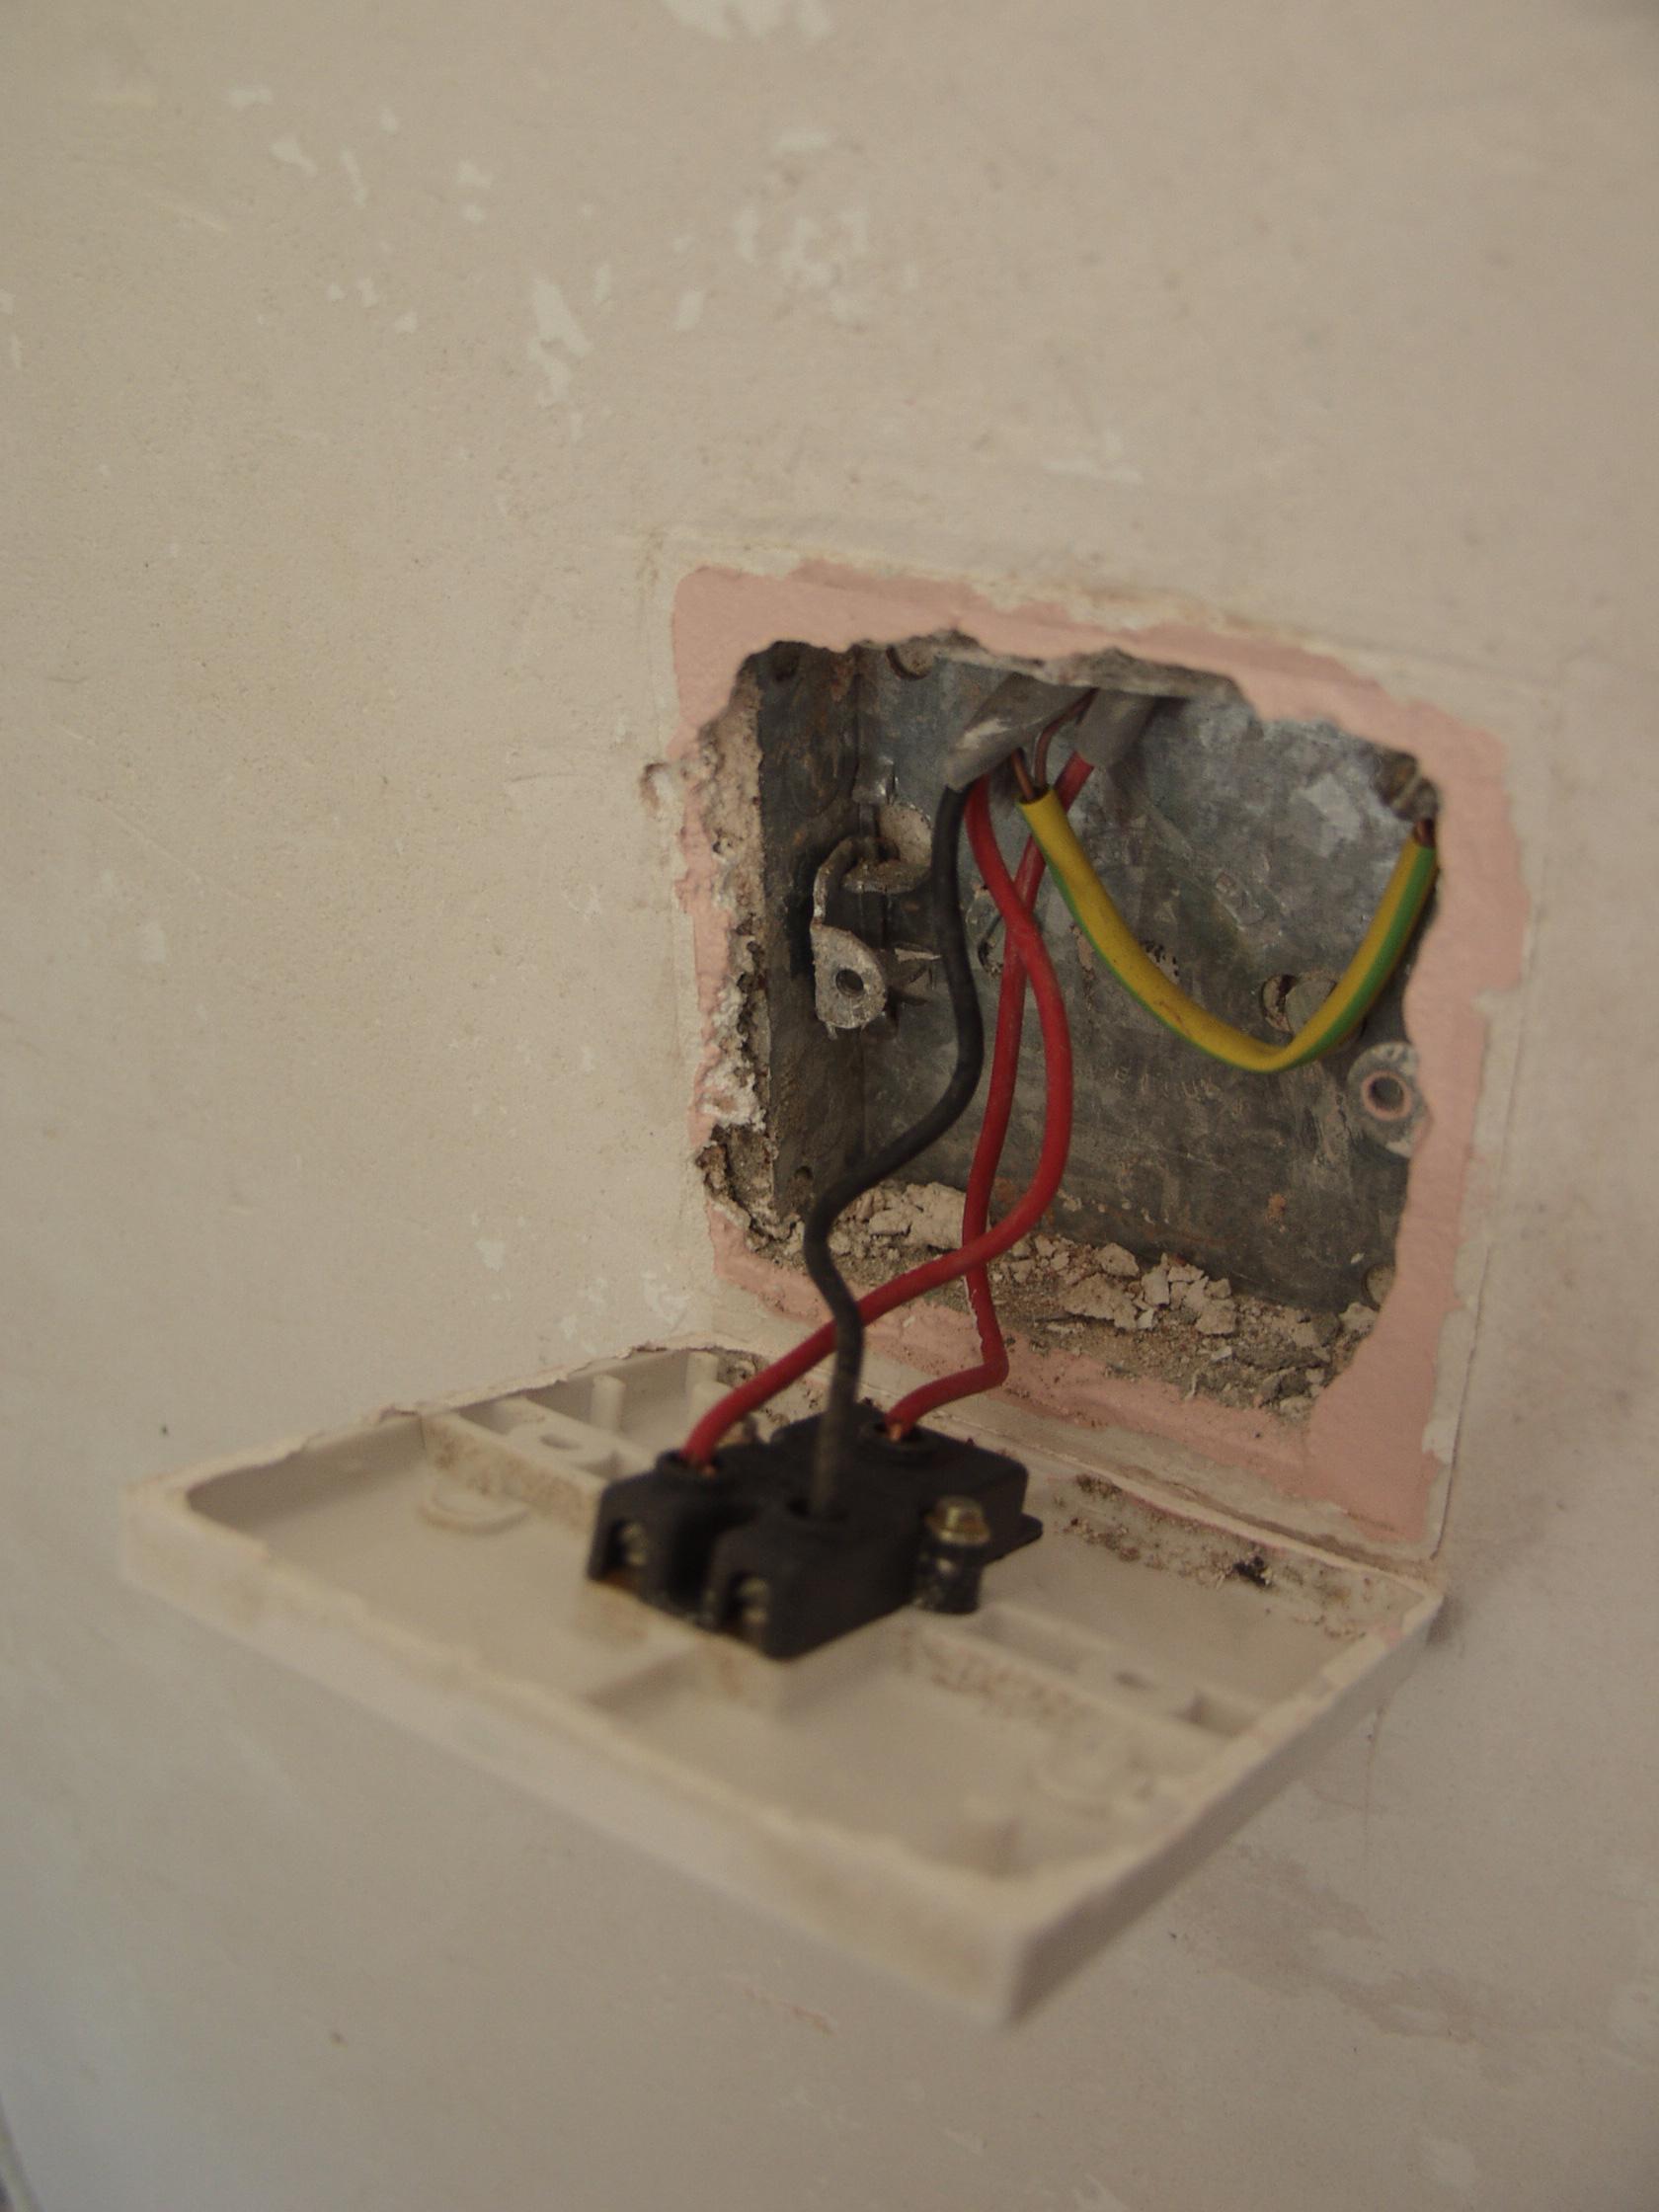
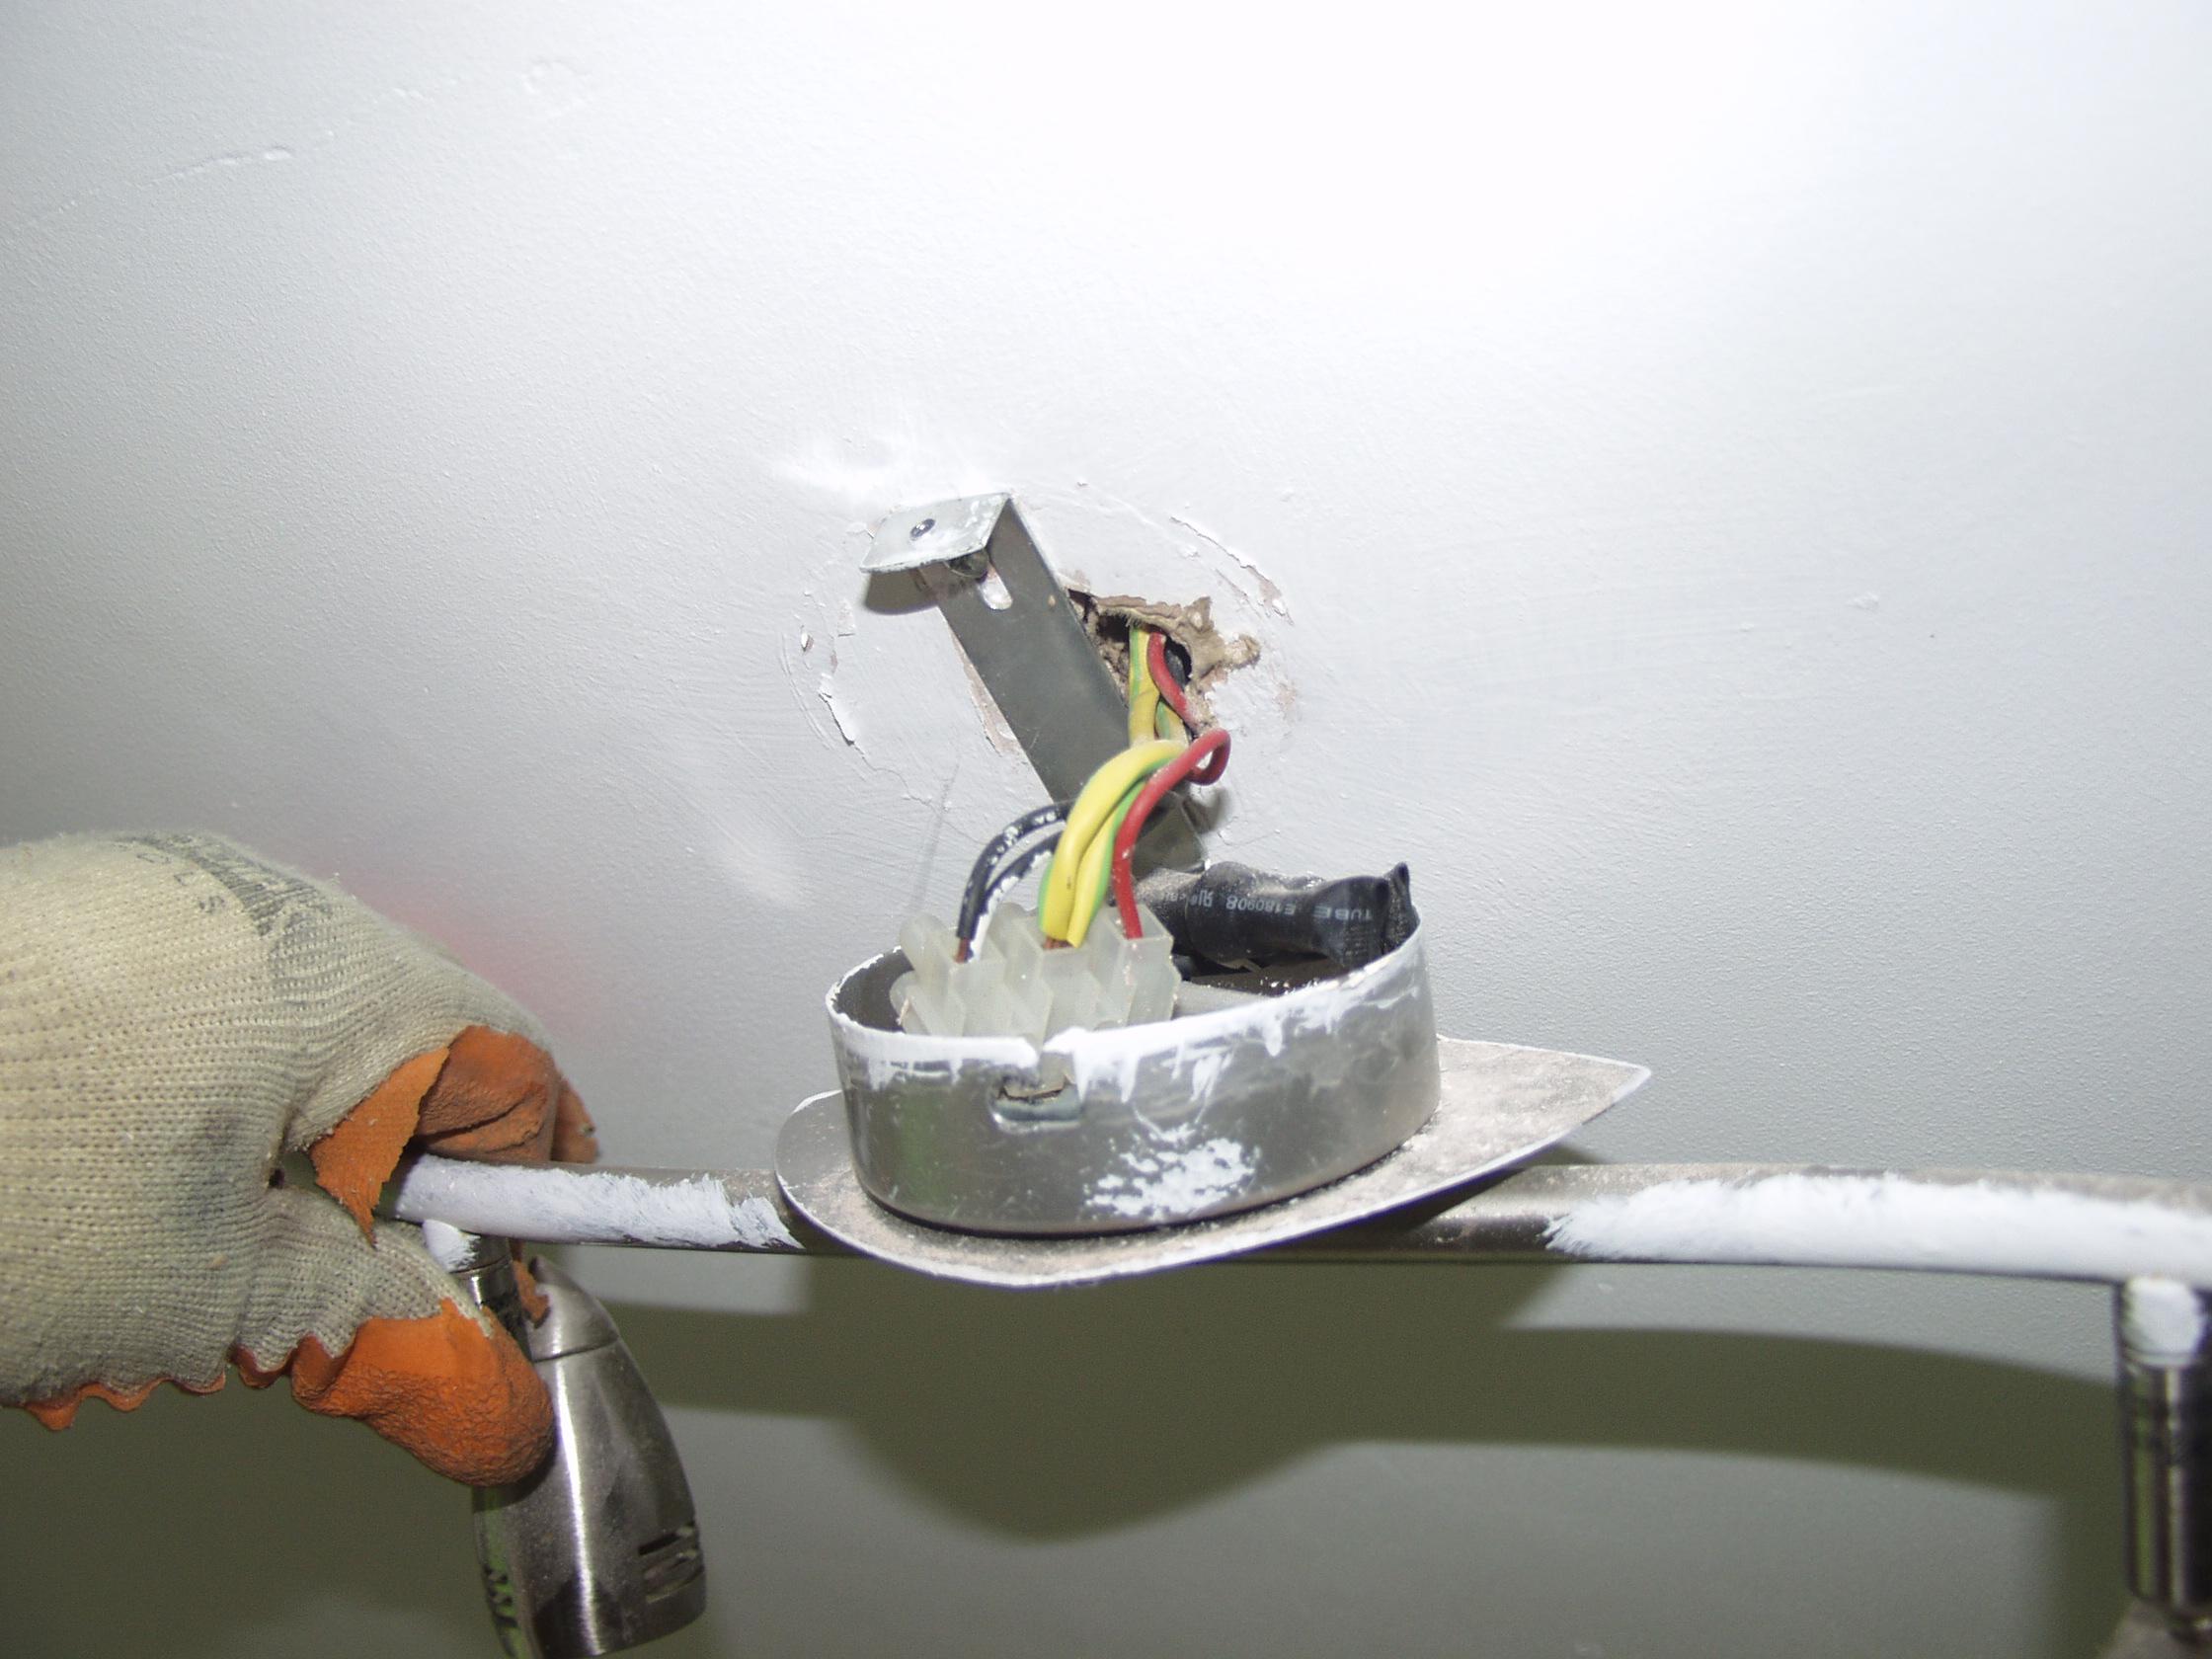
Onoff.. back to this plan of yours here, are you suggesting get rid of the connector block/ use the 2 earths, 2 neutrals, & 1 live coming down > into the new ceiling rose.. or keep the connector block in place? If so could you do one of your sketches for me? For a simple light this existing config I find & trying to fit onto, is causing a huge headache not concurring with the ceiling rose wiring diagram. I really need to get this light fitted today so I can have light to work with.. it doesn't work as it is (all 4x bulbs shot). -
Help with kitchen renovation/ 1st house.
zoothorn replied to zoothorn's topic in Bathrooms, Ensuites & Wetrooms
Been behind on the kitchen chaps/ family stuff & work. Slow progress but sill 1 & splashback done. Will try catching up on the ceiling light today..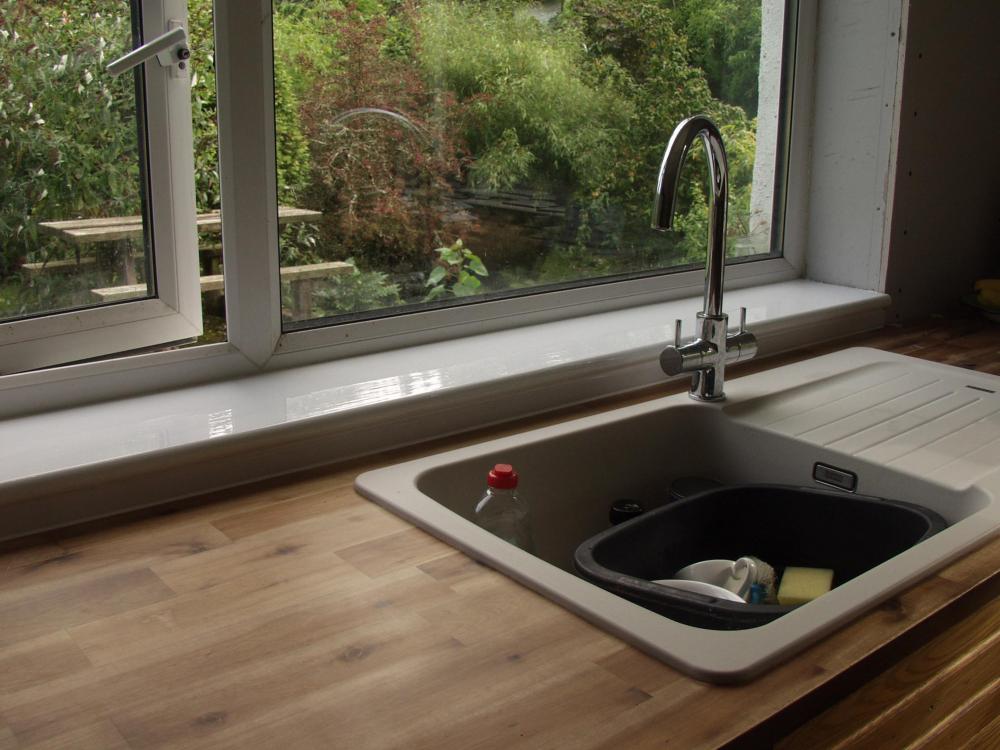
-
Help with kitchen renovation/ 1st house.
zoothorn replied to zoothorn's topic in Bathrooms, Ensuites & Wetrooms
Ok Ive got to start considering next bit now. Sill 1 is done with splashback. Sill 2 has a bigger H "splashback" bit which will need to be tiled prior to fitting the sill. Does anyone know if this tile adhesive is still o to usek after being opened & a little used/ then stored for ~1 year? https://www.screwfix.com/p/mapei-buildfix-wall-tile-adhesive-off-white-15kg/5832c -
Help with kitchen renovation/ 1st house.
zoothorn replied to zoothorn's topic in Bathrooms, Ensuites & Wetrooms
Nothing obvious at all Ed to say so. -
Help with kitchen renovation/ 1st house.
zoothorn replied to zoothorn's topic in Bathrooms, Ensuites & Wetrooms
@Onoff hi Onoff.. the 2nd grey cable into the switch box, has only a red & earth. Nothing cut back/ its a thinner grey cable. I do see a loop of red wire poking out of the ceiling hole.. with what may be a small clear placcy junction stuffed up: but its not easy to pull this red loop down/ out, & should I try to I might disconnect whatever it is up there. Its too annoying to have to get an electrician in just to do such a simple 10m job. Electrics- I don't have anything else bar this to do. -
Help with kitchen renovation/ 1st house.
zoothorn replied to zoothorn's topic in Bathrooms, Ensuites & Wetrooms
Its the only switch for the light.. the red on its own, Im not sure what you mean by a cut back twin/ do you mean is the black in the grey end @ top of pic, cut off here-? as you can see there are only 3 terminals at the switch point.. not 2 black/ 2 red: Ive never seen this before. -
Help with kitchen renovation/ 1st house.
zoothorn replied to zoothorn's topic in Bathrooms, Ensuites & Wetrooms
@ProDave I always turn the -whole- house power off (double red flip switch RHS, crabtree consumer unit) before even venturing to look inside a front plate or a ceiling plate.. rather than isoltate just the circuit in Q.. or peeping inside a live front plate, as qualified sparks tend to do. Cheers, zootH -
Help with kitchen renovation/ 1st house.
zoothorn replied to zoothorn's topic in Bathrooms, Ensuites & Wetrooms
Hi Onoff, one switch only (2 grey cables coming in).. ..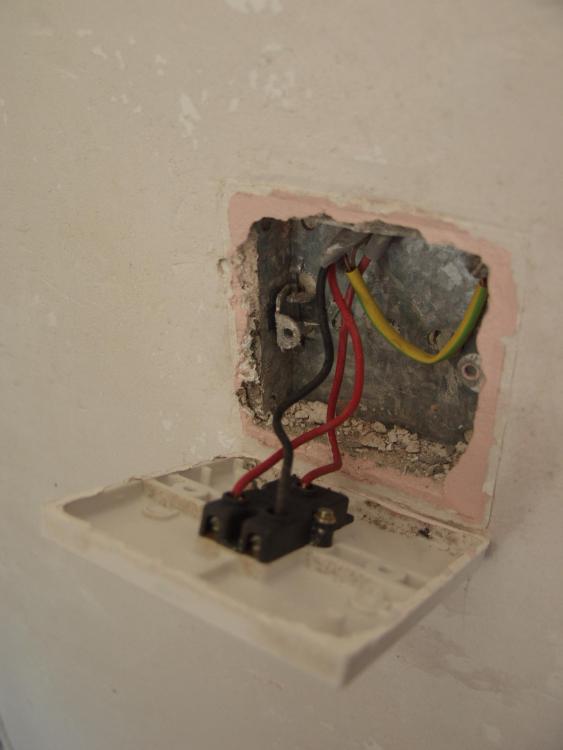
-
Help with kitchen renovation/ 1st house.
zoothorn replied to zoothorn's topic in Bathrooms, Ensuites & Wetrooms
Hi Dave- do you mean poked -up- through this hole? IE tucked away.. I'm trying to figure out, firstly, how/ why this is wired as it is. I like to establish these things 1st, make sense, then to proceed.. -
Help with kitchen renovation/ 1st house.
zoothorn replied to zoothorn's topic in Bathrooms, Ensuites & Wetrooms
Chaps, as I'm doing the electrics, I'm wanting to replace a horrible ikea 4x halogen lamp (one unit), for a simple single ceiling rose. Looking inside it, here, instead of finding 3 grey cables with L, N & Earth as I expected.. I find only *2x black Neutrals, 1x red Live, & 2x earths. How do I wire a standard ceiling rose up to these 5 wires coming down from ceiling? I know there are other lights along from/ in this circuit, as I had an intermittant fault with 3 other lights adjacent areas (UT, bathroom, above/ outside back door).. & fixed it by finding one of the *2x black Neutrals had come loose. thanks, zootH
-
Help with kitchen renovation/ 1st house.
zoothorn replied to zoothorn's topic in Bathrooms, Ensuites & Wetrooms
Ah yes my mistake.. H is always height to me. Yup pvc trim, cheap as chips. -
Help with kitchen renovation/ 1st house.
zoothorn replied to zoothorn's topic in Bathrooms, Ensuites & Wetrooms
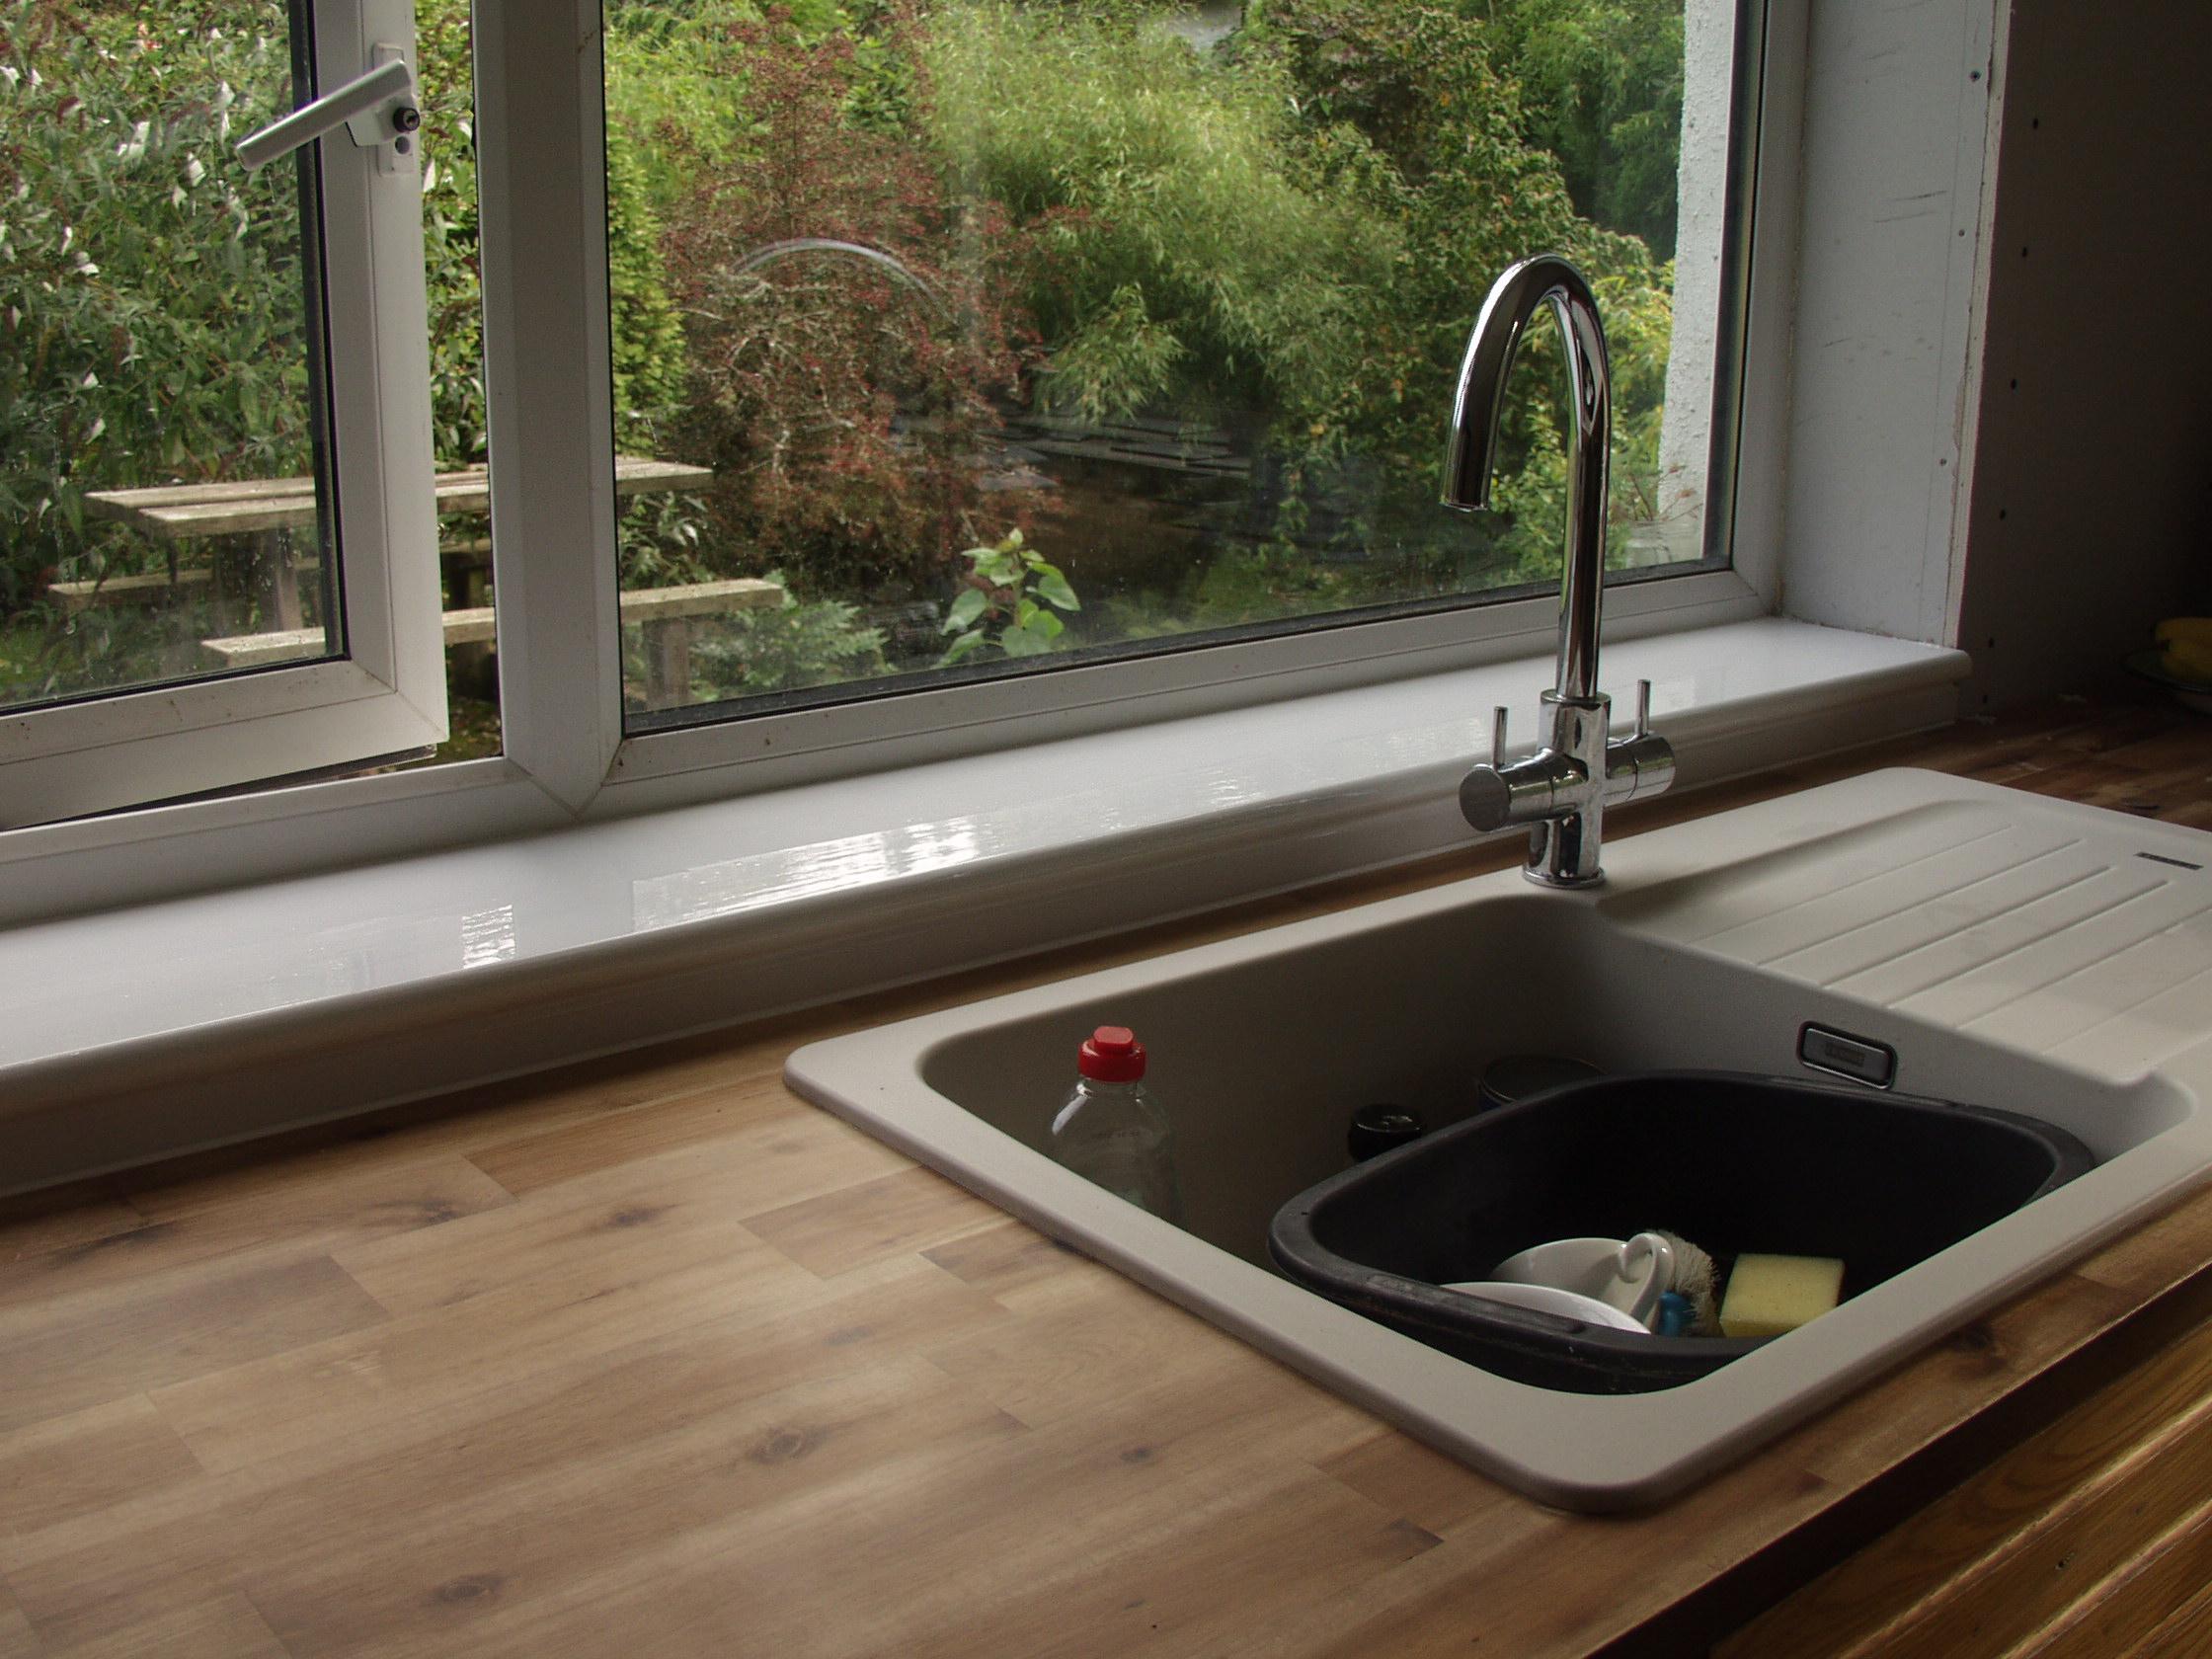
H splashback.. means..? sorry not on board. Im sticking a 3cm x 8mm window-trim placcy rounded edges white job.. as a cheapo splashback. Im gluing it to pB behind sink area/ sill front edge. So do I leave a small gap to the worktop below to silicone after, or meet the two/ no gap-? cheers Peter.. really given me the impetus back just finishing off this. makes a stack of difference/ a solid 'finished' feel. -
Help with kitchen renovation/ 1st house.
zoothorn replied to zoothorn's topic in Bathrooms, Ensuites & Wetrooms
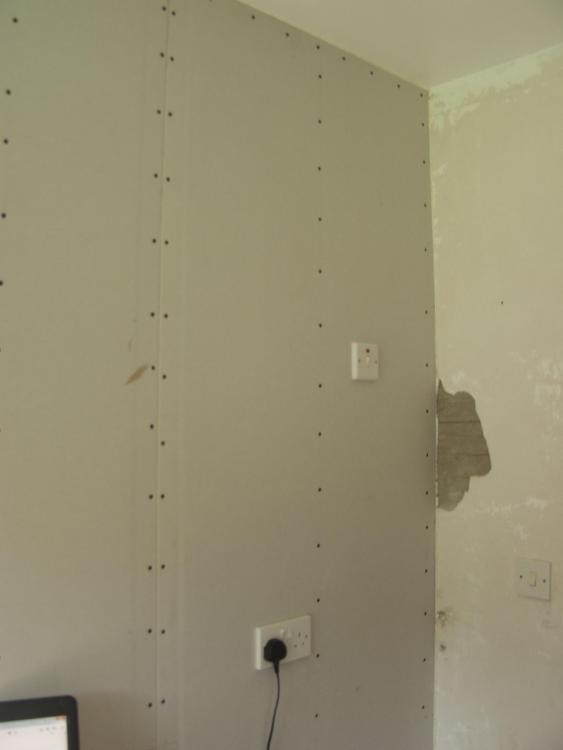
Chaps- this piddly 3cm H splashback upvc trim Im glueing on.. shall I leave a gap below to the worktop, fill after with white silicone.. or meet it to the worktop, then add a bead along after? seems a v.important bit this/ fallible area for water ingress. best do it spot-on. Done the last pB last ev/ all electrics (47mm backboxes.. ripped out old ones, ply shims in/ tapped to get my outline on pB, shims undone/ new deeper boxes set in.. & frontplates flush-mounted with longer screws). Soudalled gaps. Just strip of pB along btm & skirting can go over. Splashback & sills doing this wknd. Thanks zoot -
Help with kitchen renovation/ 1st house.
zoothorn replied to zoothorn's topic in Bathrooms, Ensuites & Wetrooms
-
Help with kitchen renovation/ 1st house.
zoothorn replied to zoothorn's topic in Bathrooms, Ensuites & Wetrooms
Good- no wings then.. much better. So I'm putting the placcy strip on with grab adhesive, leaving a 5mm gap below (& above to sill if I can).. then fill it with mould-resistant white silicone like Dow 825+ sanitary stuff? hope so. -
Help with kitchen renovation/ 1st house.
zoothorn replied to zoothorn's topic in Bathrooms, Ensuites & Wetrooms
Opinion please: cutting the sill.. should I give it some side 'wings' ? IE like a T shape with bits overhanging the sides L & R.. or leave as a 'slab'? tiling around its piddly wing bits will be a major faff surely is what I'm thinking.. or is this a std job to take on board/ a nifty trick to it. And what should I attatch my upvc window strip onto the pB with? clear sealant or grab stuff? -
Help with kitchen renovation/ 1st house.
zoothorn replied to zoothorn's topic in Bathrooms, Ensuites & Wetrooms
Hi Peter, I was onto this very stuff today in fact after seeing a chap buy it who said 'its stable if dry'.. in TP its stored in the open area, & dead flat so should be fine. yup 2 coats on the primed surface, just as I was thinking again too- looks like the way to go. Splashback area below: if I protrude sill out 3/4" to 1" above it then it'll barely be seen @ only 3cm H. So got some cheapo white window trim 9mm x 3cm (x 5 bloomin metres!) for it. I'd be a week searching for wood effect stuff around here, then cut to 3cm/ a major faff. N/a as an ebay item or posted being 1.5m long too. So a compromise yes.. but it'll have to be. -
Help with kitchen renovation/ 1st house.
zoothorn replied to zoothorn's topic in Bathrooms, Ensuites & Wetrooms
Well I'm not thinking that with this job.. actually the opposite really for maybe 1st time ever (shows how good the help's been). Its bound to go tlts up soon mind you.. just the word 'plastering' makes me shivver, & the solid wood door I hung last year, with plenty of coats of X, & nice gaps.. (has just decided/ coinciding with weather change/ just when I got tops on) to barely close now, so I'm pretty concerned about the tops. -
Help with kitchen renovation/ 1st house.
zoothorn replied to zoothorn's topic in Bathrooms, Ensuites & Wetrooms
Room's cold, only weather is damp.. basically I do a bit, then admire my handiwork.. for quite a while until I'm forced to do some more. -
Help with kitchen renovation/ 1st house.
zoothorn replied to zoothorn's topic in Bathrooms, Ensuites & Wetrooms
Aha.. ok that's a plan. So I screw near the fronts into the batten below the ISO pB.. & grab adhesive onto the pb twds the back: is grab stuff the best idea here? if it tries to bow up @ back, won't it just lift/ rip the paper face off the pB tho? pB still seems so fallible to me. I think once I get splashback + sills done it'll give me impetus to go onward to tile. I'm having more major inertia-set-in now 2 tops are done! -
Help with kitchen renovation/ 1st house.
zoothorn replied to zoothorn's topic in Bathrooms, Ensuites & Wetrooms
Ok got some of that ok. Right that's a plan. Is the pine sill stuff normally available do you know? ie thicker 1" with a rounded edge. I usually see it certainly in this house & it looks std fayre bought-as stuff, rather than a routered edge.