Mini Split Air to Air Heat pump
A short blog to show my Mini spilt Air2Air install, in the Windy Roost Static.
I looked at installing a wood burning stove, but we have zero trees on site, so when I looked at the costs of twin wall flue, terminals, flashing, creating a heat shield and making the caravan tidy plus the hassle of getting wood / coal, the costs were adding up.
A quick question on here - Build hub, some options were suggested and I decided to go with the a cheap Air 2 Air heat pump from Appliances direct.
The unit is a Telefunken 12K BTU split unit. cost around £375 but did not included the pipe to connect from indoor to outdoor unit.
I got 5M twin insulated copper pipe with the flair nuts from ebay for £56.
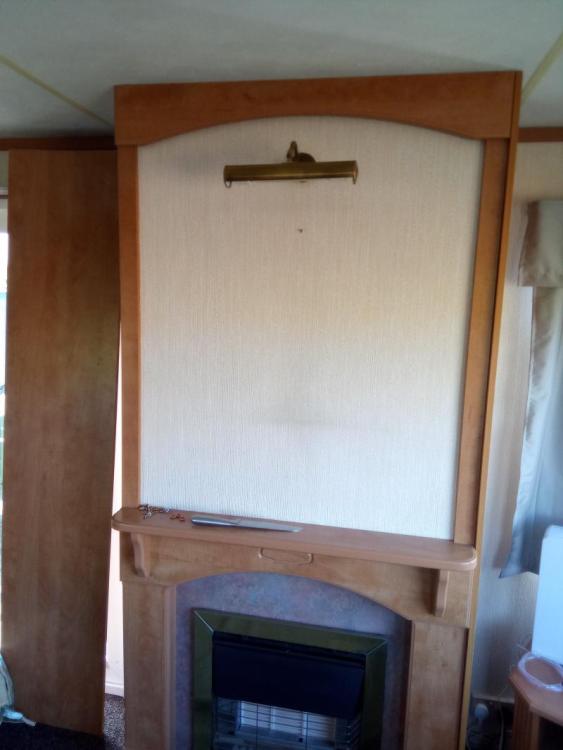
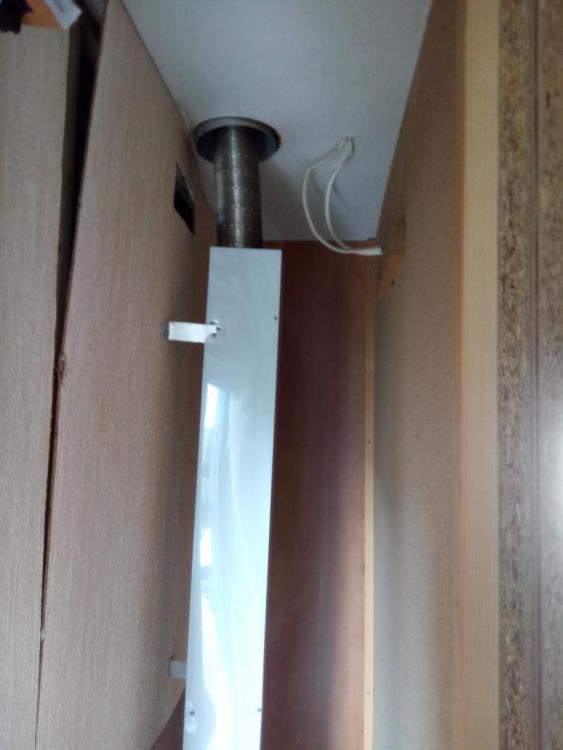
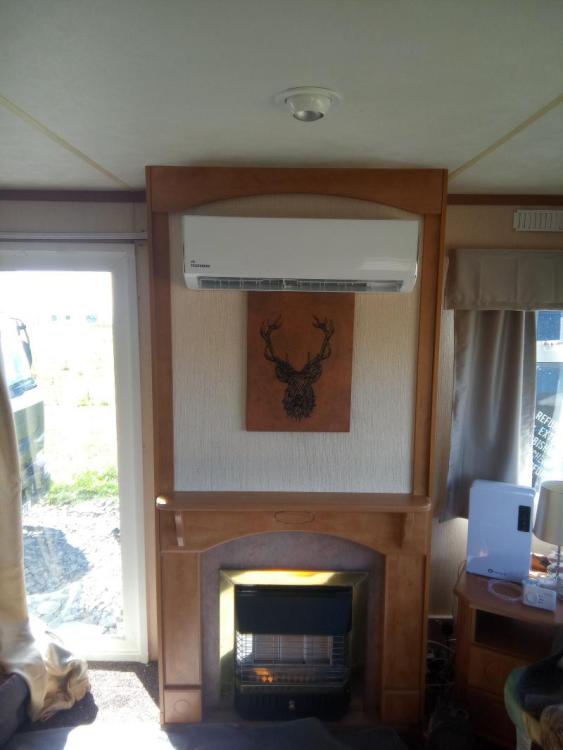
Our Static has a gas fire - useless, and a chimney breast made from chipboard, the side panel just screws off to access the flue. This was the perfect place for the indoor unit, as it would be a neat install and the rear will allow for the pipes to be hidden, also I could use the hole in the floor to route the pipes/ drain and power for the remote unit.
I removed the light fitting, screwed the bracket on the timber, and drilled a 80mm hole, for the pipes / drain and power. Then its a case of posting all the pipes/ drain and power cables through the hole, really straight forward, the indoor unit then just clips into place.
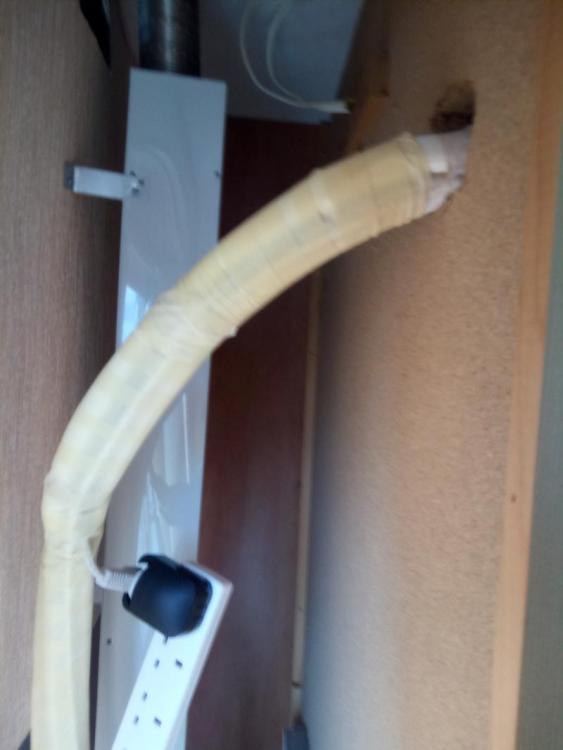
The indoor unit comes pre wired with a 13A plug top, and you need to run a 3core and earth cable from the indoor unit to the outdoor unit. this is Live, Neutral and a control / switch cable.
Next to the chimney is a double plug socket, so I wasn't messing around running new cables, I just drilled an 8mm hole in the side of the chimney breast and used 2M extension lead to plug the unit in. I used some zip ties to secure the extension lead and plug to the pipes (these were put on after the photo below). and that was the internal work complete. zero mess, and no rework / decoration required.
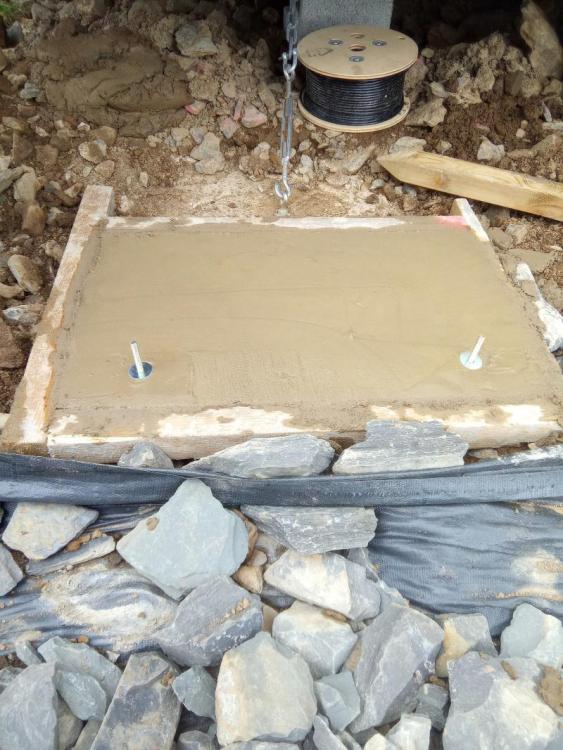
The outdoor unit was going to sit directly outside, behind the chimney breast, the ground outside was not level but it is bedrock, so a made a simple frame and made level concrete pad, and cast some hook bolts into the concrete.
For initial research I spoke with a Local (ish) refrigeration engineer, and he said he would connect for £120. but was telling me there is nothing to it, and if I was doing everything else then maybe I do it all???
I found an American You tube guide which was helpful on the pipework side. (linked below) Basically, the unit comes pre charged with gas, so you are not filling with gas etc. the main issue is removing the air from the two pipes you install. This is done with a vacuum pump. (some more expensive units come with pipes and they are pre-vacuumed with quick connectors)
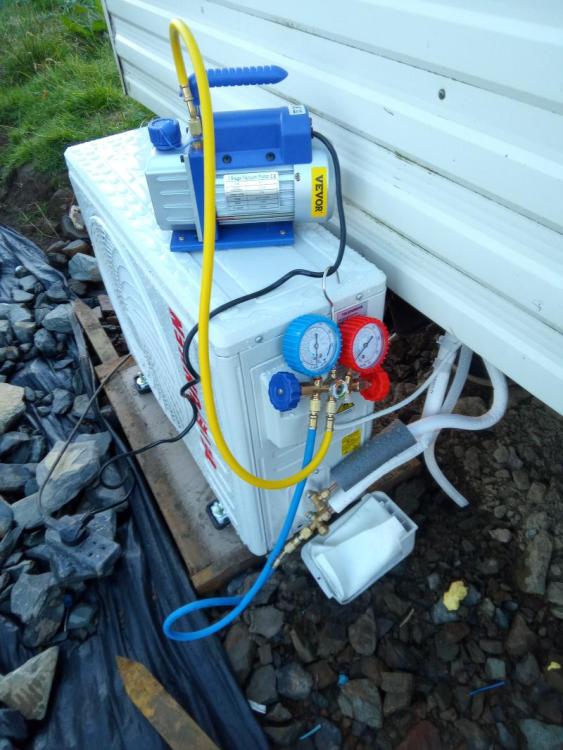
I found a vacuum pump and gauge set for sale on Vevor for £79 so £41 cheaper than the refrigeration engineer. I bought one, and an adaptor. I'm not suggesting anyone does this without an F - Gas Engineer, but the main issues are leaks, if when you connect the pipes up and they leak you are going to loose the gas, and the unit wont work.
To Purge the pipes
Step 1 connect your pump to the centre of the two gauges with a hose
Step 2 connect a second hose to one of the gauges and the other end to the one way valve on the outdoor unit
Step 3 Open the valve on the corresponding gauge from step 2.
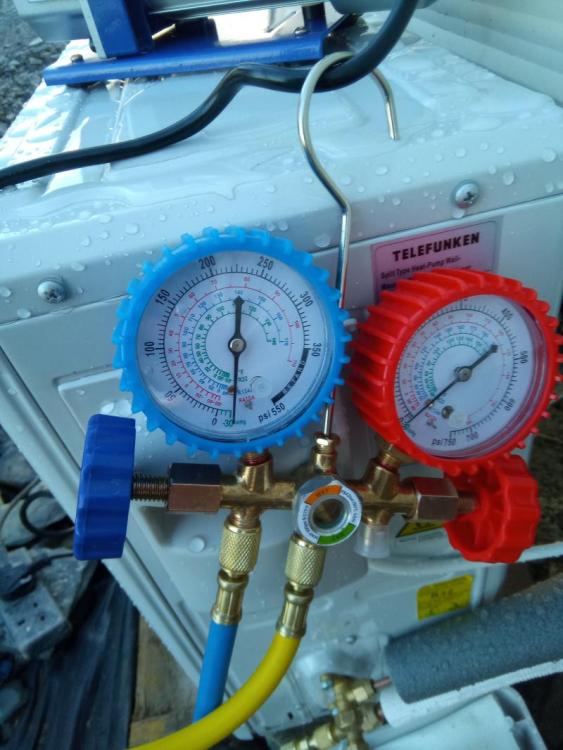
Step 4 Run the vacuum pump for 15mins to remove the air, and you check the gauge is reading negative. (-30 blue gauge in pic below)
Step 5 turn off the pump and wait 15mins, and check the gauge is still negative. (-30) - this proves there is no leaks
Step 6 close the valve you opened in step 3.
Step 7 Open the 5mm Allen screws on both valves to the gas fill the internal unit.
That is disconnect the pump plug the indoor unit in and you ready to go.
Notes: I used expanding foam in the hole at the rear of the fire. We have no intentions of using the fire as it is /was rubbish. Also the indoor unit should not be near a source of heat.
The total install time was around 4 hours. and total cost £530
More importantly my caravan has warm air. lets see what its like in winter.🤞
-
 5
5


21 Comments
Recommended Comments
Create an account or sign in to comment
You need to be a member in order to leave a comment
Create an account
Sign up for a new account in our community. It's easy!
Register a new accountSign in
Already have an account? Sign in here.
Sign In Now