Search the Community
Showing results for tags 'patio'.
-
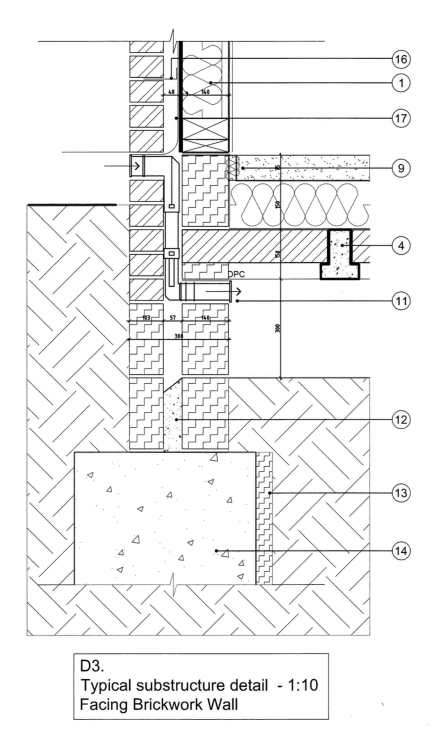
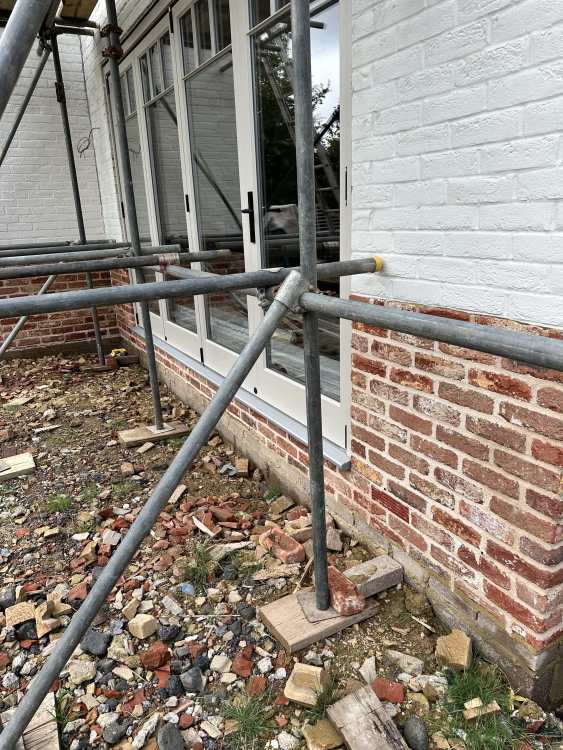
Our under ground vents were designed by our architect to sit externally a course below the finished internal floor height, and this is what was built. See attached drawing and picture. We are now onto the patio, and want our patio level to be the same as our finished internal floor, ie no step down, however if we do this we will block the vents! What is the solution? Our landscaper says the vents should be above the floor level. Our builder and architect say all new build under floor vents are positioned like this…
- 1 reply
-
- groundworks
- ventilation
-
(and 2 more)
Tagged with:
-
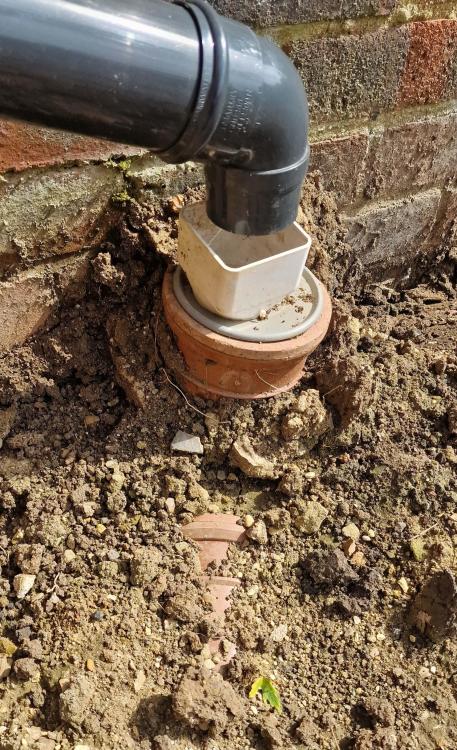
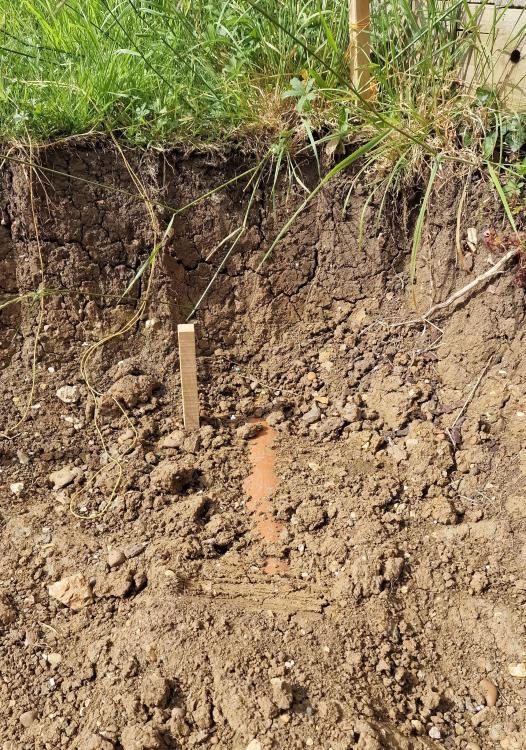
Hi and thanks in advance for any help people can offer. I am currently excavating behind my house to build a Gravel Patio and have discovered a drain pipe that runs diagonally across the back of my house and into the neighbors garden. I have no idea where the inlet is as it is not running in the direction of the neighbors house which is adjacent to mine and there is no other building in the direction of travel for about a mile. The pipe then connects to the down pipe at the back of my house that the gutter runs into. That said my main concern is how to protect it rather than where it come from. The Patio will have 100mm of MOT 10mm of sand and then 50mm of gravel in gravel girds. I was going to hire a Wacker Plate to compress the MOT. I am assuming I cannot just lob some MOT down over the top of this. I was planning to dig a trench either side lay some bricks either side and then place something over the top a bit like a lintel and then fill the trench with either sand or gravel. My questions.. Does this sound a reasonable idea? Should i use bricks or concrete blocks? I have a nice collection of bricks I have dug up left over by the builders. What should I use as a base for the bricks/blocks? Concrete or compacted MOT What should i fill the gap between the blocks and pipe with? Sand or Gravel? What could i use to place on top of the bricks/blocks to protect the pipe? The neighbour suggested cutting paving slabs. Do I need to mortar it all together or will gravity do the work? Thanks again for any advice people may be able to offer.
-
Hi everyone, Well the weather is looking to be better next week and I'm on leave so planning on doing a bit more landscaping in the garden. I'm going to excavate the bottom part of the garden (bounded by the yellow line in the model). There is a clay paver path to be laid on top of sharp sand bedding layer and also 6mm gravel in the other areas with a stabilisation layer and 10-15mm bedding layer of sharp sand. I'm planning to use a 100mm MOT Type 1 subbase layer for the whole lot. The question is should I put a fall on it or will it be OK level for drainage purposes? Many thanks, Ed
- 8 replies
-
- laying gravel
- laying clay pavers
-
(and 3 more)
Tagged with:
-
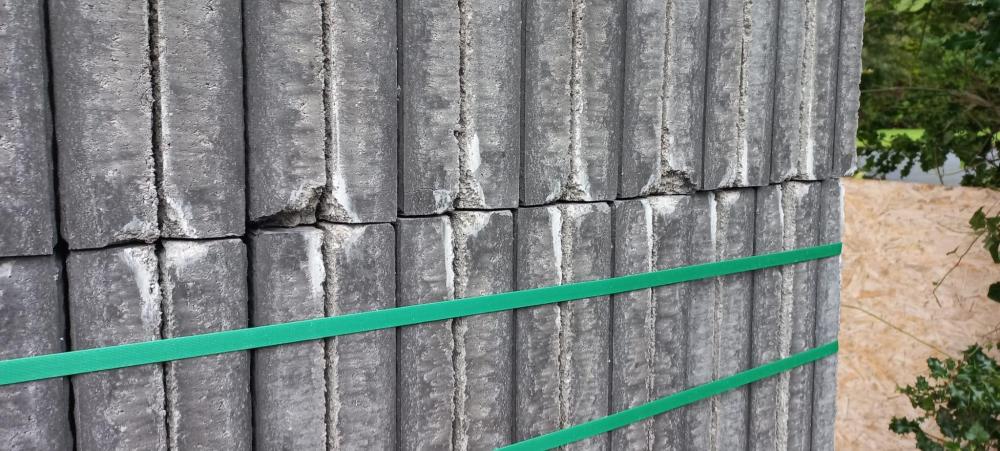
Hi all, my gut is that this is simply not acceptable, but I need your thoughts before I speak to the builder, please. So many of the delivered flags are chipped - is this an acceptable consequence of transportation? Thanks, James
-
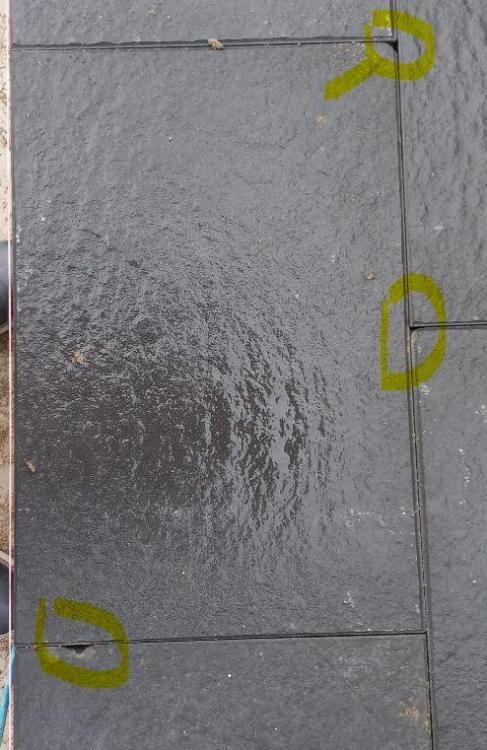
Morning, I have laid a patio with an Aco channel drain at one end. The slabs next to the drain have about 5mm gap and are about 5mm higher than the side of the drain. I have Sika Fastfix jointing compound to joint the patio. What is the best way to joint the drain gap? Obviously it needs to be filled properly so the water runs into it. Should I just work in the fastfix or use mortar? I have a mortar gun which I guess will make filling it easier. Any recommendations would be good. Thanks Ed
-
Hello, Thank you in advance for all who will take time to support! I am planning to install patio grid in my garden to give some firmness to my heavy clay soil. Now I understood I need to dig around 130mm (as it will be light traffic and only foot traffic) and put around 60mm hard subbase 30mm of Sharp sand and the 40mm of the grid filled with probably 10/20mm chipping. However as I am on clay soil and need permeability (yes raining a lot in Wales and I have a conservatory adjacent to where I am going to do the patio), I am not sure what to use as hard subbase. I read MOT 1 is the most common but my understanding is that it will not be good for the permeability so can I use 20mm Limestone instead? or 20mm gravel? It is for an area of 10sqm approximately. Thank you!
-
Hello everyone! New to the platform and have recently purchased a property in London with a very run down garden. I am looking at laying a combination of a small gravel and patio area, in total no more than 20sqm (it will be sort of U shape, with grass in the middle of the U). My garden as it stand is an unlevel mud area, with no real vegetation except some weed, and an existing piece of concrete patio that a shed sits on. My question is surrounding digging for the sub-base before laying the gravel and cement/slabs. I wondered if this was actually required or whether I could build on top of the mud etc and then raise the turf level to meet it. Is there any specific reason why digging down is better than building up? Thanks in advance, all advice welcome as I am new to this stuff!
-
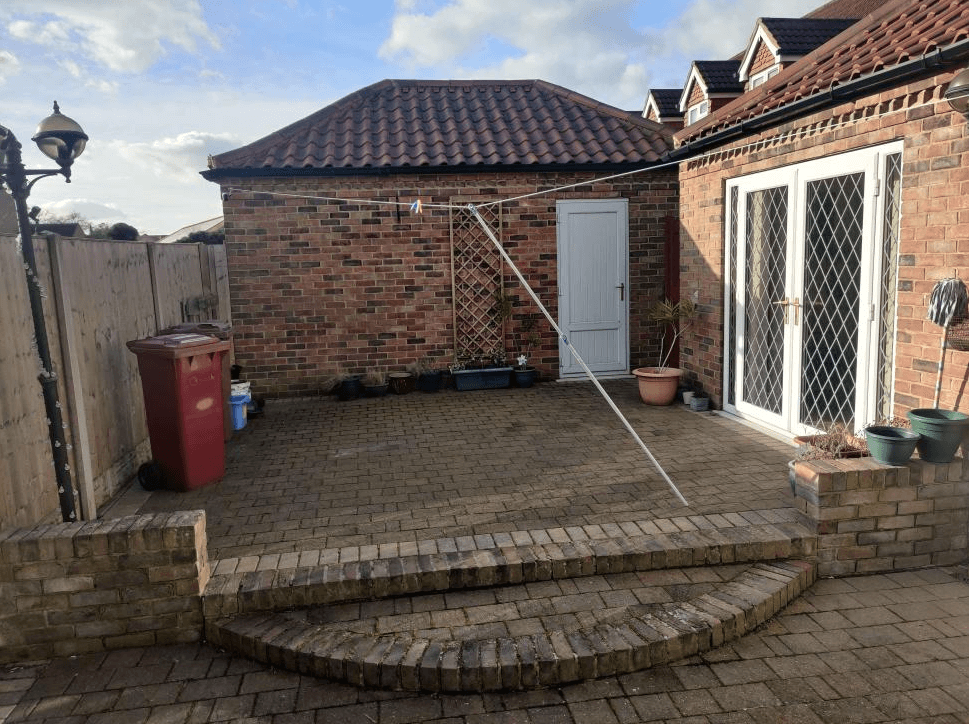
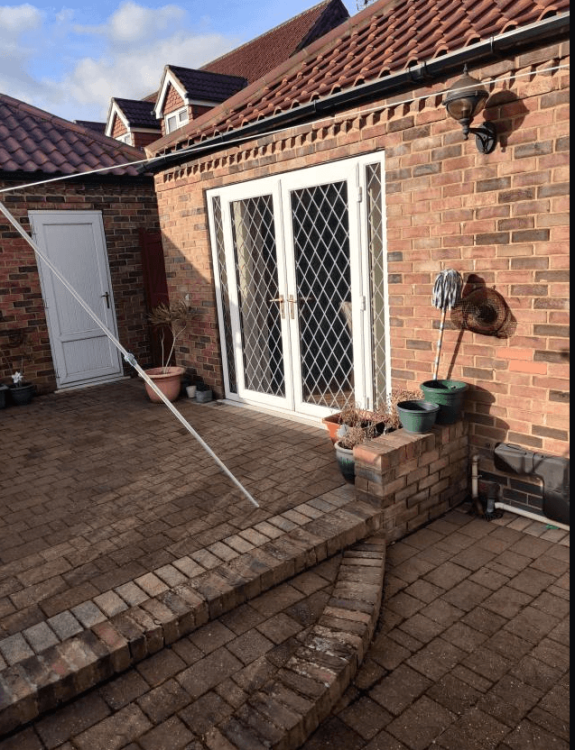
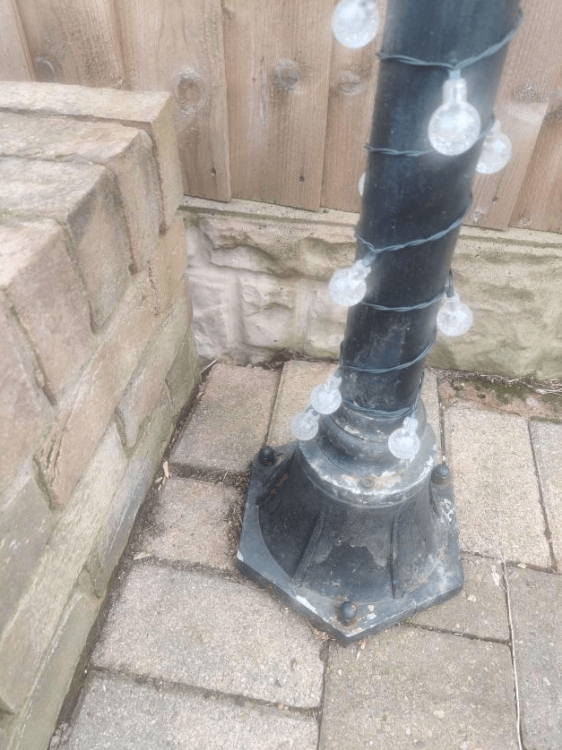
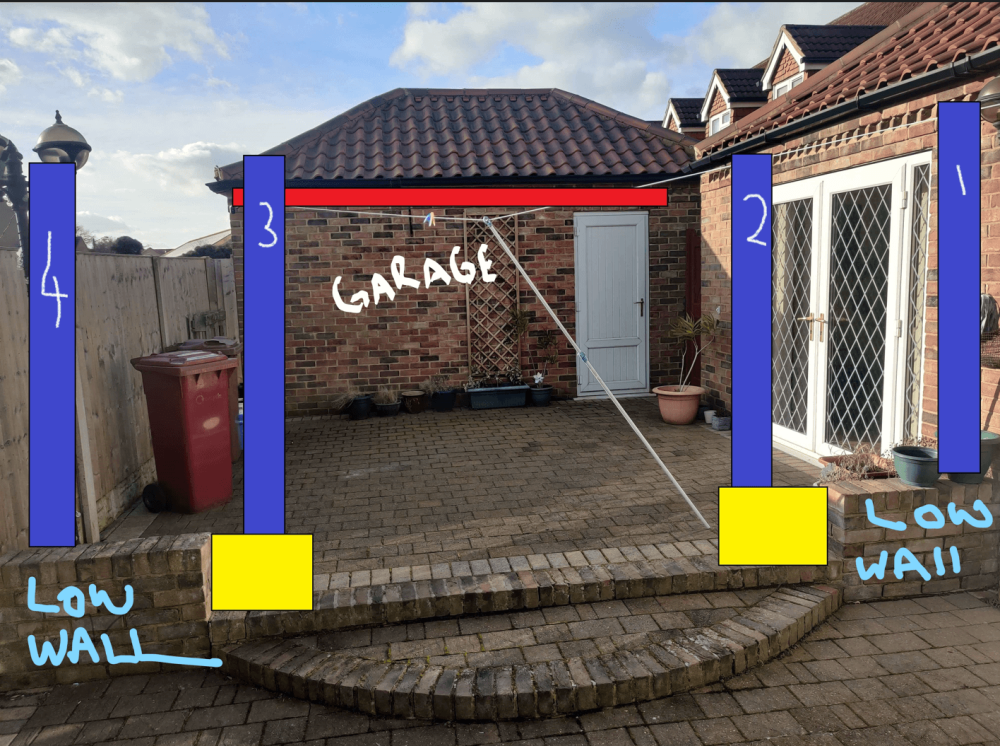
Hello everyone, I'm new to the forum! After a few summers of not getting around to it, I am determined to get a lean-to-pergola erected this year. My procrastination has mainly been down to a few issues I need to be sure of before commencing. Please refer to attached images. I want the pergola to cover the entire area of the raised patio which is 5m x 5m with a height of 2.3m to the centre of the decorative brick course. My idea is for the ledger board to be attached to the garage. I will then have 4 supporting posts (6"x6"?) sat behind the low wall. My 1st doubt is how to secure the posts and would like advice please. Posts 1 & 2 have a drain pipe underneath the patio so digging isn't an option. Post 1 can be secured to the bungalow wall IMO. Posts 3 & 4 could be dug and secured with concrete(?). Post 4 I have concerns as it is right in the corner of the raised patio area and I would suspect that digging will result in the collapse of the immediate earth? (image) Could Post 2 & 3 be secured with a kind of 'above deck' post bracket? I would suggest a bracket for Post 4 too, but as you can see the paving bricks already seem to be falling away so I have concerns about solid foundations for Post 4 if I went for a bracket. These 4 posts would support the main beam (2"x8"?) which has a total length of 5m! The gap between posts 1 & 2 and 3 & 4 would be 1m leaving a span of 3m between 2 & 3. There would also be a number of cross rafters from the ledger board to the main beam, which raises more doubts... 1) The main beam: a 5m length of 2x8 will be quite weighty I imagine. Will I need 1 beam or 2 (1 at either side of posts) 2) the 5m rafters will have no support along their span, is this unadvised? i guess the rafters aren't as thick/heavy as the main beam(s) but still, 5m might be a bit of an ask. -The light post would obv be removed - the existing electric supply would be kept to supply lighting to the pergola. - the low wall would be rebuilt to extend to hide posts. I would appreciate any advice to help with the build. 🙏
-
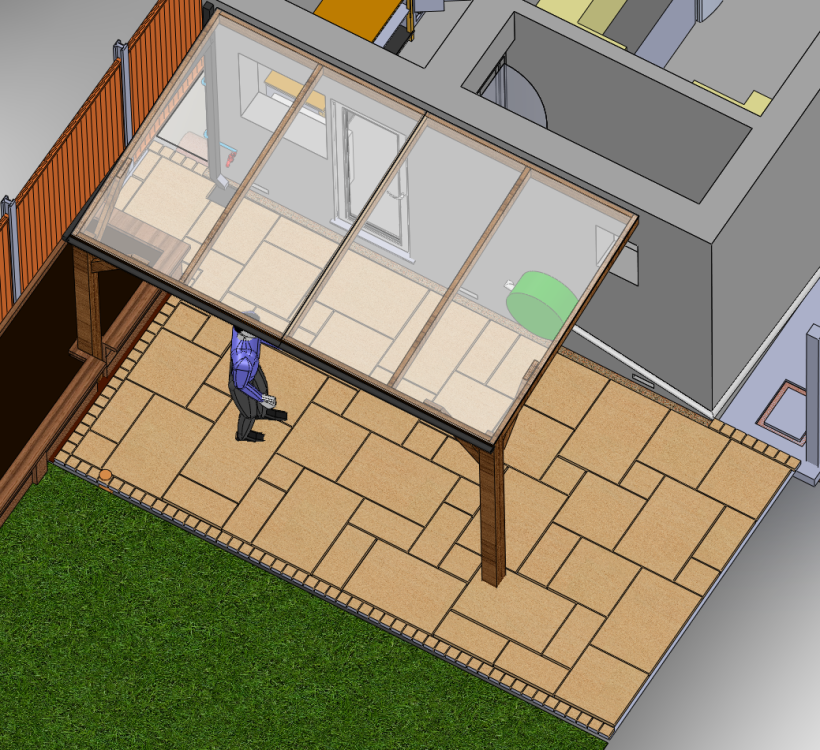
Hi all. Bit of a unusual situation it seems when planning a patio, maybe someone can help: Bought a 1970s house 2 years ago that had an extension in 1975 and later a large interior redesign which included moving the rear doorway in the rear single story cavity wall. No damp problems in the house. Picture 1: The area highlighted in green are the DPC levels. Left was the extension, middle was where old door was moved from, right is original. Total width of rear wall is ~5125mm. Picture 2: An isometric view of the recent patio design so far + polycarbonate canopy idea (Unfinished design, but refining it). We had to rebuild a soakaway because the previous failed (No membrane around a stone filled pit near house. It's now 1.2m3 about 5m from house), so we also opted to excavate for a patio while removing several tones of buried construction/refurb waste left behind. The DPC levels vary wildly across the back, but to make matters worse it's only 35mm higher than the concrete side path on the right side AND it's the absolute minimum height above of only 3 brick courses above the foundation on the right third (allowing 225mm cavity clearance for building regs). Furthermore the garden slopes upwards from the house (were adding a french drain at between the patio/garden in case), so higher patio would be prefered. Patio will slope away from house. The foundation extends about 150mm away from the wall. This all makes it tricky to get any kind of drainage channel or slope in there. We believe the foundations are so wide/deep because clay soil around here. This means a patio almost can't be 150mm below the DPC all the way as it would be cemented to the foundation creating a non-draining area, while also being below all surrounding area. We are very strongly considering a lean-to canopy over almost all the rear wall to remove most of the water getting on the area near the wall (piped directly to soakaway). We would leave a ~100mm air/stone-filled gap to the wall and either pipework, membrane wrapped stone (then topped), or proprietary solution to ensure the small amount of water can drain to the ground under the patio subbase. Among the options we were considering (left side to right): A) 150mm Below door DPC on left, slight slope to level with DPC/concrete on the right corner. B) 150mm Below door DPC on left, step in middle to 75mm below DPC on the right, small step up to side path. C) ~85mm Below door DPC on left, step in middle to level with DPC/concrete on the right D) ~85mm Below door DPC on left, NO step in middle, ~75mm ABOVE DPC on the right. ~100mm step down to side path. None are ideal, but our prefered solution is D with Canopy + 100mm air gap + solid provisions to ensure the gap (between house/patio) drains to soil below patio (i.e. so it doesn't just become a solid water collecting channel on foundation). I don't believe enough water would collect there to warrant a full drain system piped to soakaway nor could it cause any damp issues given even more draining than existing was, despite being above dpc 100mm away. How would you deal with the combined DPC and foundation issue for this patio? or thoughts?
-
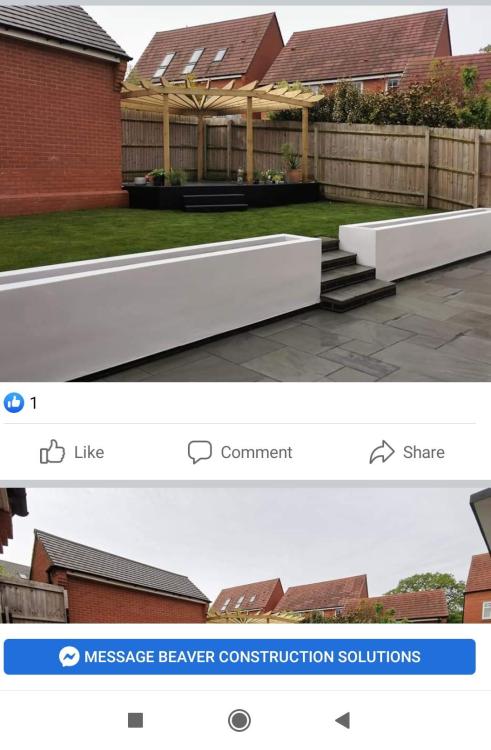
We are really after some patio inspiration. We have been saving and are in a position where we should have enough money for the porcelain and materials and we have found someone who will lay it too and do any brick work and can work with my dad to prepare the ground etc. So here is a little video .... VID_20220814_204323.mp4 Now we love the idea of some kind of rendered brick planters around the patio like these - ignoring the steps (pinched from a random Facebook page). Our neighbour is a plasterer and has said he can render anything the same as the house. The issue is what to do with the left and right as we would love to have the patio enclosed but on the left the downspout is in the way and on both sides it wouldn't be wide enough for wall planters to be attached - and with the EWI I'm a bit apprehensive on anything fixed to the house. The patio needs building up as we have a drop at the moment and the grass area would likely be level as the ground needs raising in parts as it's all uneven and messy. Ideally we would like some kind of path then leading to the old septic tank paved area which we will extend and repave in porcelain and have some kind of pergola area. So, inspire me please! Any other ideas or suggestions?
-
Hi there, I’m new here so please tell me if I’m doing something wrong! Looking for recommendations on how to improve and extend our old concrete patio please! Open to suggestions. Ideally DYI and lower cost options. We want to push it out into the garden by about 1m. The current retaining wall is about 25cm high. Ideally we could rebuild the retaining wall with sleepers and have raised beds on the other side. The drainage next to the patio doors is new (that was done when we had the small extension and left hand patio doors installed in 2020). Ideally I’d like drainage away from the house but not sure how that works with a retaining wall. The concrete seems pretty solid. It’s not level, some high points. Has been there since the 90’s. Looks like there are 3 ‘pieces’ I.e. there are two joints/seems visible. When they were digging it out for the extension it looked like it was about 1ft thick/deep. The patio doors are different heights from the patio itself as you’ll see in the photos with the tape measure. (When I work out how to upload them as larger than size restrictions) We plan to have an additional patio/deck seating area lower at the bottom of the garden for evening sun, this area by the house gets the morning sun so it doesn’t need to be huge. Any suggestions welcomed thanks! Ill work on the photo uploading! Mike
-
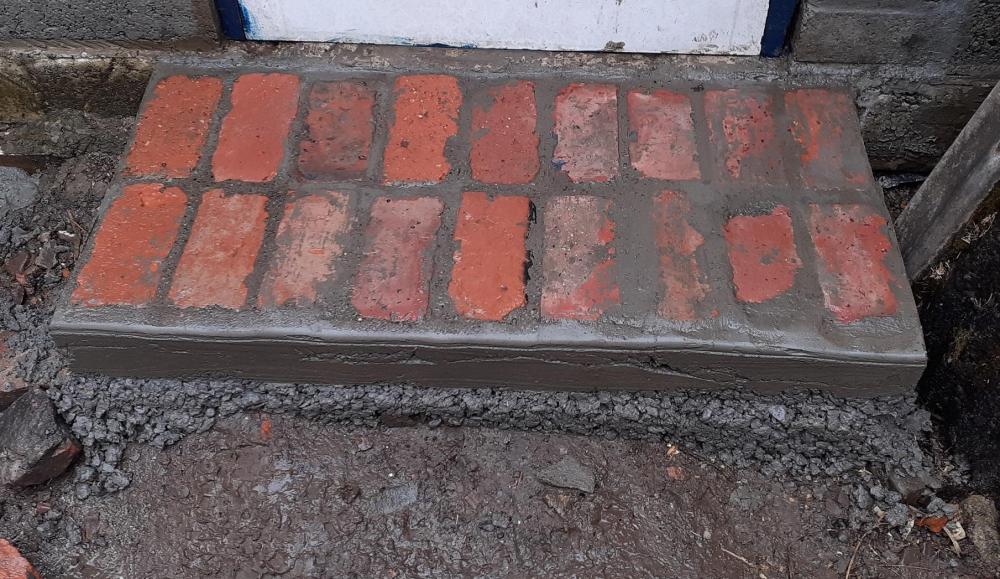
I have quite a few old bricks, found them under the old garage slab, looks like they scraped all the top soil off to the clay then dumped a lorry load of bricks to make up the ground then covered it in whin dust which sort of filled the top layer gaps. Interestingly if any of us suggested this method today we would all baulk at the idea, yet this garage did pretty well for 60 odd years on a 2-3 inch slab with edges built up on cobbles 3/4 layers deep. The bricks are quite nice, big 9" red bricks in pretty good condition, so I have been scratching my head after I had to lift a couple of 100 to run a soil pipe through the old garage site wondering what to do with them, so I looked about, I have always liked the reclaimed brick walls and paths and things so decided to give the new garage a new side entrance as test bed for bigger things. (The dark area to the left of the 4th from the right bottom brick isn't a gap, it is heavily fired clay.) I am quite pleased with the results, I used a wet grout technique, this will not be a step so the rough sides will be unseen - the ground level around is coming back up. So the plan is now a much larger area that leads to this entrance to create a theme.
-
I have an old outdoor patio with tiles laid on mortar beds on top of a 6 inch concrete pad. I want to replace the old concrete tiles with vitrified porcelain tiles I've purchased. Can I remove the old tiles and tidy the concrete dabs/pads down to the original concrete pad and lay the porcelain onto the concrete pad ? or do I need to removed the concrete pad and lay new substrate ? The pad is sound and solid it just has marks from the old dabs of mortar from the original tiles. This is the North UK.
-
I'd like to lower the level of the patio in the design as there is a gentle gradient along the length of the house that makes the patio quite high at one end. The design has two courses of bricks between the patio level and finished floor level (FFL), so that's 150mm. There will be a door frame which will add a bit more height I expect. The factors that come to mind are: Is there a building reg that limits the height change without the use of a step? Staircases have a 220mm limit and the door threshold is in some way equivalent to a step, but if there is a frame that adds extra height What would feel weird, 350mm doesn't feel viable but is 225mm? How low can the door frame be before it adds expense or looks rubbish. I'd expect the door frame to sit on the two courses of bricks and so have its bottom at FFL. I'd like to have 200mm between patio level and FFL I think, but that is only on paper not based on experience of traversing such a doorway.
-
We have just had our paving laid around the perimeter of the house. Now need to grout it! I got a great price on 600mm x 900mm x 20mm smooth platinum grey sandstone slabs (£30/sqm) and the landscaper laid about 100m2 of them on a sand & cement mix (with SBR). Opted against brick bond for a more contemporary look with 5mm gaps and while it was more fiddly for him it looks great. Standard paving grout (such as Easy joint) is intentionally porous but the landscaper is concerned that because the slabs are so smooth underneath, any water ingress and frost may loosen the slabs over time so he's suggesting a more impermeable grout such as BAL widejoint - this is stated as suitable for external use (such as pools) even more so if you use their GT1 admix. I've decided to do this part myself, any tips or advice? Not sure if this is best done by just ramming it into the gaps or to use a applicator gun. --- About the paving... we laid them flush with the house entrances and maintained a 100mm separation from the render horizontally and 200mm vertically. Once the channels are cleaned of muck, i'm applying 200mm of grey Ubilflex to the exposed external EPS and will then fill the bottom 100mm with a decorative stone to act as a french drain. Because we have a basement, there is a 1m perimeter of clean stone cobbles as backfill with a land drain at the foot of the basement so it's very free draining. Patio also falls away from house in all directions. BC and the render firm approved this as acceptable. To tidy the EPS plinth prior to paving, I applied an additional 25mm EPS to 200mm depth all around, lapping the DPM from the frame down under the new EPS. This new EPS also covered any exposed timber where the outer leaf of the frame slightly overhung the original basement EPS. Where we paved up to doors, the DPM went over the top of the stone and has been trimmed back, will run some sealant along those edges to keep water out. Garden will be graded and laid to lawn in a few weeks, then a deep breath and we start to plan the front of the house - just getting quotes for electric gates and resin bonded driveway...eek.

