flanagaj
-
Posts
1239 -
Joined
-
Last visited
-
Days Won
2
Everything posted by flanagaj
-
Insulation upstand when not having skirting board?
flanagaj replied to flanagaj's topic in General Flooring
I will have a look at self compacting concrete. When you say someone to help finish the slab, will a bull float suffice? -
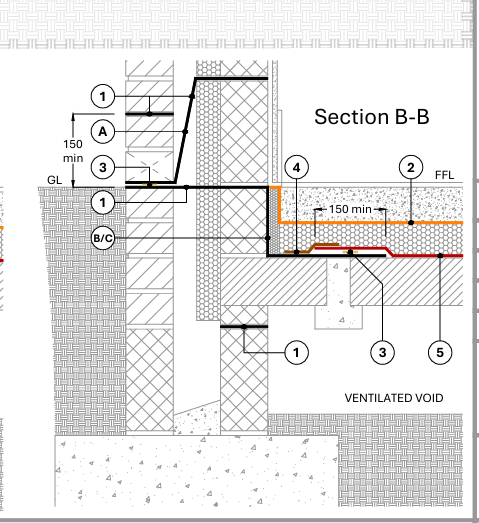
This is very interesting and although a year later, I am keen what approach you went with. I too have been banging my head against a brick wall on this topic. We are having a ground bearing slab and level thresholds. My plan is to simply follow the detailing for the block and beam Radon barrier protection. If you swap out the block and beam for a ground bearing slab then why would it not work. From what I can see, water / damp cannot migrate through the ground into the dwelling and the cavity tray captures any moisture from the cavity and will surely help mitigate and water that did try to breach the cavity. Can anyone see any reason why that detailing could not be used for membrane above a ground bearing slab? I want to go membrane above slab, for the simple reason that service penetrations are quite high and to get a decent damp / Radon seal below the 150mm slab will be a complete dog's dinner.
-
Insulation upstand when not having skirting board?
flanagaj replied to flanagaj's topic in General Flooring
I've subsequently discovered that you can cut a 45 degree angle on the PIR to hide the edge. One final question. How do you get a smooth enough finish on the slab for PIR. Do you simply use a piece of timber with a side to side motion and then use a bull float at 90 degrees. I really need to be able to do the slabs myself with my brother as I struggle to find anyone to do it without changing lots of £££ -
Build has descended into a xxxx show
flanagaj replied to flanagaj's topic in General Self Build & DIY Discussion
Thanks for the photos. So it can be done, just doesn’t look as tidy as a collar, but needs must. Brickie two is not returning. An ego the size of England, unable to understand who the client was and seemed unable to read plans regarding door openings and lintels. -
Build has descended into a xxxx show
flanagaj replied to flanagaj's topic in General Self Build & DIY Discussion
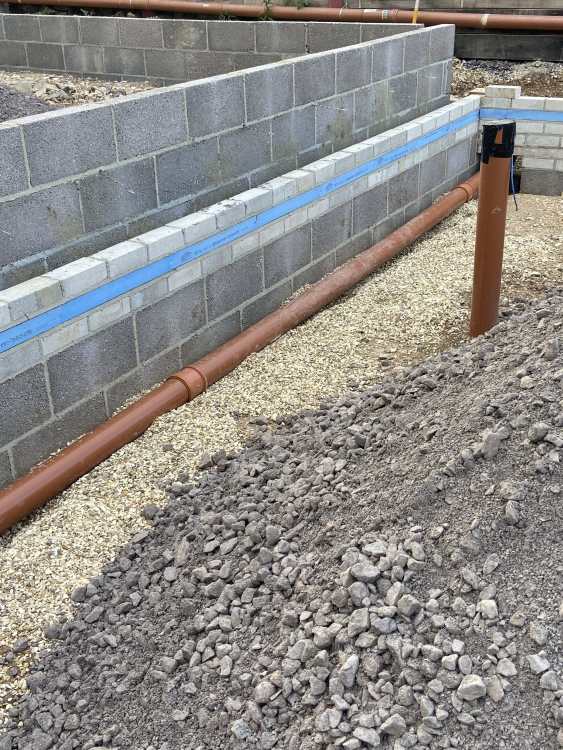
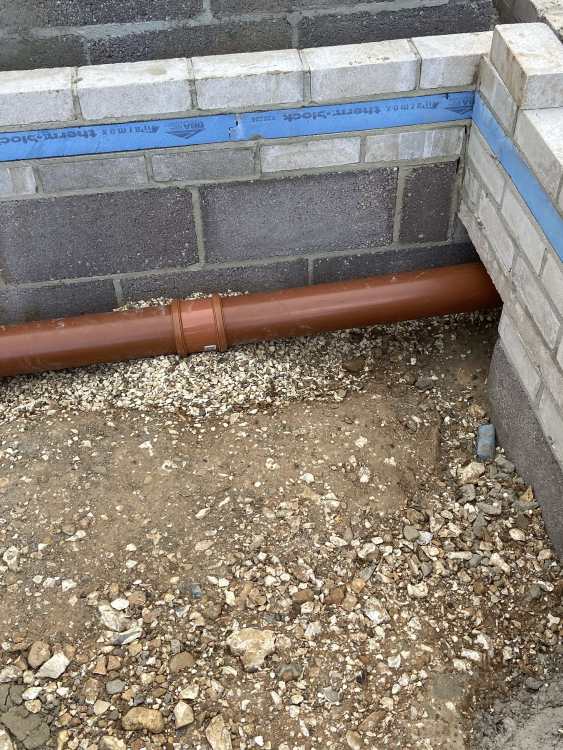
We only require 'Basic' Radon protection as we are in a 3-5% area. The one issue I've got is that the membrane sits at the same level as the coupling on the rest bend. No idea how I'm going to solve that problem. But the top hats I purchased won't work. I think Juta do a liquid rubber that you create a dam and pour. The top hats are great for soil pipes in the middle of a room, but not so when your soil pipe is in the corner of a room. -
Build has descended into a xxxx show
flanagaj replied to flanagaj's topic in General Self Build & DIY Discussion
Yes. Slab build up is as you have stated. Taking down the internal 3 courses won't take long and it will help considerably with gas membrane installation and concreting. -
Build has descended into a xxxx show
flanagaj replied to flanagaj's topic in General Self Build & DIY Discussion
Ok. There is some reassurance that undoing work can make things simpler. The required preformed Visqueen internal door openings will be circa £500 alone. Let alone the additional required taped joints. -
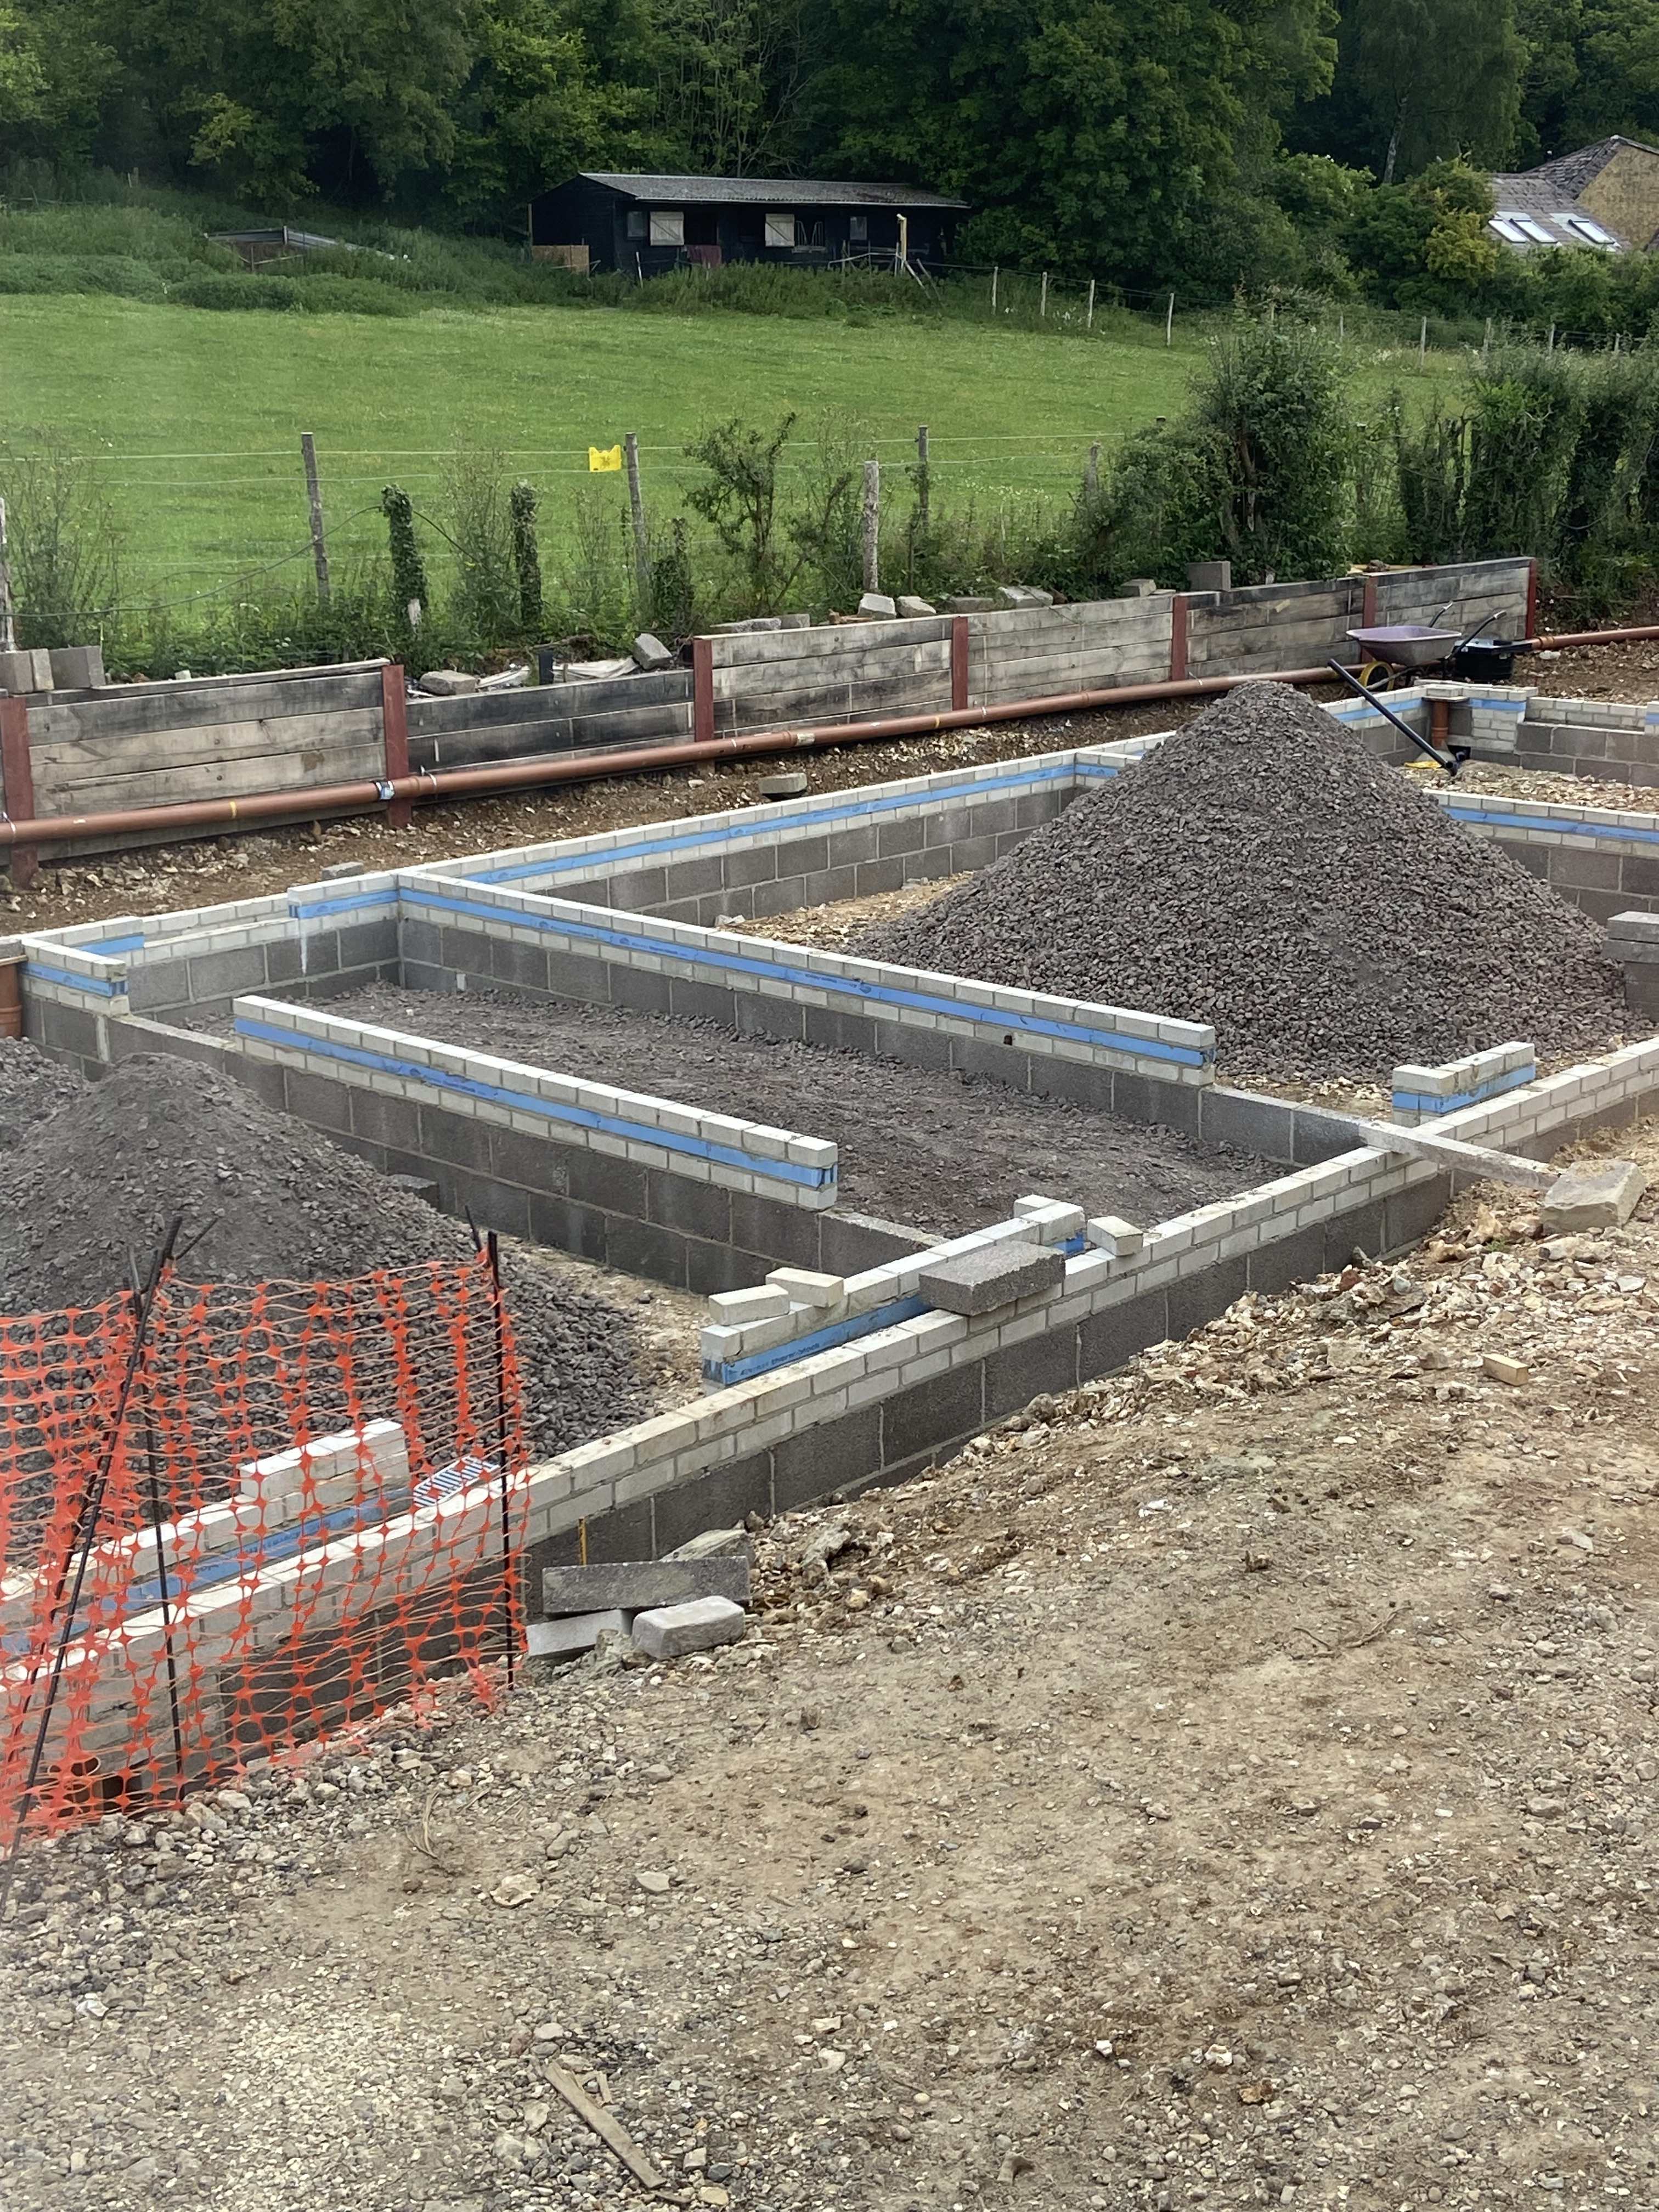
As some of you predicted, our self build has turned into a disaster. We’ve now parted ways with bricklayer number two. Choosing a ground bearing slab was a dumb idea and beam and block would have enabled everything to run more smoothly. i think the bricklayer could have made things simpler by not building up the internal walls the past the block course. This has now made the Radon membrane detailing more tricky and expensive, due to the number of internal door ways. I also feel it’s going to be difficult to lay the slab as the open door ways will mean you have different levels for tamping off. I am contemplating taking the internal walls down to the top block course. What do people think? I don’t want any hate. So if you’ve got nothing constructive to say, please don’t comment. I’ve been contemplating deleting my BH account.

-
Insulation upstand when not having skirting board?
flanagaj replied to flanagaj's topic in General Flooring
My post was confusing. I have an insulated garage floor slab, but I wasn’t planning on plaster-boarding or fixing skirting board. Rather than having a 25mm slice of PIR showing, I could either omit the upstand, but that sort of defeats the point of insulating the slab. -
Insulation upstand when not having skirting board?
flanagaj replied to flanagaj's topic in General Flooring
No floor covering -
With a conventional build, the thickness of the 'dot & dab' / float and set and skirting board will hide the 25mm thickness of the PIR upstand of a screed floor. If you are not planning on having skirting board, then a conventional build up risks the PIR showing. In such a scenario, is the only option to use insulation backed plasterboard or bring the plasterboard off the wall using battens? This obviously only applies to a polished slab finish or an insulated garage floor.
-
Ok, thanks. Do you surround the whole pipe in concrete?
-
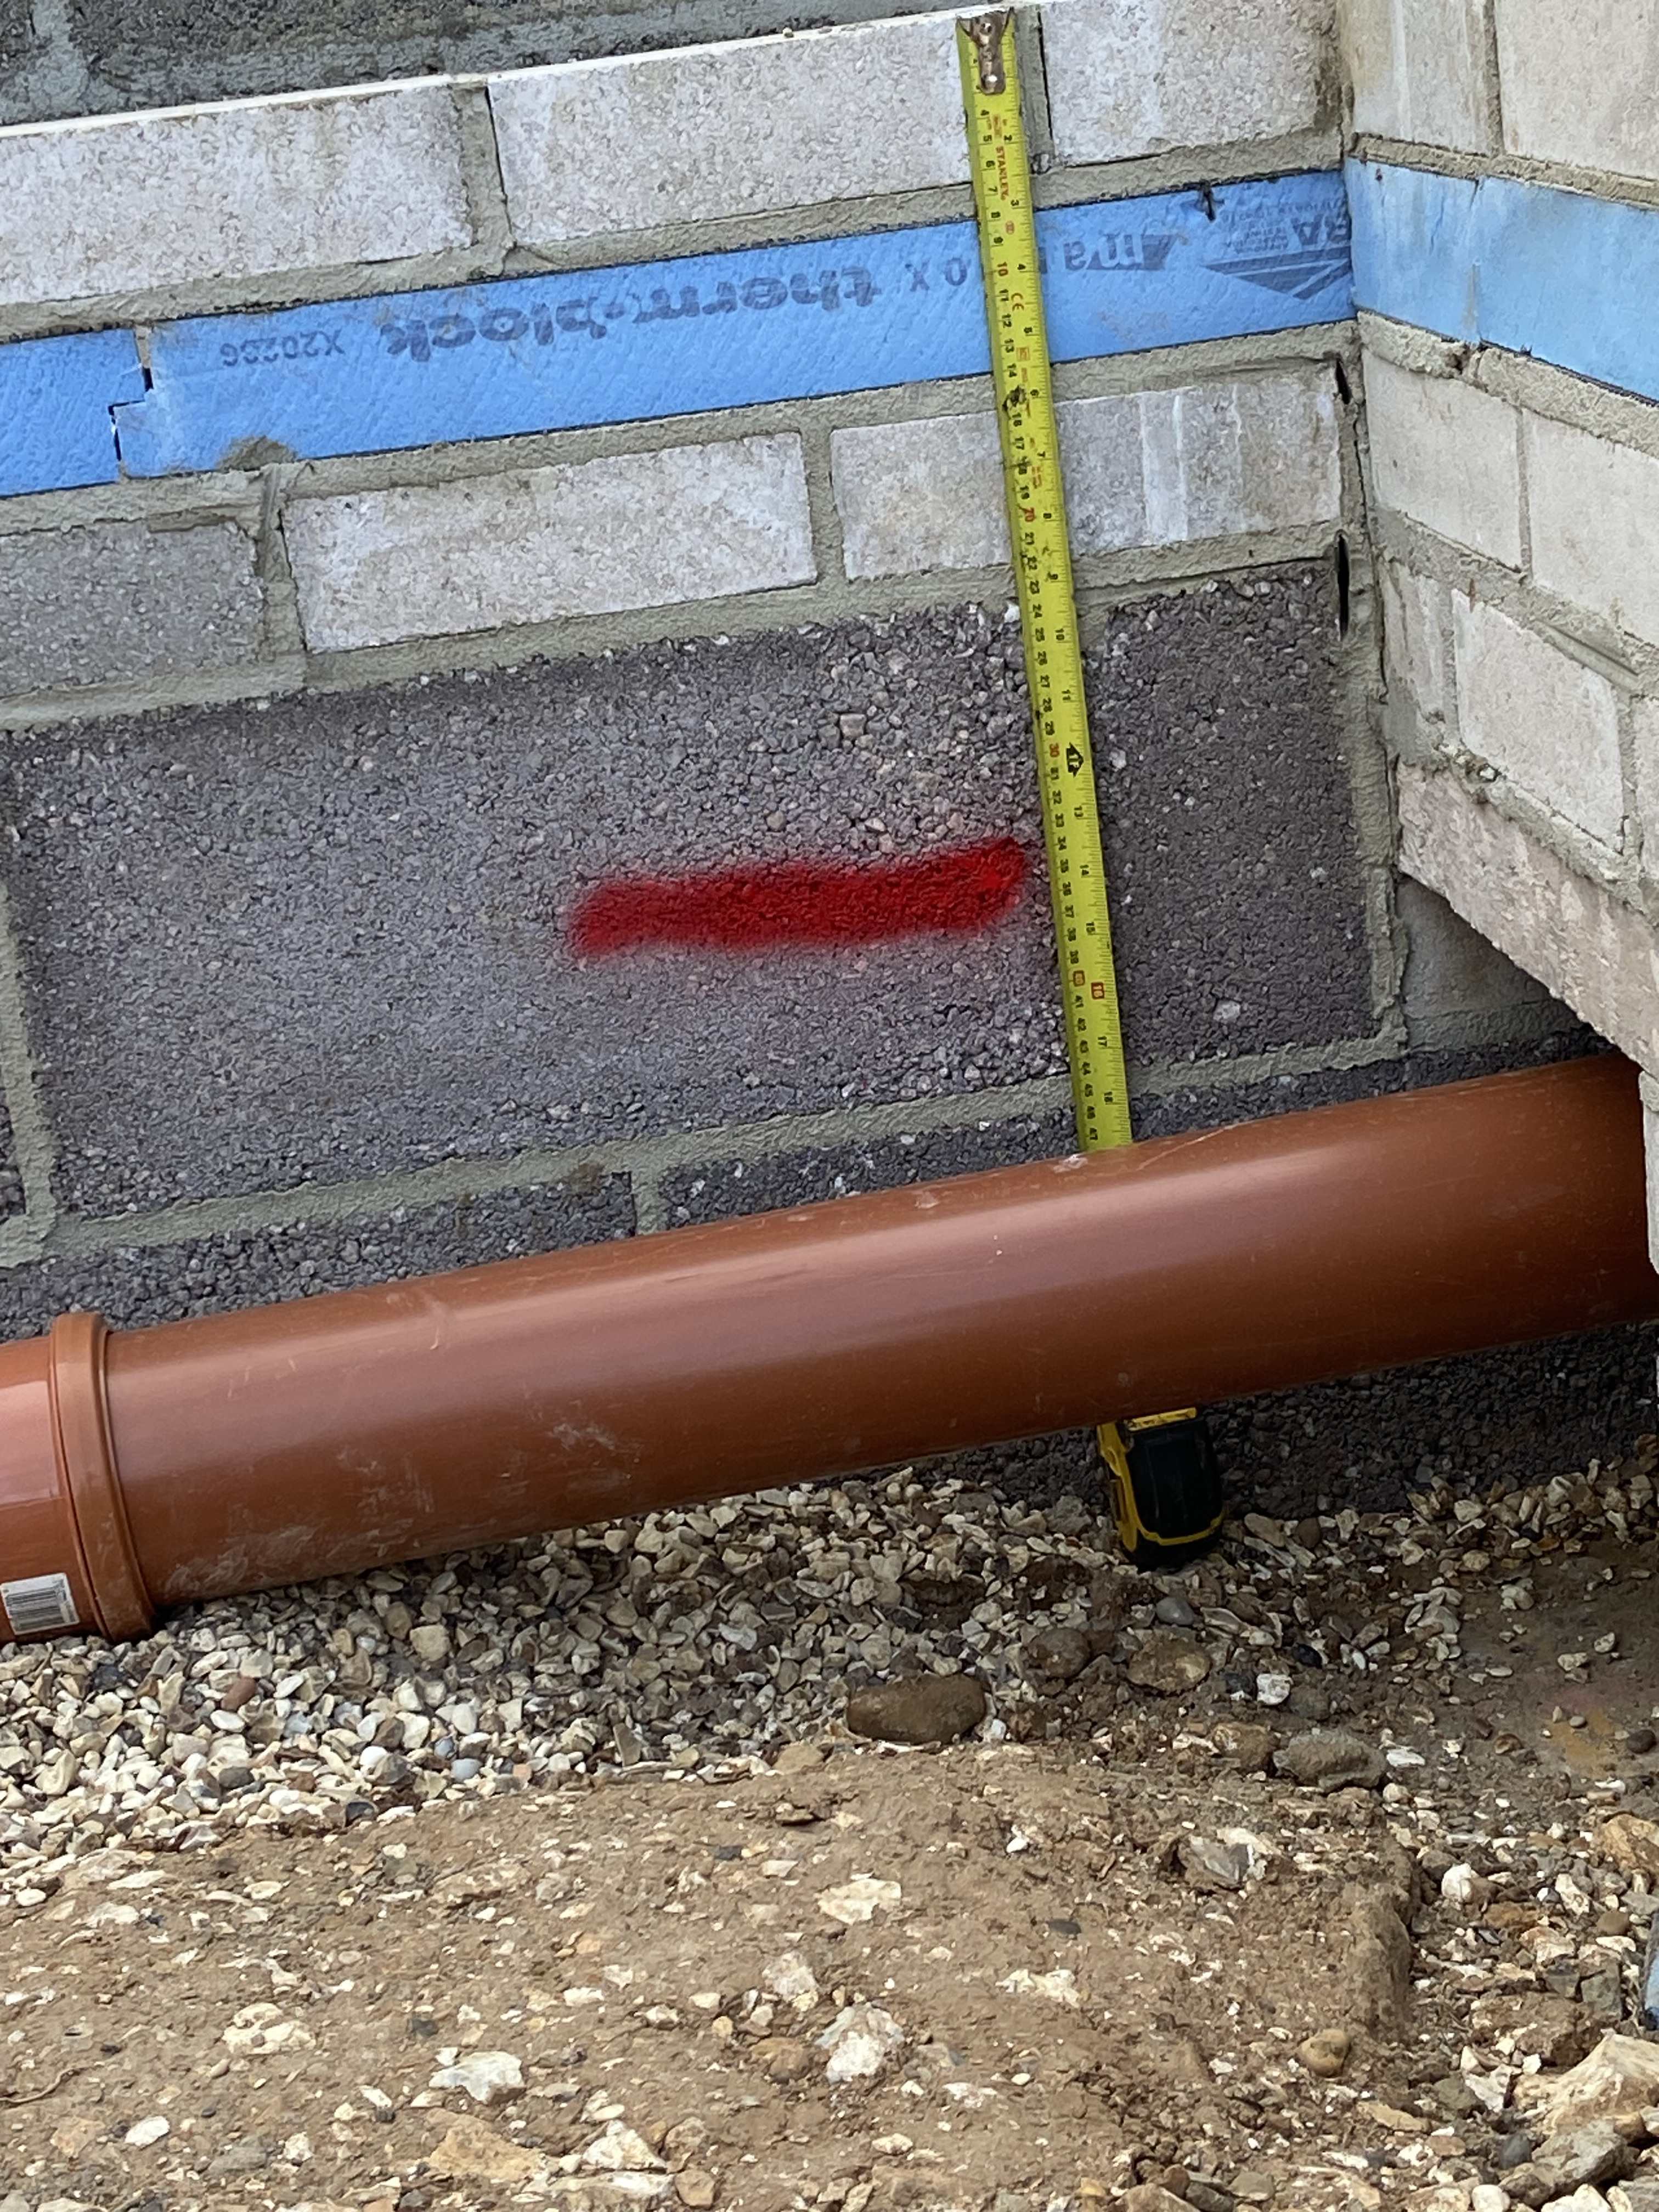
I need to route a rain water drainage pipe under the concrete slab. As you can see from the image there is only about 150mm clearance from the top of the pipe to the underside of the concrete slab (red line) Part H indicates that I need to encase the whole pipe in concrete, but I didn’t find it very clear and wondered if anyone can provide any further guidance on how I should do this. I also wonder whether I should change the pipe for socketed?

-
Garage floor build up has XPS on top of Radon membrane and below concrete slab. Do I need to put a VCL on top of the XPS as well?
-
I cannot comment on the sewage as we have a sewage treatment plant, but we simply requested the water company installed a new connection to a temporary building supply. They came along and inspected the trench a water stand pipe and then connected us up. Once that was connected you can then take a T off the supply to the caravan and then when ready connect up to your house supply.
-
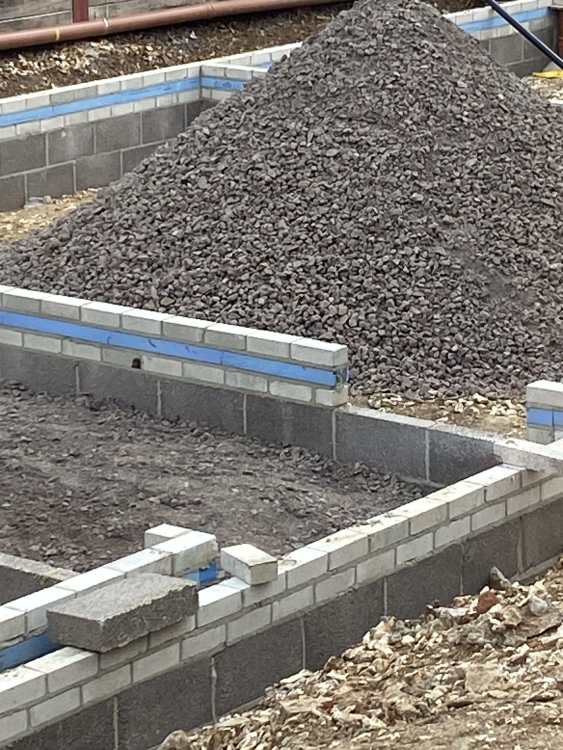
Rest bends haunched. Pea shingle layers done as described. Picking out obvious foreign objects impossible.
-
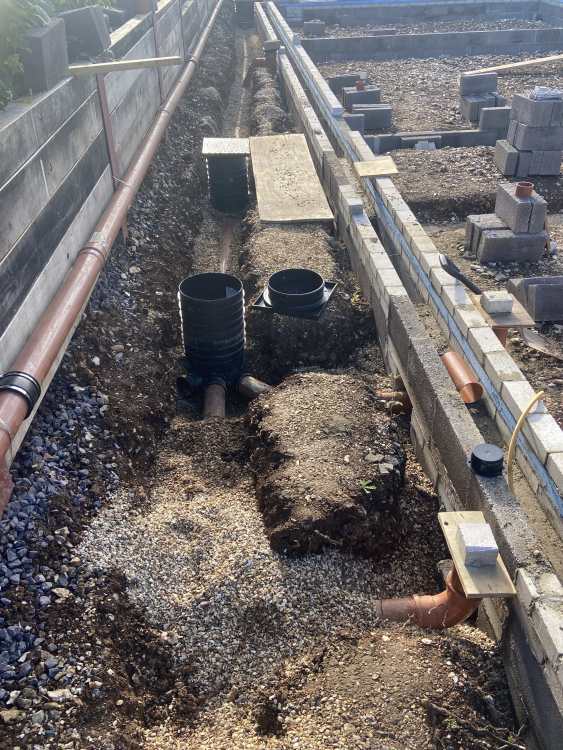
The excavated soil from the foul drainage trench is very flinty and I wanted to ask whether I could backfill the trench using said soil if I cover the foul drainage with 100mm of pea shingle or should I get someone in to screen it first. Trying to avoid unnecessary expenditure, but also possible problems in the future.
-
On paper it looks fine, but I'd just check Part H document to ensure the falls work ok with the arrangements connected to each run.
- 1 reply
-
- 1
-

-
foul waste Foul drainage. Remove inspection chamber?
flanagaj replied to flanagaj's topic in Waste & Sewerage
Foul drainage installed with my own fair hands 😀 -
foul waste Foul drainage. Remove inspection chamber?
flanagaj replied to flanagaj's topic in Waste & Sewerage
Thanks Mike. That’s why this site is so helpful. I hadn’t considered doing it that way 👍 -
Should builder correct bottle gulley mistake?
flanagaj replied to flanagaj's topic in Waste & Sewerage
Unfortunately, he’s got a big ego and apparently knows more than I do. I’ve reached a stage where I cannot lose another bricklayer as I’m already starting to lose the will to live. In his defence, he is well known in the area for high quality work. The bottle gulley was used to avoid having to have a 450mm inspection chamber or an internal rodding point. -
The image below shows the inspection chamber at the beginning of the run. As the first toilet comes in on the branch and the main leads off to the external SVP which is solely there for the sewage treatment plant, I’m concerned that I’m potentially going to get a blockage as there is no flow coming down the main run. if I remove the inspection chamber, I can then route the pipe into the main channel of the next chamber. This will enable the pipe to be rodded. I am then not sure how I’d then branch off for the external SVP?
-
Electrical conduit for bringing armoured cable into house?
flanagaj replied to flanagaj's topic in Electrics - Other
With regards to the 100mm ducting. Do you simply just put a bend in it or do you buy a preformed smooth bore bend? If such a thing exists. -
Electrical conduit for bringing armoured cable into house?
flanagaj replied to flanagaj's topic in Electrics - Other
25mm2 The cable will be from the meter to the CU in the house. -
I have been putting in foul drainage this week and now need to put the conduit in for the 2 * 23 KVa cables that will come under the lintels and into the plant room. I do have a 54mm diameter hockey stick and was wondering whether to just put two of those in, or am I better off using another type of conduit? Thanks