SimonD
-
Posts
1941 -
Joined
-
Last visited
-
Days Won
10
Everything posted by SimonD
-
I would really appreciate tips on designing and building in means to keep cables tidy in your new build. Not just behind the tv, but what about in a games room where the kids have laptops, xbox, phones and tablet and the room just becomes this nightmare tangle of wires! Much gratitude to anyone who can help my sanity here...
-
Any good news re building?
SimonD replied to CalvinHobbes's topic in General Self Build & DIY Discussion
Good to see, shame it's so far from me but positive signs. -
Any good news re building?
SimonD replied to CalvinHobbes's topic in General Self Build & DIY Discussion
I'd love to know where? In our neck of the woods Birch plywood just went up by almost 15% again in January ? I'm currently still in what feels like a grind with a partially complete house. Even so, we've got a couple of IR heaters upstairs and an area for the boys to be on their games/pc/tv as well as an area with a table tennis table. They are loving the house, think it's really exciting, amazingly cosy and they're getting very excited designing what are to be their new rooms. They're both aware that nobody in the world has a house like ours. For me, as I made what I'm not sure is the sensible or stupid decision, to build it entirely myself, I have that sense of satisfaction of creating something real and substantial in the world. Feels like a major achievement compared to what I now term as 'conceptual' stuff I spent my life doing, independently and in many large organisations for most of my life as a career which somehow never gave me the same real life tangible satisfaction. Yup, it's stressful, it's tough, it's sometimes miserable, but any worthy journey must contain those ingredients as it ain't worth it otherwise. -
Design / costs for a shepherd's hut or moveable 'bothy'...
SimonD replied to Grian's topic in New House & Self Build Design
Have a look at Rinnai https://www.rinnai-uk.co.uk/products/ -
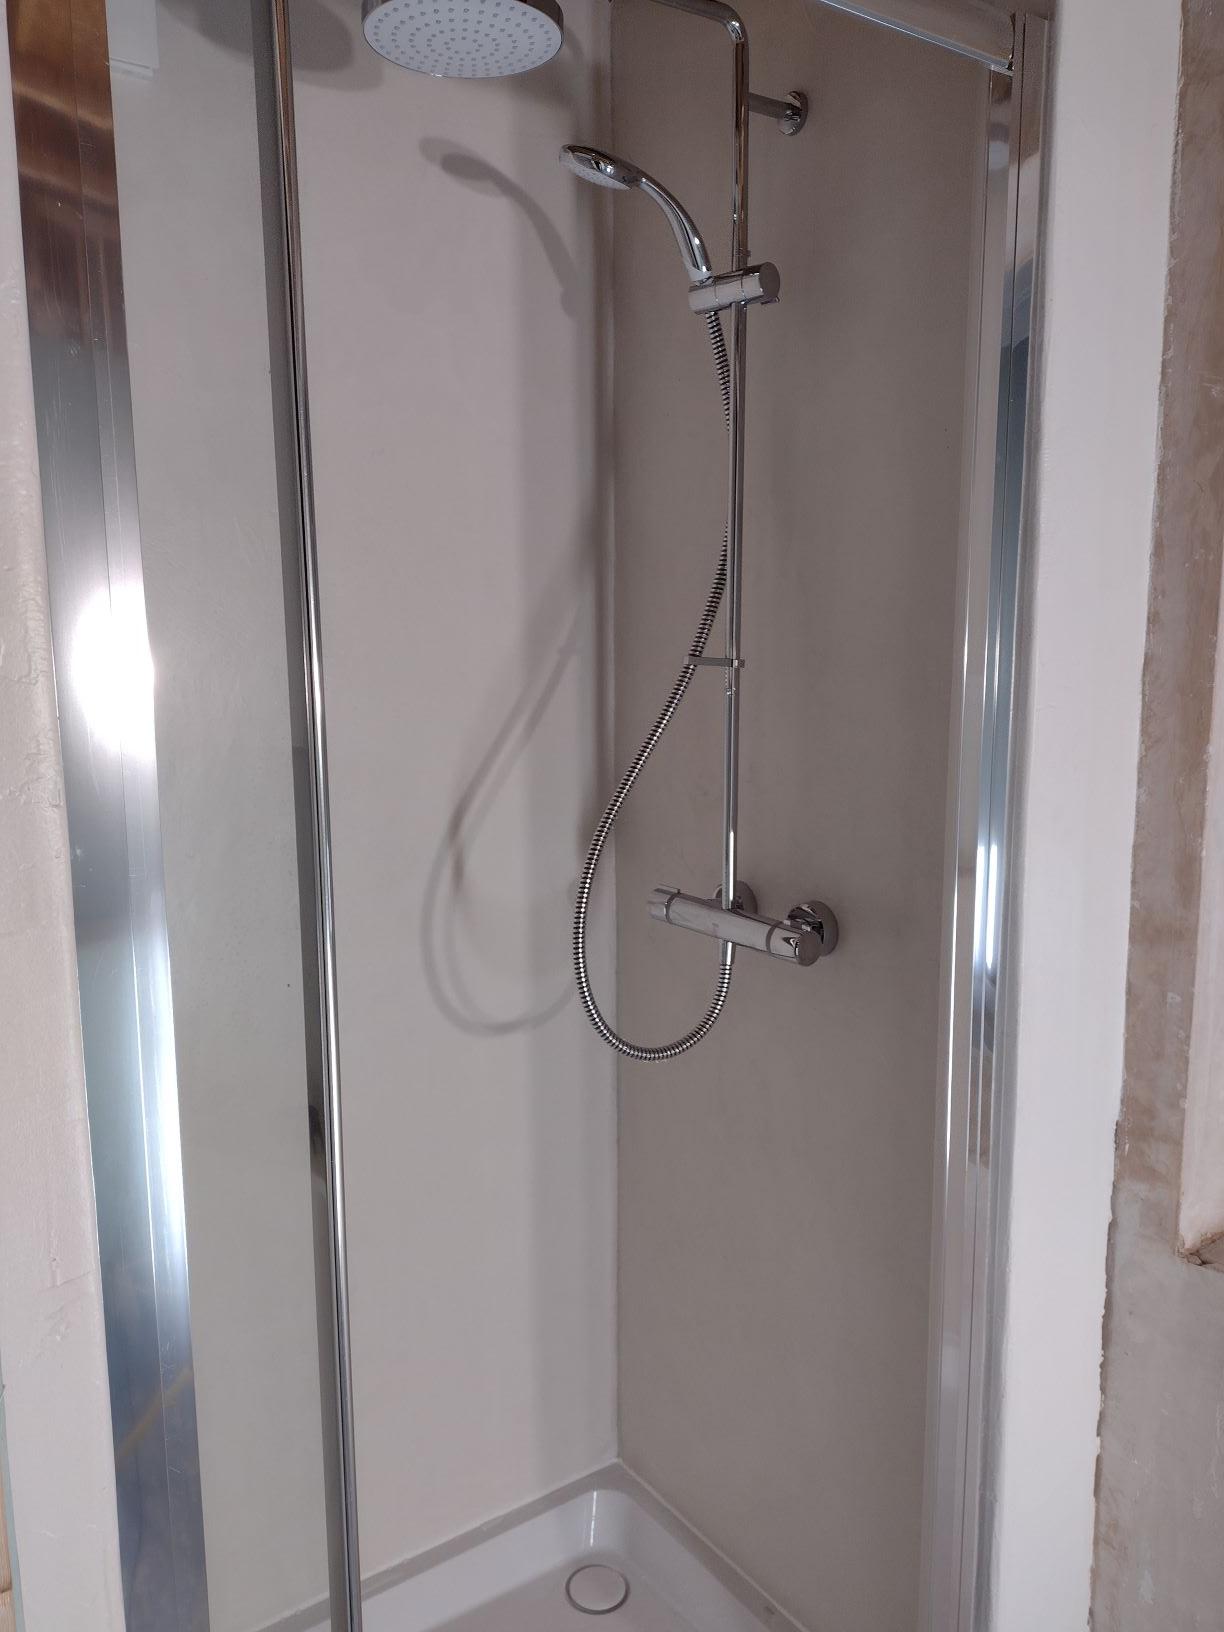
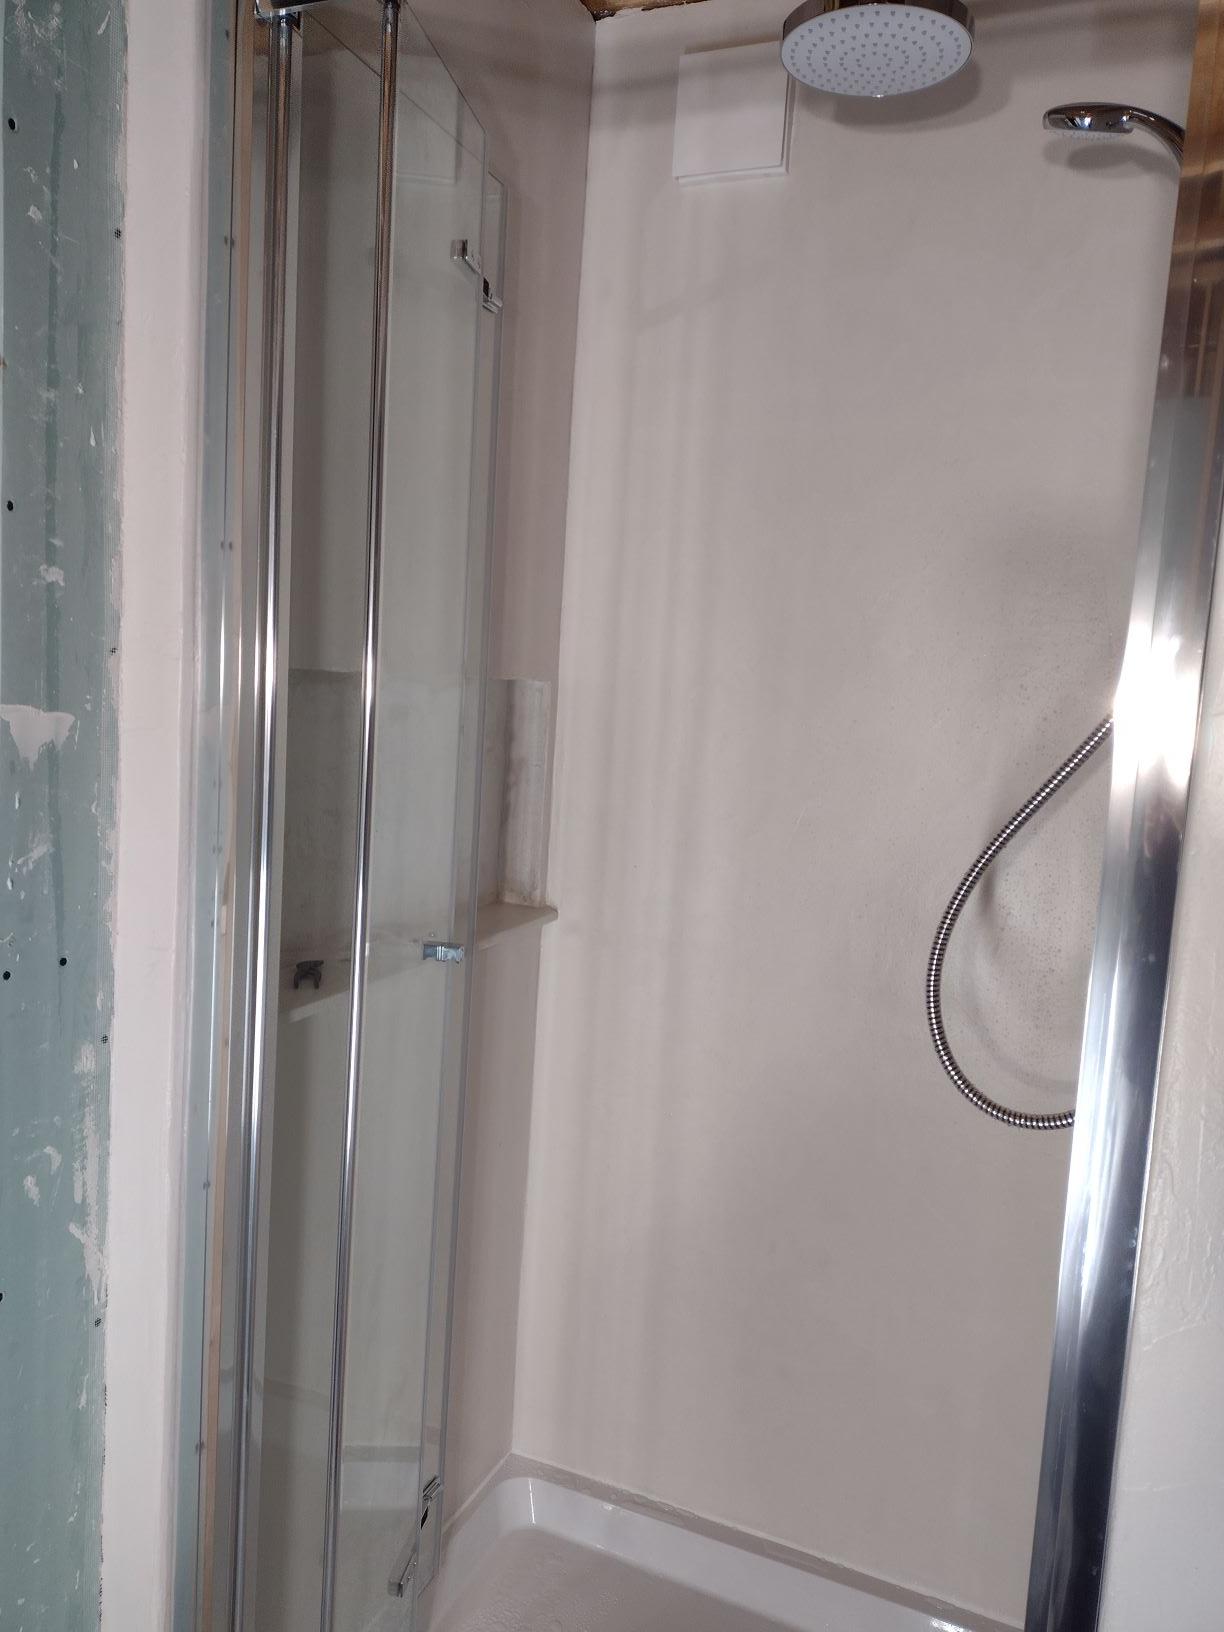
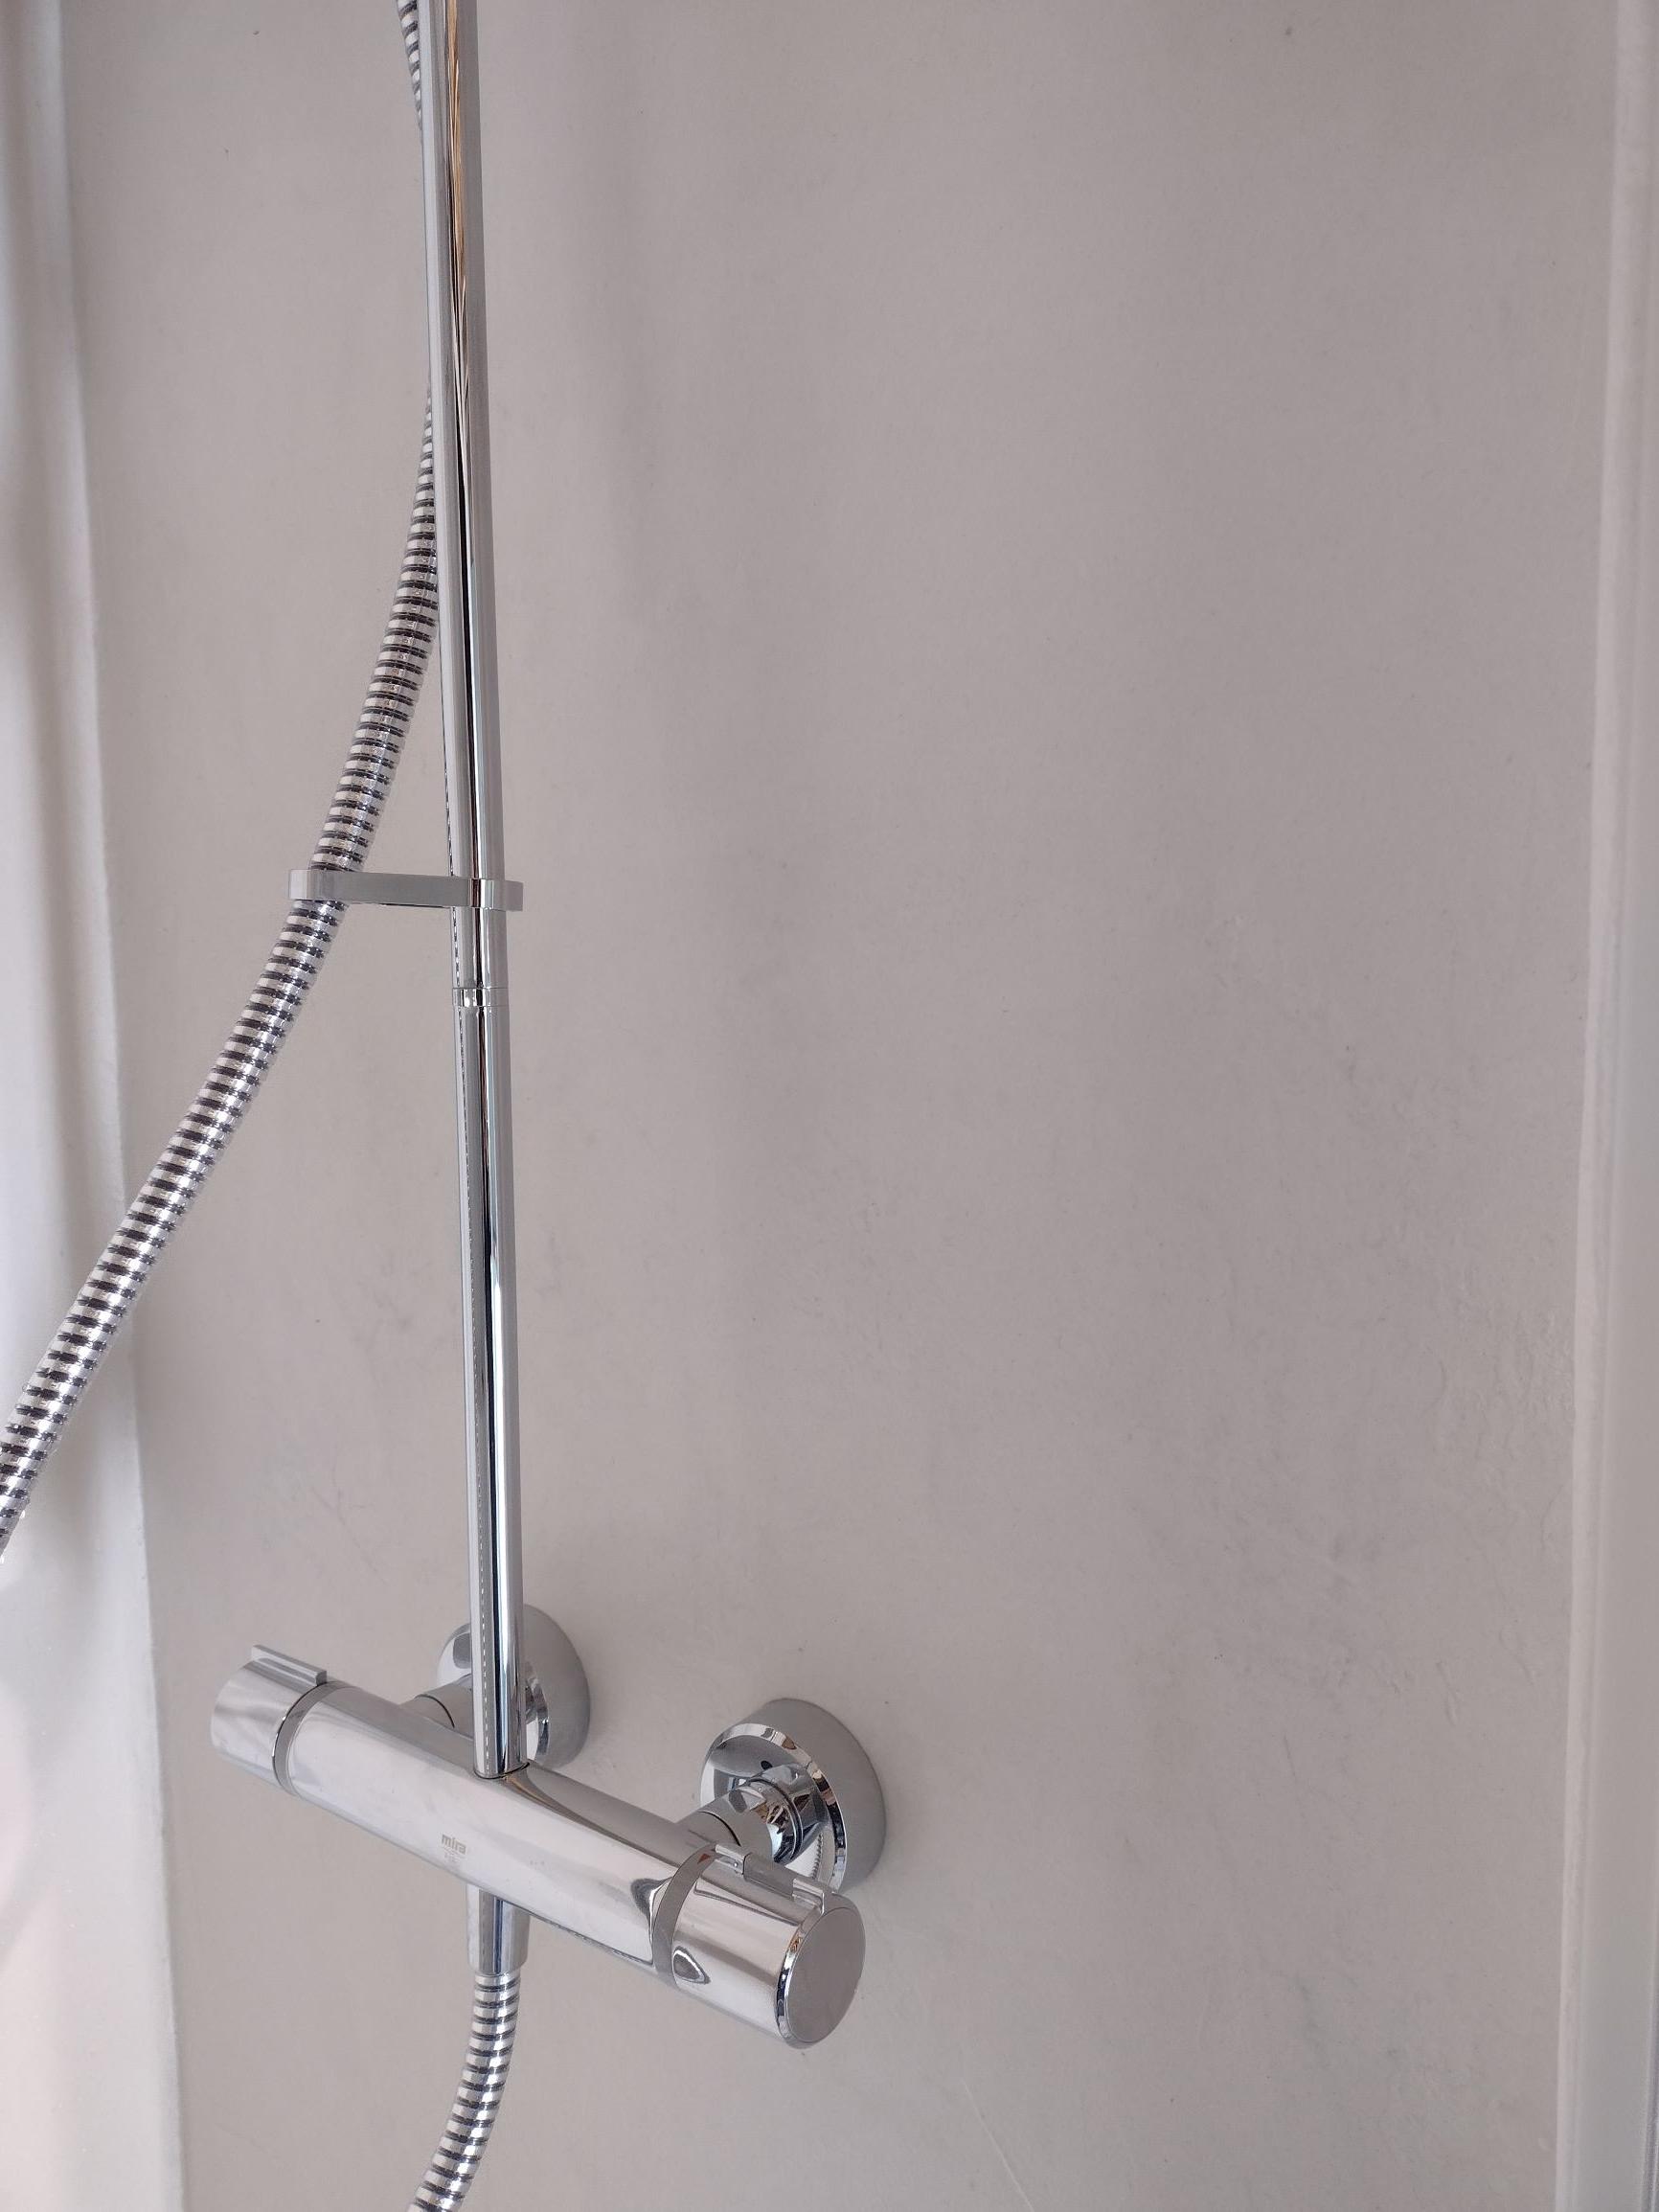
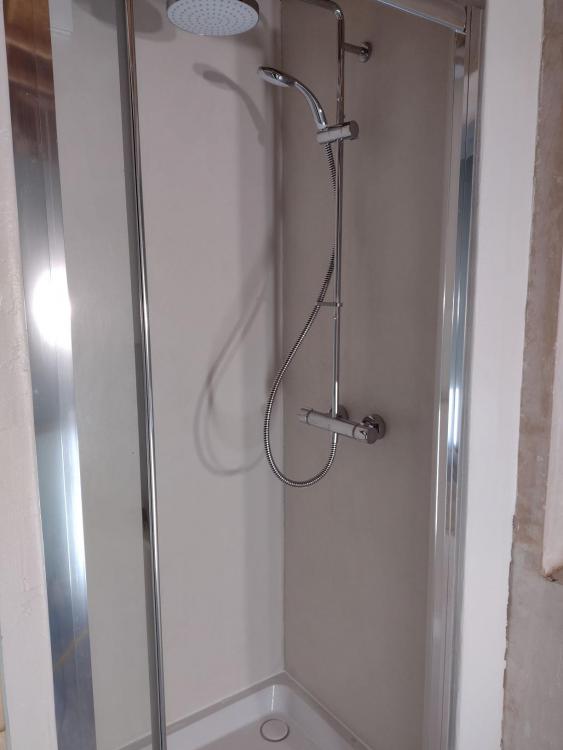
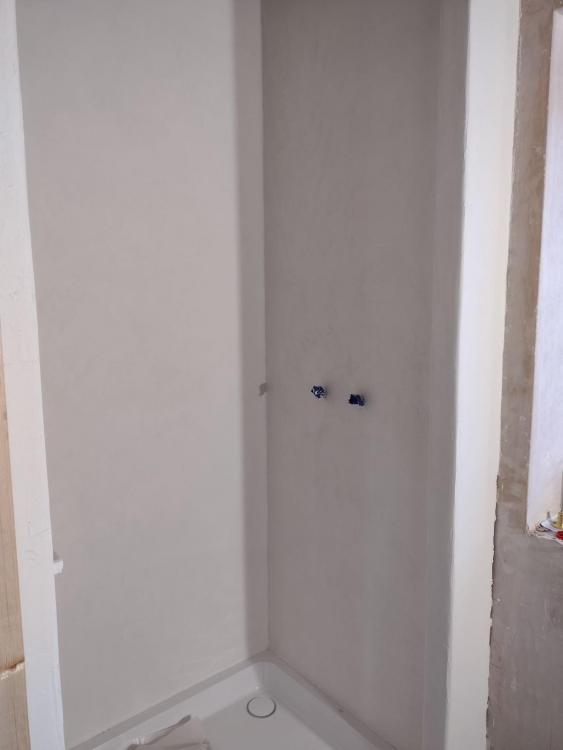
Okay, I've done the shower enclosure now. In total 4 coats of finishing resin since my last post, two coats each of a different type. Each coat sanded with 400 grit paper. I'm ever so slightly worried about the final coat as I was slightly short on hardener for this coat so I hoping it is hardy enough. However, if it isn't I can always get some of the same 2 part resin and re-coat. I've also put in the shower, shower door etc. but just waiting for tiles to put into the back and side of the built-in shelf. I'm very happy with how it's turned out. I like both the look and the colour (Montblanc White). Now we just have to see how it stands up to some abuse and I'll report back over time. Below are final photos where I've added a couple in the hope it shows the colour and texture in close up, but may not work. Hopefully this may help anybody looking at microcement in their shower.


-
Just taking a peak at the pictures you uploaded it seems like the wall have been re-pointed multiple times and my suspicion from the photo it that at least some of it has been done with sand/cement mortar. Is this the case? With the amount of mortar used to point the walls, I do wonder whether you have a decision as to whether you value the current aestetics more than thermal performance so: a) leave the stone walls as they are, b) have the stone walls re-pointed, c) do either a or b with IWI or leave uninsulated Or you can go for EWI as the roof overhang seems to lend itself to this solution and then finish this with stone slips or render. With EWI, it is probably easier to remove all the consequent thermal bridges, providing it is detailed correctly, than with IWI. Whichever way you go you will need to get a condensation analysis done by a supplier/ technical expert as the moisture transport through your walls depends on the whole buildup and wall system but in general, as already highlighted by @Iceverge, if you have a non-breathable IWI, the wall will breath to the outside. However, good practice now requires this type of insulation to have a ventilated cavity on the cold side to reduce the risk of interstitial condensation, which obviously dramatically impacts the buildup depth. If you have a breathable/capillary insulation IWI, usually of a natural persuasion, the walls will breath to the inside and outside of the building and they don't require the ventilated cavity. But you do need to be careful about the airtightness detailing. The other advantage with the breathable/capillary insulations, such as sheepswool, woodfibre, hemp etc. is that with the right buildup of plasters and paints, they will provide humidity buffering within the house. This humidity buffering in turn reduces the amount of ventilation required as it stores excess moisture peaks and then slowly releases it over a longer duration.
-
What mains water pressure and flow rate do you have? I used to do most of the cooking in my house on gas and never thought I'd move away from it. To try out induction, I bought a couple of cheap portable inductions hobs from Ikea to test for a while. I will never go back to gas. No POCs, better control, automic switch off if you leave the hob on, heats up much faster, and much easier to clean. I now have an induction hob that senses where the pan is a puts the heat there, what a dream. But we all have our preferences.? It's very straightforward by all accounts although I haven't used it personally. Joint free continuous runs and the ability to hand bend are the main attractions of course. It ain't cheap.
-
Why a 40kW combi? What is your mains supply, pressure and flow rate? How many bathrooms are you planning? Check all these things first as otherwise you may end up with an oversized boiler - it's worthless if you don't have the mains flow rates to use the boiler capacity. It's worth checking your heat loss calculations to make sure the boiler you've chosen can modulate CH output low enough to prevent cycling. The combination of boiler and cooker you've mentioned will require 35mm pipe but at least the installation volume will be below the commercial threshold at 20m length assuming it's a standard U6 type meter. Have you considered an induction hob instead of gas cooker?
-
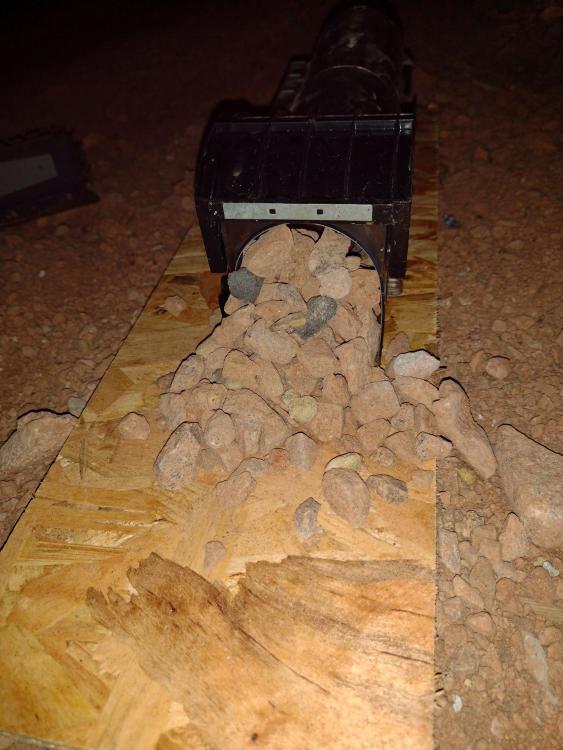
Yes, it just piled the stones into the entrance and completely closed it off. Exactly the same each time it did it. I wonder whether it knew it couldn't resist temptation to eventually go for the cheese!
-
Speaking of mice, we've got some in the very unfinished portion of the house. I've gone round and blocked up all the holes I think they can get in through yet still they come. One of them is very clued up as it's noticed the dangers of the humane traps I've been using and did something about it - not just once but 3 times!:
-
That's usually the case for compressor dehumidifiers. If you get a desiccant dehumidifier it will work down to 1 degree C and pretty much extract the same amount of moisture from the air. It will require more juice than the compressor version as it has a small heating element to work with the dessicant, but in many instances this is a benefit as it can slightly warm the space. At above 10C then a compressor version is definitely the choice.
-
I've tried heat & dehumidifier strategy before and it was dissappointing. Better off not heating the air at all. Overall, you'd be much better served by using fans to create plentiful airflow especially if there's a big void for the staircase and supplementing this with a dehumidifier if needs be.
-
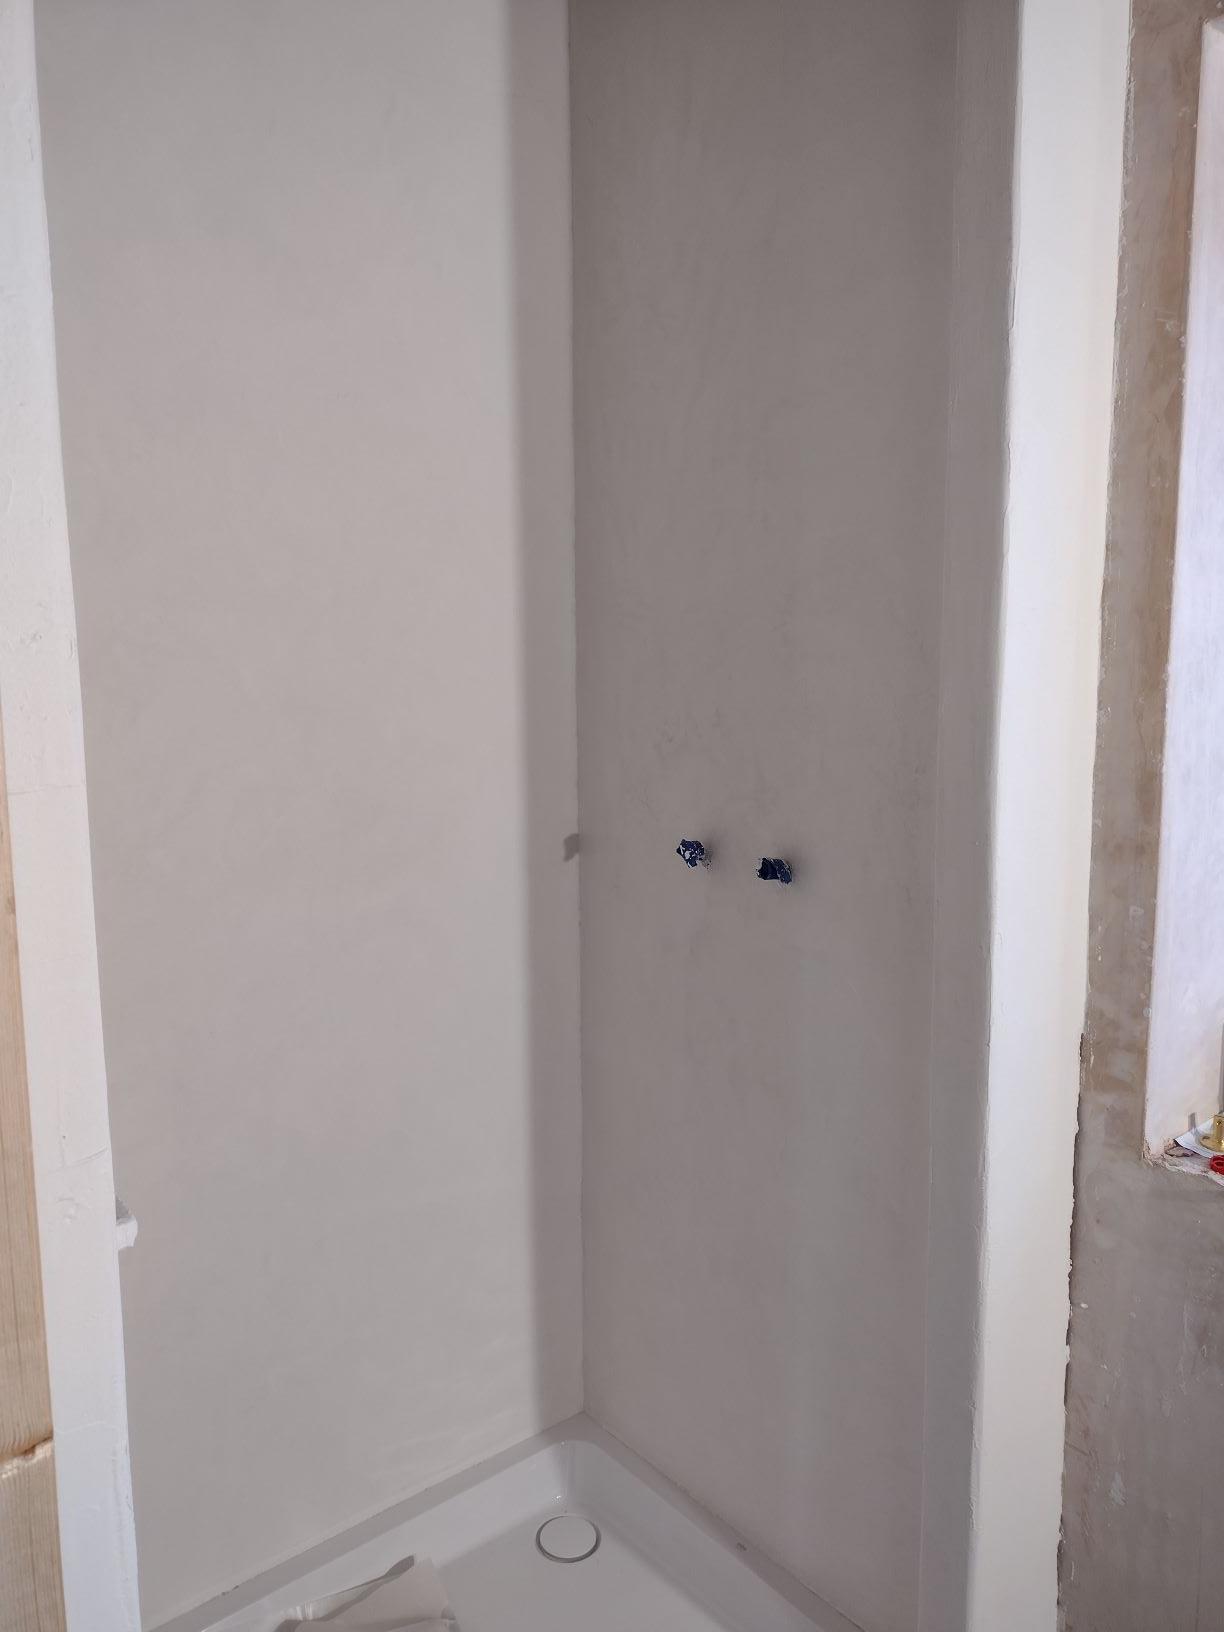
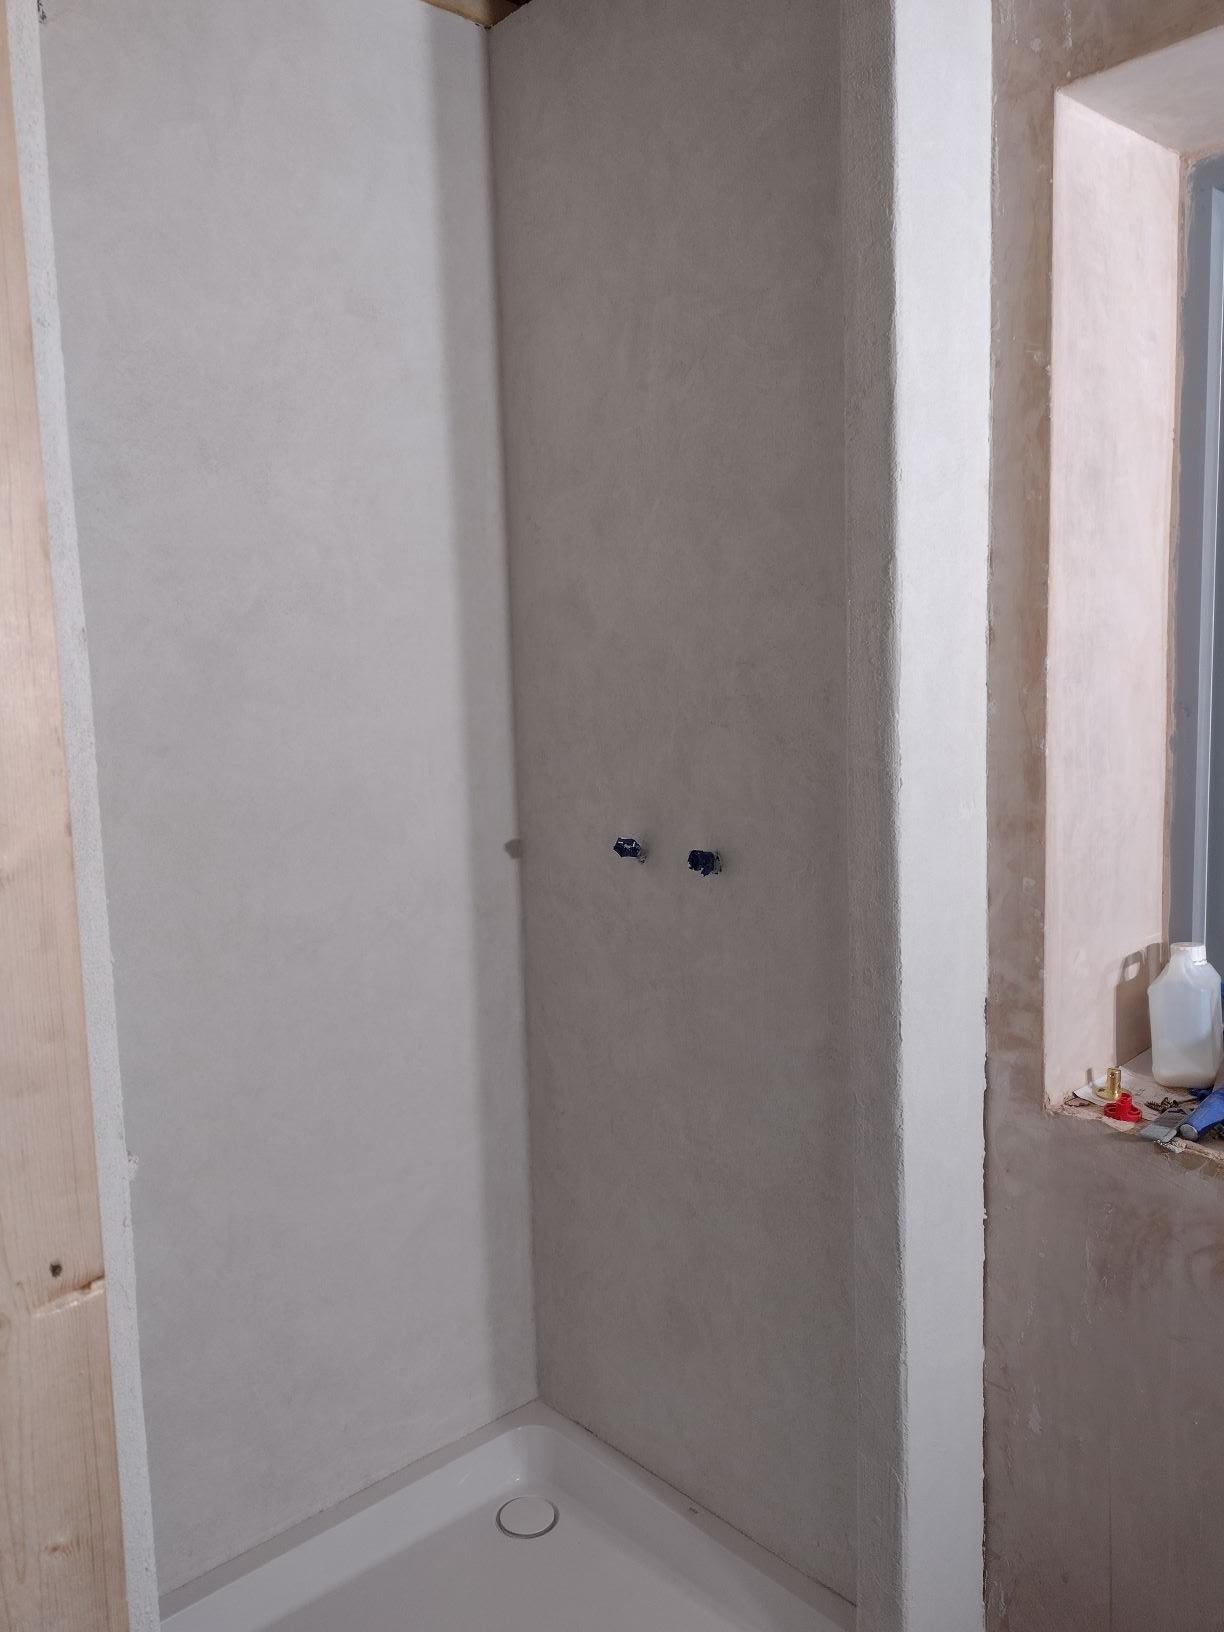
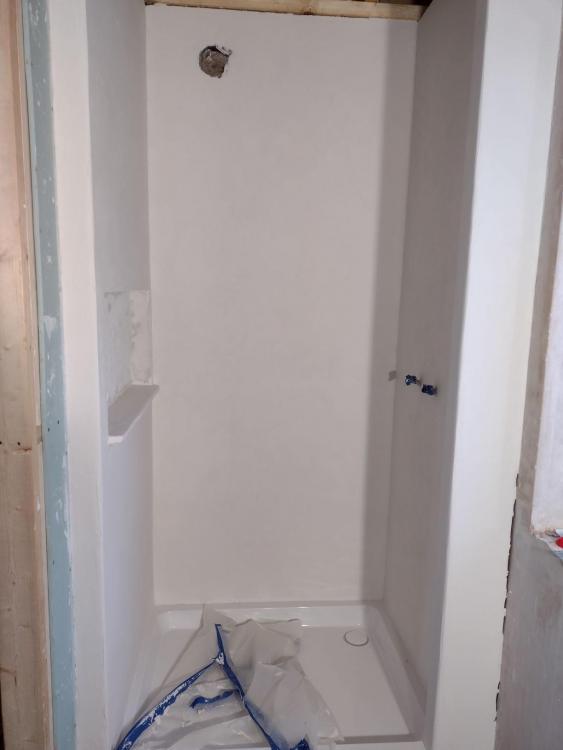
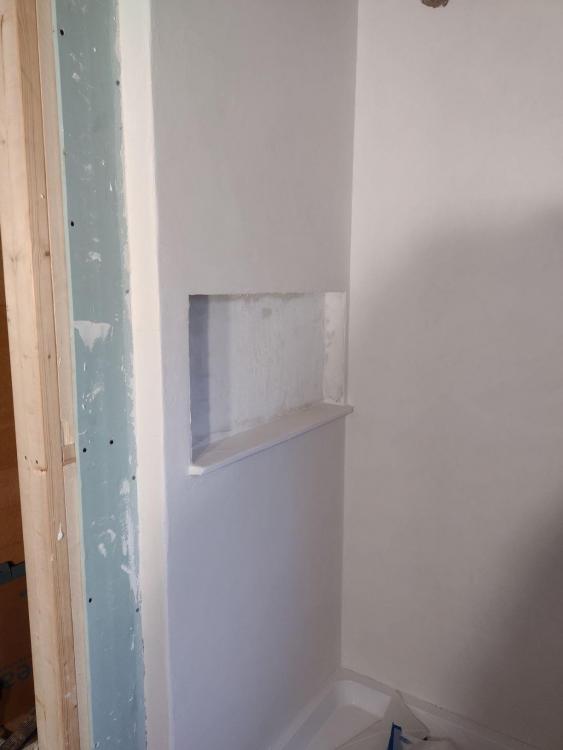
Next stage finished and allowed to set for 24 hours. This layer was much easier to apply than the 2 basecoat layers, buttered on nicely and gives a nice texture to the wall - you may not see it in the photos but the white has soft whisps of grey so it's not an entirely uniform white. Now I just need to sand this down lightly and apply what look to be runny types of resin, not quite the same as epoxy resin. The instructions are slightly confusing as with this kit I have 2 types of finishing coat, one durable, one extremely durable. I've been supplied with enough to apply two coats of each but the instructions only suggest one coat of each. If I apply 2 coats of each, I'll have to wait 12 hours between each coat, which obviously extends the finish time by quite a bit, but I'm erring on the side of caution so leaning towards 2 coats of each, just to be thorough. Pics of the second microcement layer:
-
Yes, I'm a self-builder and no, don't need a single person to do everything. I've done everything from the detailed design to building the whole house on my own, so quite the opposite of needing somebody. I am, however, a bit of an outlier in taking this path. The reason I've chosen this route is because I had some quite specific requirements in terms of the functional performance of the house and the materials I wanted to use which are fairly non-standard. I tried to educate my architect and he shifted somewhat in his approach but wasn't in the end interested, or capable, of delivering what we needed in terms of the technical side. On the other hand he was superb in the design of the house and navigating a particularly finicky planning environment we have where we are. What set the architect we chose apart was that he had an incredible ability to develop a relationship with us to understand what we wanted as clients and his design was spot on in this regard, and he spent a lot of time visiting the site. I don't think I'd ever employ an architect who didn't visit the site on at least a few occasions. Around us, there seems to have been a big growth in design & build companies which appears to be what a lot of people like as they can just hand it all over.
-
Does what you have read here on the forum, and any other self-builder experiences you've collected, mirror that? Does the design of a house not require the upfront solving of a host of problems (particularly related to a self-builder) that are not necessarily required to gain planning approval? Are you going to require that your client has a minimum amount of PM experience so they don't take up your time with questions and revision?
-
I wonder how many of those were self-PM'd, probably not a lot of them.
-
From what you've just said @CharlieKLP, I don't think you understand your target market and the problems they face at all. That's where you need to start. What you've illustrated is probably one of the areas where I and people I know have a problem with many in the architecture field and that is the architect approaching the problem from their perspective and position, and not that of their client.
-
Hmmm, as I see it, the overall discussion on drawing format highlights the various problems in building a house that while attributed to technology here, aren't fundamental technological by nature. Rather they are down to process and human relationship. You can get into multiple problems with paper/fixed issued drawings with version control and distribution as you can with CAD files, although based upon my own experience in the industry, electronic files, if distributed to the wrong entity, can allow for more errors to emerge simply through user ignorance. Self-builders (whatever that actually means or might actually be a pretty much meaningless term anyway) are a breed that ranges from those who have absolutely no technical understanding and struggle to use MS Word to those in the engineering field who are totally comfortable working with CAD files and are well versed in proper version control, distribution, managing comment/amendment input, signing off and redistributing the newly issued versions (although I've known and met plenty of engineers and some architects who are equally sh1t at this and are thus the root cause of building errors - my architect hated me because I used to reject his drawings when they weren't versioned/issued correctly). I do suspect that an architect issuing pdf files does overall reduce risk for a general client and, providing the pdf is exported properly from the design software, can actually be imported into another cad without too much problem (usually). I know that my structural engineers did this even with my architect's hand drawn designs to create the general arrangements and then subsituted their own details as a separate document. While CAD is an amazing tool and an essential requirement for some, I wonder whether your average self-builder* (see note above) who doesn't want to pay more than £5k for the design of their house, will cough up the necessary license fees for the CAD software in the first place. If they don't and instead download some freeware/cheapo design software that says it's compatible with all file formats, the bets have got to be off that something doesn't go wrong with the original raw cad files. I tried numerous cheapo versions before we started our build and experienced problems with just importing and exporting dwg/dxf files, let alone then working on them. I'm pretty literate technically with these things but chose, due to expediency, to leave it all to the professionals I'd engaged to do the work. The only thing I used was a 3d cad package to create and render a basic arrangement for the house in order to do my own bill of materials in order to minimise wastage. I definitely understand why someone would want the cad files from the architect, but it does strike me that if this is demanded this may be driven by a lack of trust and self-protectionism. If that's the case, there's something fundamentally wrong with the relationship in the first place. If the relationship is right, then it should be possible to reach an amicable arrangement that works for all involved. As for the OP, @CharlieKLP, what do you actually mean by 'self-builder' as your target market because I suspect that your target client may not actually be as wishy-washy and generic as this, but rather more specific. I may also have got the wrong sense of it, but it also feels to me like the proposition is a bit akin to providing clients with a product, which is a bit production line based and transactional whereas my sense of an architectural service is to develop a client relationship that in turn yields a home of value - I think these things sit in stark contrast, but again depends on what you want to produce and with whom you want to work.
-
I do think this is where confusion lies in that CAD files are not 'just' drawings and there's no way in a million years it's appropriate to distribute raw CAD files directly to clients, especially self-builders who are probably more likely to want to take it upon themselves to tinker with them. ? Then you've also got issues with file format, software and the associated costs of software licensing. When I got my first job in engineering it was in document management within one of the world's largest engineering consultancies and I learned quickly how poor documentation, revision, distribution and control can cause immense problems on even the smallest of projects. Providing additional information such as dimensions is a different matter and I do believe that properly detailed construction drawing should be dimensioned and made available to the client/builder as even at 1:10 it's easy to make critical mistakes. What I do think is problematic is when the various professionals can't share files to incorporate their piece of the work and therefore costs the client extra - we had that problem due to incompatibility with the architect/structural engineer and then the steel fabrication company used their own 3d modelling software - lots of circles of drawing creation/commenting and modification that could have been done more efficiently. At least our topograhical survey company provided the raw cad files when I asked them to, which was helpful for the initial designs.
-
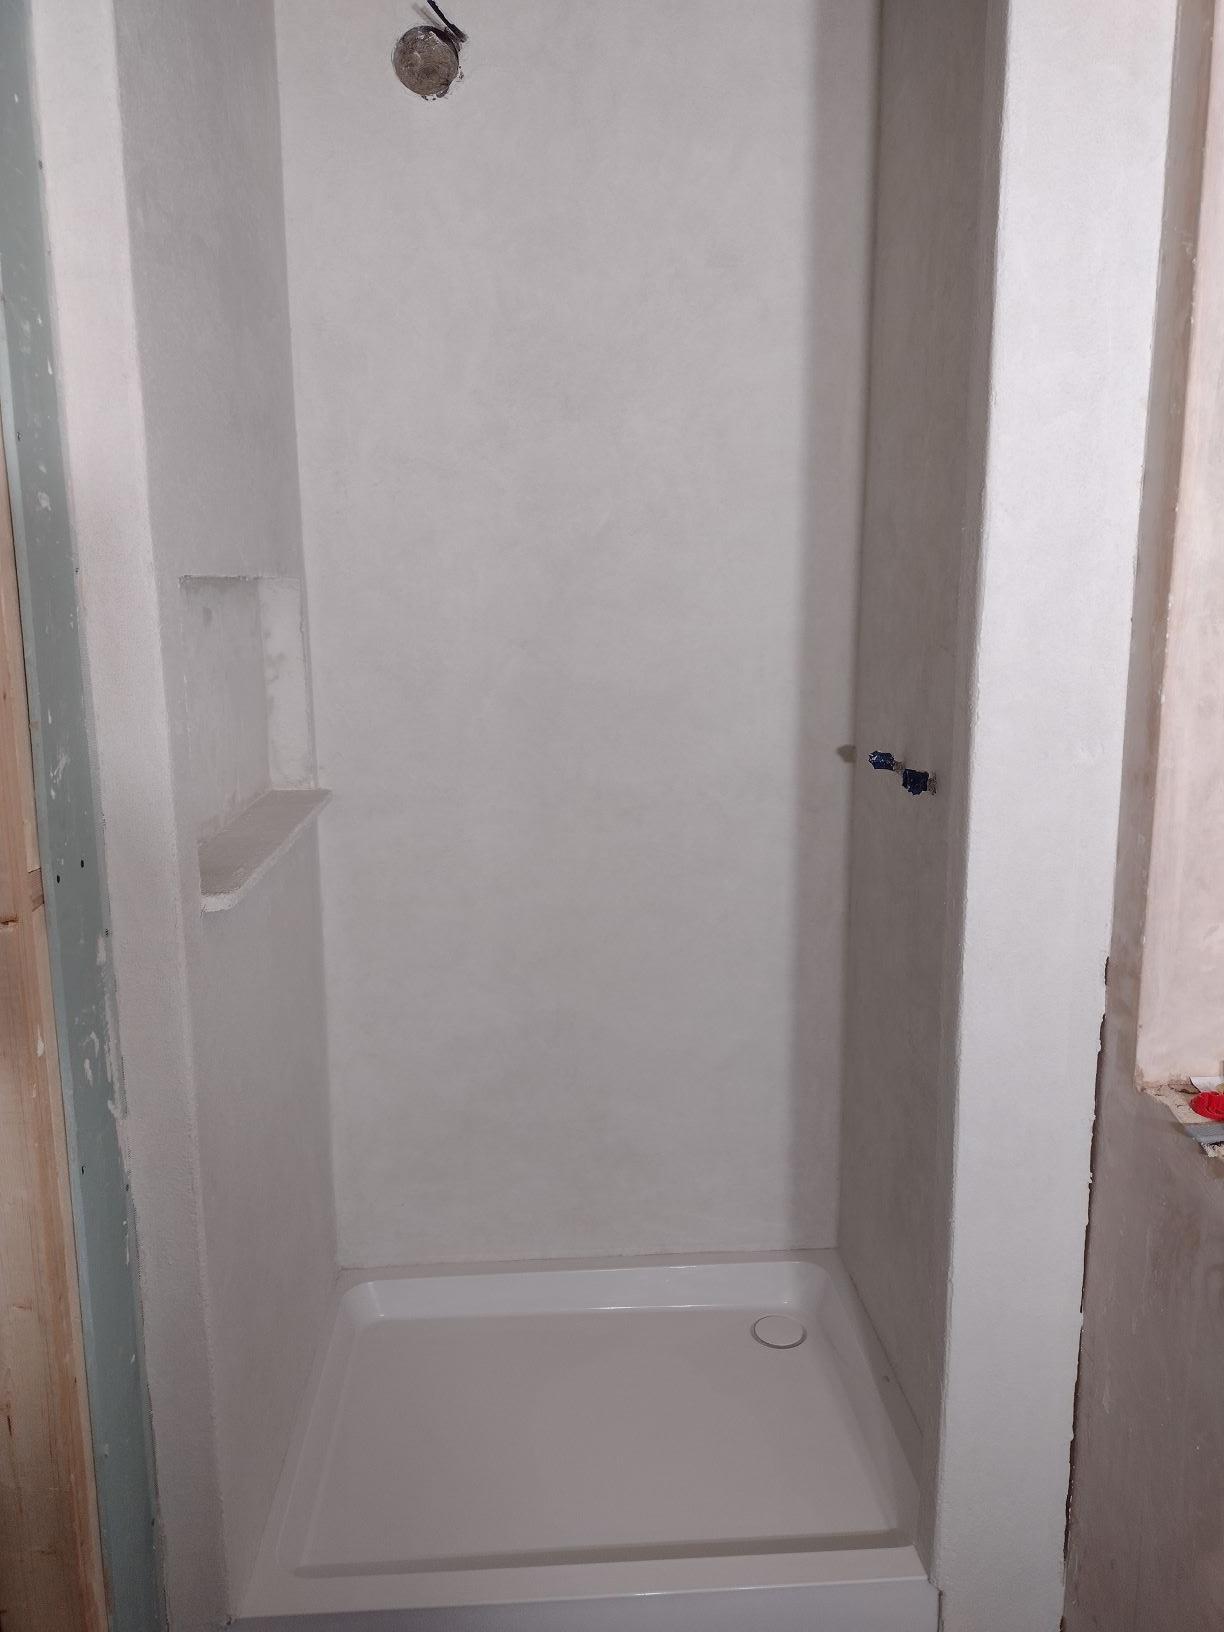
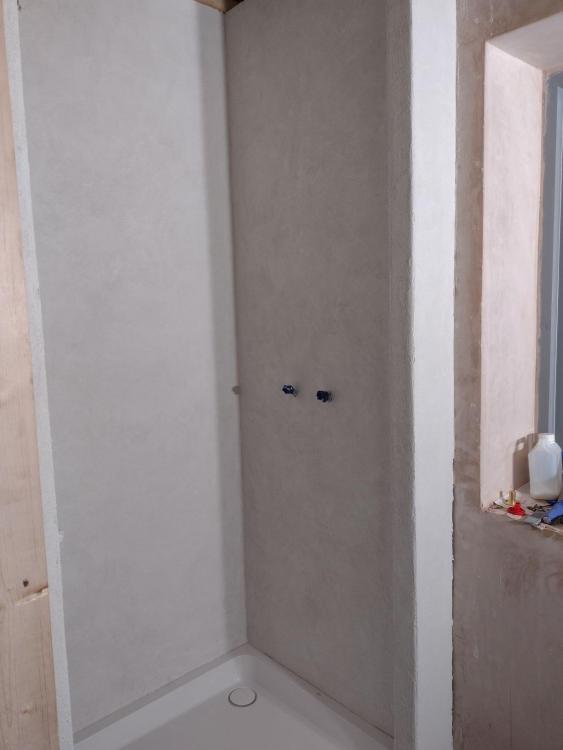
Okay, so next stage done now with 2 coats of the basecoat. I've some mistakes in that I used the basecoat to fill joints and countersunk screw holes and I used the microcement mesh across all the corners. This meant that I used a bit too much basecoat and ran a bit short on the second coat! I also used the mirocement mesh on both internal and external corners, which was not great. Next time I'll use normal scrim tape on any corners. Having never done this before I may have applied the first coat slightly too thick too. Anyway, not too much of a disaster. All that has happened is the small wall area within the built in shelf will need to be tiled at the back and sides. Applying the basecoat is really quite similar to applying thin coat render on external wall insulation, but it's a lot thinner, with each layer being only approx. 1mm. I'm going to allow this cement to set overnight and tomorrow, first sand down this layer and then apply two more layers of a slightly different cement layer with what looks like a finer aggregate, but is still trowelled on like the basecoat. Overall, I'm quite happy with how it's turning out.


-
Around us it's usual for architects to charge between about 8-12k to planning. Eventually we found a very experienced architect who charged by the hour and got us through planning, including committee for around the 5k mark. He had the vision and imagination for great design, which was our priority until after planning when our next priority became good detailed design. This is where he let us down, while pretending he was good at it. If you're not going to offer the technical design/detailing, then one suggestion I have is to ensure you have someone in your black book you can pass the detailing work along to and who you can work with to ensure it all works in harmony with your design. But also make sure you communicate this clearly with your clients. One of the worst things we experienced was the RIBA stages of work, which were meaningless to us as clients, but also, having had plenty of experience in project and programme management, both my wife and I found it one of those useless project outline documents which delivers zero added value and following it probably ends up costing the client dearly. My other bugbear, which I'd add to @Iceverge's great list is to forget designing to win awards (unless specifically required by the client). We spoke to 6 architets in total and had them all submit tenders. One withdrew and all the others highlighted how they'd design us an award winning house - but this is obviously for the benefit of the architect rather than the client. And finally, listen -really listen - to the client.
-
Cemher
-
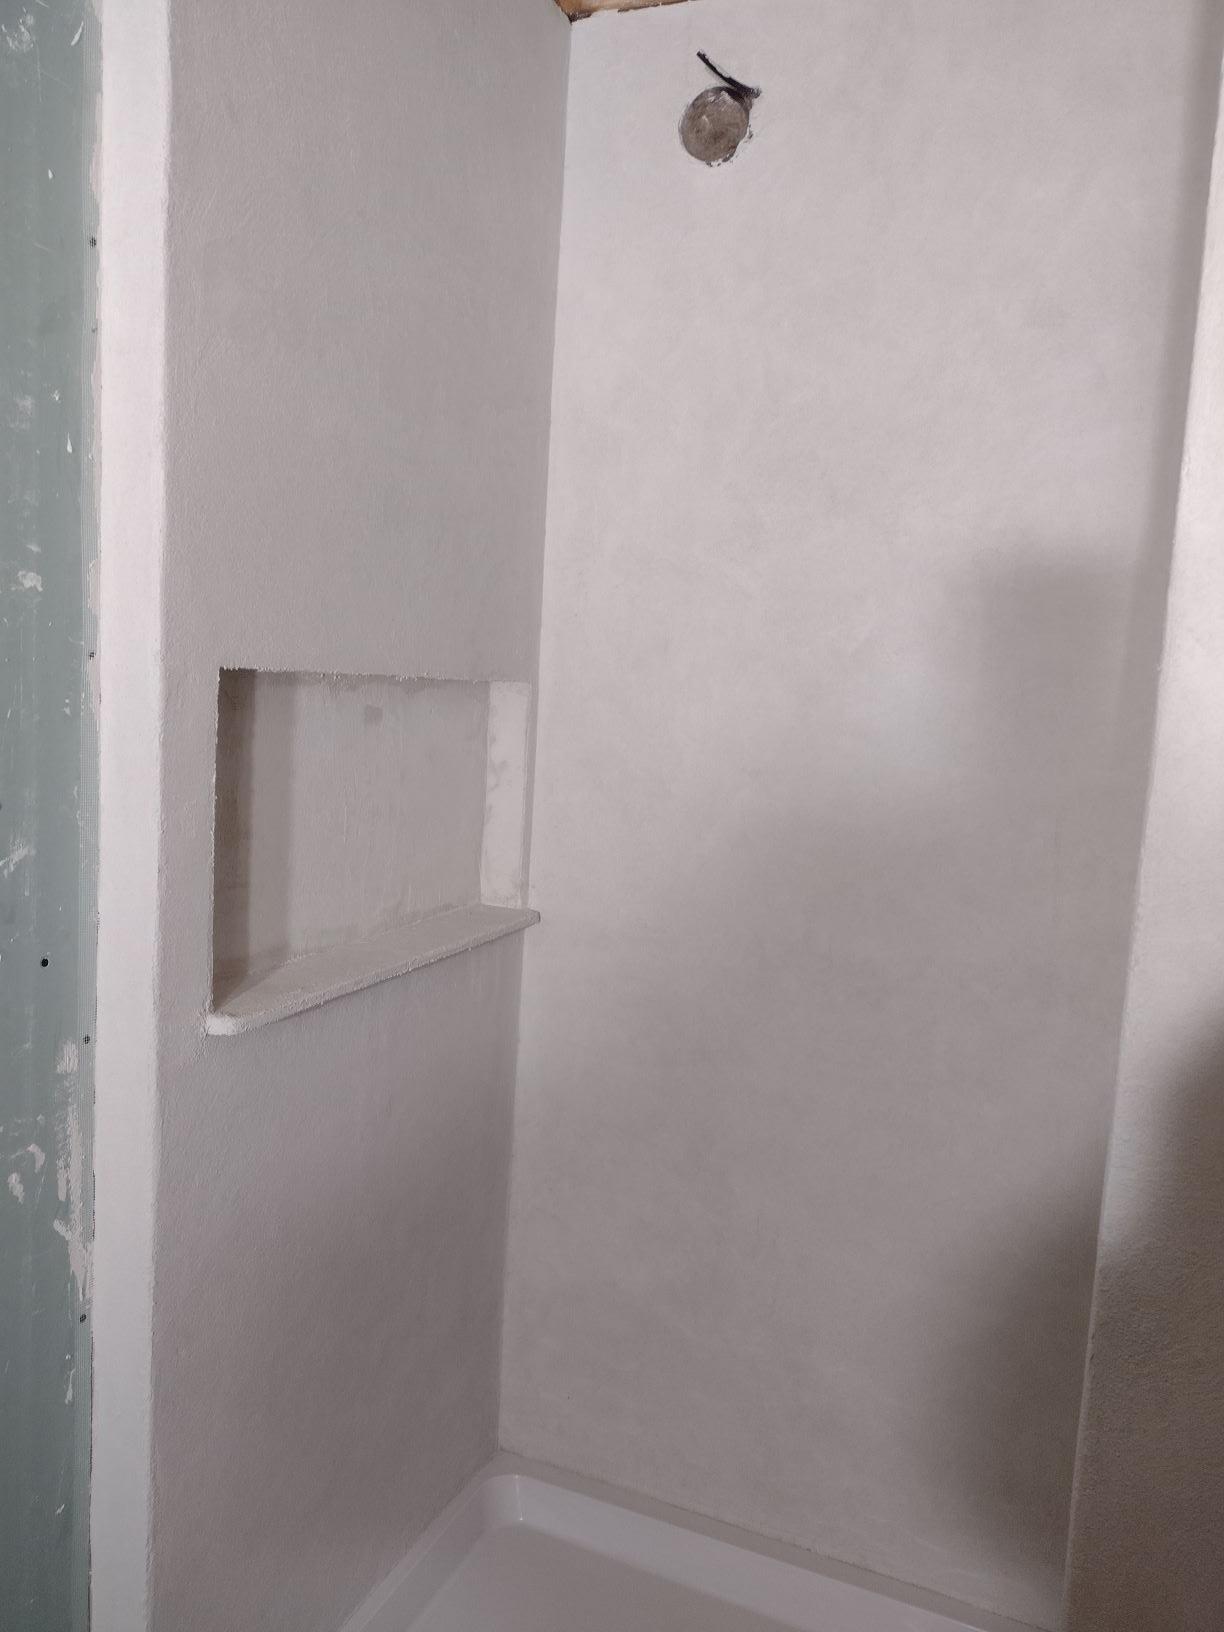
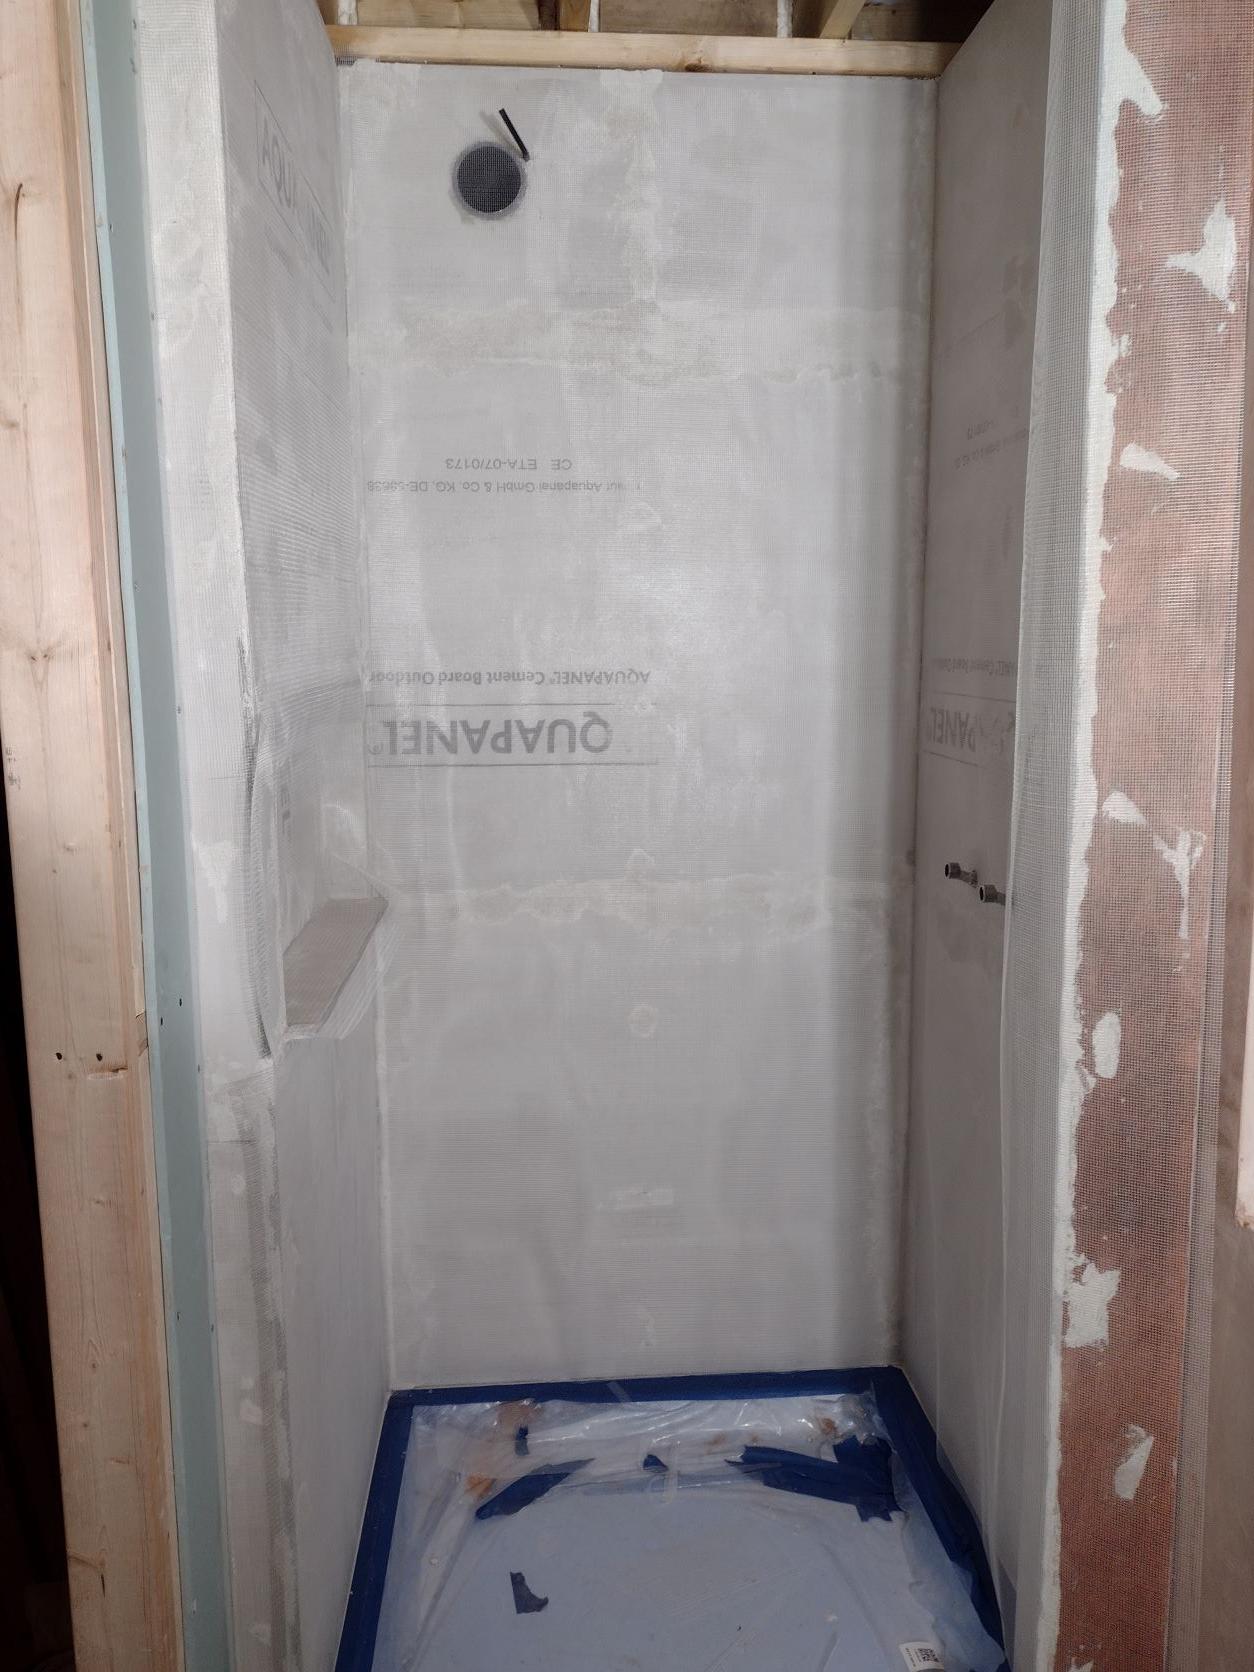
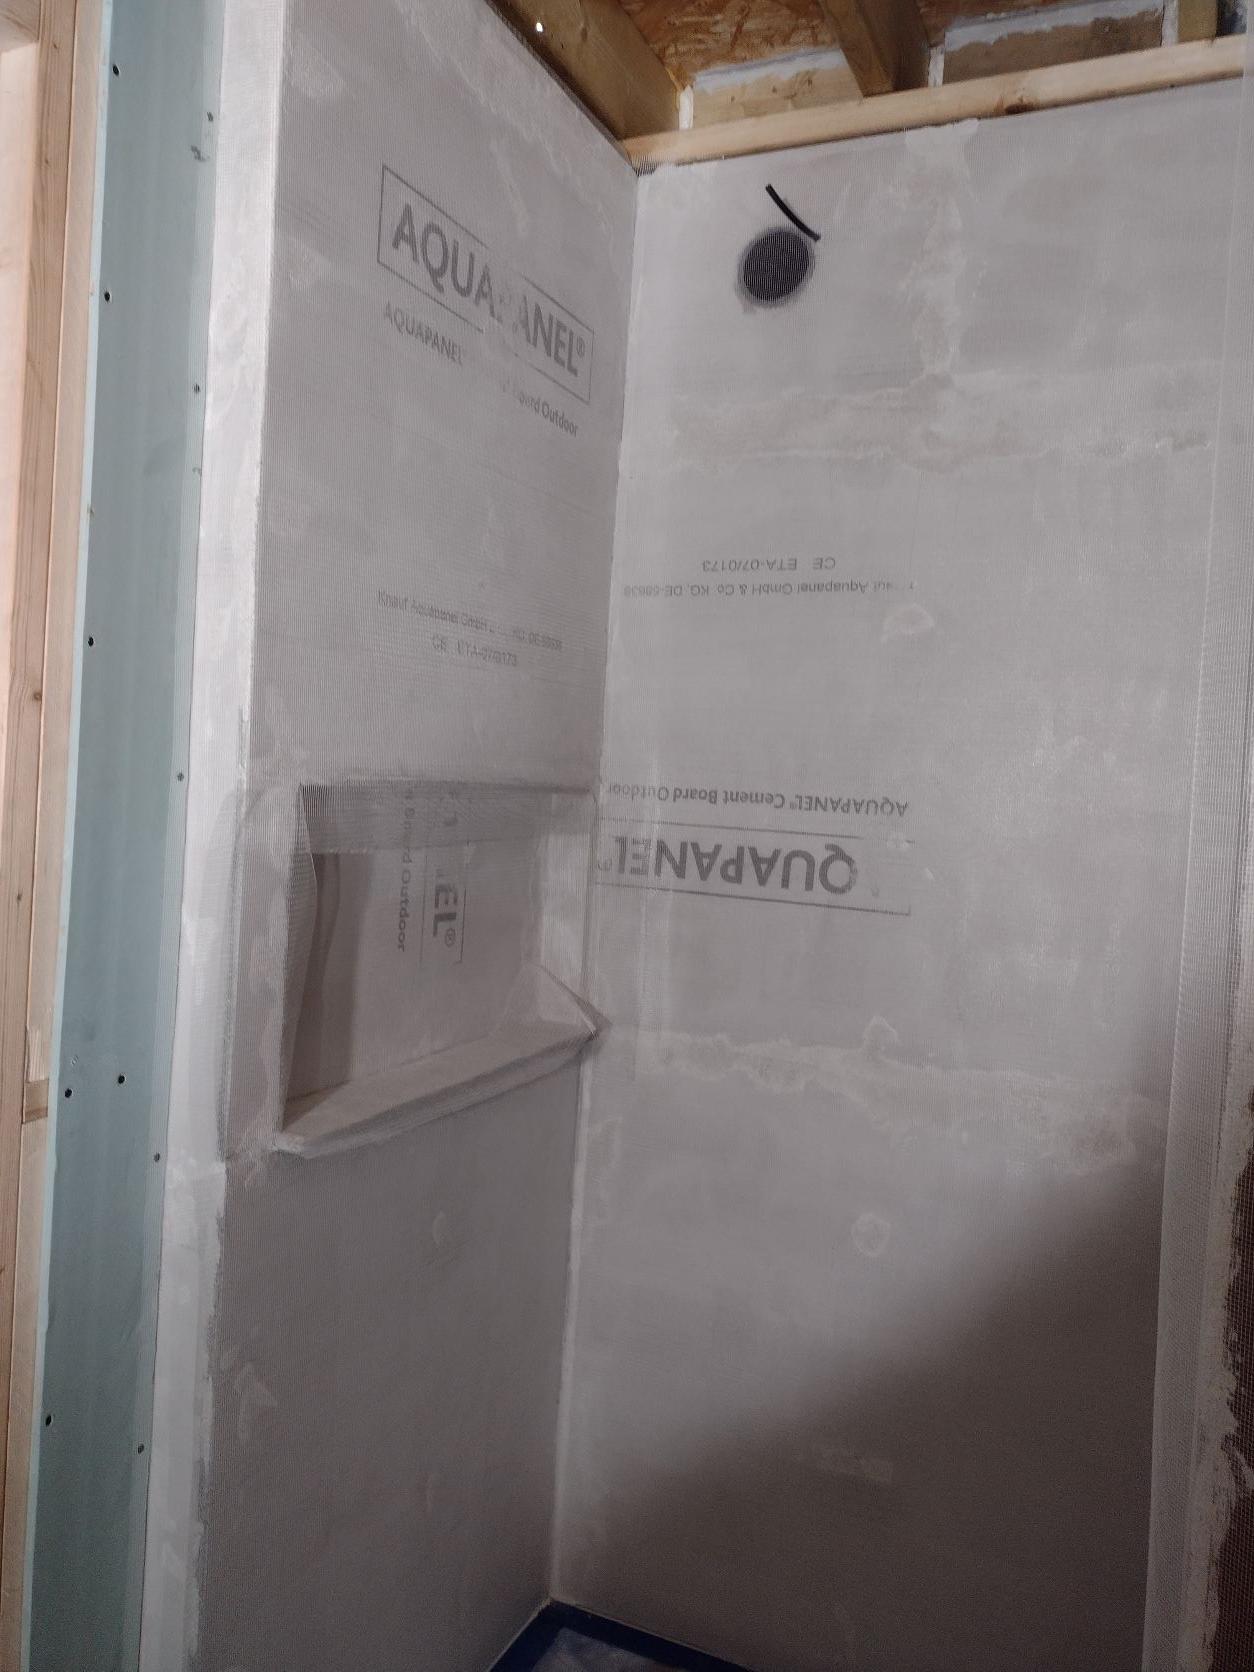
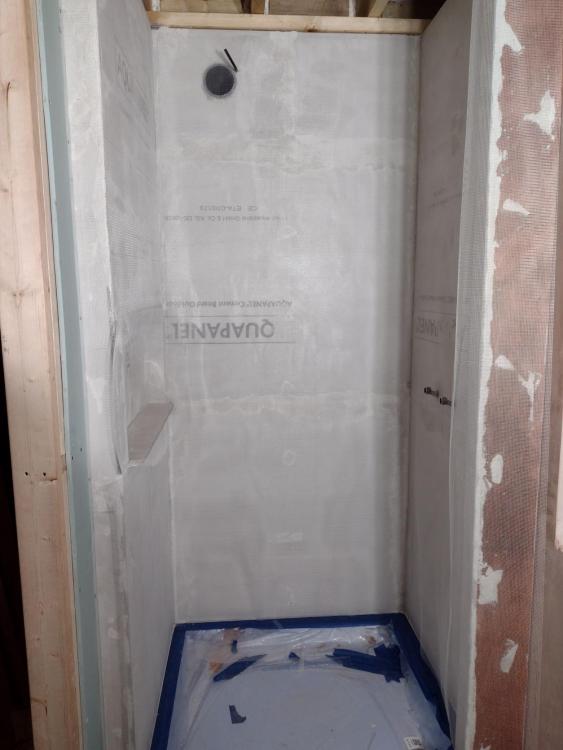
Day 2 of the ensuite now with step 2, 3 and 4 of microcement preparation. Step 2 was to sand down the basecoat used to fill the countersunk screws and joints, but I have to say this was a pain. Next time, I think I'll use the Knauf Aquapanel skim and/or filler as the microcement basecoat has aggregate in it so it's impossible to feather out the edges and it's really hard so destroys the sanding pads on the orbital sander. Took ages to only get a moderately good finish here. I'm hope the minor blemishes will be filled when coating. Step 3 just to apply the primer to the boards. Step 4 to add the reinforcing mesh which basically gets stuck to the primer (kind of - it just holds it in place for the microcement basecoat. Next step is to apply two coats of the basecoat, one uncoloured, the other coloured. Pictures attached of the stages completed today.


-
Oh no, that's awful! Sorry to hear that. I think I have slipped into self-builder overkill mode again.
-
I know some people will shudder and say don't do it in a bathroom, but I'm using birch plywood for my floor in this ensuite and the guest bathroom. It's finished with Rubio Monocoat and waiting to go down as soon as I've got the microcementing done. You can use microcement on the floor too.