Onoff
-
Posts
21157 -
Joined
-
Last visited
-
Days Won
206
Everything posted by Onoff
-
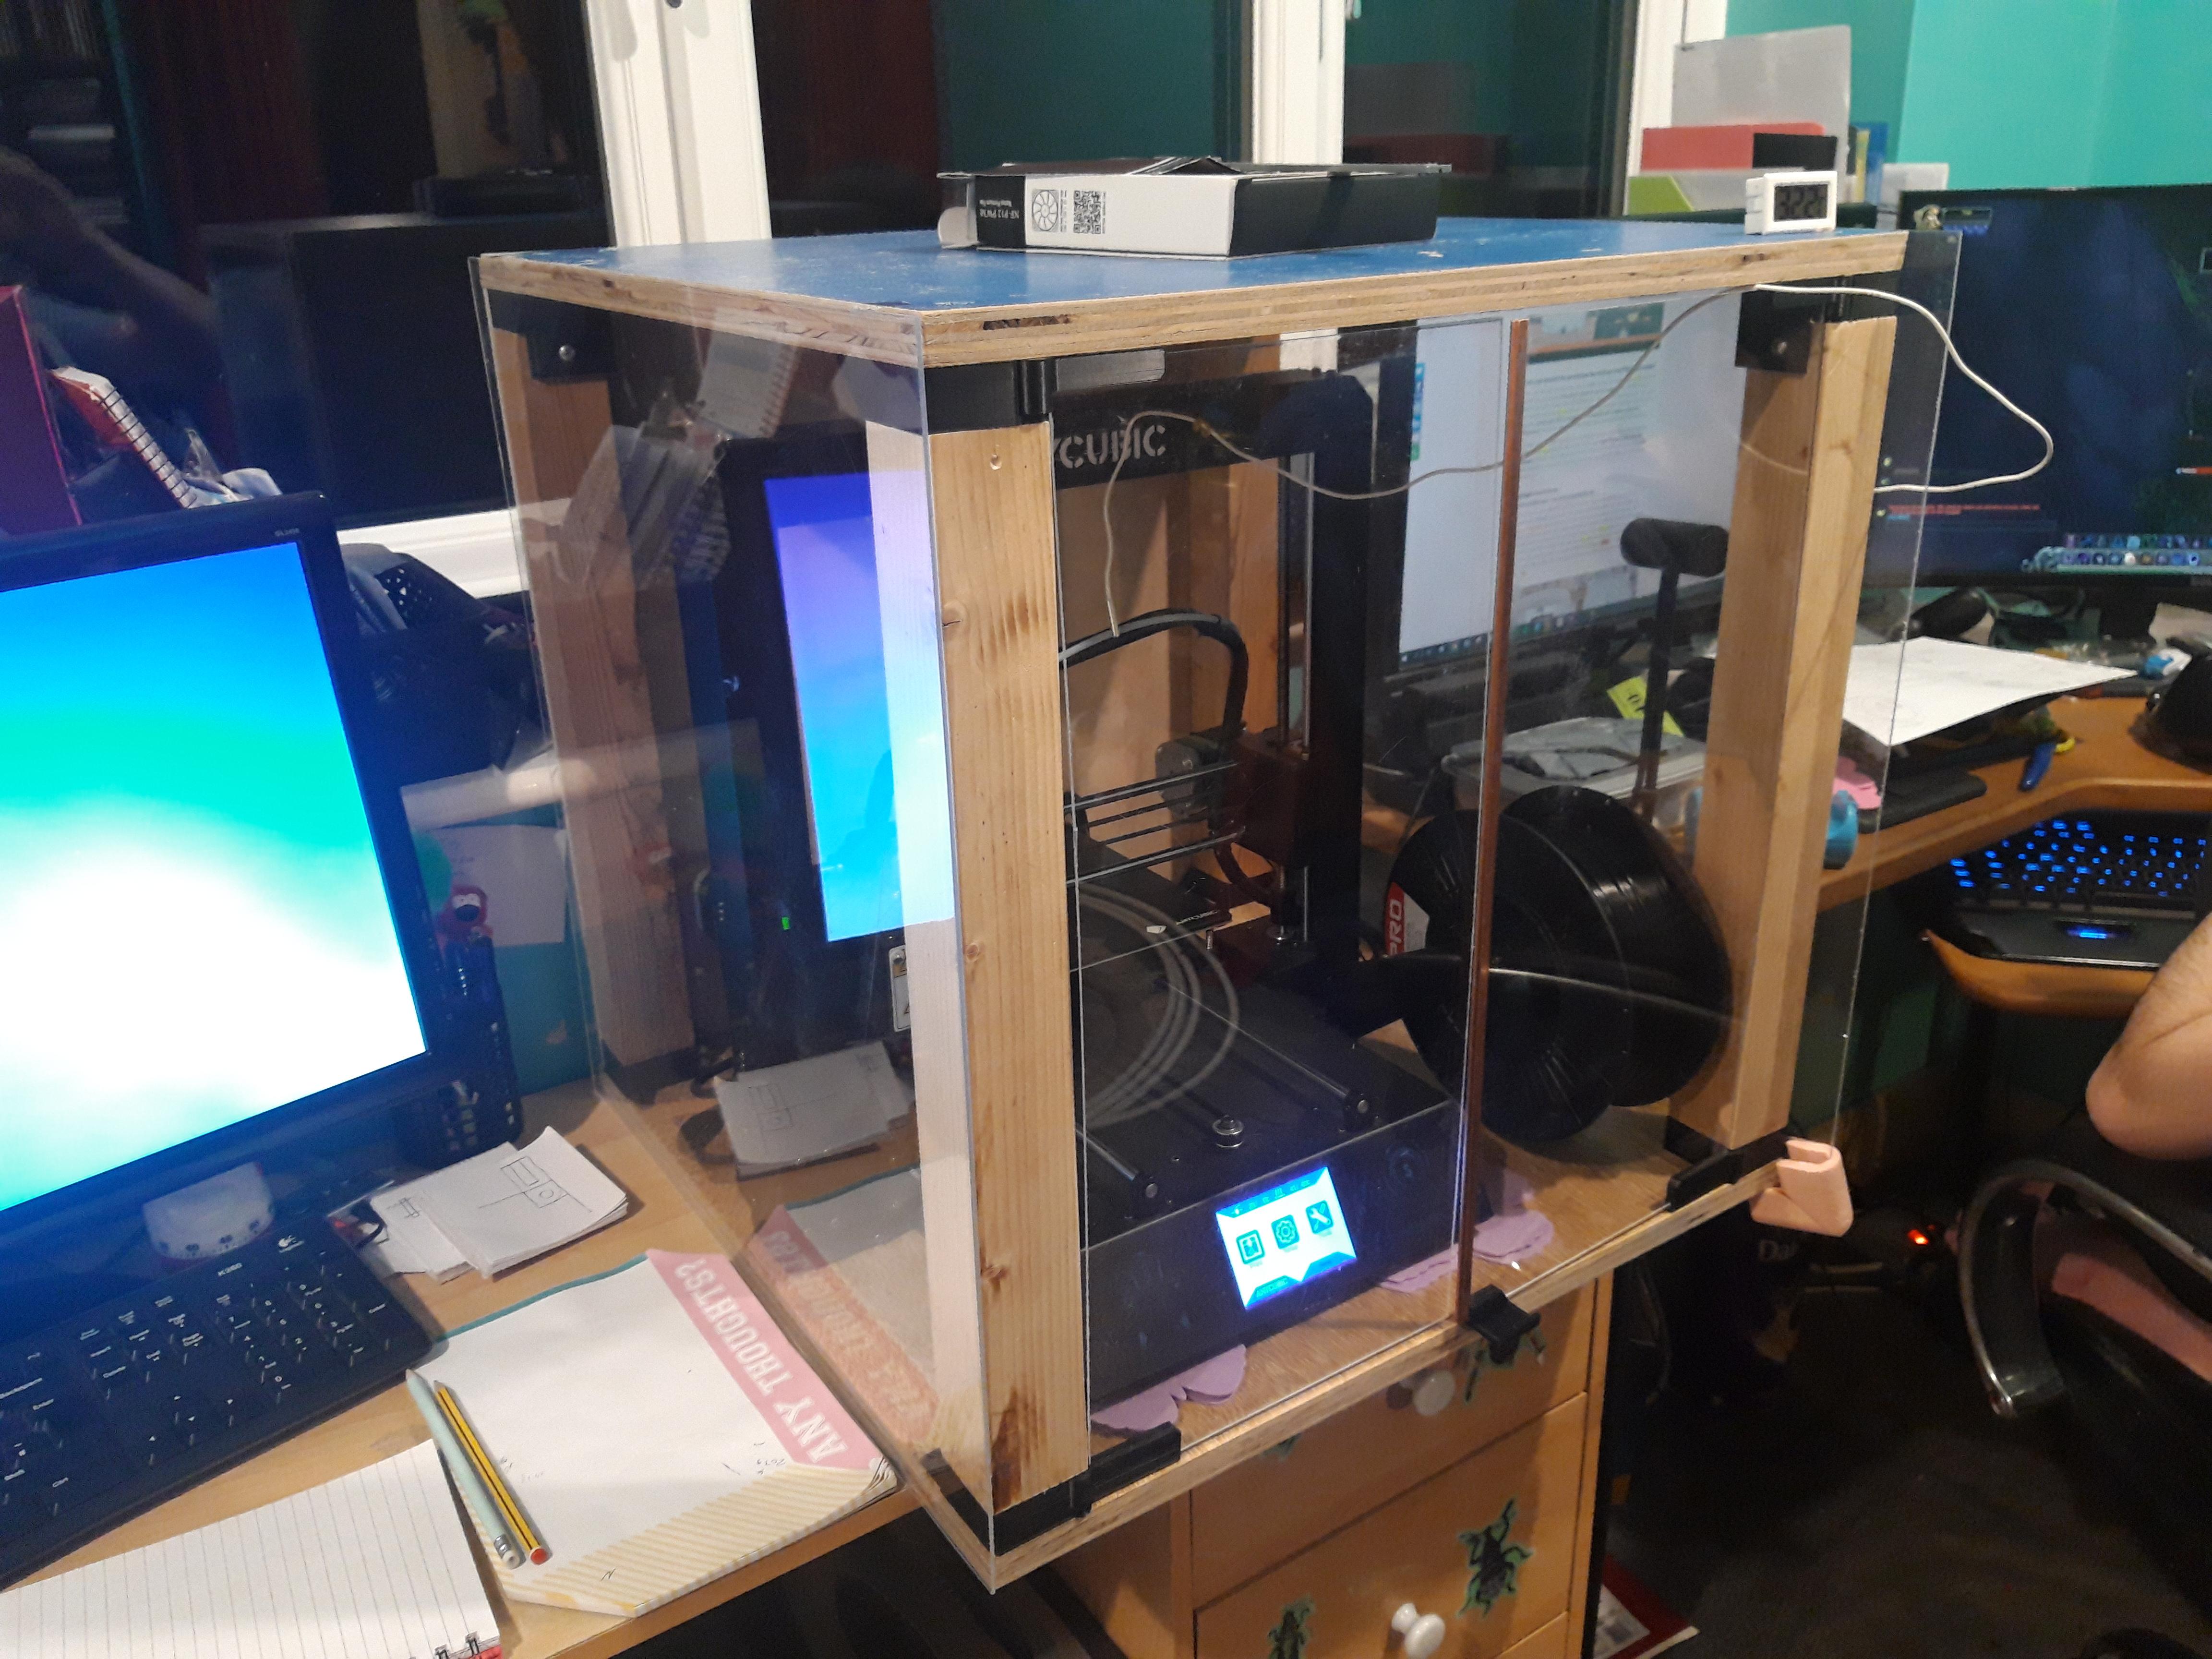
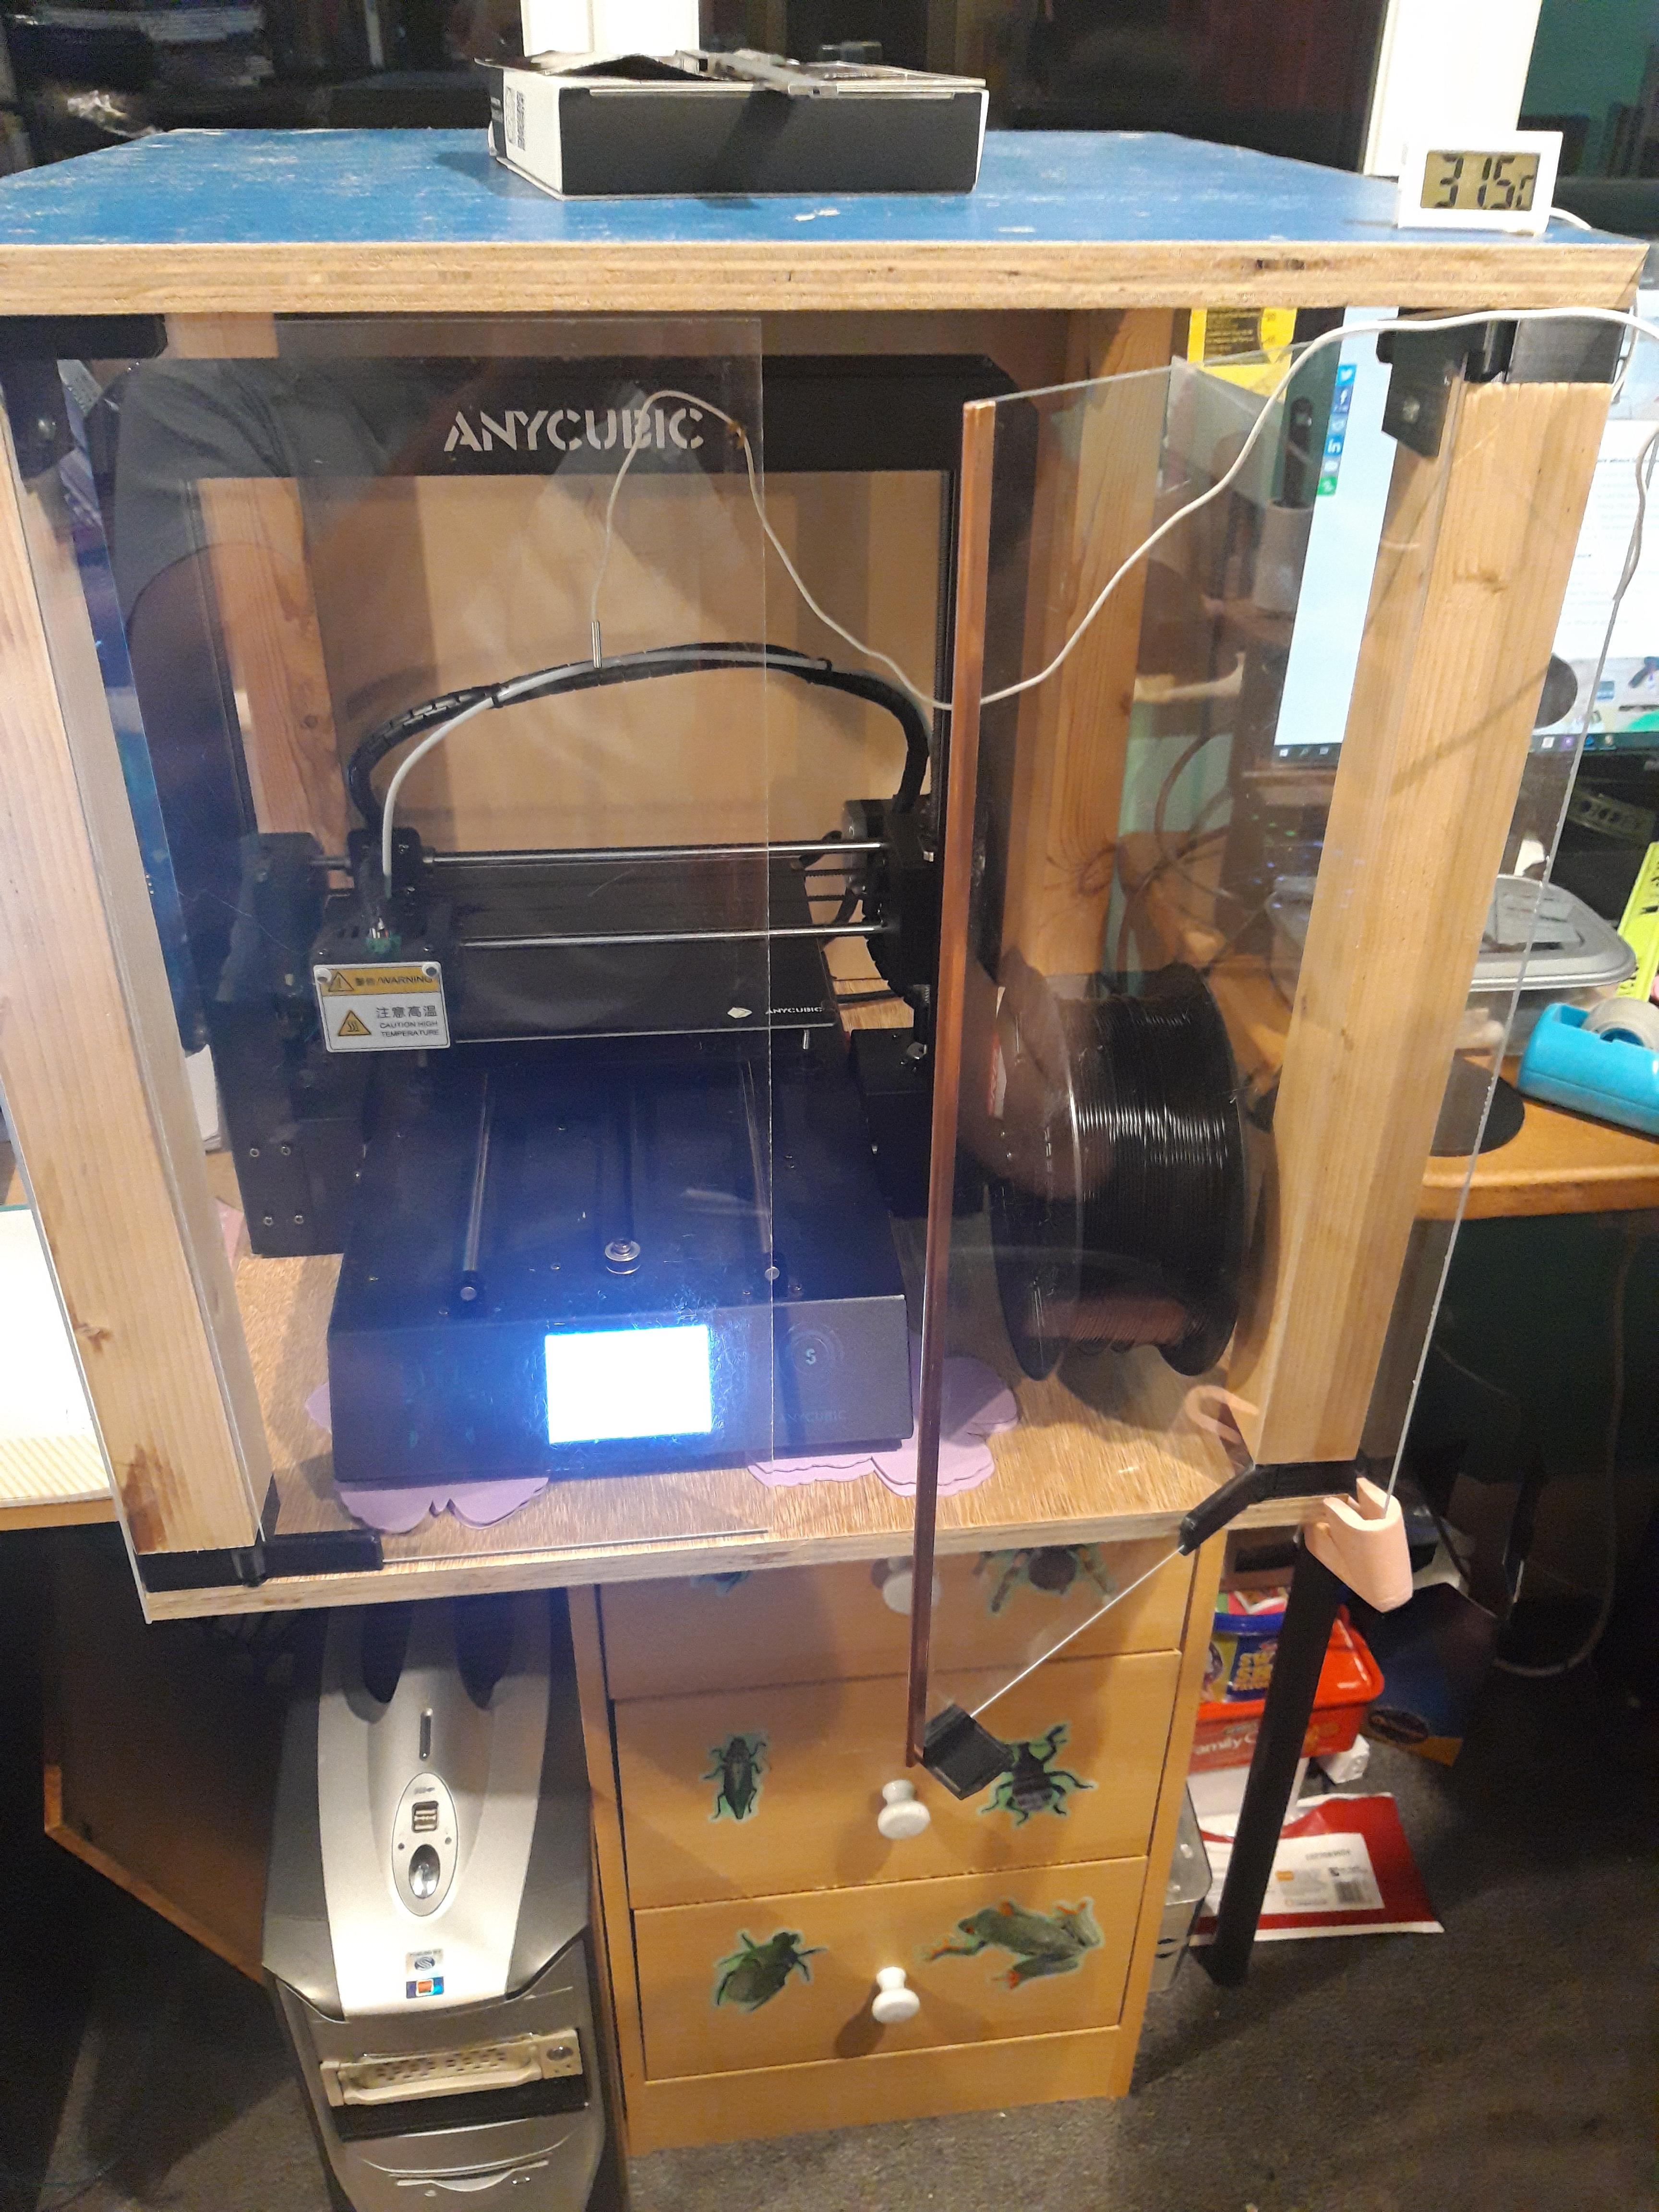
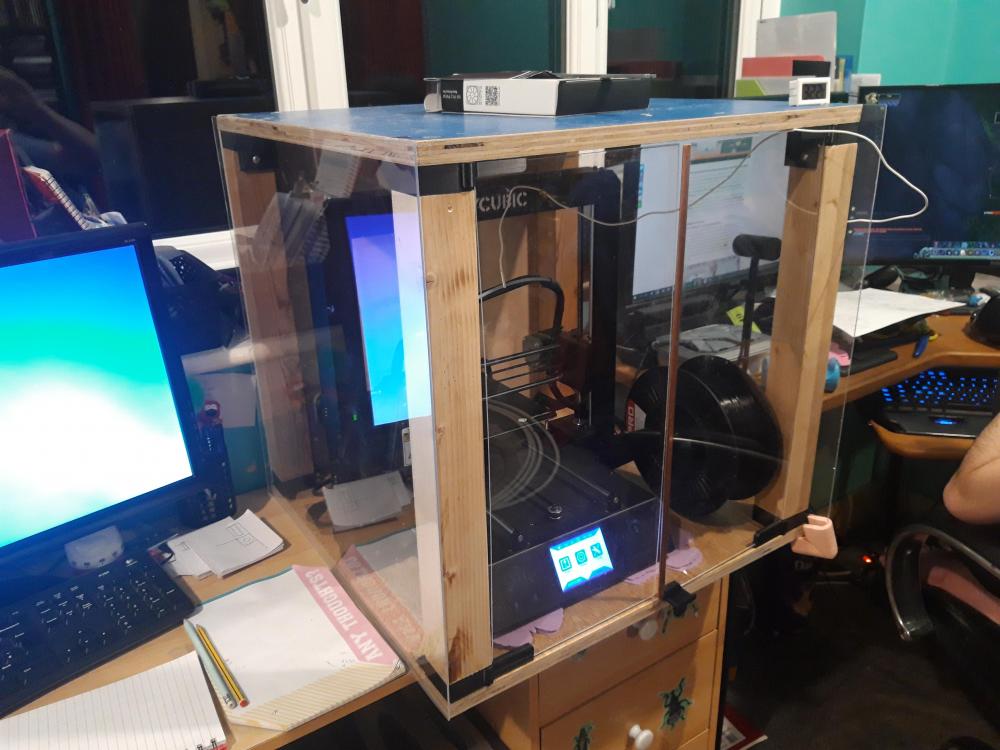
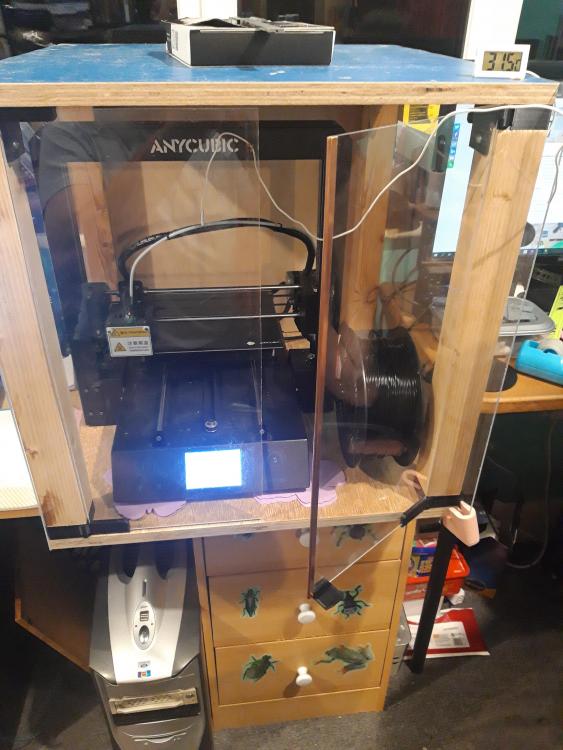
A bit more progress. Though you can't see them the reprinted bits are done. All joints slackened and re tightened for a better fit. Two front doors cut to size from 2mm perspex or whatever this freebie stuff is. As I feared 2mm is a bit flexible so on one door I've clipped a length of copper bus bar that fits over the edge a treat. Makes things much more rigid. Sides just stuck on with Sellotape at the mo. As a little test ran the bed up to 40degC. Using a little remote thermometer the internal temperature held at around 38degC. On the face of it that's good but when you think for ABS it needs a bed temp of like 110degC that will not be at all good for the printer's internal electronics; the psu, MOSFET board etc. Looking now to move these parts outside the enclosure. Got some blingy, wi-fi controlled, USB powered LED light strips coming for the inside. Comes with remote and can be controlled via an app. Picking up a 2G, MK USB socket to go on the back later.
-
I'd take the extension down or move the party wall in to my side and erect a rickety fence. Just to f*** him up.
-
For "bulk" filling I've occasionally cut a chunk of Celcon block with a saw and stuck it in with No Nails etc.
-
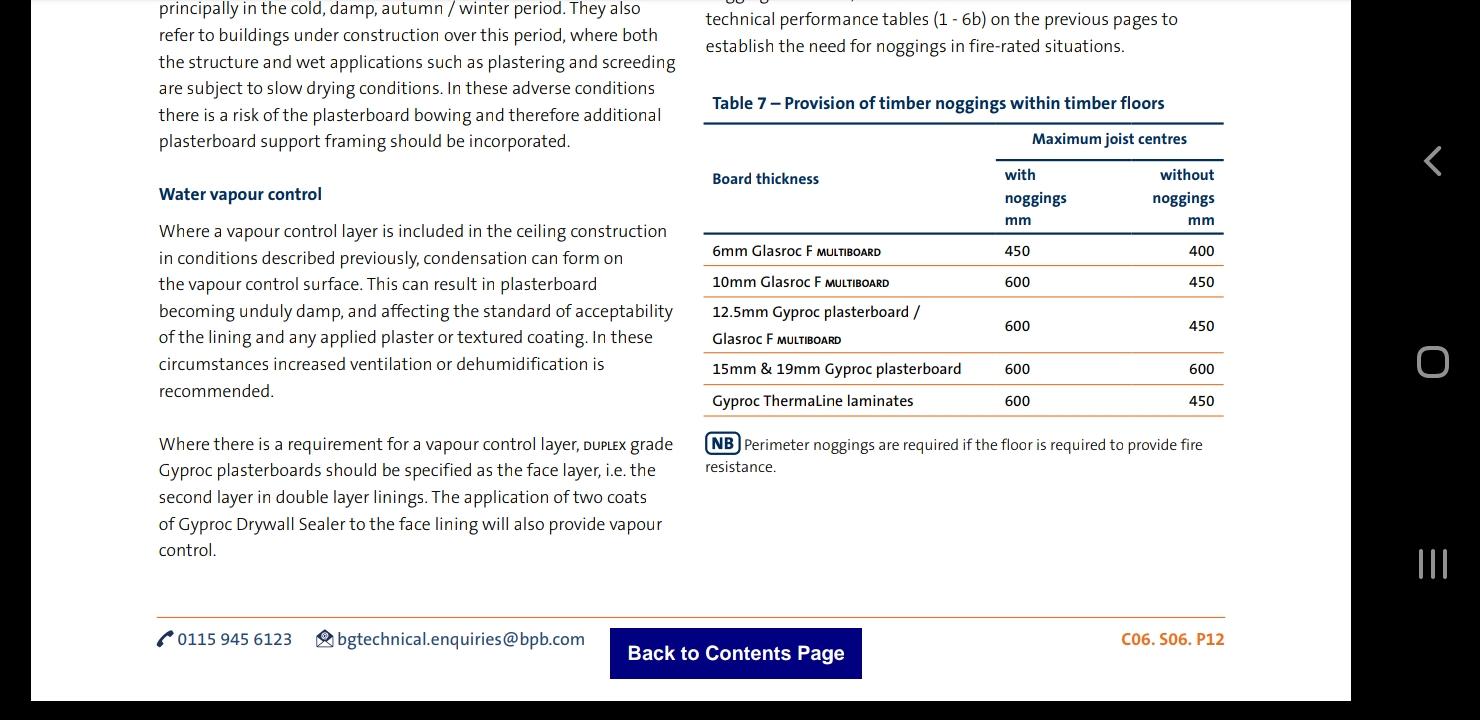
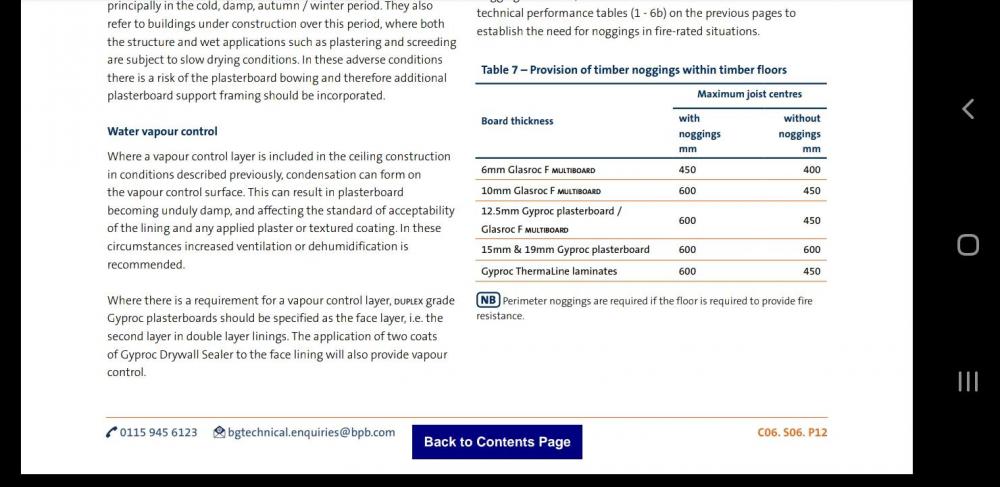
As to whether noggins are required: This from the British Gypsum White Book.
-
Some git will always point them out! On a serious note we cut all the ceiling holes first and managed OK as first time plasterers.
-
? When all's said and done you know it's all in jest and happily take it on the chin.
-
Sir Whingealot! Everybody else's fault but yours. Next you need to blame your builder/ neighbour / neighbour's cat and how everyone's ganging up on you. Edit: Sorry, thought the OP was a different person. Is it me or is that vent slightly off centre? (Grabs coat and runs).
-
Btw, stop pm'ing me please.
-
So did you not bother asking your BCO? No need I guess now you have the answer you want.
-
You left yourself wide open, I couldn't resist!
-
No problems. What size, 3XL & ruined? http://dildo-generator.com/
-
The plasterer will thank you for it.
-
@pocster be honest now.....this looks shit! ? No way of moving it to the right, dead centre of the horizontal section?
-
Like I said offer's there. This is typical: https://cults3d.com/en/3d-model/home/cover-fan-air-conditioner-grille-pour-air-climatise
-
Could I maybe 3D print you something? Just made my mate an insert to go on his stairs wall for a low down, recessed occupancy sensor. All I'd need is OD and ID of the pipe and some idea of the hole pattern you want. VID-20200512-WA0002.mp4
-
-
So you don't like the idea of doing something because it's extra work even when good reasons are given. You're now going to go and ask someone else (the BCO) hoping to get the answer you want? Just ask them in future. Gasket blown.
-
Let's be honest any local plasterer is likely a mate of your builder.
-
I have half an idea they, noggins, giving full support, might be required for added fire resistance.
-
I would yes. Btw, I tried that "Google" search engine thing someone recommended. Effing brilliant tool. I typed in "noggins plasterboard ceiling"... https://www.homebuilding.co.uk/how-to-fit-a-plasterboard-ceiling/
-
Table saw if you do rip them down I would, with dust extraction. I've spray glued extra strong Bacofoil onto boards before where the foil has come off. Works well.
-
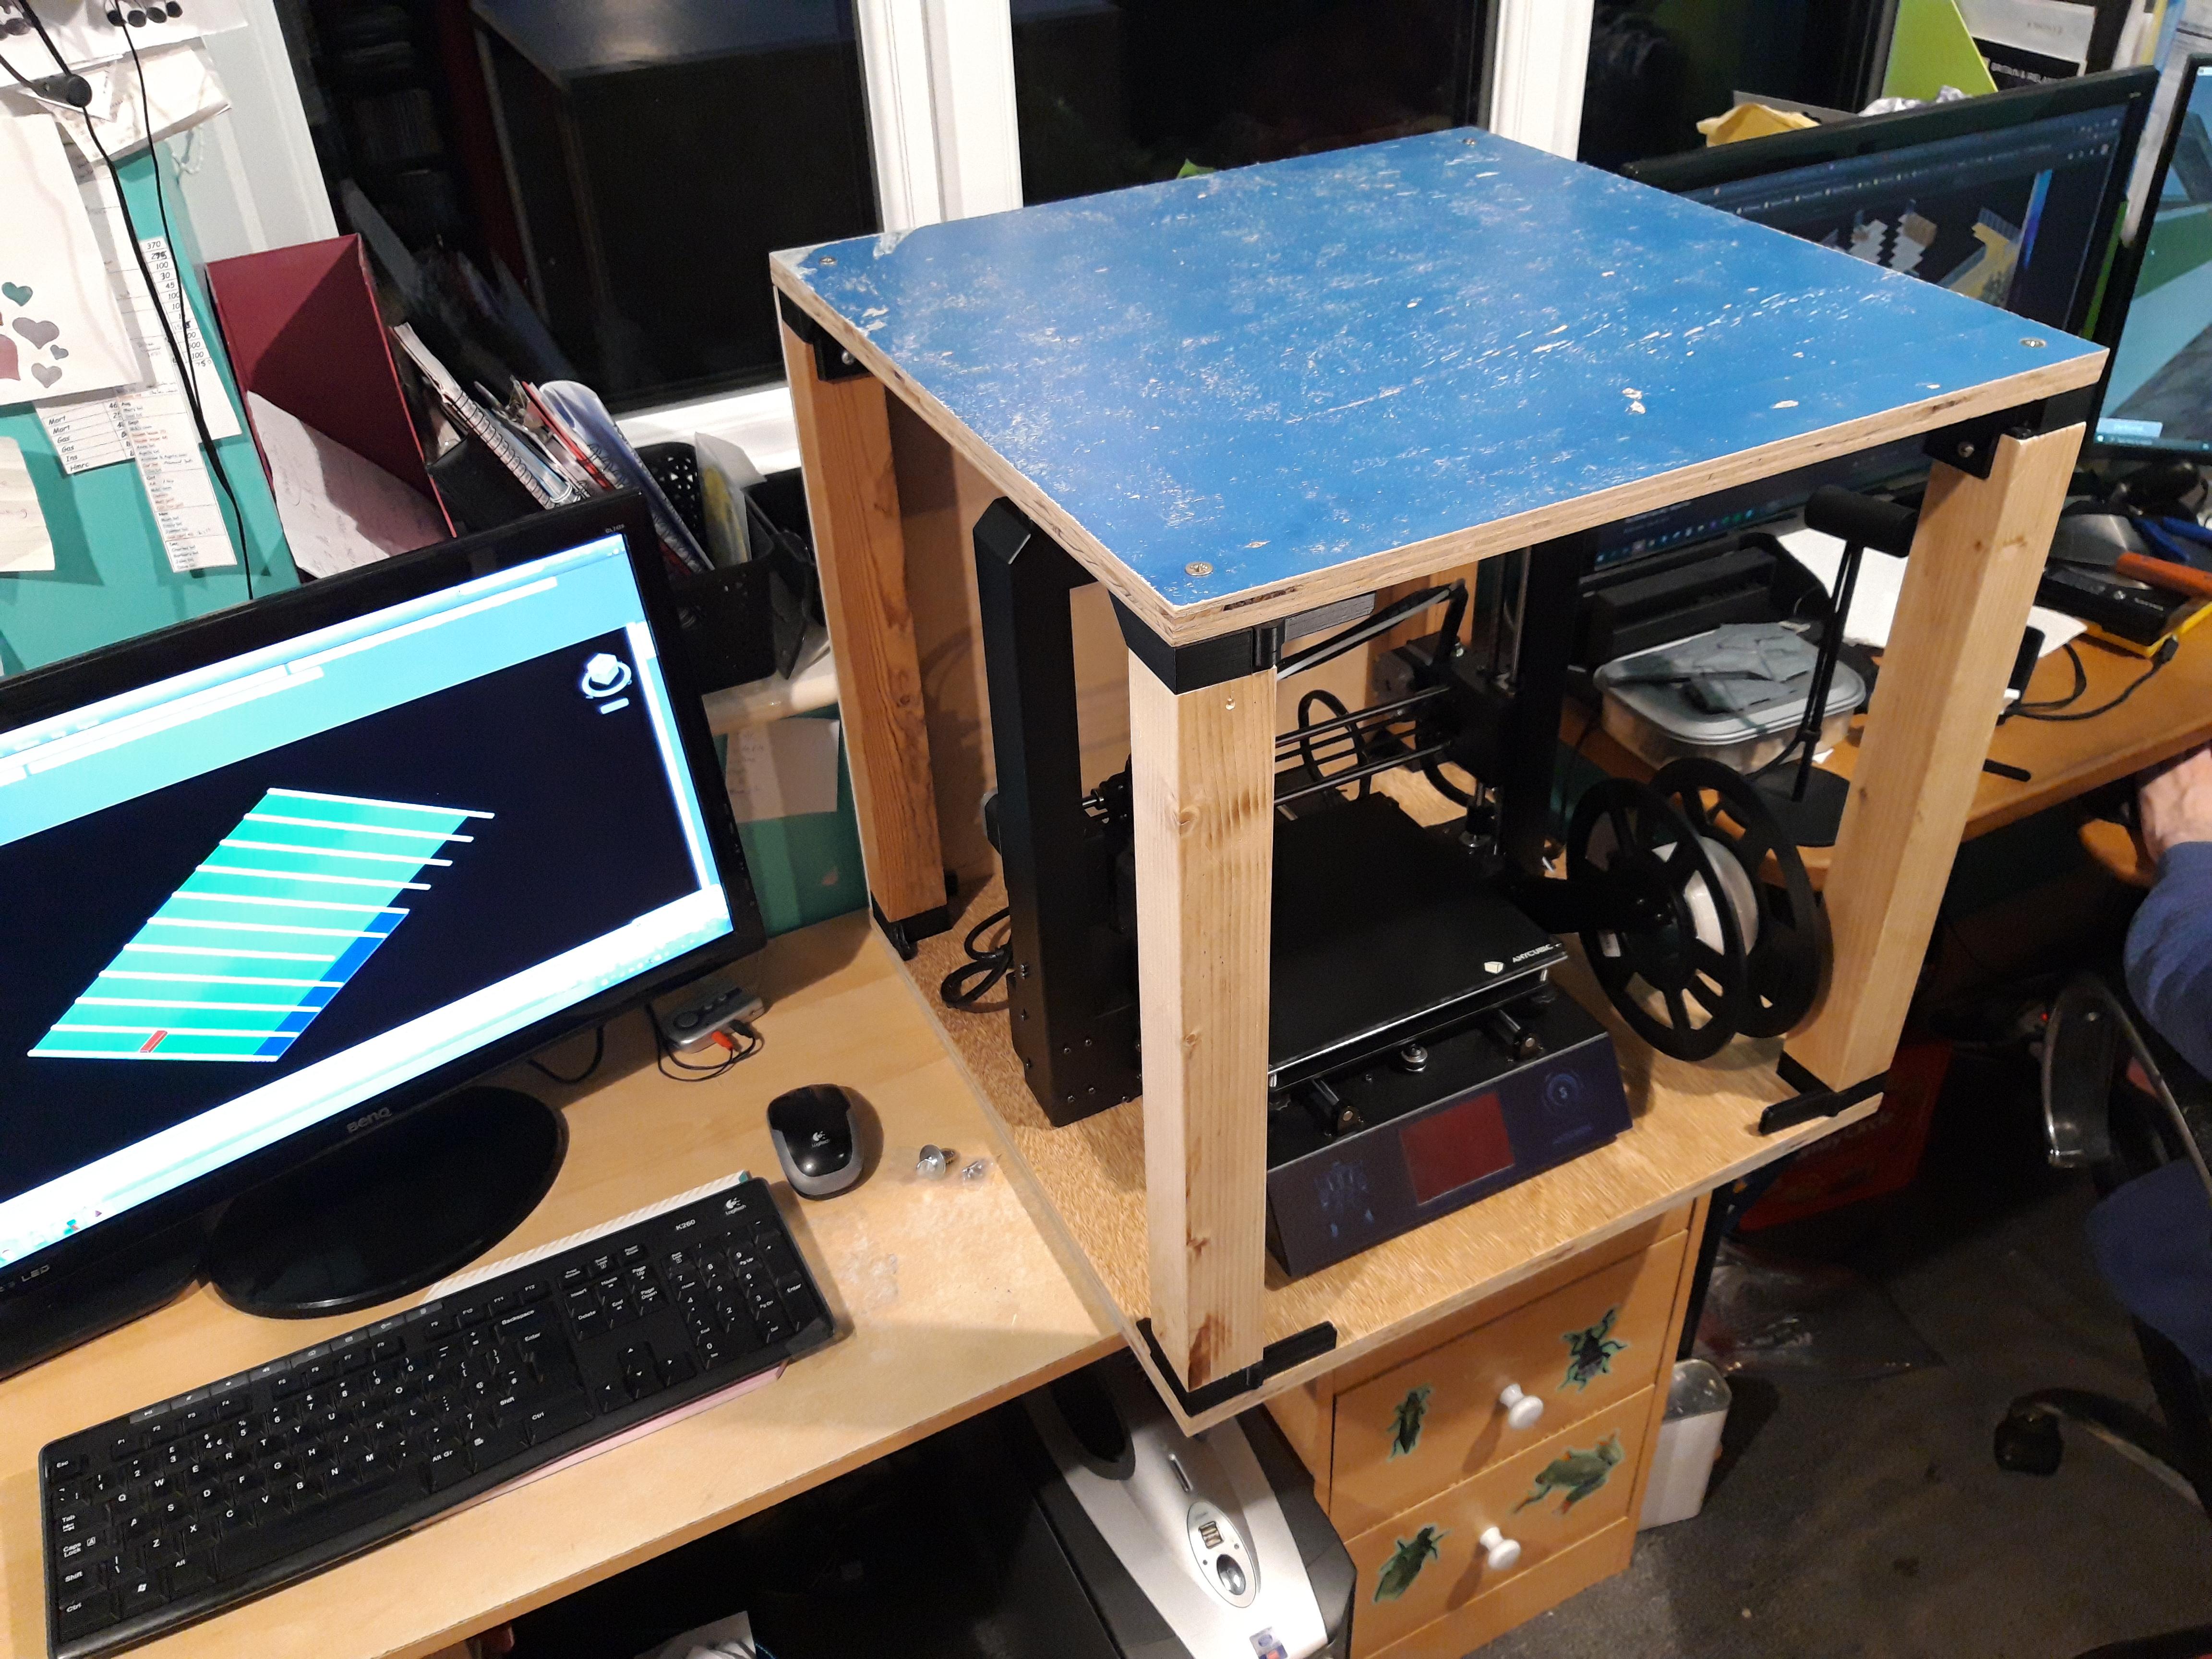
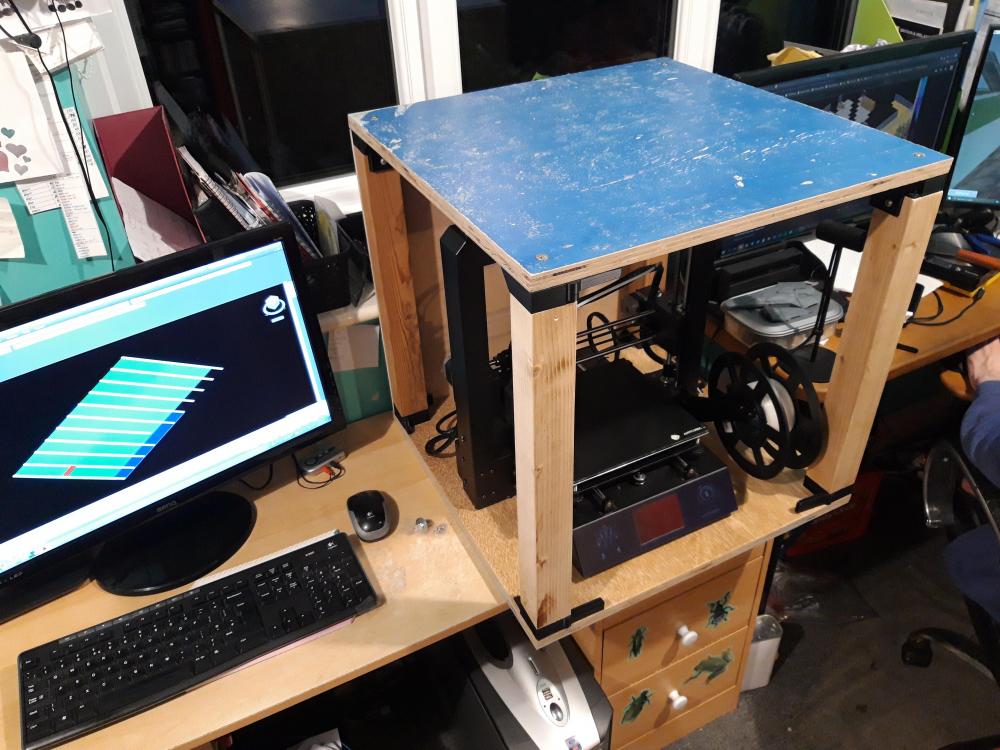
Something like this. Not the most flattering shot. It'll look better when sanded and painted up with it's "glass" sides and door! Who needs IKEA? ? All the wooden bits connect together with the 3D printed PLA bits at the corners OK. (Though I did break one hinge...I had had a couple). You can just see the door hinges on the front. 9mm ply sheet on the back. I'm a couple of mm out somewhere but I'll get away with it with a bit of trimming! Can't decide whether to let a clear panel into the top. A kilo of RS Pro black PLA coming tomorrow for some reprint bits. Not tried it before, it was just the quickest I could get any.
-
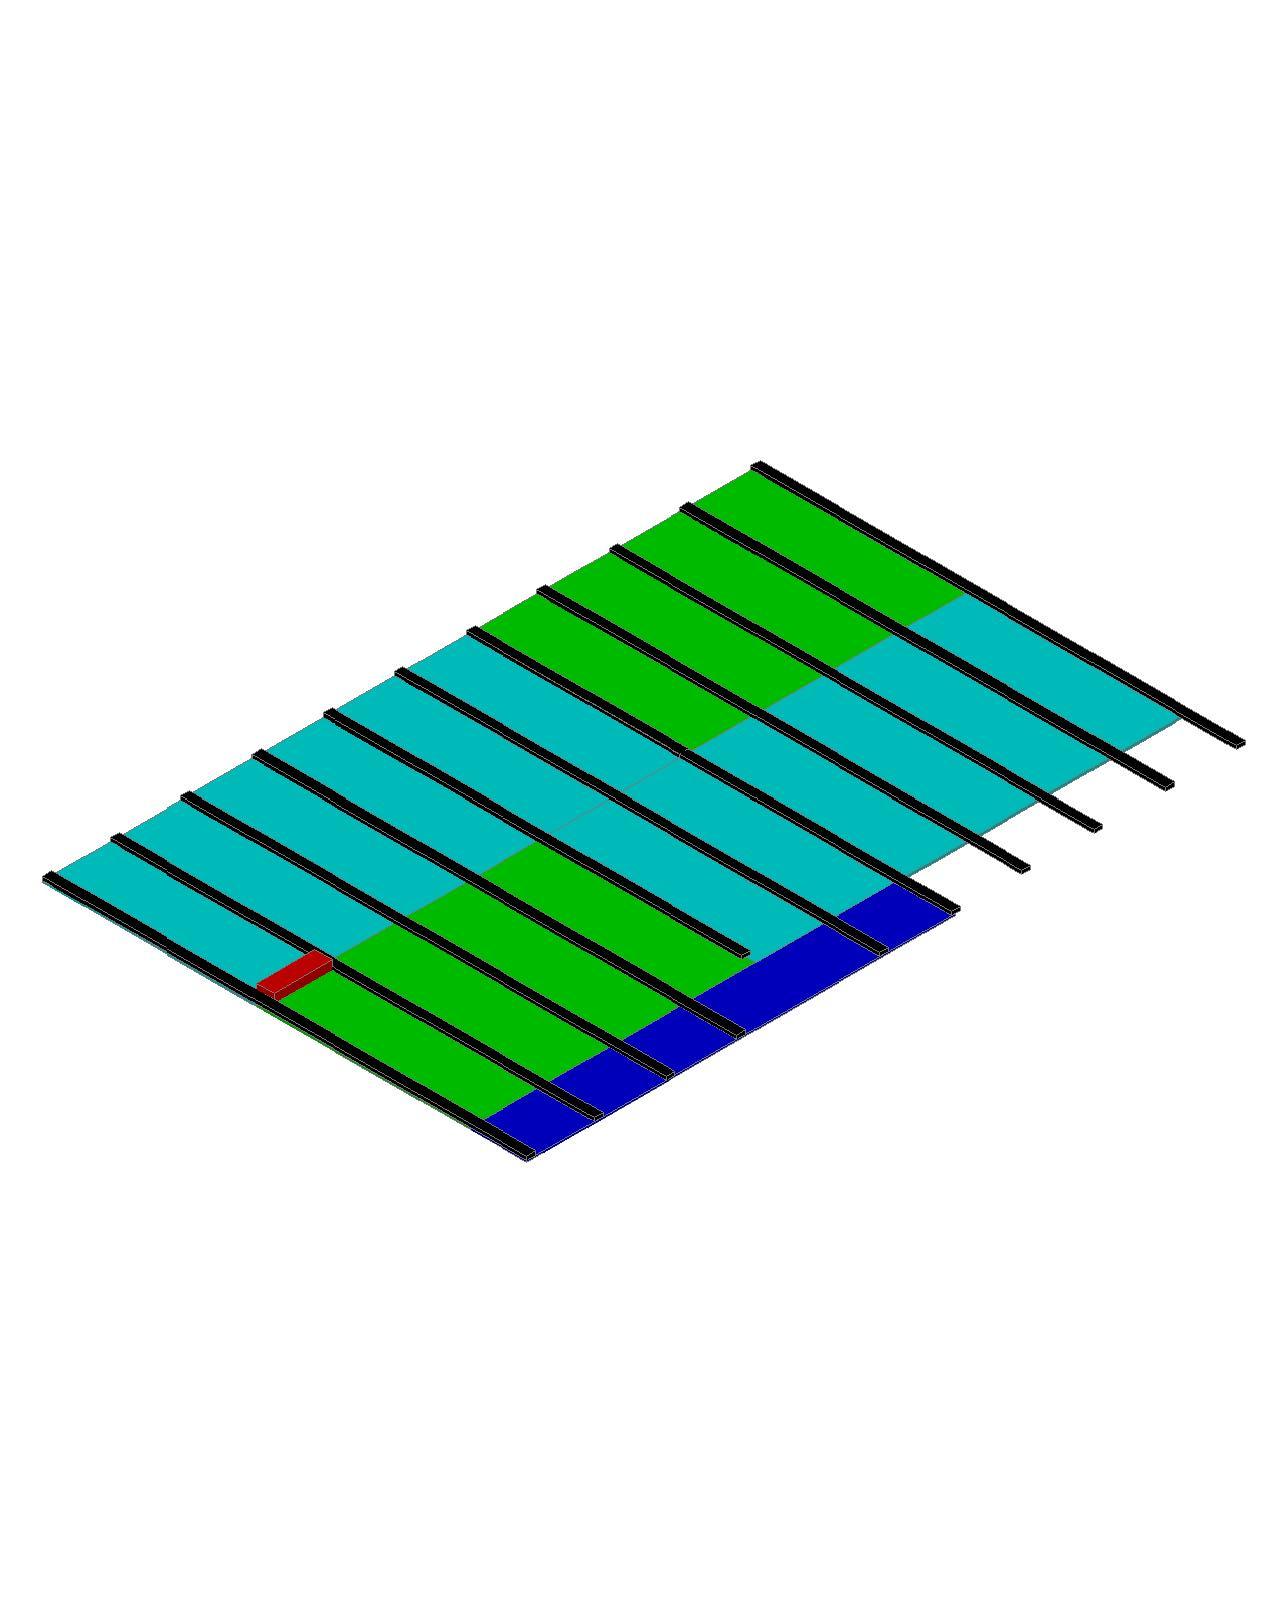
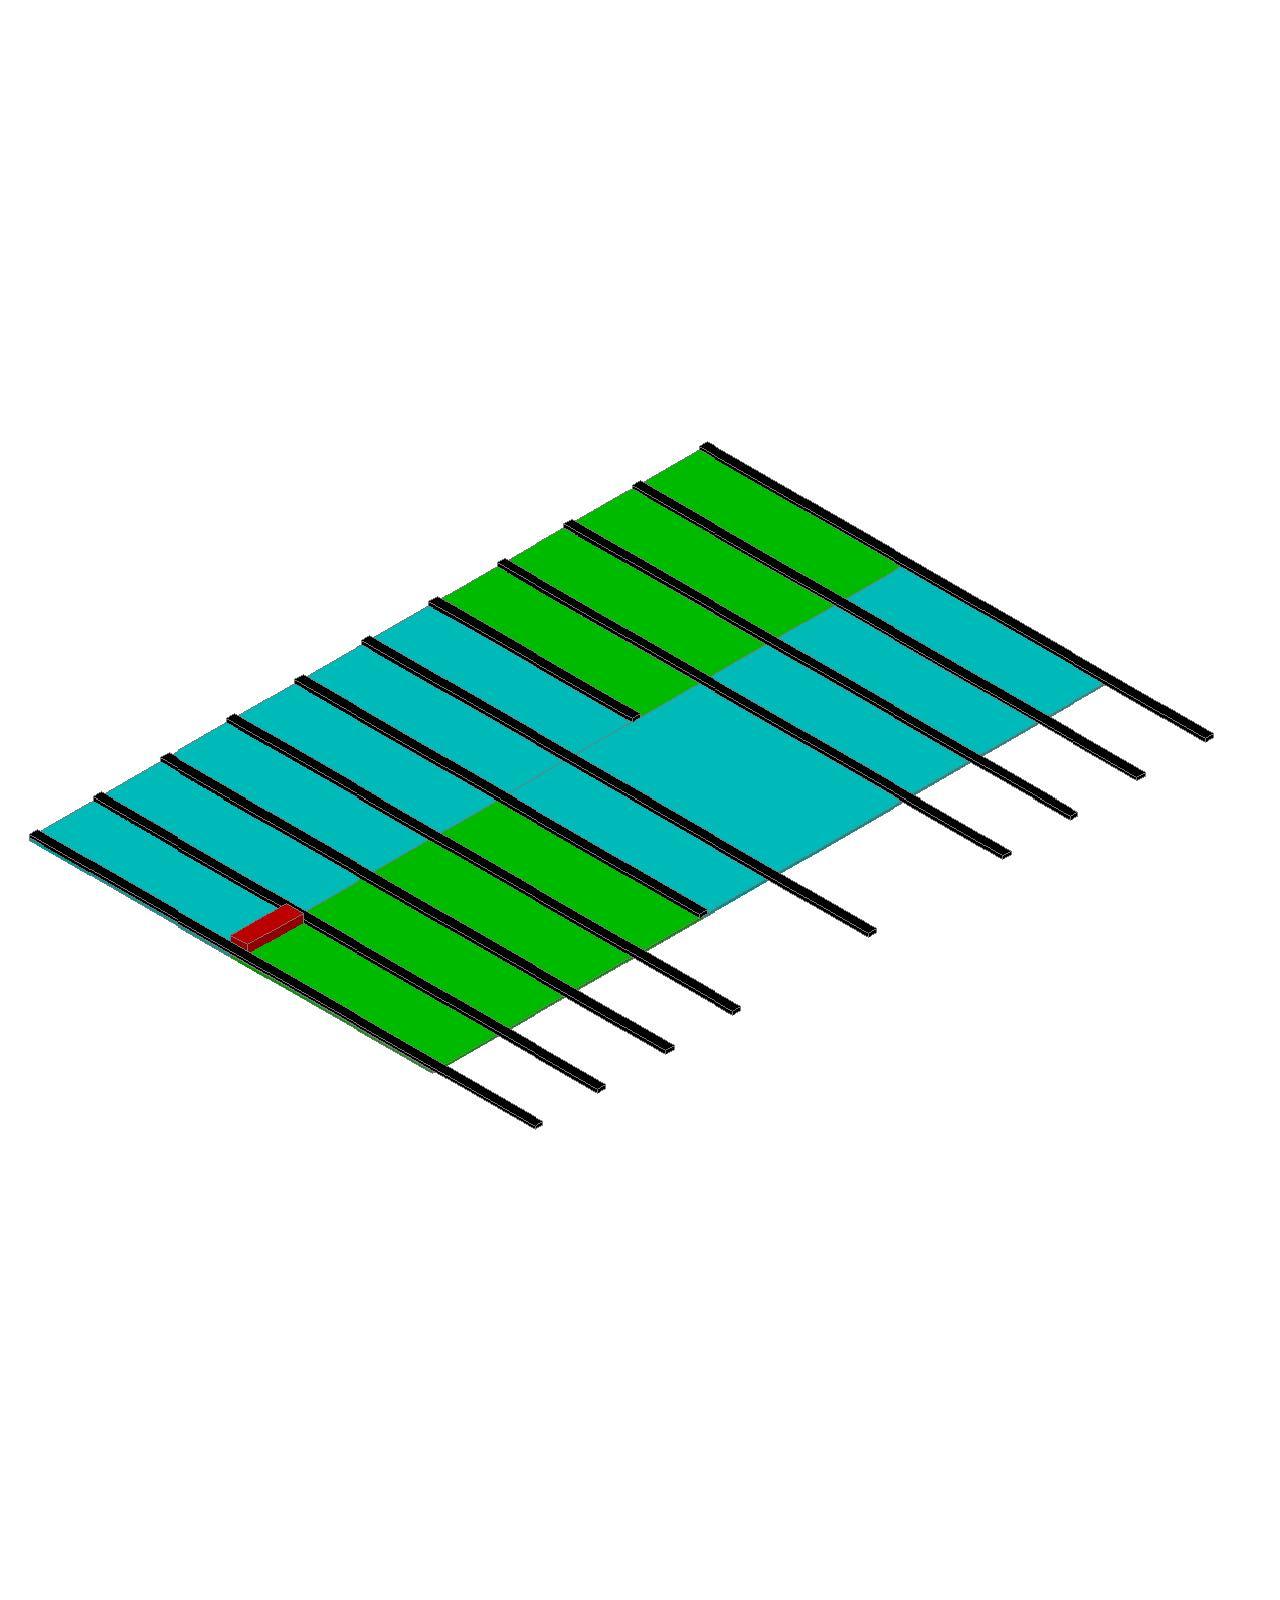
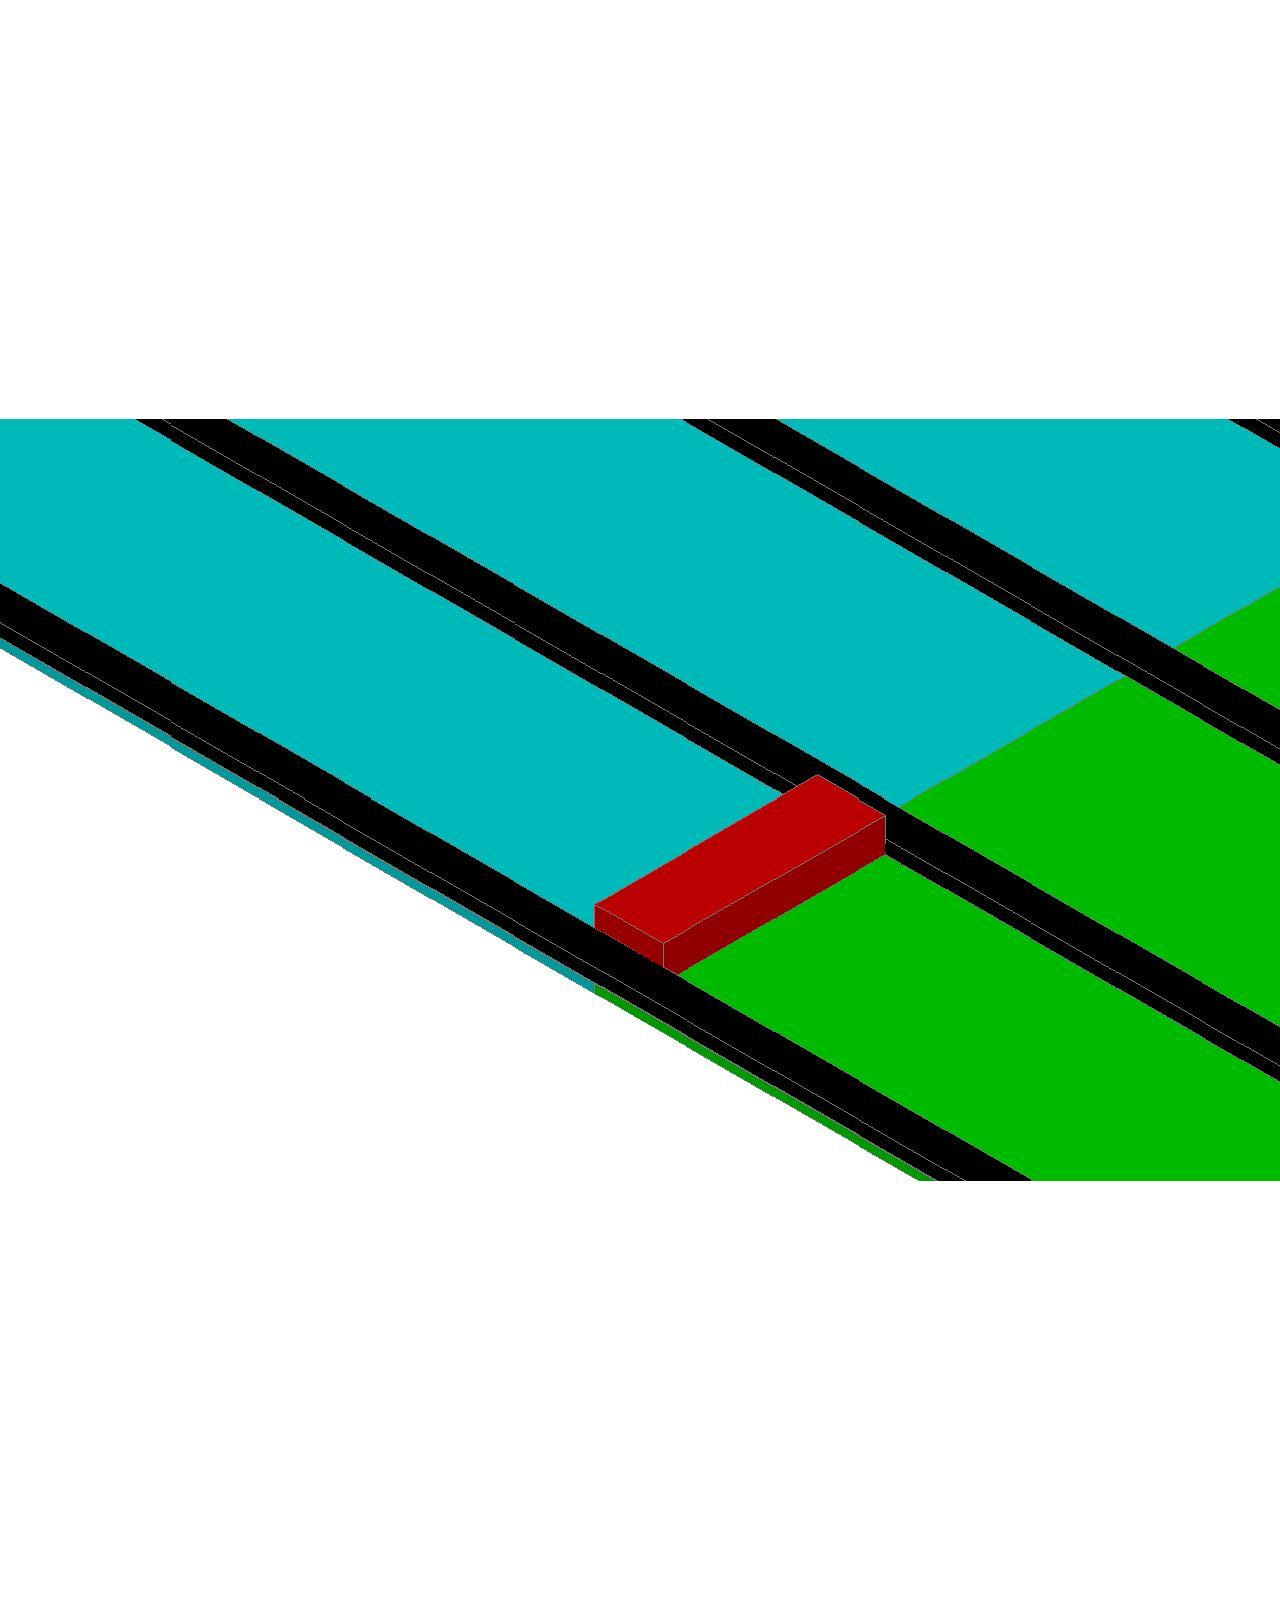
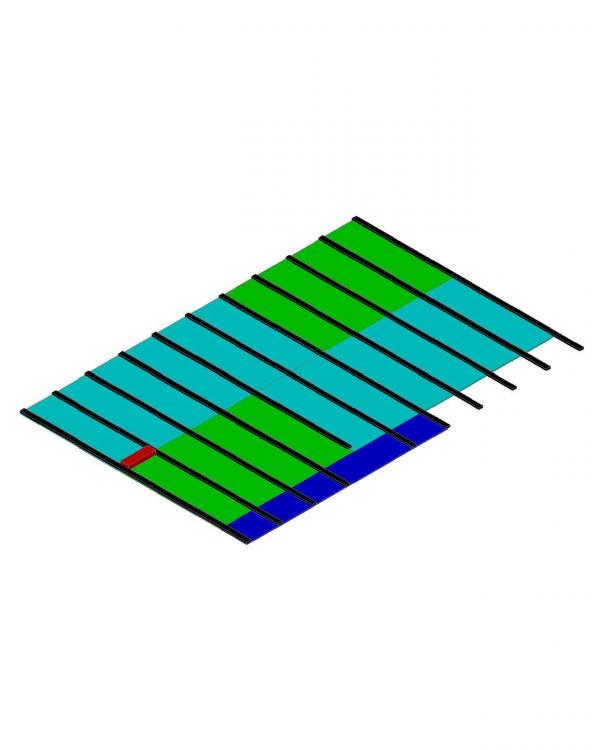
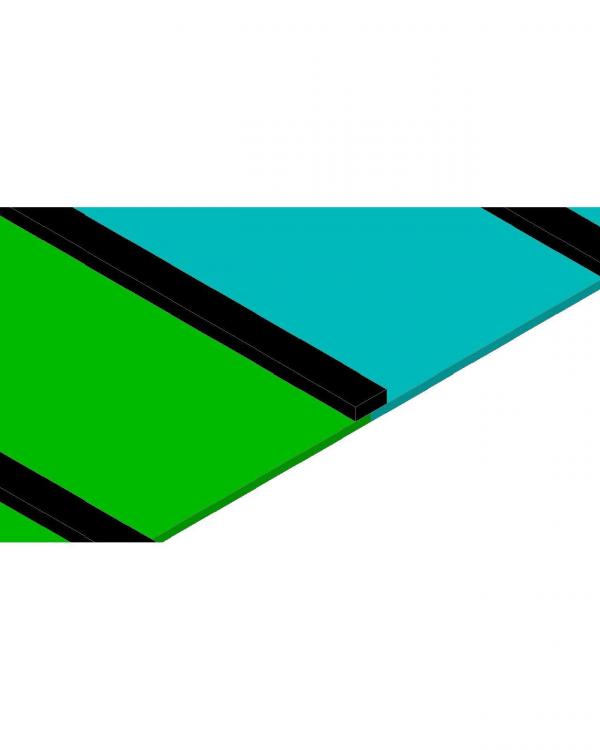
Dark blue is your 320mm wide bit. What will dictate whether you start with a full board (light blue) on the left is what the end of the board sits on. You MUST ideally have the right hand end of that board on the centre of a joist. Again, imo you want a line of noggins between the light and dark blue:
-
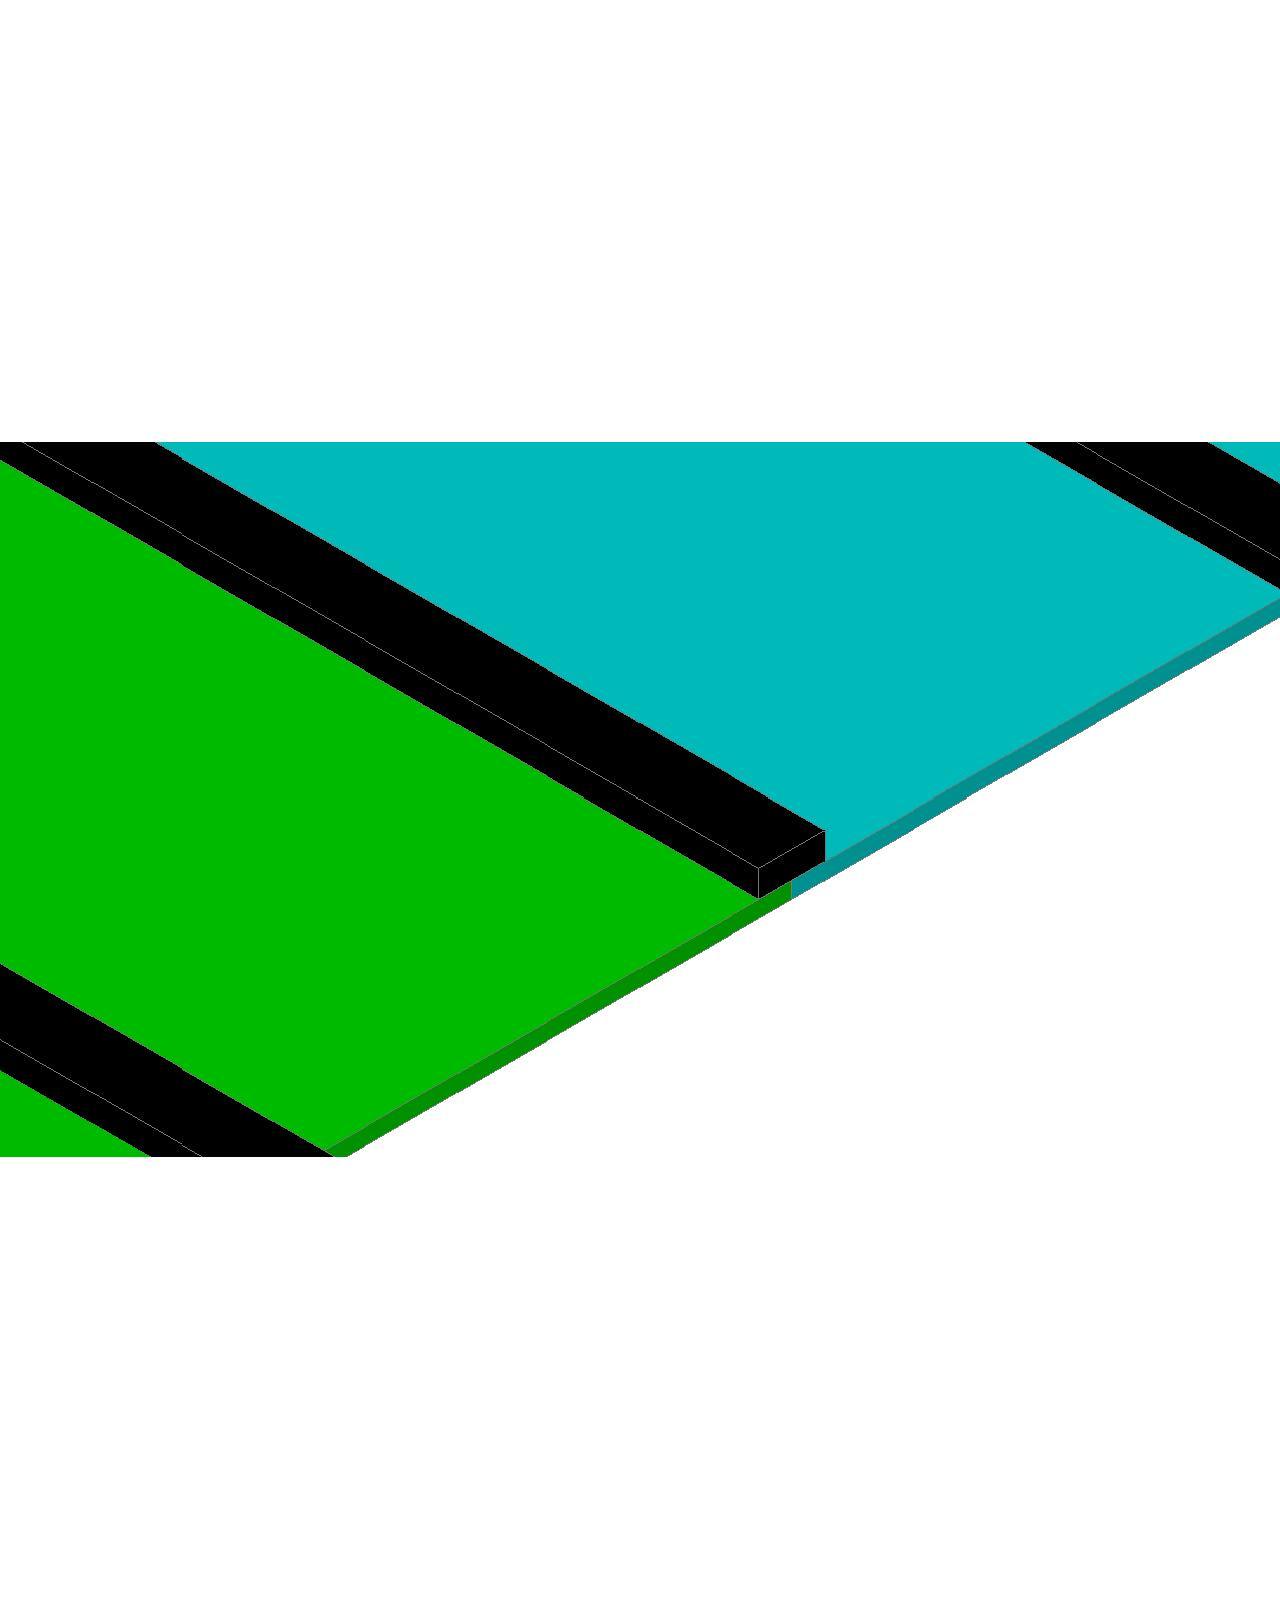
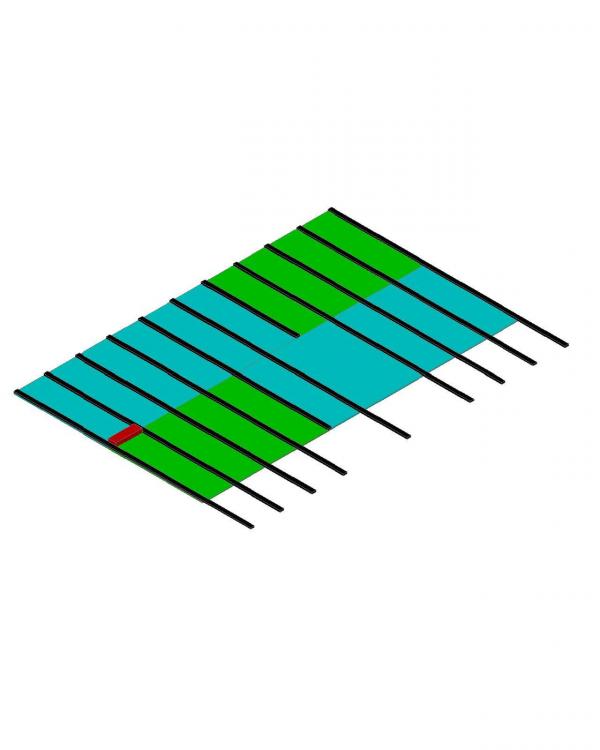
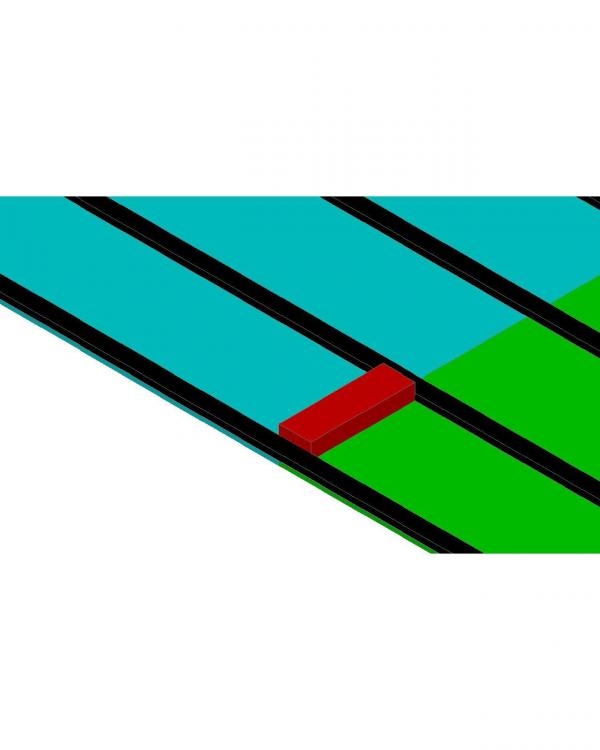
That size is no issue at all but better with two of you putting it up. In answer to your earlier questions. Plasterboards are shown blue & green, joist bottoms in black. Without noggins, shown red, there is no support under where the edges butt up to each other.
-
No @pocster, dont get exited: https://passivdom.com/home/ & https://haus.me/