Iceverge
-
Posts
4462 -
Joined
-
Last visited
-
Days Won
32
Everything posted by Iceverge
-
 This has lasted the miserable total of 4 years. 95% of my underwear is older. Now the kids are bathing in grimy brown water which for once isn't of their filthy doing. Can someone please suggest one that I can swap in that will outlive the next ice age please.
-
100mm cavity - Full fill?
Iceverge replied to iSelfBuild's topic in House Extensions & Conservatories
Still impossible to get them tight enough to be wall to prevent thermal looping. Whilst you're at it mark the K value of the boards from 0.022W/m2K down to about 0.033 as the blowing agent will escape from all the cut non foil sealed edges in a few years to be replaced by air so you're basically back at mineral wool or EPS anyway. Full fill mineral wool batts will be far far cheaper and easier to work with and result in less heat loss despite the headline worse insulative value. Airtighess is mega important too. I would recommend wet plaster internally. I was going to suggest to suggest stick framing with a blown or flexible insulation for the extension. What's your plan for the SIPs? Are you going to clad them in brick? -
Fine tuning my IWI Solid wall (Warm Batten) design
Iceverge replied to Annker's topic in Heat Insulation
Nothing. -
I'd argue that point. Very occasionally, if I procrastinate long enough about something, my wife does it for me....
-
100mm cavity - Full fill?
Iceverge replied to iSelfBuild's topic in House Extensions & Conservatories
Rigid boards in the walls are impossible to get right. Use mineral wool or EPS blown beads instead. Use normal dense blocks rather than thermalite. They add almost nothing to the insulation and crack far too easily. Widen the cavity and add more insulation rather than using an insulated plasterboard. Insulated plasterboard is terrible for airtightness and is expensive and wasteful. What's the reasoning for SIPs for the extension? -
Have a look at @Annkers thread about IWI running at the moment.
-
Pics would help. For something like that 3:2:1 chips,sand, cement would be fine. It's so little you could mix it with a bucket and trowel. Jam a board against the edge and spoon the mix in. Give it a few kicks to knock the air bubbles out (or use a blunt bit and the hammer function on an SDS to vibrate the board). S
-
Can't see why not.
-
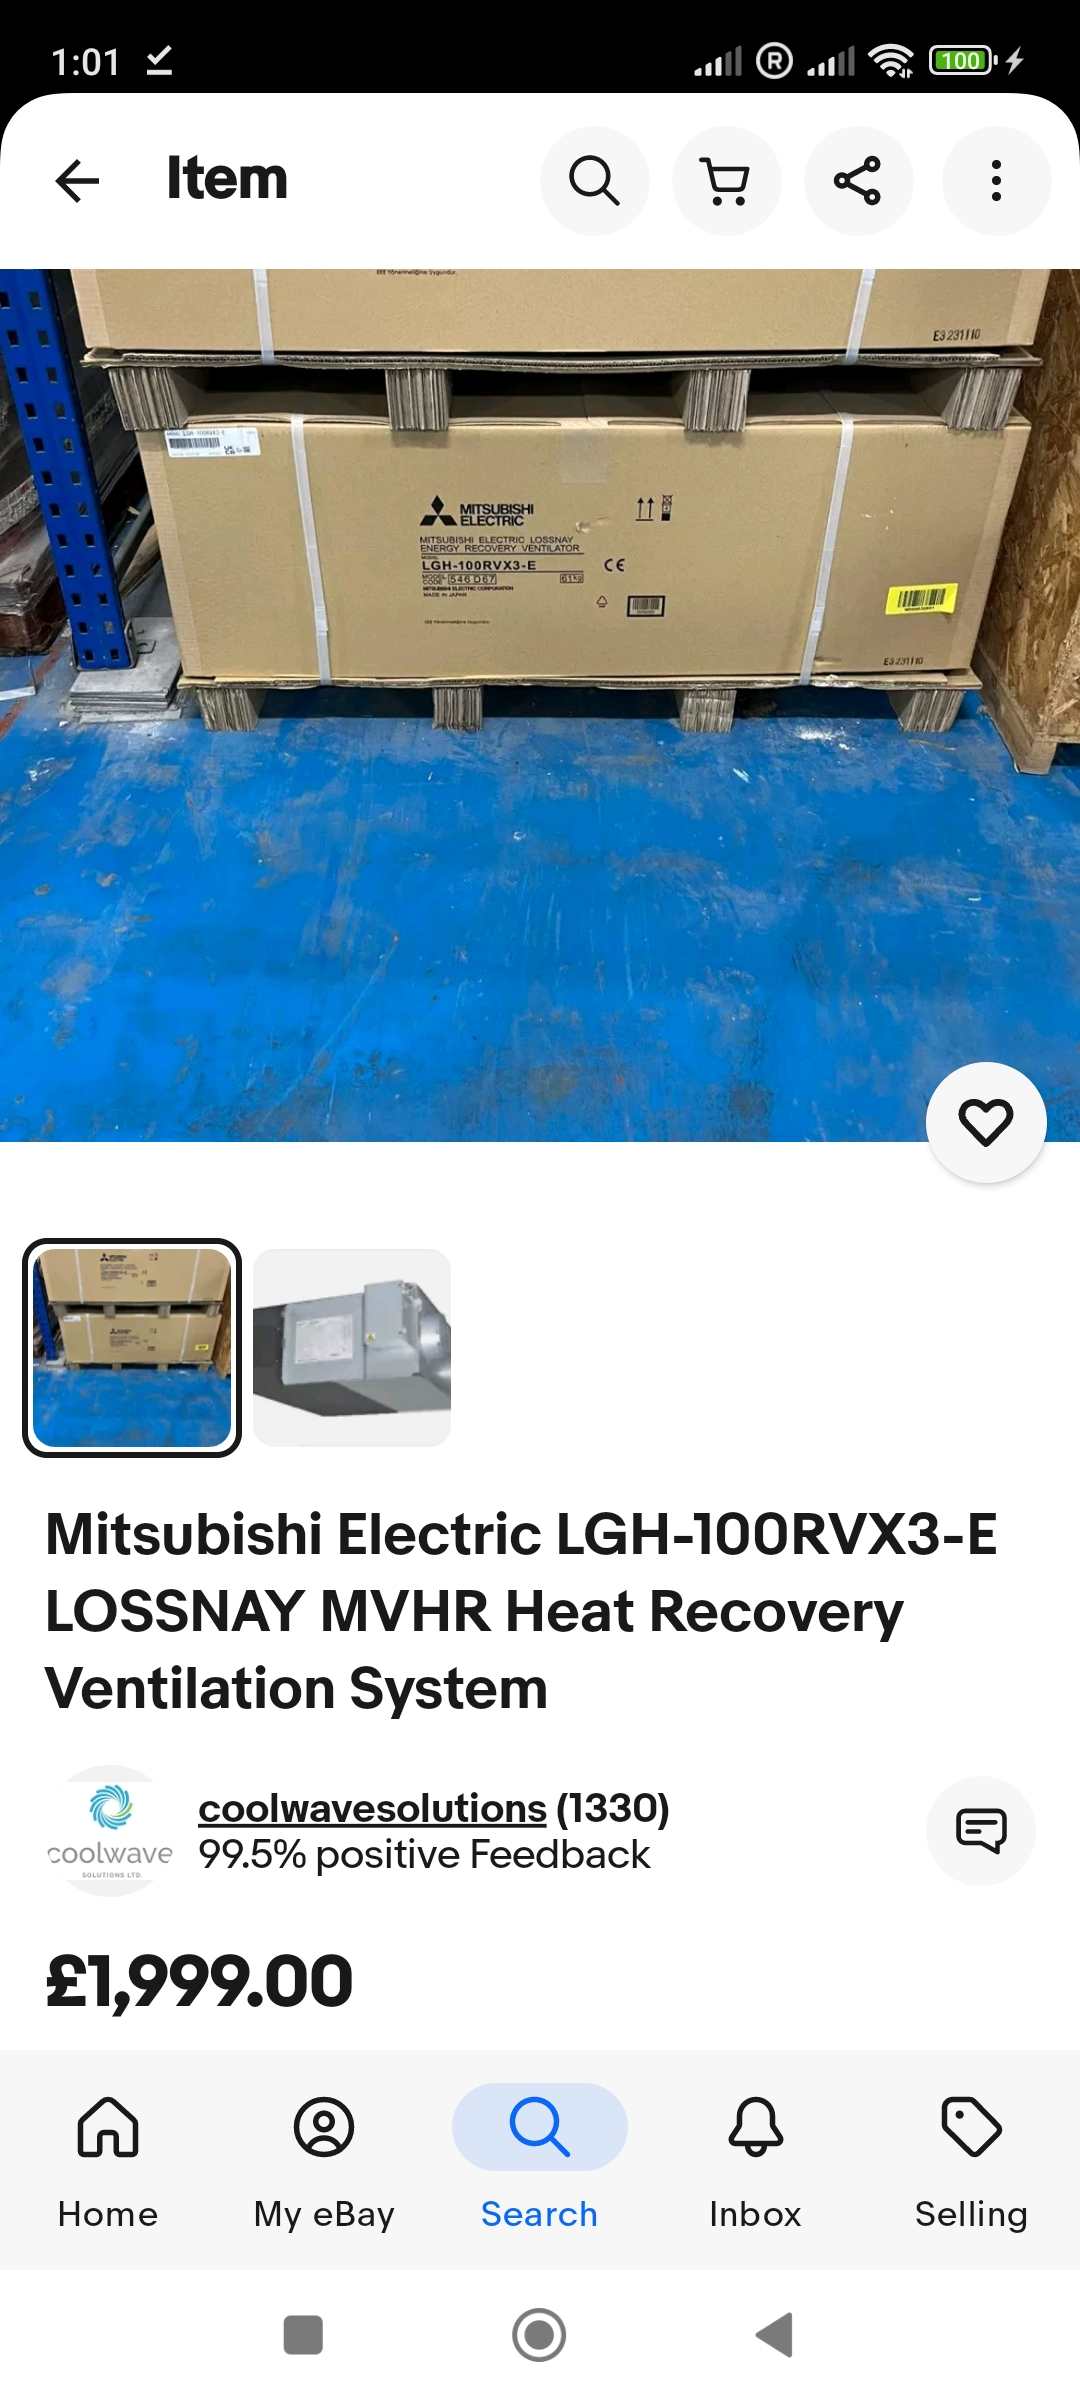
MVHR - one unit or two?
Iceverge replied to SBMS's topic in Mechanical Ventilation with Heat Recovery (MVHR)
I think the regs push them that way. In fairness if you have a v large house it is theoretically possible that it might be occupied to the rafters in future. Regs must cater for worst case scenario. -
MVHR - one unit or two?
Iceverge replied to SBMS's topic in Mechanical Ventilation with Heat Recovery (MVHR)
Try to size the unit to run at about 30%. Using 30m³/head/hr it conveniently works out at sizing a unit at 100m³ max output per person. For example this unit at 600m³/hr would be perfect for 6 people. Remember there's no point in sizing your MVHR for 10 people of they're only going to be there very occasionally. In the event of visitors just crank up the unit a little and tolerate the lower efficiency for a day or two. Or open a window.
-
Fine tuning my IWI Solid wall (Warm Batten) design
Iceverge replied to Annker's topic in Heat Insulation
Once again to emphasise. Diffusion is absolutely insignificant compared to air leakage and obviously liquid water . I would go so far as to say, that so long you have a mechanical ventilation system and don't use impermeable materials, you can completely ignore it.
-
Fine tuning my IWI Solid wall (Warm Batten) design
Iceverge replied to Annker's topic in Heat Insulation
Excellent series of video this. Nice and concise too. https://youtu.be/Xud4bC1SWDc?si=awXQYIgSo8GX1Oh_ -
Fine tuning my IWI Solid wall (Warm Batten) design
Iceverge replied to Annker's topic in Heat Insulation
Vapour diffusion is a thing, but it's the scale VS airtighess that gets lost on people. In this example a 1m² piece of wall allows 0.5g/M2/day to diffuse through it. Meanwhile a 1m x 1mm gap on a day with a gentle breeze will pass 1600 times more moisture through it. A badly sealed layer of Intello will do little to nothing for airtighess and that's the big battle you are fighting. -
Fine tuning my IWI Solid wall (Warm Batten) design
Iceverge replied to Annker's topic in Heat Insulation
Stand the studs off the wall a little. If you're feeling really picky you can jamb a little fluf behind them, but the batts will fill the gap, espically if you space the studs close enough as they're a little hairy at the edges. The batts will just stay there all by themselves if you get the spacing right. Here's one my mate is doing at the moment. These batts are only 50mm too. Even where they're 2 batts in one bay they stay there fine. Use a slightly thicker batt than the depth of your cavity and it'll take out the imperfections. Wufi and other programs are only as good as the data they get and renovations of old houses are full of incalculable variables. Beware manufacturers will typically spec a buildup that achieves two things. 1. An "on paper" safe buildup that, 2. Uses lots of their product. For example try any of the PIR manufacturers and they'll oblige but I hope my lengthy video might have explained why I think it's a bad idea. The fundamental points are that it needs to be able to not get WET. Think airtighess, and it needs to be able to DRY. Drying onwards is no issue so long as you manage the ventilation, an imperfect VCL is worse than no VCL. Your plan is sound. Keep the course.
-
MVHR - one unit or two?
Iceverge replied to SBMS's topic in Mechanical Ventilation with Heat Recovery (MVHR)
Commercial units appear on eBay a lot cheaper. This one will do 1000m³/HR.. Beware through it does use 250mm ducting so will take up a big chunk of space.
-
MVHR - one unit or two?
Iceverge replied to SBMS's topic in Mechanical Ventilation with Heat Recovery (MVHR)
A complete ballpark to sizing is to have a unit that can do 1 ACH at its max setting. Take a 165m² house with average ceiling heights of 2.7m you get 450m³ ish. A single Zehnder Q450 would be fine. In reality the sizing depends far more on the amount of people in the house than anything else. Make sure you can easily and economically service the machine. I'm about to do bearings on our PROAIR 600pli after 4 years. Filters are not particularly cheap at €22 each( I think) I've never taken out the heat exchanger and I'm not sure how easy it is yet. Will report back. -
Fine tuning my IWI Solid wall (Warm Batten) design
Iceverge replied to Annker's topic in Heat Insulation
Good work, keep us posted. We're all learning. -
https://www.panelsell.co.uk/acoustic-fire-rated-rockwool-panels
-
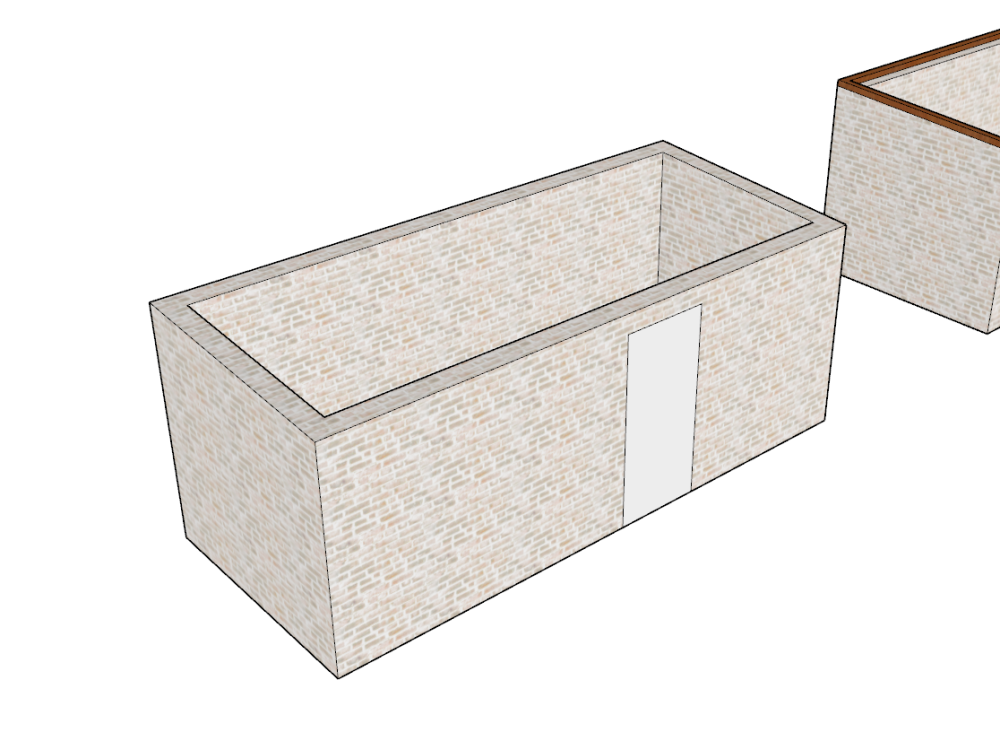
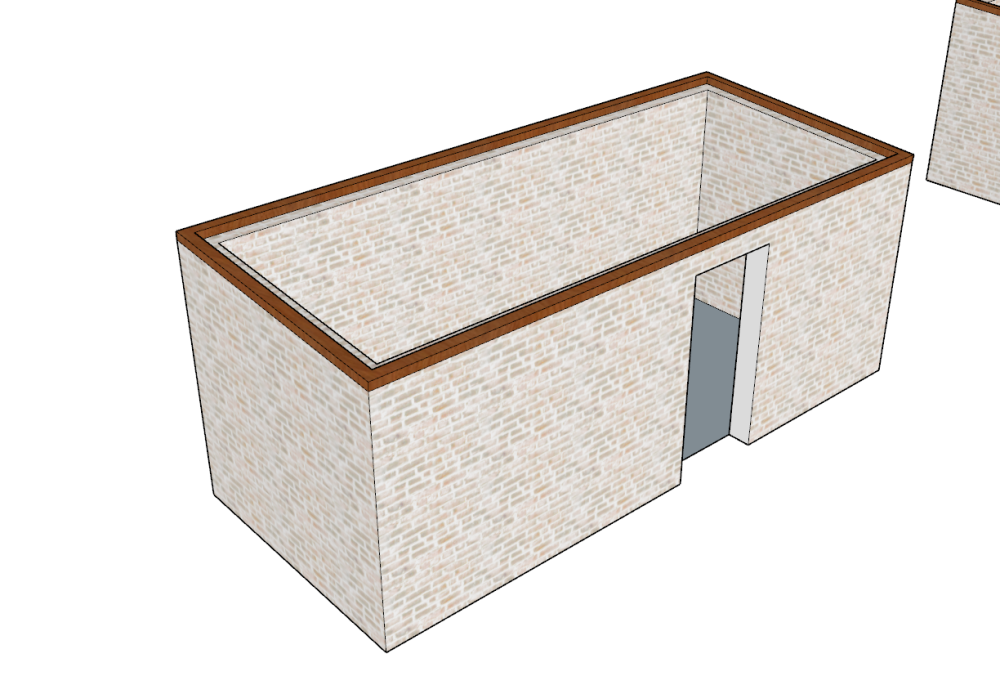
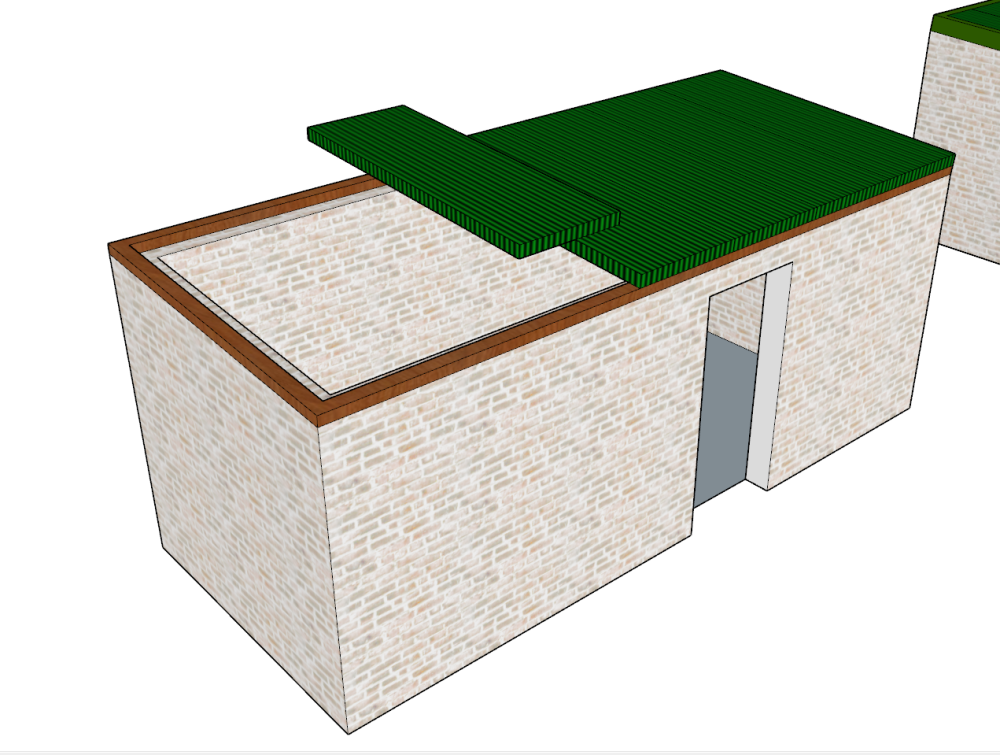
1. Strip the old roof get your wall levels correct with the 1:14 slope. 2. Strap on a new timber wall plate. 3. Screw on the Insulated panels. 4. Bolt on flashings and gutterings 5. Enjoy a drip free, leak free, economical, mould free, low maintainance, insulated roof until 2085. The underside is even presentable enough to make a finished ceiling inside IMO.

-
EDPM will require rafters, 2 layers of OSB, insulation, and a roof covering and lots of labour. Fiber cement slates won't work at such a shallow pitch. Felt won't be very durable and would need a backing board, rafters, insulation. Profile 6 sheets will require rafters and purlines. Fiber cement sheeting used to be widely used on agri buildings near me but it's all been replaced by metal as it was cracking. Plain metal sheets won't span the two walls and so will require rafters etc. They'll drip in cold weather too. For this project insulated sheeting so prefectly fills the requirements that I would be hesitant to pursue any other choices.
-
Heat pumps can be done badly. There's no doubt about it. No different than any wet heating system. An A2A generally is much less vunerable to a crappy install than an A2W. Running your house on direct electric and monitoring the usage patterns is no bad idea. We did it for a few years and had a really good idea of the house's usage. Calculations tend to run into a big issue once a real house is considered. There's too many variables, or children as I like to call them.
-
Beads in the cavity. Parge to the wall. Battens/internal studwall with mineral wool infill. Kooltherm in the Bin.
-
Got ya. Electric heater kicks in when it gets too cold for the heat pump. Matching a suitable one for our climate isn't too hard though.
-
We had an air change rate of 0.31 ACH and yet the calculated equivilant leaky hole in the house was still 49cm2, plenty to keep a bathroom fan satisfied. Believe me the air will come from somewhere in an old house.
-
I made a poor quality video trying to explain this.