Thedreamer
-
Posts
1485 -
Joined
-
Last visited
-
Days Won
9
Everything posted by Thedreamer
-
Thanks @nod Is the idea that dampness soaks into the cement render then by passes the DPC and travels across the cavity (if left untidy or filled with insulation)? Would this be a problem in a timber frame property with a clear cavity? As the blockwork and render is essentially just a wall around the house. We also have a suspended timber floor so it's a bit higher than your typically slab.
-
That would certainty stand out! I'm not sure our planners would be to happy. We are in a National Scenic Area so got to keep the appearance in line with the local vernacular.
-
I'm not sure it's pretty close to the ground, their then seems to be a bit of wet dash left at the bottom presumably that fell to the ground when it was being applied. Is the reason for asking damp concerns?
-

The Slates Start Going on in Typical Cumbrian Weather
Thedreamer commented on Triassic's blog entry in Mr and Mrs Triassics New Home
Looking good. Like original nick names. I remember last summer going up and down the ladder with a handful of slates. From your pictures it would appear to be 'ladders'. -
If going back to the planners it might be worth testing the waters to see what can be achieved as a non material variation.
-
Hi @Donnaidh Whereabouts are you? We are in Skye. Used to live in old croft house with solid stone walls was a nightmare in heating, damp etc. As @scottishjohn suggests I would at least consider knocking it down. I would then look at using the original stone walls for the outer skin cladding. The only additional costs would be the superstructure and foundations. Others here who don't go for the full on demolish, strip the roof, sarking and rafters. So you left with just the gable ends and ground floor walls. If you ain't going down the architect route, probably best to speak with a structural engineer.
-
Might be worth checking out the earlier blog posts.
-
Yes the house is a timberframe. Double block is very unusual in the Highlands and Islands these days, prehaps because of the weather conditions. Traditional here to built a timber frame and then build a single skin block wall essentially around the house with rough casting added on top. Reason being that it's best at keeping the wind and rain out. The gable end which faces the trees get hits with prevailing south west wind and rains off the mountains. So the battens are attached to the kit. No blocks behind it. Don't know if there are different ways of doing this, but if you were to fit a block here you would need to have a gap between the kit and blockwork, with a further gap between blockwork and cladding. I think you would struggle to have it all fitting on the original foundation block which was laid on the flat, does that make sense? Below the cills we have single layer of block, then down to the original foundation block work. We also have some weep vents which will provide some ventilation below the cills.
-
From reviewing the plans there seems to be a number of different final weather skins. This improves the appearance of the house but makes things more complicated and more costly. The same applies to corners and bit's that stick out, this pretty much added a cost right from the start of digging a foundation trench to the final decorating. I was on a limited budget so decided to keep the design as a simple as possible but areas where cladding met render, different roof materials etc have been the areas that caused me the most stress.
-
Thanks A stop bead was fitted to keep a gap between the render and the cladding. The cladding was fitted on battens to keep a cavity for ventilation, so block-work just starts under the cills.
-
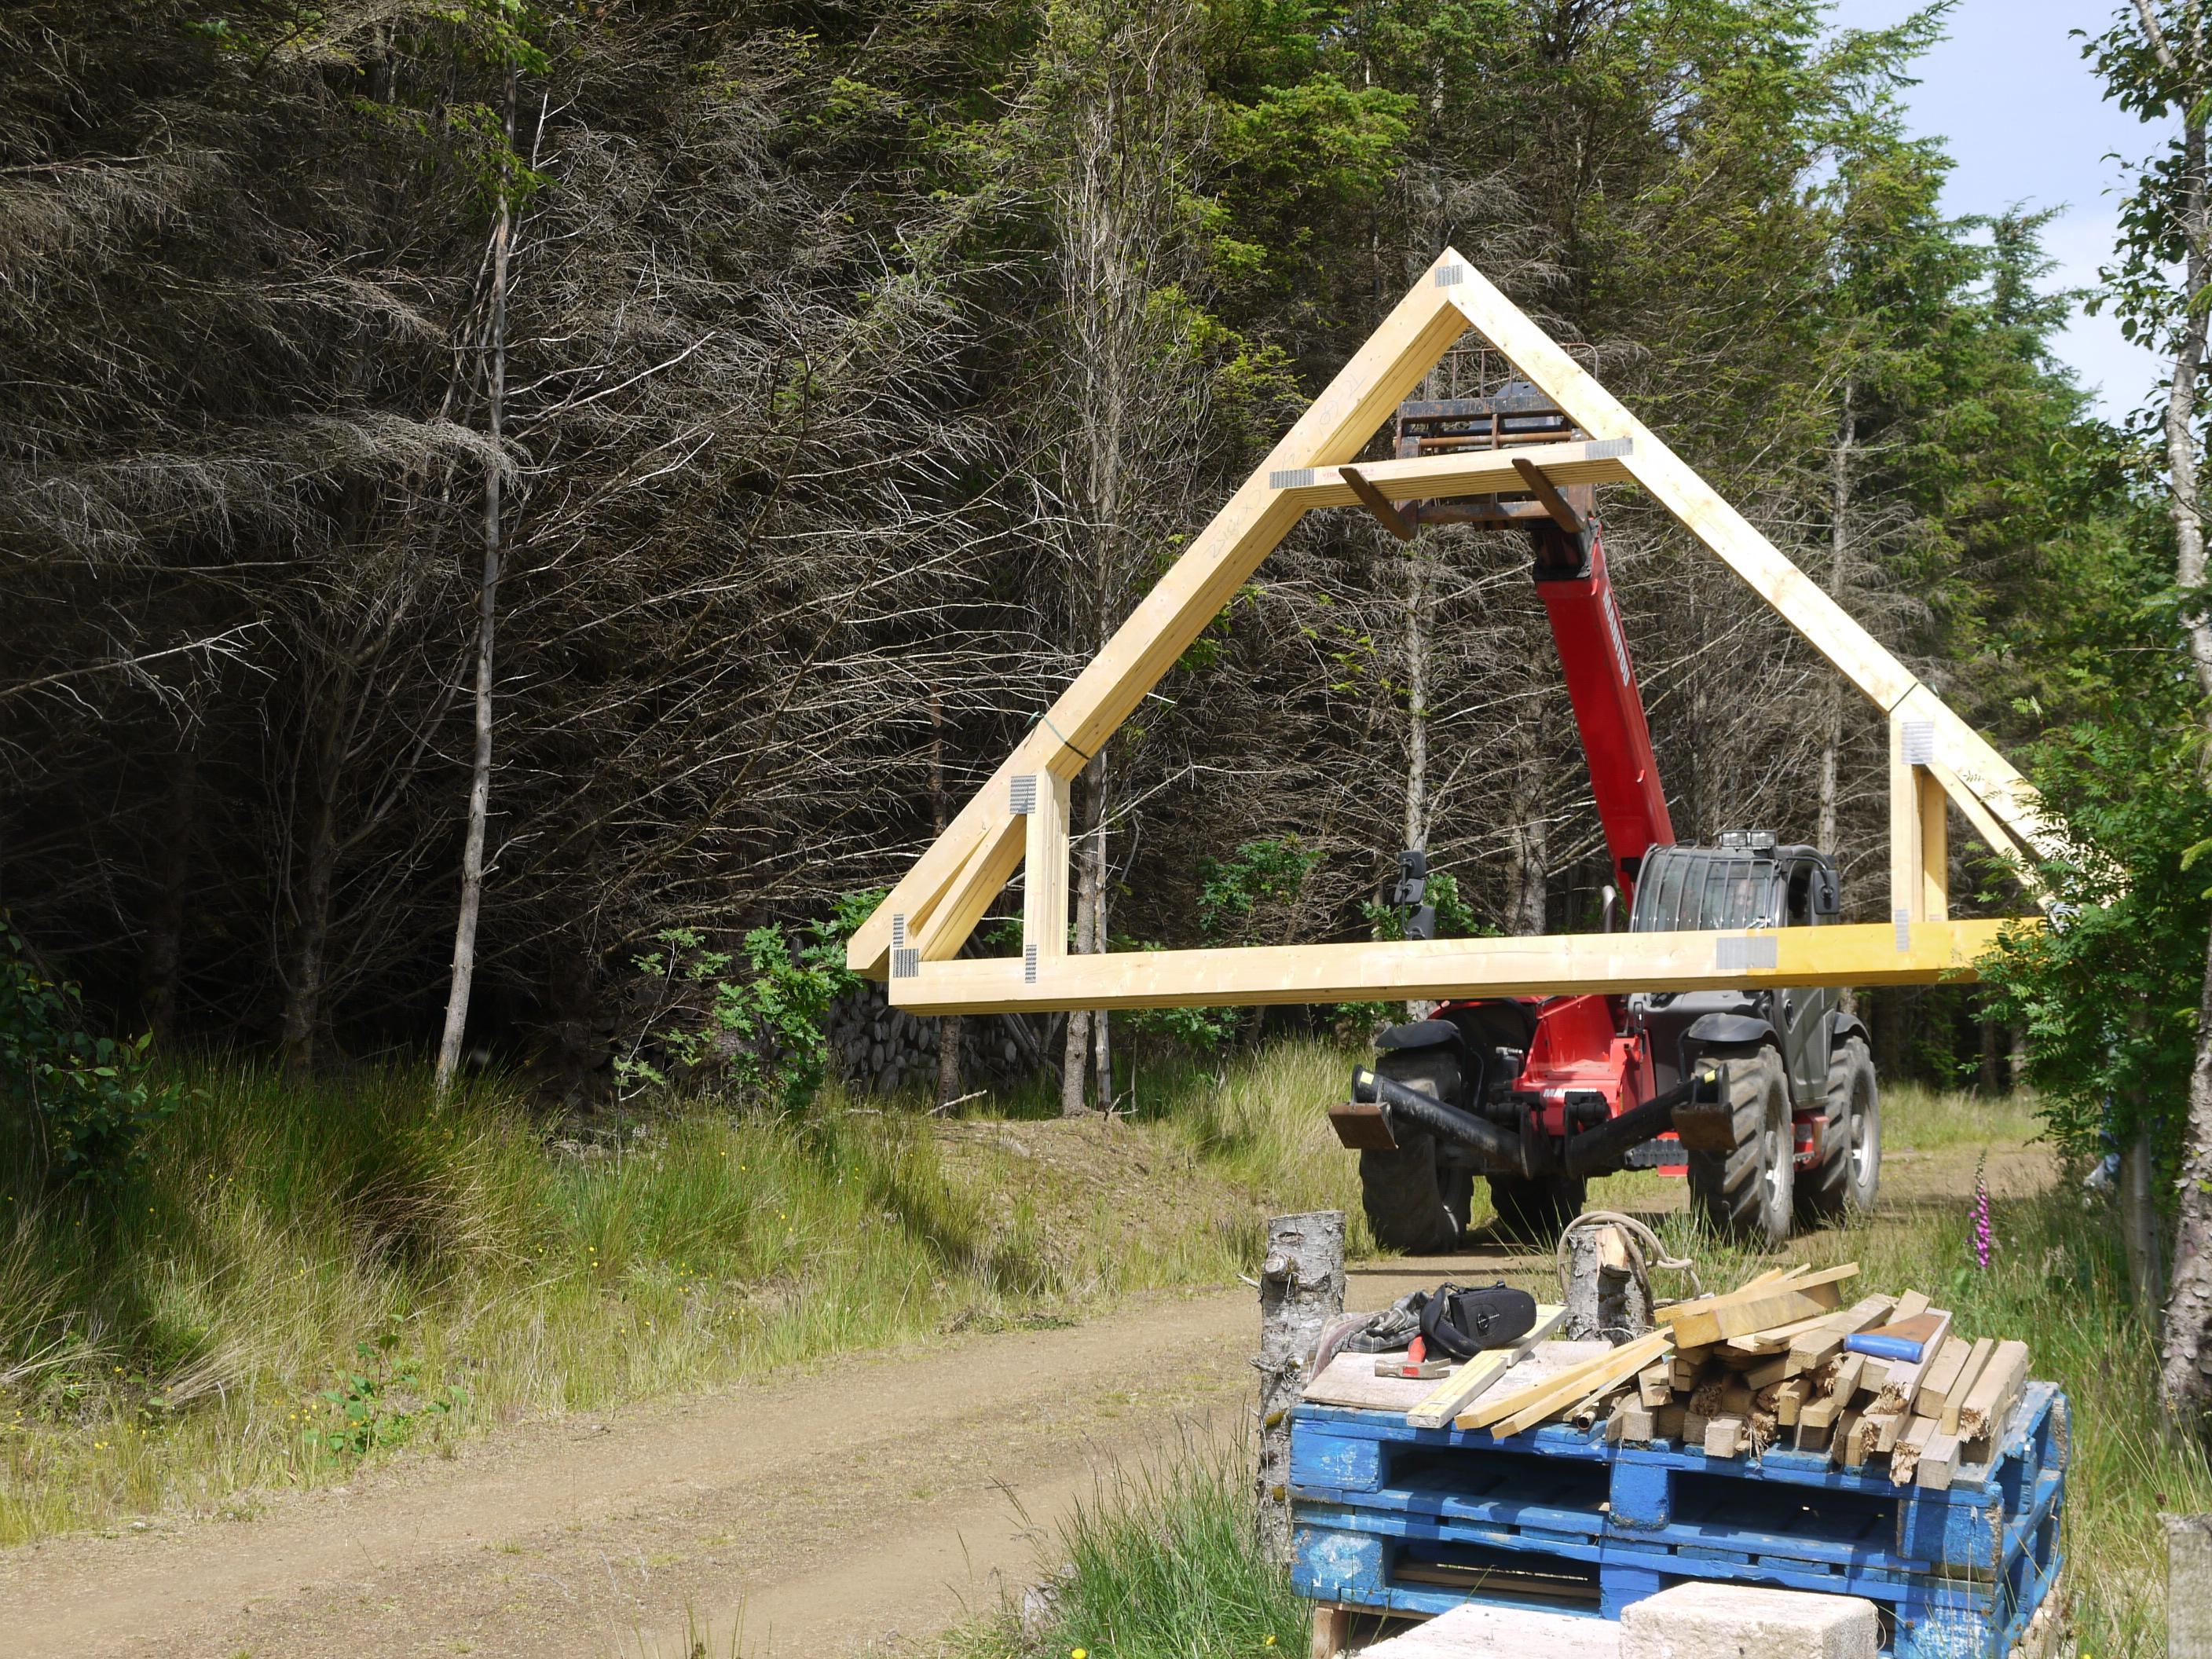
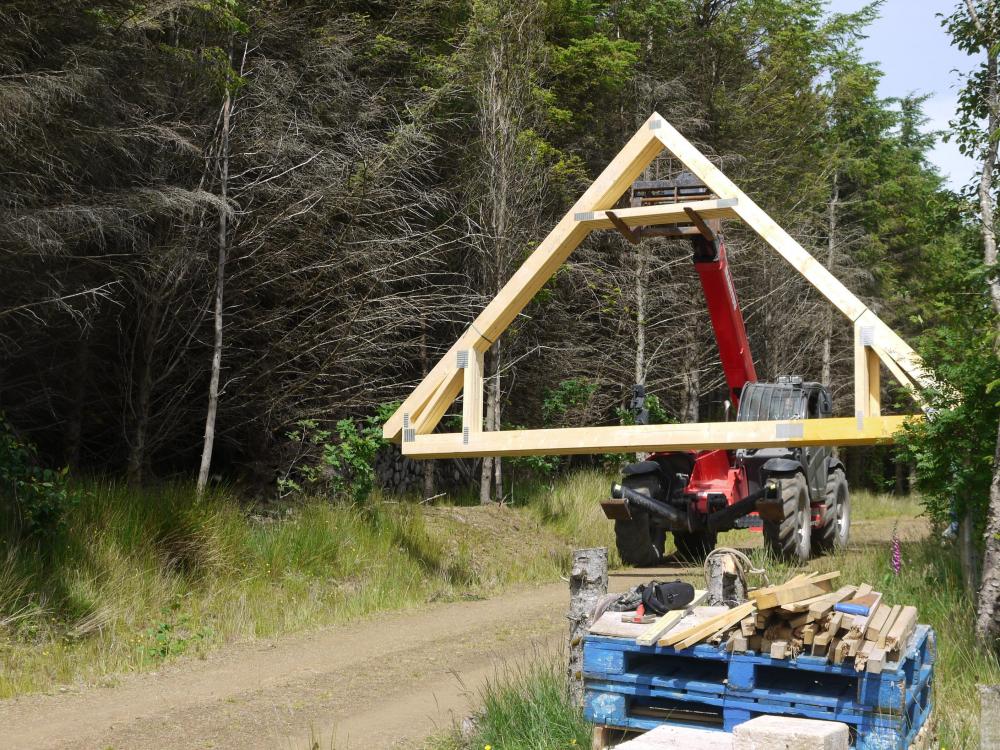
Usually always a solution for getting materials on site. Our building merchant had a wee forklift on the back and most of the materials came back and to on that. The only two moments I worried about were on day one the 60 tonne concrete wagon and whether we had clearance for our attic trusses to fit within the trees. Both were fine.
-
@ultramodsNo, if any of the above text refers to 'we' that's me getting a man in to do it. ? I'm not really a practical chap. Better with numbers.
-
Yes a few times I've passed recently painted houses on the way to work and done double checks as they look so sharp.
-
Thanks @Cpd it going to be painted white like most homes in the Hebrides.
-
The last entry was back in February when we put down some much needed flooring and we have made some progress on both the interior and exterior of the build. The first job was insulating the first floor. Two layers of 80mm quinn therm was then fitted between the rafters leaving a ventilation gap to the sarking/breathe membrane. A final layer of 25mm quinn therm layer on top with a service void. For the flat ceiling we used a couple of layers of frametherm 35 with an airtightness membrane and Quinn therm 25mm layer. We still have some work to do around the windows. Downstairs was a lot quicker. This already had frametherm fitted between the studs so the Quinn therm 25mm went on top. Now for the outside. We had been waiting for good weather for rendering the blockwork. The first step was rendering beads and mesh. Then a scratch coat coat was added. Then finally the rough casting. The rough casting will now be left and painted in July. The next step is getting the electrician and plumber to do first fix.
-
@selfbuildaberdeen you're going to be dreaming of MVHR tonight!?
-
If you haven't already checked out the blog section, there is a real range of projects here. @Christine Walker kept a great blog for her last build. Often they help me to visualise the build process. @Redoctober completed a lovely build in Scotland last year, as an example we had the same choice of slates so it was useful to see his entry before mine went on.
-
You are doing great to get the plot and planning obtained. Get the remaining paper out of way and the real fun begins. It is a long old journey self building I keep a blog here and often I look back at the stages to remind me how far we have come. Just about to do the spring entry!
-
To me they were the most cost effective option available. But the amount we could borrow was limited, seem to be a strong emphasis on stress lending including expenditure on fictional nights out and holidays etc. Fortunately we had the land, have limited outgoings and benefited from a croft house grant so got there in the end. We have a six and four year old, so didn't have two full time salaries but wanted to build a family home whilst our kids were young. So although the plot would still be there and we could have saved more, the reason for self building would not be the same if we waited longer! In reality we are probably self building twenty years too early in terms of finance and experience, but we had the dream at 22 and are close to achieving what we want and should have a relatively small mortgage. Our other option would have been to move away from our crofting community and be crippled in debt living in a modern poorly constructed developer house. We are working on a contractor basis, with a RICS quantity surveyor providing inspections as this seem to be more cost effective than using an architect or large builder.
-
Did they ask for help? Looked like a general introduction to me. Fabric first and having a generally efficient property is a good choice for all. But we all have different motivators for self building, some folk are prepared to spend a bit more on energy bills etc. As example we spent a bit more money on a longer access so we would have views and privacy. We could have saved this money building closer to the road and invested in MVHR and looked onto other property. Ultimately a self build is an individual project cover the core costs, then it's up to you to decide where to make the investment, no point comprising on some think if you will be unhappy at the end. Sounds as if the original poster has done some research on MVHR systems.
-
Hi @selfbuildaberdeen welcome to the forum. Lenders can be limited in Scotland, I went with the Scottish Building Society. It was a struggle to get a self build mortgage, but got there in the end. I'm building a house out of necessity as the property prices are to expensive here on Skye. We are in our early thirties so don't have a huge budget and not fitting a MVHR and won't have a high air tight property but like you our heating bills will not be comparable to the old solid stone croft house we used to rent!
-
Ducting questions
Thedreamer replied to Thedreamer's topic in Mechanical Ventilation with Heat Recovery (MVHR)
Thanks @ragg987 -
I'm about 90% there with my ducting order. Could anybody help with the following questions? - I have a run of about 6 meters that will need to be hung, do most use gripples and rings to support this, if so what distance between each fixing? - The website I'm looking at has metal ducting and metal ducting with a rubber seal, is it worth going for this? Once these are connect is that it, no extra measures over the joints? - Although I'm using metal ducting, it's been suggested that I used flexible ducting for the last bit so vibration is limited (the unit is in the utility room), how do you connect flexible ducting to the metal ducting and also the unit? - Have others insulated the ducting even if it's in a warm space? Thanks, any help would be greatly appreciated.
-
Hi @ITman Welcome to the forum. Looking forward to seeing your project progressing.
-
Hi @redtop Kept a blog for our stick build might be of interest to you. I also had problems with a mortgage and decided to go down this route. I didn't do any of the work myself but had a couple of joiners knock up the panels on site. Where are you based? Also US based so less relevant here but this chap and his brother are almost hypnotic to watch. No nail guns here!