Oxbow16
-
Posts
442 -
Joined
-
Last visited
Everything posted by Oxbow16
-
Hager Consumer Unit labels : mine are lost
Oxbow16 replied to ToughButterCup's topic in Consumer Units, RCDs, MCBOs
I might have a spare sheet.... Let me know if you'd like me to start the excavation to find them -
That all depends on whether the result is DIY success or more Frank Spencer Christmas Special I've gone with the roughen with a bit of sandpaper option. Everything's taped up and ready to go now, but with work tomorrow the final fitting will be tomorrow evening and over the weekend. Do you mean the pipe? If so, it can't go any high as the ceiling is in the way. But perhaps I misunderstood? Thanks for all the great help.
-
That's a great help, thank you. One other thing... I'm thinking the mortar might not stick so well to the shiny surface of the pipe. Would roughing up the outside of the pipe with sandpaper help or would it not be enough? Heck, could I glue a piece of sandpaper to the outside of the pipe, or would it get too soggy when the mortar is added? Those are my stupid suggestions; anyone got anymore sensible ones to help the mortar stick? Cheers
-
Thanks @saveasteading Is this the right stuff or is it for internal only? https://www.knaufinsulation.co.uk/products/rocksilk-rs60 Getting it into position is what might be the tricky part, but it could work... So just to be clear, if the cavity was bridged with expanding foam (albeit it just a small amount) would that be a problem? Ta
-
Another thought too... Does it matter if the mortar and/or expanding foam bridges the cavity? I guess I thought that a small amount of bridging in the top corner wouldn't do any harm but am I wrong? Do I need to avoid it totally and at all costs? Someone has also suggested wedging in a piece of rockwool to stop mortar etc dropping in the cavity. Would it be ok if the insulation stayed in place permanently? It would only be a small piece. I know there should be an air gap and it shouldn't bridge, but it would be a lot easier if I could just plonk it in and leave it there... Many thanks
-
Many thanks for the reply. I'll go with that suggestion then and use expanding foam in the central parts of the hole. That will be easiest too because it will be very difficult to reach those area with sand/cement or anything else. I'll then finish on the outside with sand/cement and on the inside with filler. Once that's all done and I fit the vent grille, I'll run a sealant where it meets the wall to stop any water getting in behind. I might also run a bead where it slides onto the pipe as the fitting isn't all that tight. Any ideas what sealant/silicone (or whatever) would be best for that? Cheers
-
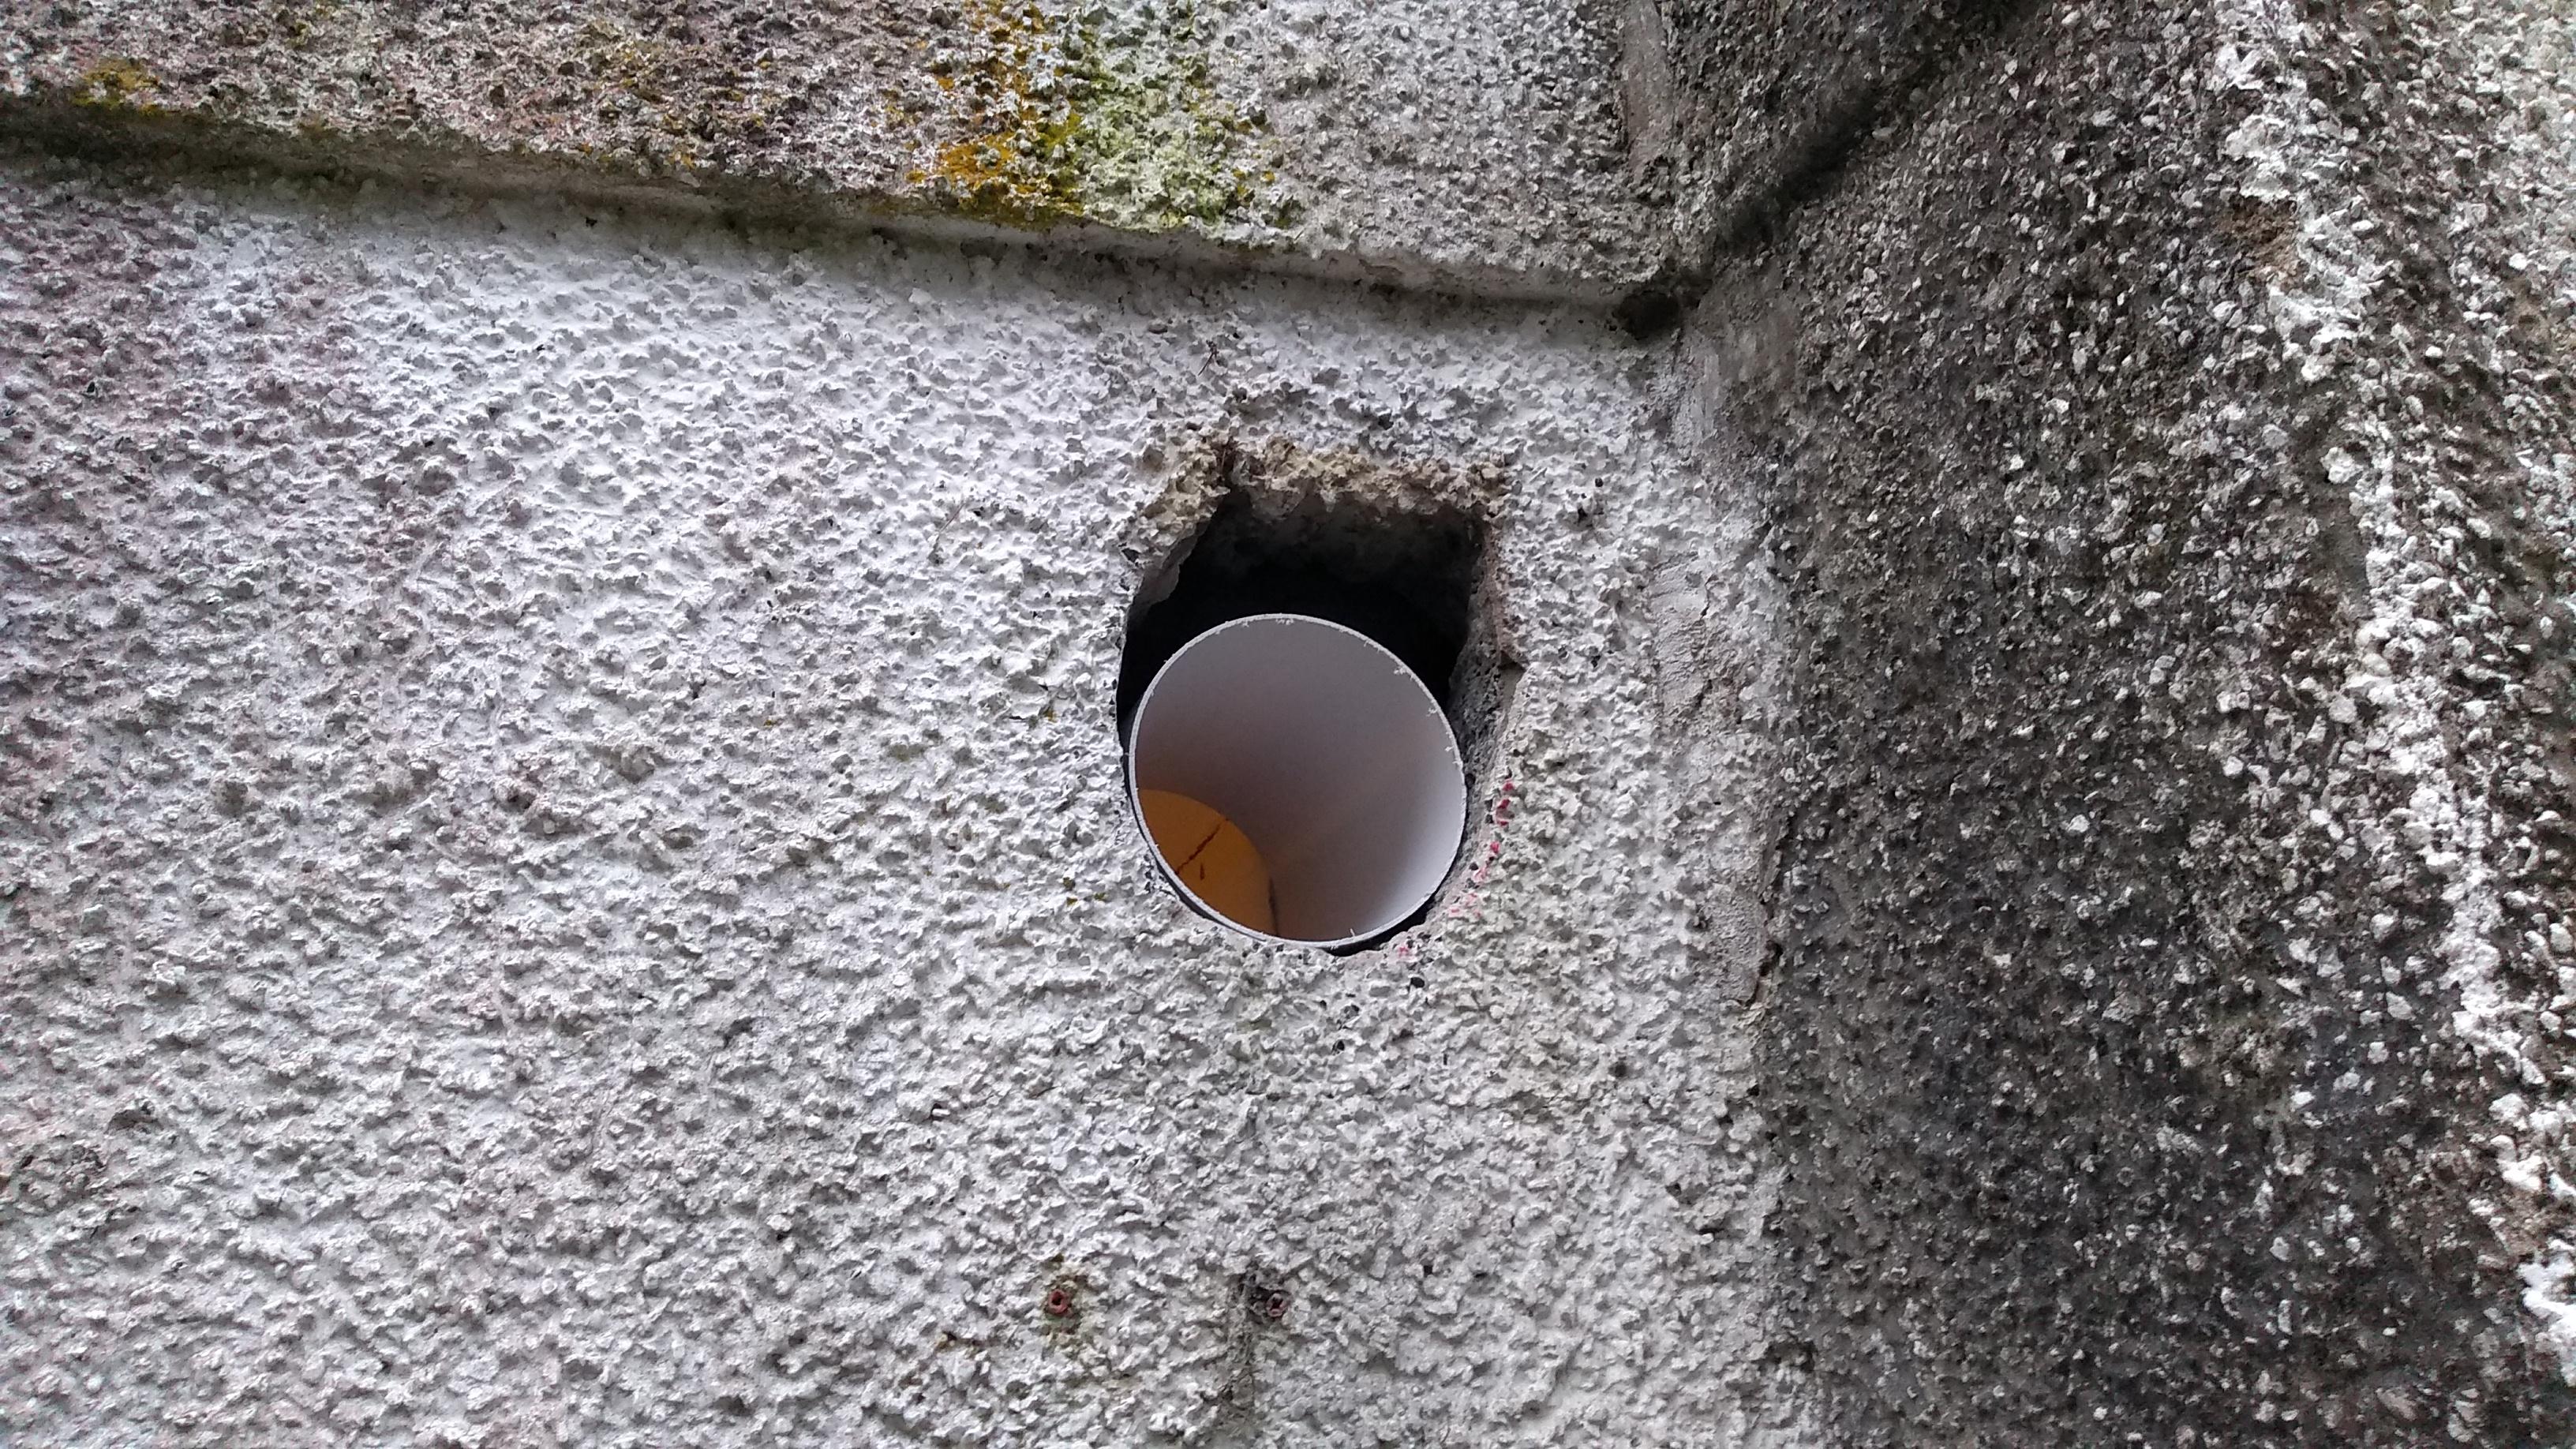
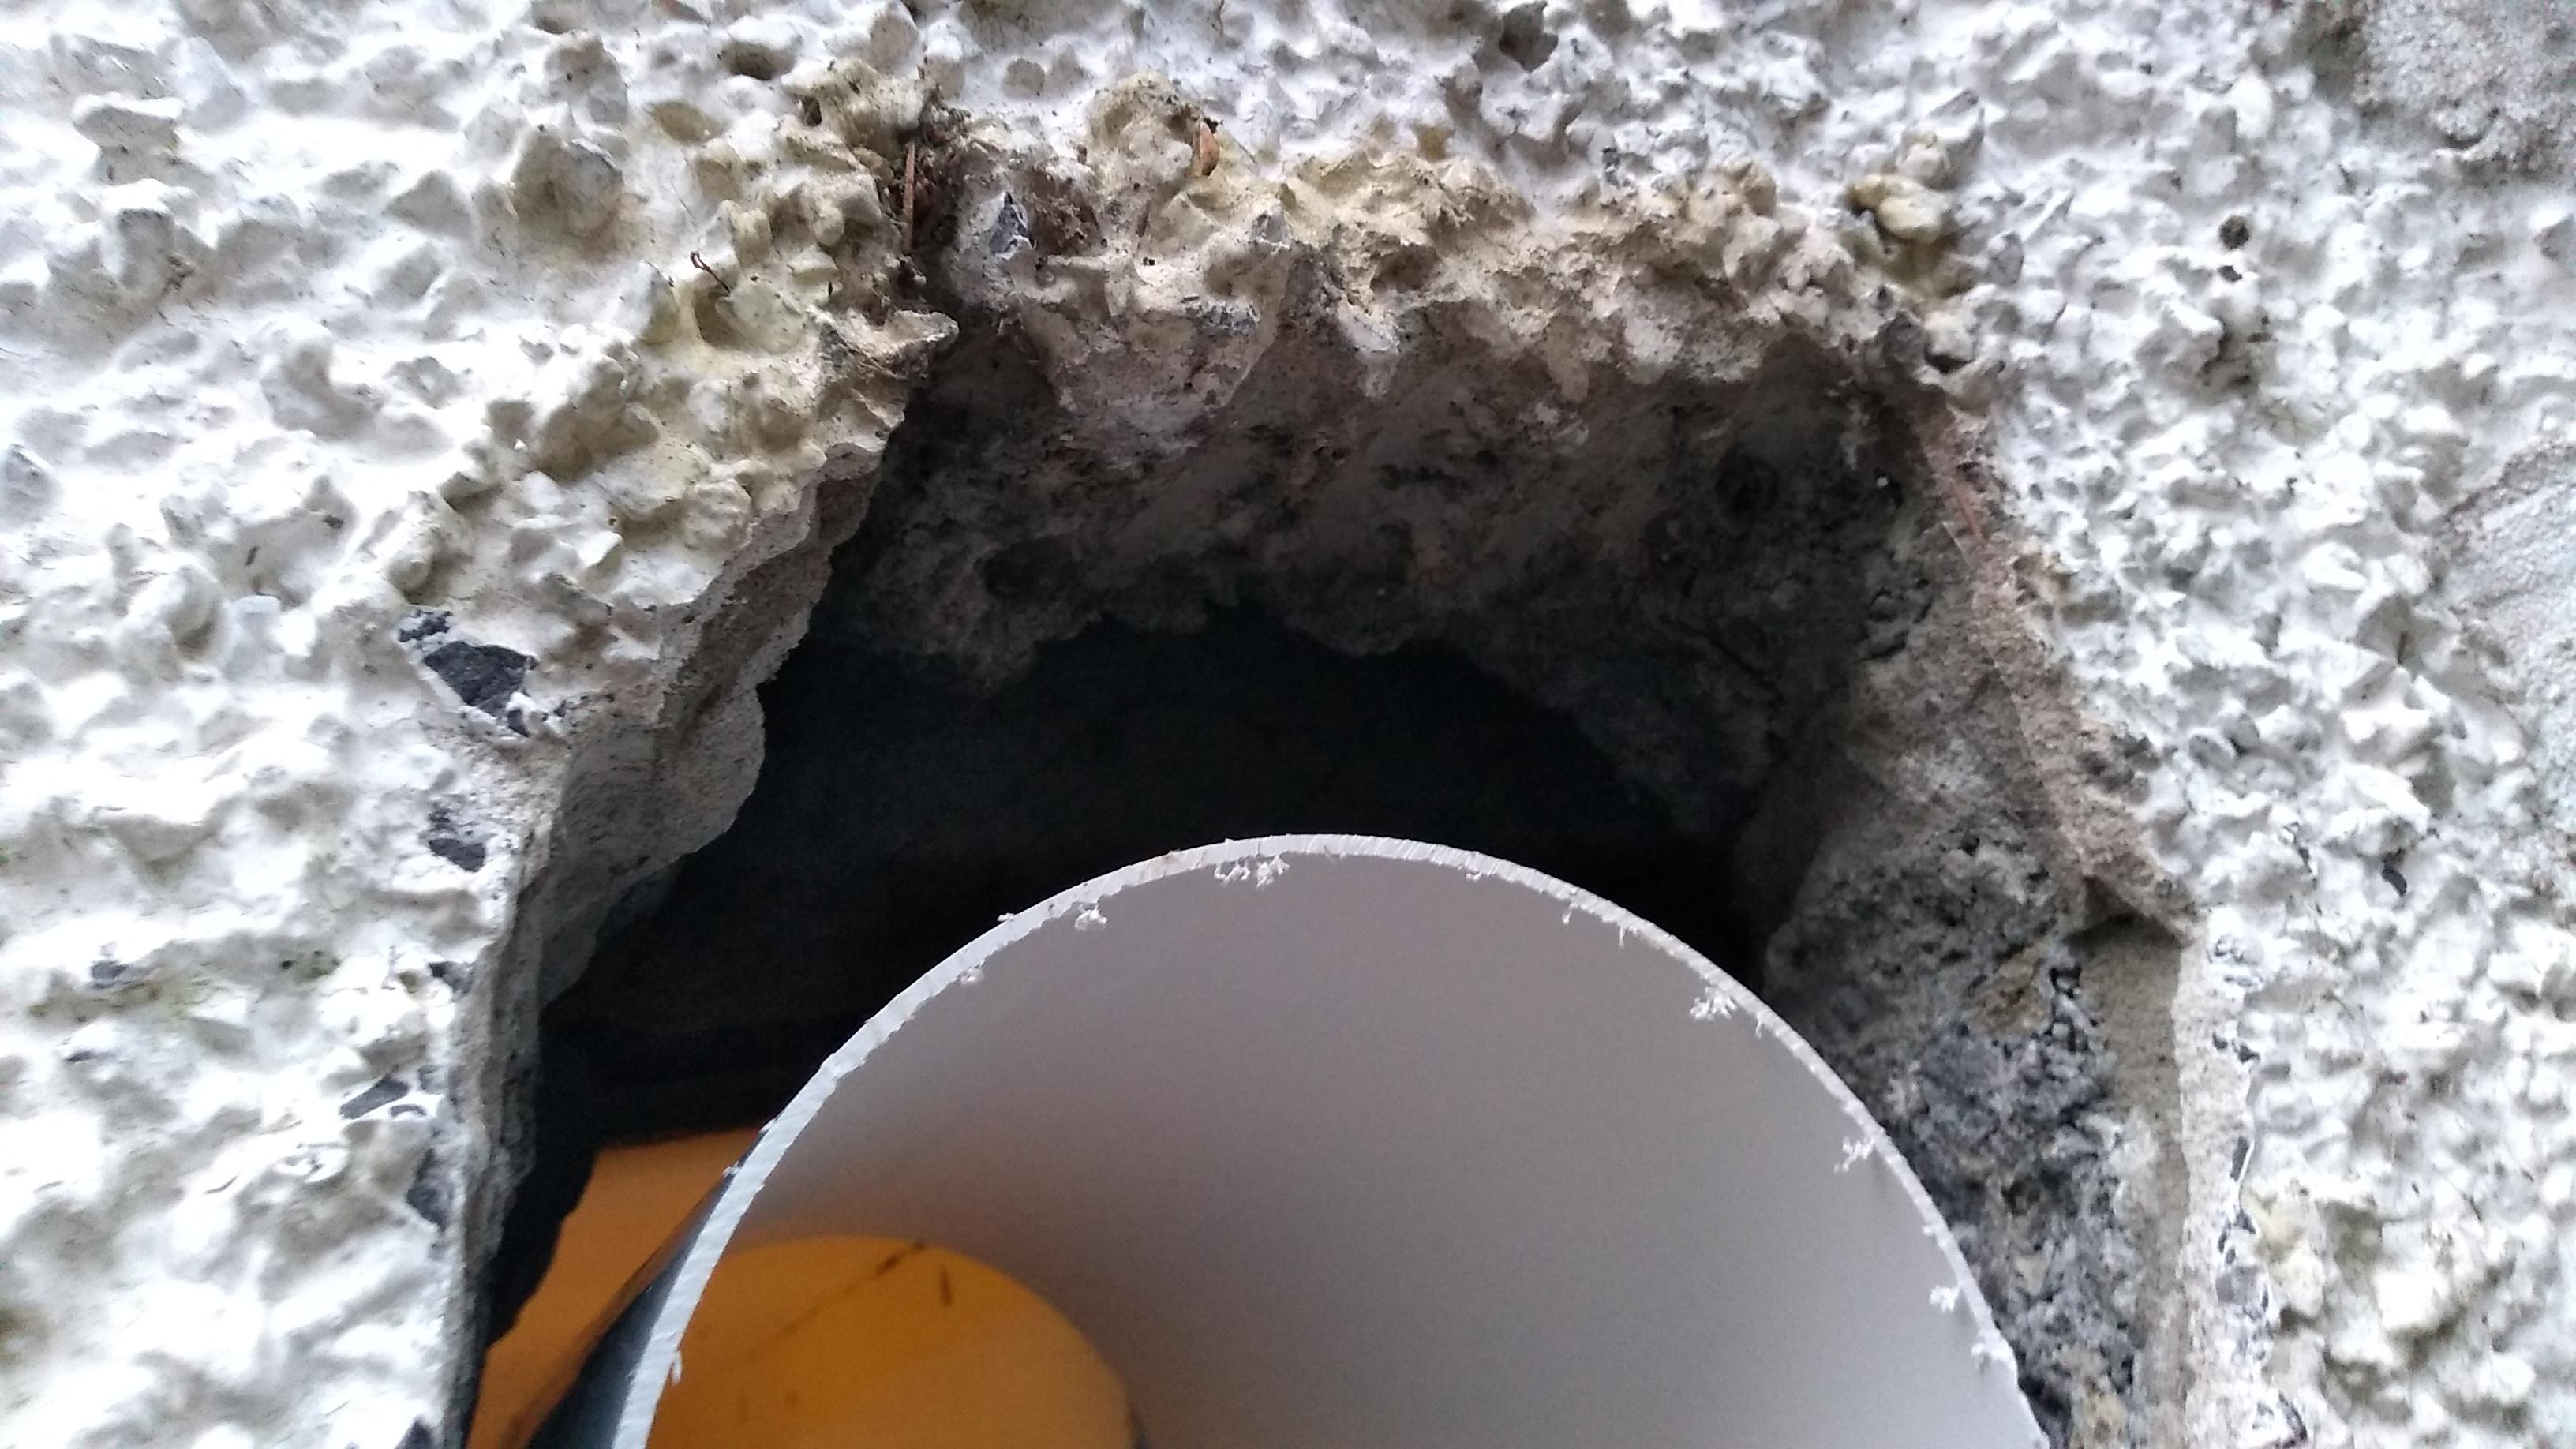
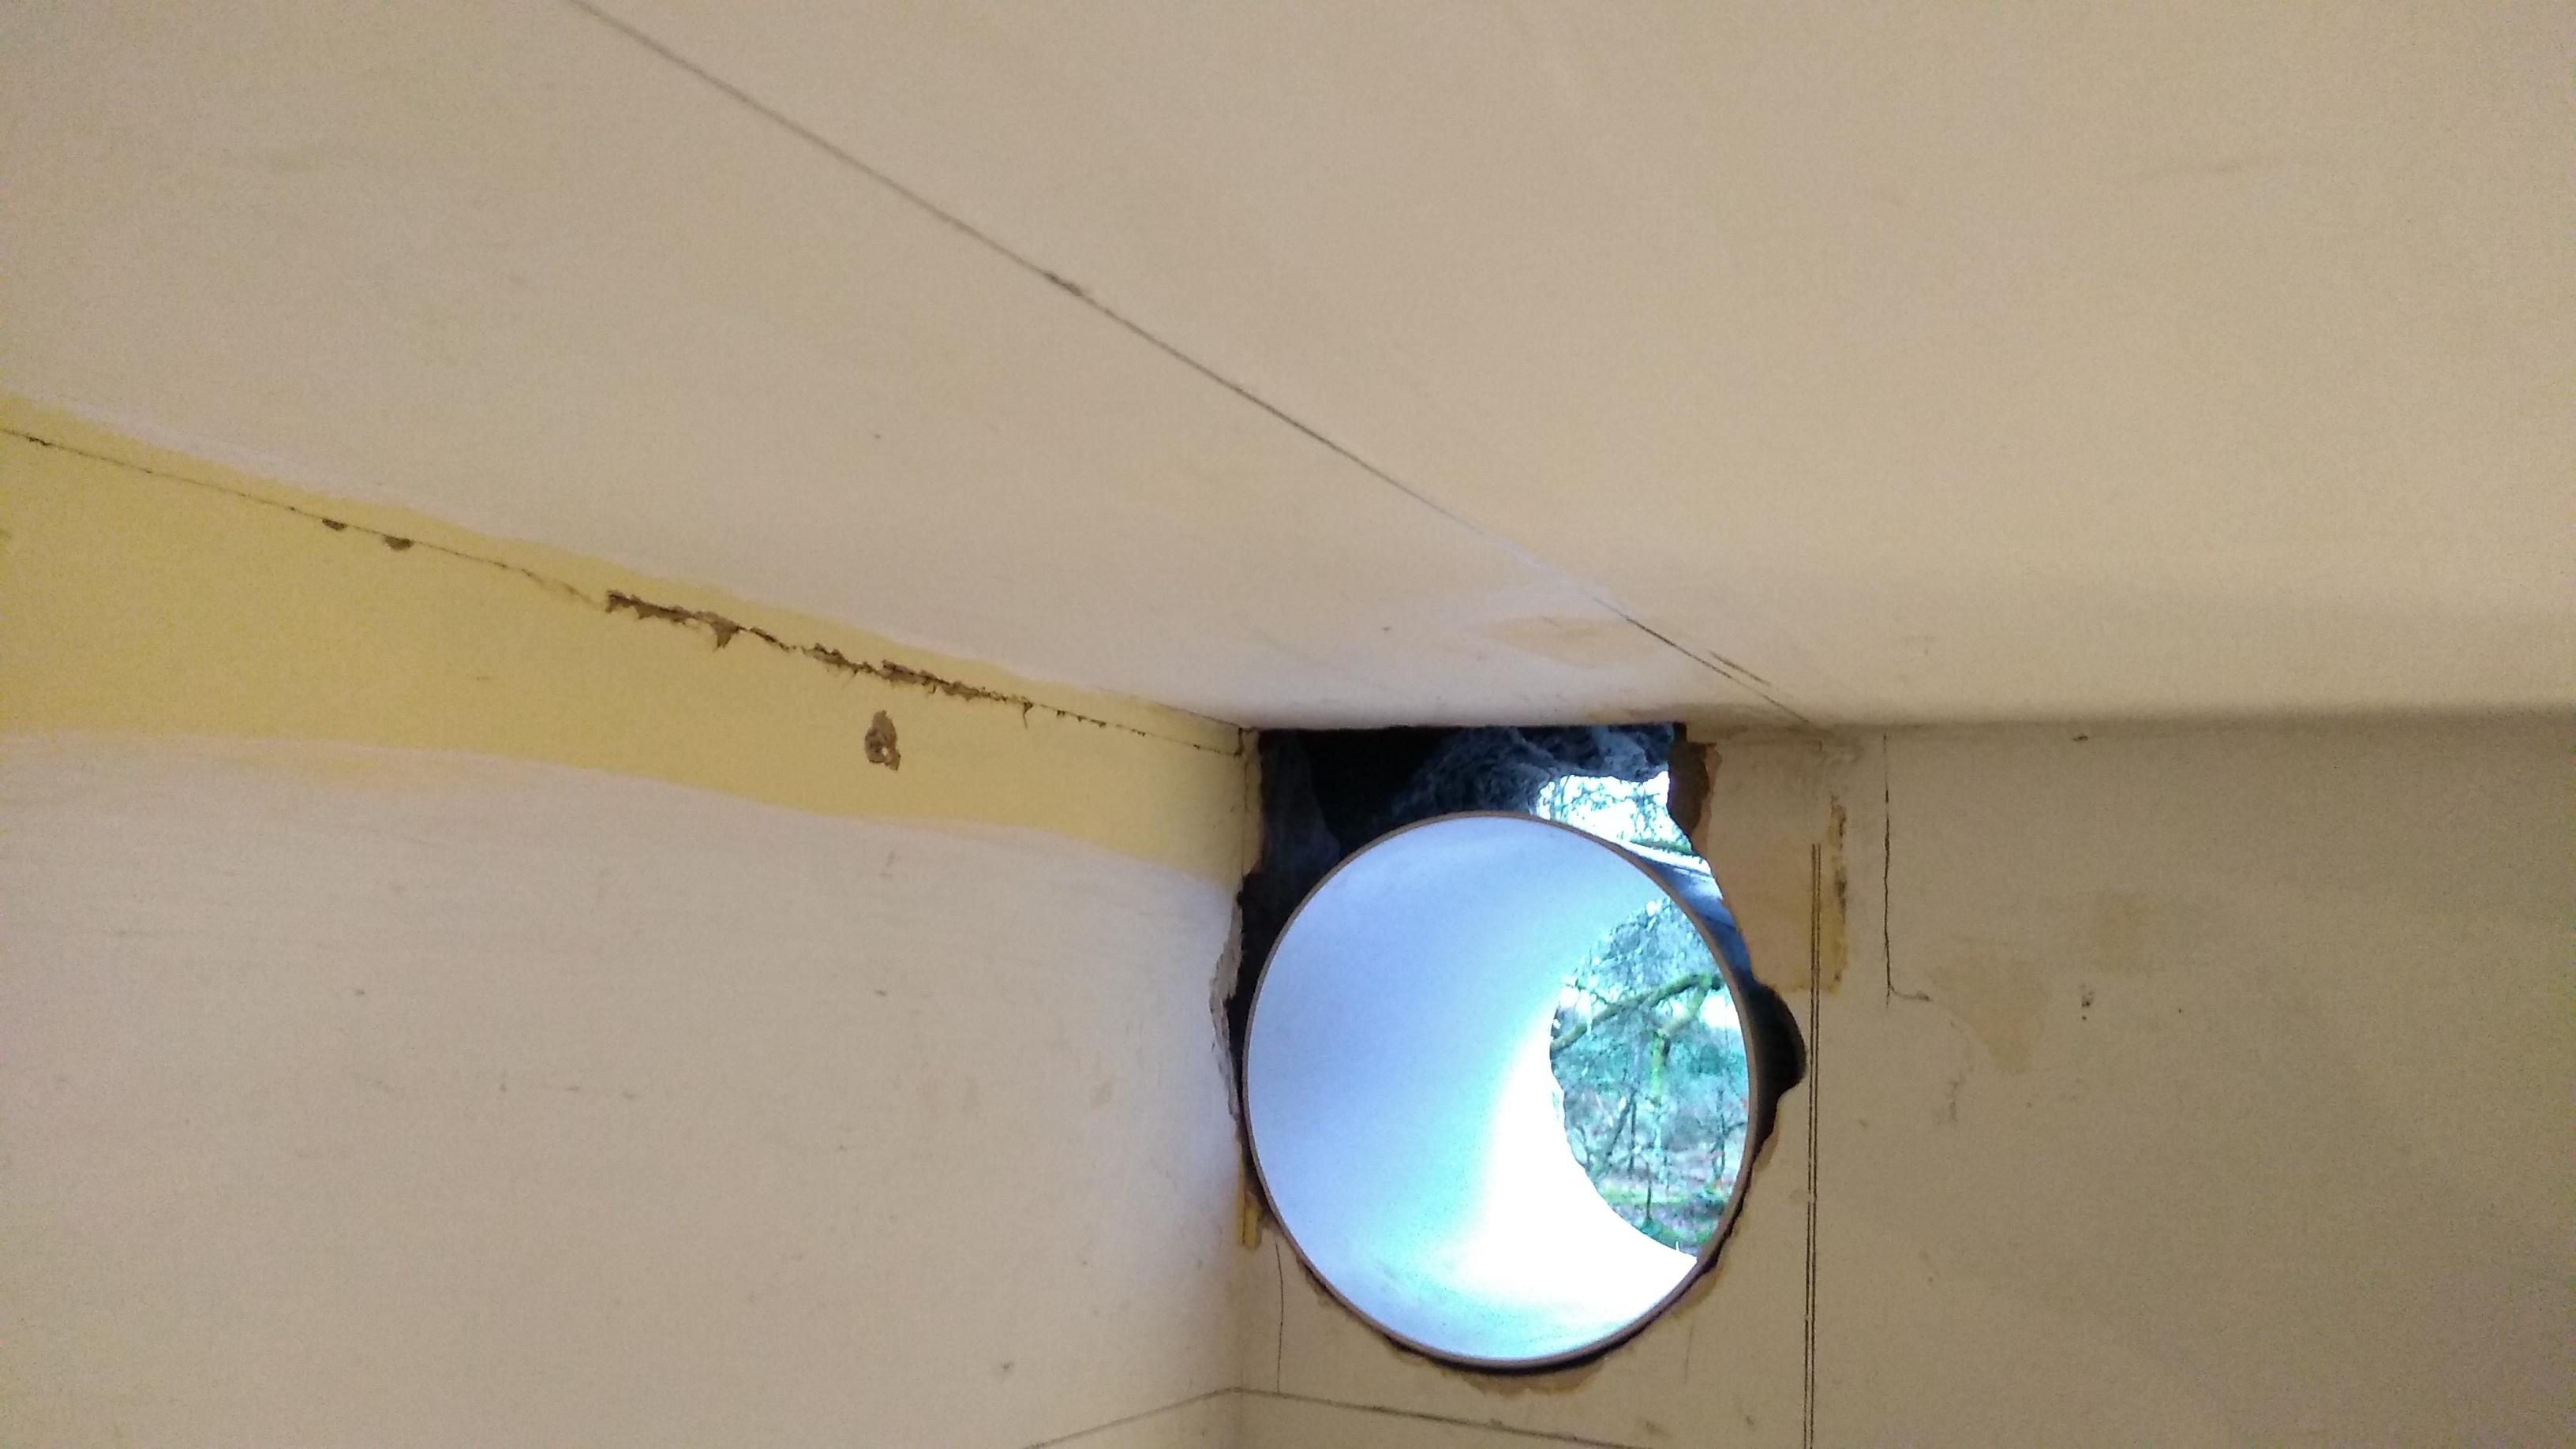
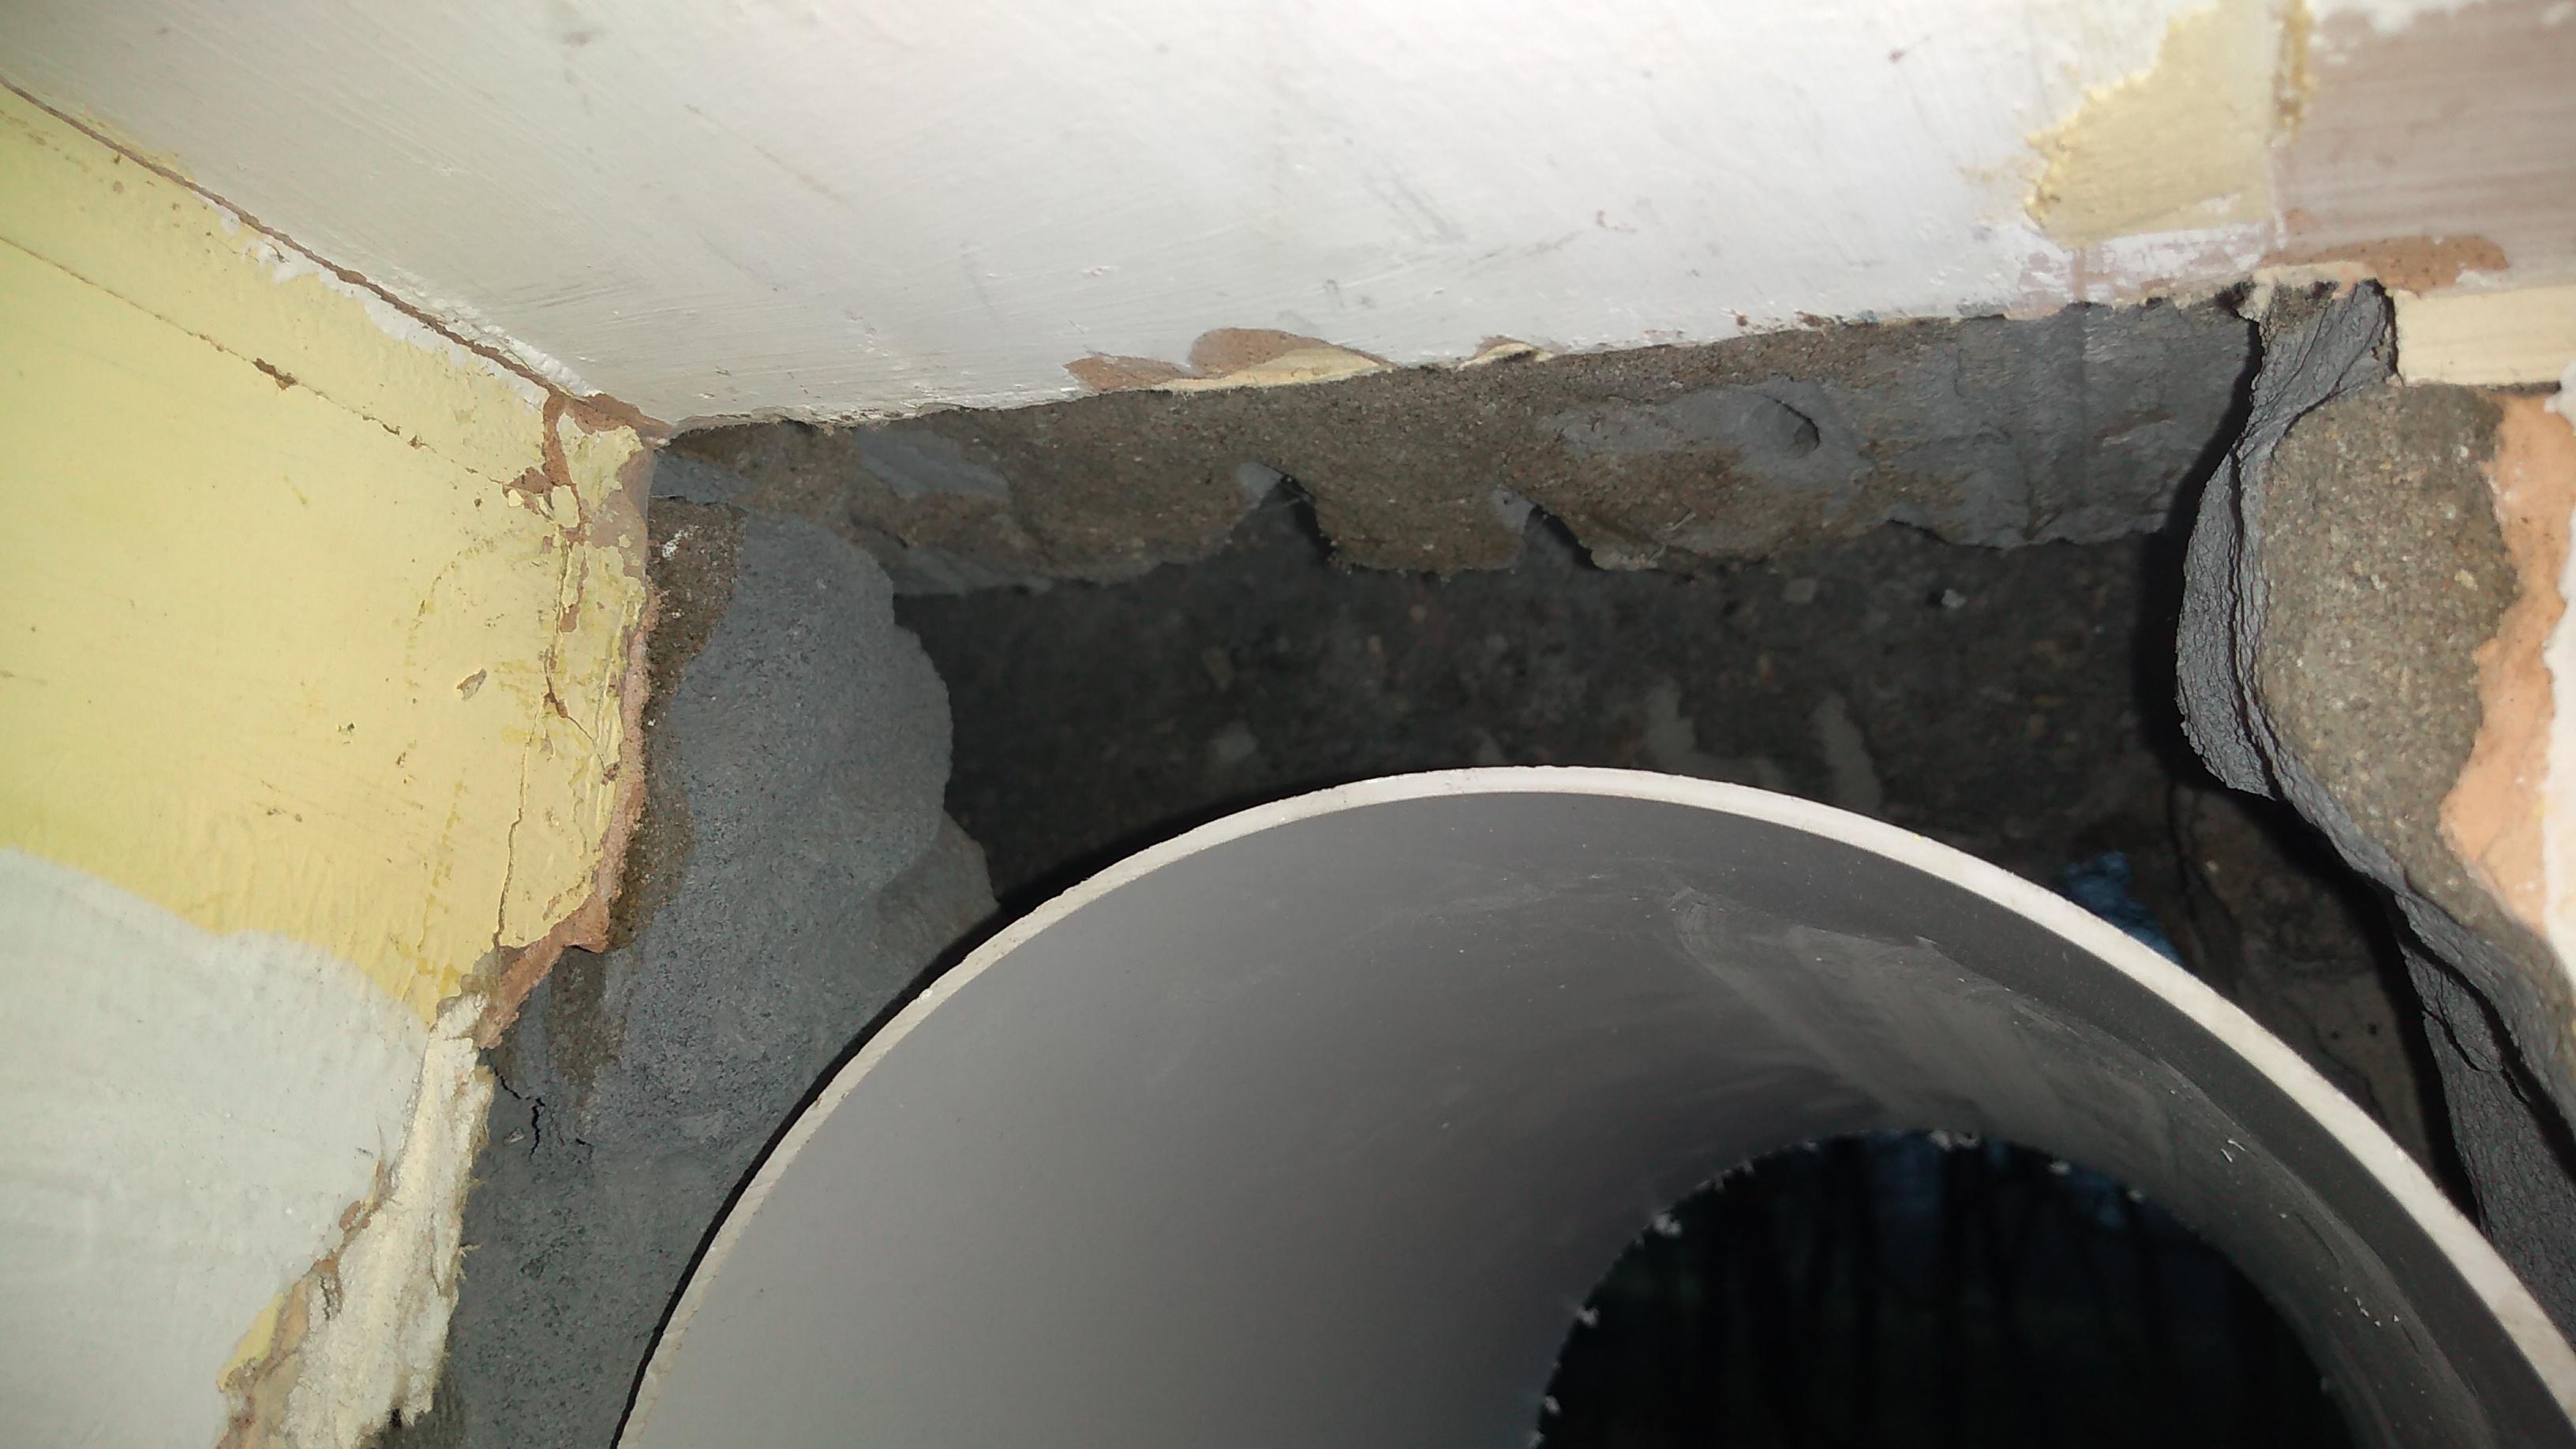
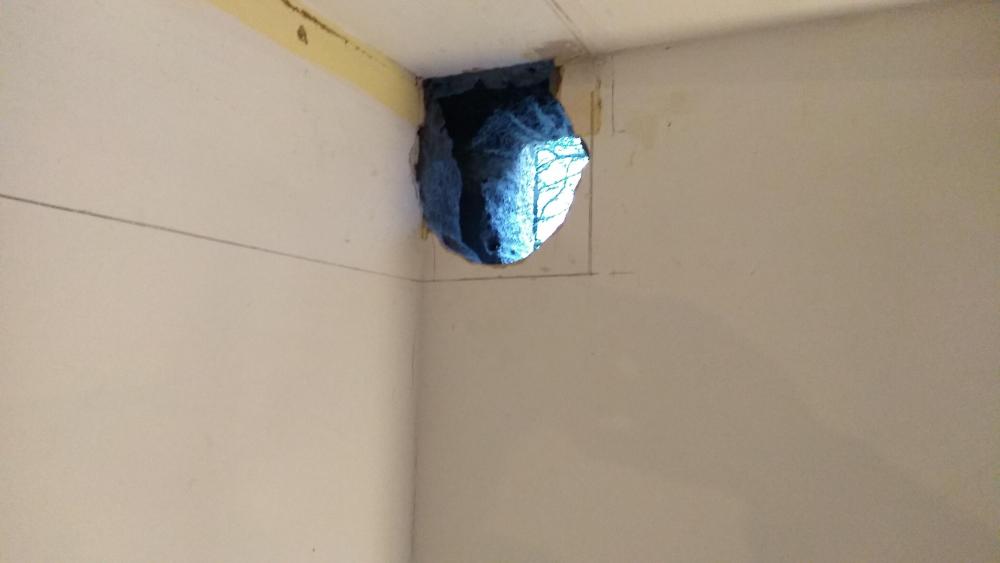
Hi folks I'm in the middle of putting up a kitchen extractor. The cooker is on an internal wall, so the ducting takes a right hand turn above the hood and runs for a meter and a half or so to the nearest outside wall. The previous hood had small rectangular ducting that exited bang in the corner there the two walls and ceiling meet. The new ducting is round and much larger at 6"/150mm diameter. I've made the hole in the wall, but because of the previous rectangular hole I'm now left with three quarters of a nice round hole, and a quarter of a large gap where the previous hole was. I feel reasonably sure none of that make much sense, so there's plenty of pics below from inside and out. As you'll see, it's a cavity wall. I'm guessing/thinking I'll need to fill the large gap with the ducting in place, but let me know if you think otherwise. But more to the point what's best to use? Mortar? Expanding foam? Or??? And does it matter if I bridge the cavity seeing as it is right in the corner and the ducting bridges it anyhow? Many thanks


-
Belfast sink - joining old waste to new 40mm trap and pipe
Oxbow16 replied to Oxbow16's topic in General Plumbing
My pleasure. It makes a refreshing change to actually be able to offer something useful and not just come onto the forum looking for advice I think the McAlpine T12A-F bit would have been just as useful if I wanted to stick with 40mm the whole way. I only switched to the other because the pipework was in 32mm and I didn't want to change it unless I had to. Cheers -
Belfast sink - joining old waste to new 40mm trap and pipe
Oxbow16 replied to Oxbow16's topic in General Plumbing
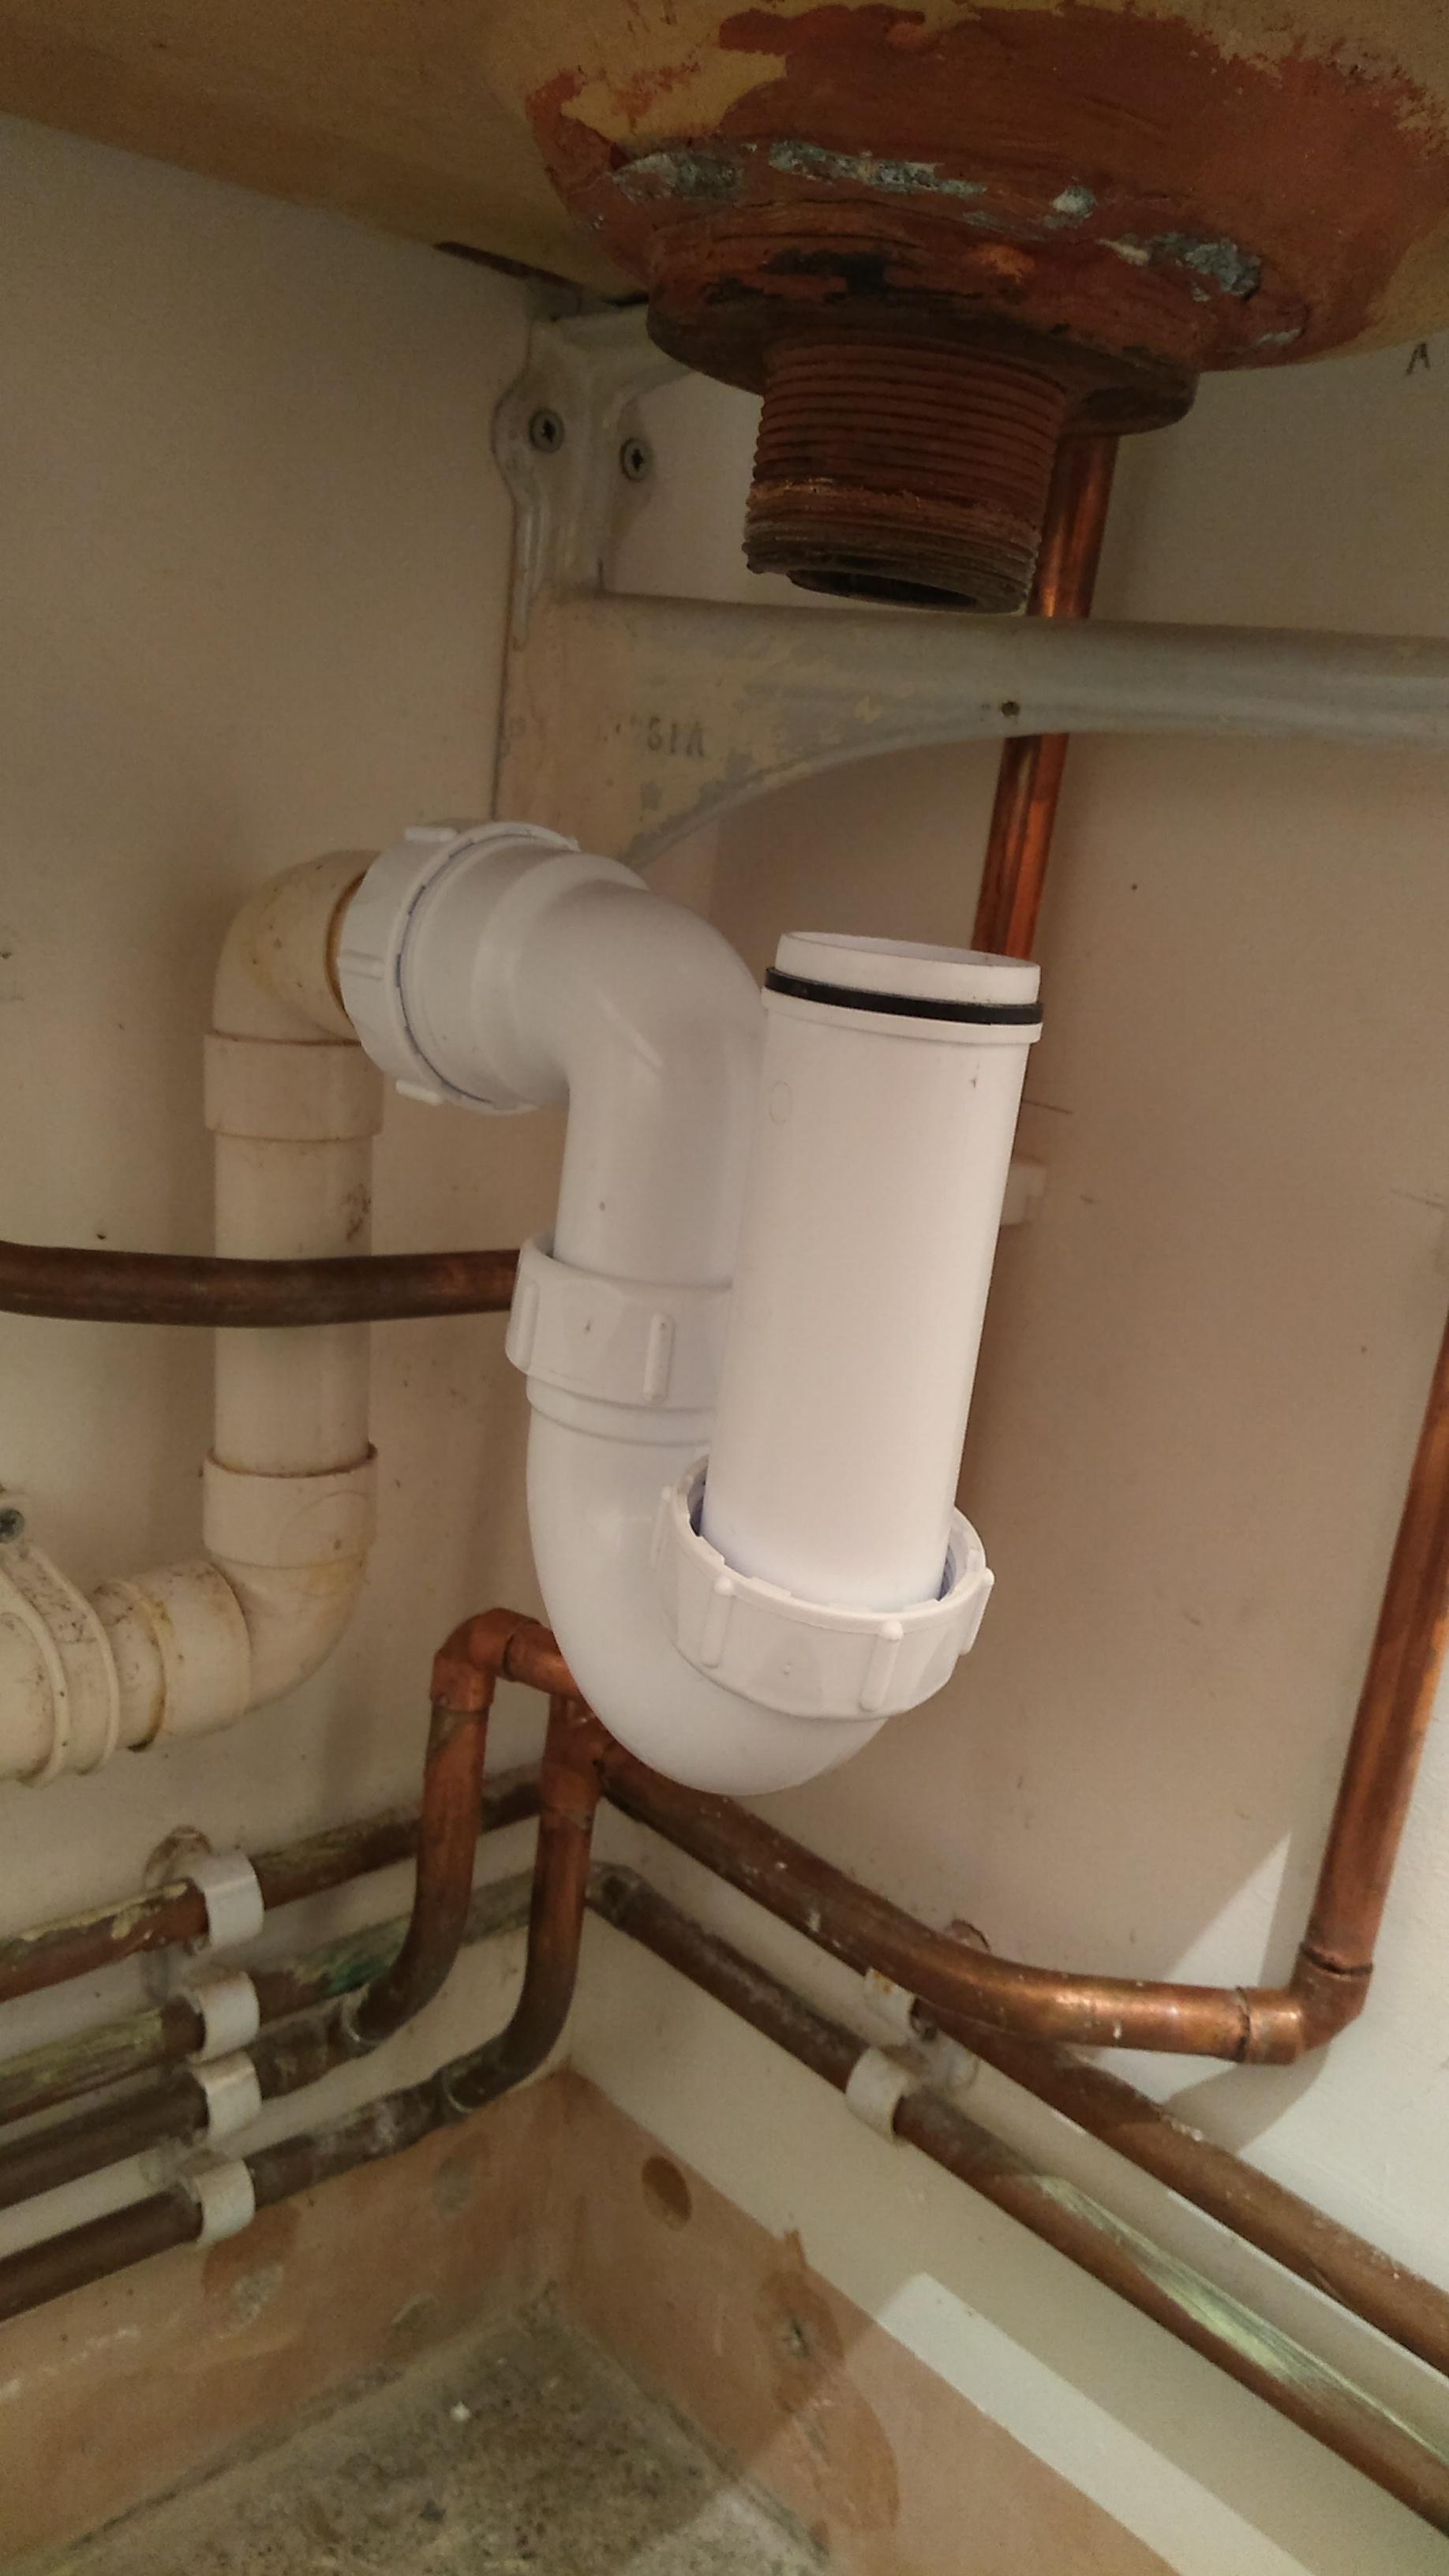
For the benefit of anyone coming across this in the future who finds themselves in a similar situation, my plan changed again! Someone recommended this: https://www.wolseley.co.uk/product/mcalpine-t12-bsp-female-x-male-couplng-15-x-1-25/ I ended up getting one of those and did the following... From the sink plug hole: - 1 1/2" - 1 1/4" coupler reducer with flat washer, as per link - 32mm telescopic P trap - Connect to existing pipework (which is 32mm) It's all working great. Thanks one and all for the help. -
Belfast sink - joining old waste to new 40mm trap and pipe
Oxbow16 replied to Oxbow16's topic in General Plumbing
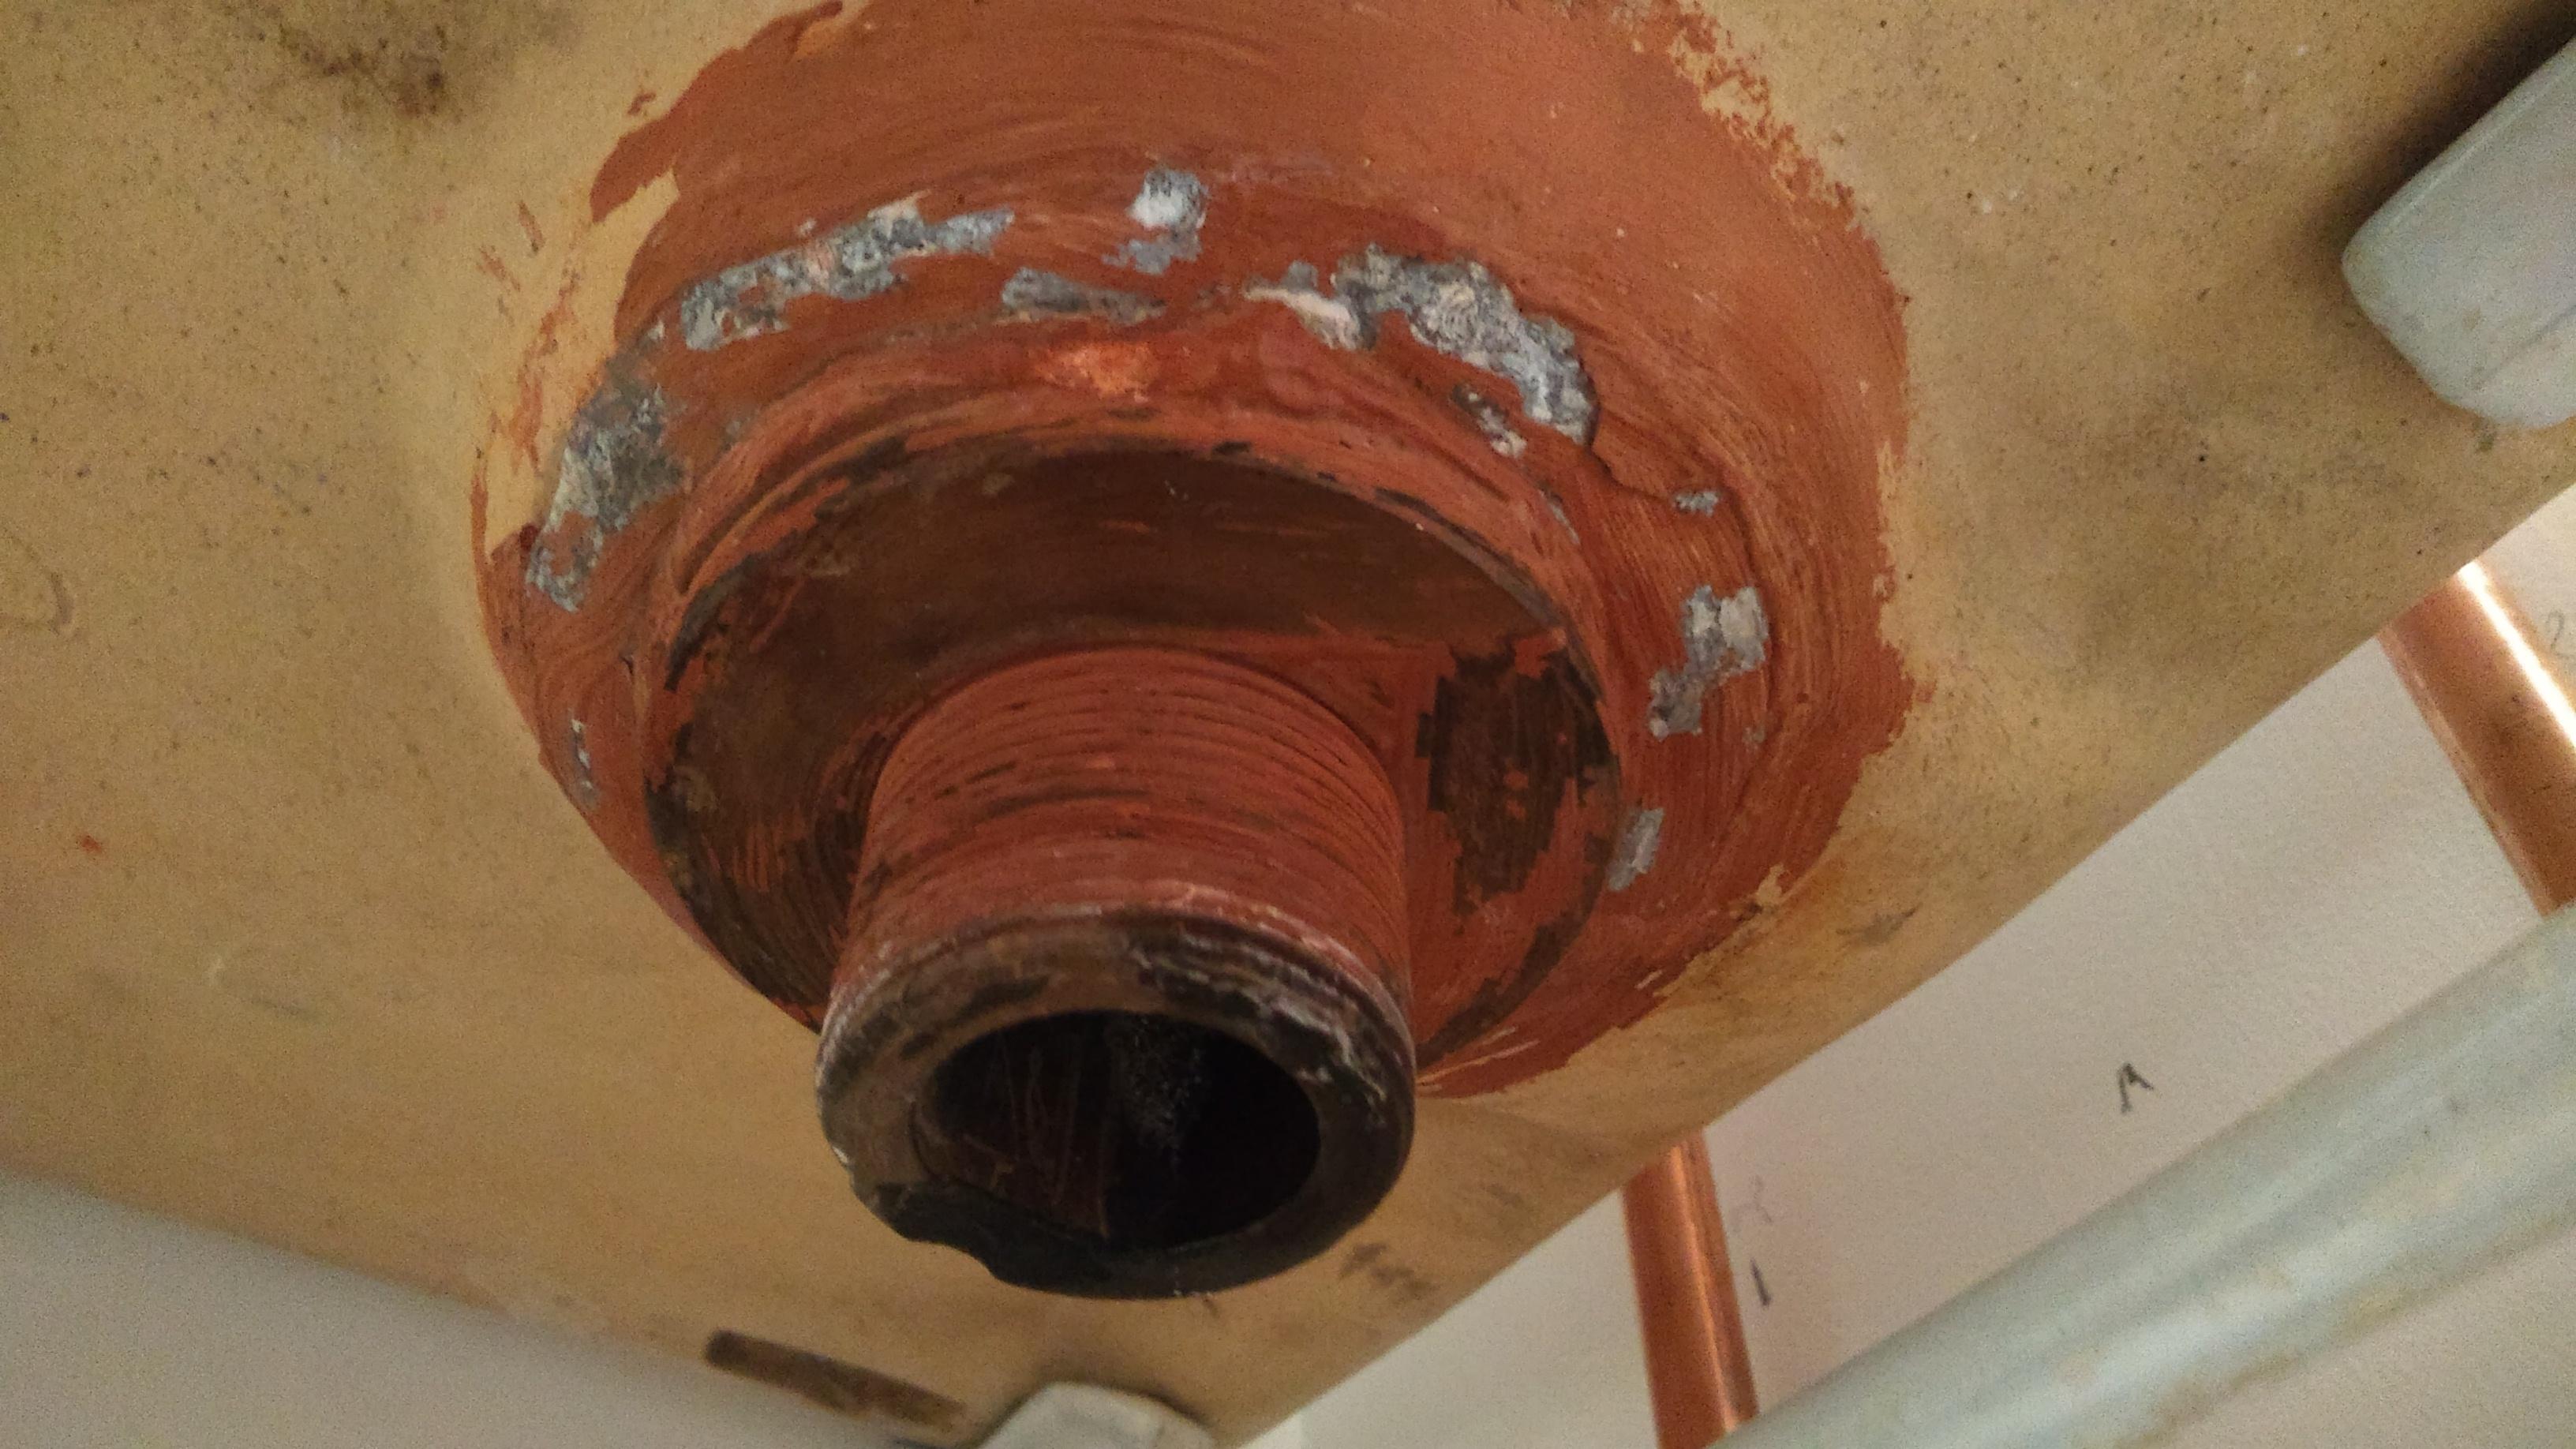
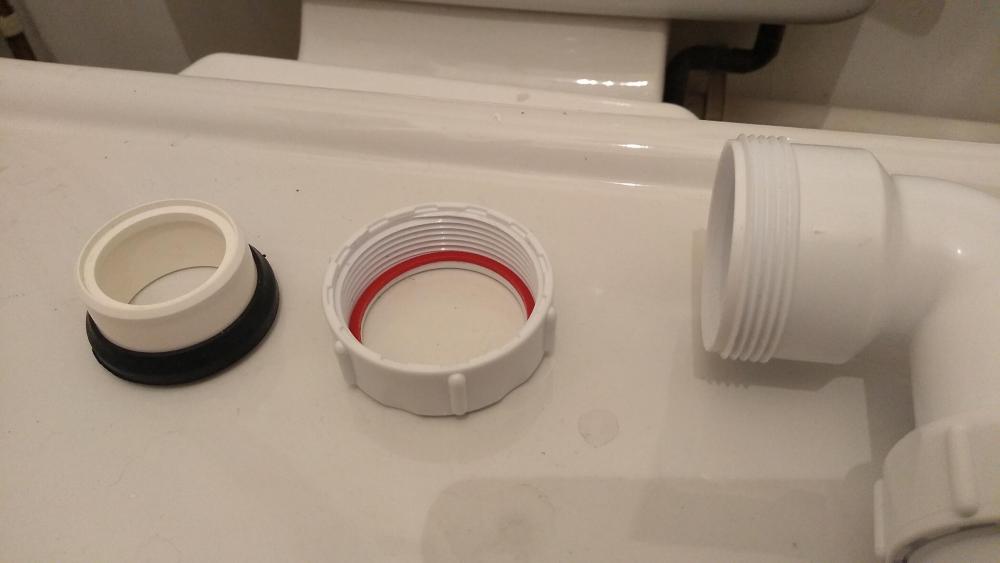
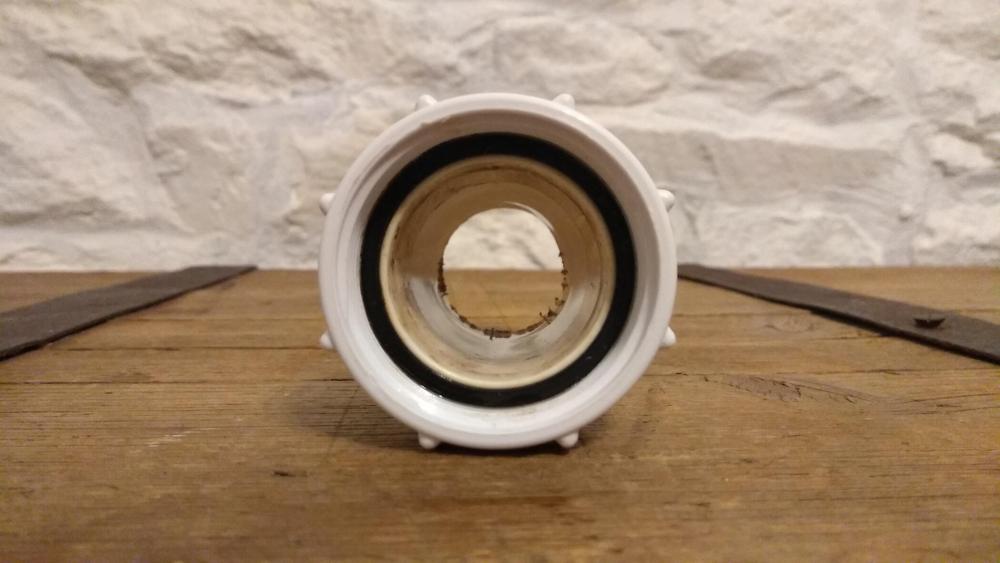
The plot thickens...! I haven't ruled out any of the above, but I am also wondering whether I should just start again with new everything from the toilet itself. I'm still struggling to get my head around sizes and compatibility. I've removed the bend where it fits to the toilet - see the photo below. The outer threaded section of the piece in the photo measures around 47.5mm, the outer section above the threaded part (i.e. right at the lip) is around 45mm, and the inner diameter is 41.8mm. So what size is that piece compatible with? If it's compatible with 40mm wastes/pipes/fittings, then I might start afresh from there and no reducer will be necessary anywhere. At least I don't think it will! Obviously everything will be a bit chunkier but hey ho, at least it will be right. Thanks to anyone who's sticking with me through this and sorry for making something complicated out of something which is probably very simply for those who know!
-
Belfast sink - joining old waste to new 40mm trap and pipe
Oxbow16 replied to Oxbow16's topic in General Plumbing
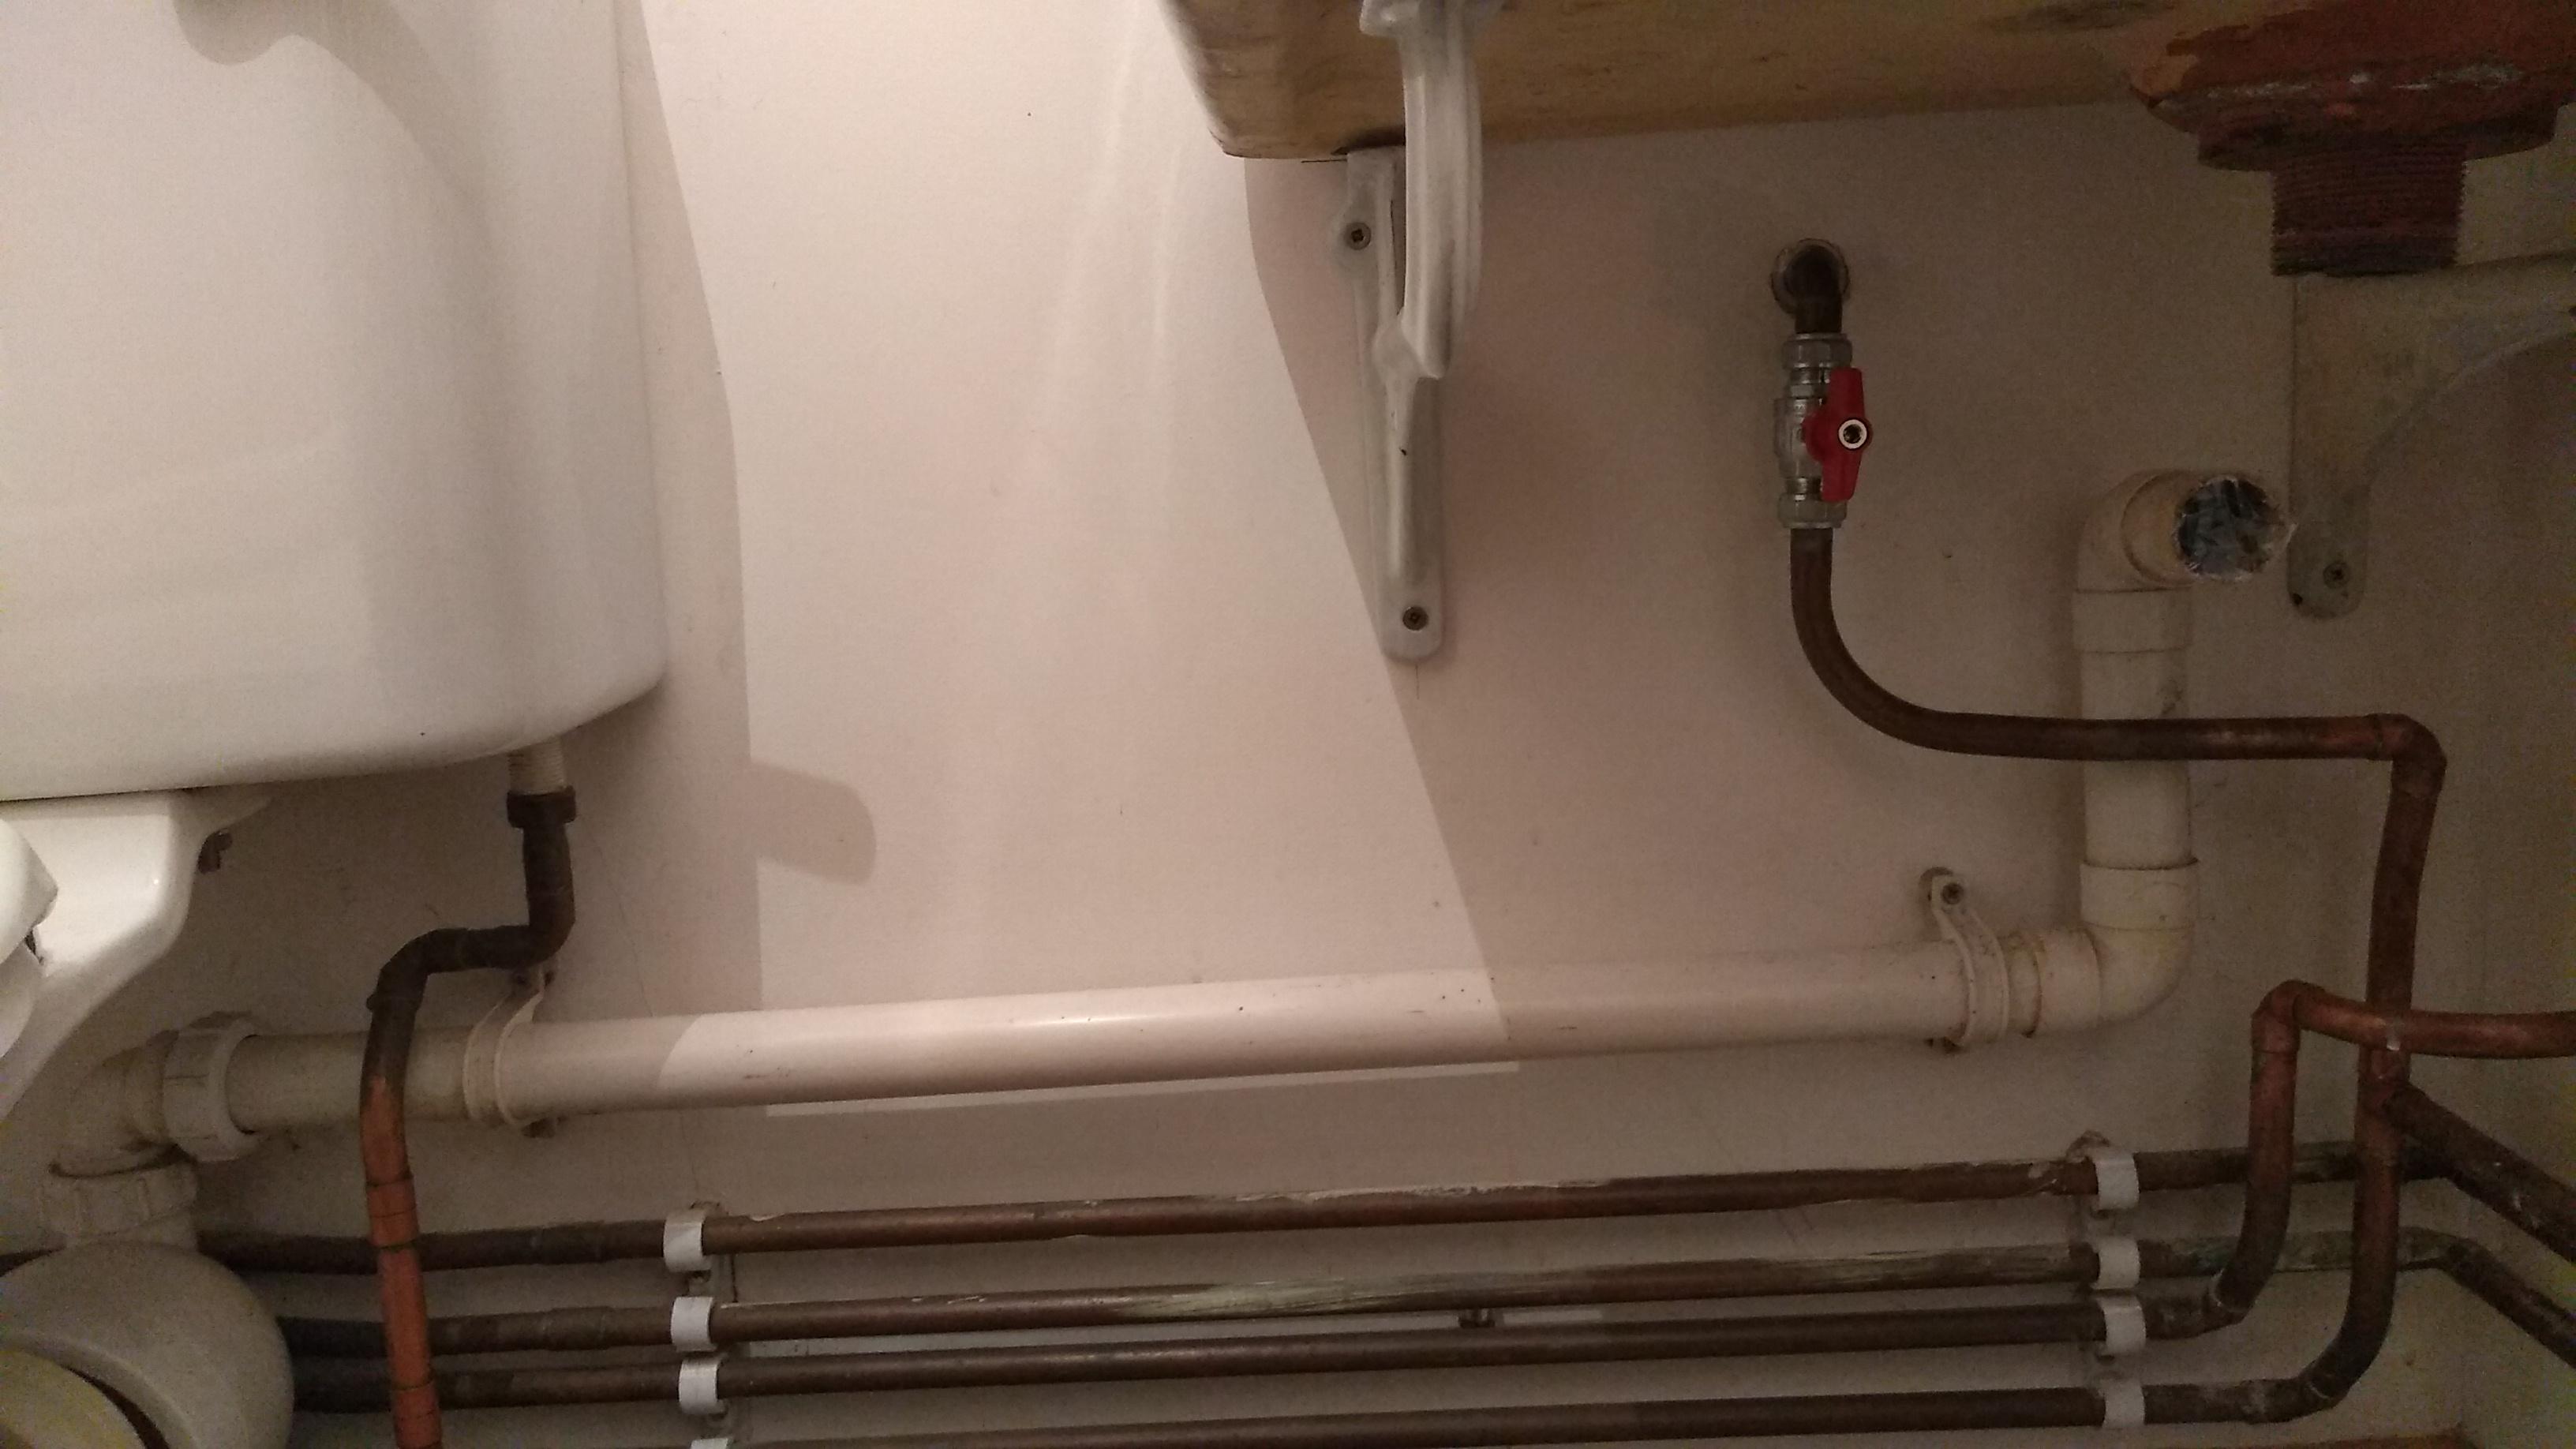
I'm definitely getting that feeling! It does sit in a recess, so you may well be right. I tried it with a bucket beneath and all seemed well, perhaps because gravity is on its side. But I think it is worth doing once and properly so I'll stick with using the McAlpine T12A-F. Once I've got that, I'm wondering what the best way would be to connect to my existing pipework. In the correct order from the plug hole, I'm thinking: 1. The McAlpine T12A-F 2. A telescopic P trap, as there's a shortfall in the height. 3. Cut the end of the existing pipework (the horizontal bit on the solvent weld section) to whatever's needed to get the correct position under the sink's waste. Does that all sound good? One problem though... The sink waste is 1 1/2"/40mm. The existing pipework is 32mm. Where would be the best place to use a reducer and what type of reducer? The plumber left a reducer piece here, but I can't for the life of me see how to use it properly for a good seal. And I'm not certain if it's the best solution or not... I was wondering about one of these: https://www.screwfix.com/p/mcalpine-st28m-straight-connector-white-32mm-x-40mm/95260 And perhaps if that can go directly after the T12A-F? Then I can use a 32mm trap instead (the one the plumber left is 40mm) and may not even need the adjustable trap if the reducer drops me to the correct height. That's just me thinking aloud though and not really knowing anything! So any thoughts from the experts are most welcome please. Pics below to help make sense of my gibberish. But happy to take more as needed. Cheers

-
Belfast sink - joining old waste to new 40mm trap and pipe
Oxbow16 replied to Oxbow16's topic in General Plumbing
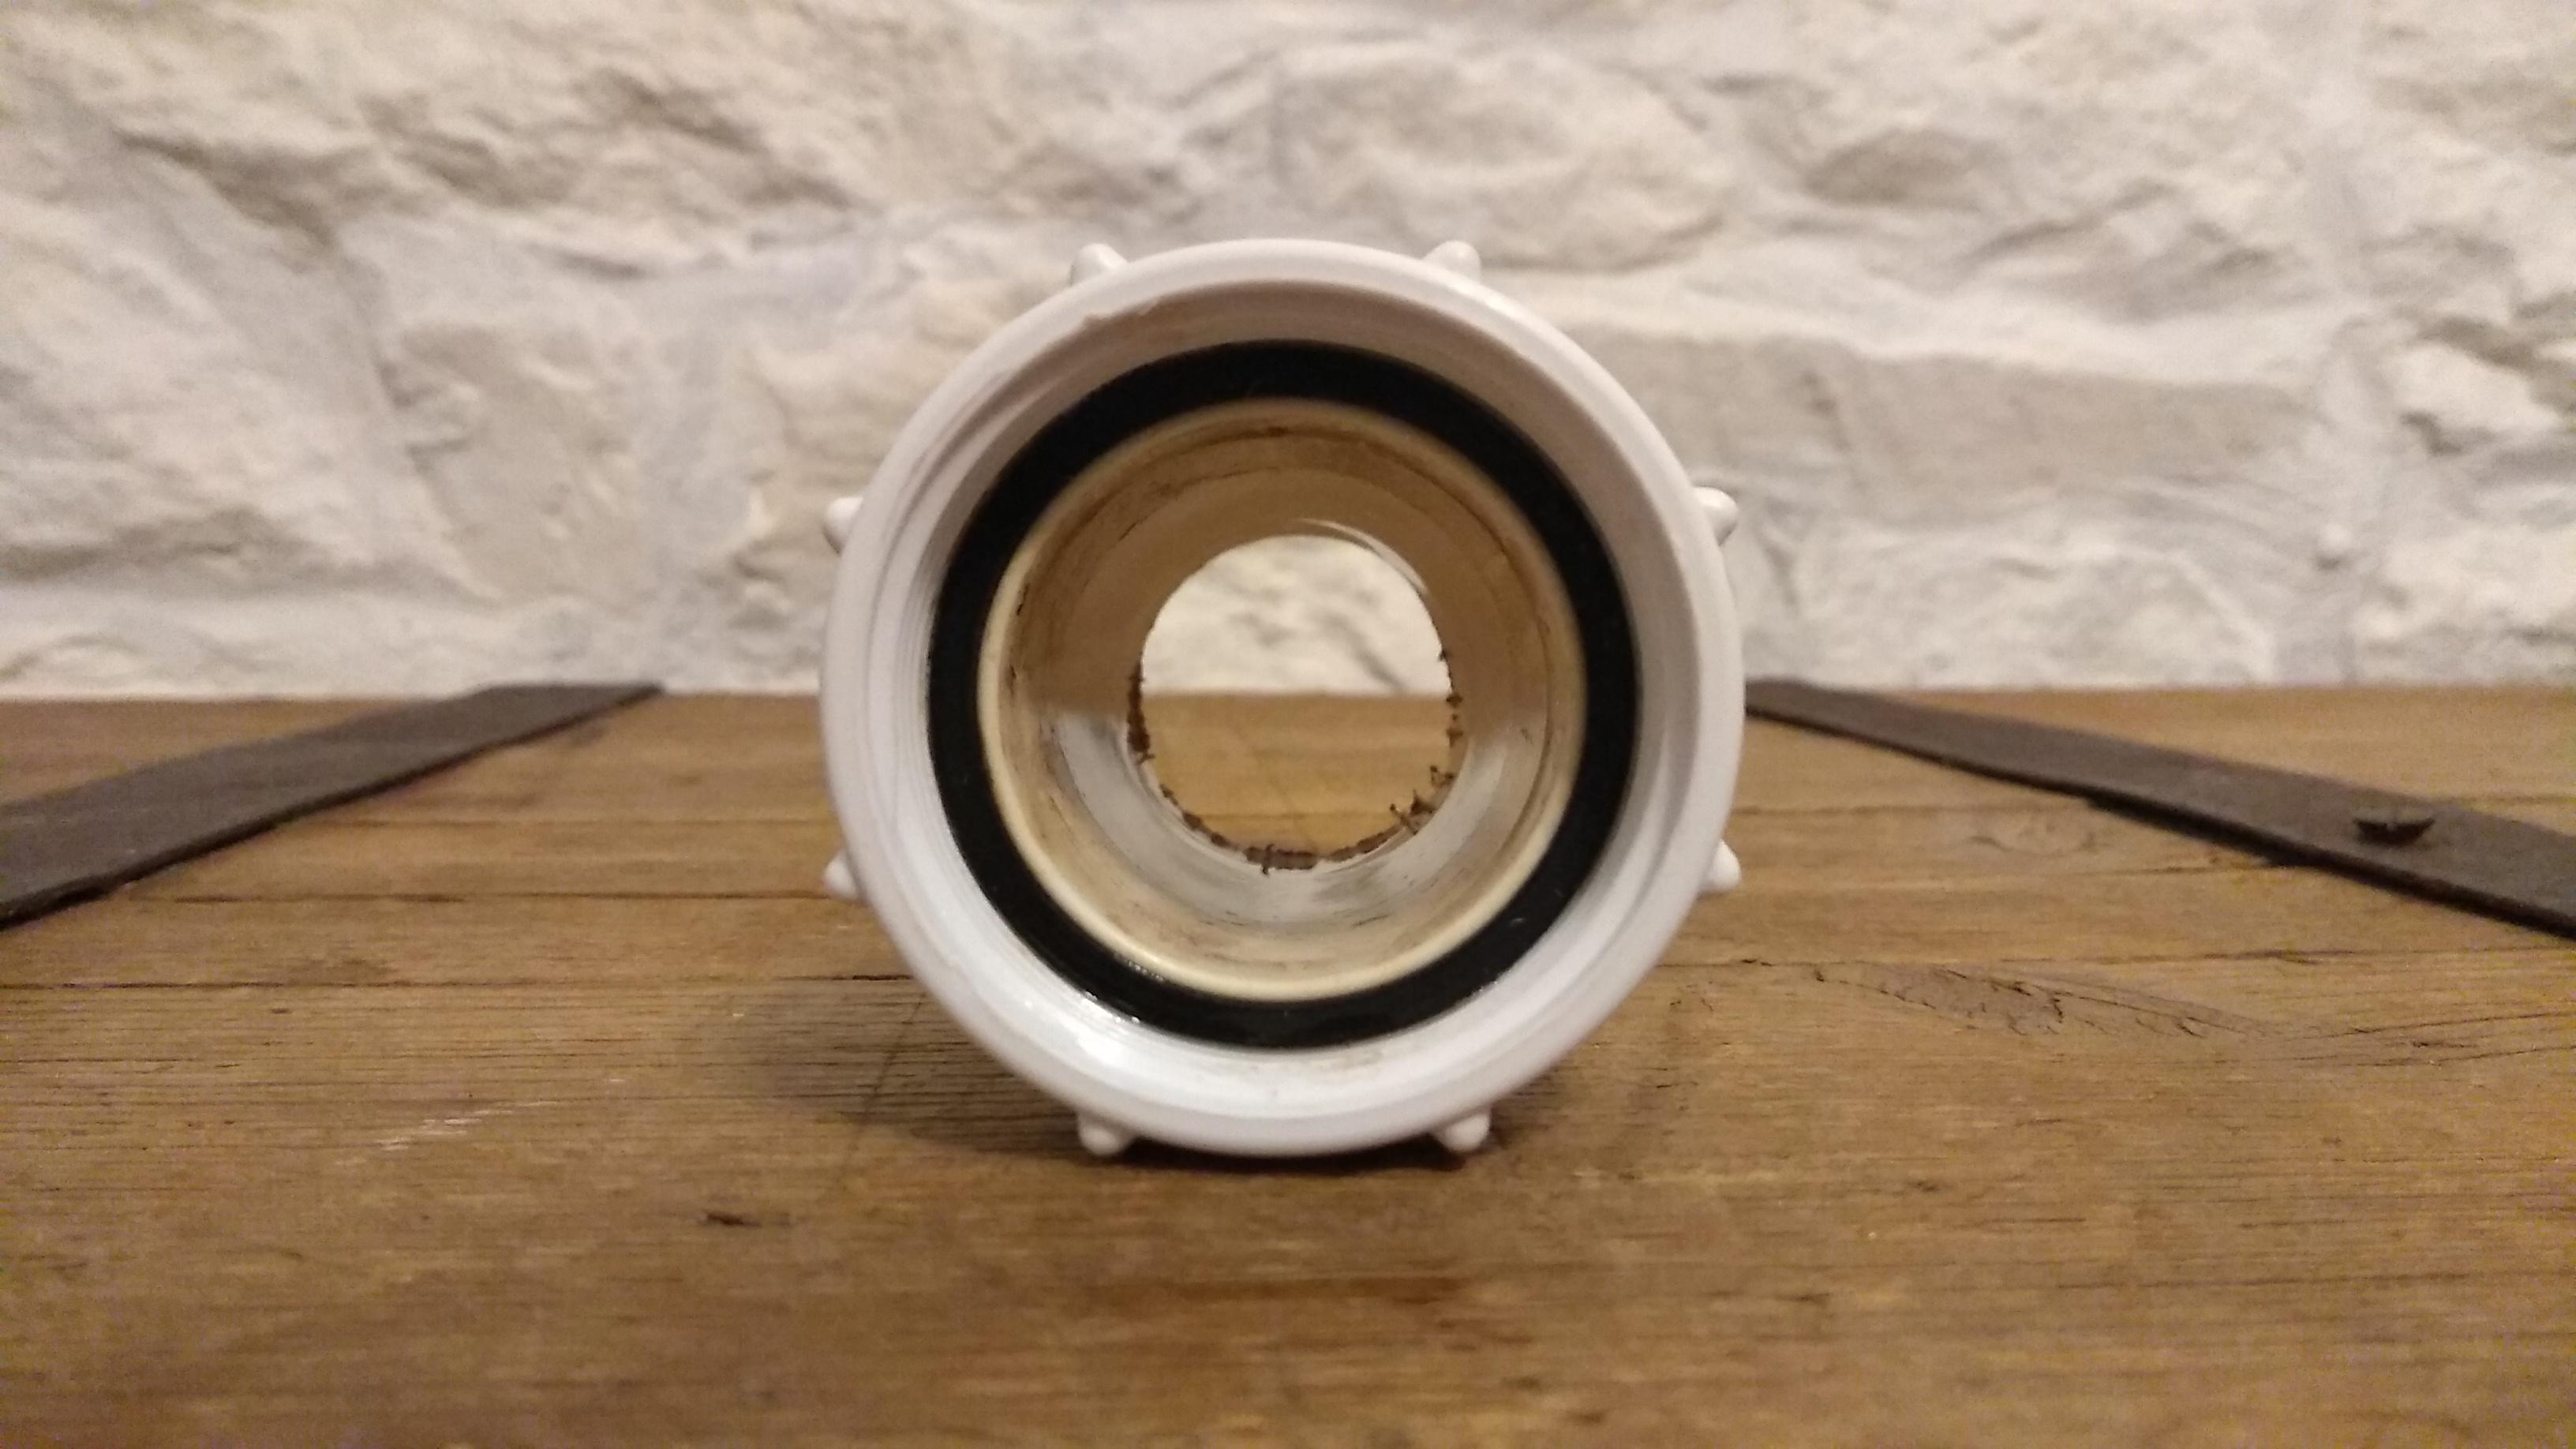
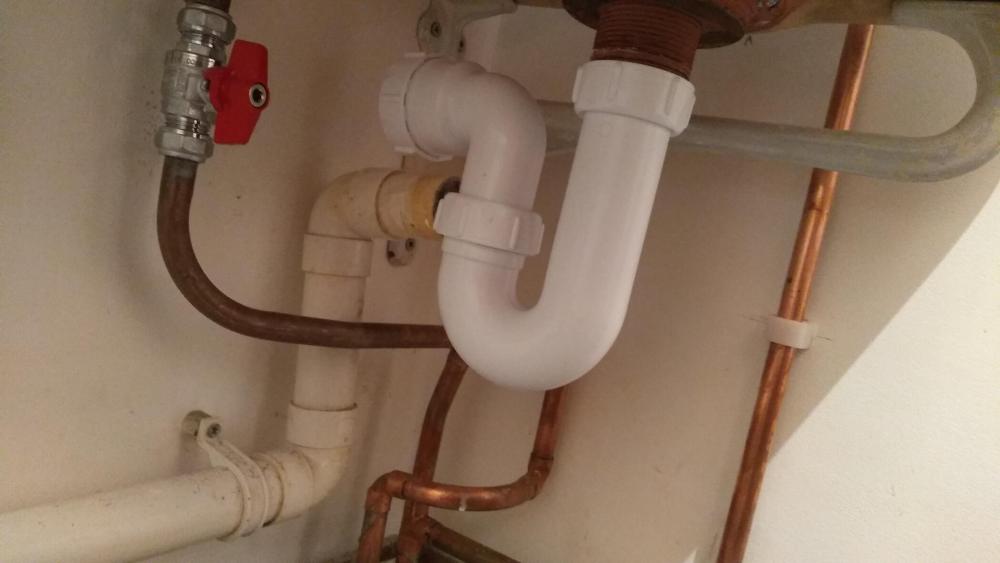
I'm unable to leave the house at the moment, so haven't picked up a McAlpine T12A-F as of yet. But I was mulling it over just now and took the waste pipes off my kitchen sink to see what they have. Turns out that what I have on the 1/2 side of my one and a half sink is just the ticket... Or at least I think it is, but I'm no expert. It has a moulded "nut"/end and flat washer. I've put a couple of pics below. Is there any reason why something like that wouldn't work? If it is ok to use, then: - What's it called / how do I find one the same? - How does it then connect to the P-trap? Sorry that these are such basic questions, and also if I'm missing the glaringly obvious. It's all new to me! Cheers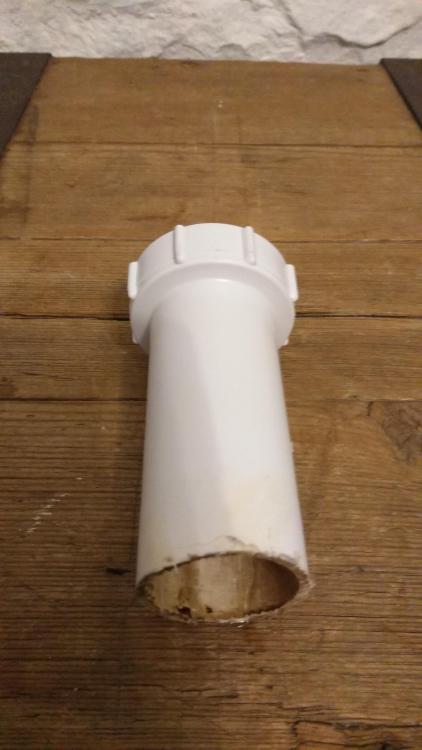
-
Belfast sink - joining old waste to new 40mm trap and pipe
Oxbow16 replied to Oxbow16's topic in General Plumbing
Someone has recommended a McAlpine TF12A adapter, and judging by the pictures of it I think it could be just the job. I've got one on order and will report back as to whether it works. Many thanks for the help -
Belfast sink - joining old waste to new 40mm trap and pipe
Oxbow16 replied to Oxbow16's topic in General Plumbing
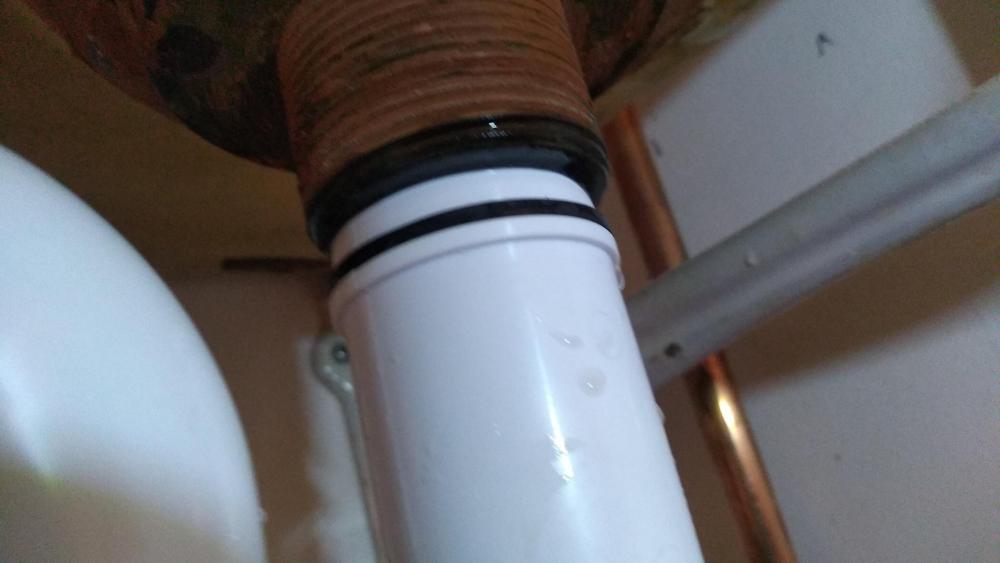
That all sounds great, but to be honest that's why I'm here because I don't know what I would need. Nor whether it even exists! Perhaps. And if we have to do that then so be it, but I'd like to see what options I have first as it's definitely our preference to keep the old waste. You'll have to forgive me, I'm not familiar with the different types of plumbing fittings, BSP, etc. But having looked into it more it turns out that the "nut" from a standard trap (the bit that you tighten) actually screws on fine, so I guess the thread is standard 1 1/2" BSP. The problem is with the pipe section and rubber seal of the trap. Because the sink waste's inner diameter is smaller than normal, the trap pipe won't slot into the waste to form a seal with the O ring. So whereas it should be like this: On my sink it doesn't and it looks like this: With all that in mind, is there anything other than the rubber reducer with jubilee clips that will work? Many thanks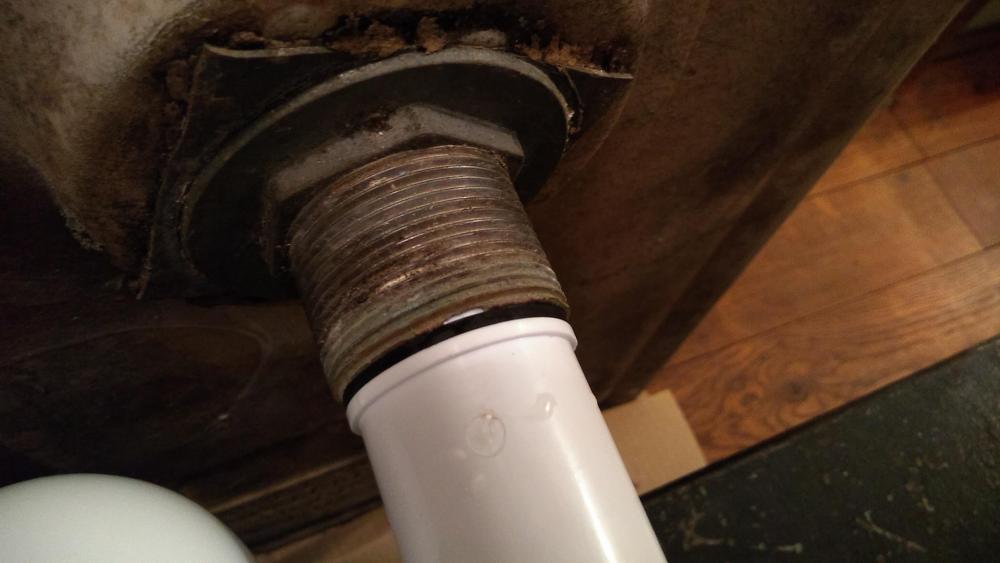
-
Belfast sink - joining old waste to new 40mm trap and pipe
Oxbow16 replied to Oxbow16's topic in General Plumbing
Sorry, it's been a long day! I meant trap, which to be fair does consist of bits of pipe I've amended the title and thread to make it clearer though.... Cheers -
Hi all We're having an old belfast sink fitted in our WC/utility room. We'd like to use the existing old waste; and by all accounts it'd be a pig's jacksie to remove even if we wanted to! The threaded section in the photo measures approx. 1.88" / 47.8mm outside diameter and 1.24" / 31.5mm internal diameter. The only thing I can think to use is something like this: https://www.swelluk.com/swell-rubber-reducer/ But whilst the sink out will be inside the reducer, which is good from a gravity point of view, the 40mm trap/pipe will also be inside the reducer which ain't so great. So I wondered if there are any other options? Anything entirely different? Or something along the lines of the rubber reducer, but with a threaded connection on the smaller end to it connects to the 40mm trap/pipe properly? I'll keep looking in the meantime. Thanks a million

-
Hi all I've already got vermiculite in the loft, but only to 100mm or so (varies quite a lot)... I'm currently reboarding beneath my header tank and got a few other jobs to do up there, but will soon want to add additional insulation. Does anyone know how vermiculite performs compared to the usual suspects? I've had a quick look online and come up with nothing so far. It would be really helpful to know so that I can decide what else to add up there, where to put what, etc. Many thanks for reading.
-
Thanks for the replies and suggestions. Someone reminded me about Toupret fillers... I'd kind of forgotten. I've used Le Reboucheur in the past after having read how much pro decorators rate it, and I too thought it was excellent stuff. Not used it for a few years, and so forgot that it says there's no maximum depth. I'm not sure if another one of their other fillers - TX110 - was about when I bought Le Reboucher, but with a quicker setting time and no limit to the application thickness, I'm gonna give that a go. Cheers for taking the time to respond and help
-
Great, thanks for the tip I'm going to be using low expanding foam around the frame to seal it. Could I potentially use that in the gap or is it too large? Cheers
-
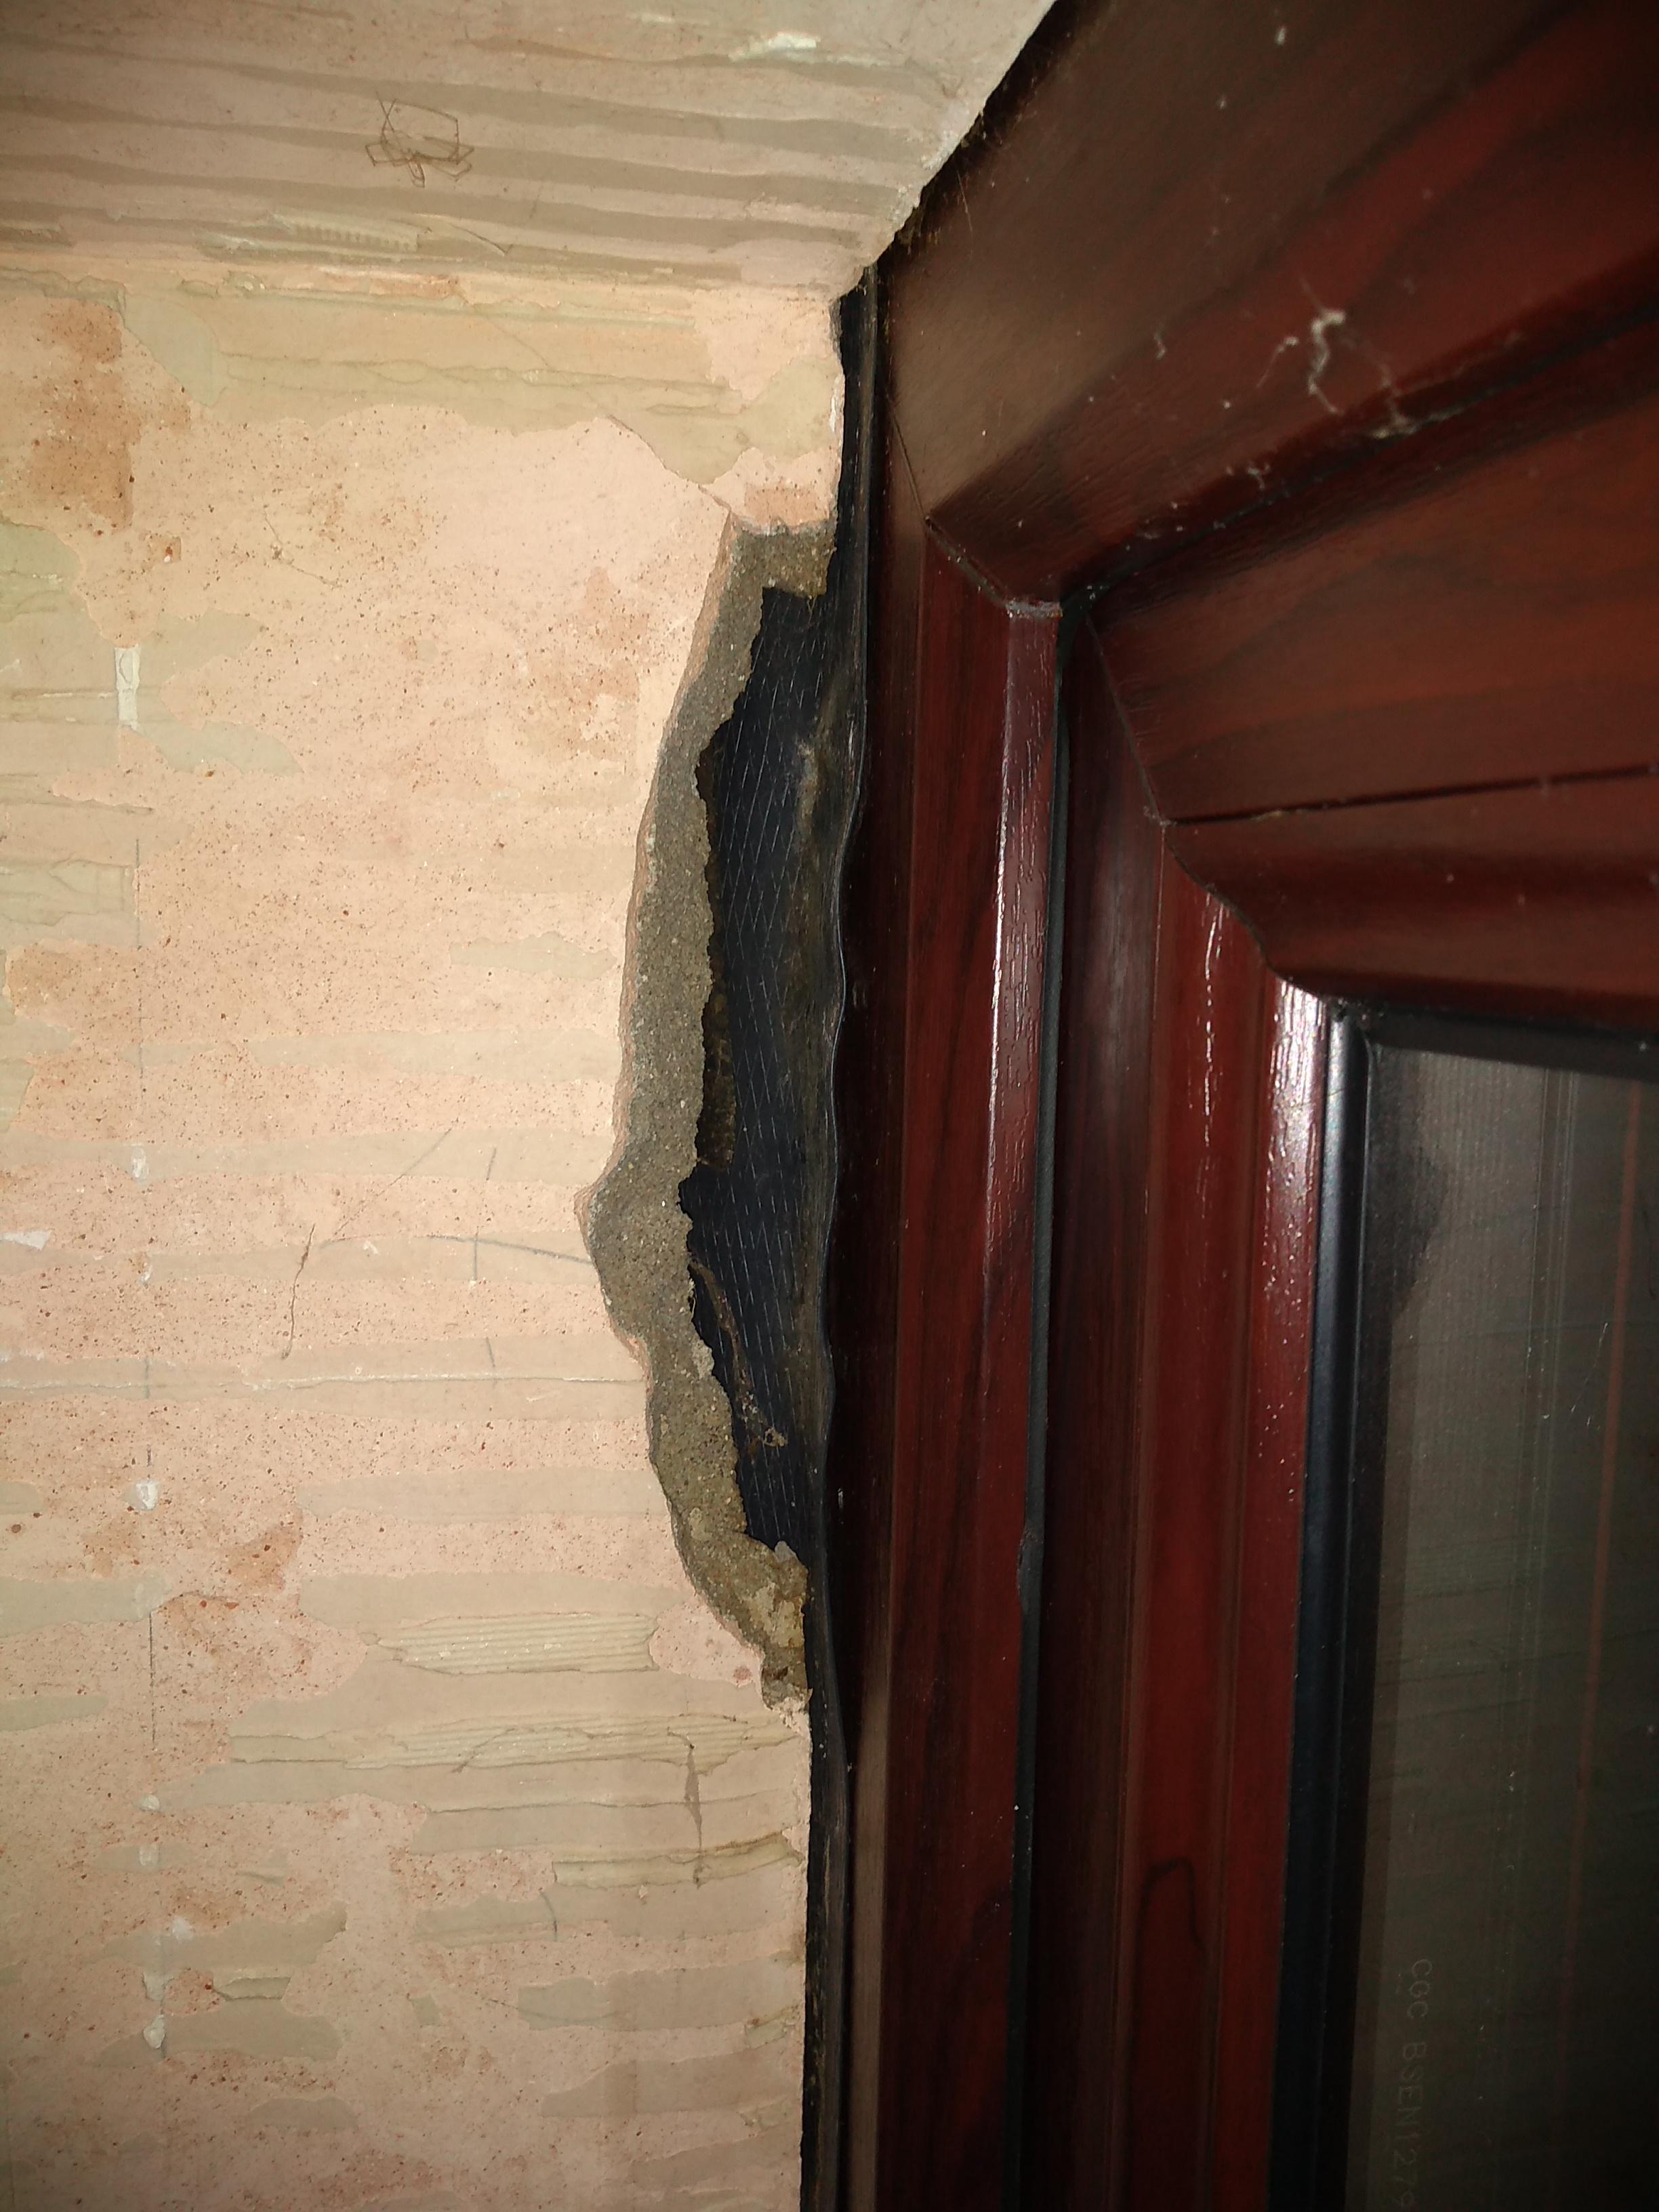
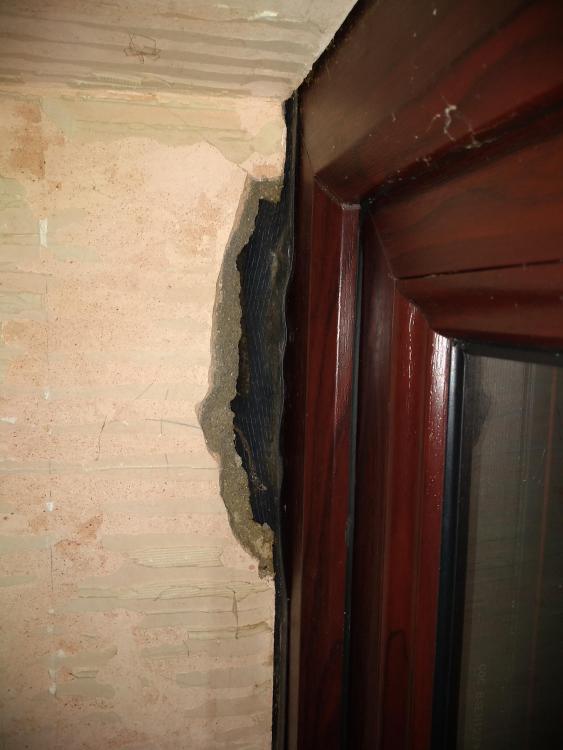
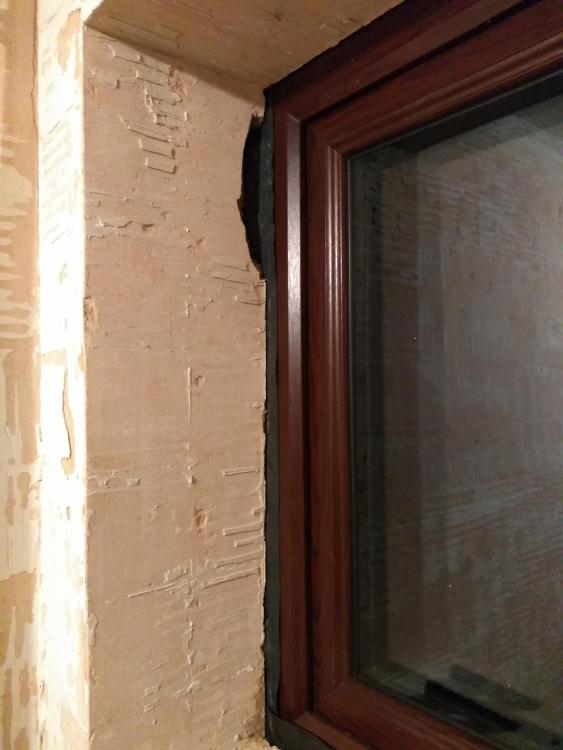
I'm might have ballsed up here... I was planning to patch up a few holes like this one before it gets tiled in just over a week or so (could be less): I had thought to use mortar, but now I'm thinking that might take too long to cure enough for tiling over (more than happy to be corrected if I'm wrong!!)? If I'm right, is there anything else I can use that could be dry/cured well enough in 5-7 days+? I'll get there one day! Cheers
-
Thank Jesus, Buddha and Mohammed for that! Right, I think I get you. So in the last two photos I'd be foaming/filling to the left of the DPC? And the order of things looking from left to right would be - reveal, foam, DPC, window frame. Is that right. So to be el thicko, but I keep drawing a blank when I try to think about it logically myself! As for the large deep gap, I was thinking of using mortar for that. Or could foam be used there too? Wasn't sure if it was too large for foam. Thanks again for all the help and guidance.
-
Hi Craig Thanks for joining it and sharing your expertise Not a fan of it, but do you hate it enough that you would take hammer and chisel to the reveals and get it all out? I hope not because that sounds like quite a big job! And it's not the only window that has it. Assuming for a moment that you're not proposing that and that whilst not ideal it's there now and so must stay, how do I do about doing the filling and foaming around the window? Should the DPC you can see be on the outside side of the foam etc (pressed against the frame?), or on the room side? The reveal is going to be tiled in the next week or two, so what foaming/filling I do will be the stage one to the stage two of tiling. Thanks for your help.
-
That all makes sense RE the 5mm. I was thinking about it properly. I did see expanding tape while I was looking into it earlier this week, and I wondered when and how that would be used. That explains it then I do tend to struggle with the theory behind the sealing vs ventilating balance. Think I might have done a thread about it a few months back. It's something I need to get my head around as we do more work on the house. As I sit here now only two coffees into the morning, I scratch my head when I think on the one hand the desire to seal around the window properly to eliminate all draughts, cold bridging etc, yet on the other hand the need for a trickle vent. Or perhaps it's quite simple - the gaps around the window aren't controllable whereas the trickle vent is??? In any case, there's no trickle vent, but we do have the window open often-ish. Cheers
-
Morning Onoff Not sure what was there before but I'd think wooden windows is most likely. It's a mid-70s extension and the current windows - I think - were put in around the turn of the century. Yep, it is cavity walls. Hard to tell how much the DPC wraps around beyond what you can see in the photos. Unless I take hammer and chisel to reveal, which I'd rather not! I will have another look now it's daylight though, and also a look at other windows from the same era to see how they look. We discussed me filling all gaps with expanding foam, even as small as 5mm. Does that matter seeing as there is meant to be a 5mm gap (something I also read/saw on youtube vids earlier in the week)? Presumably the gap is to allow the window to expand / contract? Or is the idea that expanding foam is flexible enough to allow the expansion whilst eliminating the draughts and cold? Thanks again and have a great weekend.