Oxbow16
-
Posts
442 -
Joined
-
Last visited
Everything posted by Oxbow16
-
Hi I'm going to be having some roof work done. The lead needs replacing and doing properly where a lower roof meets a wall (it slopes down the side of the wall... ASIDE - what's it called where a roof meets a wall like this?). The chap doing it has proposed to put in long overlapping lengths of lead beneath all the slates (I think around 1.5m lengths each). And then lengths of around 1m flashing on top of the slates. All the info and videos I can find say to use small soakers that are the same length as the slates, and sit on top one slate/covered by the next. I'm worried that the way the chap has proposed to do it is wrong, as I can't find anything that recommends doing it like that. In case it changs anything, he is planning to put a bell bead on the wall above the lead. Sorry if I've not explained that very well... It's be a long day! Many thanks
-
Great, thanks @joe90 I'll have a measure up but I think the gap is likely to be 10mm+ The "stuffing" is just temporary until the wall is repointed. Yes, the soffits are ventilated on the other side so all good there. Not sure why they chose to ventilate one side but not the other... Cheers
-
Any ideas guys? Cheers
-
Great - that's a relief. Very pleased that all should be well as it is When I install new ventilated soffits after the re-pointing, with the thin gaps around the over extended wall plate be enough to get air up into the loft. If not, any ideas how I can improve the ventilation there? I've no idea why they decided to have insulation at joist level and at rafter level. The glass wall in the rafters is quite thin. It's bonded to the underside of the felt. Not sure if it was bought like that or added. But anyhow, sorting the insulation is on the list of works to be done. As is making sure there is adequate ventilation by adding the ventilated soffits where there are none. Many thanks for all the help with this
-
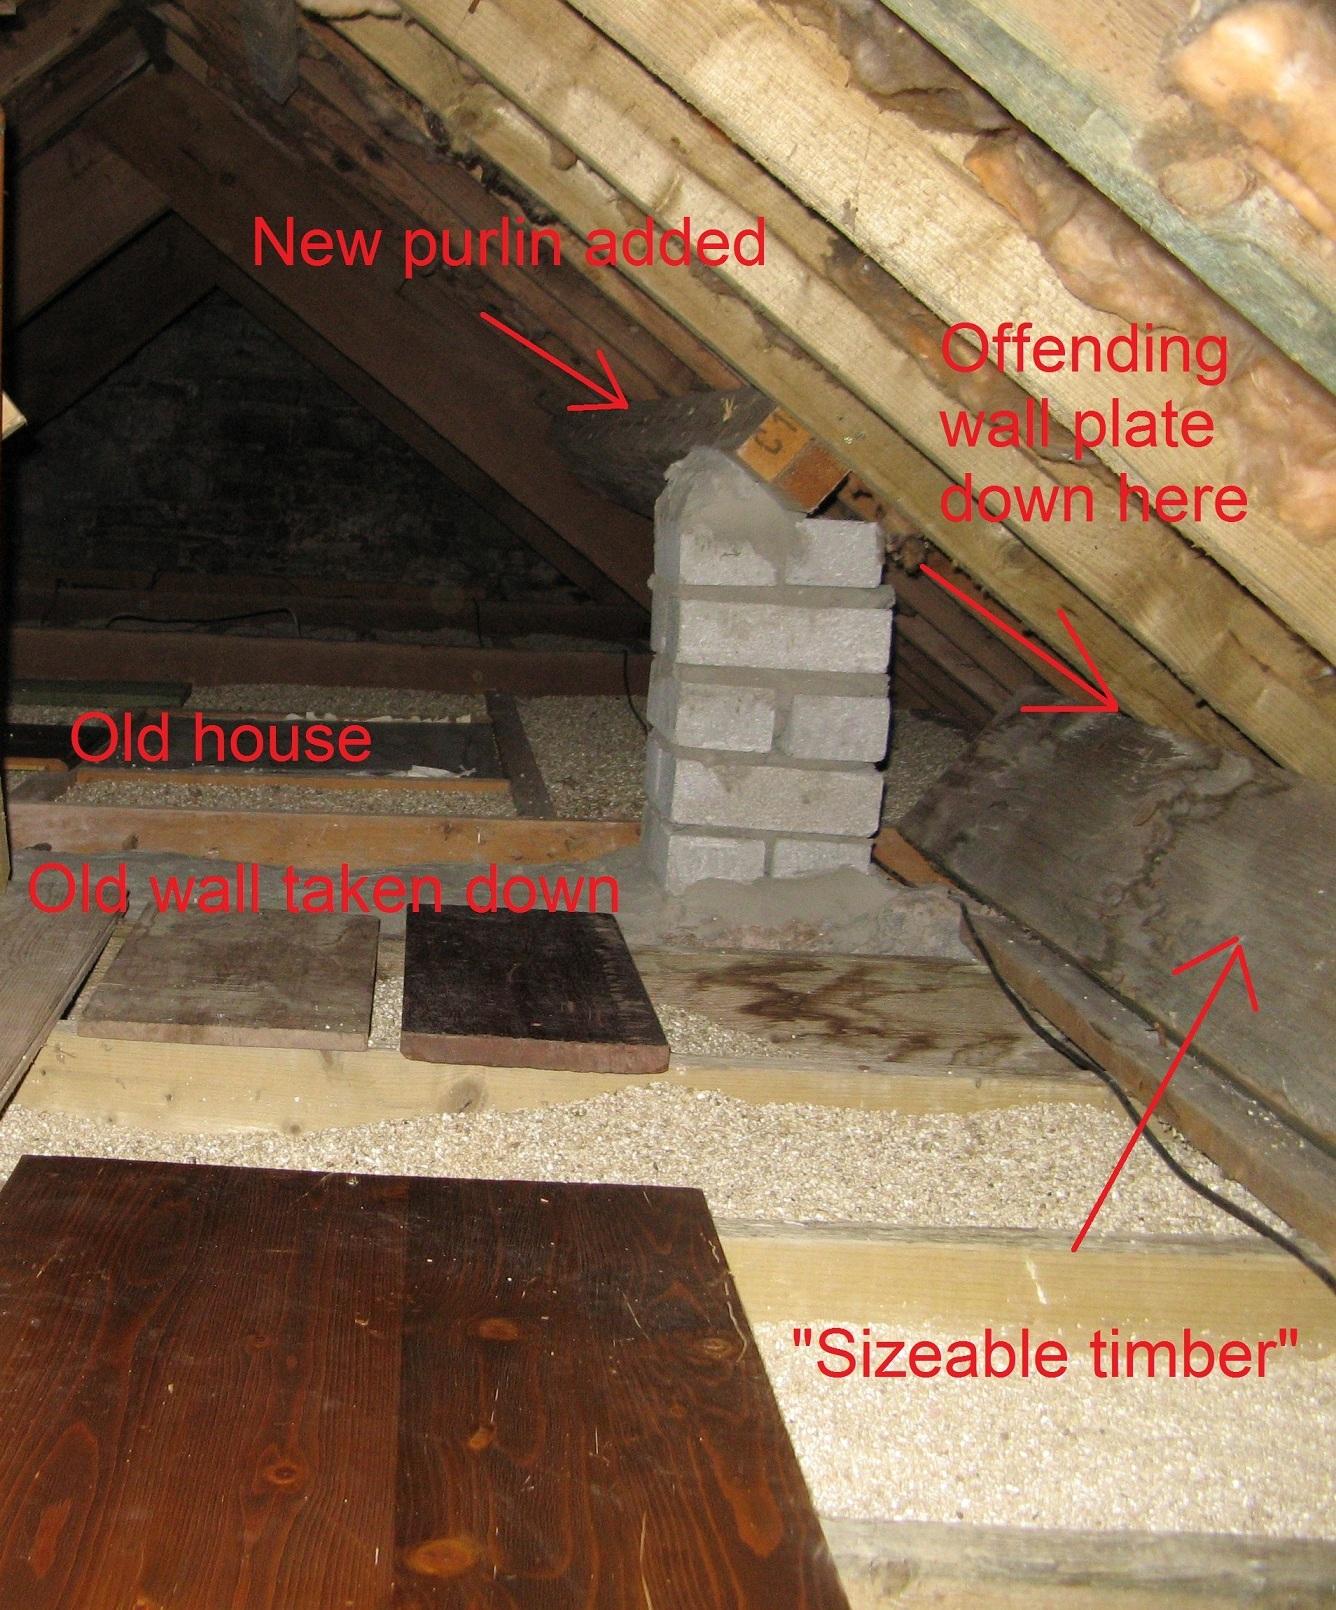
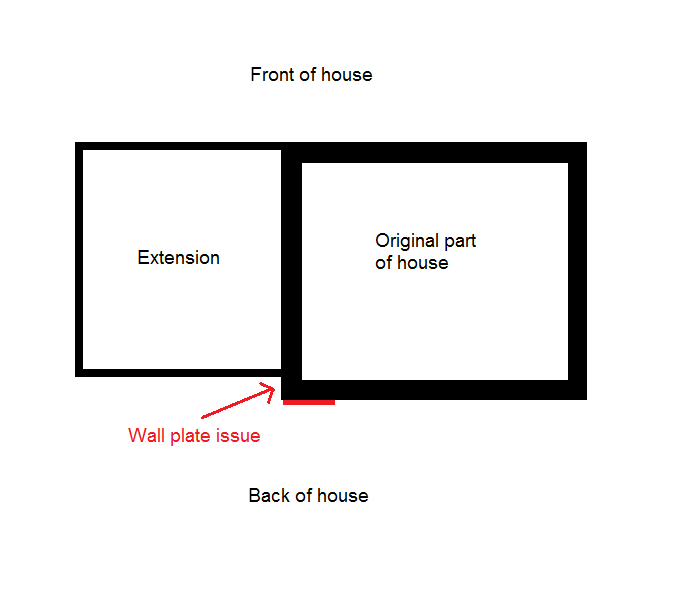
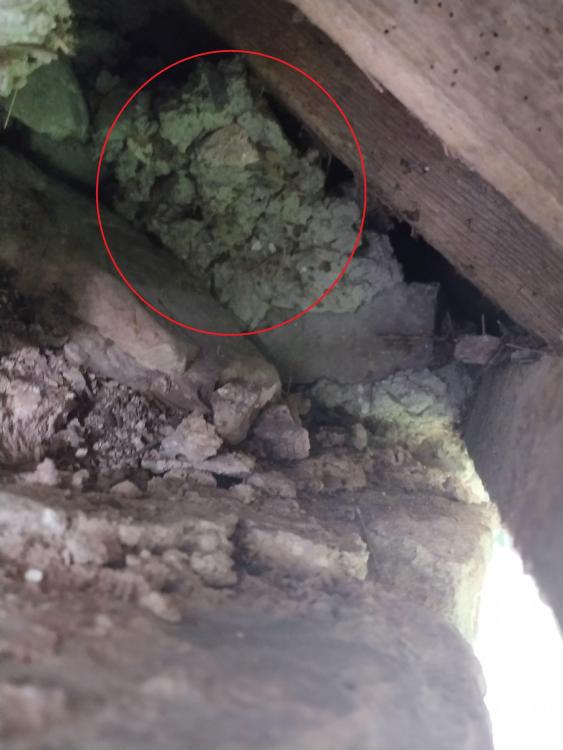
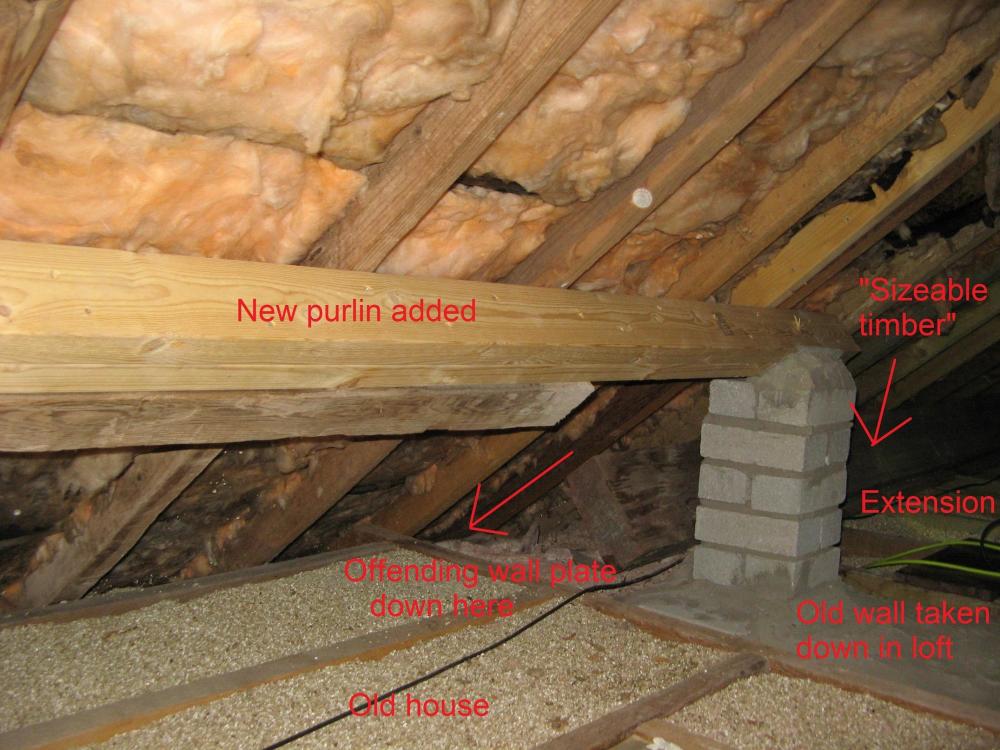
Hi Apologies for the delay. I should have made it clear that this is not a gable end. It was originally, but an extension was added a few decades ago. The extension is stepped in from the old house by 30cm at the back and that’s where we're looking. (For reference, the old part of the house and extension are flush at the front.) It looks like this from above: The old part of the house has solid walls, around 550mm thick, and is random rubble I think. (For reference, the extension is 300mm cavity walls). The top section of the wall of the old house – where it meets the extension – has been taken down in the loft. The roof construction in the old part is “A” frames with principal rafters, and purlins supporting the smaller rafters. The tie beams / collar beams are at joist level. The joists run perpendicular to the tie/collar beams. There’s no principal rafter at the problem wall plate area, I guess because it would have been the gable end originally with the wall providing support. The last purlin before the extension joins has been replaced at some point, presumably when the extension was built. A support pillar has been built in the loft on top of the old wall for this purlin. In the extension, there are no tie beams. The joists run opposite to what they do in the old part – so from front to back of house. Atop the joists there’s a sizeable timber running from the top of the old wall into the new gable end. This supports the rafters. In the house, the ceilings slope where they meet the external walls. Hence why none of this is visible in the external photos. And why the wall plate is not visible in the loft. Hopefully that makes some kind of sense and along with the photos below explains what we have construction wise, but happy to try to answer any questions or post more photos. To answer some of the points raised above… The different colouration of the underside of the wall plate wood… The concrete render has been hacked off the wall, which – along with removing the soffits – has revealed the wall plate issue. The colouration change shows where the render was. Perhaps they felt that the render was enough support for the wall plate. 1 to 3 = not that I know of. 4 = it’s an old house that has had various changes over the years (i.e the extension). The tiles are concrete so definitely not original! It’s the same tiles on the old part of the house as it is on the extension that adjoins it. Not that I can see, but because that part of the roof is not accessible, I couldn’t say for sure. I’ll have another look though from both ways. There is a big lump of concrete beneath a rafter. which may have been an attempt at adding additional support? See red circle here: I can’t access the wall plate on the other side (front of the house) to see unfortunately. So I can’t answer what’s going on there. Yes, soffits and fasicas are new-ish – think they were installed around 10-15 years ago. With the render discolouration on the underside of the wall plate as well, I think @ProDave is right to say that the timber was already like that when the new soffits etc were fitted. Finally, to add: - looking at the offending section of wall plate in my first post, the first section of timber starting at the corner, is 56cm long. - From the corner to the window lintel is around 80cm. - At the window, the wall plate half sits on top of the lintel - There is no rafter behind pvc barge boardy bit. - The rafters are fixed to the wall plate as far as I can see. So based on all of the above, is there adequate support without the wall plate being on the wall? Sorry for such a long post! And huge thanks again for all the help.

-
Thank you all so much for all the replies and enquiries. Very helpful and very kind. It may be a day or two before I can get answers and additional photos together, but as soon as I have I'll be back. Thanks again in the meantime
-
More photos:

-
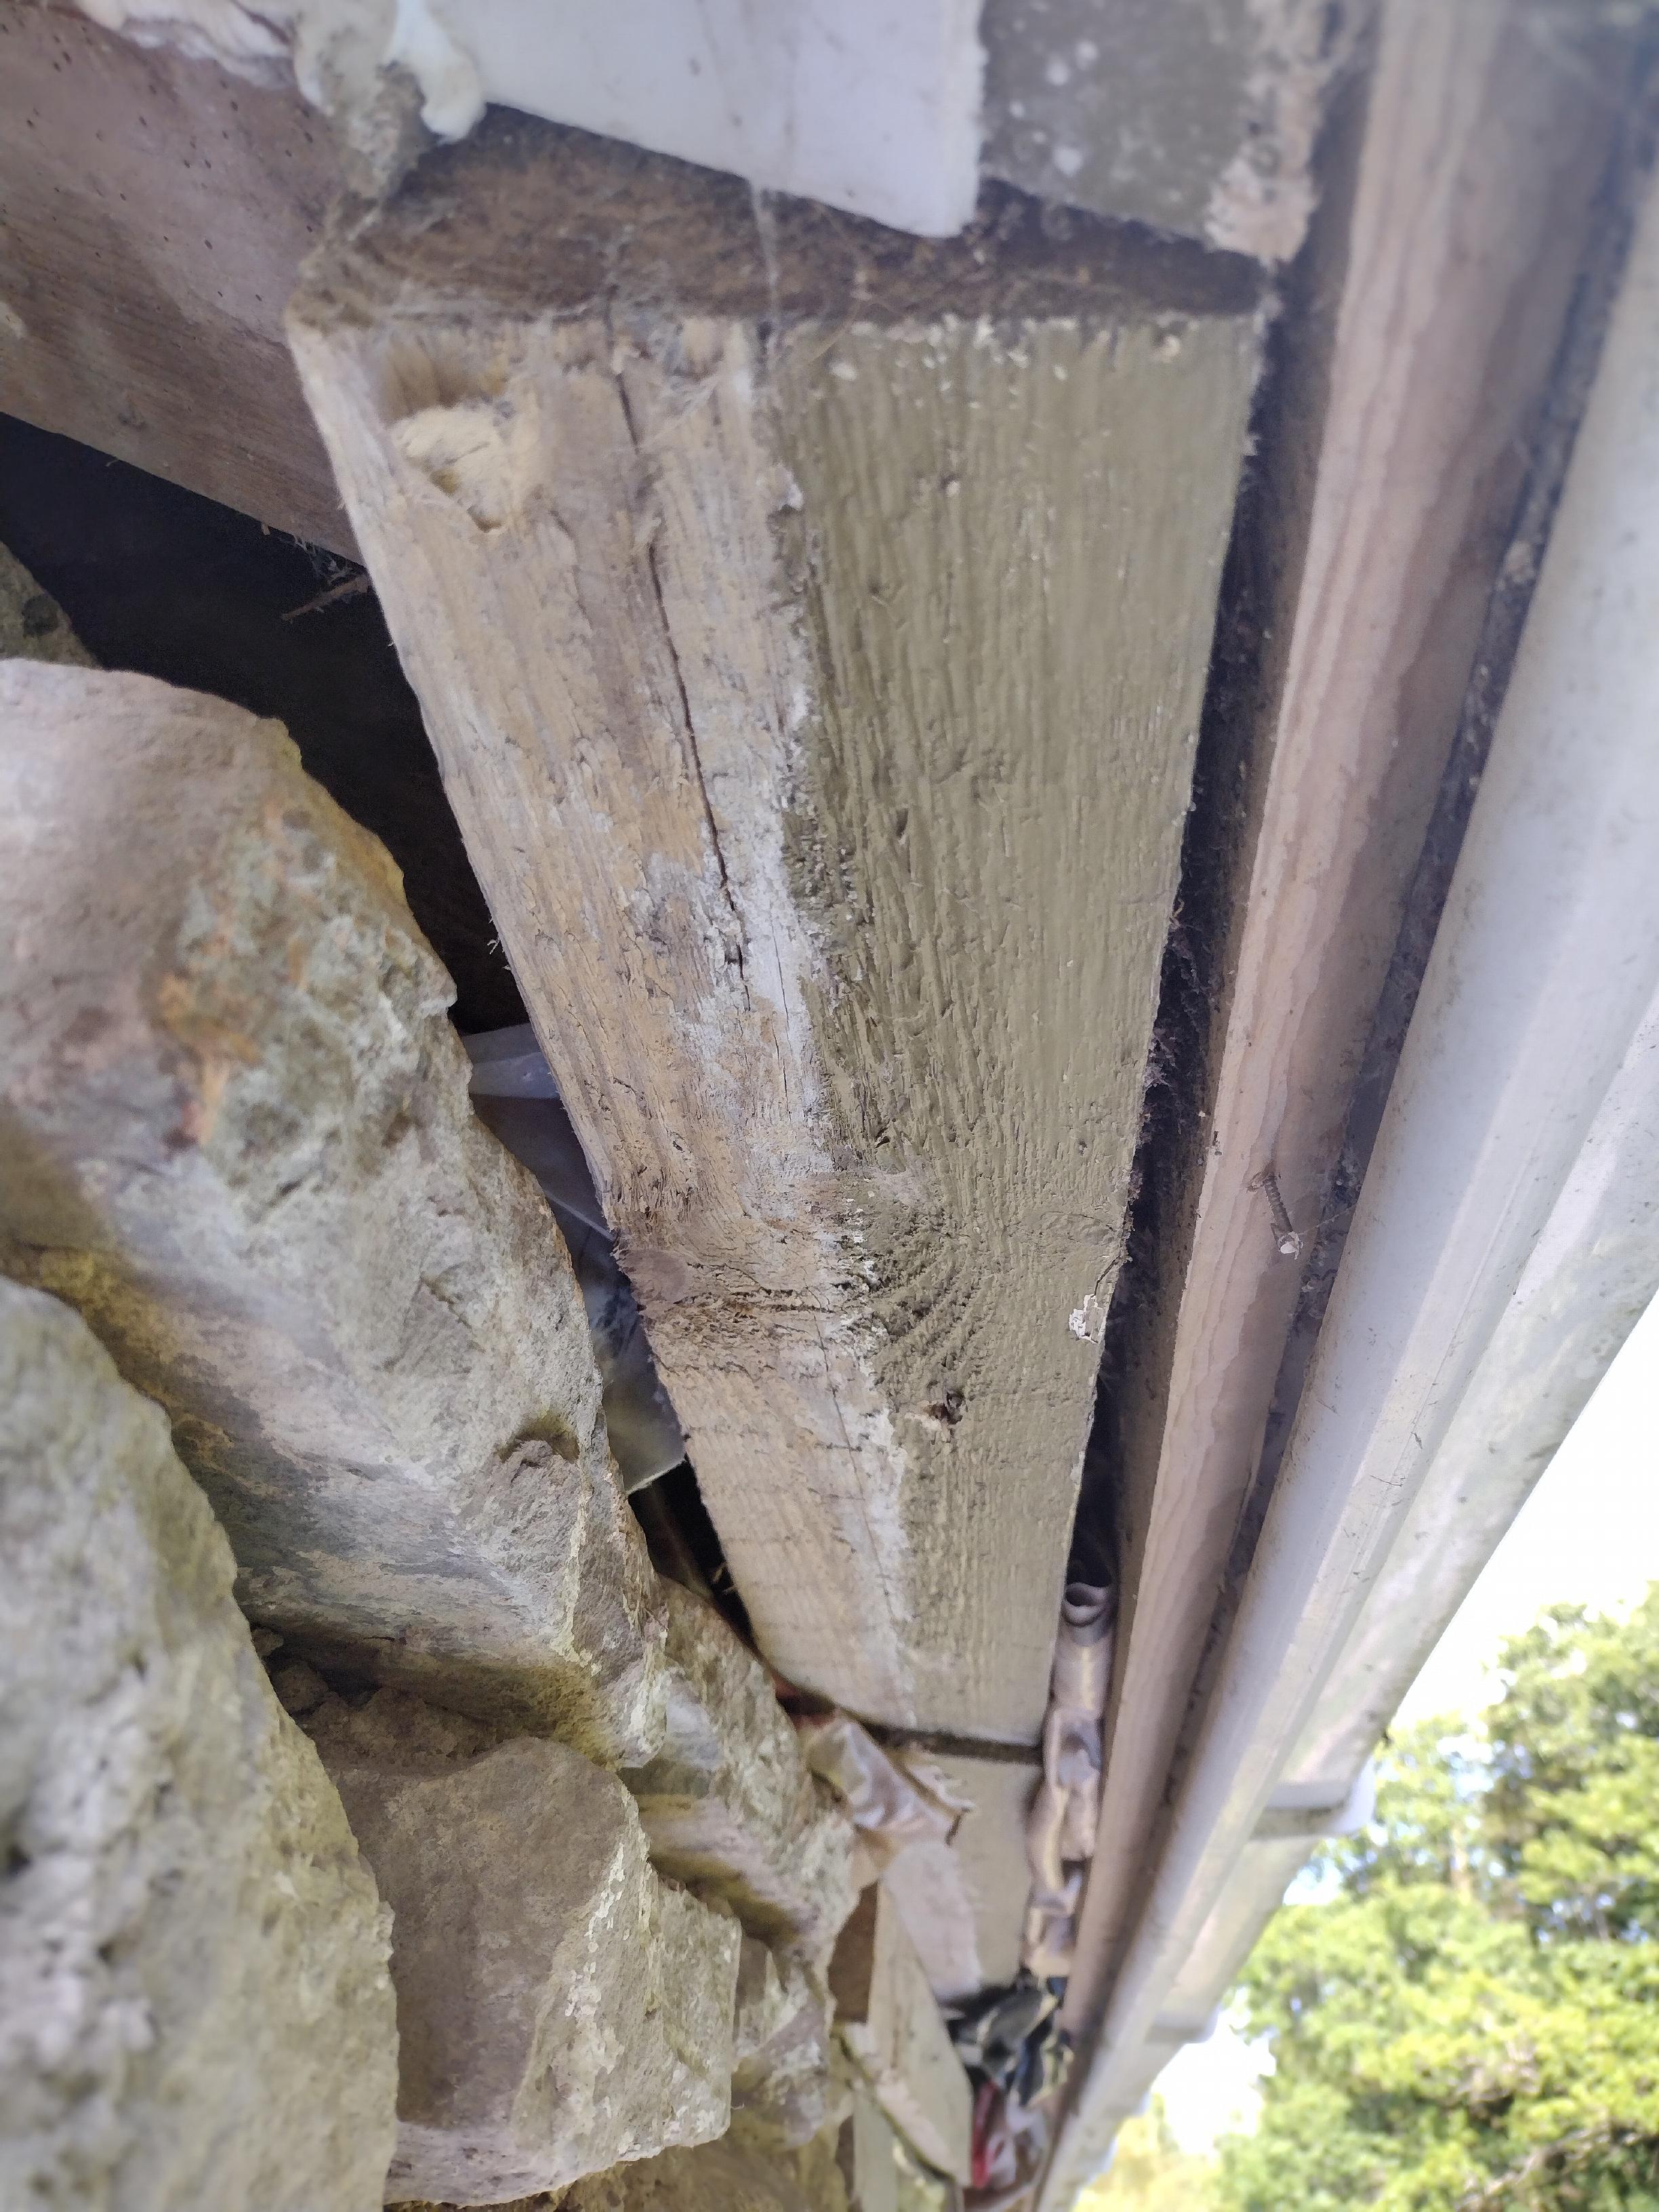
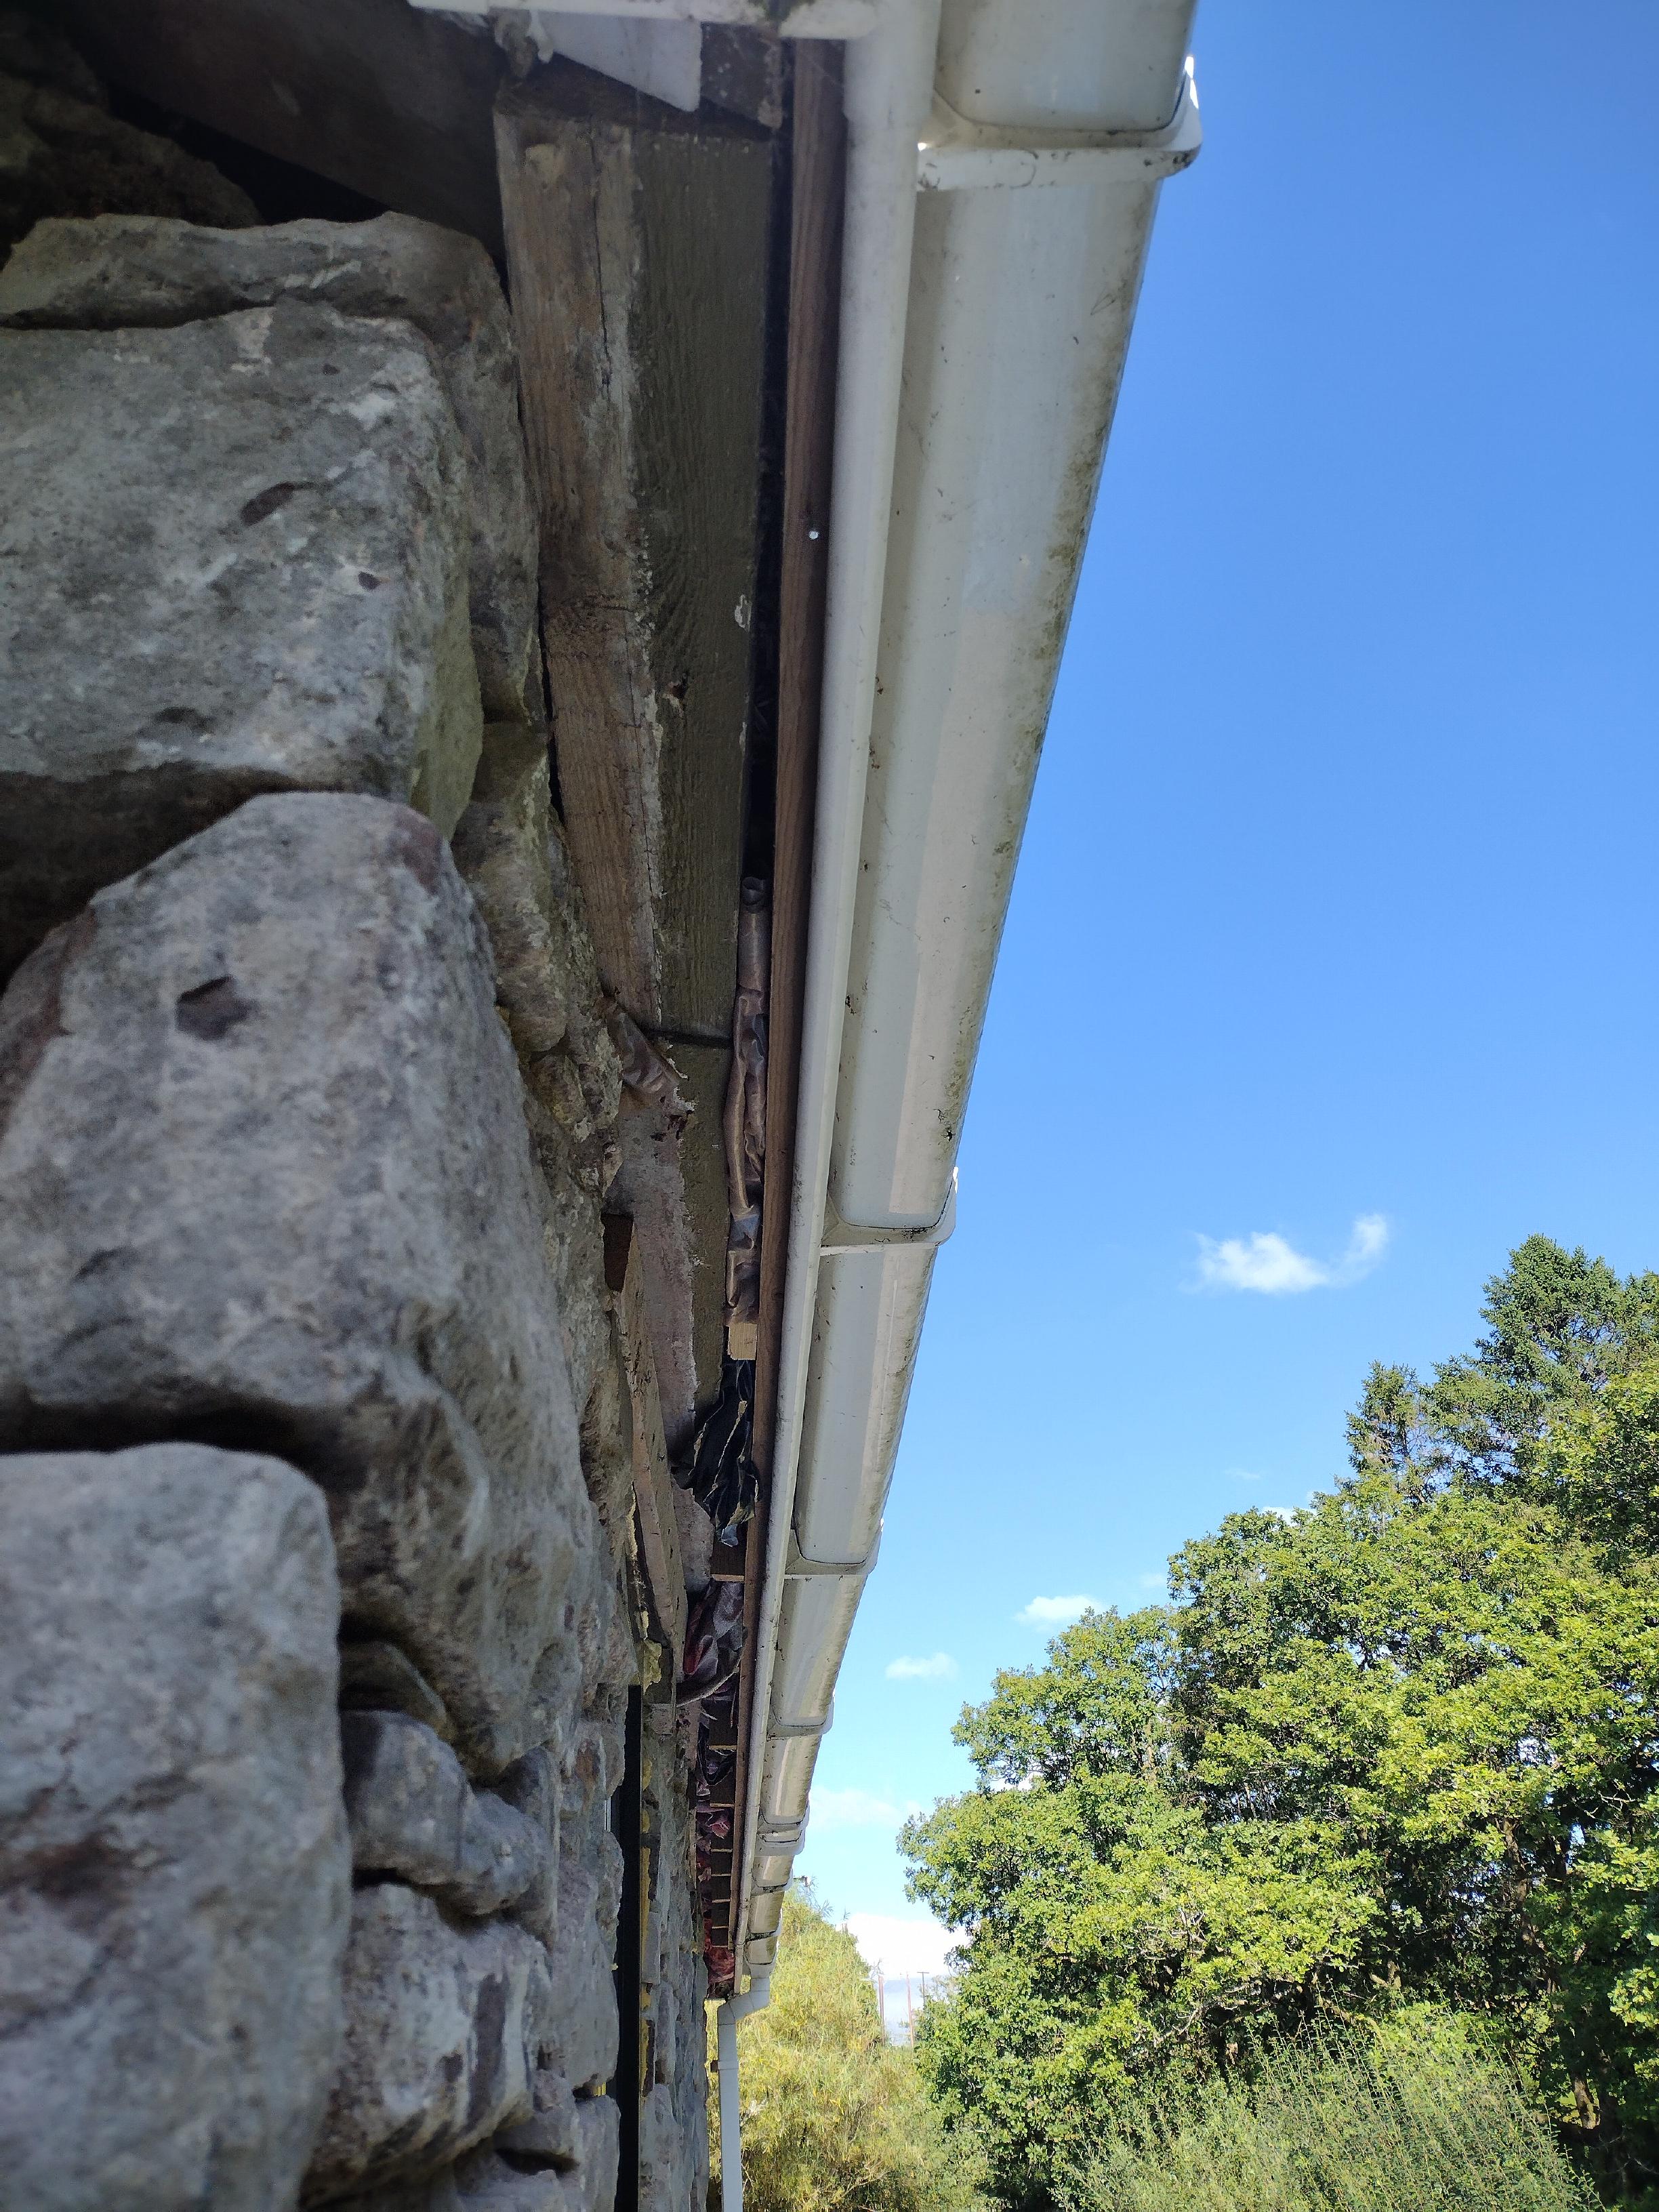
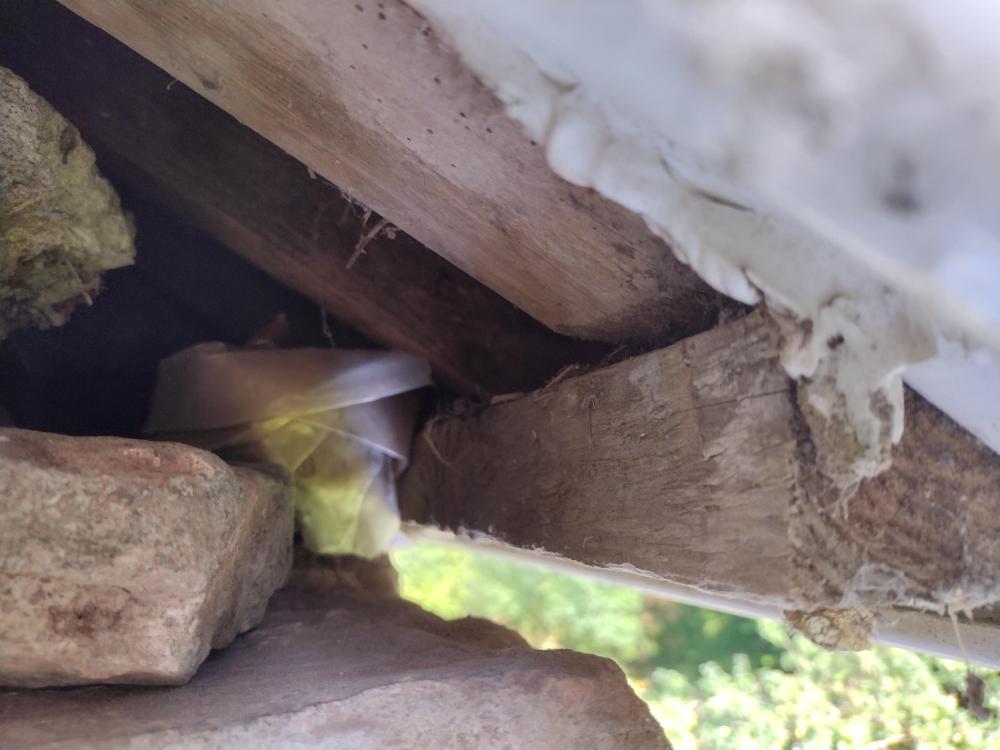
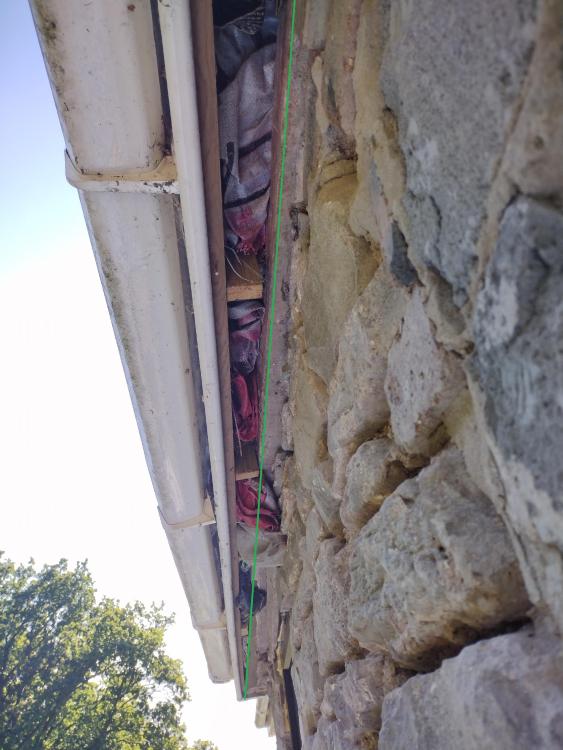
Hi again Apologies for another question so soon... Having removed the concrete render from the back of our house, I've also removed the soffits which I'll replace after repointing. I don't know much about building, but I presume the wood on top of the wall is the wall plate? On the right hand side, this seems to be as I would expect - firmly on top of the wall, leaving space in front for ventilation, with small pieces of wood to attach the soffits to. But as it goes along the wall, the wall plate gets further and further away. By the time it reaches the left hand side, it is no longer on the wall at all! Aside from potentially being wrong, the other problem is that I plan to install ventilated soffits. In that area they won't be very effective because the timber pretty much spans the gap the soffit will span, so not much air would get passed. Bit stuck as to whether I am over worrying, it is totally wrong and needs remedial action, or something in between. Any help would be fantastic. The first photo shows the full length. The second shows only half the length, looking in the opposite direction, and starting from where the wall plate/timber starts to move away from the wall top. I've put a green line on to help show the timber edge. The third is a closer look at the timber off the wall. And the fourth is the same, but looking from behind). Please ignore all the plastic bags etc which have just been put in to prevent unwanted visitors. Many thanks

-
Thanks Mark. No, it is not leaking, and has not leaked since the flue was taken down and slated over.
-
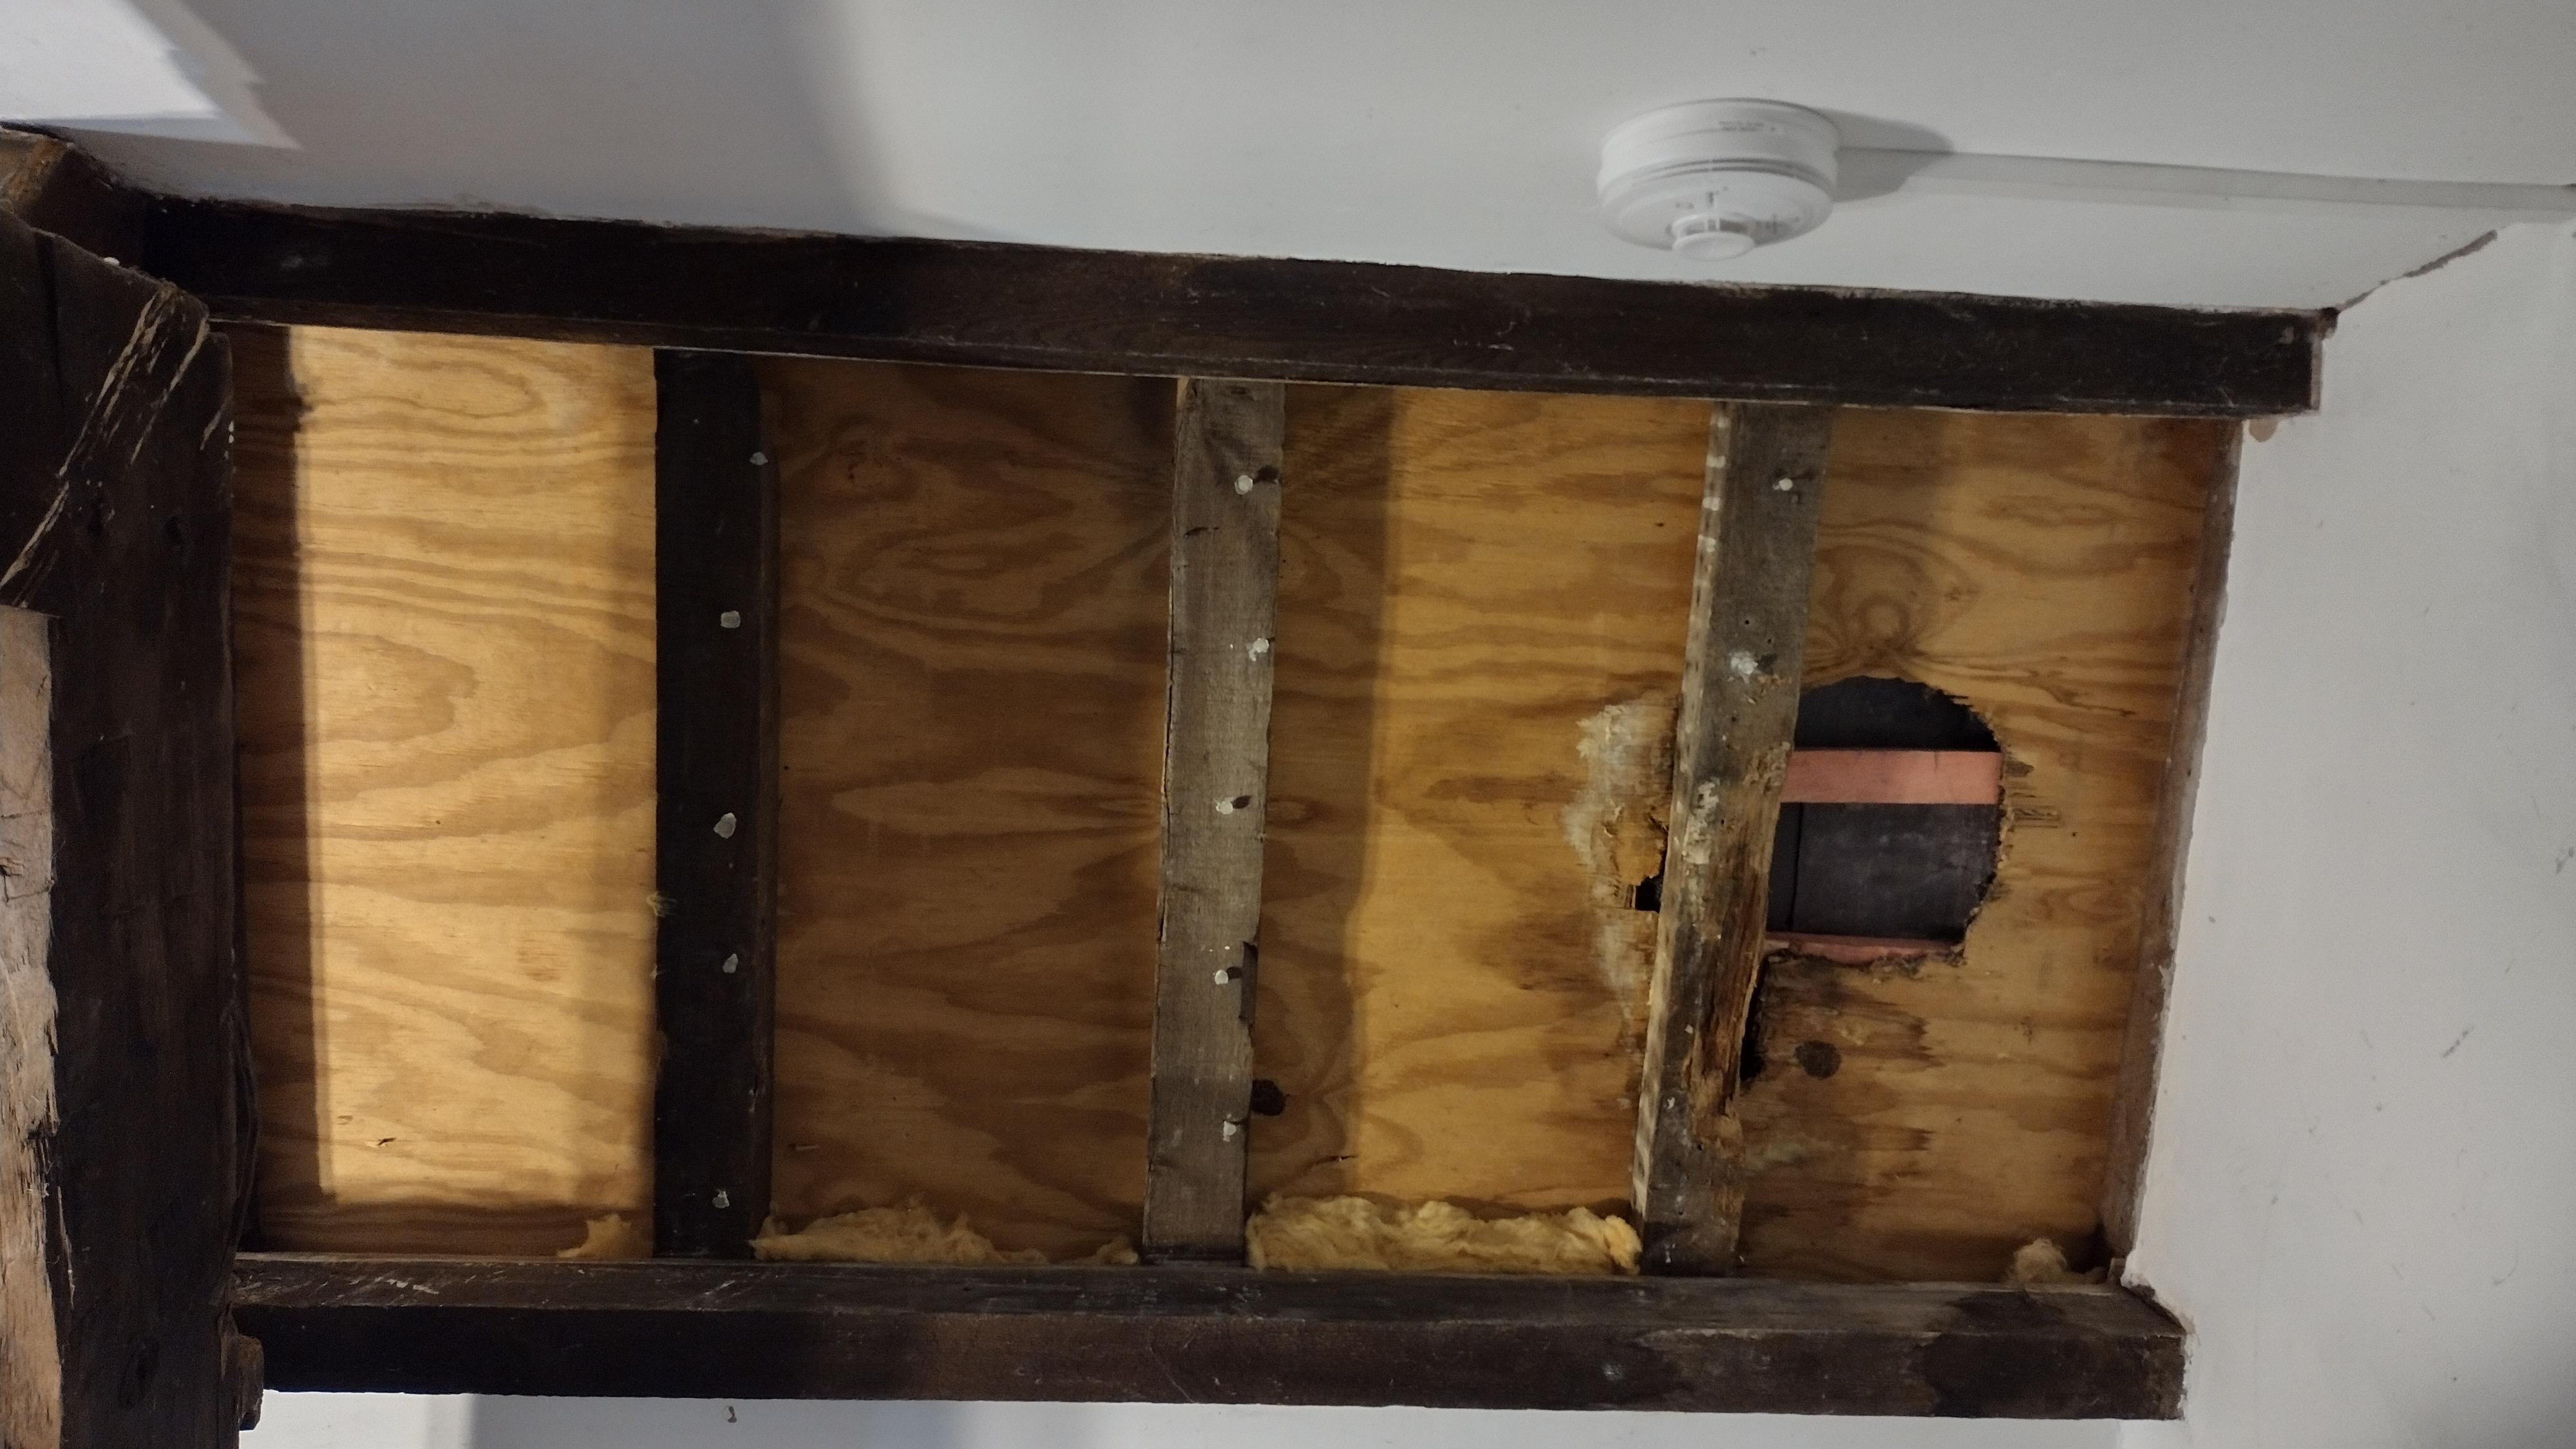
Hi I've got a repair to do where an old wood stove flue used to go through the roof, but has since been taken down. Water had been leaking through and caused some rot to the rafter, which I will "sister" with some new timber. What I don't know is whether it would be a good idea to repair/replace the sarking board, and the felt on top of it? If so, is it possible to do what needs doing from inside the room? Or is the only option to strip back slates and repair from above. Would prefer to do it from inside if at all possible. Any opinions and suggestions on how best to approach this would be most appreciated. Many thanks

-
Hi there Sorry for not coming back to you sooner, I've been away... No, the sink did not have holes for the little round lugs. These brackets are designed for bathroom sinks/basins, on which everything lines up well. I decided in the end to saw off the lugs, leaving a nice flat surface. The brackets were attached to the wall with the largest screws I could use that would fit through the holes. And the sink is just sat on the brackets. The plan was to silicone the back of it to the wall for additional stability but that never happened. Seems pretty sturdy as it is, on account of the weight. Might still do it one day though... Good luck and sorry if you've already done it by now!
-
All good and working great! Really helpful for removing the dust and loose debris in the deeper and harder to reach areas. So I'm giving the wall a good brush down first and then following up with the blower for one last clean up. Better than doing it all with the blower, not least of all with today's energy prices! Many thanks
-
Thank you for the replies. Now about to put it back together to see how it does... Cheers
-
One other question please... The long black tubey bit comes in two sections. The machine says that they must be used together, but for what I have planned (blowing out the dust between stones) it would be a lot easier to use it with just one of the pieces attached, so that it is half the length. Can anyone think of a reason why that would be a bad idea? Many thanks
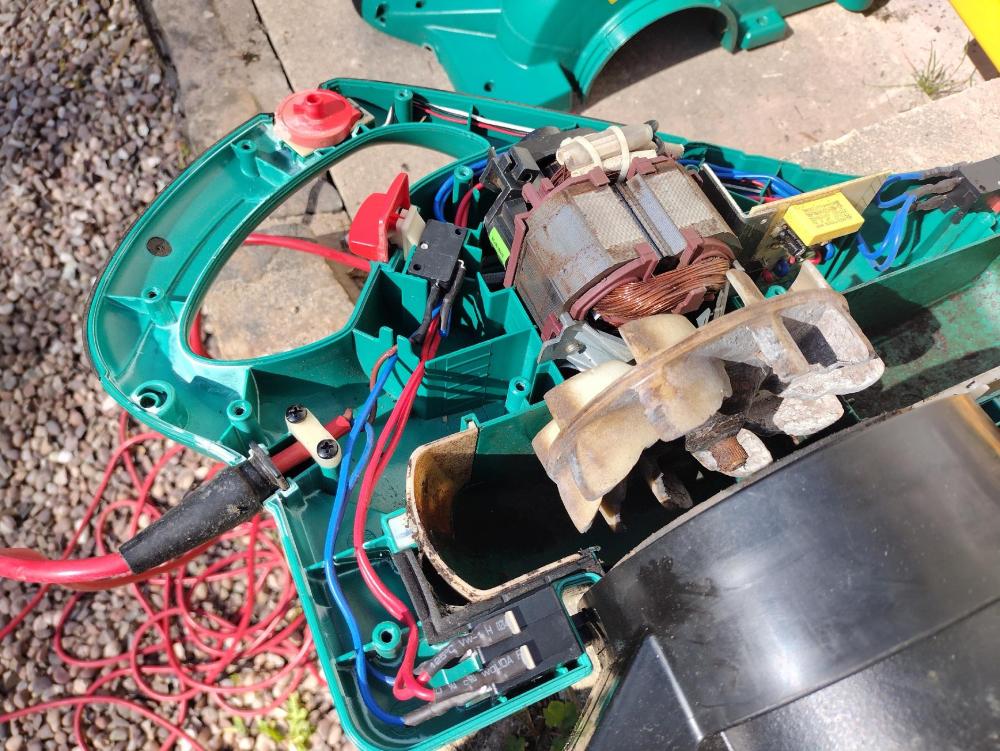
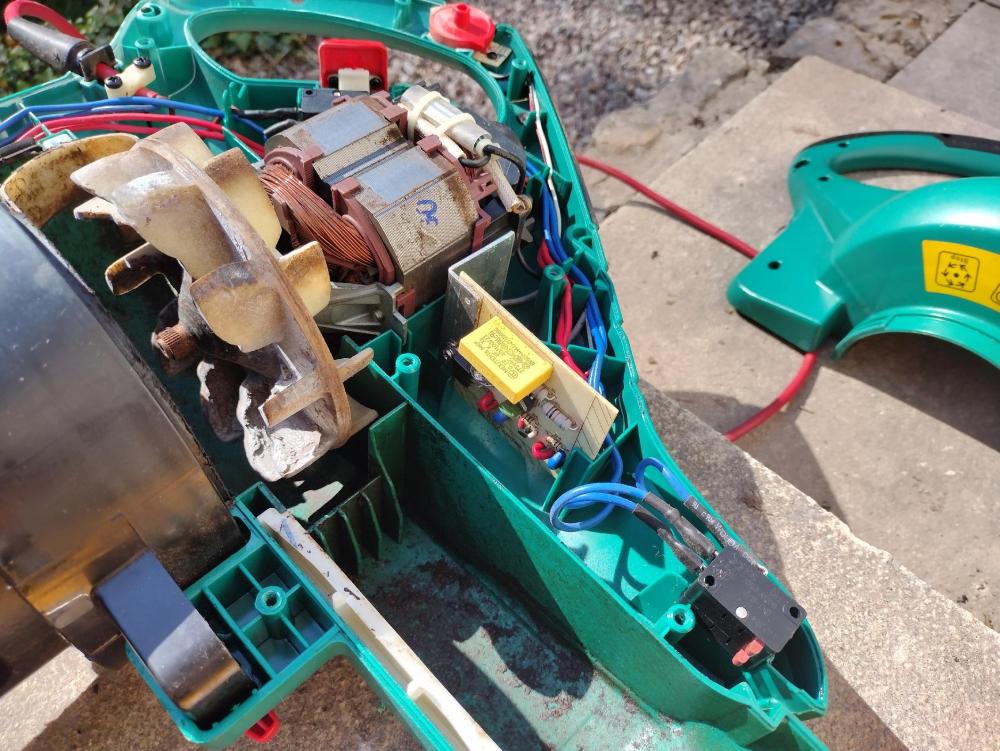
-
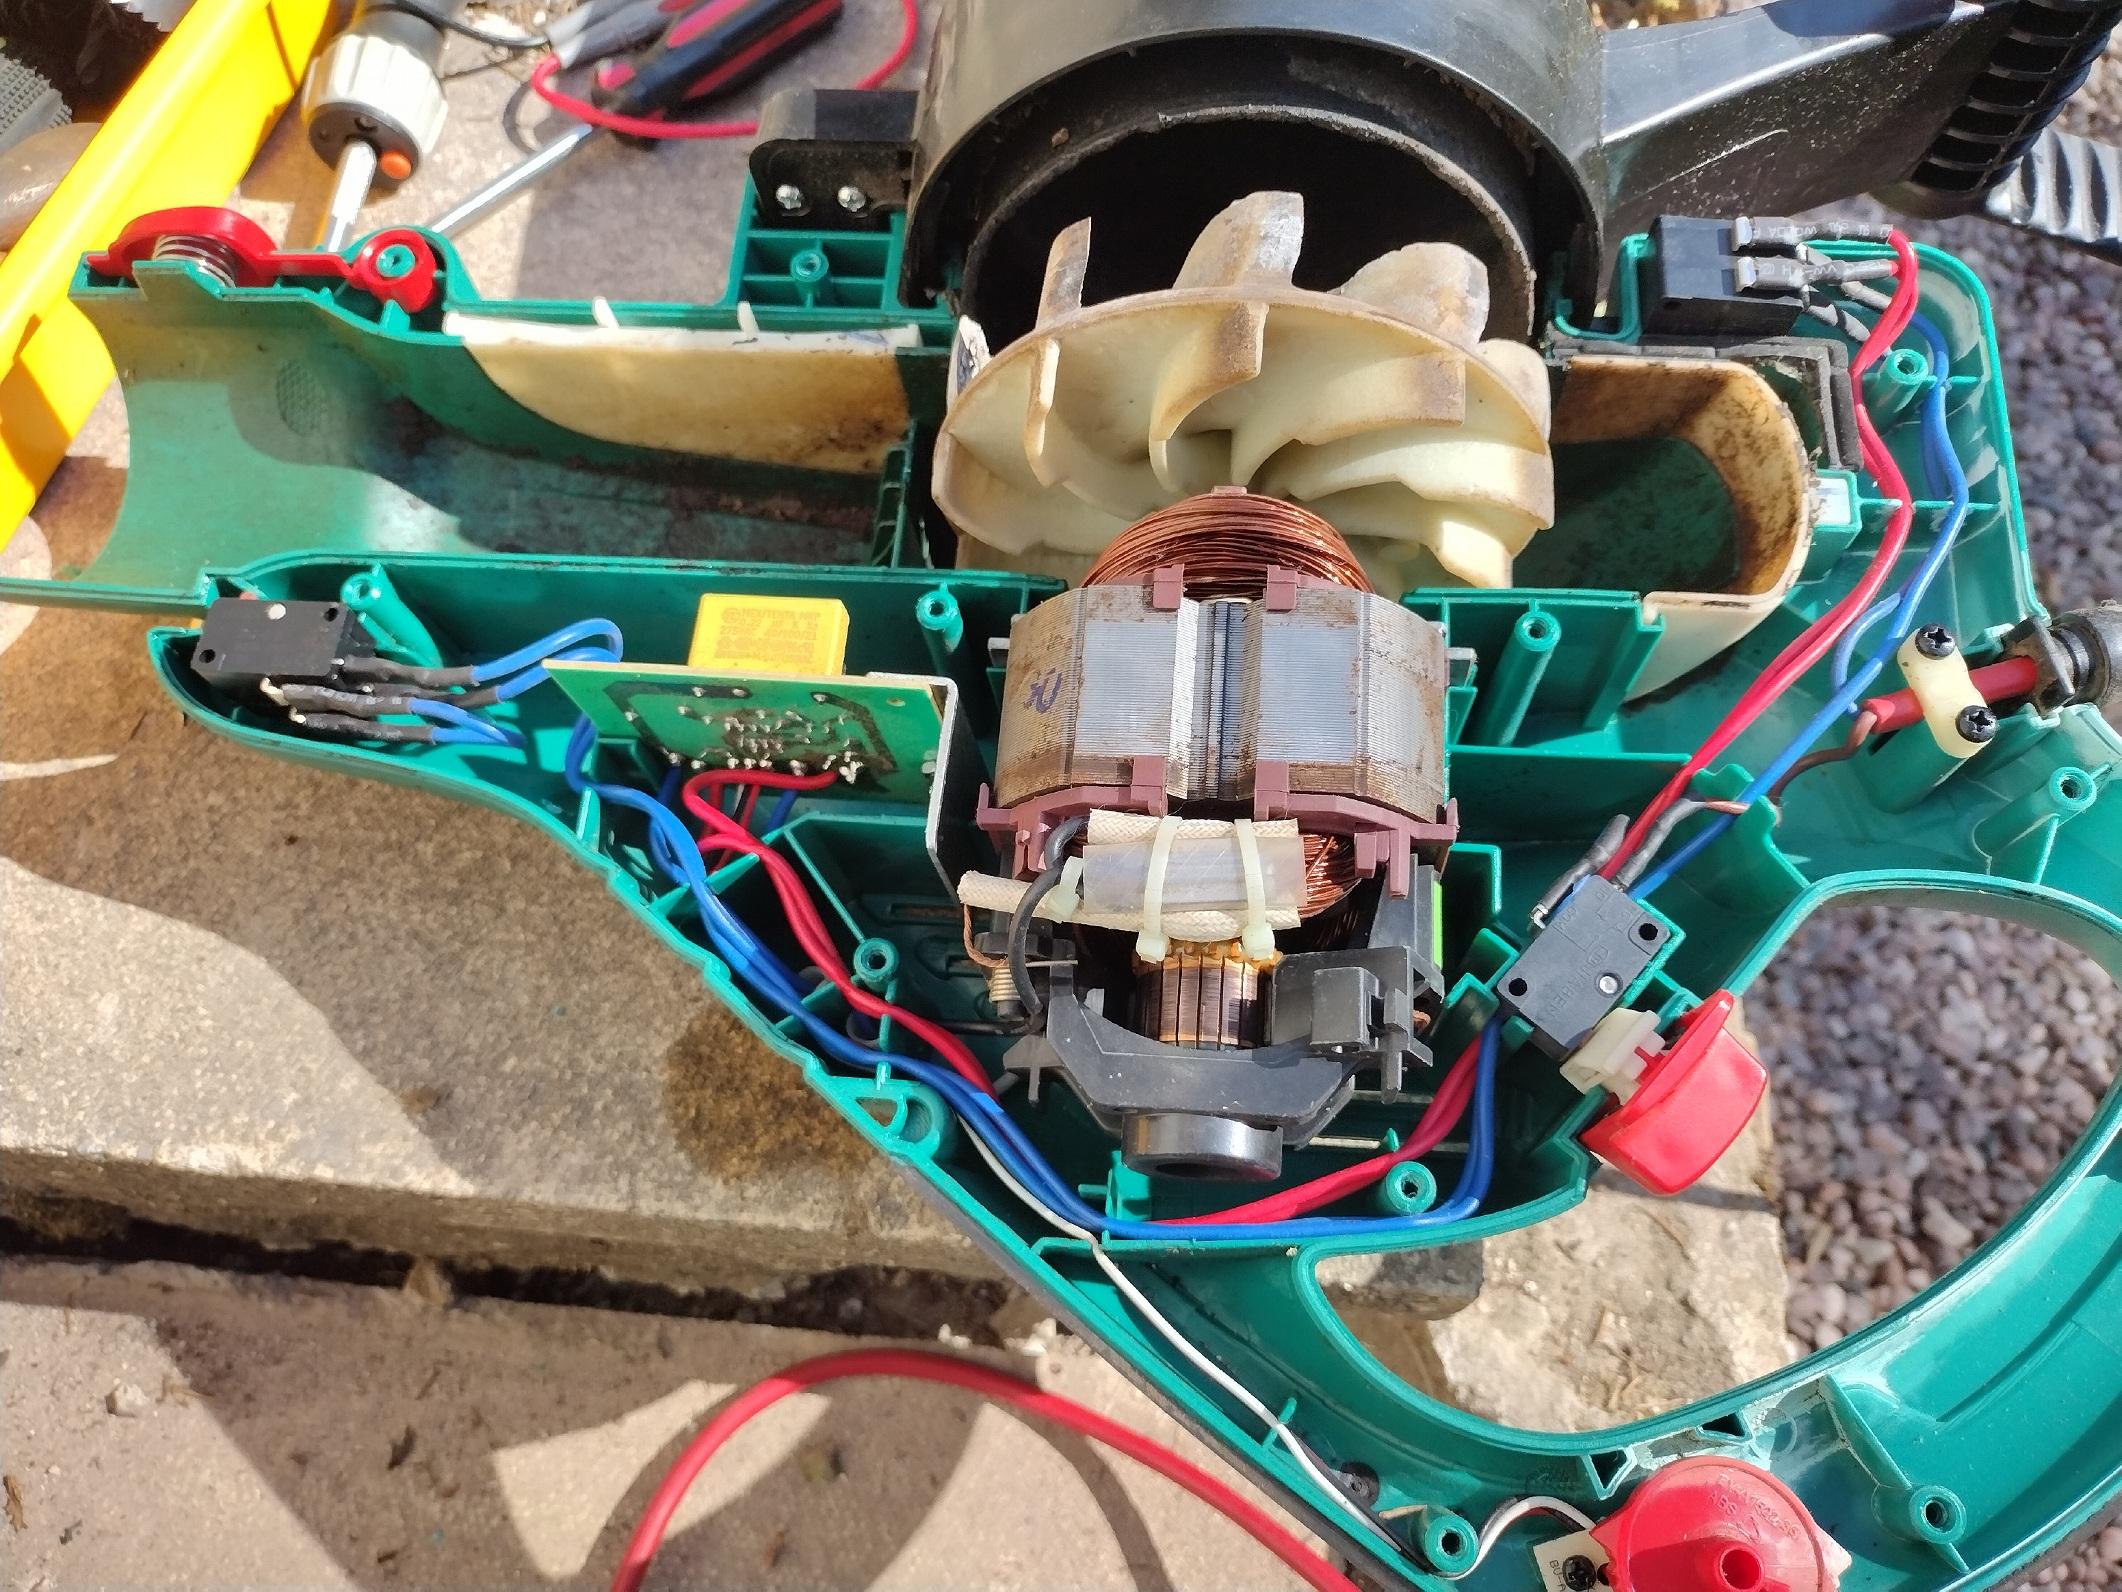
Hi Many thanks for the replies. There was no humming noise that I remember hearing. I wasn't listening out for it though, and I do have tinnitus, so there's every chance I missed it! I've had the machine apart this morning and checked at various points for continuity with a mutlimeter, as suggested. All seemed well to begin with, and I think it has led me to “the problem”. I’ve put that in inverted commas because if it is the reason for no power, then it isn’t so much a problem but more a reminder to read the manual!!! From what I can tell, there is a double microswitch where the bag connects. So without the bag connected = no power. As I was planning to use it as a blower rather than a sucker, I didn’t think I would need to connect the bag, and certainly didn’t think it would prevent the machine starting up. Of course I might be wrong on this, but there’s no continuity in the latter stages of the wiring until the microswitches are pressed. I’ll put the machine back together a little later and see if I’m right. In the meantime, if anyone can confirm that what I’ve described sounds likely (or unlikely) then please chime in so I can carry out any further checks while still apart. I’ll post a photo or three of the innards for reference. Sorry to be daft, but aside from the blade piece for mulching the leaves, what else should I try spinning by hand? Can't see anything obvious... This part of the house has old stone walls. We’ve removed the concrete render and pointing, and are now back to the lime pointing. It’s really crumbly and to quite a depth in places. So while I plan to use a brush in the main, I was planning to follow up with the blower to get to the parts other brushes cannot reach. Thanks again

-
Hi They've not been used for two or three years and have been stored in a shed. They worked fine when last used. I've checked the fuses and they're fine. Is there anything else obvious I can check or is it time for a new one? Although saying that, I plan to use it to blow out all of the loose pointing in my walls before a re-point, so if there's something better to use then I'm all ears. An air compressor comes to mind, and perhaps would be useful for other stuff. But I don't know the first thing about them and wouldn't know where to start, which made me think repairing what I have or getting a secondhand replacement might be the cheapest / easiest option. Cheers
-
I can totally see the sense in that. But obviously we need to address the soffits issue as soon as the pointing is done. So perhaps we should look to make the soffits good and ventilated in whatever way we can manage, and then do the whole thing properly at re-roof time (whenever that may be?). I should add - there will be a scaffold up for the repointing on the back of the house (where the gutters are). The gable end section where we will need barge boards and standard (unventilated) soffits will be done off roof ladders. Cheers
-
Thanks @TonyT When you say at the same time, do you mean? At the same time as what please? Ta
-
Hi folks Hope you're all enjoying the nice weather. I've almost finished hacking off the concrete render from our stone building. We'll be having it re-pointed, but not rendered, and as such the soffits are no longer wide enough. Plus, they need to be the ventilated type on some sections. So once the pointing is finished, the plan is to put in new soffits to the correct width and with ventilation slots where needed. While I'm at it, I might change or at least paint the fascias and barge boards, and I hope to put in deeper/better gutters. The thing is, at some point in the future we are likely to need a re-roof. It could be soon, it could be a few years time. Would it be daft to put in new soffits/fascias/gutters and THEN have a re-roof? Or are they pretty separate things? Is there a usual order of events? Many thanks
-
Opinions please on several aspects of new windows installation
Oxbow16 replied to Oxbow16's topic in Windows & Glazing
No, it was a wooden window and cill. Thanks for the reply -
Opinions please on several aspects of new windows installation
Oxbow16 replied to Oxbow16's topic in Windows & Glazing

-
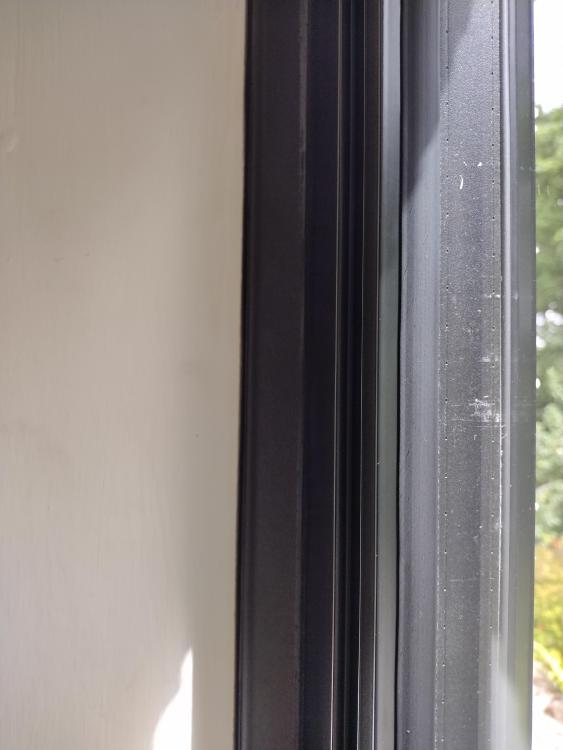
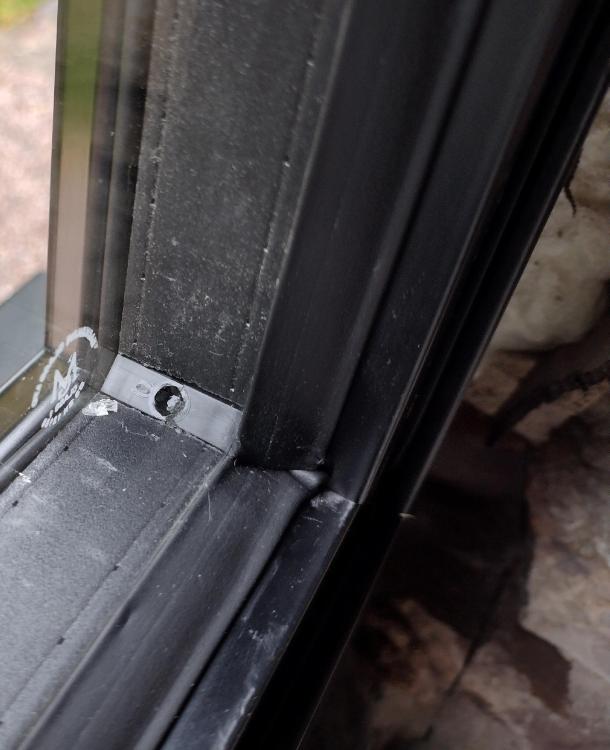
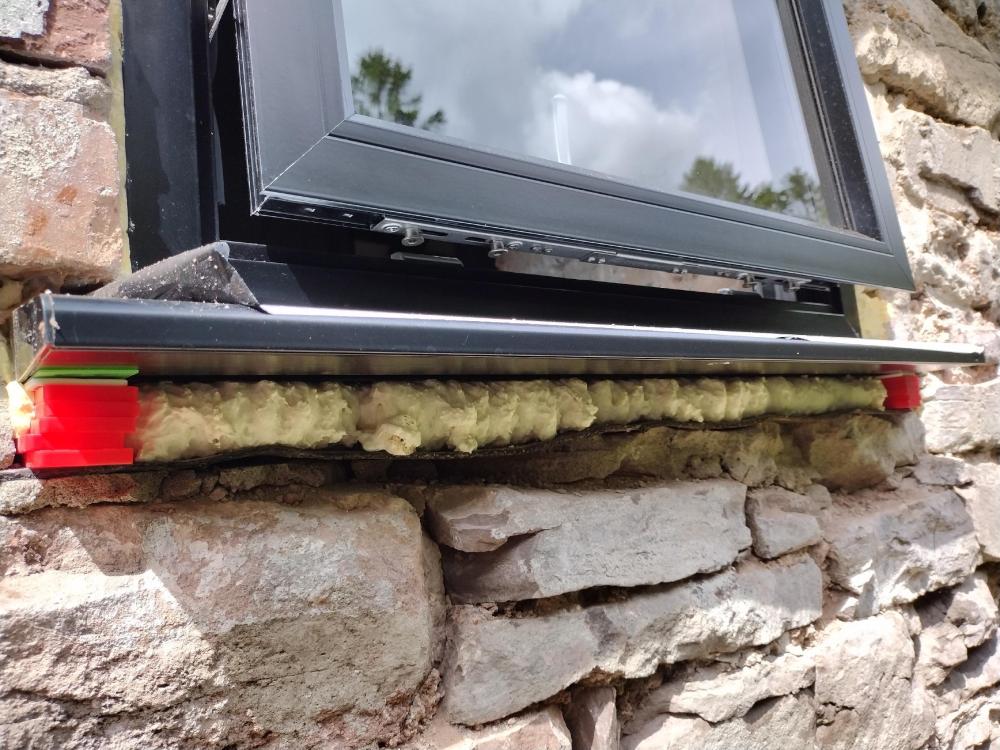
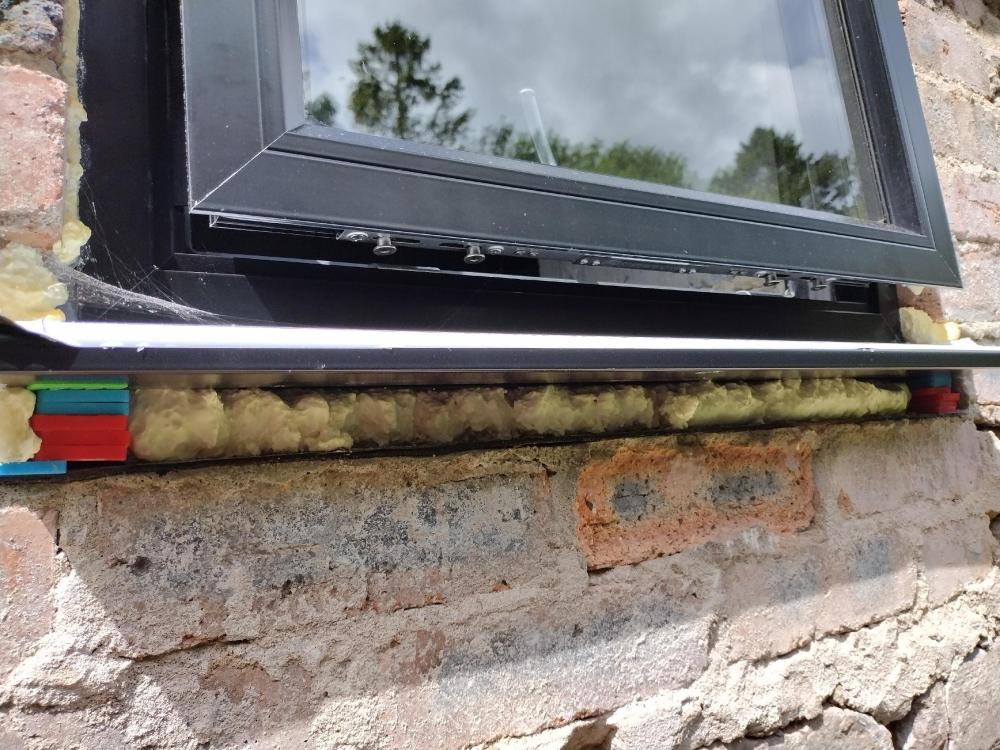
Hi I recently had some new aluminium windows fitted and there’s a few things I wanted to check with you guys as to whether they look ok / normal, so i know whether I need to take them up with the installers. 1. Two windows have a lot of expanding foam and frame packers underneath… Is it a usual amount? 2. The frame fixings on some windows are quite close to the frame corners, the nearest being 50mm. I’ve read in the past they shouldn’t be too close. Why shouldn’t they be and what are the potential problems if they are? 3. Also on frame fixings, is there a specific part of the frame that should be used? Should they go through the aluminium or the thermal break, or either? 4. Is it normal to have dust and specs of dirt inside the glazed units, on the spacer bars, but possibly on the glass itself? 5. And is it possible to confirm from photos whether these are warm edge spacer bars? Also curious as to what the 45 degree joins are with the holes in them? Photos below and happy to take more. Many thanks
-
Scaffold Boards - are these ok and safe to use?
Oxbow16 replied to Oxbow16's topic in Building Materials
Great, that'a all encouraging to hear - many thanks. Yep, we've got one of those too! But he's happy to change that one. Cheers -
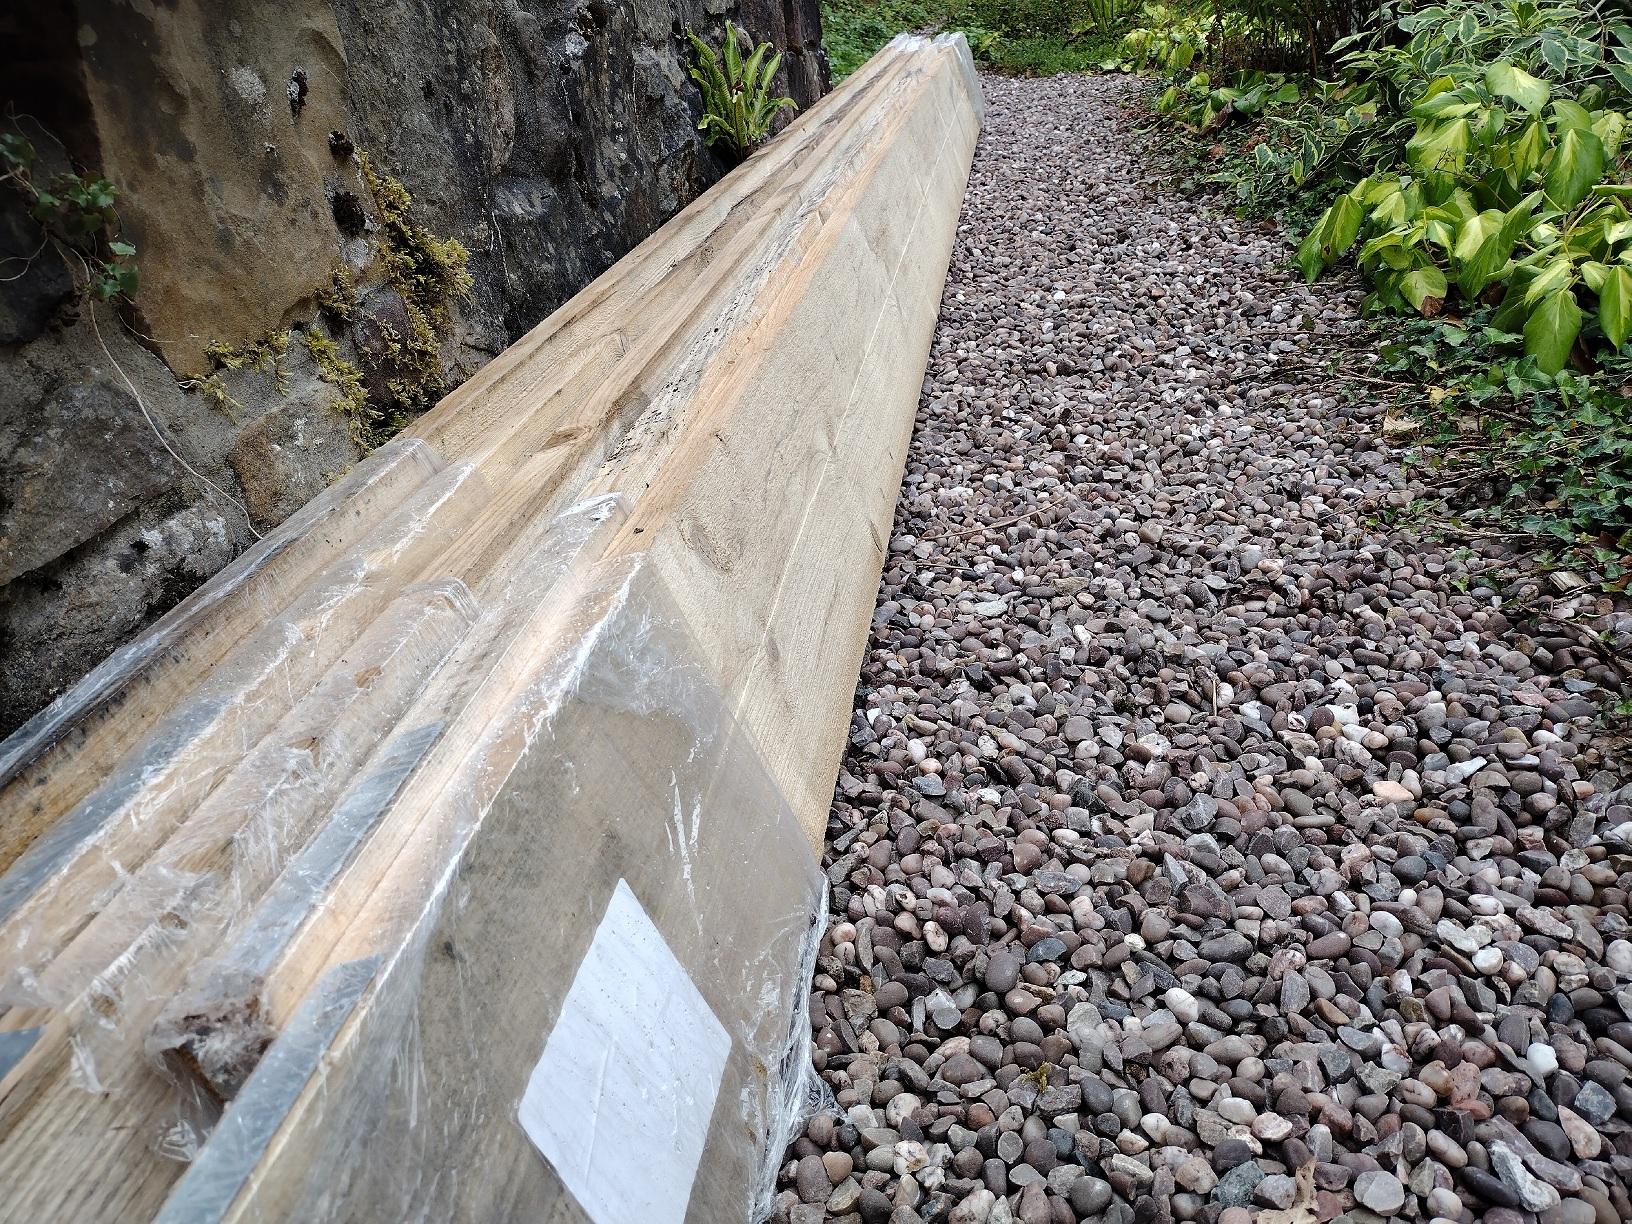
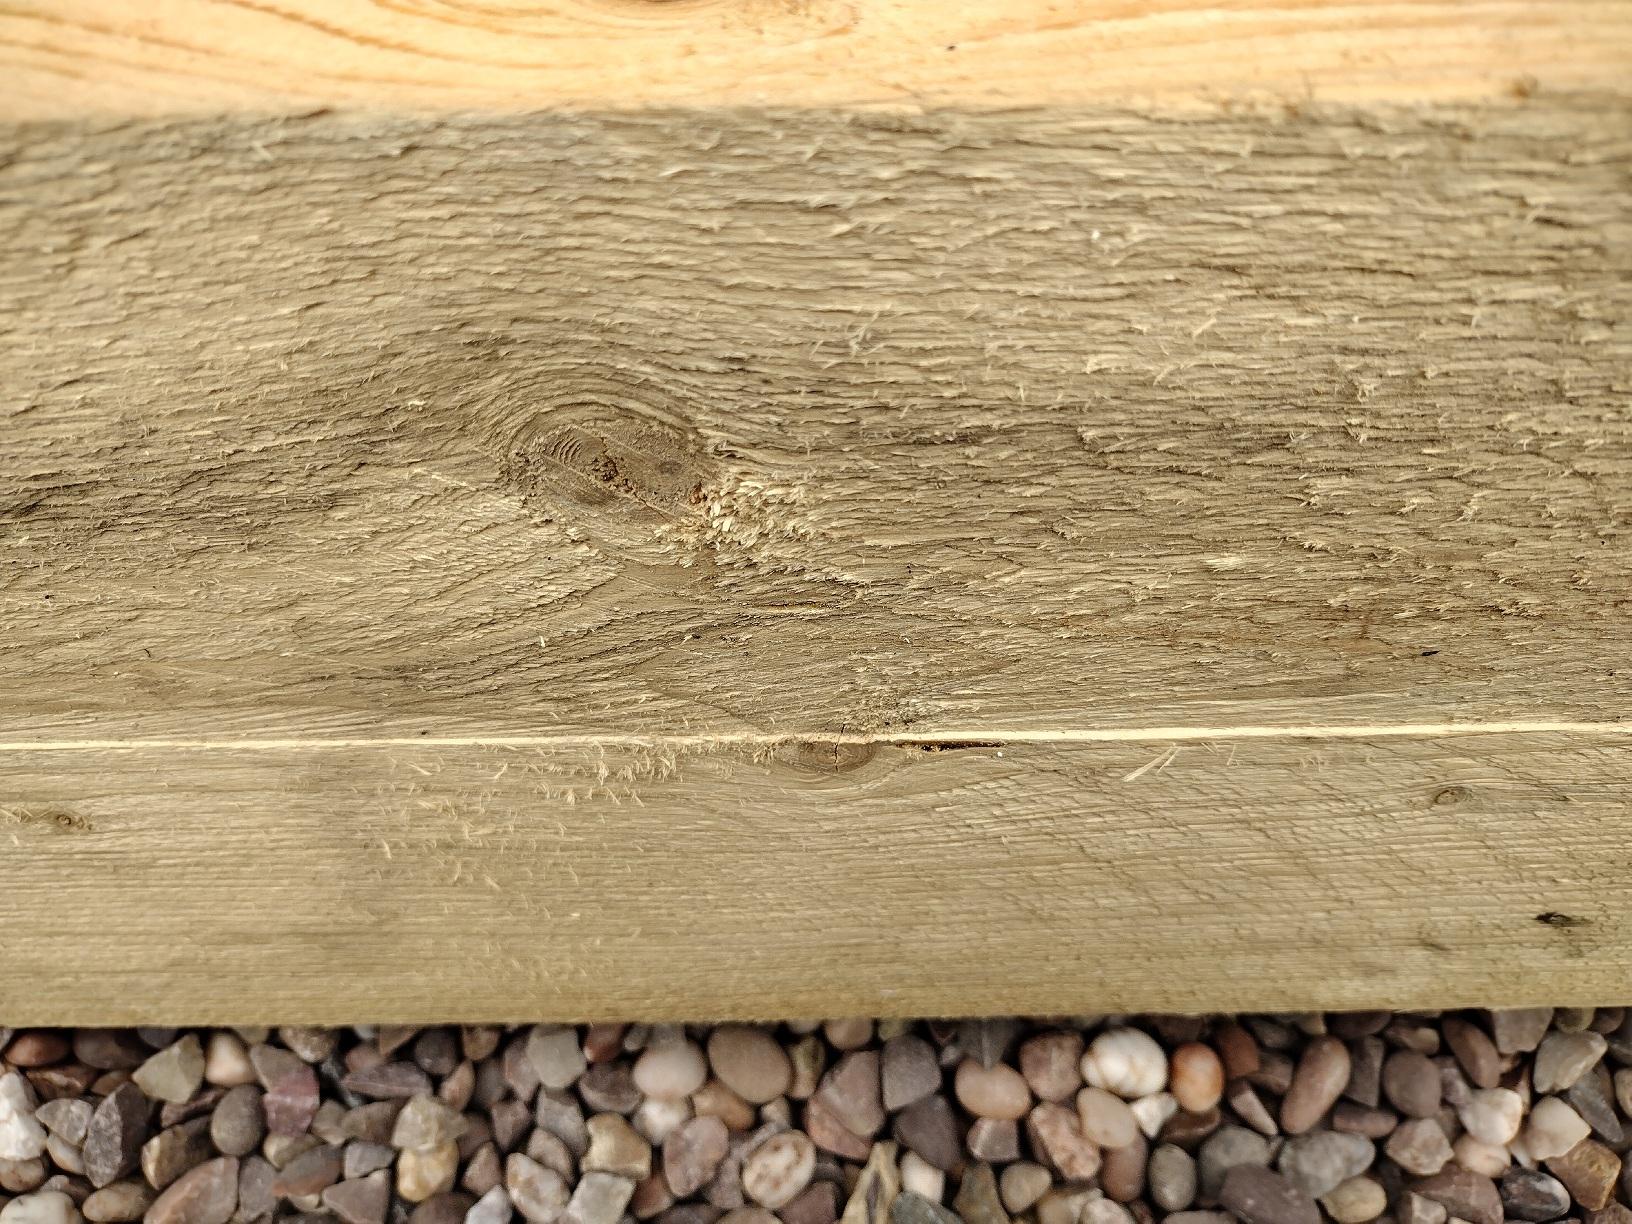
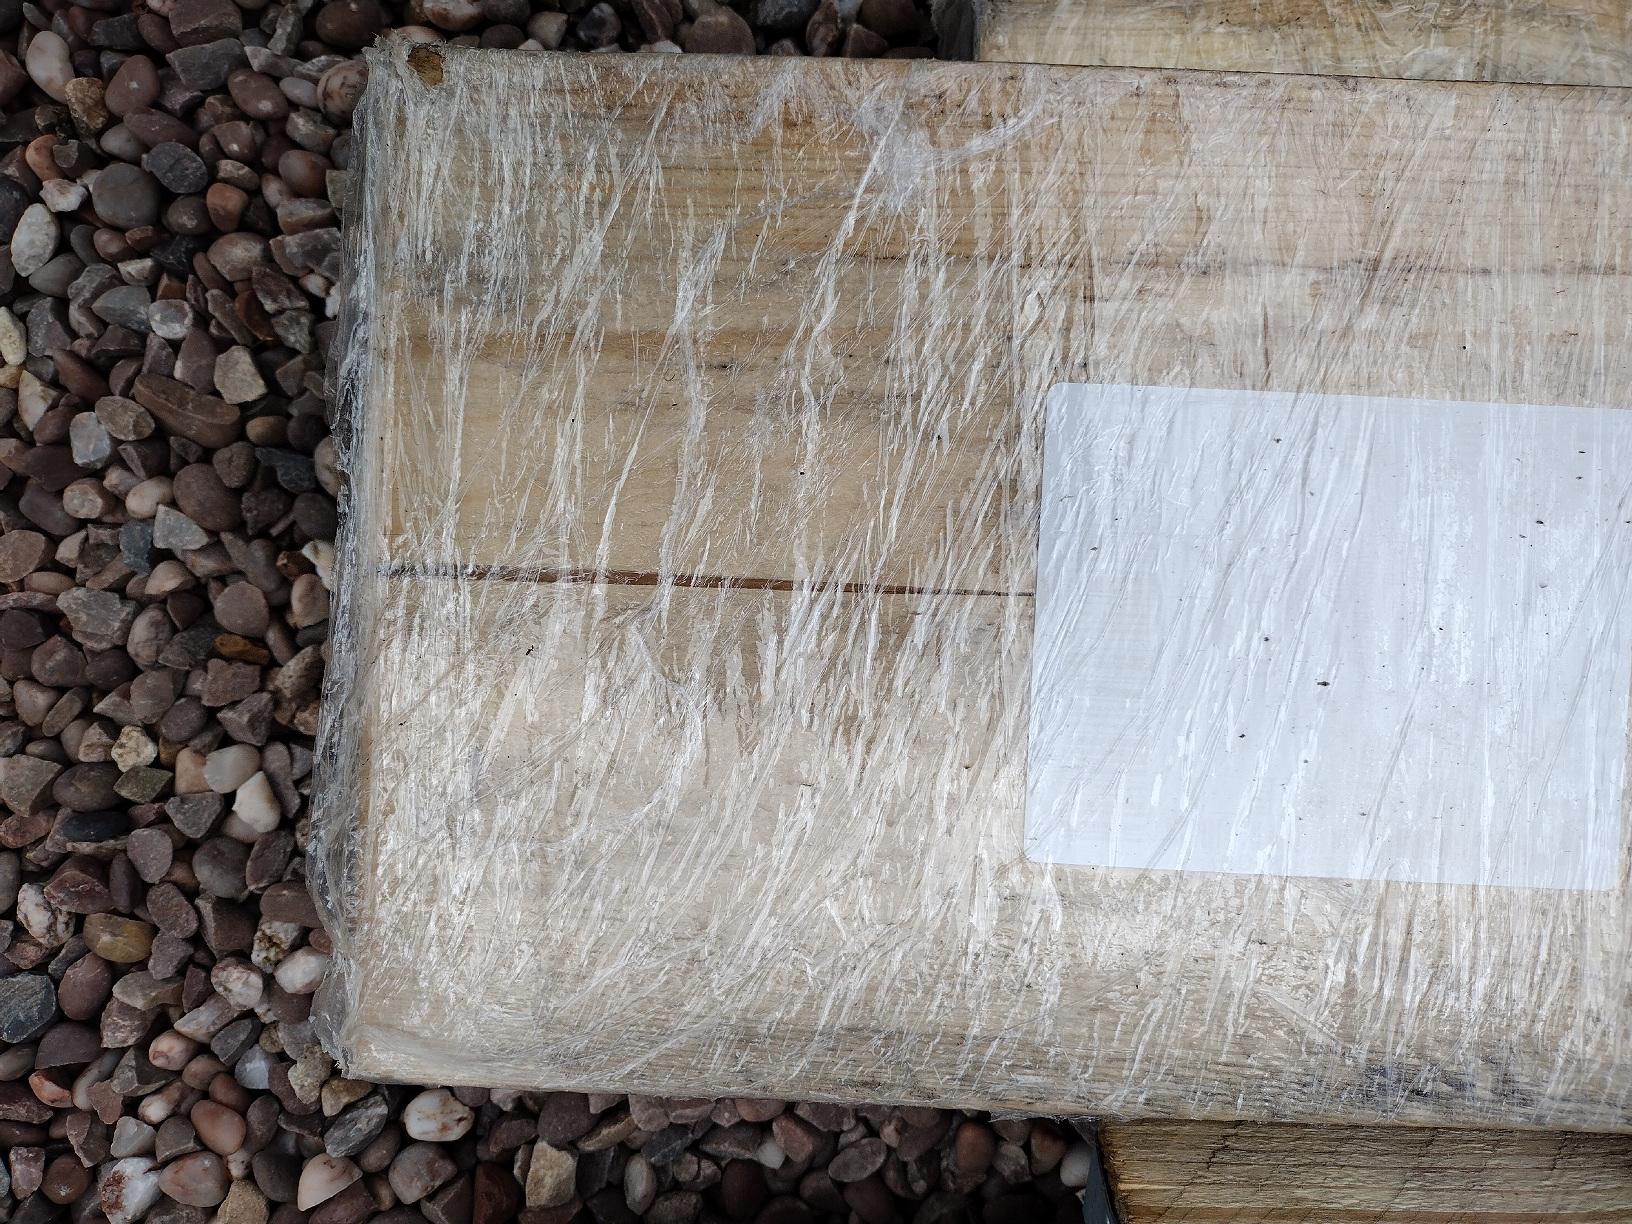
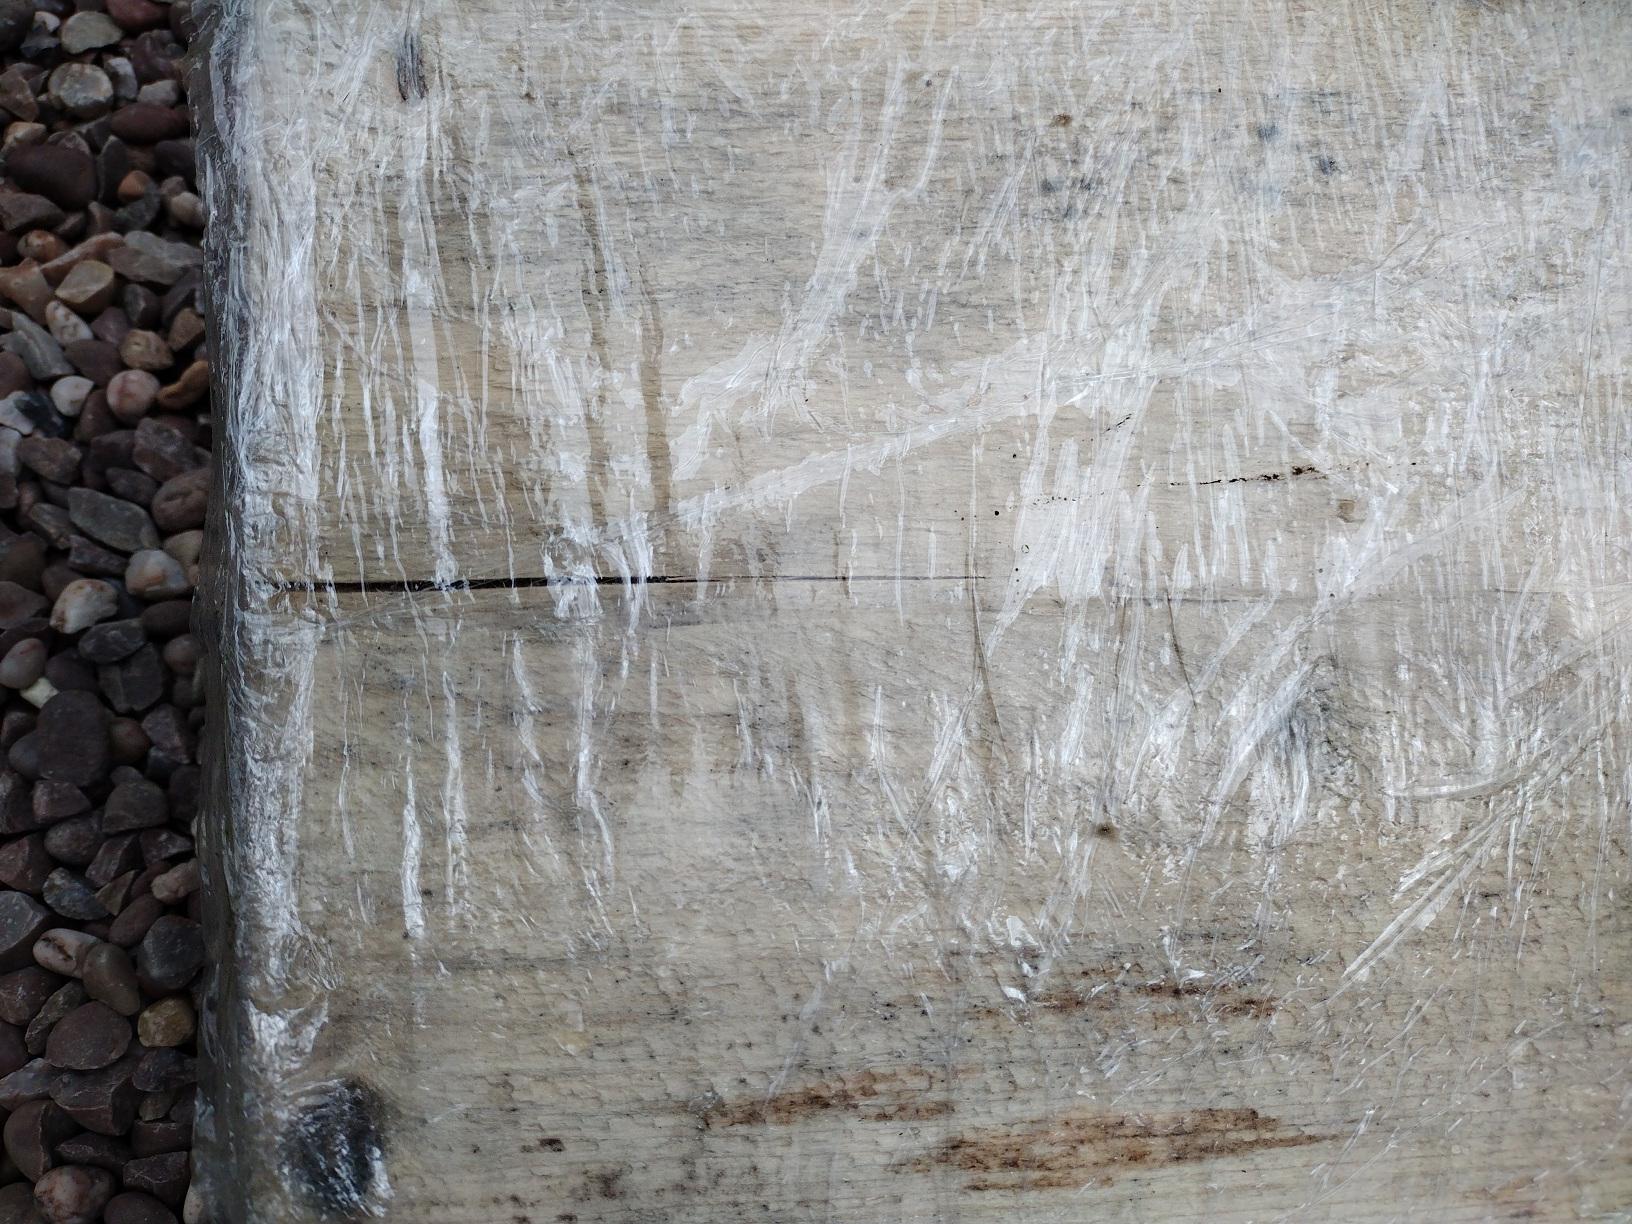
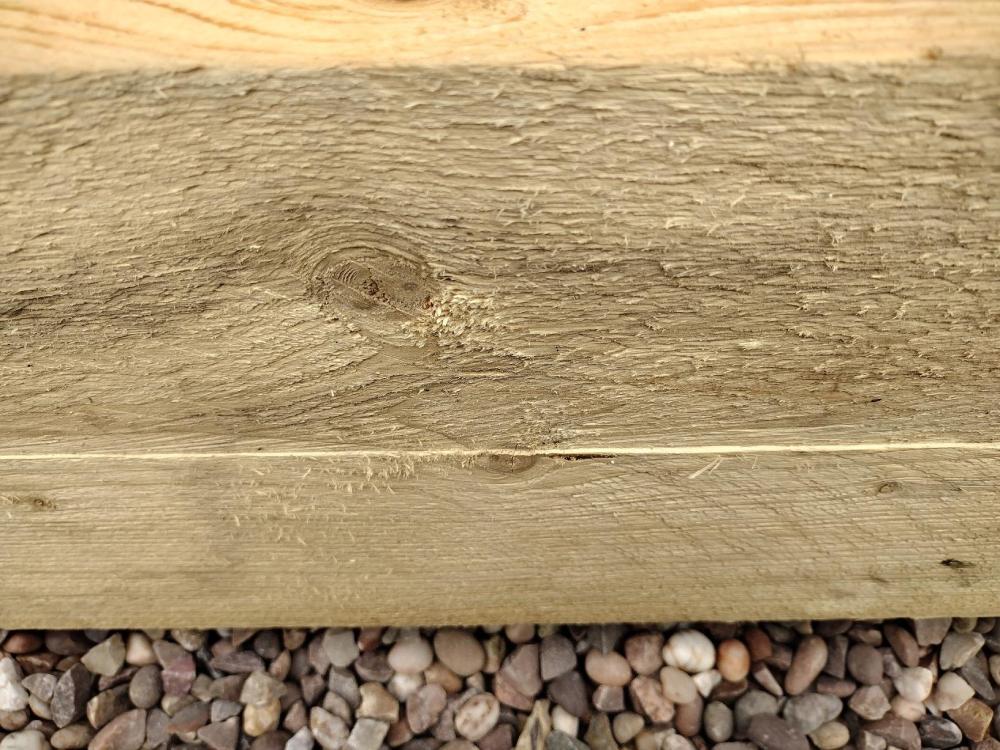
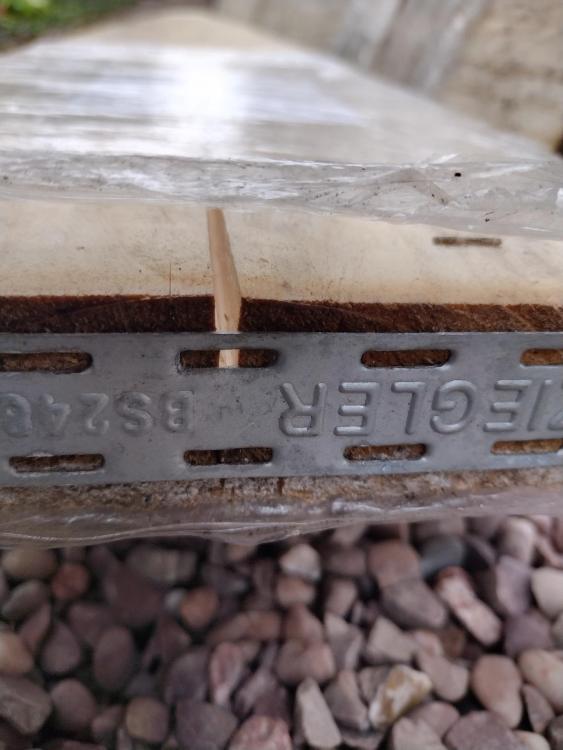
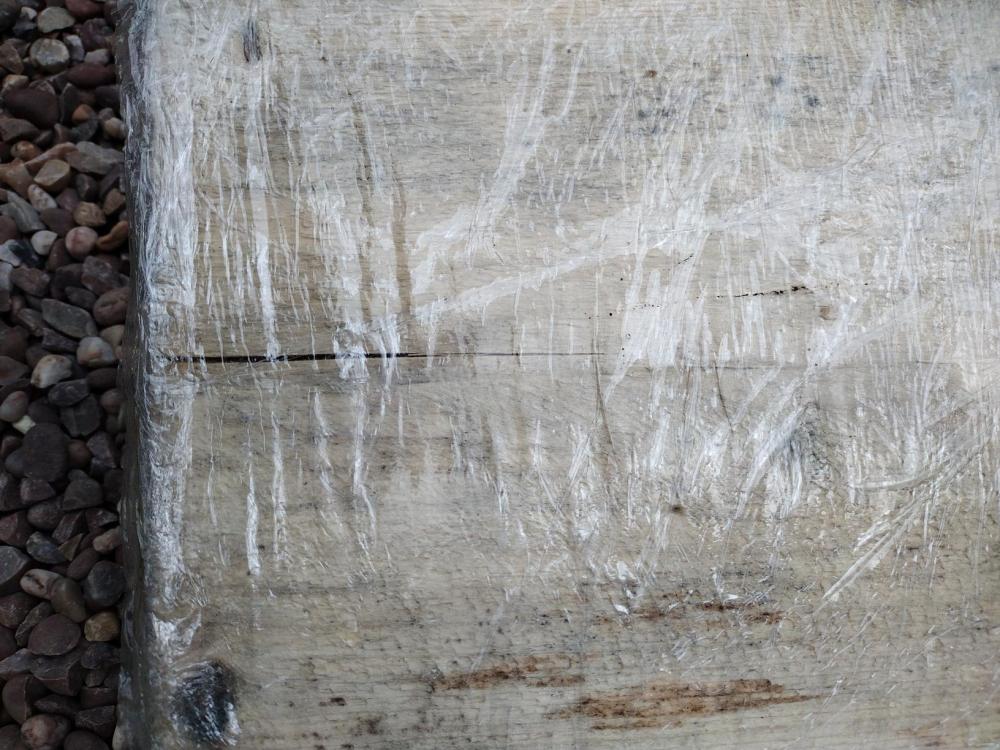
Hi I bought some new old stock scaffold boards. I've never had or used scaff boards before so not sure what is acceptable or cause for concern. One of the boards has a lip along the entire length. A couple of others have a similar lip but it is a lot less pronounced. Curious also as to what causes it? To begin with I thought they must be two separate lengths joined, but on closer inspection that doesn't seem to be the case. Here's a couple of photos of the worse one: One of the other boards has a more severe but much short split at one end. Here's some photos of that one, top middle and underside: Any thoughts most appreciated. Many thanks


-
How much would you say the ladder stops short by on your longer roof? The ladder I'm looking at would be short by about 30cm on my longest roof and I'm not sure how much of a problem that may or may not be when it comes to stepping on and off. Might also mean I would have to be more creative when it comes tying it to the extendable.... Cheers