-
Posts
134 -
Joined
-
Last visited
Everything posted by Delicatedave
-

Suspicious minds
Delicatedave replied to Delicatedave's topic in General Self Build & DIY Discussion
Did you notice the window hits the roof board so won't open more than a few inches ? In fact the floor under that window had almost rotten though from a leaking water tank. -

Suspicious minds
Delicatedave replied to Delicatedave's topic in General Self Build & DIY Discussion
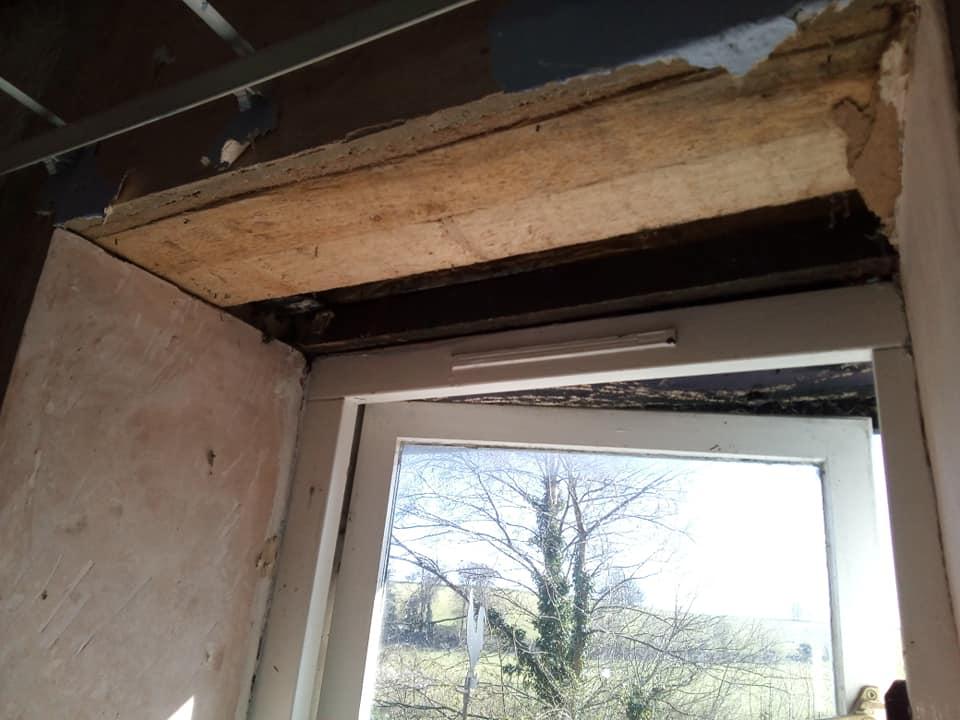
I think what you think are wormworm holes is a wood fibre board that's been plastered over. Above is the loft, the window is only about 600mm wide and the walls either side are about 2ft thick stone. Realisticly it's supporting nothing as nothing would fall down. I suspect it's been there for 15 years as is. What I've now done is water proof the external wall with some flashing roll I had then back filled the whole with the stones and mortar after creating a sort of cage out of wood, then put some more flashing tape accross and screwed some plasterboard over the lot. The inside of that wall and another is being battened, insulated, boarded and skimmed. -
So I'm current renovating out bedroom, we moved in a few months ago. I noticed on one of the window recess top had been nailed hardboard. Well that has to go I thought, I didn't think the would be a big gapping hole behind it! Put my hand up and about ten stones came out about the size of ya hand.
-
It's a case of preparing wood for the surrounding it's going to be used in. I had MDF board in my old house for years with no issues and we had tiled floors. We didn't use a mope, we used one of the squeegy mope things and sprayed cleaner on the tiles and wiped it that way. If we were going to drench the floor in water with an old fashion mop I certainly would have protected the MDF better than I did.
-
YES H = HIGH & M = Medium What I meant by sealing the boards was once they are down using sealant along the bottom to stop water seeping under them and resting in any dips. If you are mopining the floor it's bound to get under the board if you don't seal them. MDF & water result the same as bread & water. Another thing you could do it give them a coat of yacyt varnish, if they are unprimed do that first 50/50 solution so it penetrates deeper.
-
How does the MDF get blow with water, do you not seal the bottom with waterproof sealant? I do that just to get the bugs out. Suspect HDF would just take a little longer if put down the same way. The is always plastic.
-
As a french polisher I would suggest clean them as you like - you can see them I can - but the option are chemical, sanding/blasting or scraping. As for finish that depends on the look you want, a weak water based stain like Van Dyke is nice. Then wax if you want them to age or a 50-50 clear varnish or button polish then a wax. Whatever you do don't pledge them. If you want a deeper texture think about wire brushing them along the grain. Another option if you do that is lime wax. All very nice finishes imo.
-

Quick Question - Switch Power Supply
Delicatedave replied to Delicatedave's topic in Electrics - Other
Actually it's The Very Vulnerable Dave for the next 3 months at least. ? -

Quick Question - Switch Power Supply
Delicatedave replied to Delicatedave's topic in Electrics - Other
Yes, as I said silly question but I've seen so many with use twin lighting cable. Just I have one handy but I shell resist the temptation and use an old PC power cable and plug it in. -
Do I need to use an earth in this or can I use the old supply from the lighting for the 240v input? Sorry it's one of the question you feel you know the answer.
-

A leak in a lockdown - help me remove these radiators
Delicatedave replied to Roz's topic in Central Heating (Radiators)
Funny enough I'm having a similar problem, not rads just old pipes I need to remove. Been my carry on plumbing here what with first the stop value locked up so could cut of the water in the house, then finding the one outside and discovering the tap was more than an arms length down, then more or less guessing which 2 of 3 pipes I could remove, tapping the end of the other. Then then I could find either of the 2 pipe cutters I have and the hack saw broke. Ended up using a the jig saw but only had a worn out wood blade - very very churky if you are interested. Did 3 cuts with that before it snapped so still need to cut the pipes the loft before I can remove them. Order in for more jigsaw blades from Amazon but even then 6 out the last 8 orders from them have gone elsewhere ? Fun & games, good luck mate. -
We moved in in Oct, cleared the loft Nov, it's March and if I open the loft hatch for a few hours the bedroom window sill will have flies tried to get out. Don't have clue where they are in the loft, it's be vacuumed to to bottom. Don't want to use chemicals so hoping it'll fade away.
-
I tell what is a great supply of decent timber, the second hand furniture market. Even old kitchen doors as long as they are solid. I've just cut a strip of oak from a kitchen door to use as trim for our new stable door. The edge where the top and bottom door joins lets in rain if you don't put an edge on the top door. This was ideal, it even had a nice routed edge ? I was thinking the rounding frame of an oak kitchen door is idea for what you want.
-

Might need filling that!
Delicatedave replied to Delicatedave's topic in General Self Build & DIY Discussion
Didn't have much option of putting boards up. The rafters wouldn't hold boards so it was boards and new rafters or fix it that way. This ended up being very cheap too as DIY goes. -

Might need filling that!
Delicatedave replied to Delicatedave's topic in General Self Build & DIY Discussion
To get to where we could start that we had to remove a emersion heater and all the tanks inc the one in the loft ? We don't intend moving again and I'm very traditional with lots of time I didn't think I would have 5 years ago. Enjoying it but not rushing helps. -

Might need filling that!
Delicatedave replied to Delicatedave's topic in General Self Build & DIY Discussion
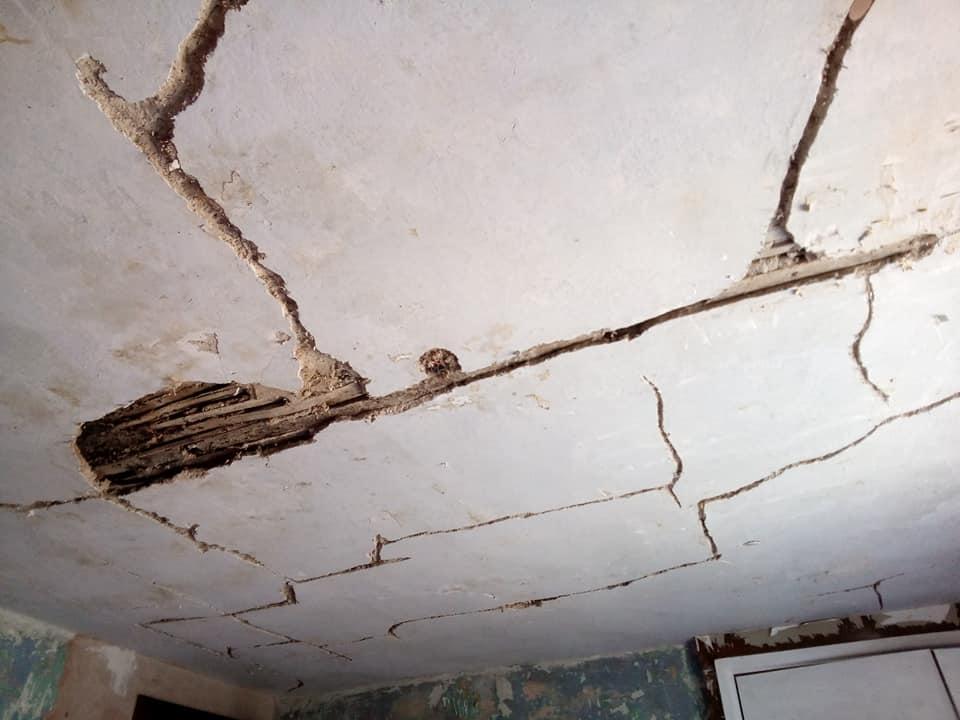
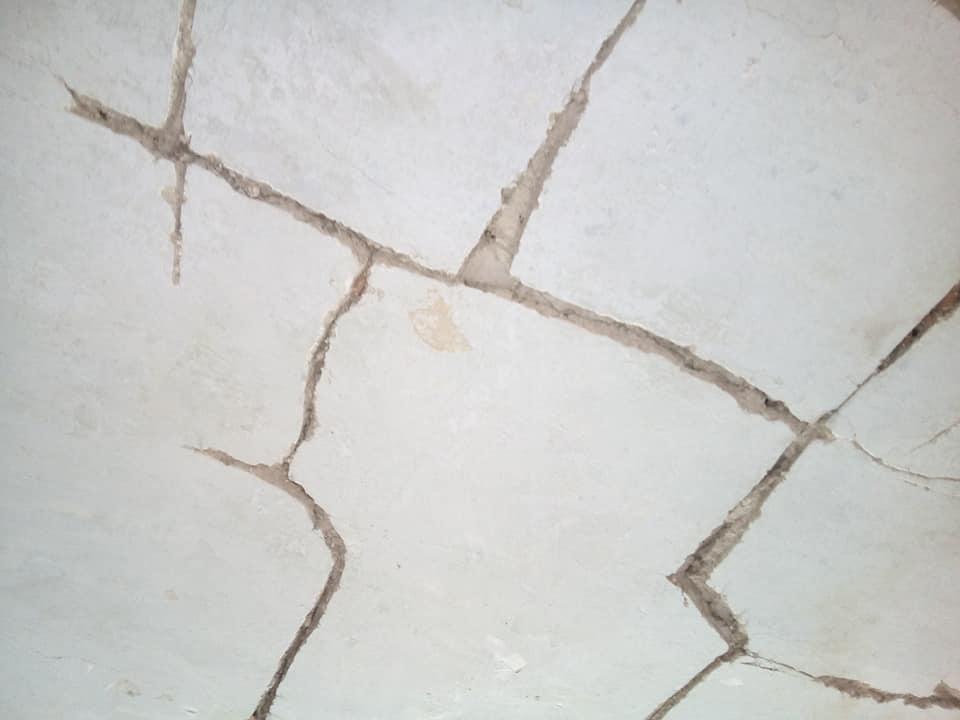
Ok people are getting confused here so let give more detail on what I've done and why I'm so confident. 1. Supported the ceiling with polls pushing back what was were 2 inch sags in places. 2. From above the ceiling I've scrapped all the loose plaster from the laths and vacuumed it out. 3. Brushed PVA along all the laths before pouring well mixed plaster along them. 4. While still wet I brushed nylon mesh in to the plaster. 5. Then for extra support I stretched thick wire from the roof supports to the ceiling joists. The ceiling is now flat enough and firm 6. Naturally that wasn't all done at once but leaving a few days inbetween, when done I inspected the ceiling and pulled out by hand any plaster that was still loose. 7. I then chased out all the old cracks to give a wide/deep enough channel to fill, the large holes I've used plasterboard cement & mesh pushing well though the laths. 8. I'll then wash the whole ceiling with PVA before doing a very thin skim. Not having lights in the ceiling so don't need to worry about that. -

Might need filling that!
Delicatedave replied to Delicatedave's topic in General Self Build & DIY Discussion
Oh chaps you have no soul. The is nothing wrong with the ceiling now it's rock solid. If I wanted to put boards up the is no way I could do without add extra beams above to support the boards because if I secure the board to the existing beam - which are just quarter sawn tree trunks - the weight will bring it down surely. Read the post, what I've done is the best way, I'll fill the gaps and wash the lot with PVA and give a very light skim. -
Finally got the bedroom ceiling in to a shape where I can fill and then very lightly skim. It's a cottage so not looking for perfection here but had press the laths back up and support them with plaster from above to make it a flat as possible. The whole of that ceiling is supported by the external walls and one main beam in the centre. More for my own comfort I've add wire support above so it doesn't sag again. Horrid job in the loft because whoever replaced the roof left all their shit in there. So I sent days vacuuming the loft and took out at least 3 bags of stuff. Naturally the insects were disturbed and we then had to cope with a regular flow of flies looking for light.
-
Tell ya what, if I could get someone to do those but with the heads of famous footballers I'm in ?
-
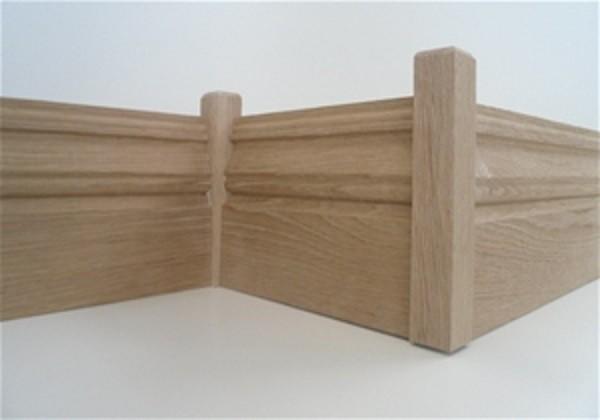
I'm replacing the whole skirting and achi in my house but can't afford that sort of waste so I'll be cutting all my lengths at 90 degs and using little square ends to butt them together. I was thinking of sitting wooden chess peices on each of these end but I think that might be a bit naff ? this image is not mine but shows what I mean, Natually the corners of the door archi will be bigger and square. As for finish I would, you could use a water based stain that you can delute to get the shade you want. Also thining the first coart of varnish down if sprite based - 50-50 will allow it to penerate the wood a lot more. Fine rub down and second coat, them a rub down and a wax. I've done 100s of miles of skirting in hotels like that.
-
Hi John, only joined recently myself. Not a bad bunch, plenty of knowledge going back and forth.
-

How to stop water coming through soil bank
Delicatedave replied to rpuddle's topic in Garages & Workshops
This bloke seems worth listening to, easy to make mistakes on french drains -
Are well perhaps I've (expletive deleted)ed up then but I checked the specs and the product by brand -one was given as 1 something and the other was 3 sorry if I misled anyone. Mine was only 20m so doesn't really matter that much it's only extra insulation on 2 external walls. I just wanted to post the link to the cheapest option I found Woodfibre was about 30% more but more environmentally a choice. PIR Thermal conductivity/ λ (lambda) W / m . K = 0.023–0.026(18) Thermal resistance at 100mm K⋅m2/W = 4.50 Specific Heat Capacity J / (kg . K) = n/a Density kg / m3 = 30 – 40 Thermal diffusivity m2/s = n/a Embodied energy MJ/kg = 101 (17) Vapour permeable: No Wood Fibre Thermal conductivity/ λ (lambda) W / m . K = 0.038 Thermal resistance at 100mm K⋅m2/W = 2.5 Specific Heat Capacity J / (kg . K)= 2100 Density kg / m3 = 160 Thermal diffusivity m2/s = n/a Embodied energy MJ/kg = n/a Vapour permeable: Yes
-
I just done this merry go around and found Insulation Superstore by far the cheapest and you can use TCB to get 3.2% back. But in the end I ordered Steico Therm Woodfibre because it had 3 time the R value.


