MortarThePoint
-
Posts
2198 -
Joined
-
Last visited
Everything posted by MortarThePoint
-
How much are we talking about? <300mm? What about eave heights, or are they not relevant?
-
Interesting, I have been putting DPC under my stud walls, but wondered how overly cautious I was being. They don't extend 25mm either side though, just a 100mm DPC under 4x2. On the first floor, I have timber sole plates under my MF partitions which basically brings up to level with the top of screed. Screed was then poured before framing (MF) and boarding. The DPC rule may be more critical if proceeding at pace and there is a chance whatever the sole plate is going on is still high in moisture. I pressume you don't put DPC under purely MF partitions.
-
Deflection Head under Steel Beam
MortarThePoint replied to MortarThePoint's topic in Plastering & Rendering
I've already boarded the beam so the board over the MF on the flush side needs to come up to the board already on the beam. That means I either close the 10mm gap with the board or leave a gap that skim won't be able to bridge surely? -
Deflection Head under Steel Beam
MortarThePoint replied to MortarThePoint's topic in Plastering & Rendering
I did ponder that but became slightly concerned about thermal movement -
Deflection Head under Steel Beam
MortarThePoint replied to MortarThePoint's topic in Plastering & Rendering
Hi nod, the gap is all the way along the length of the beam. are you saying to run the plasterboard up to the beam? -
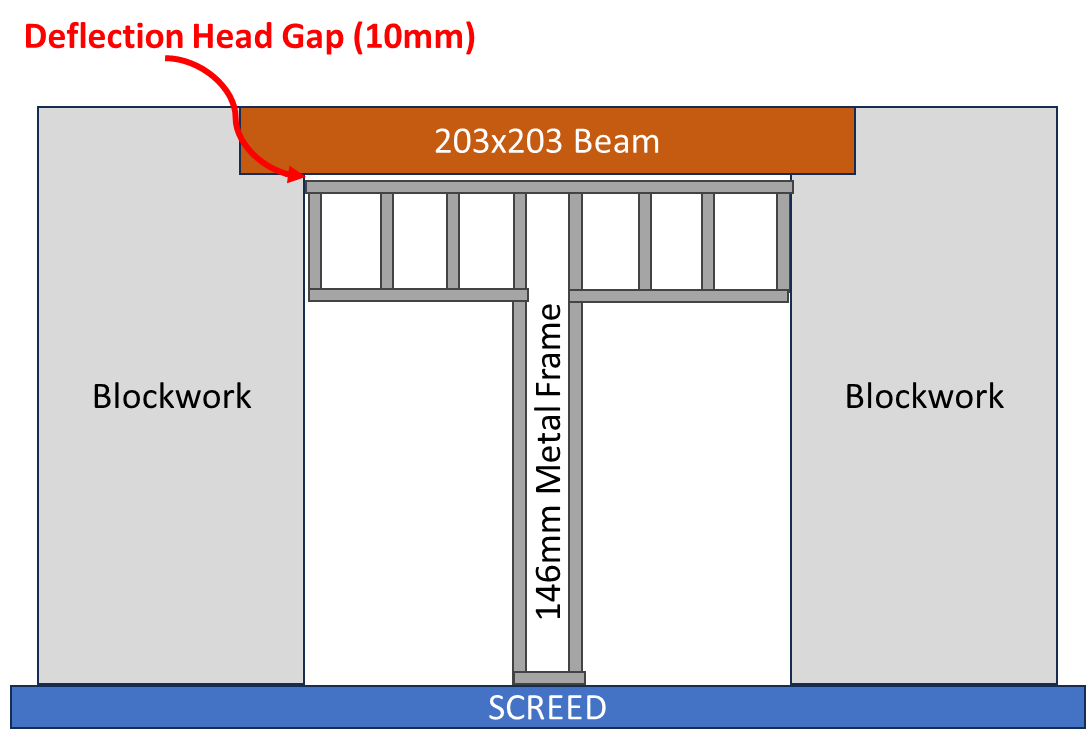
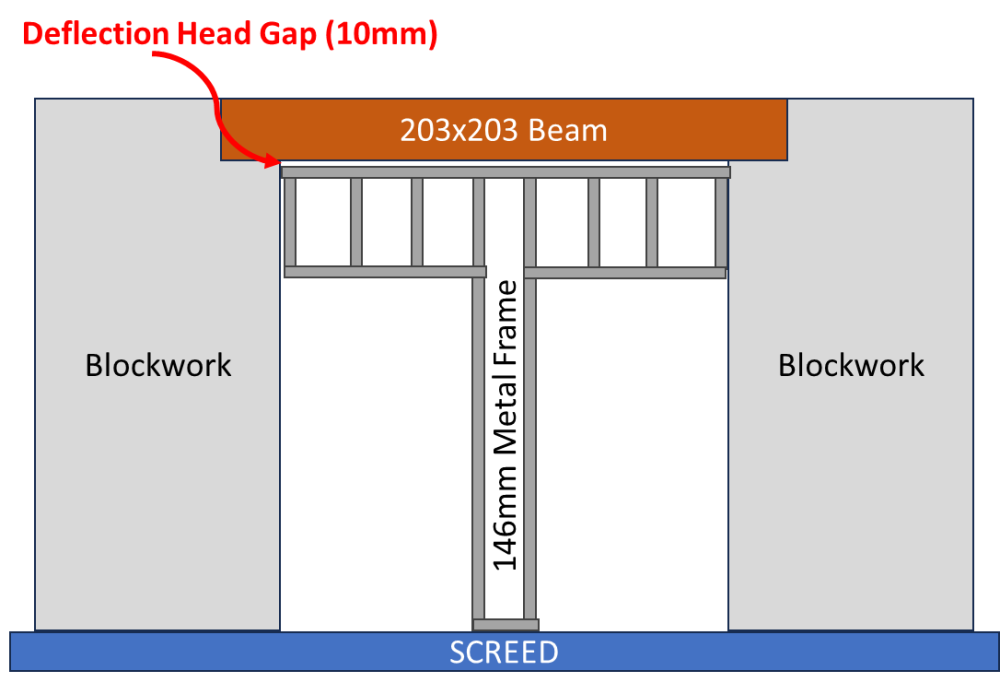
I have a 3.6m opening under a steel beam which is to have metal frame (M.F.) added to make two door openings (each French doors). I am supposed to have a deflection head to avoid the M.F. accidentally becoming load bearing and so buckling. The M.F. is to be flush with one surface of the dressed beam and have a small reveal on the other side. On the side that is flush, I am struggling to work out how to have something that will plaster well. I expect the deflection head shouldn't be subject to movement, but is there just in case. Does anyone have any good thoughts as to what I can do? The beam is dressing in fire proof plasterboard which stands a bit forward of the blockwork, but HardWall can plumb that up. I have included plenty of battens on the underside of the beam during the beam dressing to allow the MF to be attached to the beam. The image above shows a gap above the MF whereas in reality it is normally achieved by using deep track and a c-stud cut short within it.
-
I think that's one of the keys at installation, don't put the paper on to unpainted plaster
-
We have young children and it would be fun to have wallpaper that they'll grow out of. I've never stripped wallpaper before. Is there a way at install to make it easier to remove later? It will be going onto Multifinish. I guess some adhesives are a better choice than others and people probably normally spend there time worrying about making it last longer. It would be good if it looked nice right up to the fateful day. Should I look out for anything in the paper itself too? Ideally, I'd like to leave a good paintable surface when the wallpaper is removed.
-
Plastering kitchen vs unknown socket locations
MortarThePoint replied to MortarThePoint's topic in Kitchen Units & Worktops
Neat, I'd wondered about something like that. They're presumably completely hidden to normal eye level -
Plastering kitchen vs unknown socket locations
MortarThePoint replied to MortarThePoint's topic in Kitchen Units & Worktops
Why won't it work for wet plastered? I agree your suggestion makes it much easier, but I'm not keen. -
Plastering kitchen vs unknown socket locations
MortarThePoint replied to MortarThePoint's topic in Kitchen Units & Worktops
Wow, 😮 that must have been gutting -
Plastering kitchen vs unknown socket locations
MortarThePoint replied to MortarThePoint's topic in Kitchen Units & Worktops
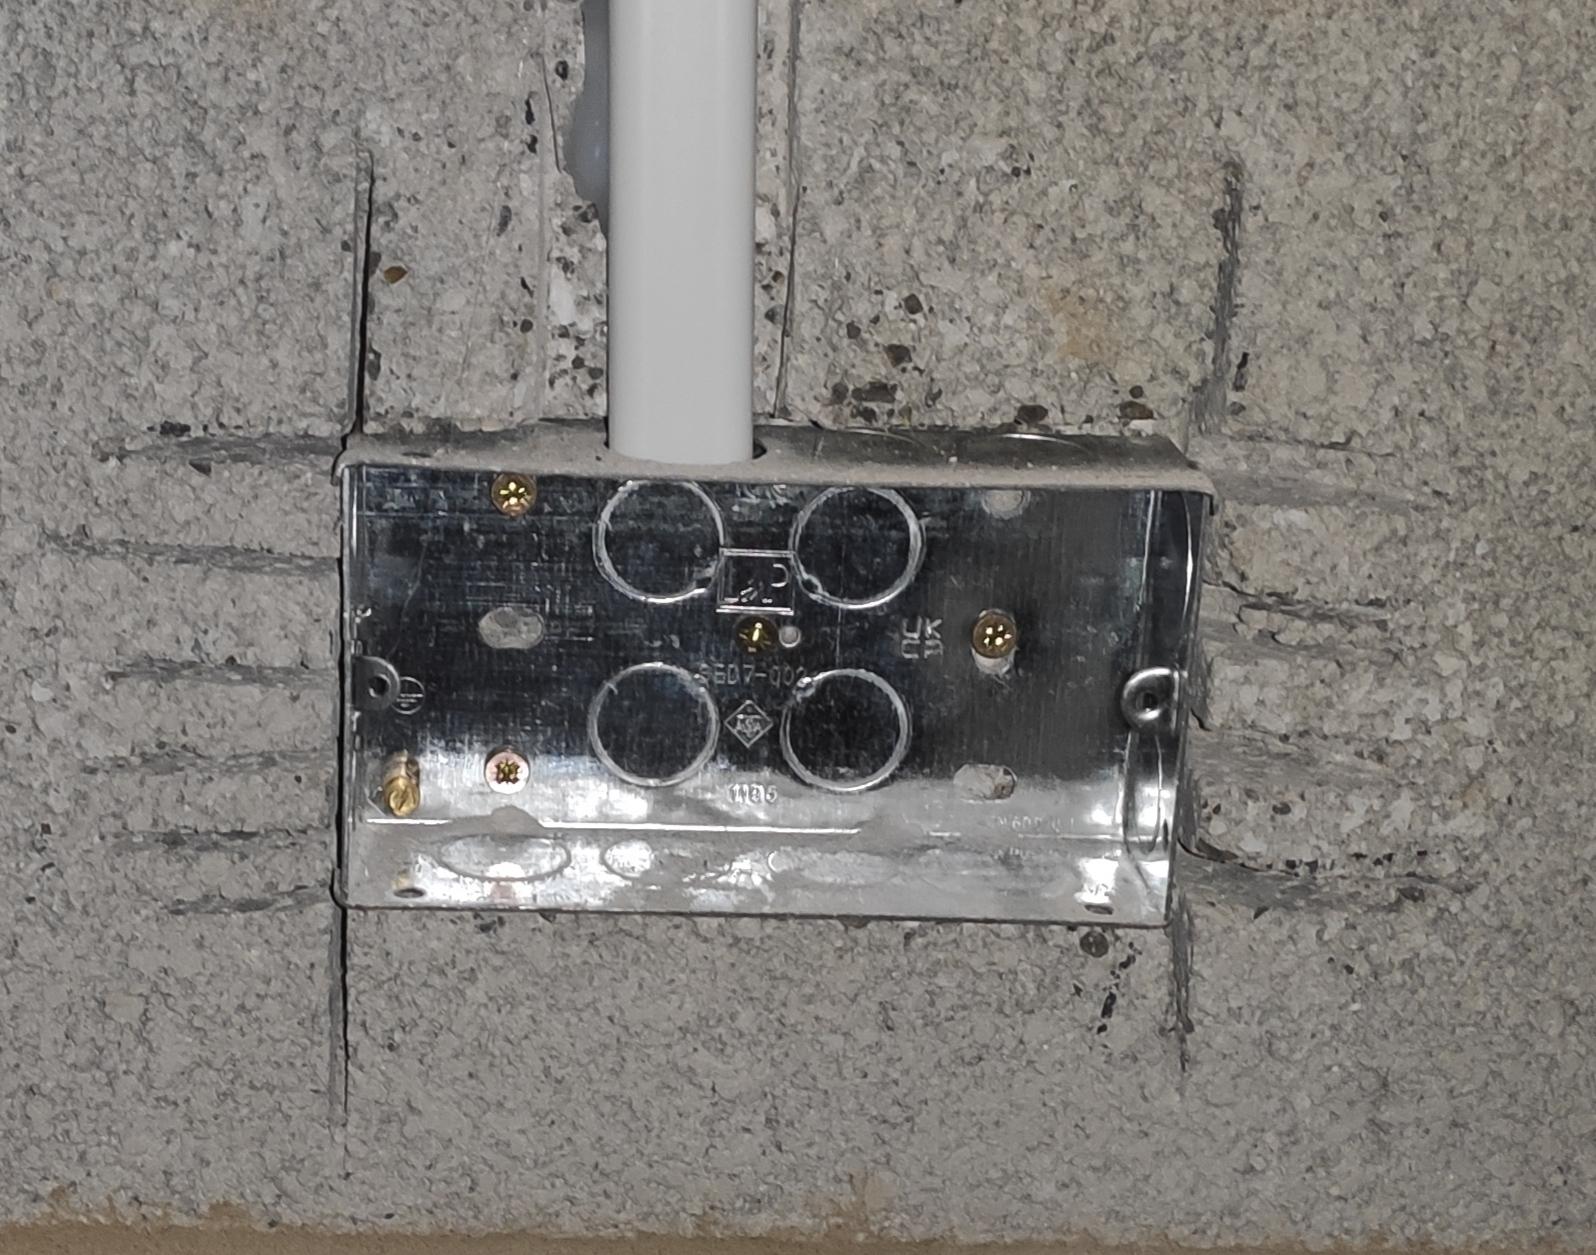
Here's a typical example of by back box "handy work"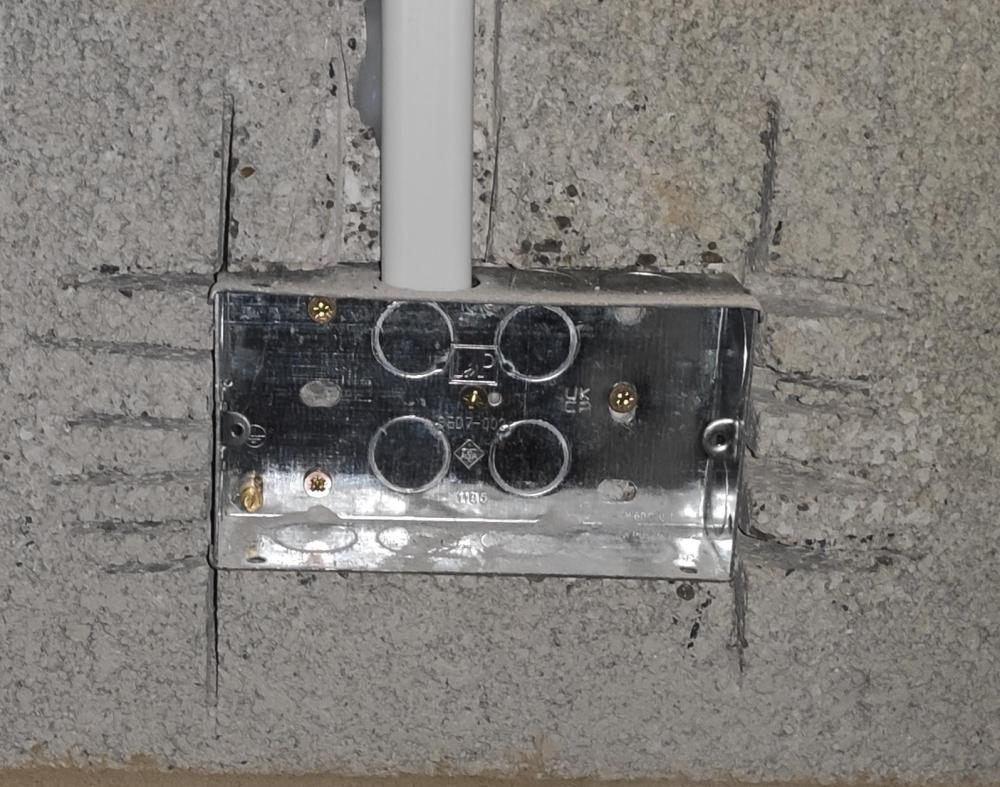
-
I keep having a recurring disagreement with my wife over the kitchen. She wants to buy and fit a second hand one but I'd like to make one. I know, we're both wrong 😔.That's the background, but it's now creating issues on site as the plasterer is due to plaster the kitchen tomorrow. We're going with fully plastered (blockwork) behind our imaginary units. We plan to have tiles between worktops and high level units. I haven't cut any back boxes in yet and that makes me twitchy. How worried should I be or should I just chill as butchering the plasterwork under tiles is no biggy. I plan to feed the sockets from horizontal runs in the void behind the cabinets with a vertical chase of about 300mm to the back box, bottom of which to be 150mm above the worktop surface. So I shouldn't have to do horizontal chases. When I cut back boxes into blockwork it looks a bit like Wolverine did it as I use an angle grinder and have to overcut before chipping out. If I wasn't tiling, I guess I'd use EasyFill 60 and a decorators filling knife to tidy up? The plasterer gets it so smooth it feels like a crime to start hacking away at it. @nod how do you feel when people start hacking away at work you're proud of? I should probably wait for the plasterer to leave before I ruin his finish.
-
A friend dropped a glass bottle on his floor and the bottle survived but has made a hole in the floor. It is on the grout line between to tiles and is about 8mm across on the surface. Though it is small on the surface (entrance wound) it has blown out a large amount of tile under the surface. On that basis, doesn't look like a great tiling job was done as I would expect it to be nigh on full with adhesive below the tile, but you can tap around the small surface hole and feel a large void beneath. Anyway, he asked me how to fix it and I thought squirting some epoxy in the hole would be a good idea and then if he was obsessed enough he could paint the top with a colour match to the tile and grout to make it near invisible. Does this sound a good option and if so can anyone recommend a good epoxy choice. I was thinking low viscosity and use a syringe with wide bore needle. No picture, sorry.
-
Any joy check this?
-
That would be brilliant thanks!
-
The majority of pull cord switches need a pretty hefty pull to switch. I've forgotten to make decent provision for this and want to use a low force one mounted on the plasterboard ceiling. Can anyone recommend a low force one?
-
https://www.plumbingsuperstore.co.uk/product/brass-90-elbow-fxf-12-inch.html These don't have the screw plate, but could be anchored in place with bonding / plasterboard adhesive / something. I think strictly the whole lot should be accessible for maintenance, but that doesn't seem to be how people to it with wallplates etc.
-
I was wondering about doing that
-
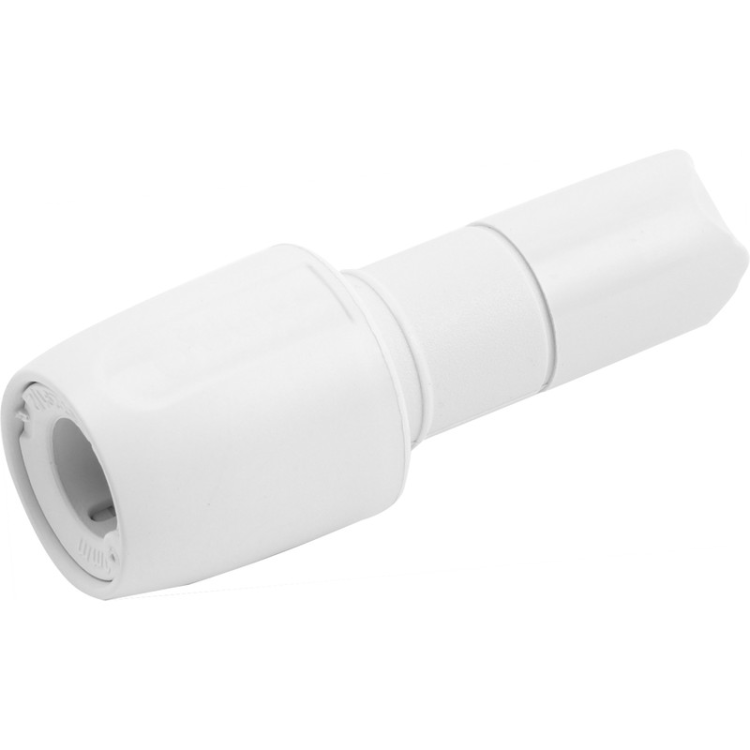
@Nickfromwales I know you warn against mixing Hep2o pipe and compression fittings, but should I also avoid compression fittings on their spigots? I'm wondering about using the two parts below to replace the now discontinued brass wallplate elbow. I can't find 1/2 X 1/2 wallplate elbow to use the hep2o BSP adapter.

-
Sadly Wavin don't appear to make the brass wallplate elbows any more, just the plastic ones which look rubbish. The only option left is 10mm(F) to 15mm(F) coupler with 15mm copper in and then a 15mm to 1/2" compression wallplate elbow. Heeding @Nickfromwales advice to avoid Hep2O into compression fittings.
-
The stove fitter?
-
I'd been thinking more of the beam shrinking away from the plaster, but plaster shrinkage is a further risk
-
That's my thinking too Was there a missing link?
-
Our fireplace has a 6ft opening with a 140(w) X 215(h) concrete lintel over. I'd like to dress this in Oak and there are places selling 3-4 year seasoned for ££ and others selling partially seasoned for £. I'm wondering if well seasoned is a red herring as it will always need to adjust to its new environment. My hope is to attach it to the concrete lintel and then plaster around it (11mm Hardwall plus 2-3mm MultiFinish). What are my chances of the oak not shifting and cracking the plaster? @nod do you ever do this and do you have any tips?