


MortarThePoint
-
Posts
2294 -
Joined
-
Last visited
Everything posted by MortarThePoint
-
Right angle toilet connection (and AAV thoughts)
MortarThePoint replied to MortarThePoint's topic in Waste & Sewerage
Interesting, how did you attach the 50mm to the bend? -
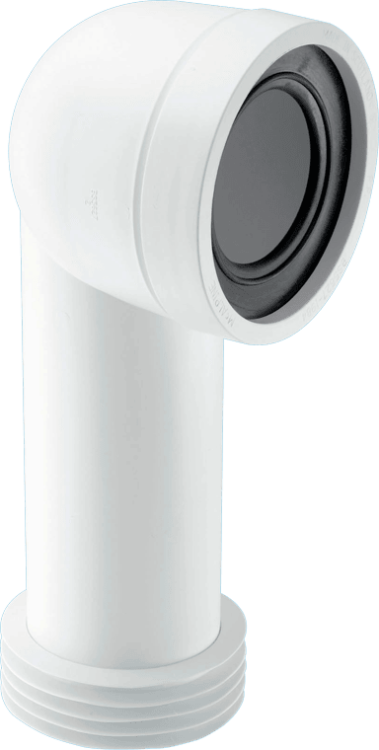
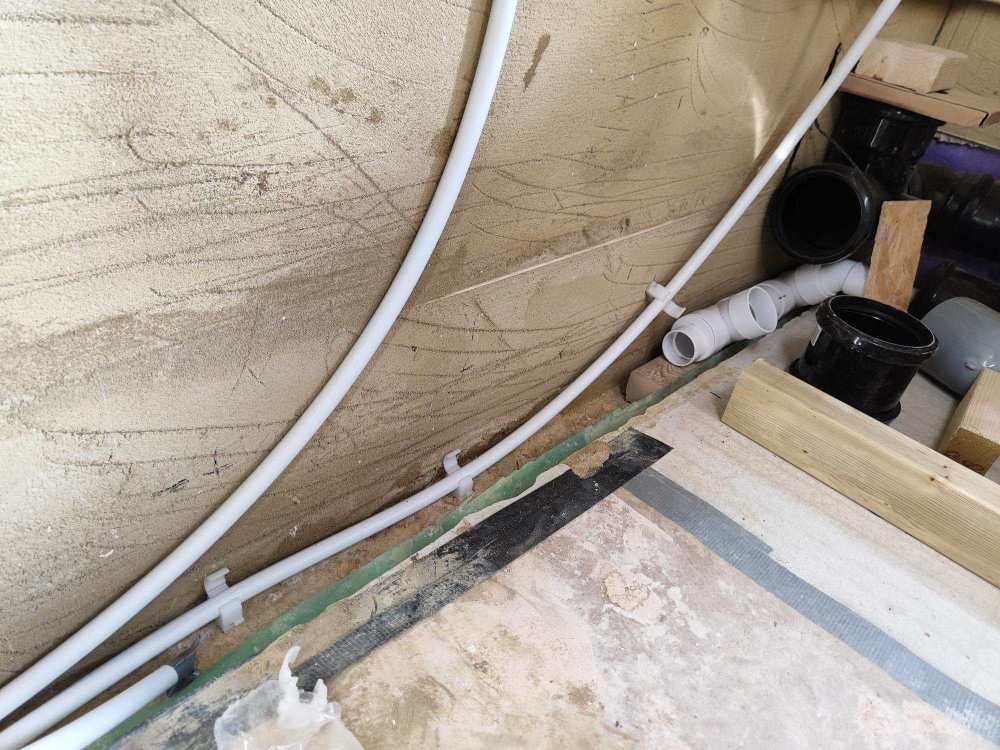
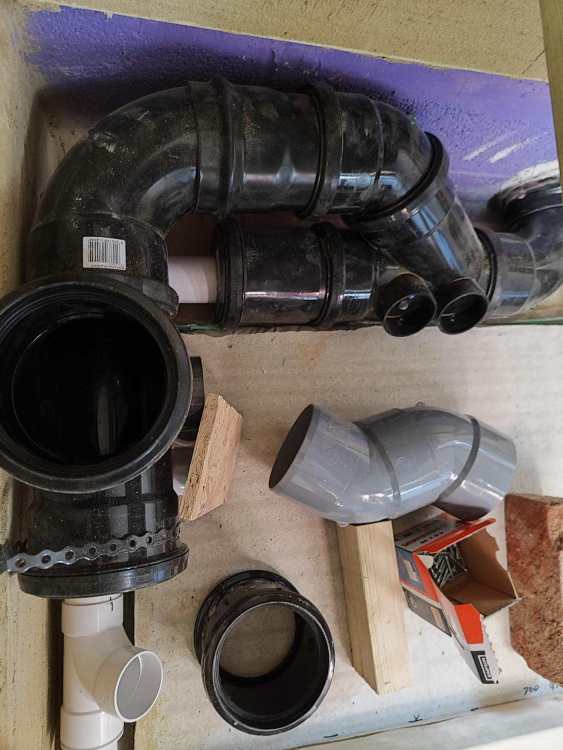
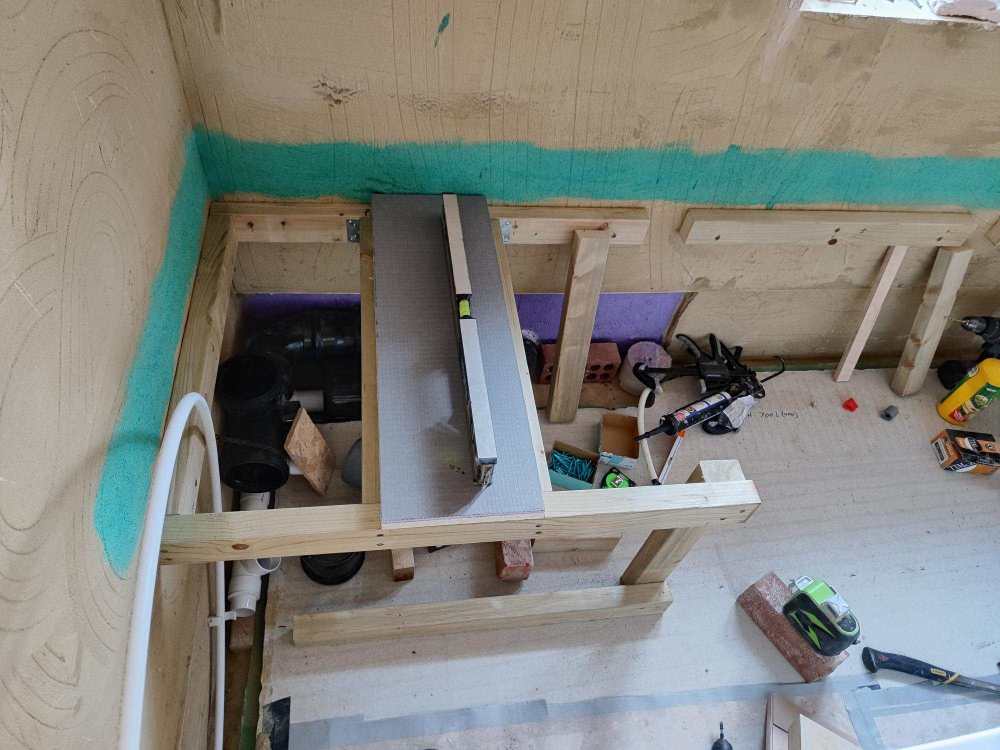
I'm wondering if I should go with a straightforward right angle WC connector (below) or use a roddable elbow and straight connector. I've never rodded through the pan of a toilet before. After this point there is about a 1m horizontal run before a branch laid on its back that is for an AAV. Difficult, but may be able to rod through there. Would be easier if I have a removable tile panel above that horizontal zone (at end of bath). Separately, I'm wondering about using two 50mm AAVs instead of a single 110mm one. One would connect to the previously mentioned branch, the second would be on the 50mm tee. Both are before the vertical section of soil pipe and the advantages are space saving and the one on the 50mm tee can help with the bath and shower . https://mcalpineplumbing.com/wc-connectors/rigid-wc-connectors/90-bend-adjustable-length-rigid-wc-connector/
-
Back to bathrooms and the like, which is better Acetoxy (stinky vinegar) or Neutral cure? I'm considering these two: Dow 785+ Bacteria-Resistant Sanitary Silicone White 310ml (58308) Dow 785N Sanitary Sealant White 310ml (800FG) Both have fungicide,
-
Ideally I would and in most places have made some sort of provision. But for the shower valve attachment they are going to get tiled over so it would be a job, but not impossible to get at them again.
-
I've used this (or similar) for one of my showers
-
Mainly for providing a point of connection at the end of runs for bath and basin taps, loo cisterns etc. I don't want Hep2O going into a loo cistern as doesn't look so good.
-
The French have their own classification system that covers building products in general: ÉMISSIONS DANS LÁIR INTÉRIEUR Their strictest classification is A+ which has a Formaldehyde limit of 10ug/m3. NB: That is the same limit as the Finnish M1 classification. That has led me to a manufacturer of Marine Plywood (BS1088) that is A+: Joubert Plywood No idea if you can get it anywhere in the UK, but if it was a big project that needed the answer there it is. Irritatingly, there English language page and datasheet don't have the A+ rating shown, which again shows how hard it is to find the information for this topic.
-
Yes, could do that way too. Probably better as I have just seen that some people advise against inaccessible compression fittings which makes sense.
-
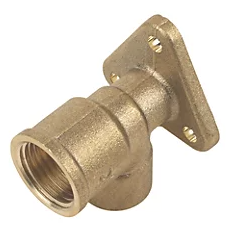
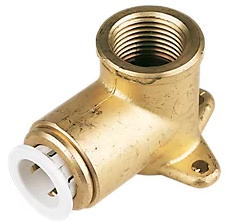
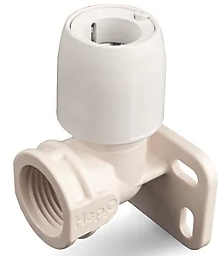
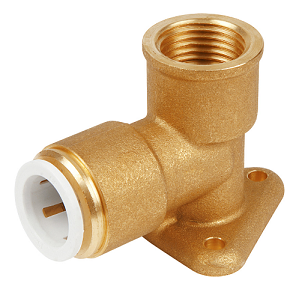
A major weakness in the Hep2O system is the lack of a brass wall plate elbow. They use to do them, but now only do the plastic ones (£7.90) which just aren't up to the task in my mind. JG Speedfit do a brass wall plate elbow (£11.23) and I have seen installations that use these with everything else being Hep2O. JG Speedfit make a slightly mixed statement about compatibility, but that feels like the lawyers got involved when in reality they are compatible. An alternative would be to use a Hep2O straight coupler onto a short length of copper pipe and then a brass wall plate elbow (e.g. compression). That's extra joints and expensive if you're buying copper pipe just for that bit. If you have lot's to do, then you would be looking at: Hep2O Plastic Push-Fit Equal Coupler 15mm £1.75 100mm of copper pipe £0.30 Brass Compression Adapting 90° Wall Plate Elbow £2.80 So £4.85 total which is £3 cheaper than the Hep2O plastic wall plate elbow. It has two extra joints though which is not ideal as adds two extra potential failure points. I used a Hep2O Plastic Push-Fit Adapting Male Coupler 15mm x 1/2" (£4.85) into a 1/2" x 1/2" wall plate elbow (~£4) which was hard to find.

-
Best way to shorten a joist?
MortarThePoint replied to Sparrowhawk's topic in General Construction Issues
You could cut the joist short and use a trimmer between the neighbouring joist and a face fix hanger on the wall. You'd need to check the wall is OK with the extra load though. -
Shower Trap to Solvent Weld Connection
MortarThePoint replied to MortarThePoint's topic in General Plumbing
Thanks, but that would need a length of PP pipe between the trap and the universal connection of that adaptor. As it turns out, I've now found a spare adaptor in a load of bits so think I'm OK. Others may still benefit from a link here if there is one. -
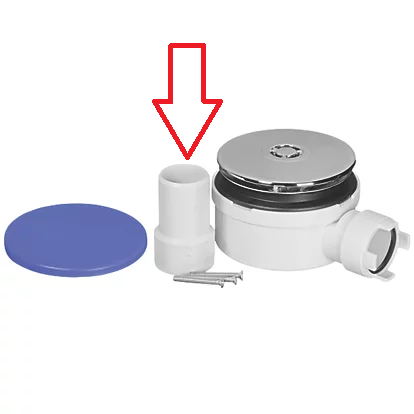
I'm using 40mm solvent weld abs for my shower wastes, but the shower traps have compression fittings and at least one (Crosswater STHFW6190) can't accommodate the larger 40mm solvent weld pipe. I need an adaptor between compression fit (same as pushfit?) and solvent weld. McAlpine appear to include these with some of their shower traps, but I can't see it as an individual item: Any suggestions?
-
Interesting as I gravitate towards mortar because it's a material I'm much more familiar with. Would adding SBR give you more confidence, or you'd still air towards the flexible tile adhesive. I know some tray manufacturer's suggest a very weak sand:cement mix at perhaps 8:1 which I can appreciate would be pretty weak. I'd be more inclined towards 6:1.
-
Binder is correct, thanks. This link says "Products using ECOSE Technology are formaldehyde-free."
-
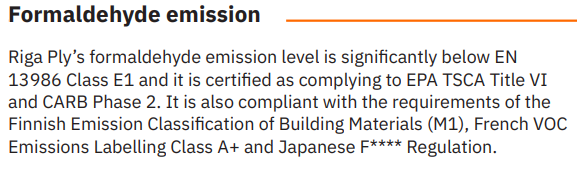
Some will already know, but a quirk of my build is I am trying to avoid introducing anything that will off gas lots of formaldehyde (or other things too). I'm less concerned about off gassing paint which lots of people worry about. The reason for that is that the layer is very thin and we aren't living in the house yet, so it should hopefully have finished by time we are in. That's not to say that it's not a point of discussion with 'the client' on occasion though. I have spent a lot of time looking at Plywood and thought I would dump some of my learnings here for anyone who may be interested. There may be inaccuracies, so feel free to correct. Glue: Remember that the wood itself contains formaldehyde, so the main variable is the glue. The two most commonly used glues are Urea Formaldehyde (UF) and Phenol Formaldehyde (PF). PF is stronger and emits less, but is more expensive. Europe (& UK): This is according to the standard EN 13986, the lower class of which is E1 (0.124mg/m3) which has higher emissions than many other standards. There is an informal E0 classification (?? mg/m3) and Germany have adopted an E0.5 or E05 limit (0.08mg/m3). Ikea have apparently used an E0.5 type standard for a while. It's all about to change with the adoption of a new standard, EU 2023/1464 which introduces a tighter limit (0.062mg/m3 for "furniture and wood-based articles"). That new standard will be effective from Aug 2026, but some companies are already stating compliance. It's worth noting that Finland also have their own standard, M1, with a limit of 0.010mg/m3, so 12.4 times tighter than E1. USA: California has the CARB Phase 2 (CARB P2 or CARB2) limit of 0.05ppm for hardwood plywood. I'm not sure how they work it out, but I've seen articles that say Europe's E1 is equivalent to 0.10ppm so is twice CARB2. CARB2 is adopted nationwide, but the office standard is EPA TSCA Title VI limit which is the same 0.05ppm limit. Japan: They have a 4-star scale, the strictest of which is F**** (or F4) with a limit of 0.005mg/m2h. Despite using a different measure from the rest, I believe this to be the strictest standard. China: As per Europe's EN 13986, but adding E0 (limit 0.050mg/m3) and ENF (limit 0.025mg/m3). Effectively being in Europe means we are currently only governed by EN 13986 and so most products only state that they are E1 and, quite reasonably, that's all most suppliers understand. There is a chance of finding M1 compliance stated which is one of the tightest limits globally. Some manufacturer's (e.g. Riga) clearly set out the various standards that they meet in a more global context. For example here is an extract from Riga birch ply: Some example products I have found: Birch: Riga Ply (meets F4), Wisa may be good but documentation not so clear Radiata Pine: AraucoPly (meets F4) Poplar: Panguaneta (meets F4) Marine: I have yet to find a marine ply (i.e. meeting BS 1088) which meets any formaldehyde class other than EN 13986 E1. I would like to though so if anyone has found one please add it here Other notes: NAF - no added formaldehyde which means only that which comes from the wood. OSB3 easily available as NAF (e.g. SterlingOSB Zero OSB3 widely carried by merchants) Glass wool insulation - Knauf' standard "Ecose Technology" uses a formaldehyde free blowing agent MDF - Medite Clear is an NAF MDF, but no moisture resistant version as far as I know The other chemical often considered is pentachlorophenol (PCP)
-
So you'd go cement board, but of the options given it would be Option (2) Mortar down 35mm thick paving slabs. Cement board would be better as it allows a hole to be cut for the waste pass through rather and then still providing support to the corner of the tray past the waste. I'm guessing in reality there isn't any load applied to a tray in that location anyway. I'm a wuss about Cement Board so I think I'll go with the concrete slabs & mortar and for the corner I will screw some timber to the wall and have mortar between that and the tray. I've had a wasted day trying to source plywood, but that's a whole other story.
-
The McAlpine ST90CP10-NRV is just (53mm + seal) deep from the underside of the tray to the trap's bottom (image below). There wouldn't be enough space between the pipe and tray to fit 18mm ply though, so I would have to cut a channel in the ply all the way to the edge of the tray which could weaken it. Conversely, the trap that came with the tray (Crosswater STHFW6190, second image below) has about 33mm between underside of tray and top of pipe and is overall about 73mm deep. The screed is 65mm deep over HCF and the waste pipe is already raised up 40mm above HCF by other factors. That connection point is 1.5m from the shower waste position, so these two options work out as a rise above unfinished floor of: McAlpine ST90CP10-NRV : 40mm + (18mm/m * 1.5m) + 73mm - 65mm = 75mm, so about 60mm above top of tile (i.e. FFL) Crosswater STHFW6190 : 40mm + (18mm/m * 1.5m) + 53mm - 65mm = 55mm, so about 40mm above top of tile (i.e. FFL) Another thing to like about the NRV valved one is that it can act like an air admittance valve (AAV) so I wouldn't have to worry about the shower trap drying out. It's in the kids' bathroom, so they may not be showering for a few years as they are young enough to prefer a bath.


-
I have to raise it to get the required waste fall unfortunately
-
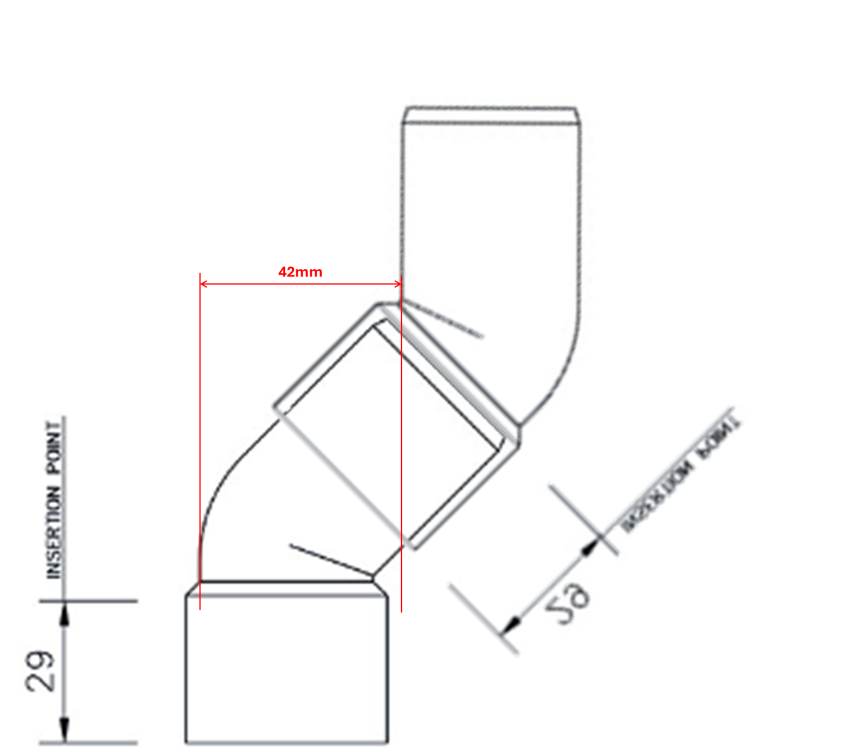
Not sure why I didn't spot this at the time, but you can use two 45 degree conversion bends to make a 42mm offset. You'd then need to use a straight coupler to connect to the pipe, but that's easy and doesn't affect the offset. You could use a 45 degree conversion coupler and a standard 45 bend to get an intermediate offset as well.
-
@Nickfromwales I'm gearing up to do this now. What approach would you take?
-
Staddle Stones vs Post Bases
MortarThePoint replied to MortarThePoint's topic in General Construction Issues
Some people just CT-1 staddle stones down and CT-1 does have good strength (CT1: Tensile: 2.9N/mm2=29kg/cm2, PGB: Tensile: 22kg/cm2, Shear: 11kg/cm2). 150mm x 150mm should have at least 24kN strength which is plenty, though that would assume perfect conditions. 10% of that figure would still be plenty. I think I will still use a threaded anchor though as that allows accurate alignment. https://www.ct1.com/wp-content/uploads/bsk-pdf-manager/2020/09/CT1_Product_Info_sheet_TRIBRID_10_09_2020.pdf https://www.ct1.com/wp-content/uploads/bsk-pdf-manager/2020/06/Power-GnB-Product-Info-sheet-12-05-2020.pdf As far as I can tell PGB is a gloopier CT1 with better initial stick (i.e. grab). -
Staddle Stones vs Post Bases
MortarThePoint replied to MortarThePoint's topic in General Construction Issues
I've found some staddle stones without pins in, just pre-drilled 16mm (50mm deep) holes. That allows the use of stainless pins. Their straight sided not tapered. There's a product called a Dowel Screw or Hanger Bolt that has a wood thread on one end and a machine thread on the other end. That should work well to screw into the end of the post and then resin anchor into the staddle stone hole. Some dowel screws have flats and some have a hex socket at the end of the machine thread. I think I'd want about 40mm sticking out of the timber unless I deepened the hole in the staddle stone. That's less anchorage depth than in the Fischer table, but should still be good. Also the dowel screws seem to top out at M12, so the 16mm hole is a little large, but hopefully OK. Another option is to drill a deeper 14mm hole on the other end of the staddle stone and use it the other way up. An advantage of an oversize hole is it allows a bit of centring tolerance. https://www.westfieldfasteners.co.uk/Bolts-Screws-Metric/Dowel-Screw-Hanger-Bolt-Centre-Hex-Drive-M12x120-A2-Stainless.html -
Thanks for taking the time to photograph. It does look the same. Do you think under firing it would allow the plastic to be picked off and then tighten it the last bit as a screw? So much for their claim "Six times faster to install than standard wood screw". The head looks quite a lot larger than the (unavailable) Clad-Tite head which is also a shame. Are you aware of any other nail gin screws?
-
Interesting, thank you for the heads up. Do you know how long ago that was as they appear to have made changes to the strip, but that may have made tings worse. When they actually fired OK, were they good otherwise?
-
Definitely planning on stainless. The Paslode Stainless aren't much more expensive either. I prefer using screws as it is much easier t remove and sort things out if there is a mistake. For cladding, I also like the idea of under driving it using the nail gun and then tightening it as a screw to get the depth spot on.





