zoothorn
-
Posts
4749 -
Joined
-
Last visited
-
Days Won
3
Everything posted by zoothorn
-
Ok good. I see the std redwood deck boards are 32mm: are these 'decent' enough? or maybe you're hinting these not suitable?
-
Correct. This way = 1400mm (width across = 2320mm).
-
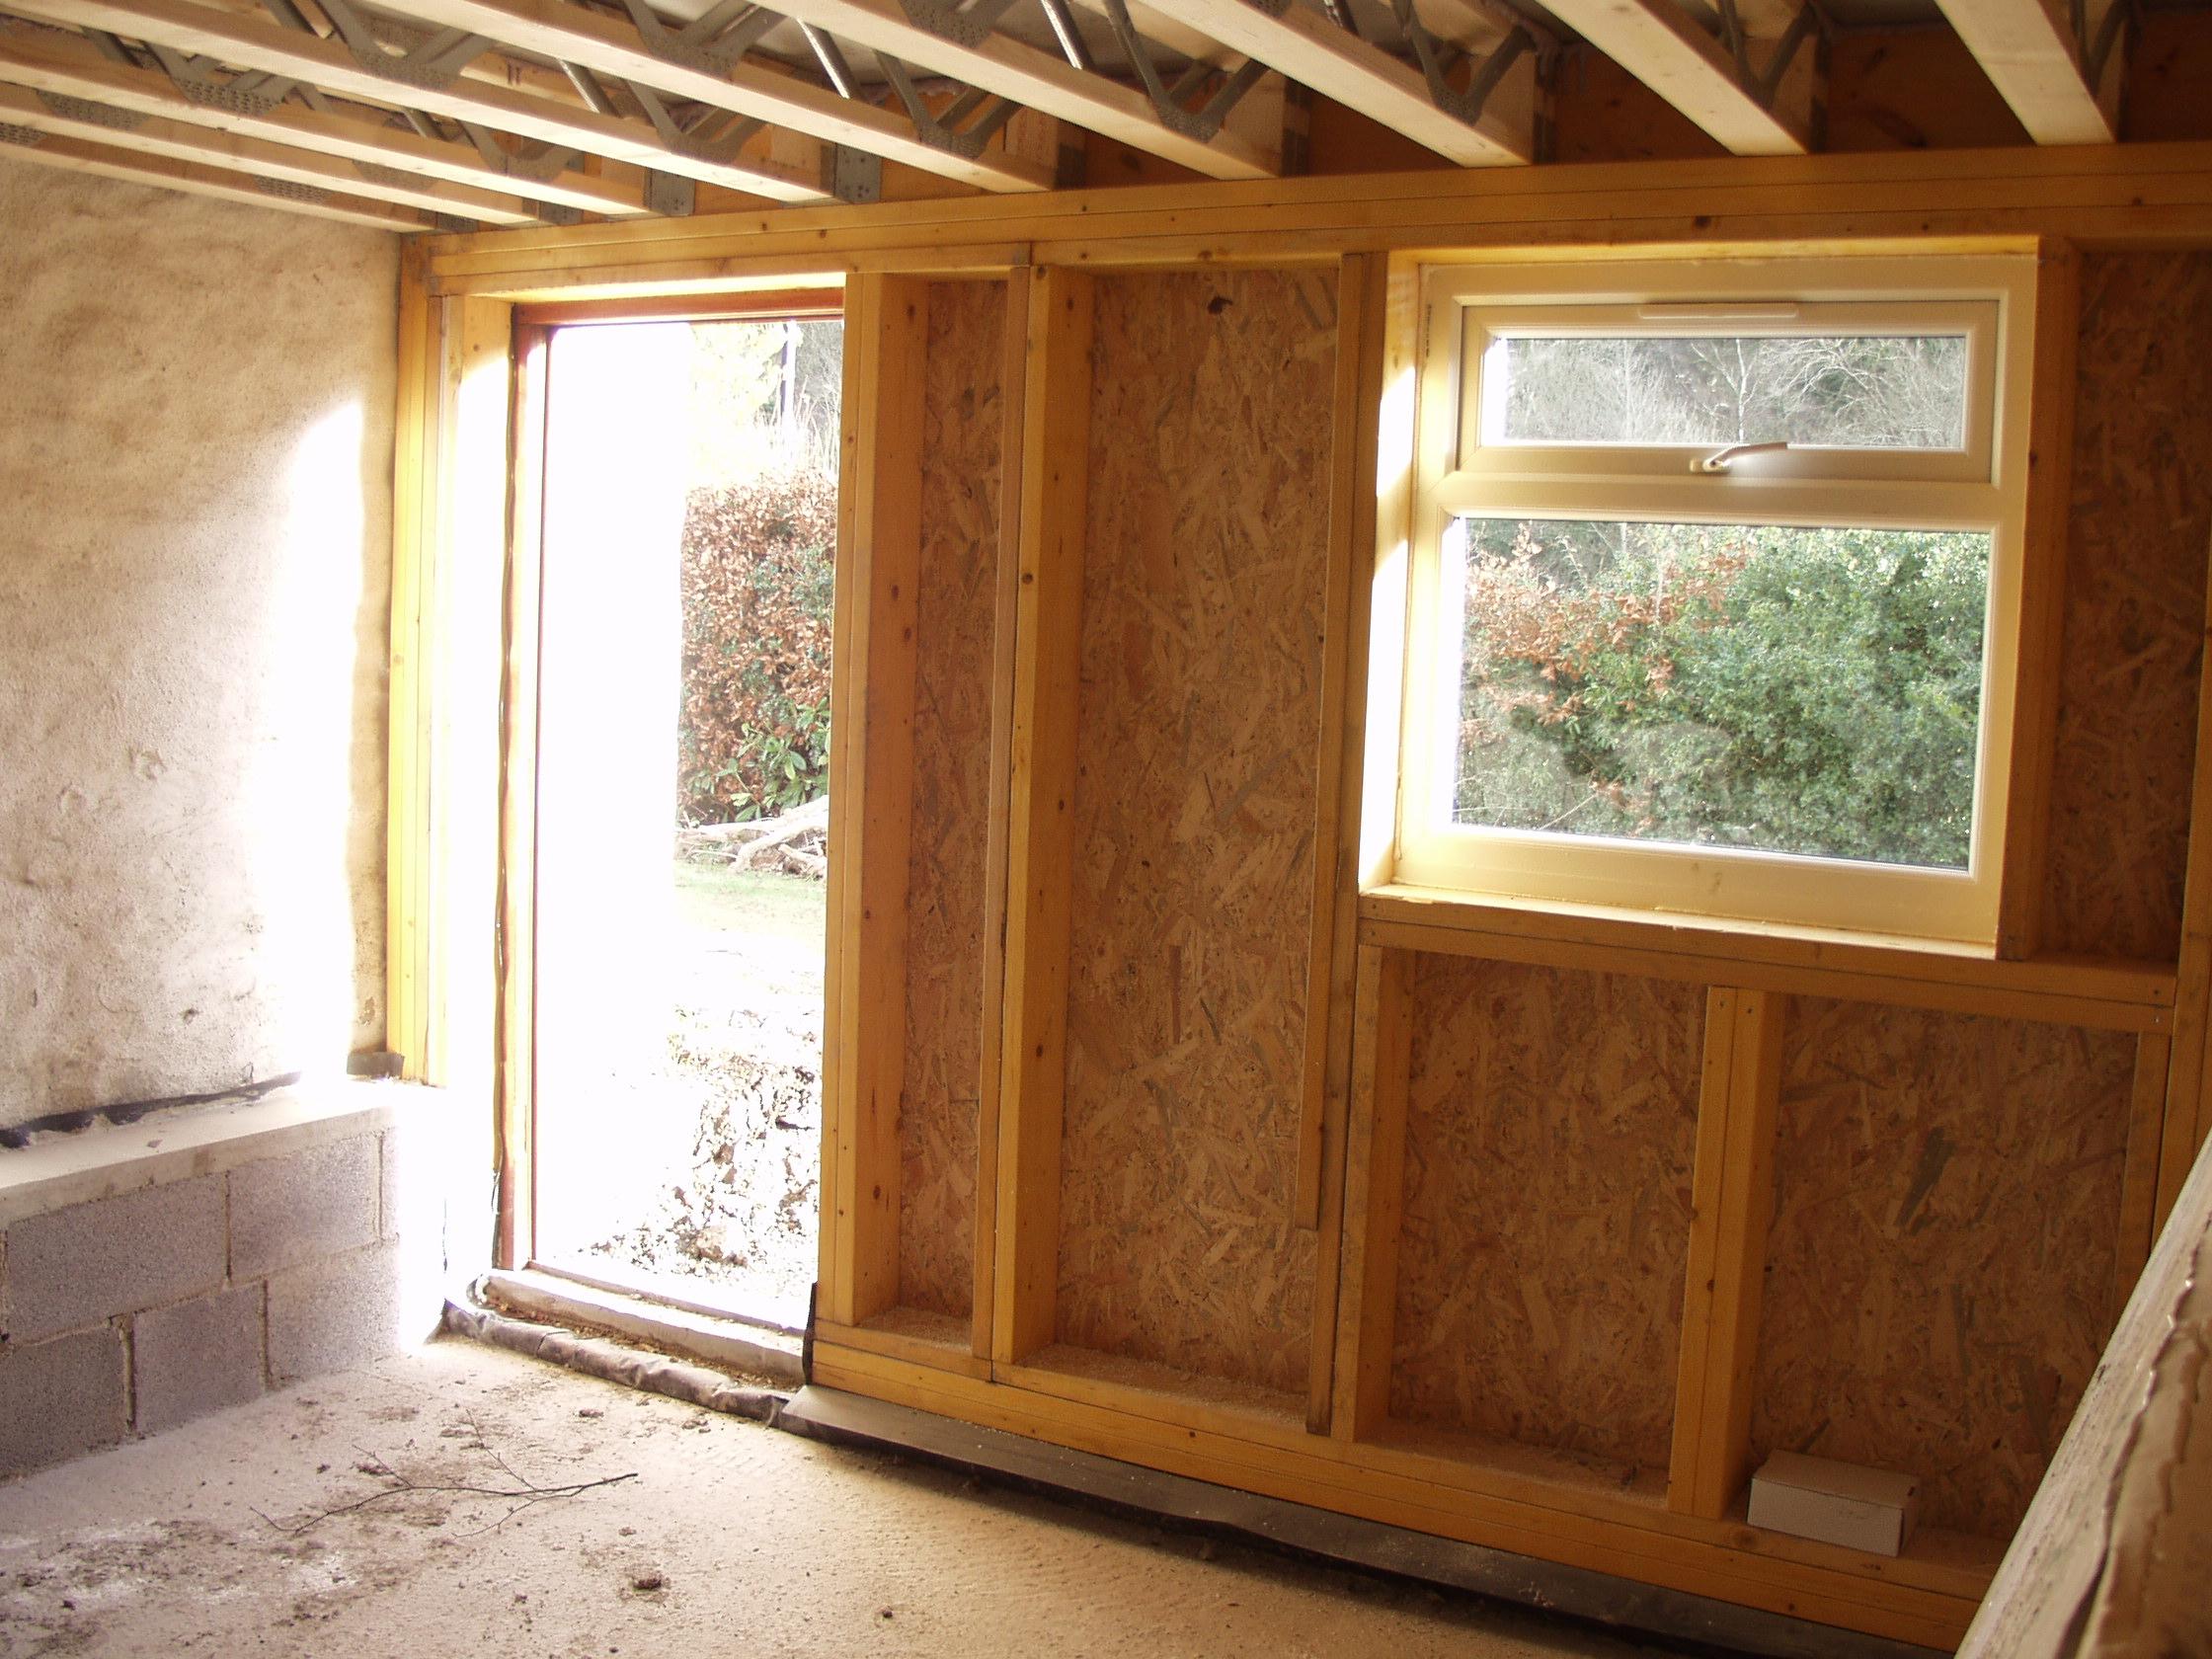
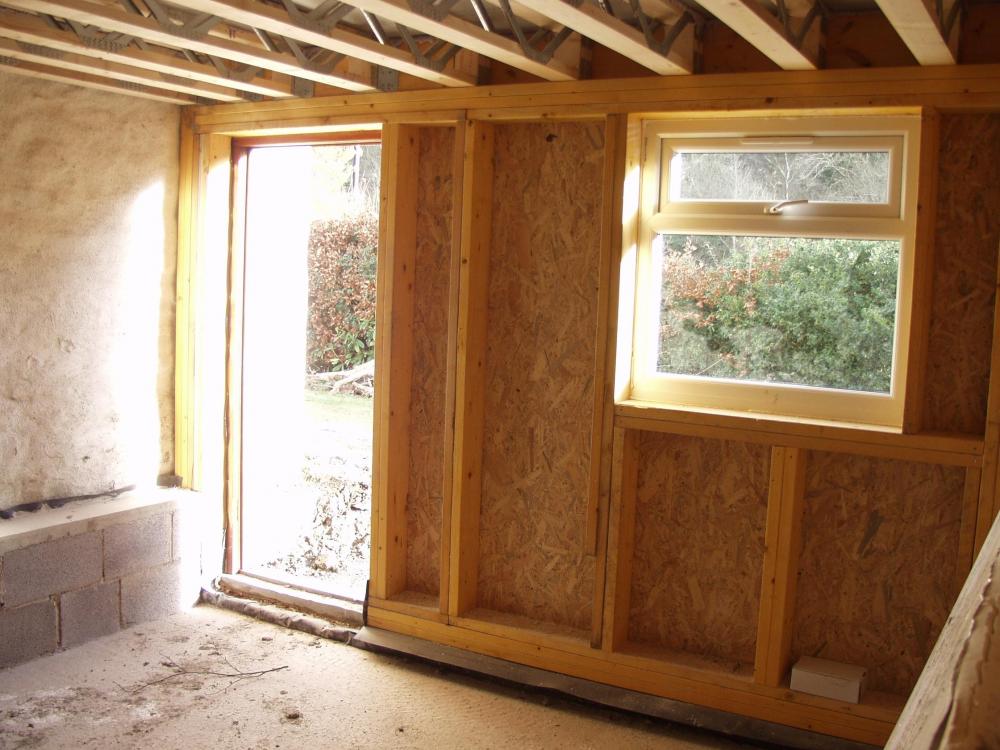
@Onoff hi Onoff or anyone. Could you give thoughts on my last area in my lower room to do: the 'retaining'/ covering 2 block high wall whacked up over the (alarming) exposed earth area below my old wall shallow foundations. Pic: you can just see it LHS. Its back-filled with mortar ~ 6" so pressing a dpm onto the earth side = a long low small shelf. I got plants growing up out from behind the vertical dpm.. fantastic.. god knows what I do about that. Board it over? if so fixing.. Ive seen soudal foam specifically to fix board onto block/ brick ( I wonder if soudal LE foam be useable even.. having got 1/2 a can here). Thanks, zH
-
@PeterW where the single nogs end here (along middle, parallel to stream).. is my front cabin joist, & it sits flush on the far edge of it.
-
Ah didnt see this reply- ok alas no, I don't have a joist near my door, the door literally sits bang on edge of my outer 6x3 'frame' joist.
-
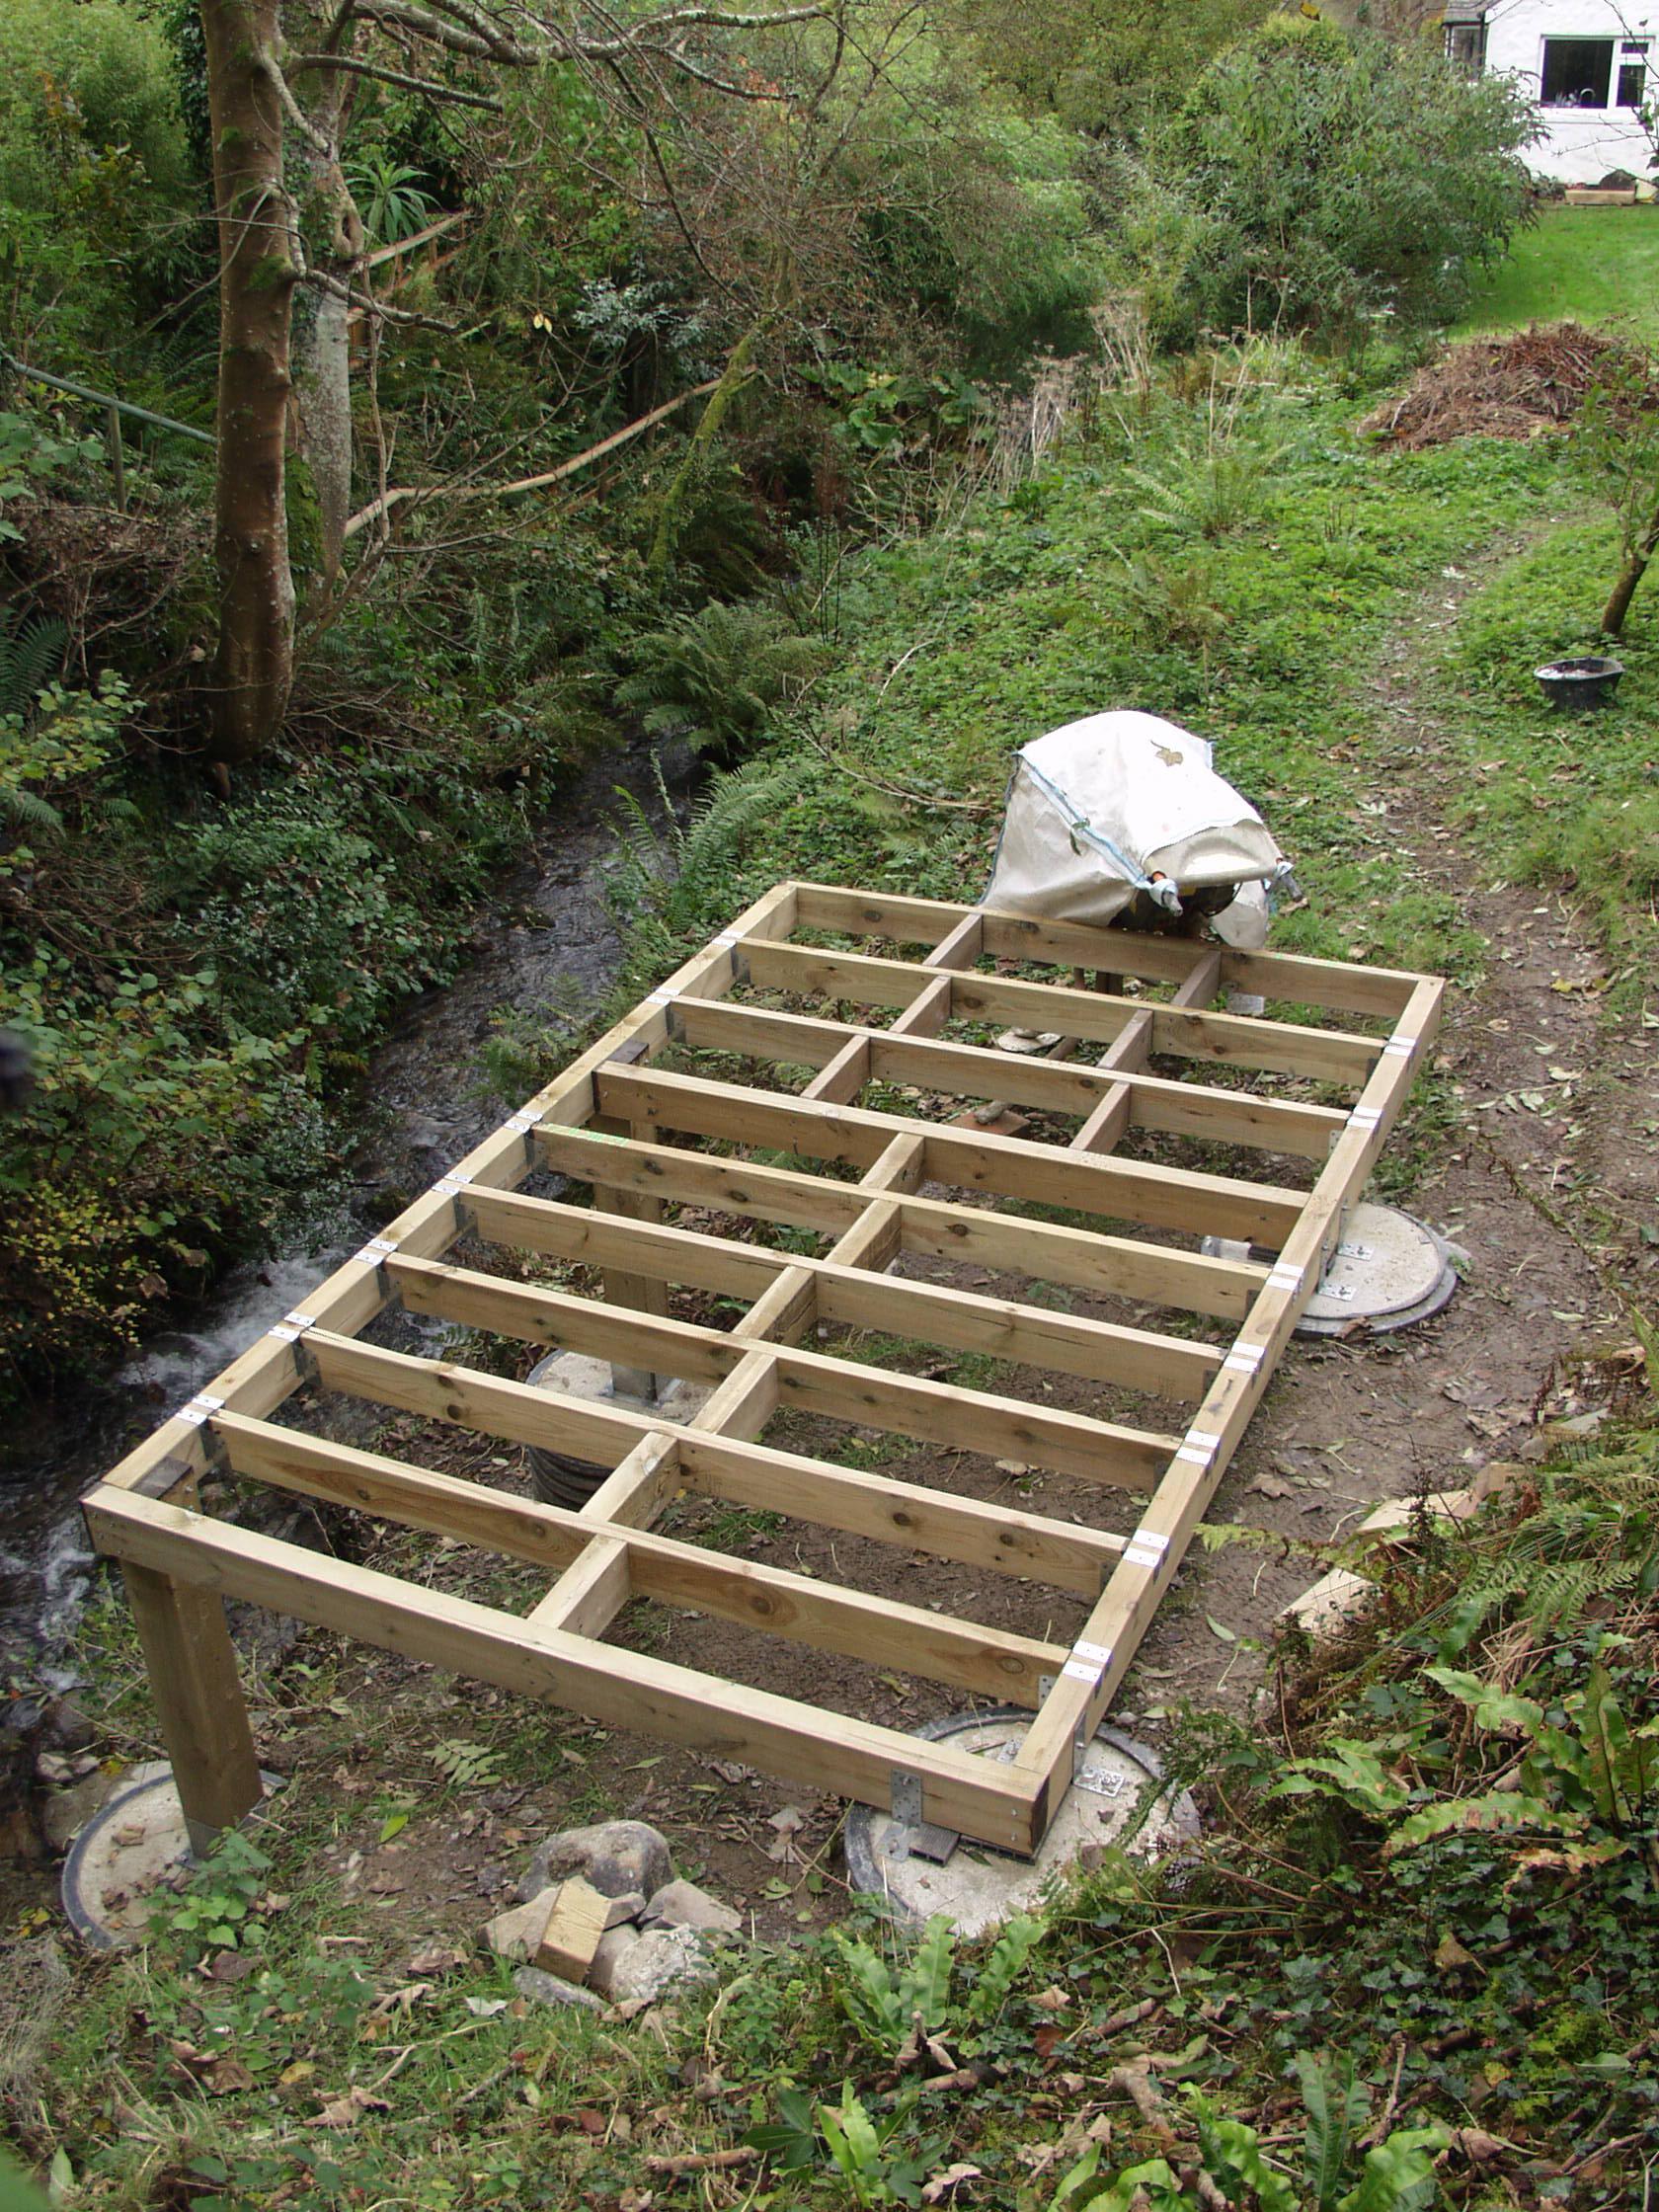
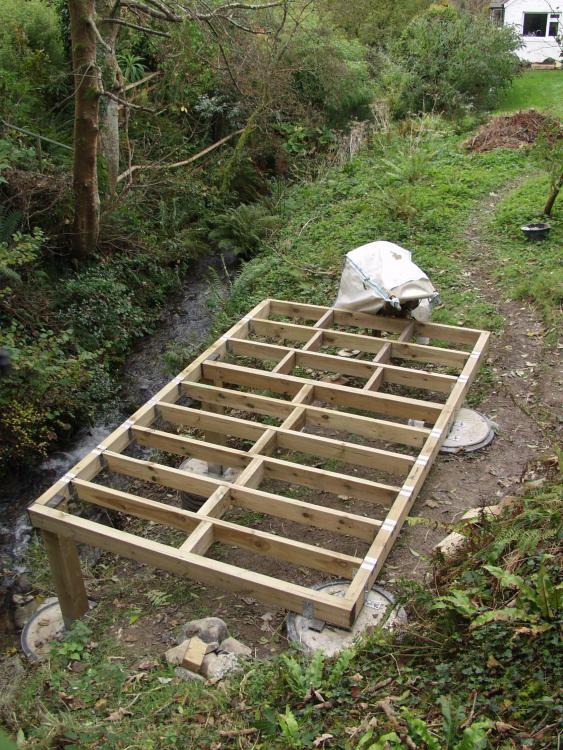
@PeterW or @Onoff or anybody.. Needing help on orientation of deck boards (32 x 125). Ideally loadwise & looking at my joists (pic^) I'd think the suggestion might be to place them from door side >> to front, the shorter 140mm dim. As my width across is 2320mm, using 4.8m boards (divided in two) would be cheaper. and I think would look better. Can I deck it this way? I guess its a Q of whether I have enough noggins in. thx zoot.
-
Hi Peter- ok I agree/ going for this. So, 1stly I need to put ridged decking boards down. Would the best orientation be across-ways, like my scaffold pirate planks are? Or is this dependent on how Ive done my joists & nogs? Can I just double-check my deck base is ok (the gaps between ok, & no more nog supports needed).. I know you said fine but just want to be sure with dims: gaps between nogs (measured across, like pirate planks are) are mostly 640mm W & 720mm W (Im sure ok) but two central bigger gaps one immediately outside door (under pirate planks), & other at mid front.. are @ 780mm W. Thanks, zoot.
-
Onoff was right again. Best way to fix seems panel pins (will show thru tho.. & a fallible method going into the very edge of boards softer & easily damaged).. so no fix is perfect. A bigger cnr beady bit is essential: this stuff is claptrap (toolstn).. but best materials are just n/a. Got better at it as I went on, the 10" taping fish flipper working well. Huge sanding now. I cant get on with my mirka sander (dust clogs -maybe moisture- then too heavy to be sucked out it seems), so huge dust my main problem. No-nonsense 10kg plaster is decent/ sanding -thankfully- a breeze.
-
No I didn't mean I had a velux/ I don't.. I was just commenting on ProDave's situation being different, hand-done cnrs ok for him up on a high velux.. but not ideal on a window or door cnr for me here.
-
Yup that's reasonable: in the right hands/ a pro.. this would be done in 2 hours of course. But I'm a novice. Its 3 things me, the tool & the beading tbh.. not just me Onoff! metal tape? no Q's its simply a thin taper to patiently fashion (but with no structure/ rigidity I don't think suitable tbh). The beading is terrible compared to my kitchen type: but I just cannot get it. And I can't afford £50 on the ideal tool (no income in 3+ months now). thanks- zH
-
Ok thanks ProDave: that gives me the full picture I needed. I can progress now. I think a velux being high, could get away with hand-done corners as knocks not likely.. but here I think beading is needed. I even think metal tape isn't the thing to use/ no structure to it, esp for a bedroom & workshop. Ok maybe I need to go your approach, & do a series of thin coats > let dry. Maybe then I'm not tearing my hair out making pass after pass & still seeing xyz showing thru.
-
Ok so let me get this right. If you skim a wall, you use metal corners (this is what's suggested by your post here). Understood. But what i don't understand, is whether these metal cnrs is --solely-- applicable to straight edge boards (as Id assume these 80's boards to be) Or, if not & they can be used with taper-edge boards..... if this was a viable alternative corner thing I could have chosen instead of my placcy ones. And onward.. same Q as I put to Onoff, whether this metal corner tape is you suggesting what's possibly been used on my 80's boards, or, whether you're making a suggestion as to what I could have chosen --insteda-- of my placcy beading (& therefore what I could conceivably go out & buy to use instead). why there's a line underneath.. I have no idea.
-
hang on.. are you suggesting A) this is what has been used on my 80's corners, or, are you suggesting B ) this is a method I could have chosen -instead- of my placcy beading? (as you haven't included a quote of my Q in the post before.. it does possibly hint at B ).
-
jfb but that would mean the heads would sit at best 2-3mm proud, & at the leg end of the beading.. which is what I don't want surely. I'm struggling with the beadings 1.5mm thickness + low 'bead' , hence Onoff's suggestion of raising the bead & using as-flat-as-poss fixing method (even copper hardboard pins n/g as their heads are a 1mm proud point). Ive got my fixing method.. & assuming workable, its now actually how to spread the mud on is my problem. Vertical corners & a flat 10" taper spreader thing = very tricky, for me. What I dont get, is how my existing pB (old 80's?) corners & reveals have been done. There's no plaster afaict, just pB.. but the corners are perfect without a hint they've been taper-done at the peripheries like I'm trying to do. They're flat as a pancake.
-
@Onoff great idea, all understood Onoff thanks.. sketches ace. I will try this tmrw. i was thinking maybe put s'thing inside the bead corner as a lift-off packer.. but pB edges so soft (esp here/ recent moisture making it crumbly almost) I dont think so now. Copper pins have a sticky outy head.. but got panel pins: only Q is tapping into the pB as some of its a bit fallible. should be ok. Its just the issue with a pliable placcy beading moving when I do your idea, but maybe 2x passes 1st to 'lock' the beading in place perhaps. I can practise 1st on ground room being a workshop.. but want to get upstairs 'decent' but doesn't need to be 'super-pro' (as if I could..). I also only have my 10" taper-join flat metal whatnot to do it, don't have a specific plasterers' whatnot. Has flex tho, if I can get the damn technique mind you..
-
I spent ages choosing the nearest I had before (cannot get it.. or i can, but a 90m trip to screwfix newtown/ too dear). Its this https://www.toolstation.com/pvcu-drywall-corner-bead/p99021 & spent ages on how to fix it, scrim tape sounded best.. but adds a fraction of a mm to 'leg' thickness I could do without/ struggle is here.. & the beady bit is shallow. Not understanding 'face of the bead' (looked with a magnifying glass, but cant see any little face) & the lifting 3mm idea. Not quite getting what your referring to.
-
Hi Peter- ok good I think I'll go with some decking boards. unless they cost even more! ah ok understand your point about the base rails. So you suggest -only- using the upright pillar bits ? I guess that means then the many 'spindles' (I think is the name) design is not feasable without base rails then-?
-
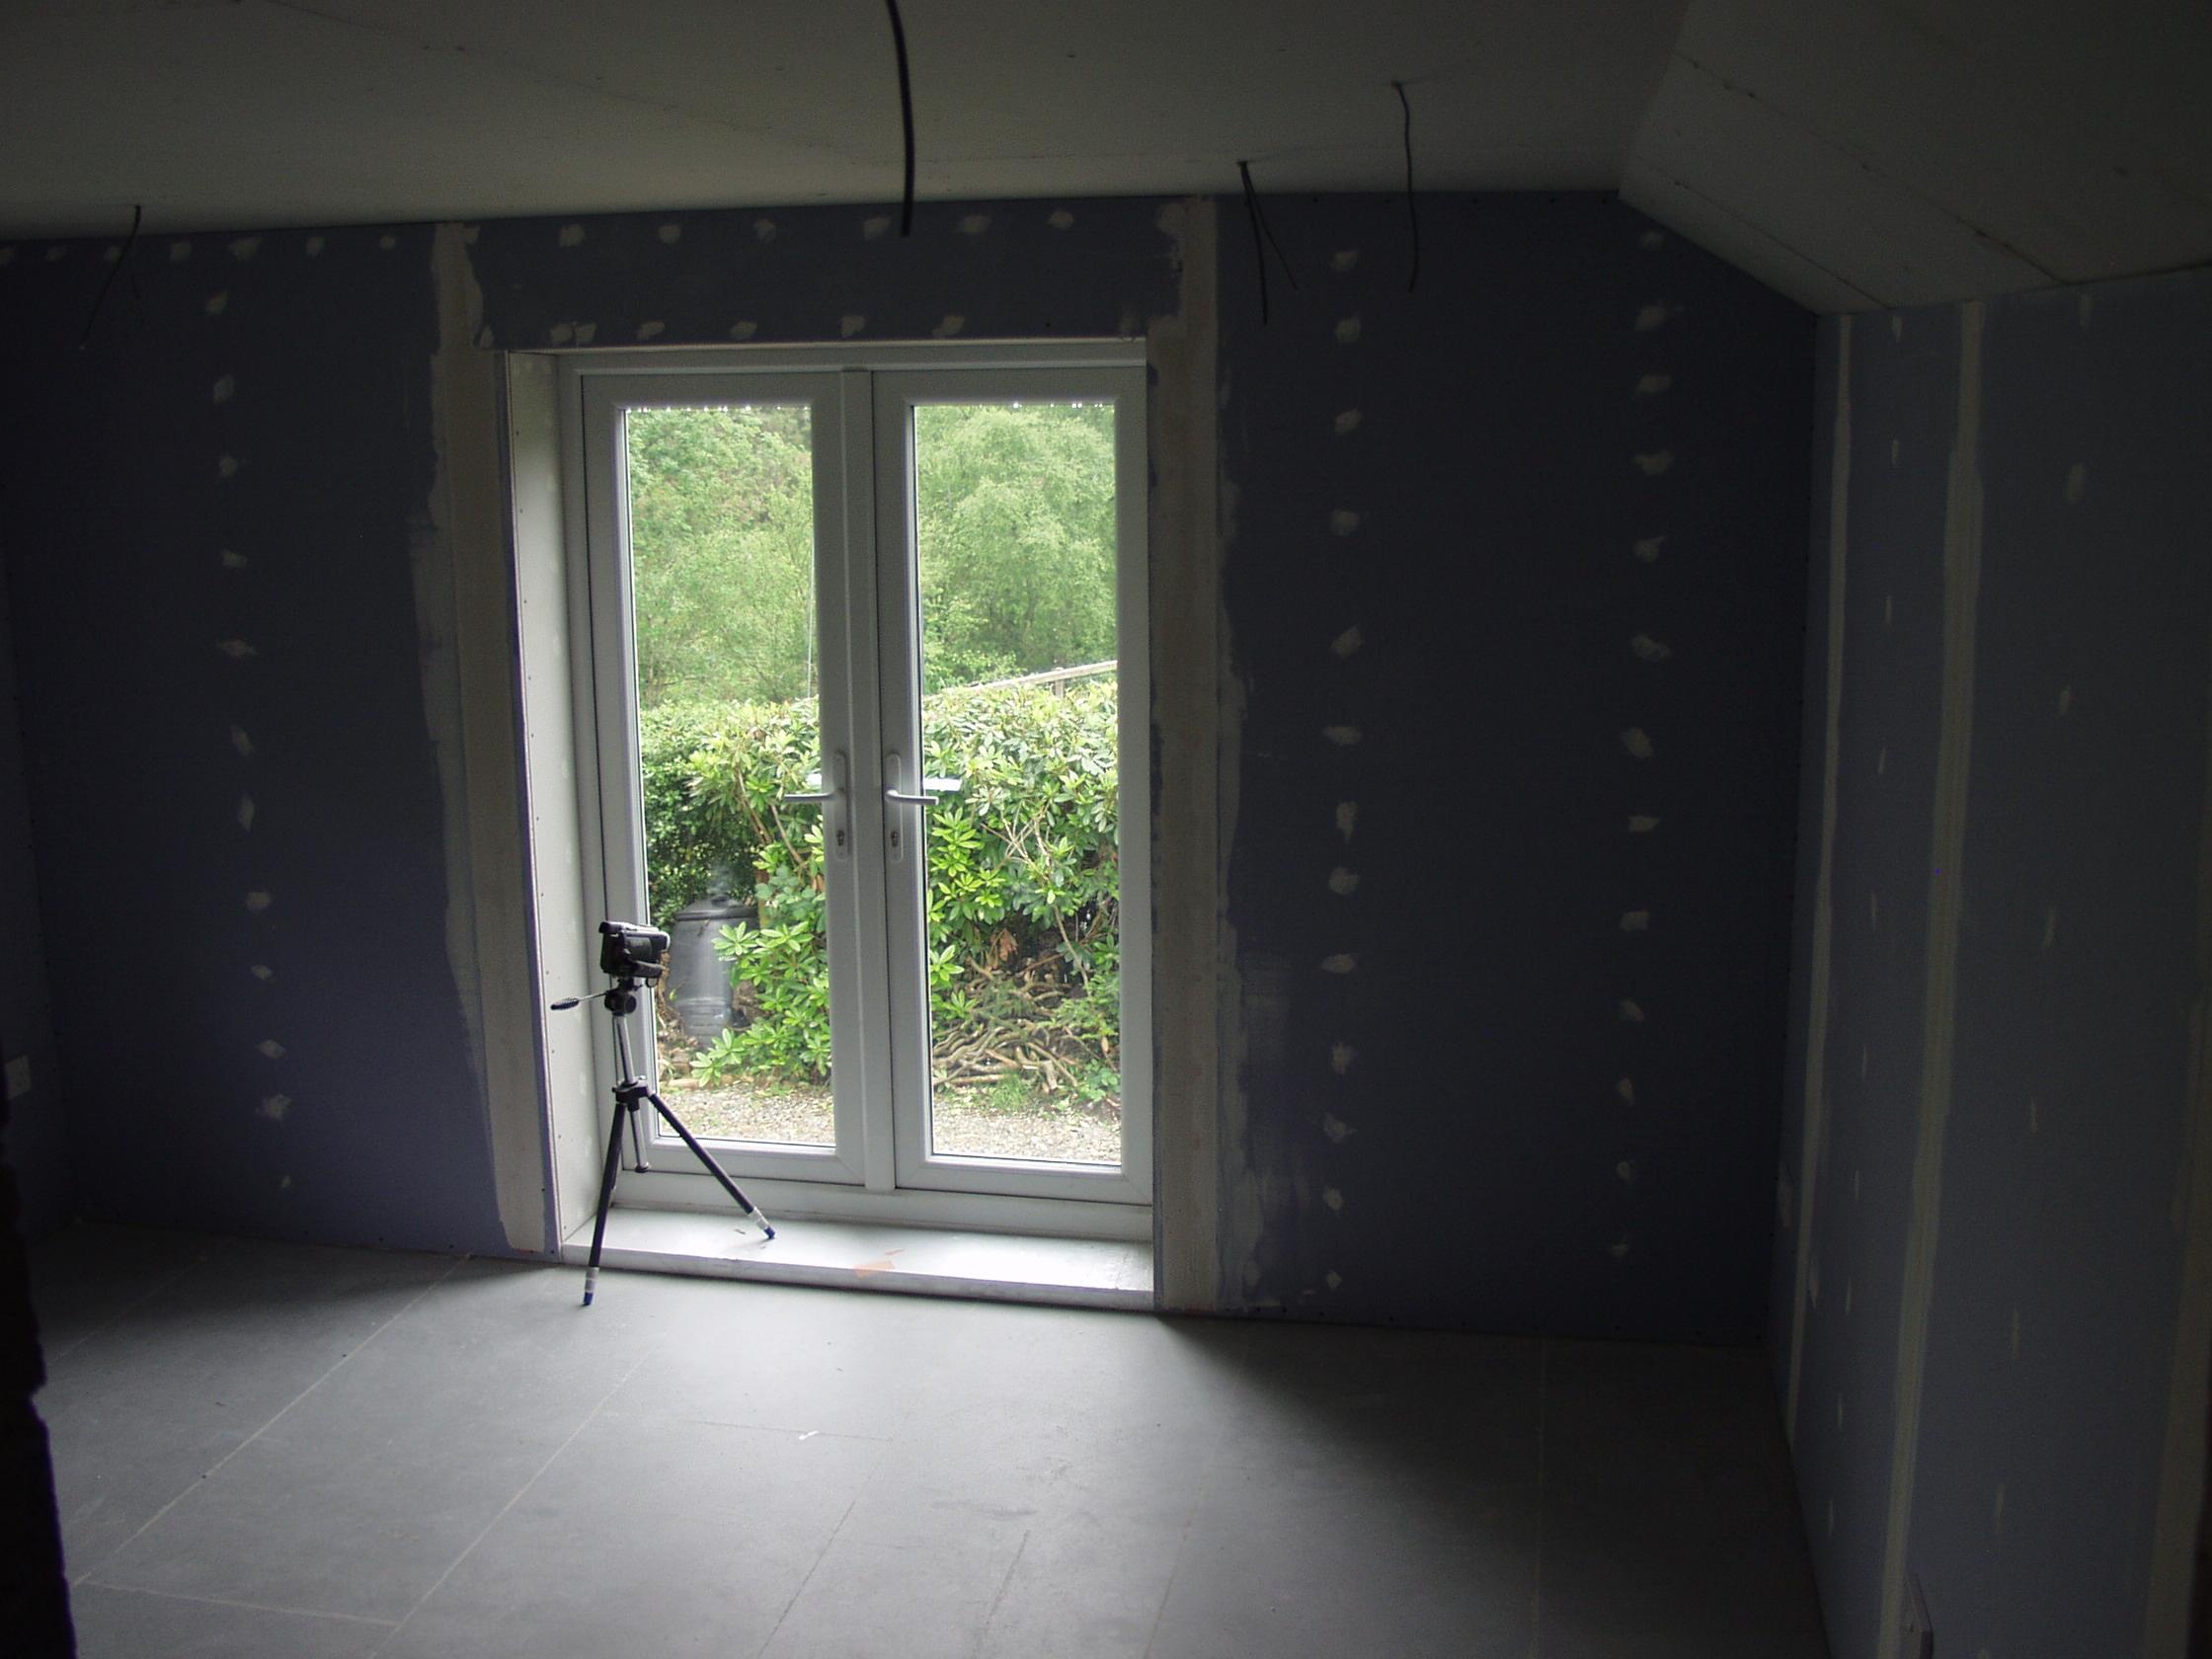
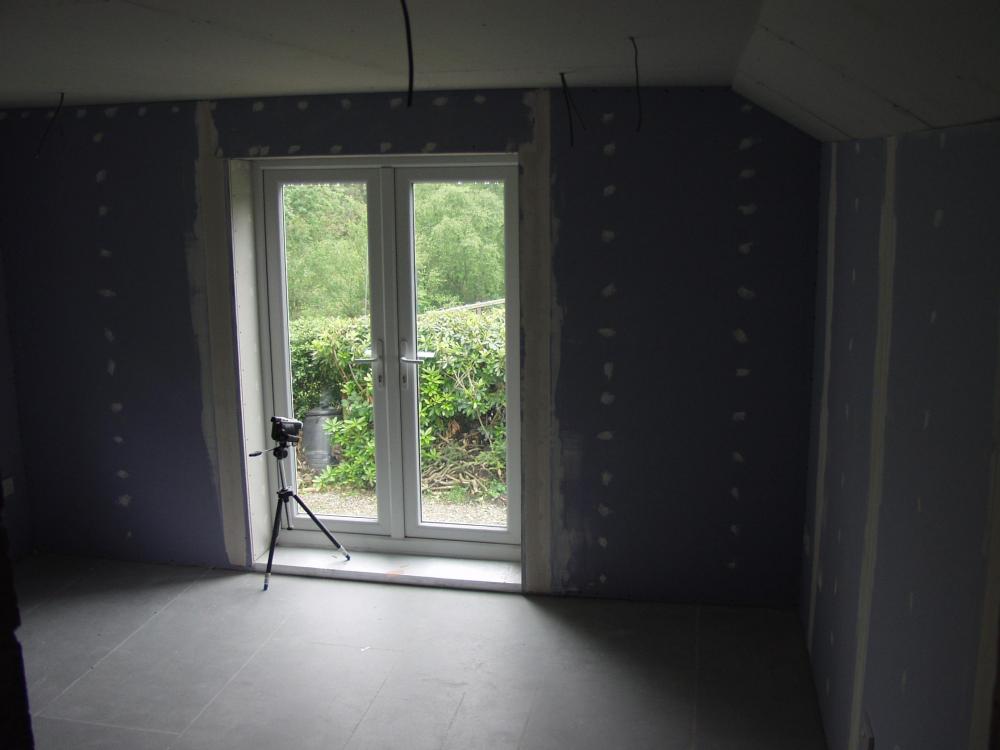
@PeterW or @Onoff I'm having a real sod of a job on my reveal corner beading.. Onoff I think this is your forte-? When I did the kitchen I nipped off one bead 'leg' (tiled inside of reveal) so only needed plastering on the wall. Here I have both the wall & the inside of reveal to plaster, 6 areas in total, for two windows.. & two doors.. & its totally daunting. Ive had a go/ made a (bad) but start its the 1st job that's properly defeating me. I cannot get the same beading as kitchen. This was thin, &, the bead fairly big = an easy task to feather-plaster it. Here I have thicker bead 'legs' & a less prominent bead = an absolute sod to plaster & not show either the bead &/ or the orange scrim tape stuff showing thru (I spent ages determining tape was the best way to fix: the pink gubbins I used in kitchen was awful to use as a fix, a total mess due to latticed plastc etc). Ive seen clips, but they're such pro's & all are eg's of wall edges.. window reveals are pesky areas to get into, esp the upside down bit. Any tips/ advice? thx zooter schmoot.
-
Can someone help me out on my corners? I assume my 2x window, 1x door, & french door reveals need plastic corner beading > feather-filling. I have googled & seen clips but the info I need is not apparant. Is this the only way to finish my corners for taper-edge boards? Can metal corner beading be used? What are the options for attatching it to the pB? Are some beadings specifically for taper-edge drywall finishing (a graded/ feather fill from the pB surface > to corner bead point)? Ive done before in kitchen, but alot of pink grip mess.. & frustratingly I can't get the beading I used, which seemed ideal (nice & thin). So I'm not sure if I chanced upon ideal beading for my non-skimmed pB walls, whether it was specifically designed for it/ if any are specifically for it. Thanks zoot
-
What's the idea where 2 boards join in a corner? I noticed the paper join tape I have has a creace for 'corners'.. but if I have 2 straight edges joining here, what to do? presumably the tape's for 2 taper edges joining at a corner.
-
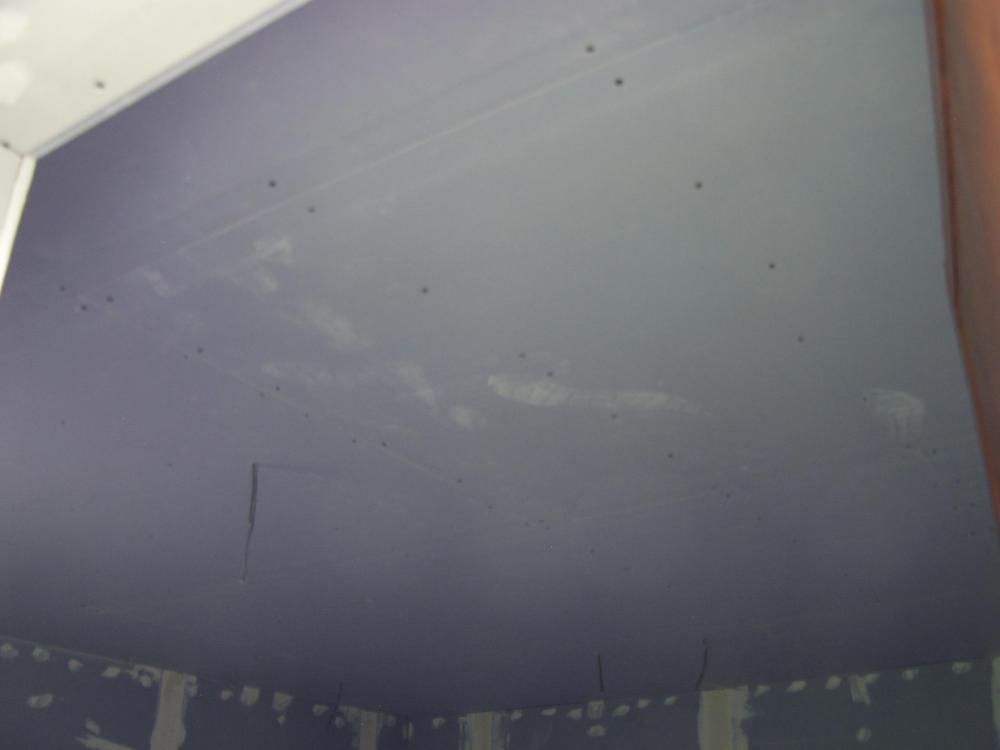
Anyway progressing.. very pleased with my ceiling: hiring a board lifter (£25) was fab/ even making the job enjoyable. Walls trickier due to uneven studs, so I often have 2 boards joining with a 3-5mm discrepency all the way up, making filling (& esp sanding to somesort of flat, my next job) a real sod. Ceiling no issue as all joists level one to next.
-
Haha! only just seen this reply. No I was referring to the pic just above your pitch black one! so in this pic ^ LHS of the window (not the french doors pic) I've scribed the pB to the old wall. You can see how inny-outy this old (white) wall is by the wibble of my scribble. I wonder if this old wall face could have the slate stone revealed. Or maybe its a stupid idea. I guess proof's in the pud regarding how warm the room is once autumn hits, & therefore how feasable the idea is tho.
-
Actually Im asking in the wrong place re. boarding my walls.. skimming ceiling prepped (once I can hold of the plaster bags that is).. so thread done. thanks chaps.
-
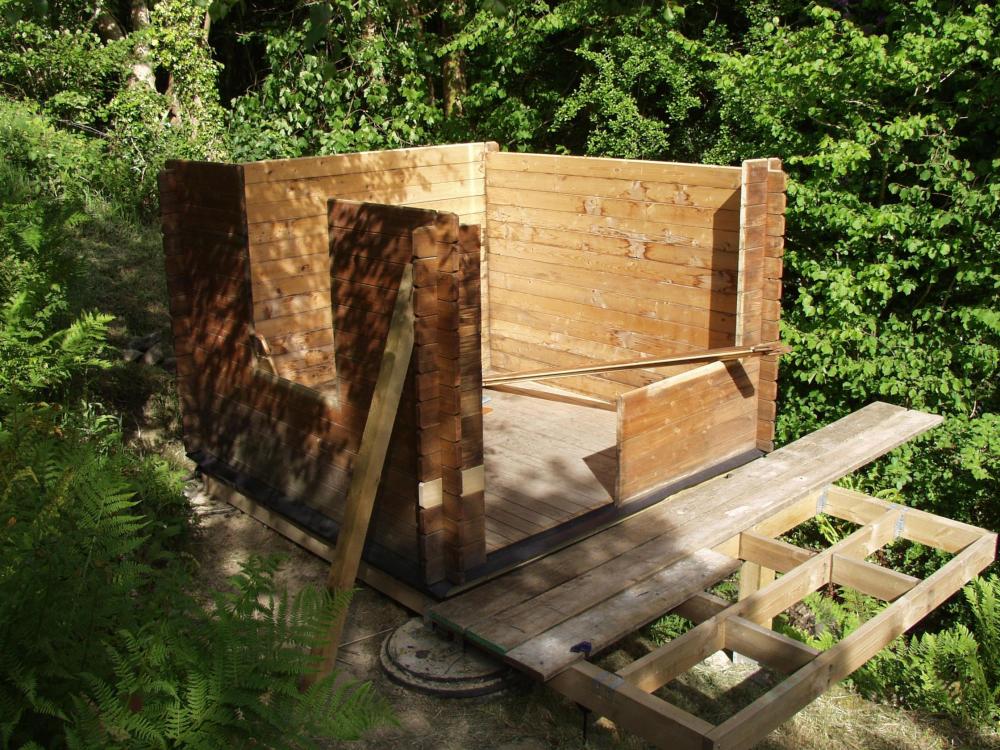
@Onoff great link that/ good pics of the treehouse-cabin. Yup an Onoff cuckoo gargolyle-on-bigFO spring needed. I've always wanted a spiral staircase.. might think on this as an addition to my extention balcony. A few moons away, but spurs me on! It's the softwood style handrail I want I'm certain, in the pic here https://www.edecks.co.uk/m/products/119/29/79/0/1800mm-Hand/Baserail . Only needed on 2 sides front & stream side (LHS left open, a sleeper for a step up to deck). That's a good start. I'm still considering the deck floor: 5x scaffold boards is £110.. pretty dear. Do I have enough support I wonder, IE my added nogs etc, to instead use standard decking ~5" wide boards? (usual types, seen in the edecks pic ^). gotta be cheaper surely. cheers zH
-
The no-nonsense plaster's fine/ decent stuff it seems. Few probs to sort I need advice on. The studs where the pB taper edges sit, are often 5mm proud of each other.. so I have a taper-edge join offset to fill: problem is once fibre taped & filled (1st fill) the pB 'trench' near-enough flat.. I can see the fibre tape showing thru/ on the surface, all the way up the pB join. If I now fill my 2nd coat 2mm or so ontop > then sand I'll innevitably start hitting the tape.