zoothorn
-
Posts
4749 -
Joined
-
Last visited
-
Days Won
3
Everything posted by zoothorn
-
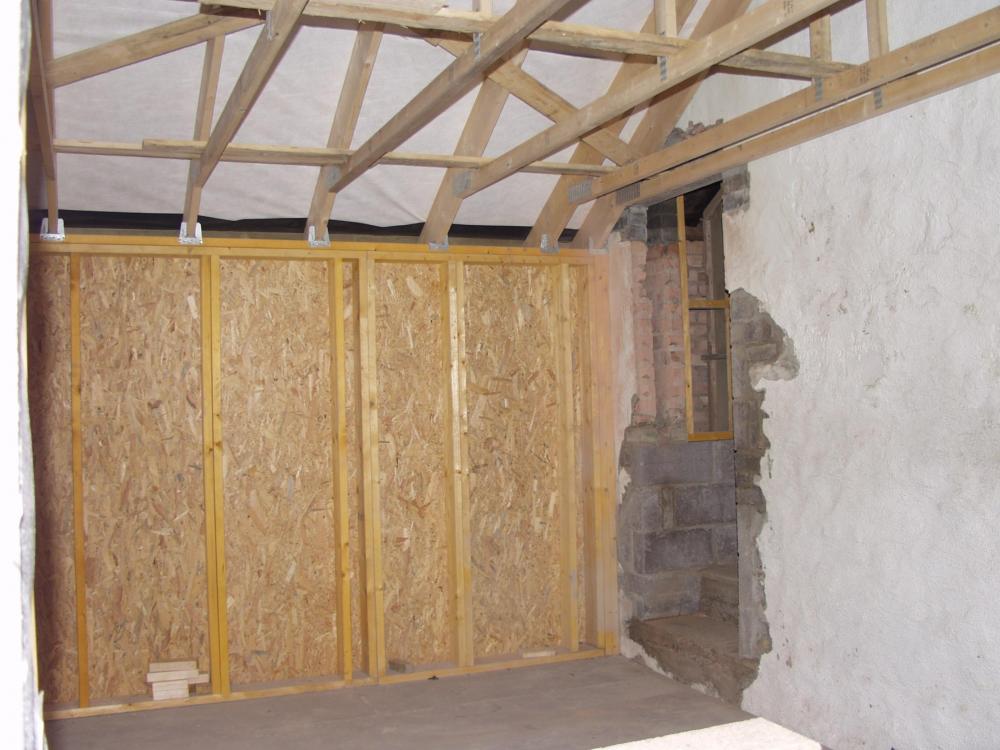
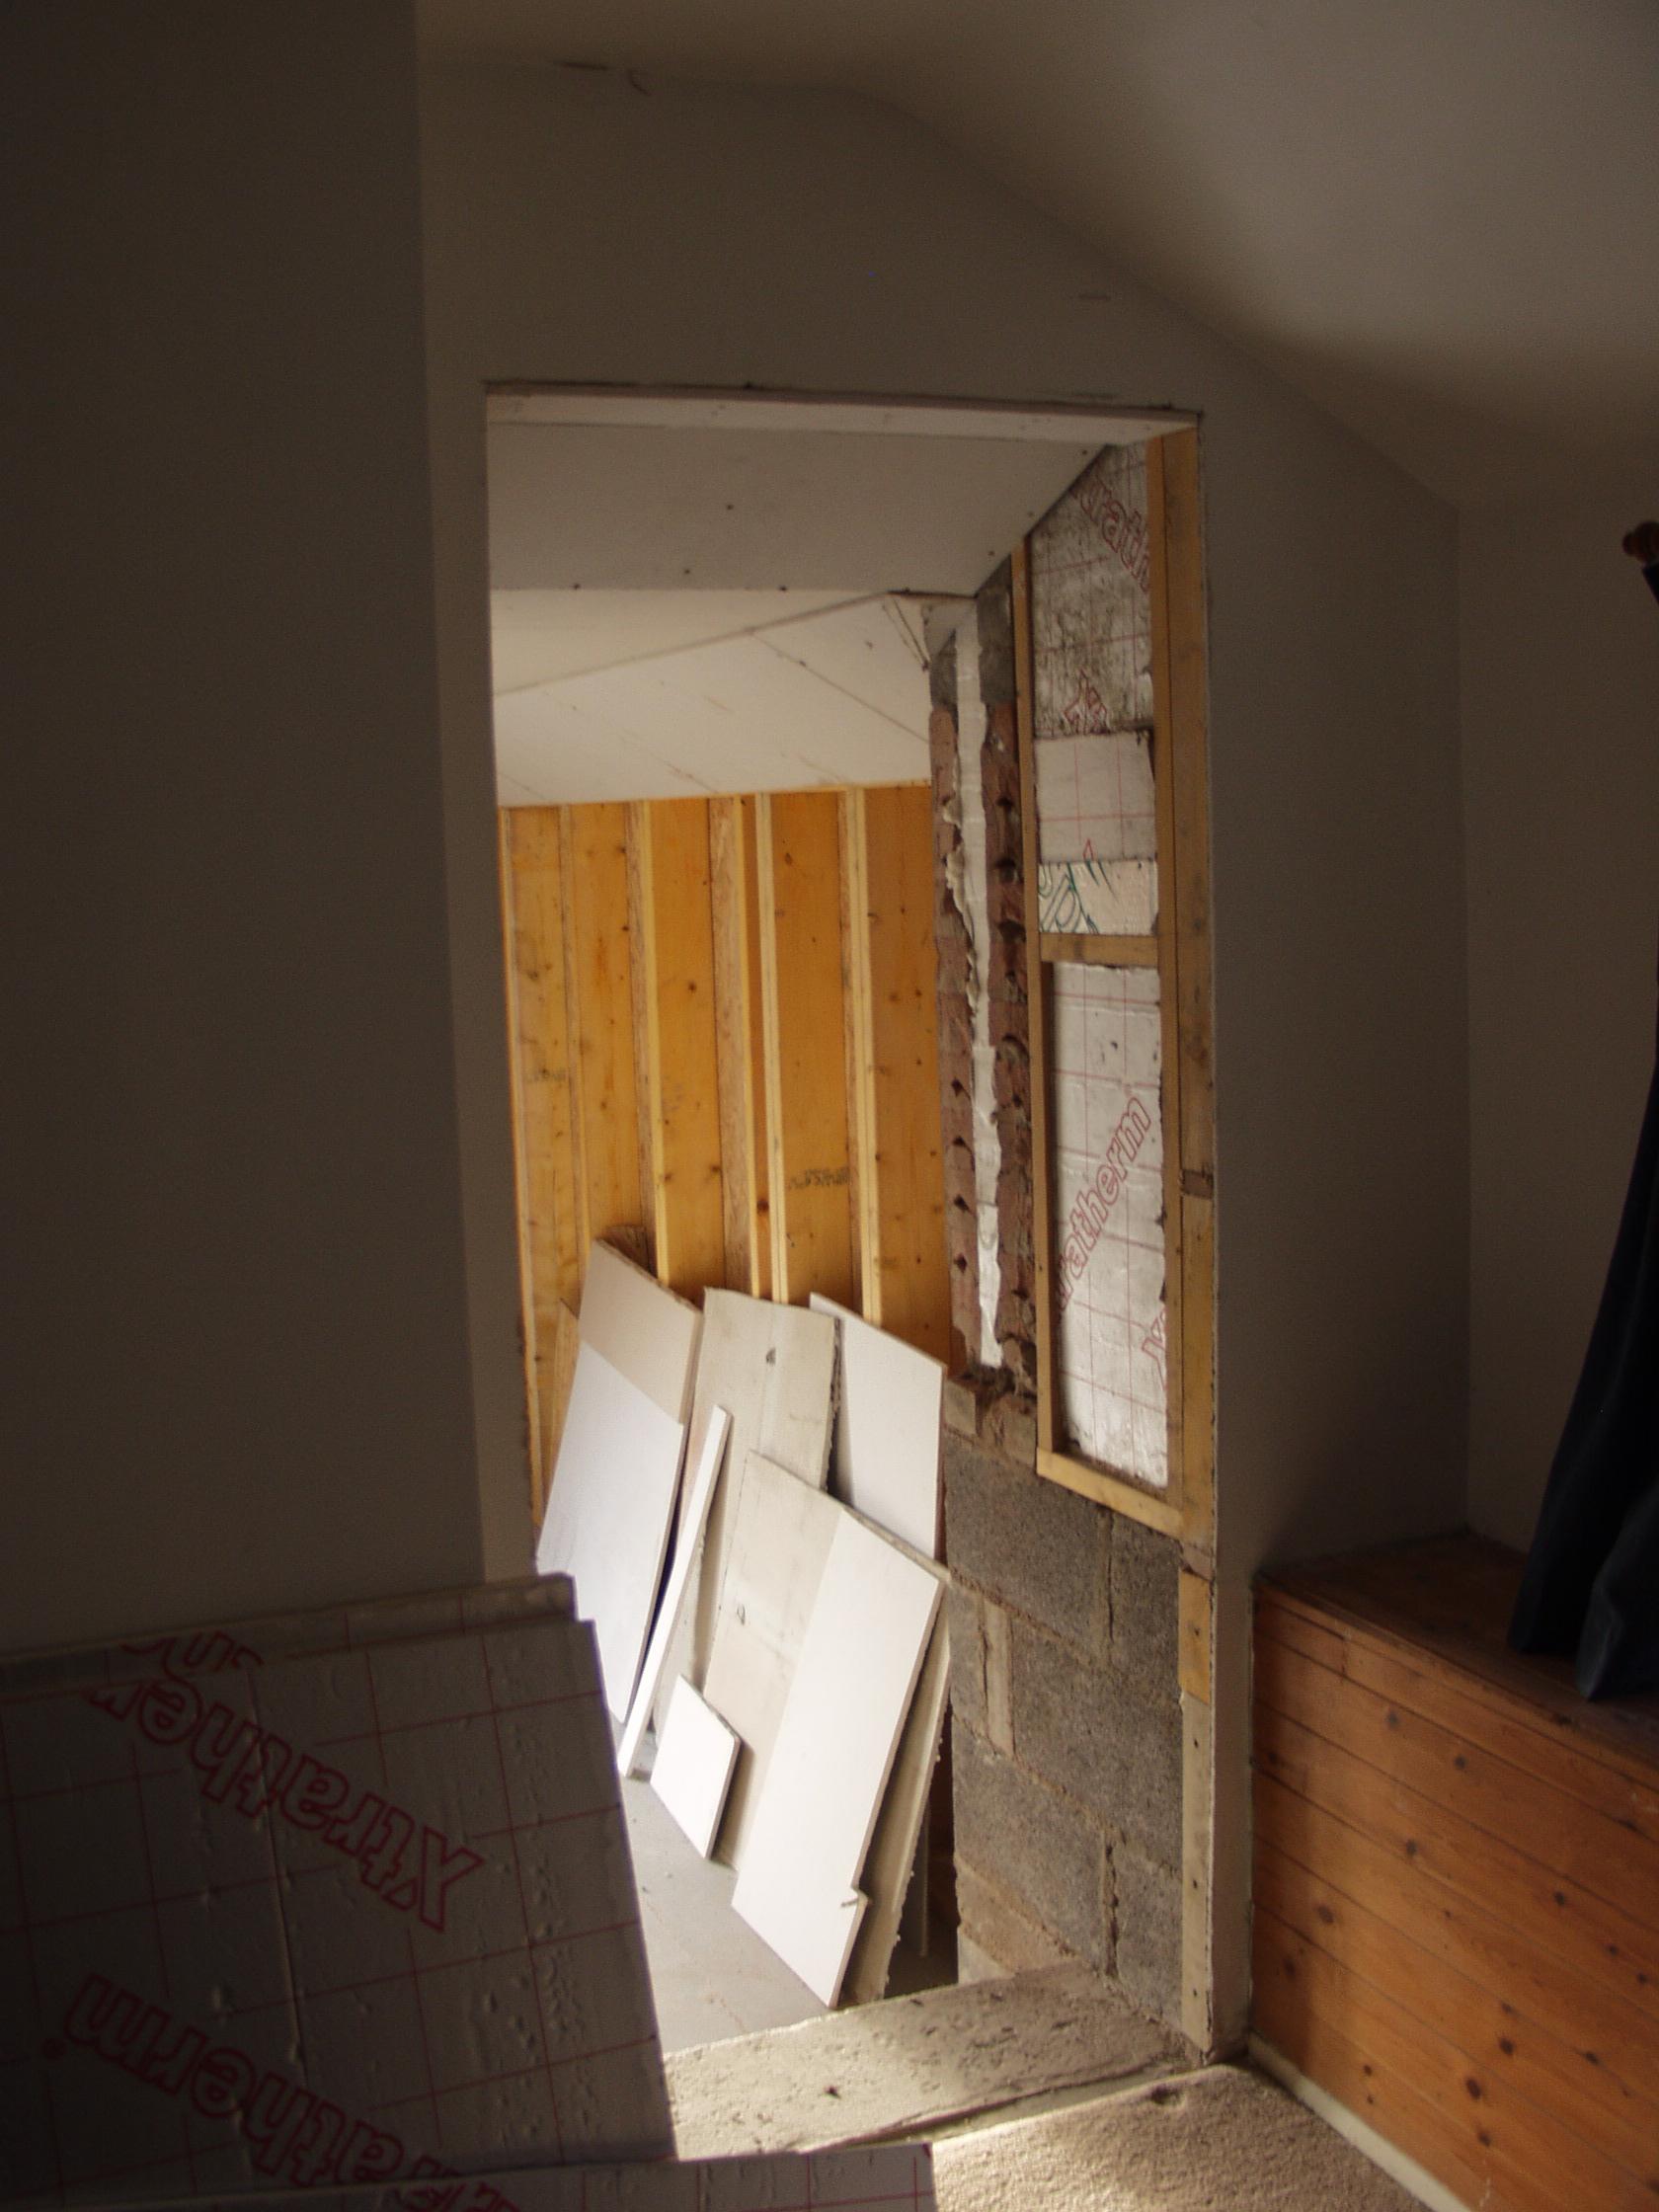
Last leg of the pB job.. one side of this knock-thru area to do (one done LH, with switch in), & lower room low block 'covering wall': I found some damp in old wall render just above.. so need to address this b4 doing this last easy pB job, but before 6 weeks or my soudal adhesive n/g. I had my spark in to do final 2nd fix stuff, & all 11x downlights/ dim switches/ sockets done (& temp powered up/ look great.. tho spots not the right choice in retrospect for my workshop: my fault: the ceiling being so low the 'spread' of the lights I hadn't accounted for.. so the floor's perfectly lit, but the worktops won't be nearly as well lit). Anyway 1 mistake. I marked the wrong position for last downlight in lower room (how Ive no idea/ 3x checked), so 1x 57mm hole drilled by mistake & no cable found above (redrilled it 8" away in the correct position). So I have a 57mm hole in the ceiling to repair/ plug. I've kept the removed pB ~52mm rounds. Advice please chaps. Thanks- zoot.
-
Ok point taken.. that's a good trick tho/ hadn't thought of that. Peter these sections are a pig of a job.. hence I need to prep as best I can. One's taken most of a day to shape & fit & not even put up. Getting the curve @ top, sorting out the bow in the wall (convex, & sideways as well as up/down), cardboard templates, messing up 1 board with 1st go (as soundbloc is so damn heavy it broke jigsawing my curve).. its an utter sod. Its far from 'just whack it up/ stop thinking'. I'm dreading fitting it.
-
@PeterW yes saw this clip on the toolstation foam can page.. thx. What do you mean by drill it & plug it (it being-?). Does this adhesive expand like LE stuff? reason I ask is I have 2 areas above the block, on my LH wall side (with the switch on): the timber/ insulation area I screw into, but next to it is a brick/ render area which is set a good 1.5" deeper. The block & timber areas are flush., I'm wondering if I just foam back of the pB, in this top R area, say 3x as thick.. & just hope the adhesive expands forming a join between the two surfaces. Or.. do I LE foam over the deeper area prior to boarding, wait till gone off, & cut it off flush with the block & timber areas.
-
@PeterW so the idea is to pB these 2 knock-thru side walls.. & door frame goes in over the pB/ am I doing this area the right way round pB'ing 1st > frame 2nd? If so I'd have thought tho this means I lose 30mm of door W (foamed pB = 15mm let's say).. &.. I can't see where timbers are to fix frame onto.
-
Aha 1mm? that's great then. Not gonna be an easy job squashing flat.. but got pB aplenty if I c*ck up. Shaping the damn section tricky.. so I'd prefer to get right 1st time. The soudal clip (toolstn £7.14 btw/ s'fix £10) just gives me impression the foam = a good 2cm gap you see.
-
You mean the dedicated Soudal Pladterboard Adhesive, red/ yellow can? (this is what I have). Sio the idea is you squash the foam flat.. so effectively you're aiming to minimise the adhesive 'gap'? If this is the right way to use it (I don't know.. it doesn't tell me the thickness the product introduce) then I guess I can screw into area above without concern the pB will break.
-
(Soudal Plasterboard Adhesive, dedicated stuff: got a new can/ so not using my 1/2 can of the soudal LE foam for this.. one thing it doesn't tell me tho is the thickness to aim for, or what you squash the pB onto a wall, the foam making a gap of: *25mm maybe? 5mm?) Hi Peter. I get the idea suggested, just a little trickier surely: if foam needed to bond pB to the block area, & you factor in a *gap.. then screwing the pB into the timber area above will break it. So I either have to spread a very thin 3mm or so adhesive layer (or, squash the pB on very hard -I don't know how it behaves/ if this possible) in order to then screw into the timber area above.. without there being a step, to mitigate a crushing of the pB.
-
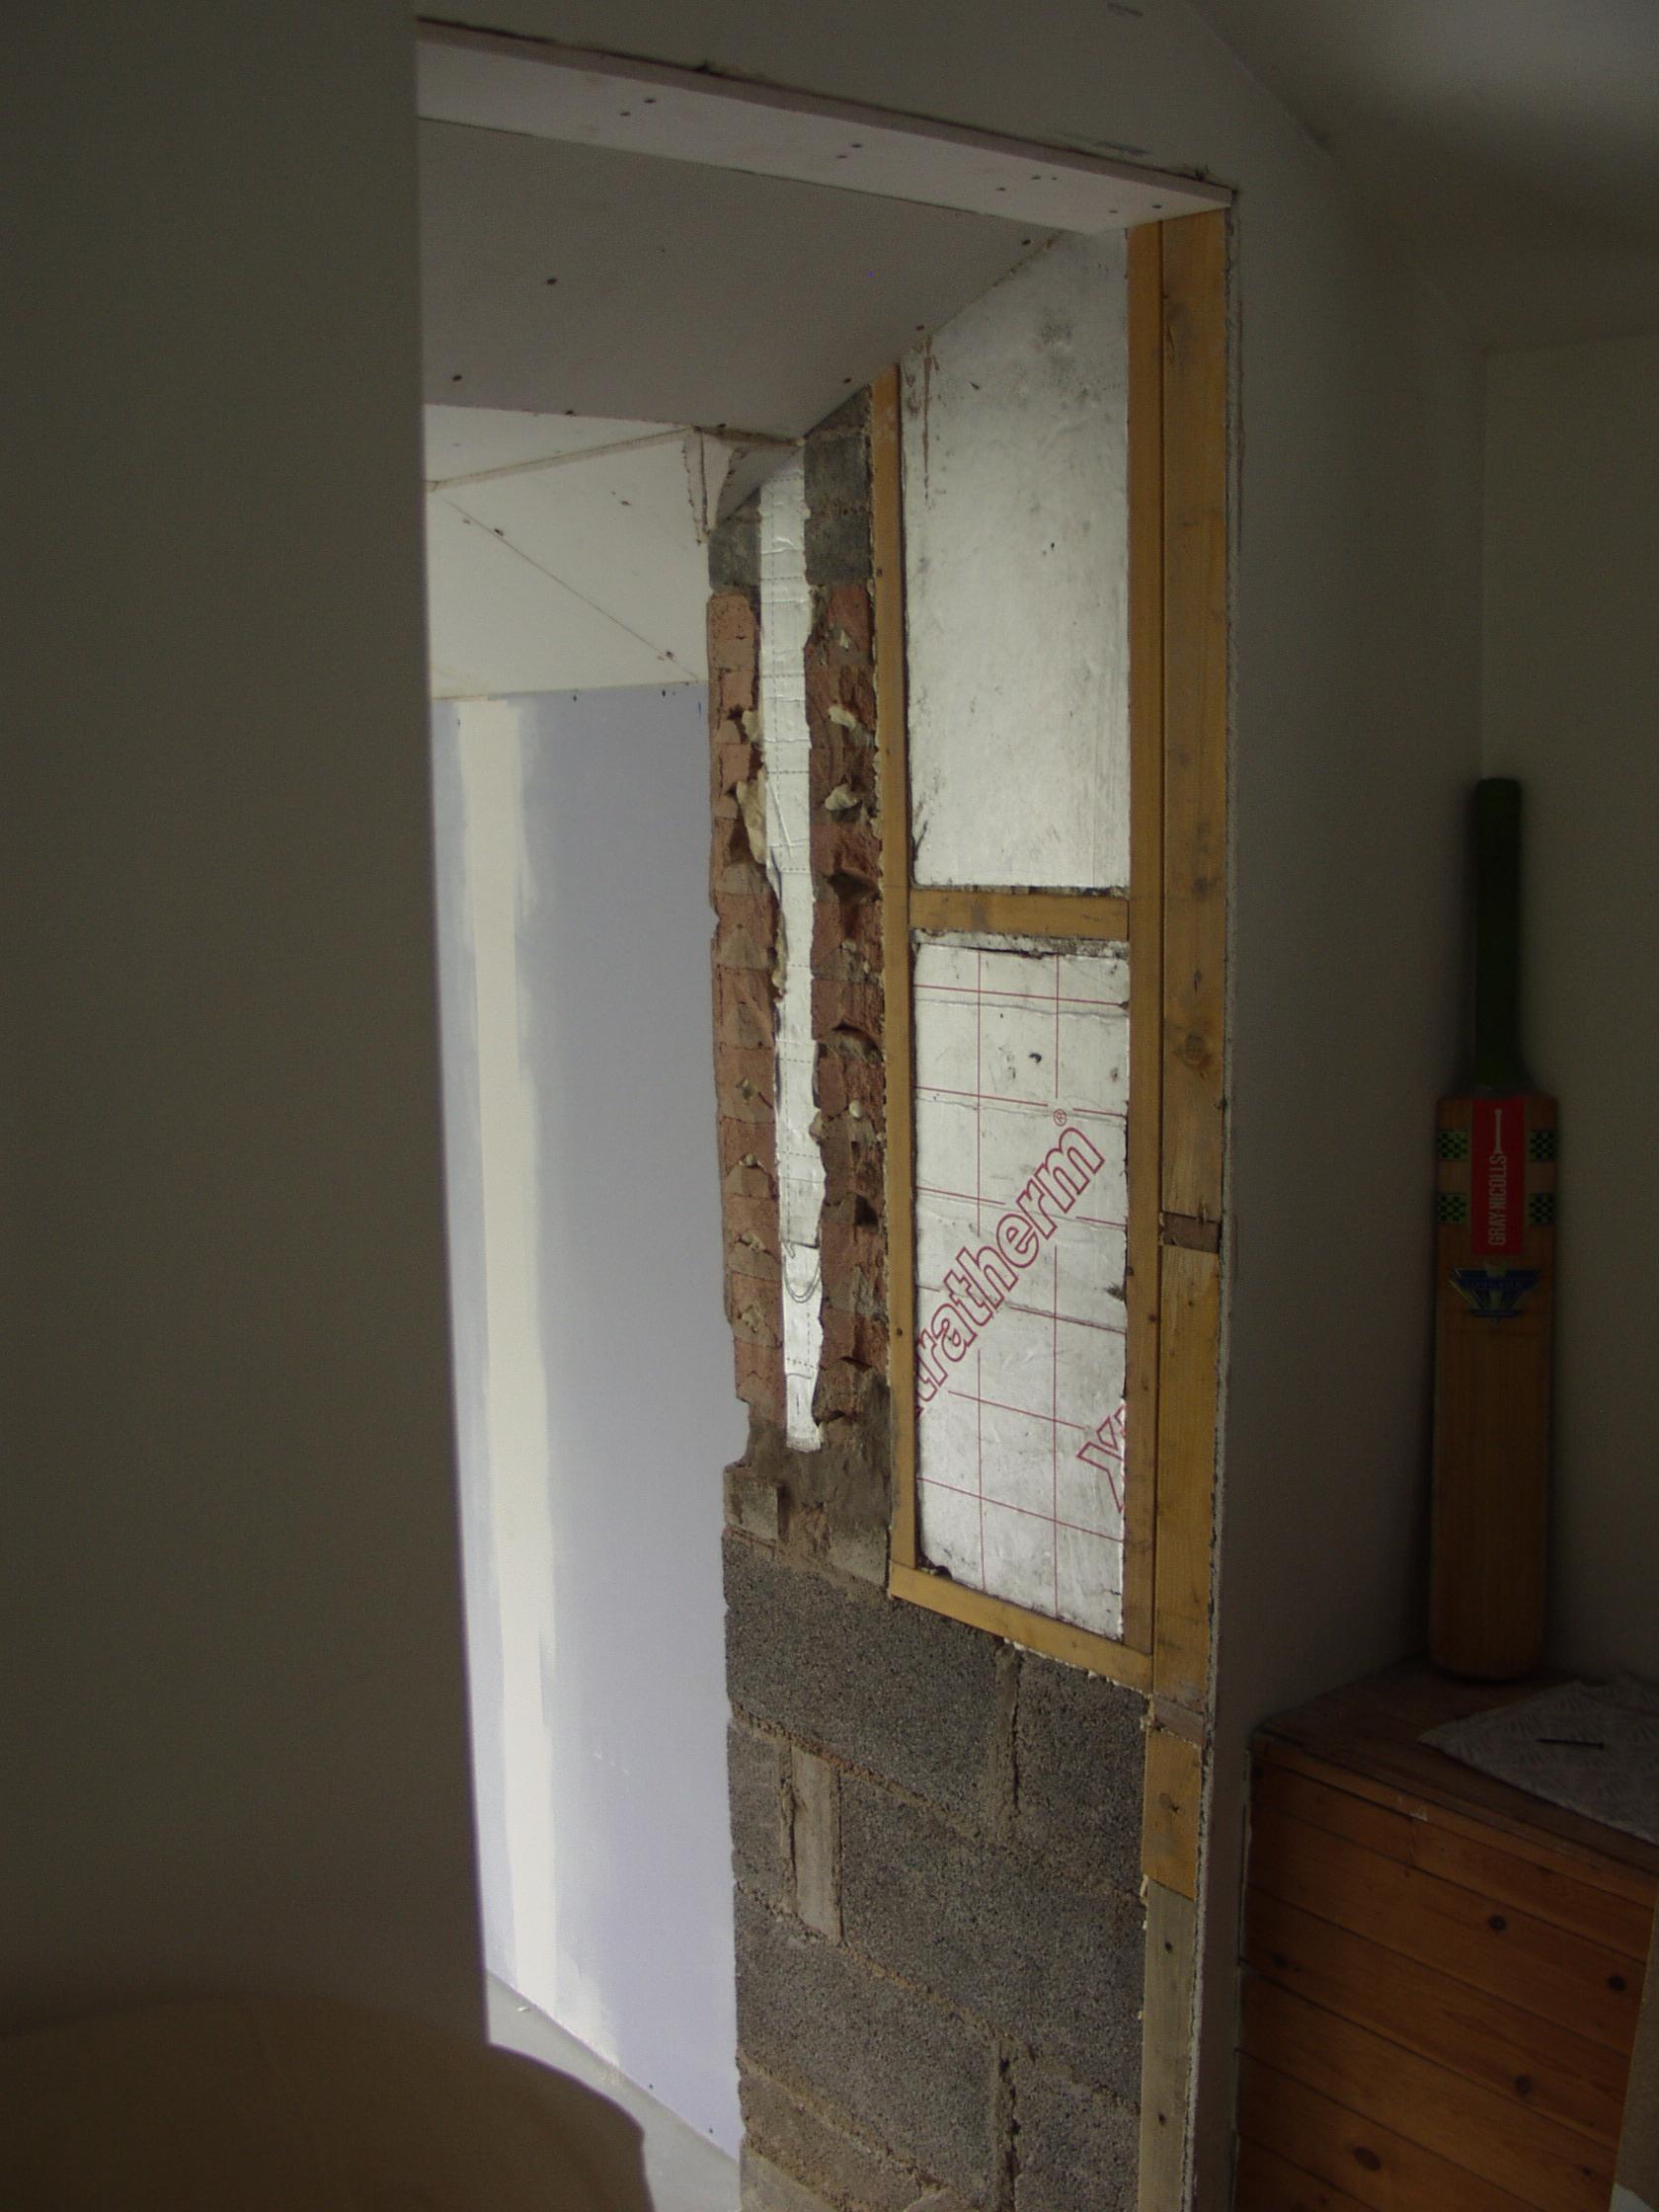
@PeterW or @Onoff or anyone who can lend a hand.. My spark's coming tmrw to do 2nd fix, one thing being the light switch set in the knock-thru wall (LH wall in above pics). So, just dawned on me I need to get this side pB'd before.. if indeed pB is the right idea for these two 'tunnel' walls. So 1st I need to establish if pB'ing these two side walls is the right approach. At the mo I'm stuck not knowing how to cover/ finish these walls. Also the door frame: is it correct to put this in 1st (assuming I have ok structure to attatch it to.. another Q) & then if pB is the right way to go, to pB the knock-thru side wall up to the frame? or should I pB the side wall > put the frame in over pB? I surely lose 3/4" of door width doing it this way (pB + adhesive = 3/4" min) tho. thanks- zoot
-
I need advice on the knock-thru walls, how/ what to do here. The last main job of the build for me. Firstly, as the door is to go @ the top of steps now (so next to the crix bat).. is the idea to address (plasterboard?) these sides -before- the door frame's set in? I have a new soudal plasterboard adhesive can in case needed. The light switch is on the LH wall (just backbox/ wires in at this stage). The ceiling above is now skimmed too. Thanks- zoot.


-
Hi Peter- ok understood.. so, I'll add my step additions after its signed off. Now its been skimmed (looking great) I'm even lower still.. or rather as I'm stepping off onto the lower step, my head is cm's from the ceiling here: its a total 2cm fluke I'm not hitting my head tbh. Yet another issue with this 1ft anomally problem: every damn thing is affected, at every turn/ continuously. But I have to lump it.. but by god it inflames me. Ideally the top step's drop point needs nipping back a good 4".. but me to do, or get s'one in to refashion it I just can't deal with. Ok I need to forget this step/ height issue for now (or I get angry.. again) & concentrate on getting a frame in the easier (?)/ more sensible top area. Plasterer said I -can- add a frame top section over his skimmed last bit/ a 4" wide, flat pB strip where the top part of doorframe likely to be.
-
It does make alot of ease actually even plonking down a bit of scaffold on this lower 2nd step, then 2x bits of cls on the room floor as a '3rd step'.. as I have temporarily. So maybe just 40mm step addition is all needed on this 2nd step. If I put the door @ top of stairs 1st > get signed off > then put in a 2nd door later.. I don't need to worry about BRegs specific heights/ I can squeeze a few cms perhaps, & put my extra bit on the steps. Right- so if I concentrate on door placed @ top of stairs for now I think Peter. But ideas/ info useful to come back to. cheers zH
-
Ok will wait for clarification on this BRegs point. Yes it would make more sense to put it top of stairs.. but I'm concerned about the structure of the corner here RHS to hang a door from. If I can establish what I have is ok, or, how I can sure it up (without ripping out old 80's pB, you can see in pic pg4, around the frame area > to redo timber xyz > redo the pB).. then its sensible to have the door here I agree. I had wanted 2 doors in fact, either end of the 2 steps (for a bit of extra privacy, should I have guests in next bedroom).. but for now just the one: so if I do the sensible one 1st, then the tricky height one -if- I want to once signed off/ next year or so. Thanks- zoot.
-
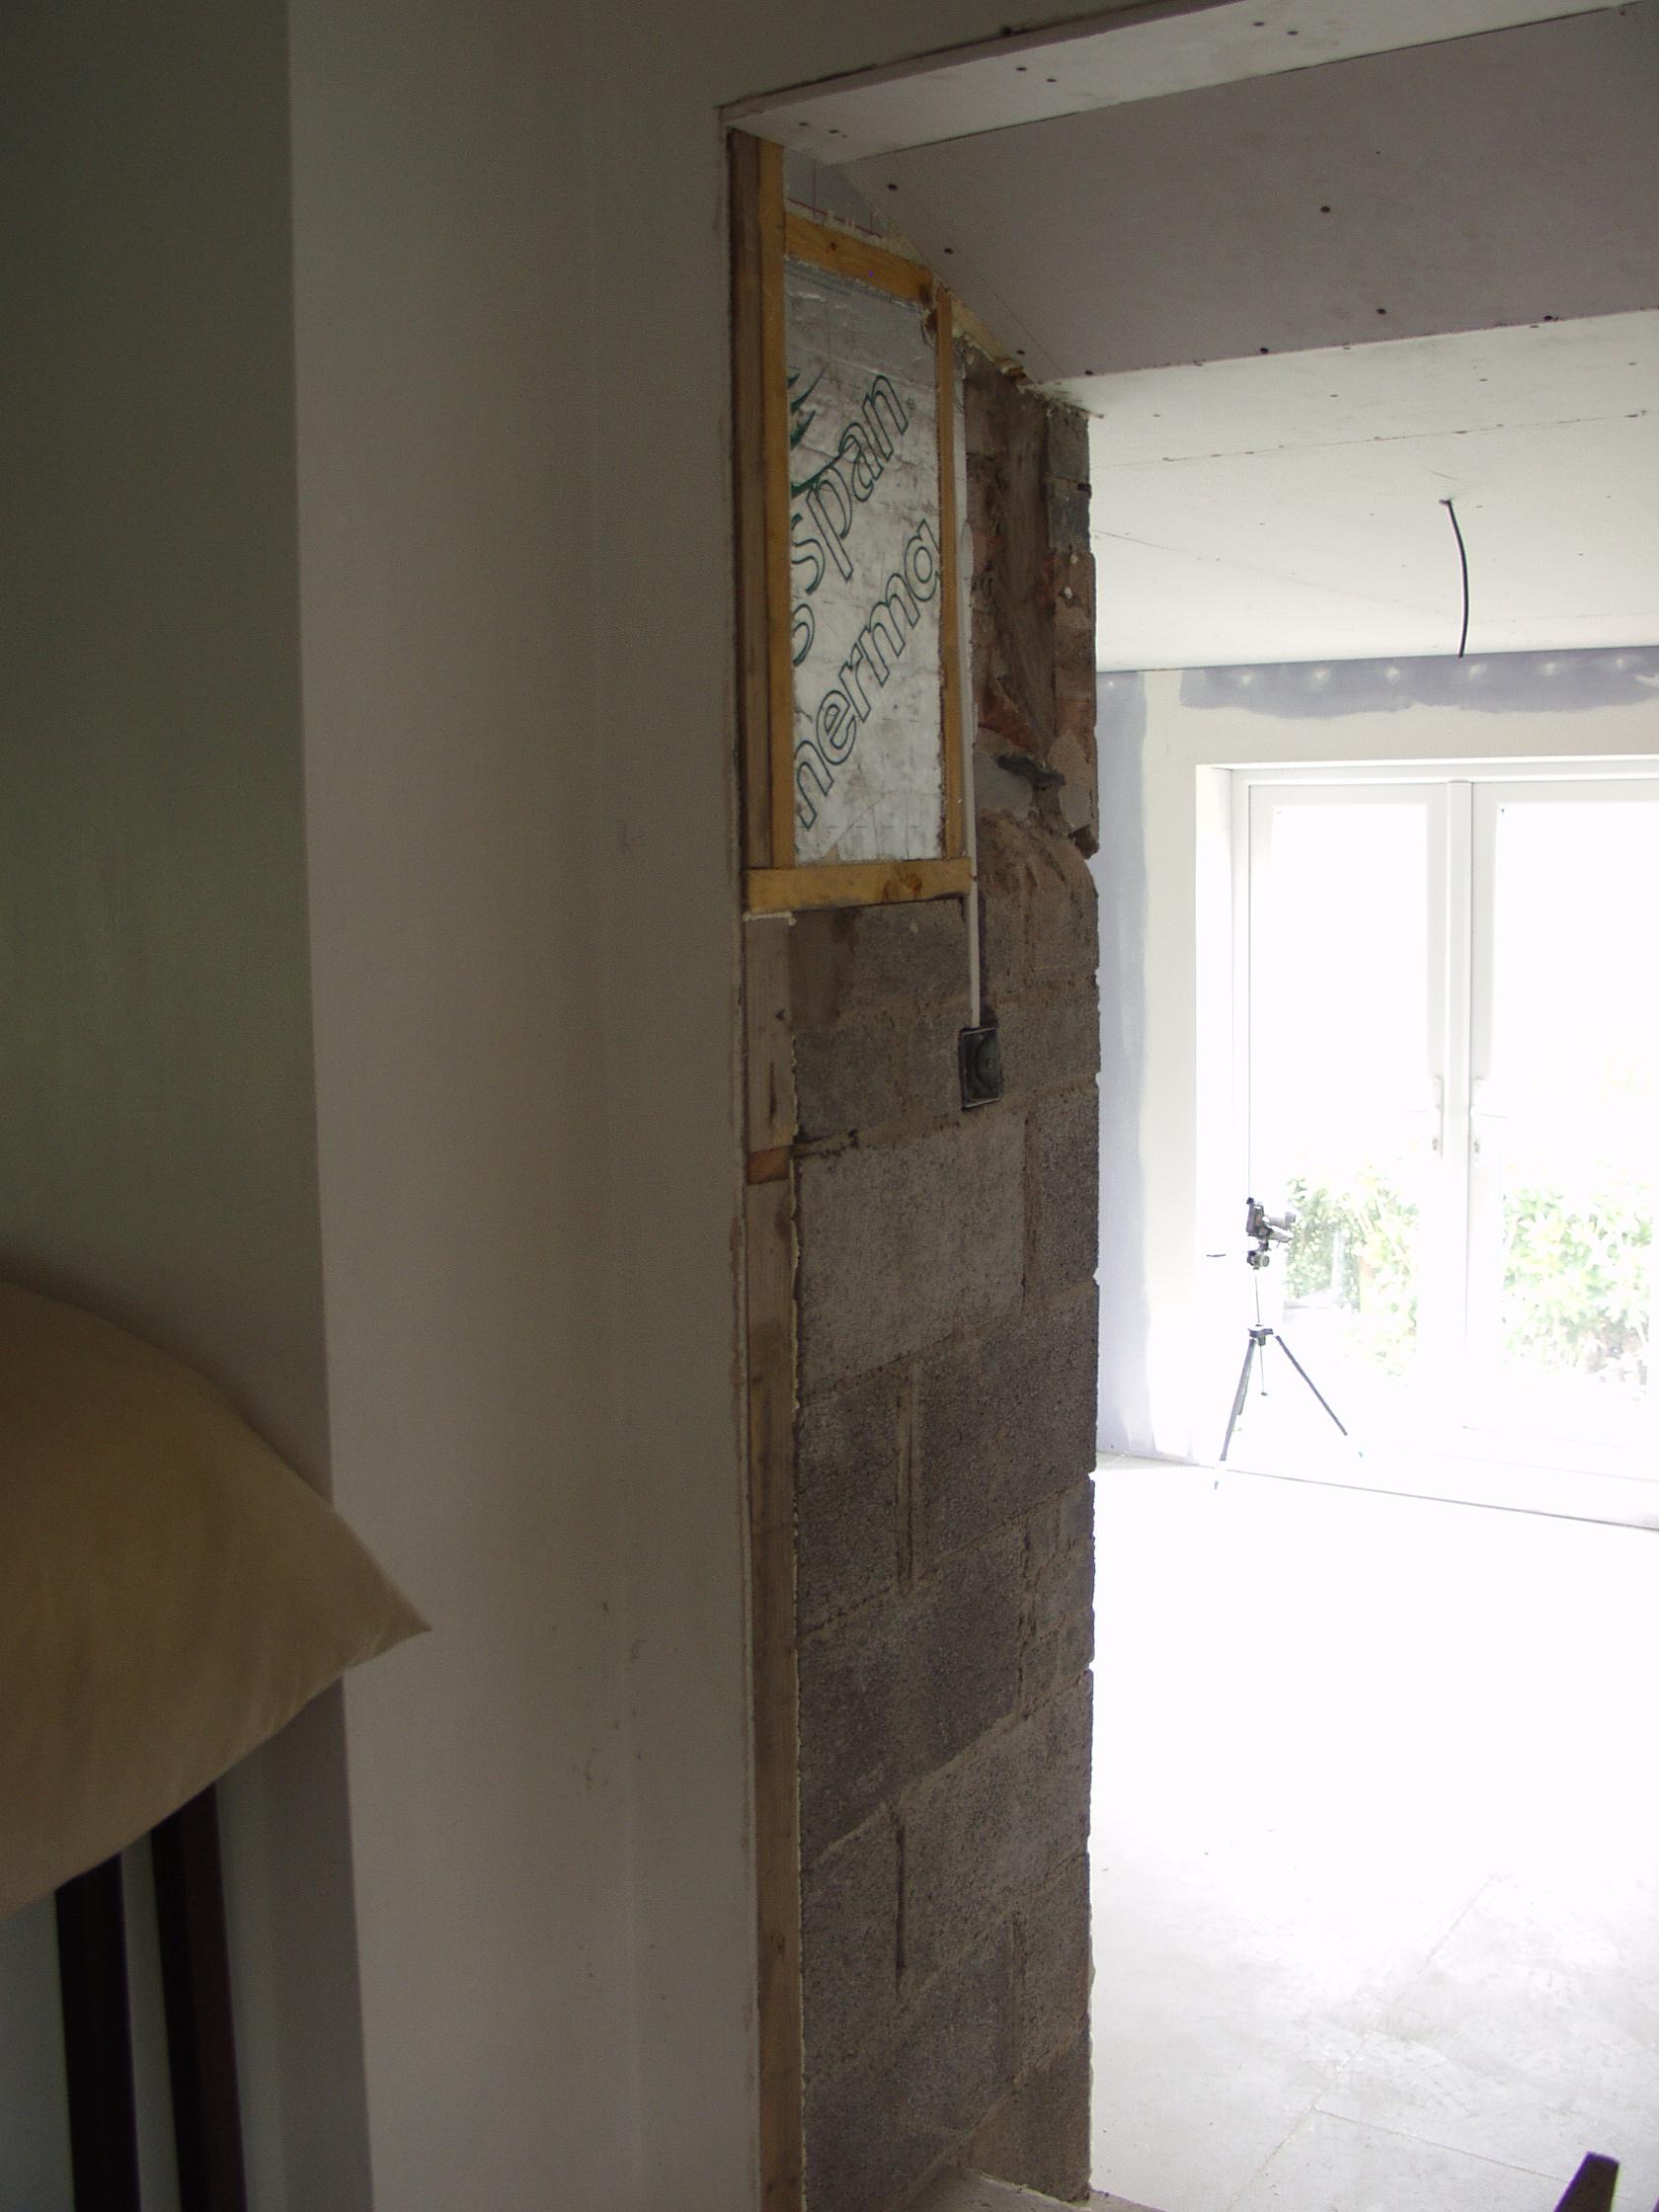
@PeterW ok measured to your red line (understanding why). 1990mm. No door or frame (Im WAY off/ haven't even rendered or pB'd knock thru yet let alone know where the door can feasably go). The steps down you see, at the moment are 2x huge ones 9" each.. I was hoping to make into 3x by adding a new one within the room & adding 60mm onto the one you can see most of/ one I'm measuring up to the red line from. These steps are so big as to be uncomfortable you see.. 3 would be great, & an easy addition timber job to sort, I'd hope. But it adds a big sod into any door equation going on this entry place.
-
If that means the frame.. no no. I'm way off even deciding upon where a door goes, let alone -if- it can open without being hampered. Your idea only works, if a door can open. At the mo I'm picturing how/ if it can, nipping a bit off the cnr, & I just don't think it can at all now: the sloping area inside the room (4m long x 500mm) will surely prevent any door of full H, to open, even an arched shape will be severly hampered so much so even this isn't feasable.. I think.
-
Ive thought of this idea 1st up.. but it won't work.. hence my asking about it. If I just saw cnr off, it still wont open correctly/ the full H (almost all of) the door will hit the big sloping ceiling area. Sawing cnr off will only mean it can open mostly.. but still cannot fully. Its a pickle of angles & head-scratching this exact ceiling bit. Hence my Q's.
-
But that doesn't include the frame tho does it? surely this is 40mm which needs to be set in place 'lining' the area above my head. I think the last joist is just a bit lower -iirc- than the lintel. I guess its this joist I have to attatch/ line the frame with, rather than onto a BFO solid concrete lintel.
-
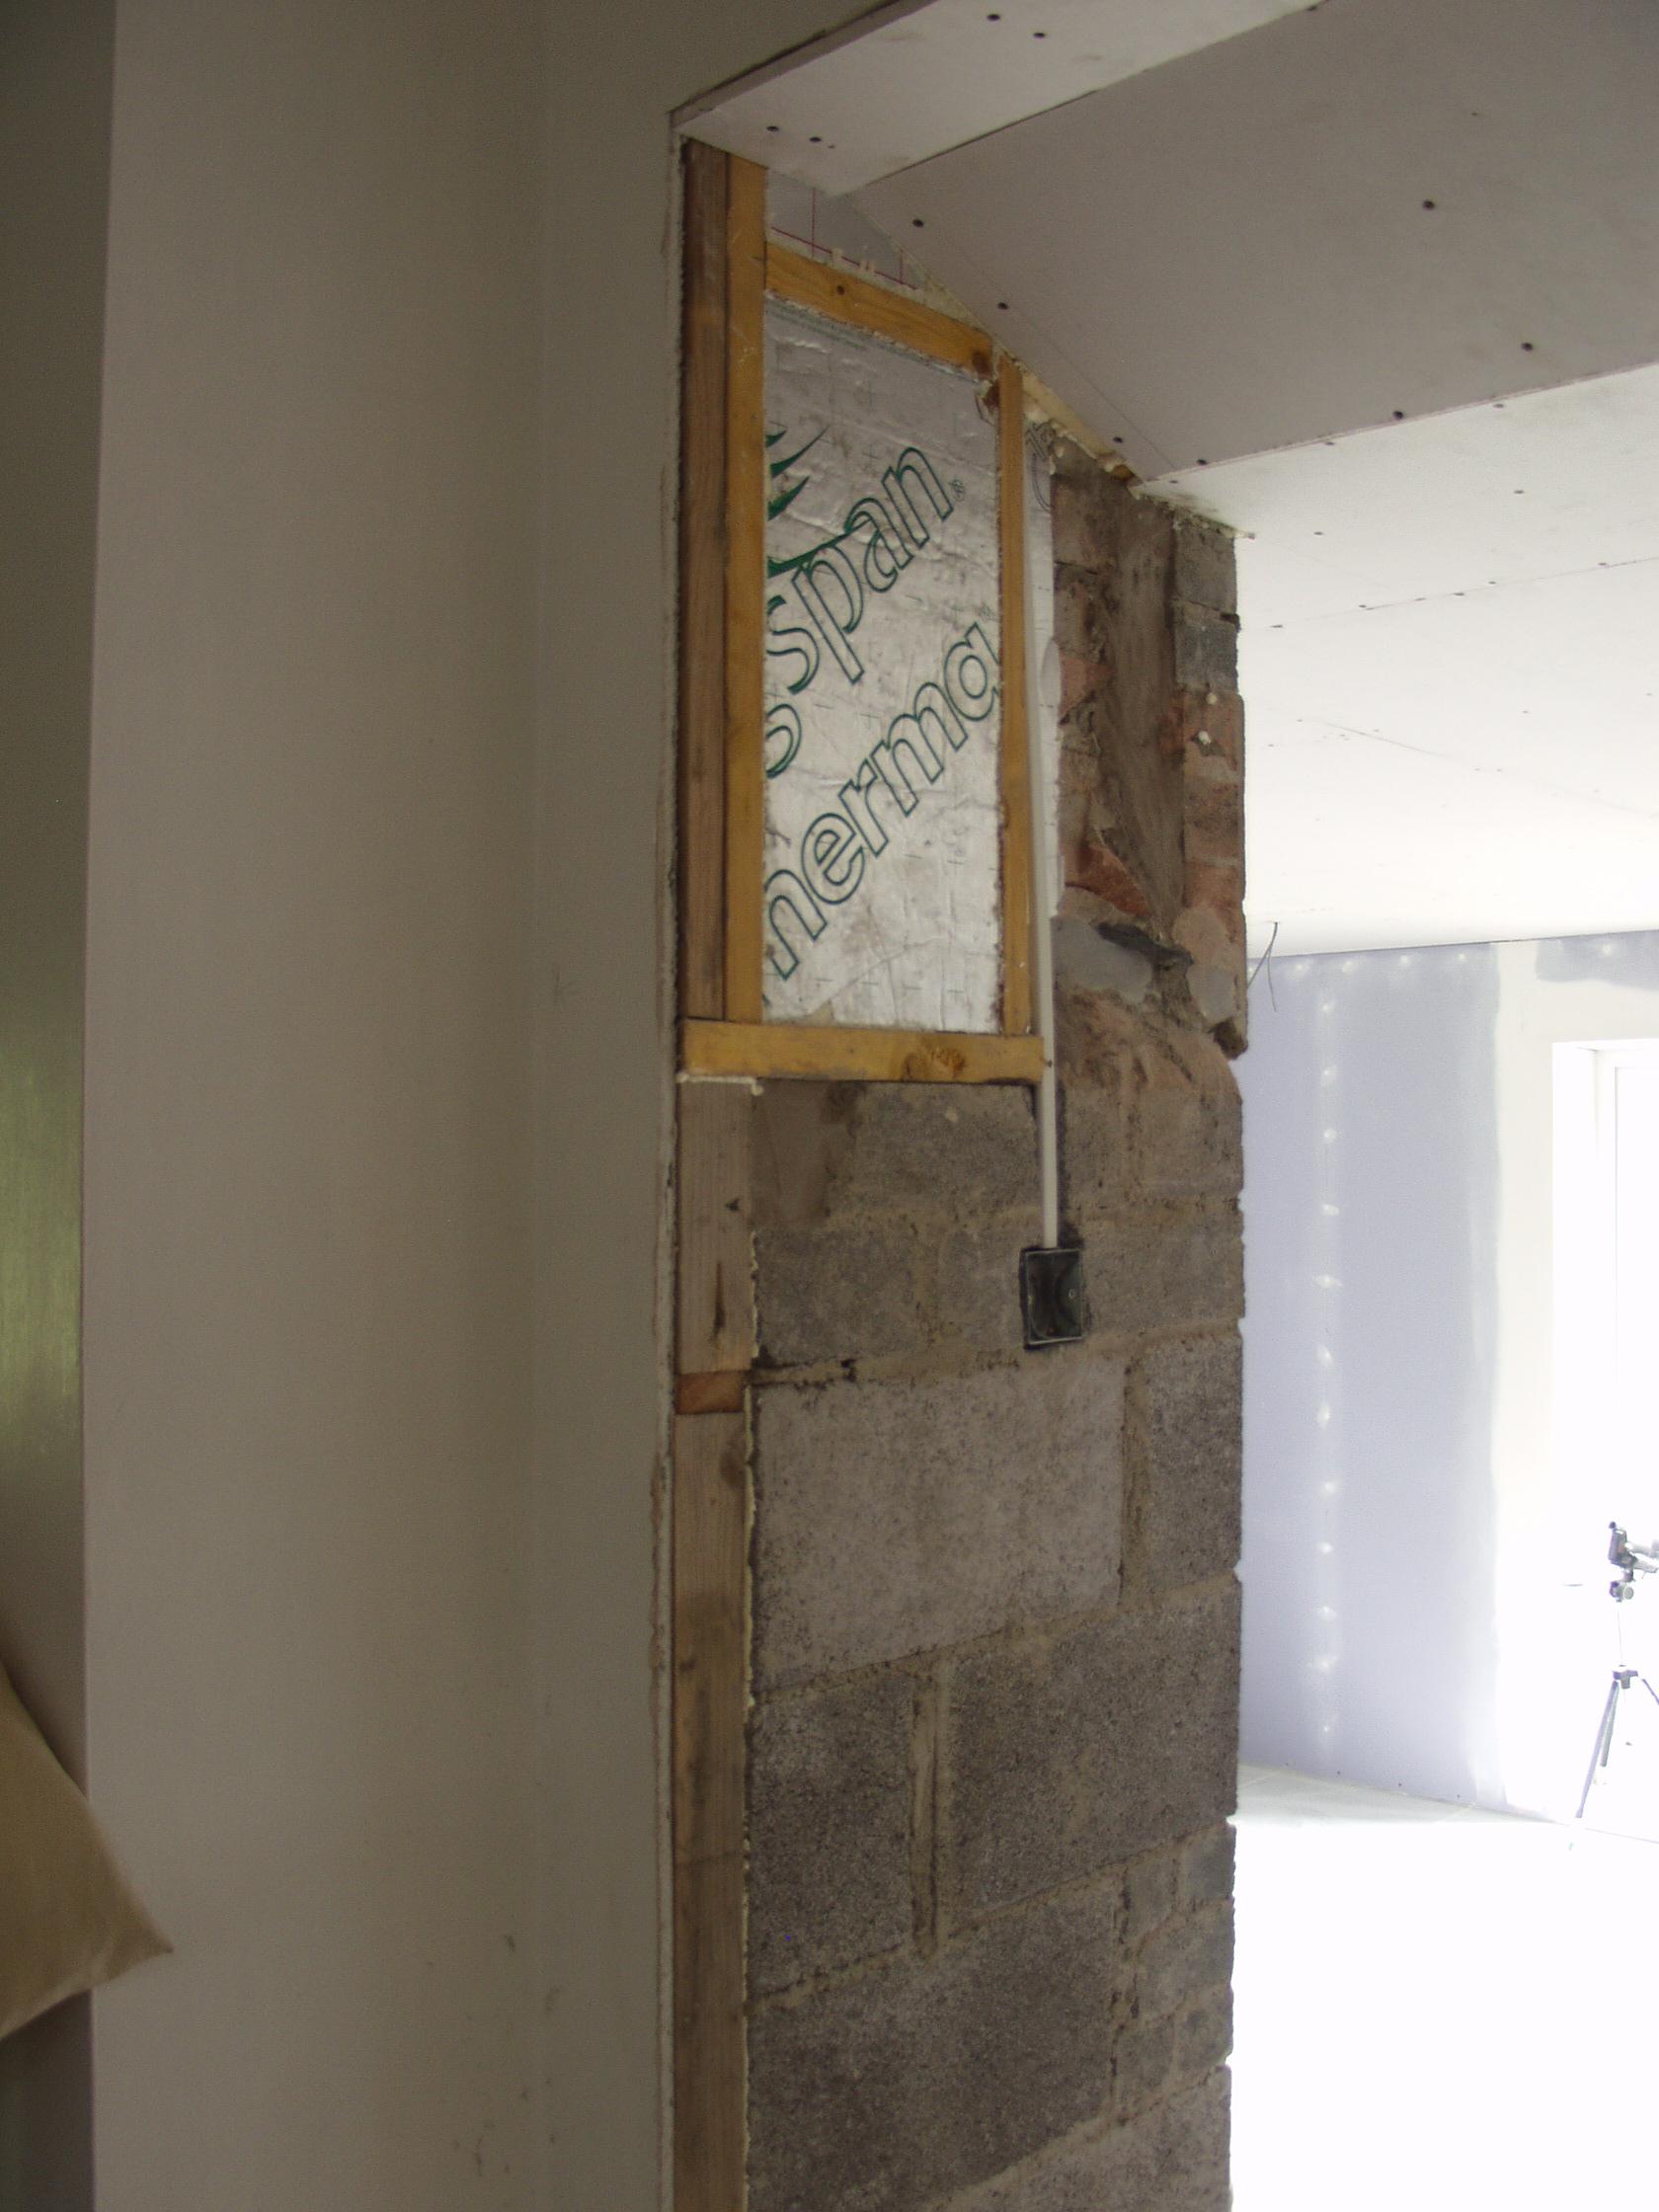
@PeterW from the last step (the one you see most of/ nearest to the new room) it'll be 2090mm. IE with pB on, as it is now = 2080mm.
-
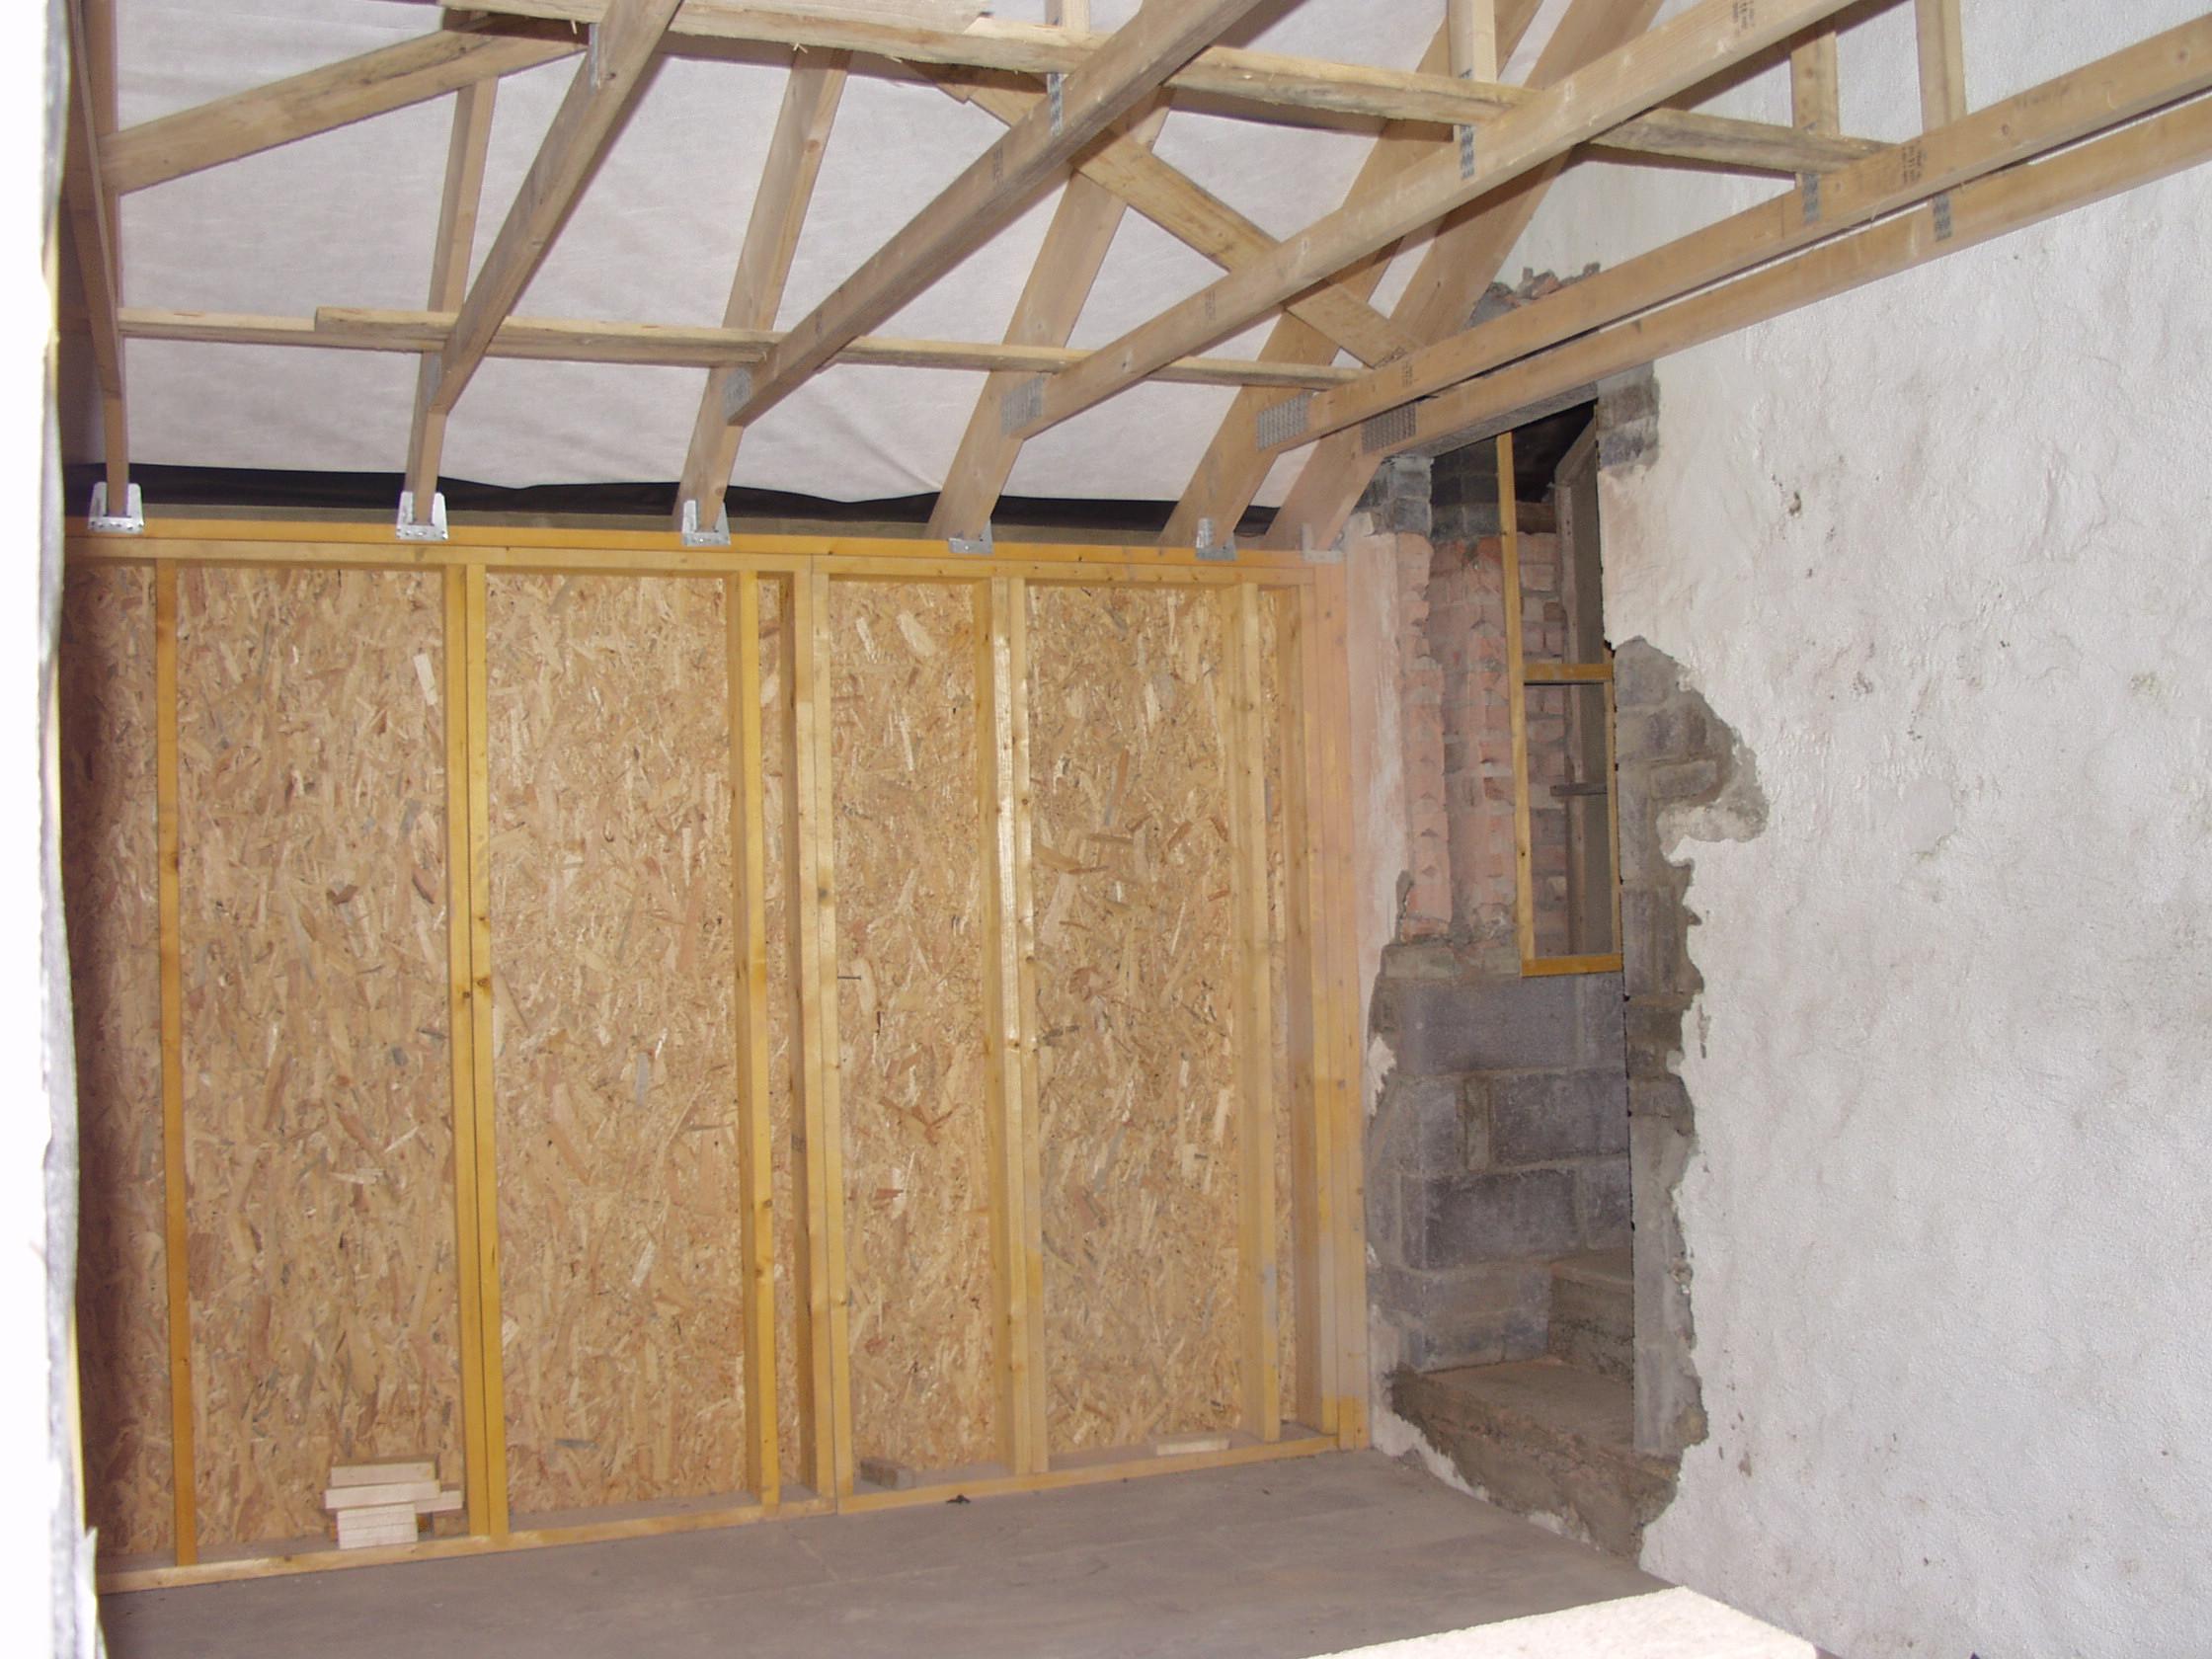
But its what the lining will screw onto. As you can see, it looks half-decent timber stud etc but its not: here its wobbly cls offcuts, badly inserted, a patched together rush-job I cannot see how to sure-up without taking out the old pB (like Ive had to redo prolly 50x pB screws in the ceiling my builder's two lads very badly did in a few hrs I was charged £500 +vat for).
-
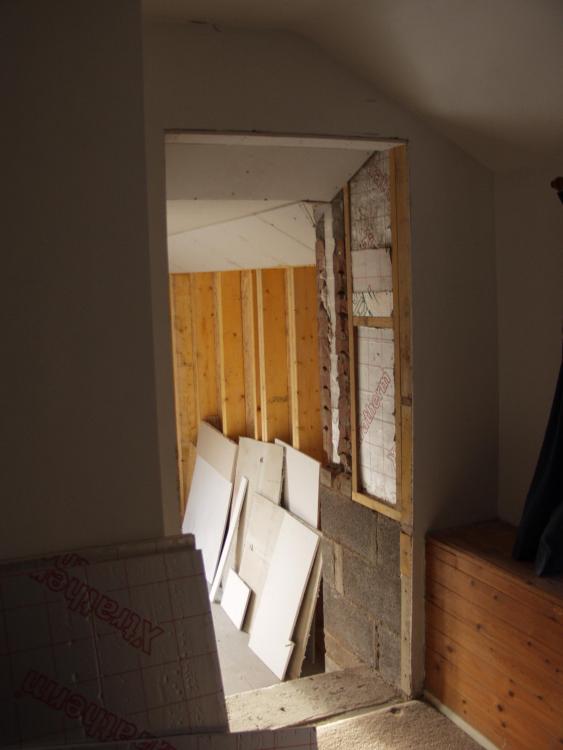
I could indeed.. & its nothing imminently 'needed' being 1 here.. so I could take my time. But, Ive just had a look & considered an arch.. & alas I don't think its viable due to the restricted H within the knock-thru (yet -another- issue due to the wretched 1ft all-build-too-low problem). My head is 1" from the pB here where the slope down ceiling bit starts, within the knock-thru 'tunnel'. Where the door would be (2 short steps onwards) I'm only -just- getting my head under any standard door frame inserted here. At the mo I'm at 6's & 7's knowing what to do, what scope I have to do what design.. & where. The problem remains tho, I think, with an arched door if opening inwards to the new room, of its top hitting the 'collared' ceiling area within the room & therefore only opening mostly, not fully: you can see the area I refer to: above the stacked pB bits.. this sloped ceiling section 4m long. Its both this -and- the pesky ceiling triangle causing problems with any door opening into the new room.. simply where you'd expect one to be.
-
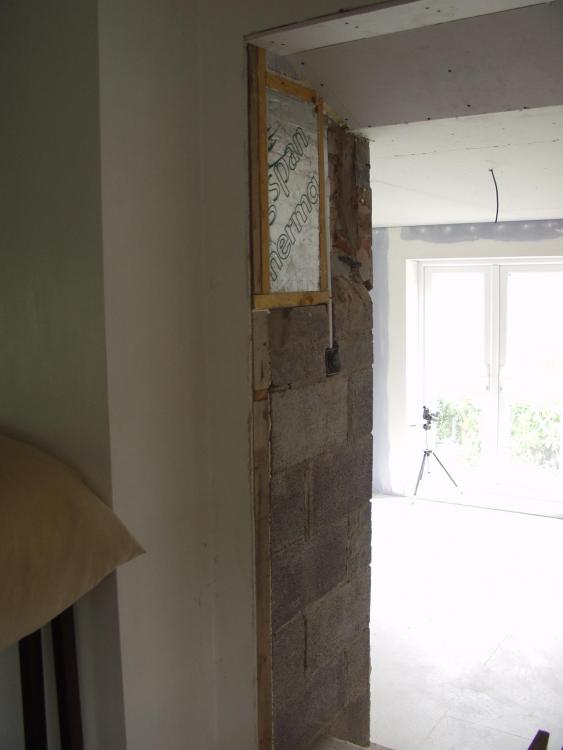
Ok now I understand Mr.P. No need for a bifold if opening twds camera, I have enough room in here (master bed at the mo). This I think is the most sensible place considering this pesky ceiling bit means alot of door faff to have it here.. tho the place I wanted it. So the hinge point visible in the photo here (so the RHS, near the blue curtain). The problem here tho, is the structure of the wall compared to either if the door opened inwards to the new room (where I wanted it to be) where I have solid brick/ block (as visible) RHS.. & solid block/ old wall LHS. The structure here RHS (nr blue curtain) is wobbly cls bits all patched together (below is block/ ok here). I just don't know how I could get a vertical frame solidly in here, esp all the door weight hanging from it. Redoing it surely means ripping out the master bedroom plasterboard all around > redoing the woodwork > redoing the pB.. I just can't face that prospect.
-
Interesting idea. I guess the idea being it negates the top RHS by having a frame arch bit here. But its alot of work, for me: just a simple frame & door was going to be a big challenge for me.. never having done one before.
-
Hi Peter- did think of it, but not very cottagey/ would need to go behind bed (not ideal) & would be an oddity to the other doors. I want to follow the other 2 bed doors being a simple t&g pine, braced-back door, with a black typical cottage thumb latch-open thing.
-
Hi Mr.P. The idea was always having the door opening inwards, into the new room, & hinged @ this edge visible in the photo. This would be fine & straightforward, if it wasn't for a pesky small triangle of ceiling (only 3x4 inches) nipping into the door area. Its not too visible in the photo (I'll attempt another, this pic is from 7 months ago).. but if you can see the two courses of brick, on my knock thru side area here, just onwards from the cls rectangle above the block.. ther's a vertical slim piece of kingspan I put in the brick cavity.. follow this kingspan up & it hits this wee triangle of ceiling. I can't have the door opening inwards from the visible edge/ hingepoint -without- the door being made 3" short in height, needed for it to open into the room properly, bc of this pesky ceiling shape. If it opened inwards from opposite side of the knock-thru.. fine.. the door top RHS just has a corner nipped off: but its not ideal having door open from this side.
-
My last pB area I need advice on.. & I've been dreading. The knock-thru area: lower areas of new block, & above cls stud & kingspan/ ropey offcuts all patchworked together it seems. The thing that stumps me, is that a door is obviously needed, & it can't go (as always was the idea) on the far side of the knock-thru, at the very entrance of the new room.. because of the ceiling step-down slope having the most irritating extra 4"x3" sloping section -top RHS in photo- c*cking this door position idea up (due to -& the last in a massive list of ongoing issues- this hateful "anomally" of the whole damn build being 1 ft lower than it should be). So what can I do with this area, & how (& where) do I add a door? Thankfully its my last hurdle of the build (& this wretched issue). Thanks- zoot.
-
Here is a pic of the joists I'd need to refettle to put a hatch in.. as you can see they're widely spaced, & very thin joists too.