zoothorn
-
Posts
4752 -
Joined
-
Last visited
-
Days Won
3
Everything posted by zoothorn
-
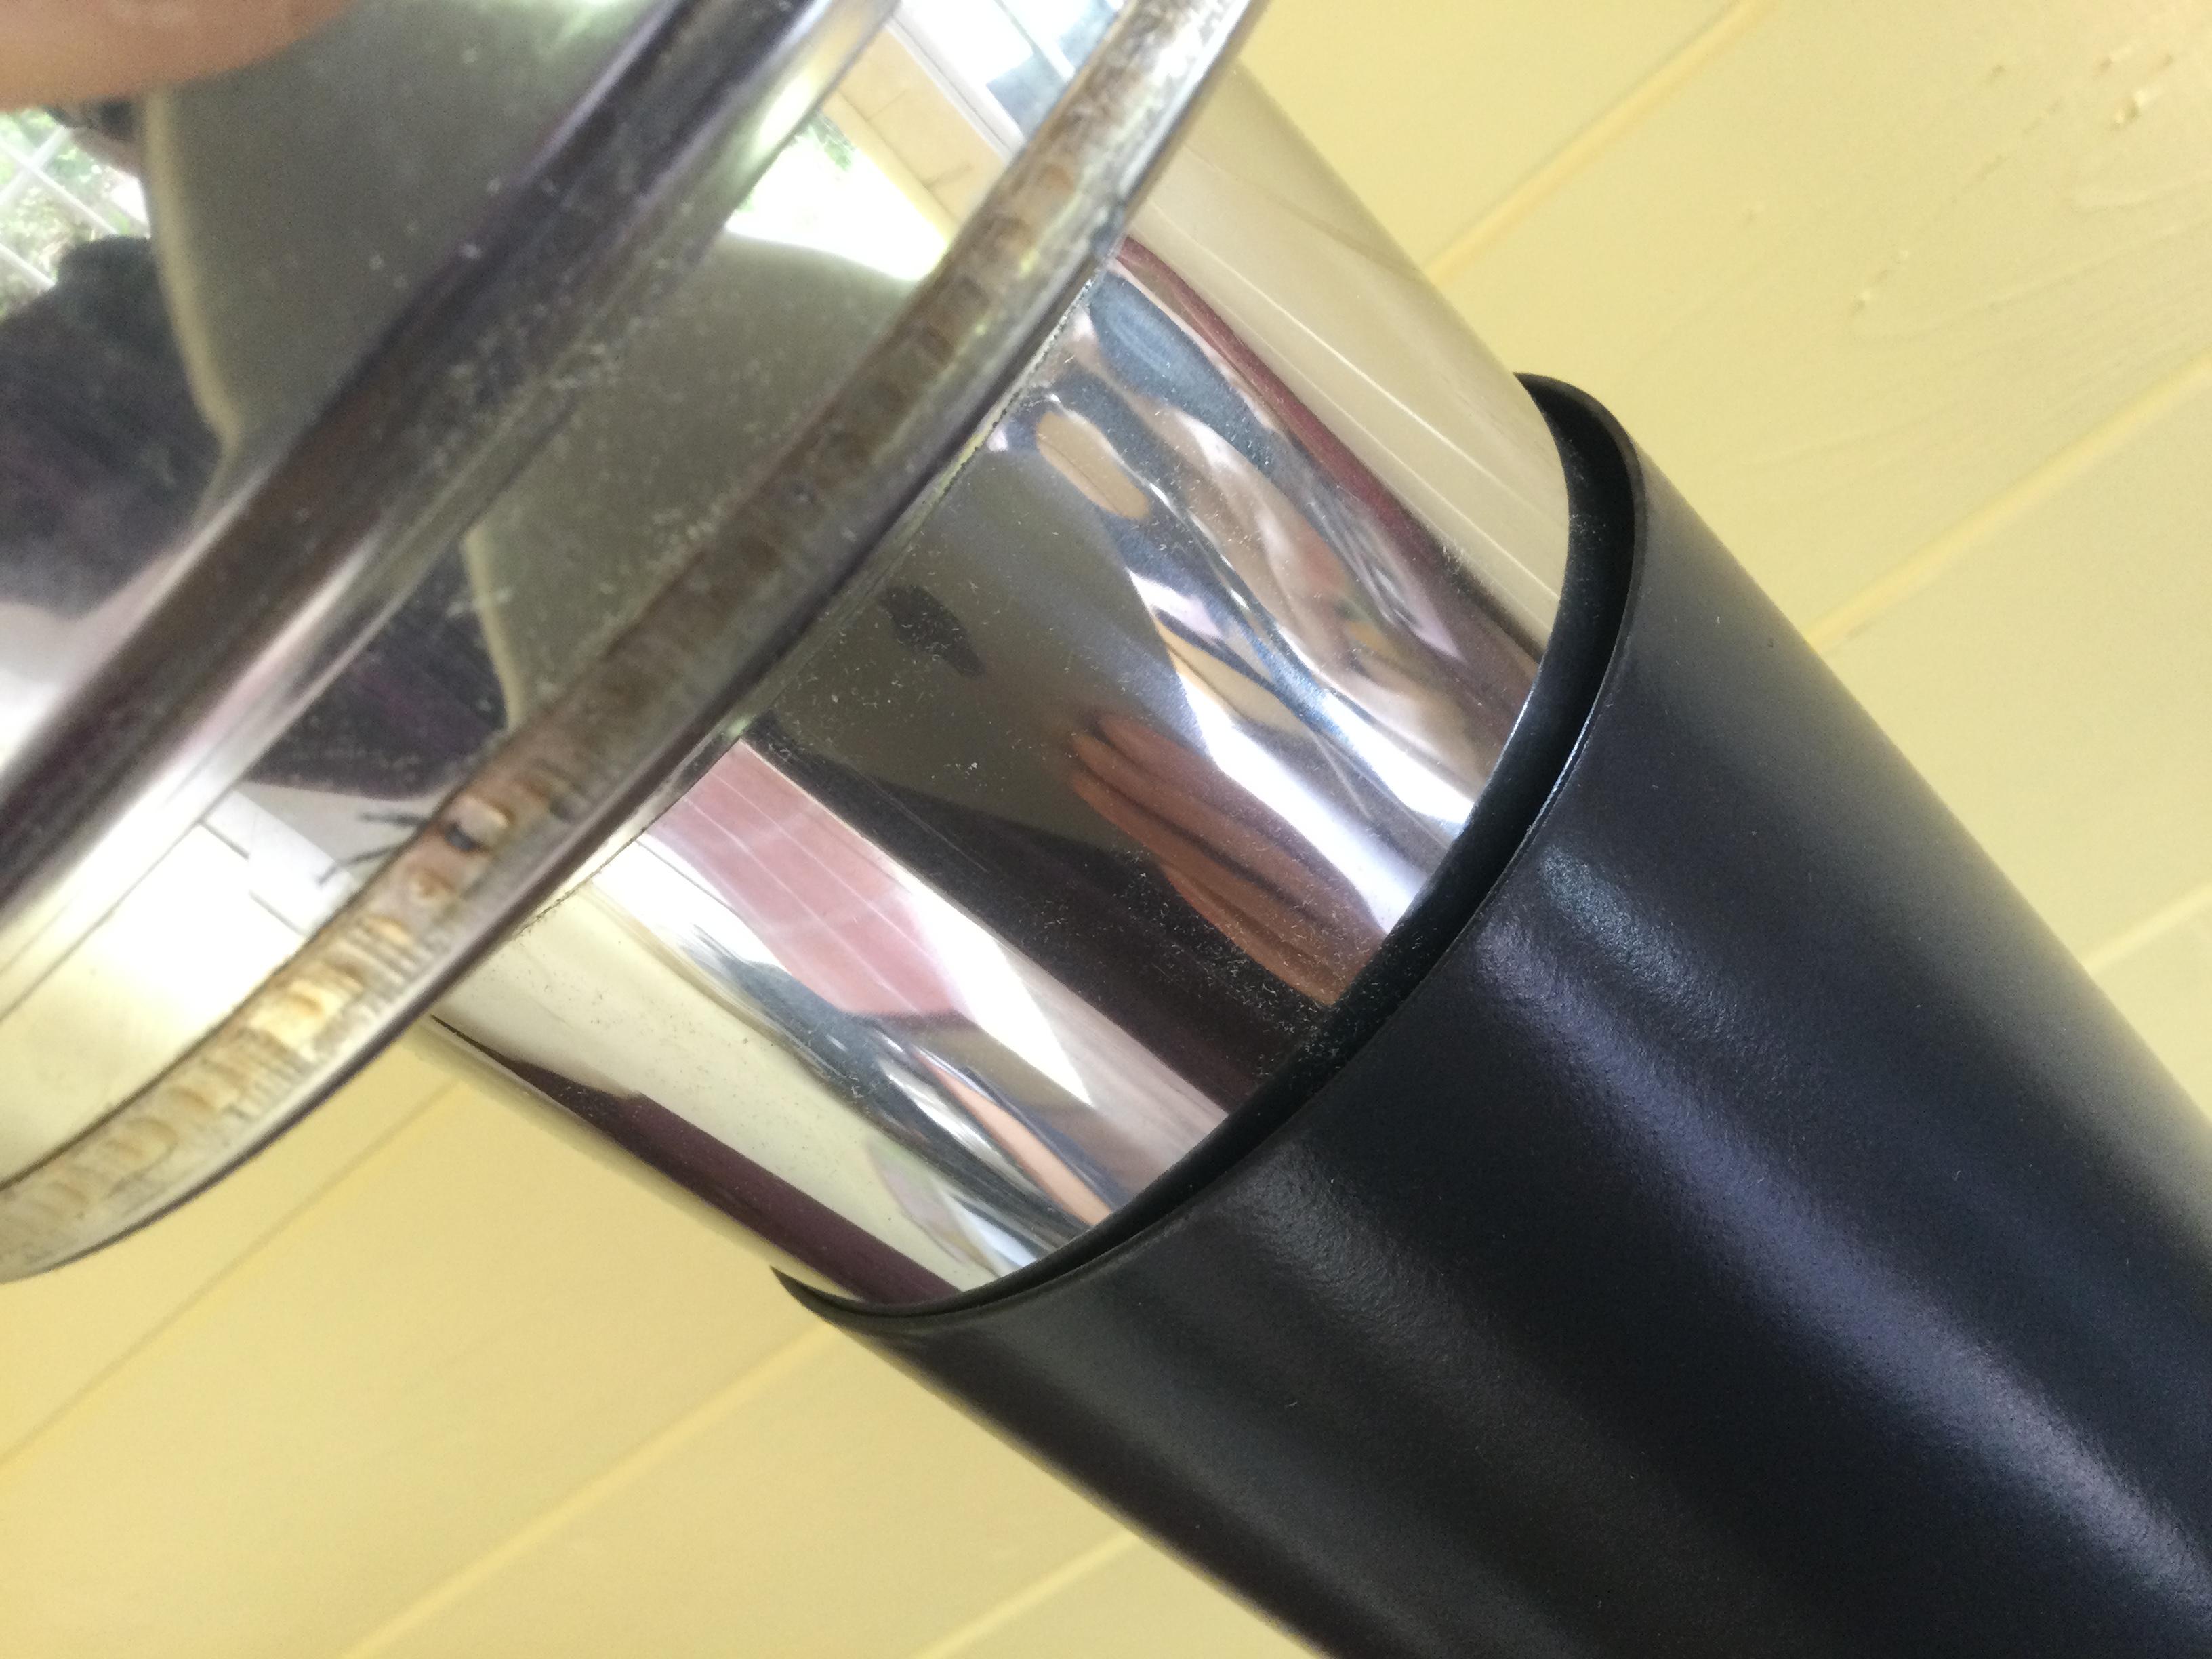
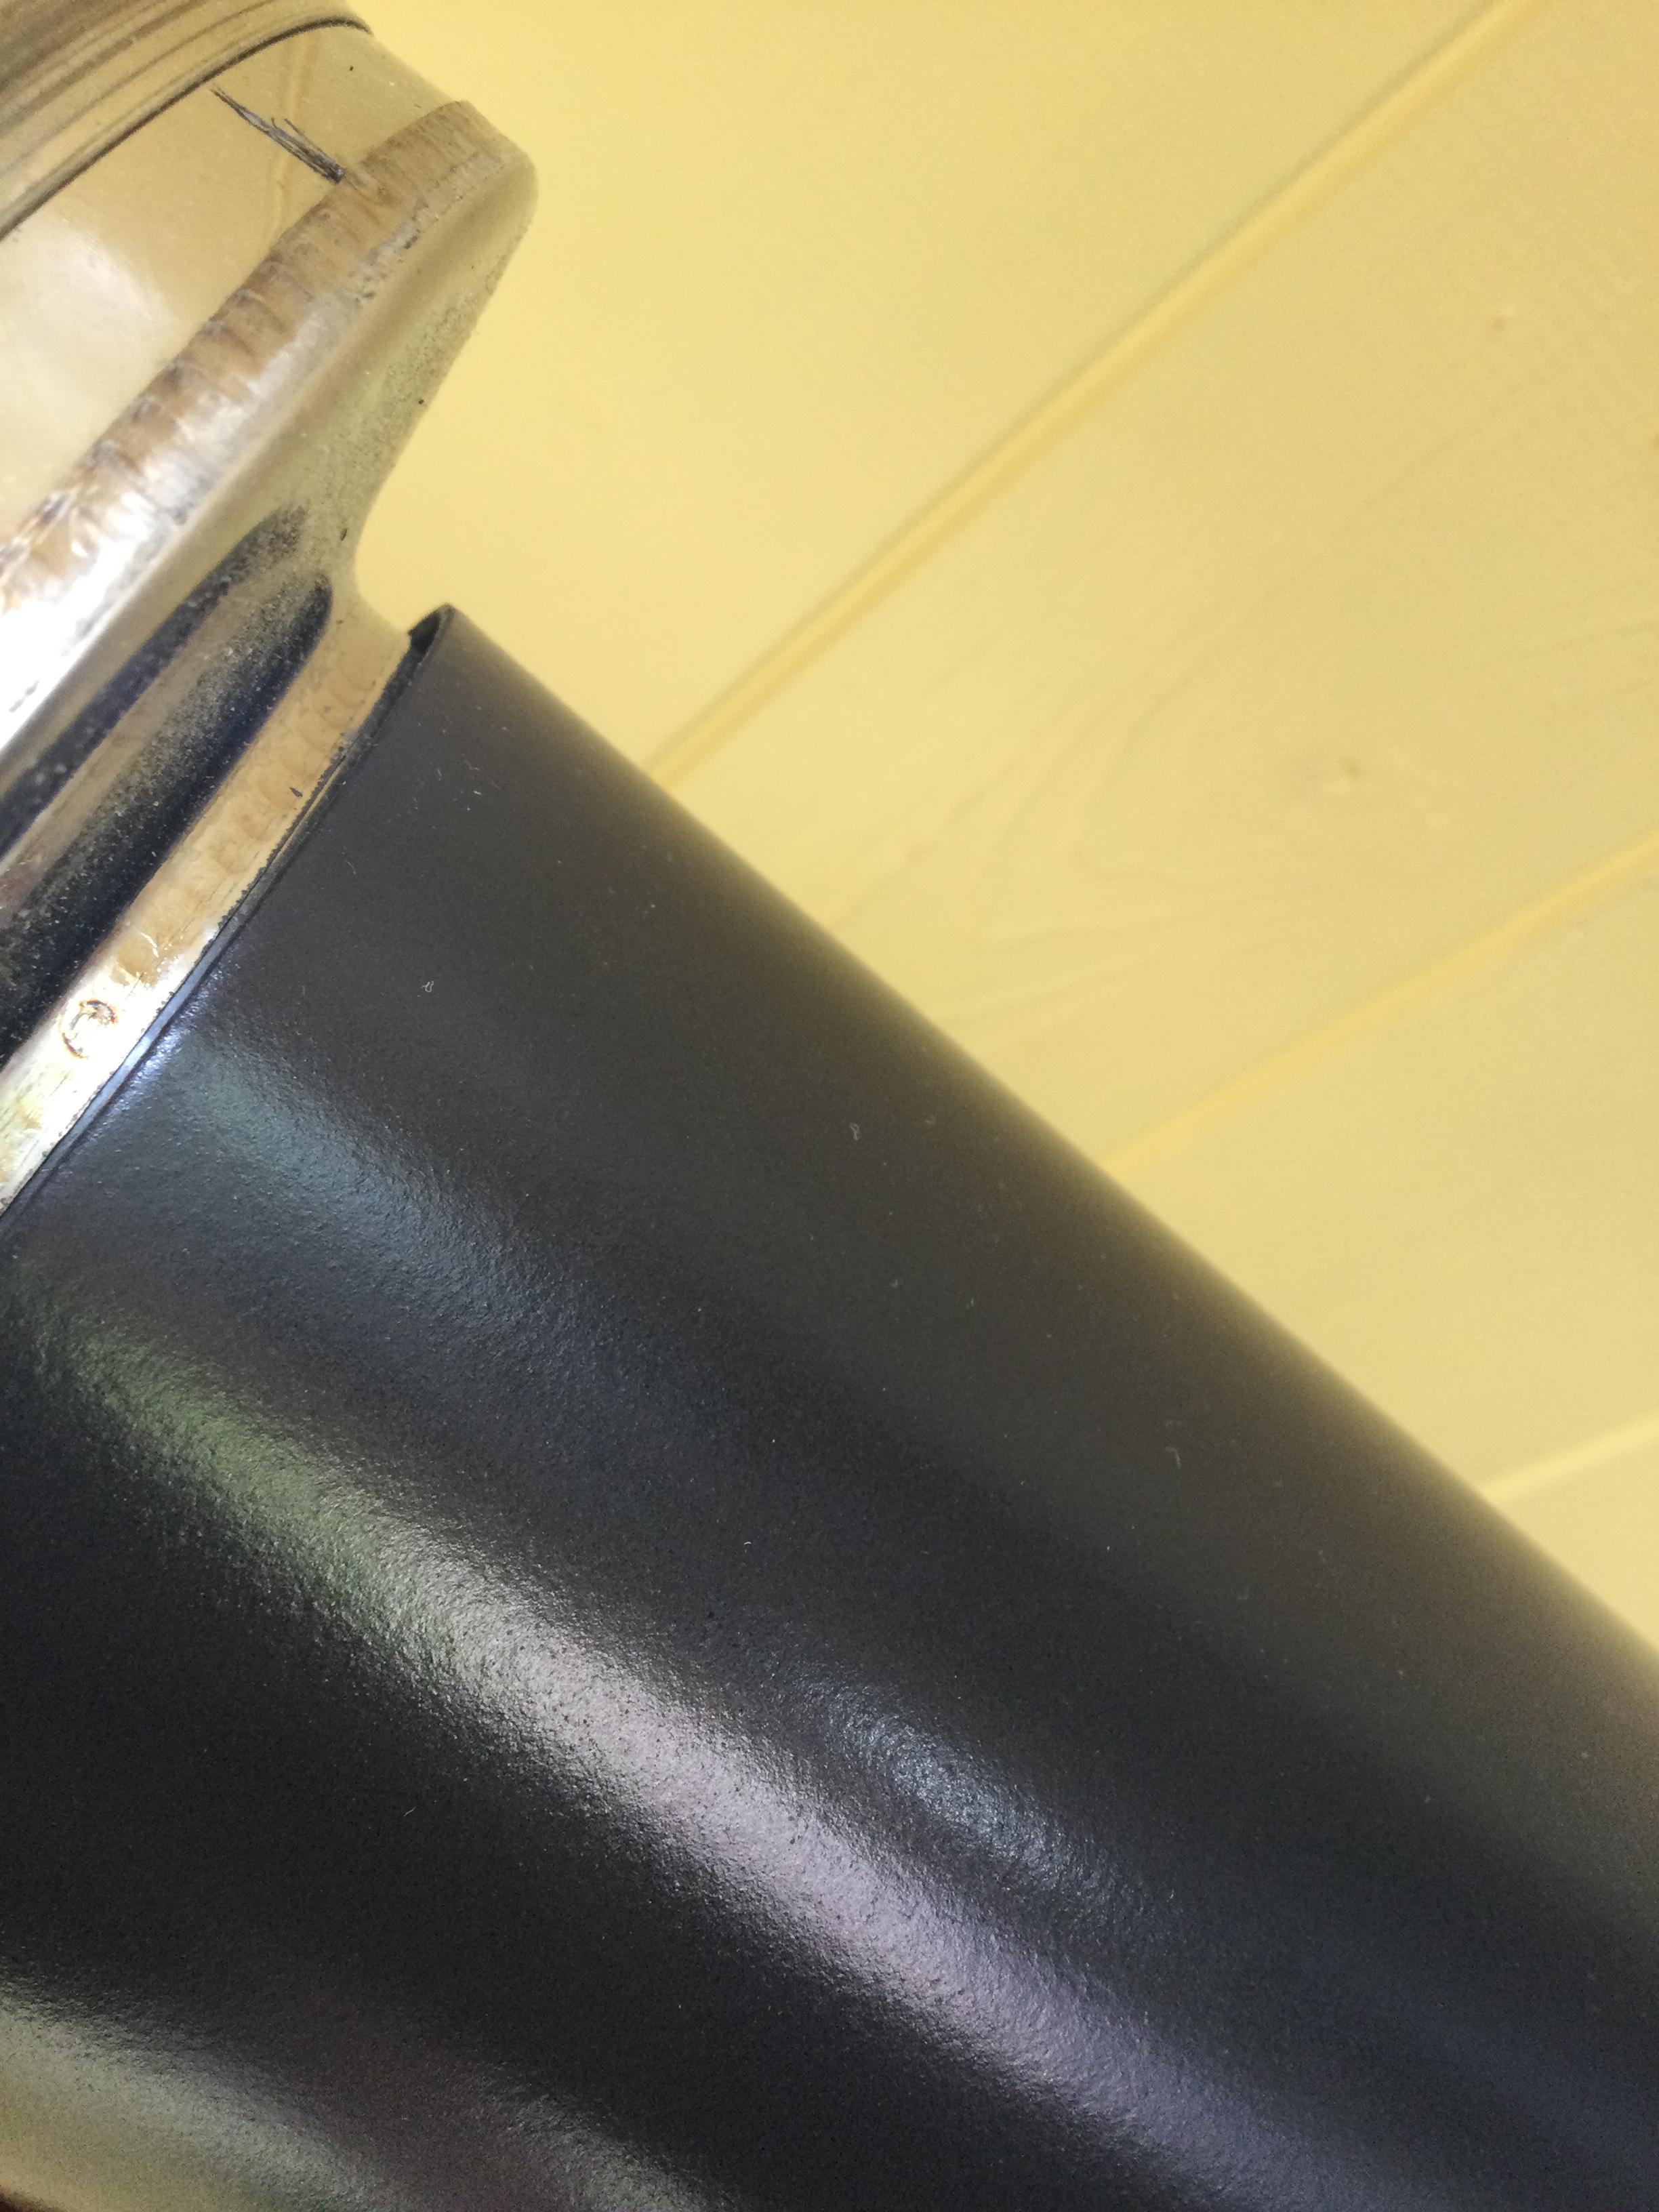
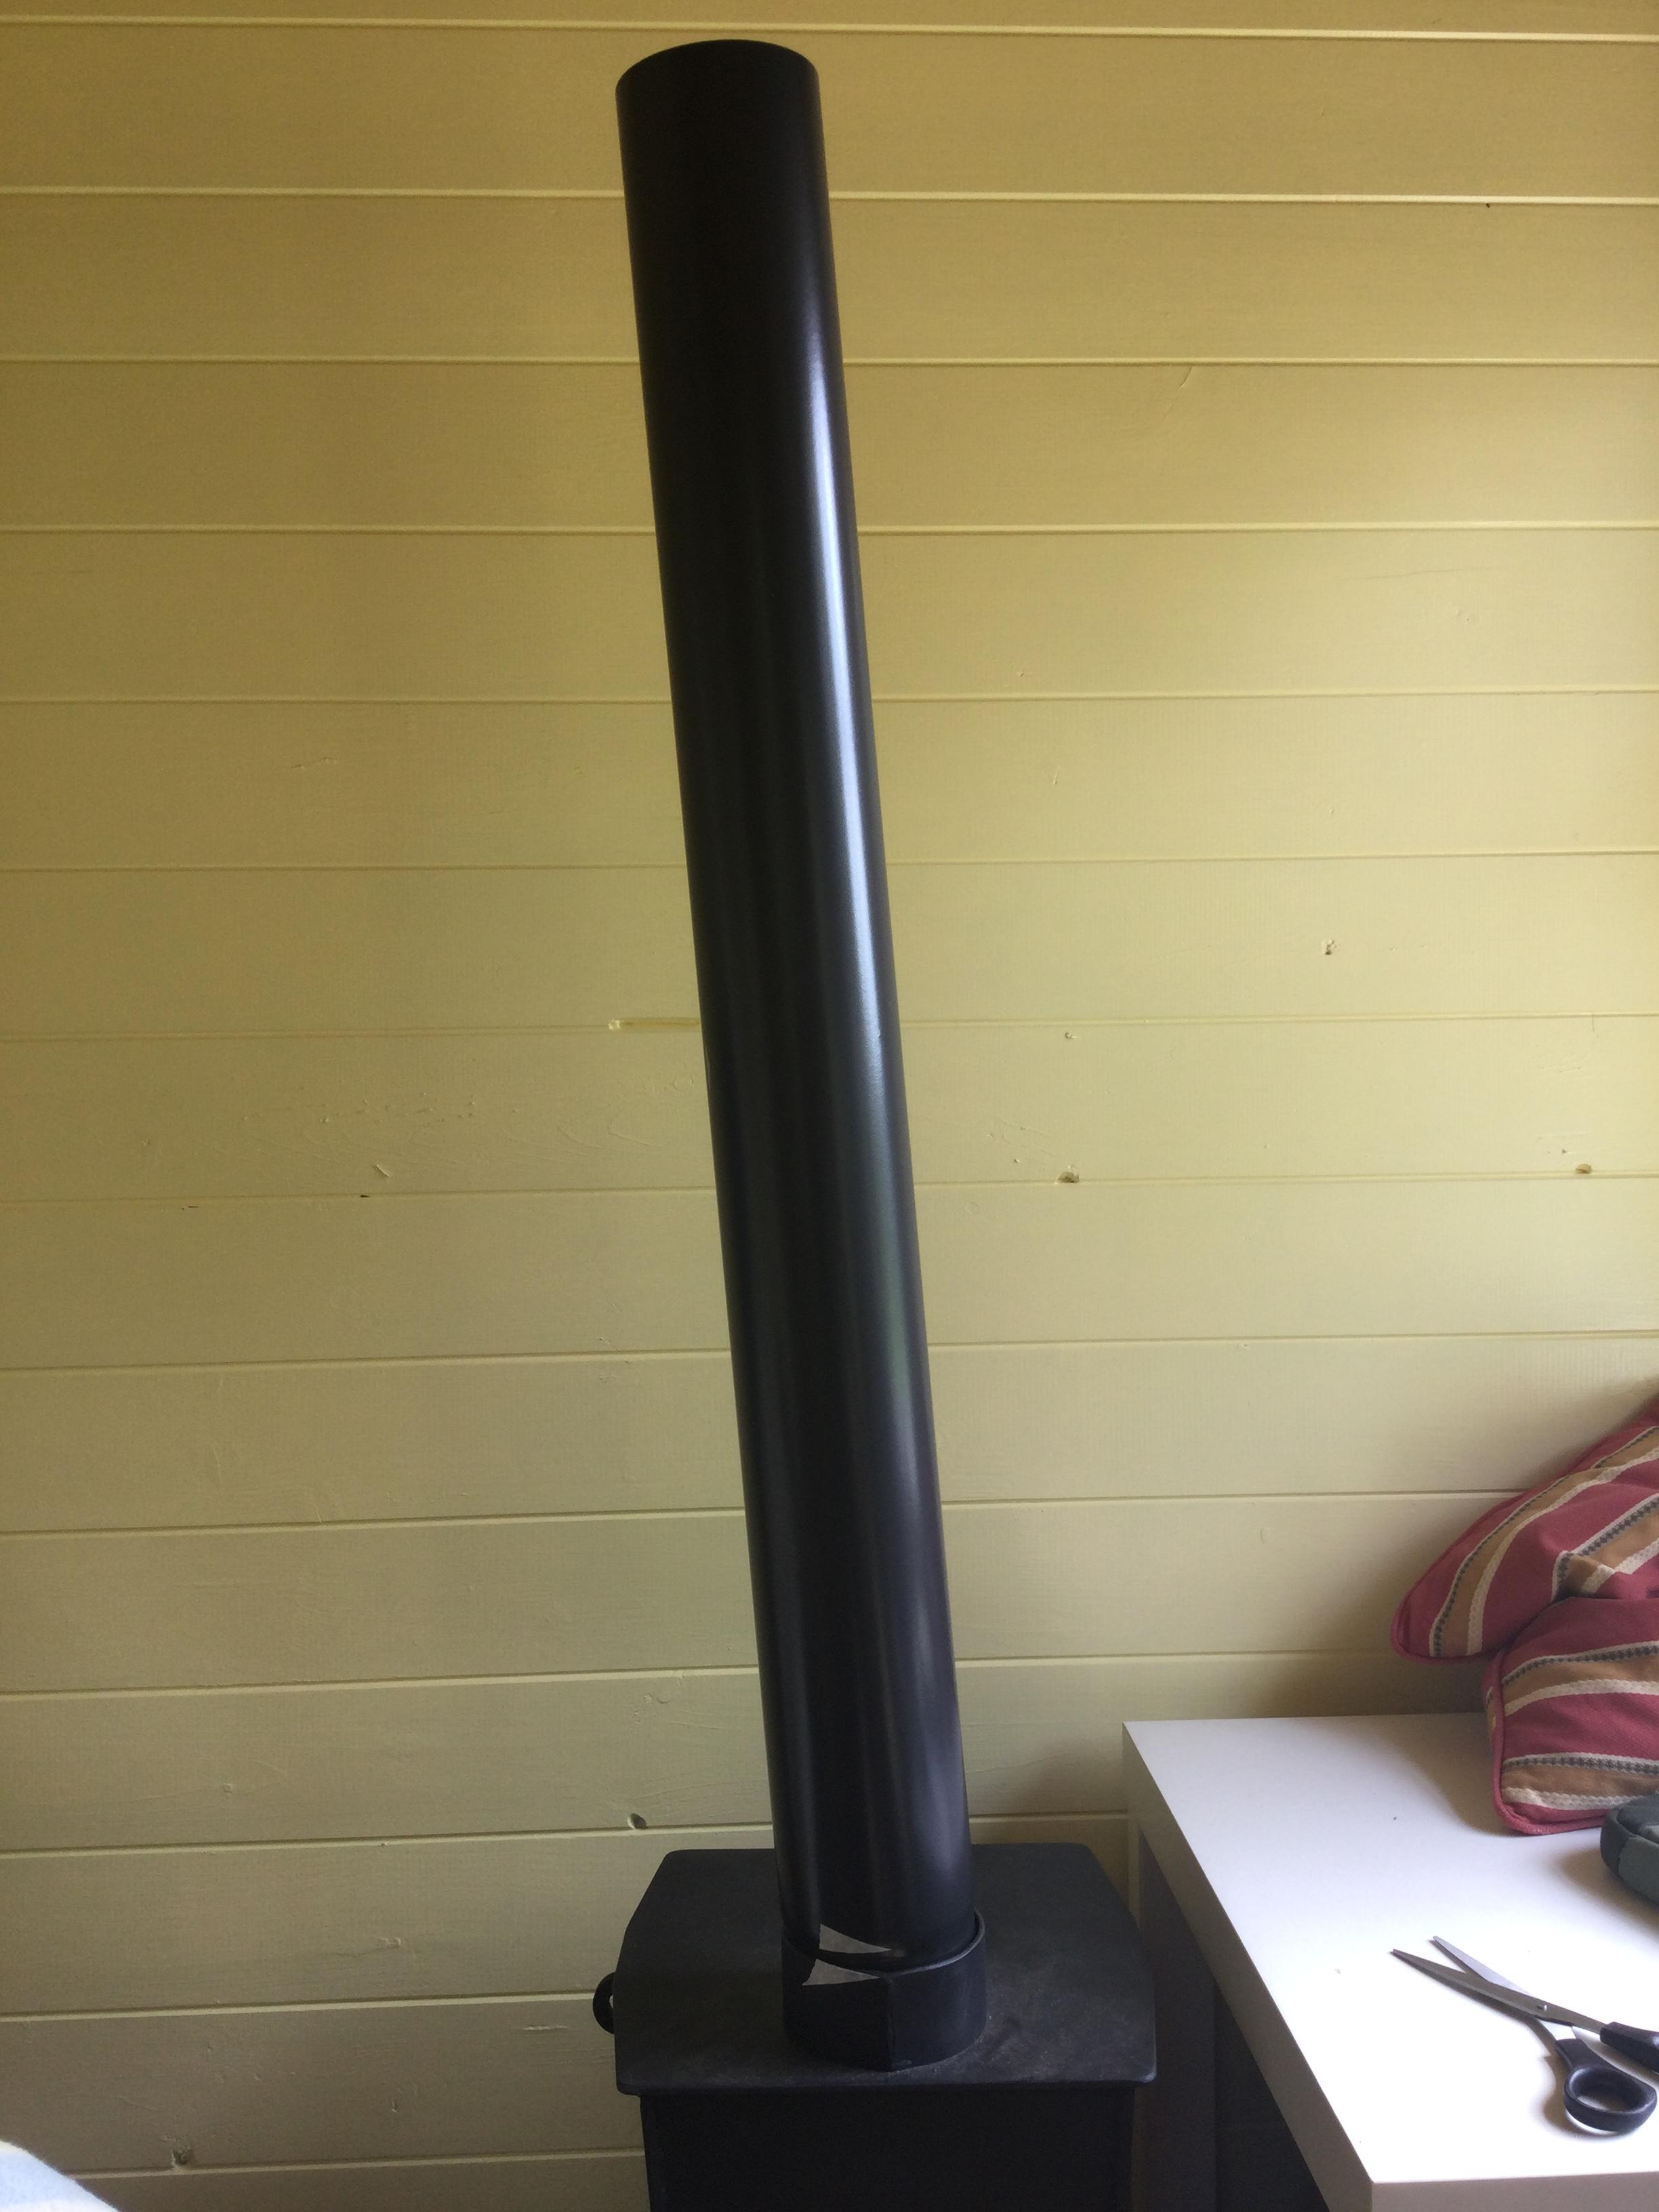
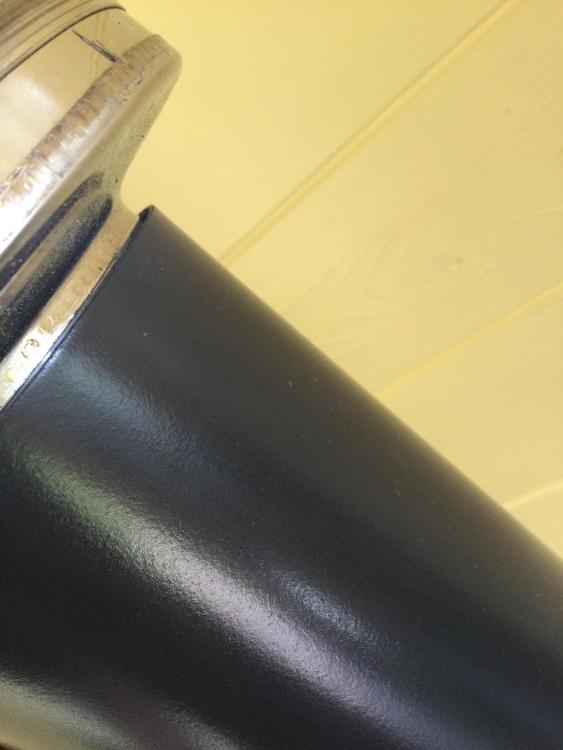
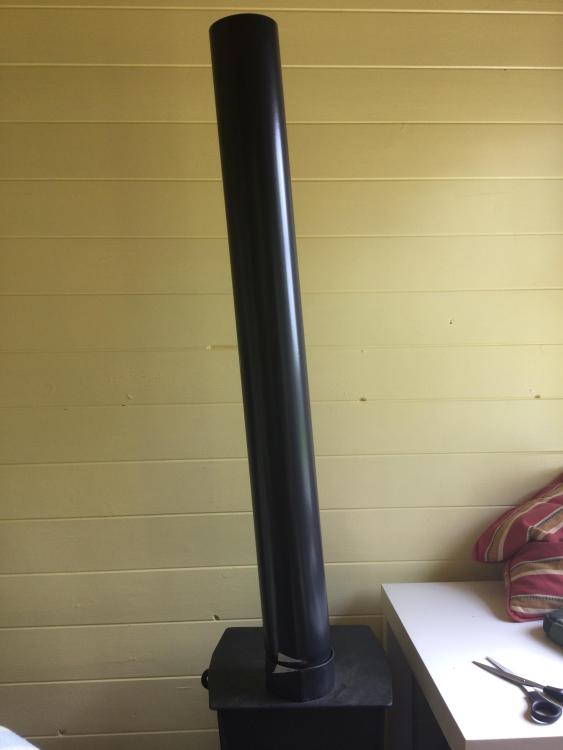
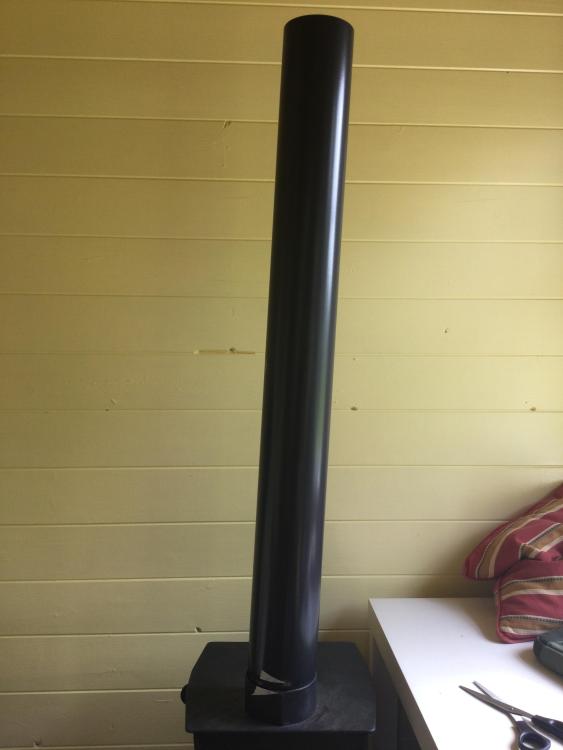
Ok thanks ProDave. I think you & Peter are aggreeing I need to anglegrind 20mm off. In a way Id prefer not to, & have the weight resting on the more solid weld band... but... sealing the difference between (which seems the critical thing surely) -seems to me- compromised this way. If it was china junk you see Id not be happy the lot sitting on the rim ( as after a while the heat might form a split in the stove collar-?), though the seal better this way. But as it seems well made I guess its ok plonking all 4 bits' weight onto the rim then. Ok. But sealing the other end 1m above is my Q no.2. Here is the gap (pic 1) no metal bracket can clamp these two, & any gubbins put on the silver adaptor before inserting, cannot be checked or seen (so how can I ever be sure this seal is good?). There is -thankfully- 1mm of extra metal (pic 2) around @ the join, meaning my gap narrows to 3mm (1.5mm all around). So I'm happier about this gap compared to the lower end into stove. Pic 3 shows it simply sitting on the flue. It rocks dry like so, it is far from tight. Any tiny rocking here (at this junction) which if 600mm of the flue is above the roof outside is surely inevitable in wind.. means any seal gubbins Ive put on the silver adaptor, being unseen once the black pipe covers it, cannot ever be verified as still being good. Is my concern about this upper junction understood? Is my point clear? Ok I've a plan for this

-
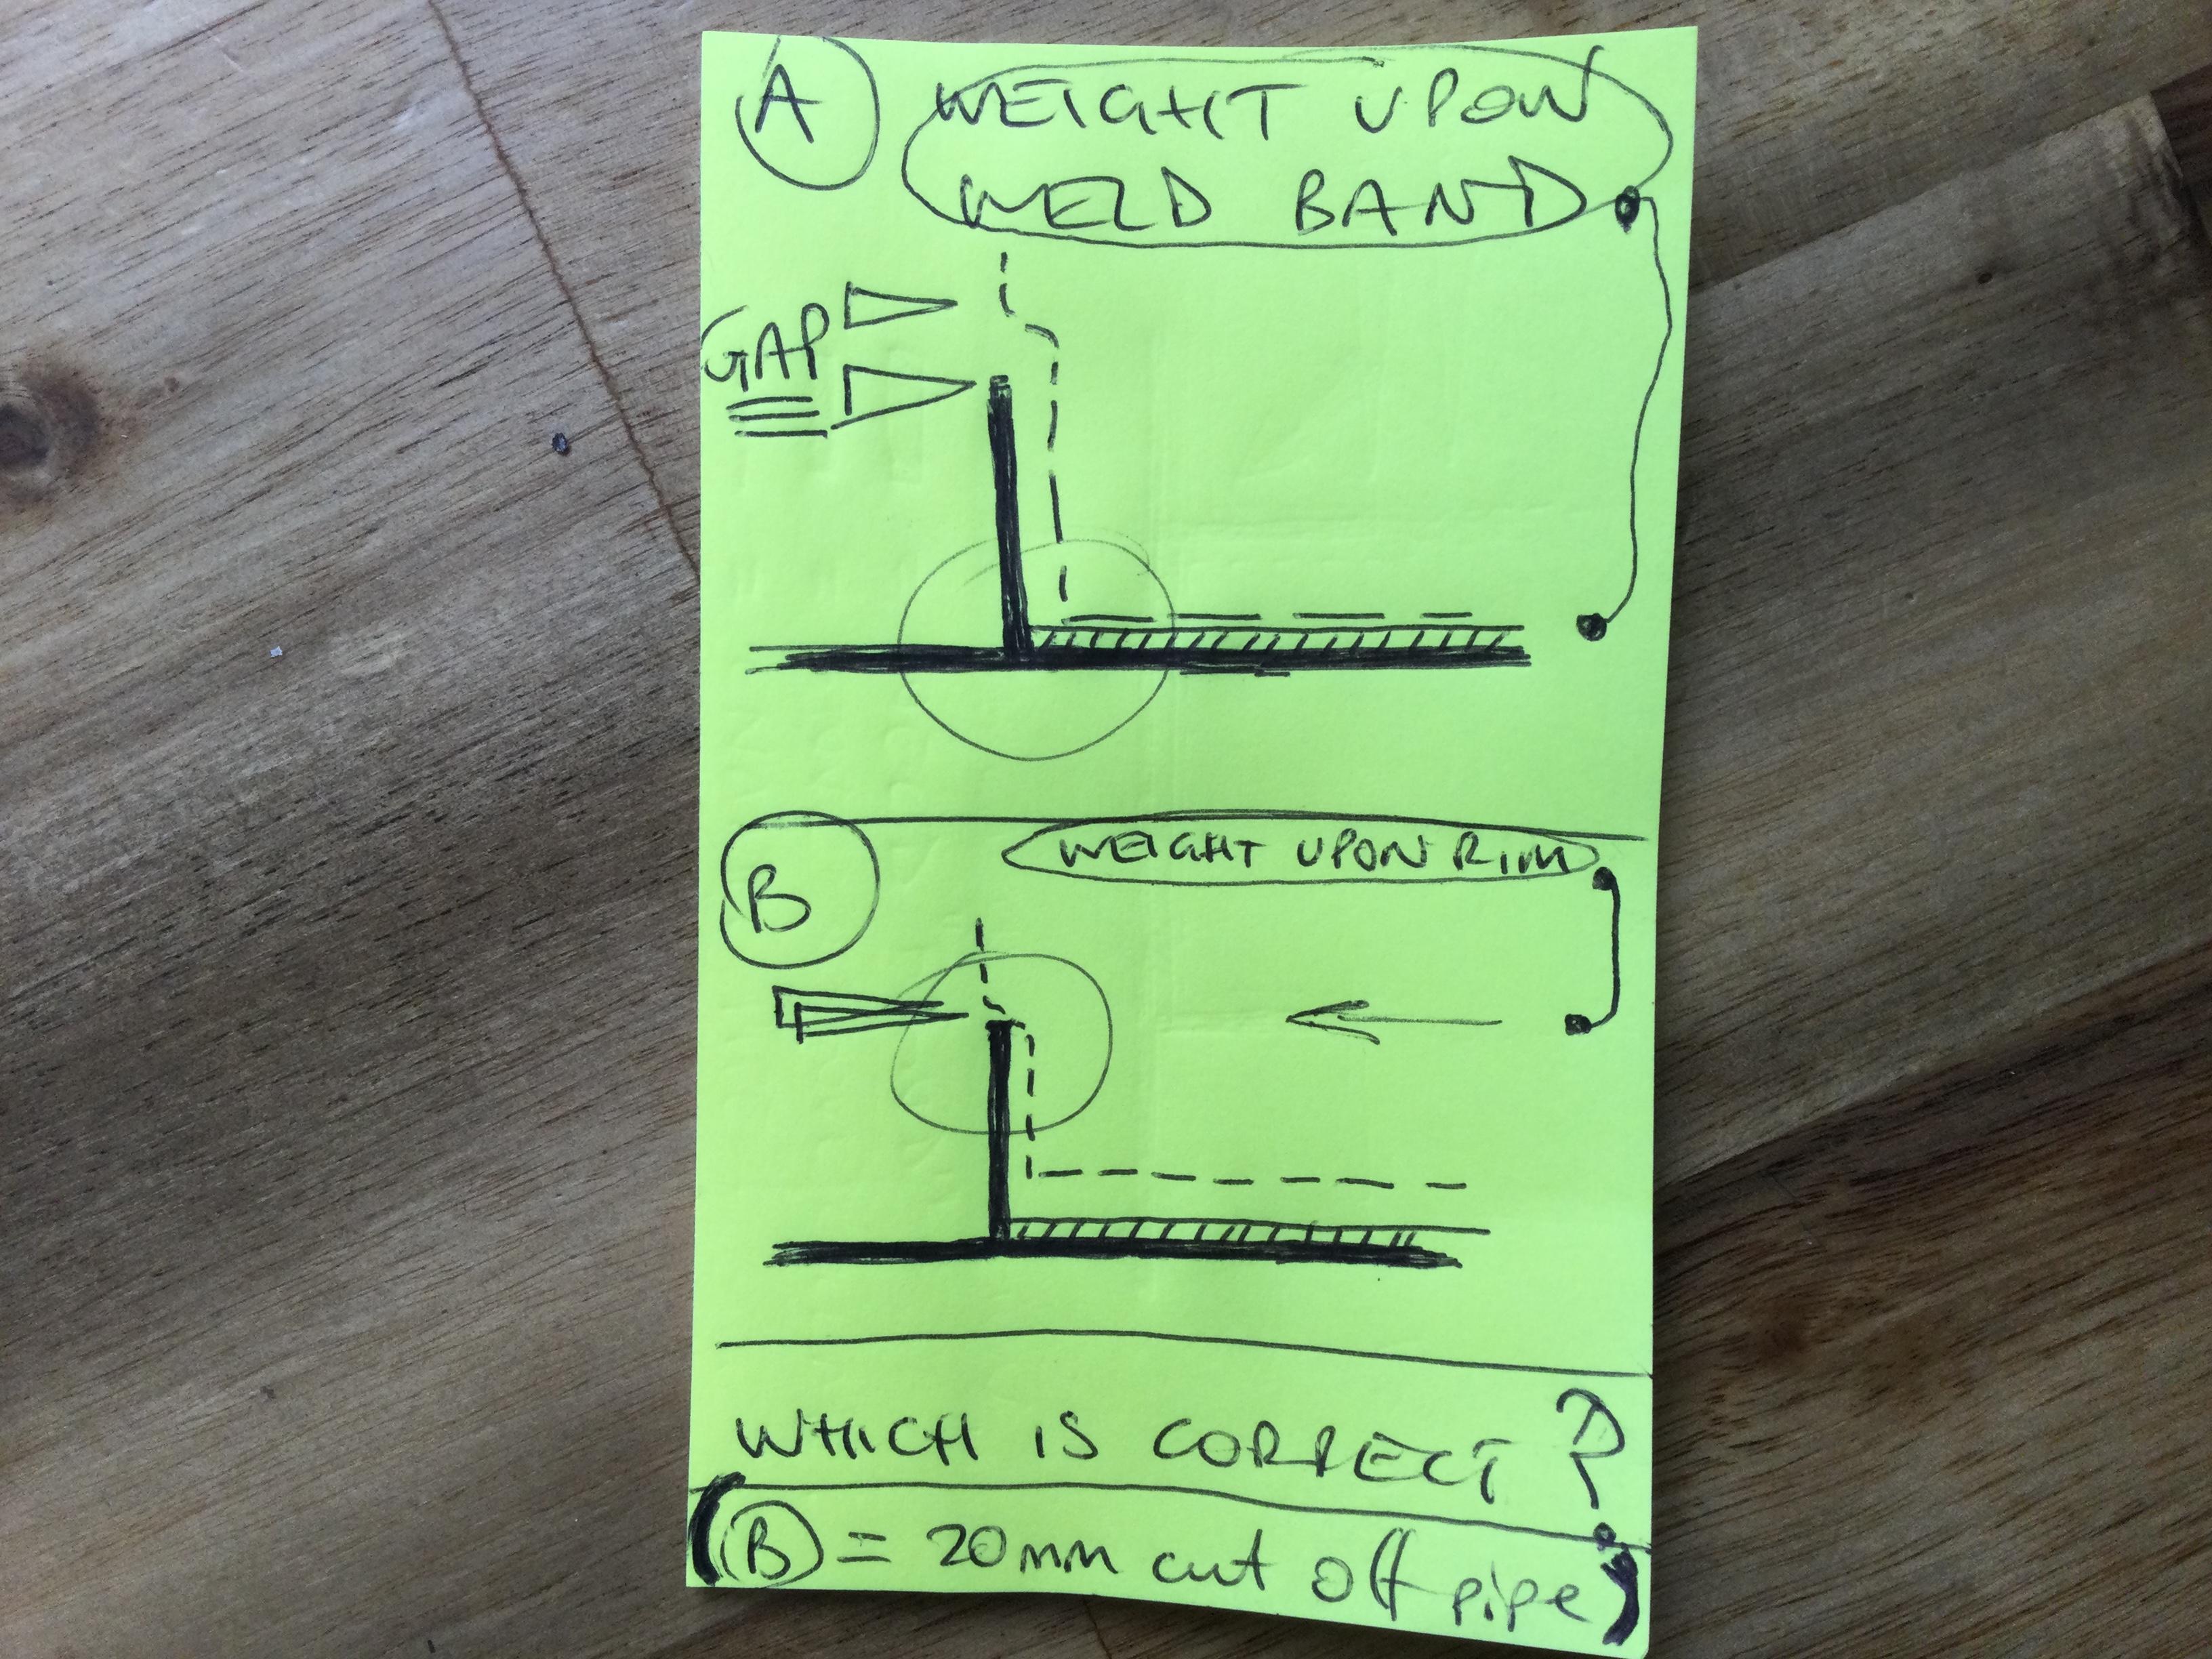
Or maybe this helps clarify my Q no.1. ((Which is correct?)) Thanks, zoot.

-
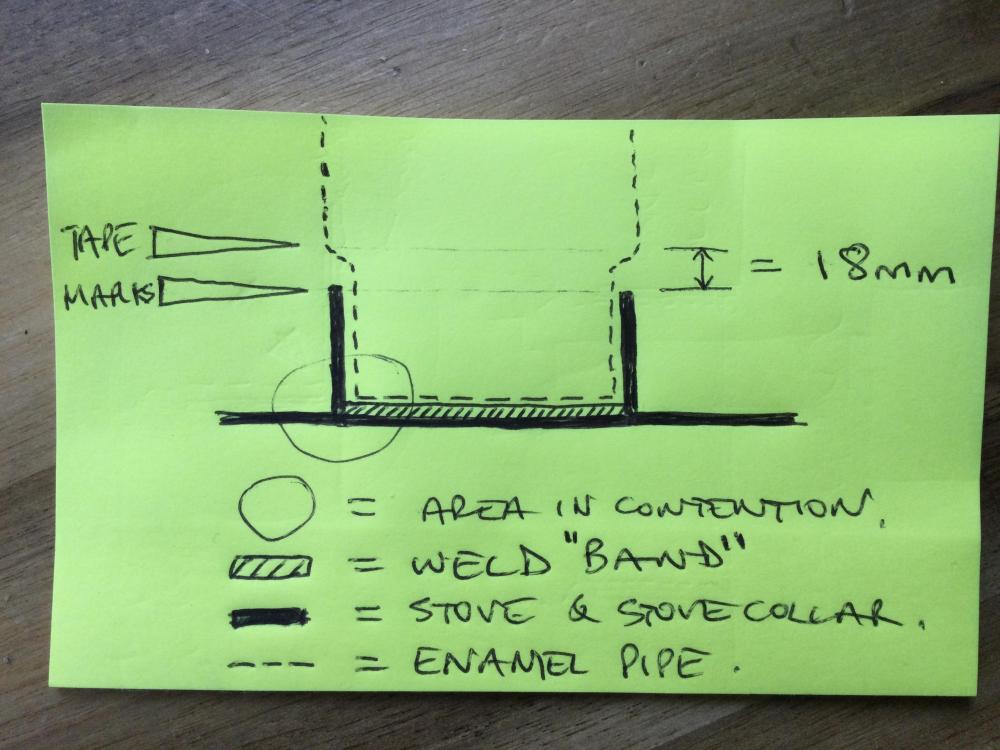
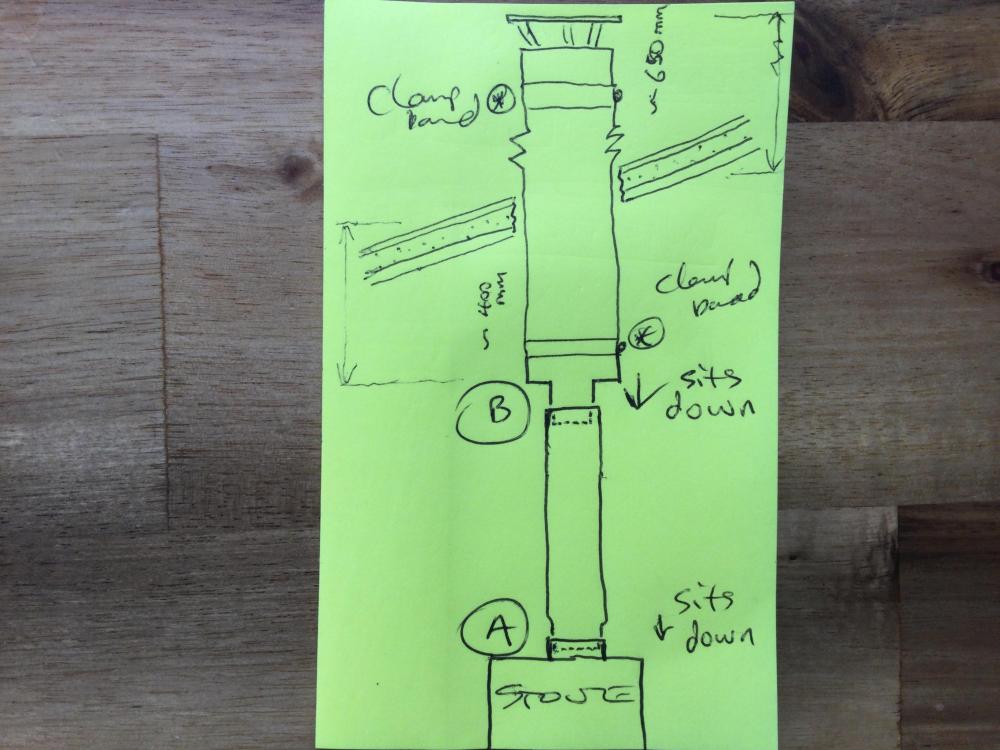
Hi Peter, what are these rubber seals you refer to here? I'm still not clear on my question no.1 above too. I asked if the pipe should sit upon the weld ring, & you replied "yes correct". But just before you suggested cutting 20mm off the pipe. --- Trouble is Im not sure if what I'm trying to describe, is comprehensible/ understood (often the way with text replies on forums: simply the point lost in translation). My photo with tape marks -should- show what I mean. But in case not understood (I cant think of another way to explain how the pipe sits on a weld band, in the stove, creating this gap in my marks) a sketch:
-
So the load is bearing down on the weld, on the stove top. I don't know if this is correct, or, if the load should bear down on the rim of the stove collar TOP instead (the only way this could be achieved, is by cutting off 1/2"+ from the bottom of the pipe. THEN the two marks would be together, a good seal even as it is would be made ( so with adding cement.. surely an even better seal made).. and the load would be bearing down upon the collar rim. The load itself is irrelevant/ there is nothing particularly heavy involved, but where it resides upon, determines (* I would think ) possibly whether a good seal, or a bad seal is formed at this important juncture. * I am only speculating, to be sure, because it is critical a good & correctly made join, is formed: so I may be incorrect & the pics show what is expected/ what is correct/ to proceed as it is. I just do not know. Thsnks, Zoot.
-
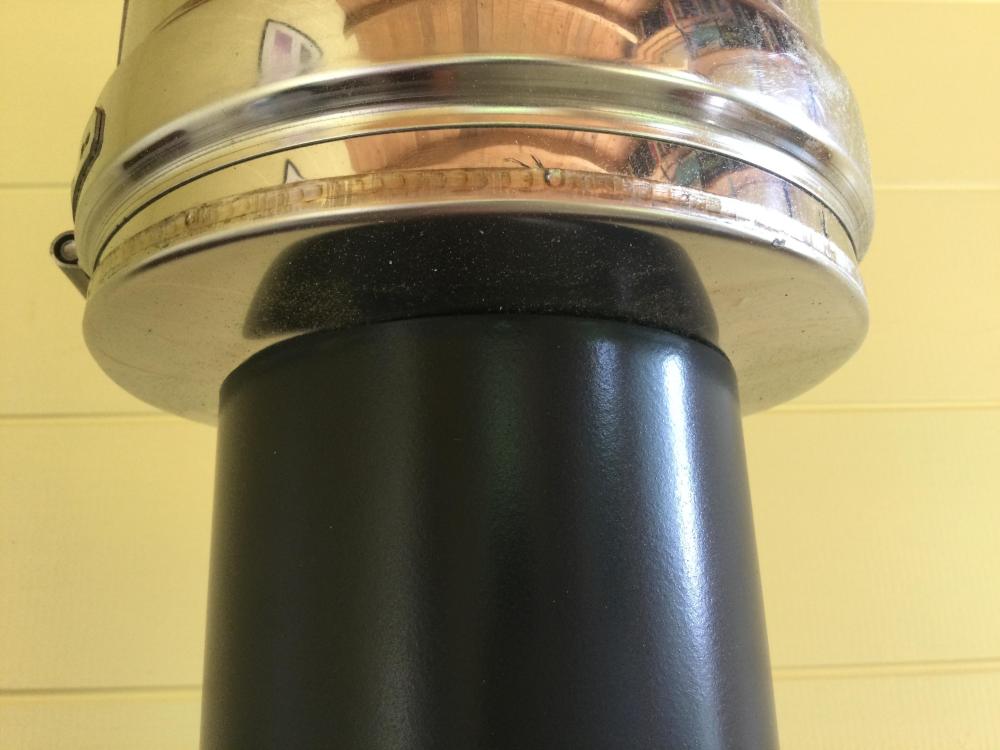
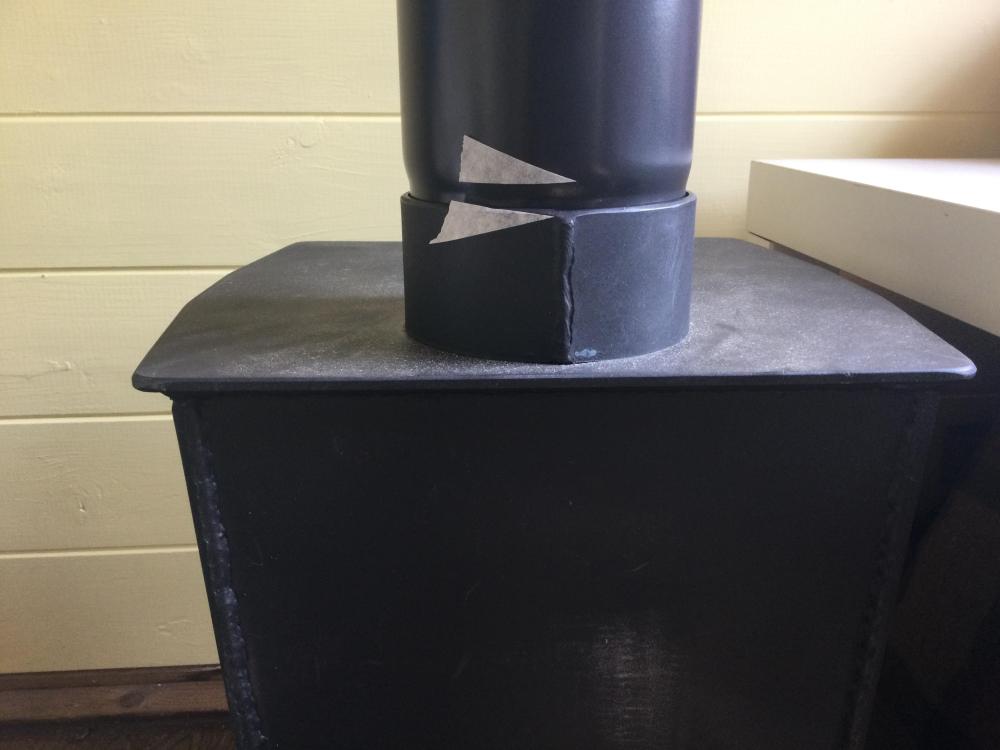
Ok, so my upper mark is where the 'male end dip' starts. There's a good 1/2" gap, to the other mark. So the pipe must sit on something inside the stove (orthe two marks would be right next to each other). The thing that prevents the pipe slipping down further, is a thick ring of weld, on the stove, within the stove collar. Pics two & three show how much lateral " give " the pipe has if I rock it max one way, then the other. It doesn't sit nicely flat n flush if I centre it, because the weld band it sits on, is fairly 'rustic' uneven. Zh
-
Ok I need to simplify. Step by step Q's. This job looks simple in principle.... but it is not, with the 4 sections I have. Q no.1. If I simply offer the single enamel length, into the stove collar, it hits a band of weld ( stove makers' collar join to stove top). It rocks L to R I'd say a full 8" at the top. So if I let go, the weight of it is resting on this weld join. Is this correct? zh.
-
Hi Peter, got distracted with tarting up me workshop! back onto these final prep bits/ this job. Thanks for your input. I'm not quite on board tho with 'fit adaptor into stove'. The only adaptor is 1m above the stove, adapting the black enamel single > into the twinwall silver 1m. What I'm wondering ( I think my describing hasn't been sufficient maybe ) is the seating on the 1m single wall, into the stove. This pipe obviously has an inward 'male' end, obviously designed to go into my stove collar. But where should this pipe length actually sit upon? Where should it's weight bear down upon? this is my point. It has two choices. 1). As it is IE just offered up, it sits ( awkwardly) upon a thick welded band around btm of the stove collar. This weld bonds the collar, to the stove. Its a thick, slightly uneven, very handmade weld band. With the pipe sitting upon this, the start of the shaped 'male end dip' of the pipe, is 1" above the stove collar top. Now, I could get all the 4 bits together, have the lot bearing down upon this weld band, get the lot super rigid ( somehow) without any possible movement.... then.... fill up this collar 4mm gap with cement. Somehow. 2) cut 1" off the shaped male end of the pipe. If I do this/ the idea behind this, is that now the weight of the whole 4 bits bear down upon the top of the stove collar. Dry it would of course make a fairly decent join. So somehow then I have to get the 4 bits joined, then, seat the lot into the collar. Then lift it all up, apply cement, seat the lot down. I do not know 2 things still though, X) which of the above methods is best, & Y) & this is still to be understood/ determined, how on earth to join the adaptor to the top of the 1m single length, if I cannot see what's going on ( as Ive tried to explain above). If I had gone twinwall all the way up from stove, I could've factored out the problem Y). I might have also had a better fit into the stove collar too. But it was saving £40 using a single length (& having a huge 6" wide silver flue in the smallish cabin.. would be odd, bulky & incongruous). Thanks, Zoot.
-
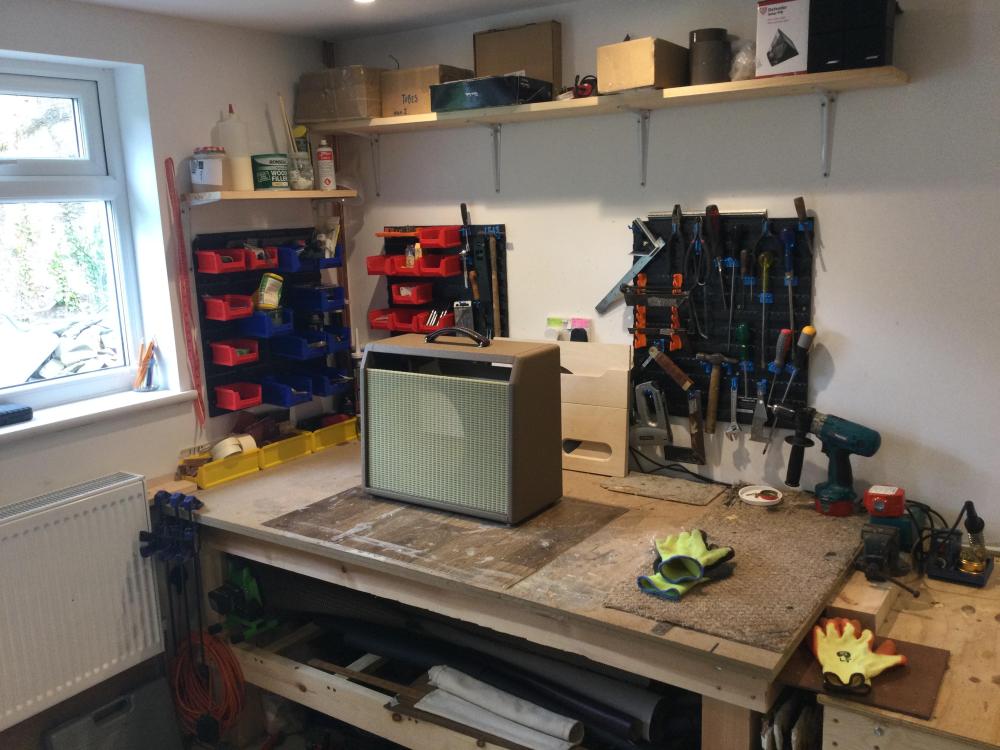
@Onoff my biggest 'build project' of all here: bought a blown cheap ebay '78 twin reverb. Then like joe90's mg, stripped & rebuilt every part, using the better 60's circuit. Another reason this bigass fender actually cheaper, is @ 85- 135w(insanity) you can't dime them, to dig into the natural tube overdrive like a princeton. So known as 'clean machines' jazz & country dudes love them tho (& j.marr so have their fans). Actually one person did dime his TR.. sex pistols s.jones! What a surprise! (what a glorious sound too, poor engineers & fans tho). Zoot.

-
Hi Onoff. Its a fabulous space, ceiling in both (extention) rooms pinpoint perfect, & both rooms perfect size. Gone the days of monster marshalls (even twin reverbs -beasts- are 'cheap' due to inconveniently heavy). Thank god. So: the smaller 1x 12" speaker @ 12-15w (tube) amps are sensibly the most popular. N. Young model for eg, so crank them on volume knob & you're just ok with drums ( ie amp volume just sufficient), plus once past 6.5 or so THEN the glorious overdriven tube tone emerges. This ^ model is most popular of all, Princeton Reverb, due to the above aspects plus its reverb & tremolo are especially rich: the 'desert island' go-to amp. The next most popular is NY's Tweed Deluxe a 50's model, I'm midway thru a build now. If interested, youtube a 60's fender princeton reverb (or a dimed original tweed deluxe). My cabs can be heard via clips on Rift Amps site ( under 50's, 60's models). Zooter.
-
Thanks all for help on this. Zoot.
-
Hi dpm. Ive tested it upside down, to see if the female larger end will fit into my stove collar... but no, its a bit to wide. Now your idea of cutting though, tallies with what I can think is the only way my enamel pipe ( male end) can sit inside the stove collar & its weight resting evenly upon the top lip of the stove collar. But I don't know if this is the way these two sections are meant to join. I only know that obviously one slots inside the other. If you enlarge my sketch, the length of the male end, & the length of the stove collar... are good for explaining what I mean/ one is a little longer than the other. Ideally I need them the other way round: the collar longer than the pipe... so... it sits evenly, resting upon the top of the collar. Surely this is the optimal way these two should join. But I don't know tbh. Cut an inch off the enamel male end? Does anyone know what I'm actually trying to explain? I bet not. Thanks, zoot.
-
I have some standard stuff, a tub of Koss fire cement. Does the male end of the enamel pipe, need to " rest " on the lip of the stove hole collar section? One thing I notice, is this male end is 1" longer than my stove hole collar which as expected is welded on, & the whole pipe sits unevenly upon the thick ring of the weld. So, my pipe doesn't rest on it's lip. It's a facet of the stove being very 'handmade' that both the hole seems a tad too wide, and, the welded on collar section isn't high enough for the pipe to sit neatly resting on its highest edge. But I bet what I am trying to say here isn't comprehensible. ButI can't explain it any better. Zoot.
-
Hi Peter. Yes it has the shaped 'male' lower end, I sort of tried to draw this narrowing of it at A). But it's just either slightly too narrow (the dip in/ shaped end almost dips in a bit ott)... or of course, this is fine but my stove hole is judt slightly too big/ too "safely made". Im just in no position to know which it might be, nor whether either is in fact problematic at all. As I have no reference to look at. It could be that each is as should be, & the cement makes it a 'tight fit'. --- But point B)... there is no narrowing of the adaptor, no shaping 'dip' inwards, just the whole section of it that slides into the enamel pipe top, is similarly "loose" a fit. By a few mm's. It's this join that concerns me, as it seems the seal between the two seems to be made simply by the weight of the adaptor/ twinwall/ hat (this whole formed section all banded together well) just resting on ( albeit within) the enamel pipe. If any tiny rocking here... smoke will surely escape into the room. If I put 3mm rope around, it will disintegrate after a while, & I have no way of telling if it has done so. Because I cannot see it. Zoot
-
Its A) and B) points the issue. Specifically B) because I cannot see what's going on, as I can with A). [Conjecture: even slight movement of the chimney above join B) will compromise whatever is used to help this join here. Less movement at A) & if the cement does fail here with say a tiny bit of chimney movement, I can visually see > re-cement.] All 3 twin sections above B), clamp together just fine. Thanks zoot.
-
@PeterW Just to reitterate. I bought a single flue diameter 4", 1m length, going into the stove ( fits, but loosely, a 4mm gap here). Then an adaptor to twin wall. Then a 1m twin wall. Hat. It seems the single length is too narrow at the (lower end) male end. And it seems either it's other female end (higher end) is too wide.. .. or the adaptor's ( into which its top end fits around) lower male end is too narrow. But I just don't know what to expect/ what is normal/ whether these fitting together are all fine, or totally not fine at all. Zoot
-
Hi Peter, it's not at all this seems the problem. Ive got another 4mm gap ( 2mm all around the adaptor's downward male end) here. There is no band tightening these two, because the outer layer here is the very solid single enamel flue. So, how I join these two.. I really don't know tbh. The only thing I can think of to do, is add a wadge of cement around the adaptor, like a ring around the uppermost part of the downward end... then just sit the heavy twinwall sections onto the single & let gravity do the seal aided maybe by the cement, but not very well surely, & will just crack & fall out soon. But I cannot see. The three silver twin bits, adaptor/ 1m/ hat, do join together fine with supplied two bands. A photo I don't think can help as the single just covers over the adaptor, outside of it. I spent ages on call after call to get certainty these 4 bits would fit together, buying all from the same place, costing me a fair bit more to source from one supplier. Hmm. Zoot.
-
Hi Peter. Very grateful for your prior post: gives me confidence to do this. Which I had planned to do today.. but rain/ dammit first in ages. So end of week maybe. I'm going through your post today. My plumb mark... done, so a tentative step made. A few things I need clarity on first though: bracing of the outside 600mm+ twinwall (?). I'm concerned any slight movement of it, will compromise my single-wall ends' joins below. I'll need to fire-cement both, inside the cabin, as the pipe design & my stove maker shows in his vid clip, even with maybe an added shim (rope, tape even? not yet decided on) beforehand, using some fire cement as a final 'seal' pressed in well etc. The lower join @ my stove top is less of a concern, as I can monitor/ see this. So if cement cracked I can repair asap. But the top join @ the adaptor... I can't see; & should the twin section move a fraction ( strong wind, surely, will do exactly this) & the cement cracks this join surely will be compromised, & me unaware of it. Which is why I was asking about bracing of the twin. Inside? outside? Both, or not at all needed? Maybe you could mull for me. Appreciated, zoot.
-
That's useful. I didn't know rope went smaller than 8mm. Ok I can trawl away to try find some 3mm stuff. The only concern I have is my sittingroom stove ash pan door rope only a year new, has become hard, brittle & split. Maybe I can do a dry run with my cement to see if it could suffice for my 4mm gap. Its the wind movement of the 6" wide & high extended-above-roof 600mm flue Im concerned about. Zoot
-
Hi ProDave. Ok now I see what you mean, stove rope. But this is invariably 8-10mm or so. My gap is an annoying 4mm. Anyway I can trawl for something along these lines maybe to wrap around.. tho I can really only think a shim is needed, to widen the male single flue end ( Im not sure the cause is due to an incorrectly small flue end, or, an overtly big stove top hole). Im not even sure the 4mm gap is OTT either. This results in a 2mm gap circumference when its seated, just to clarify. I'd think the more super-stable the twinwall section above it is, the less I need to be concerned this join will crack. Anyway thanks. Zoot
-
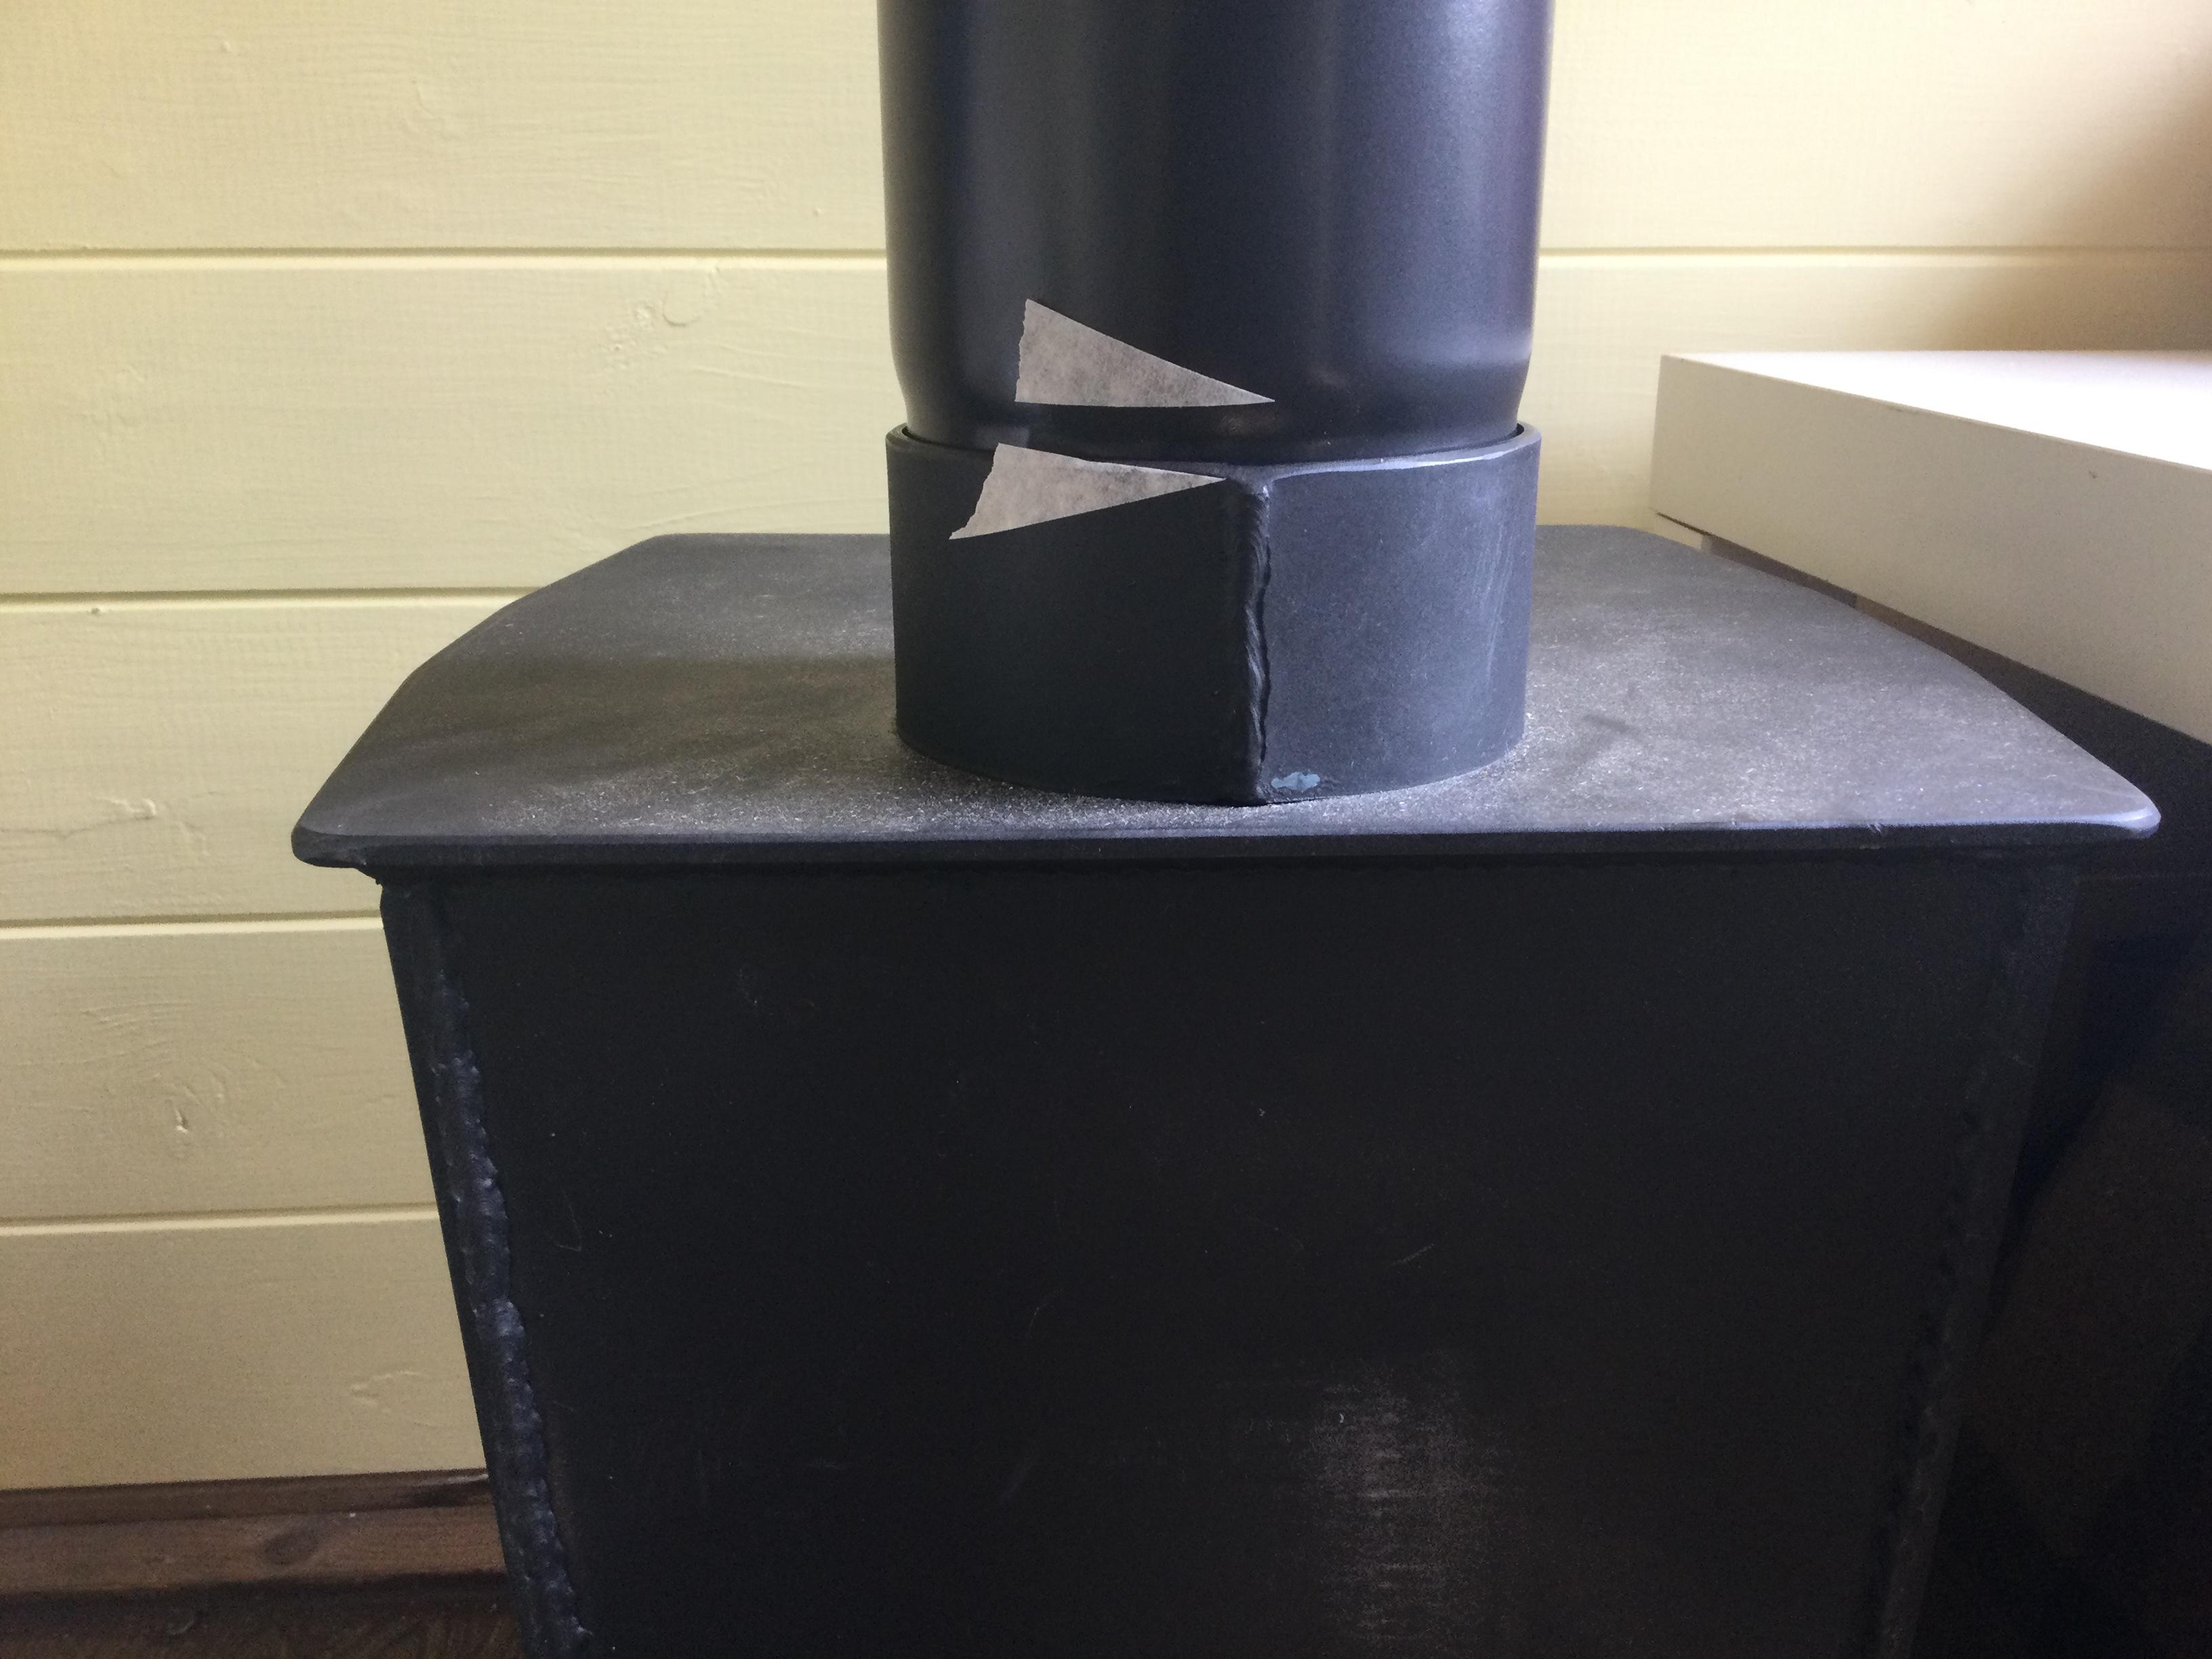
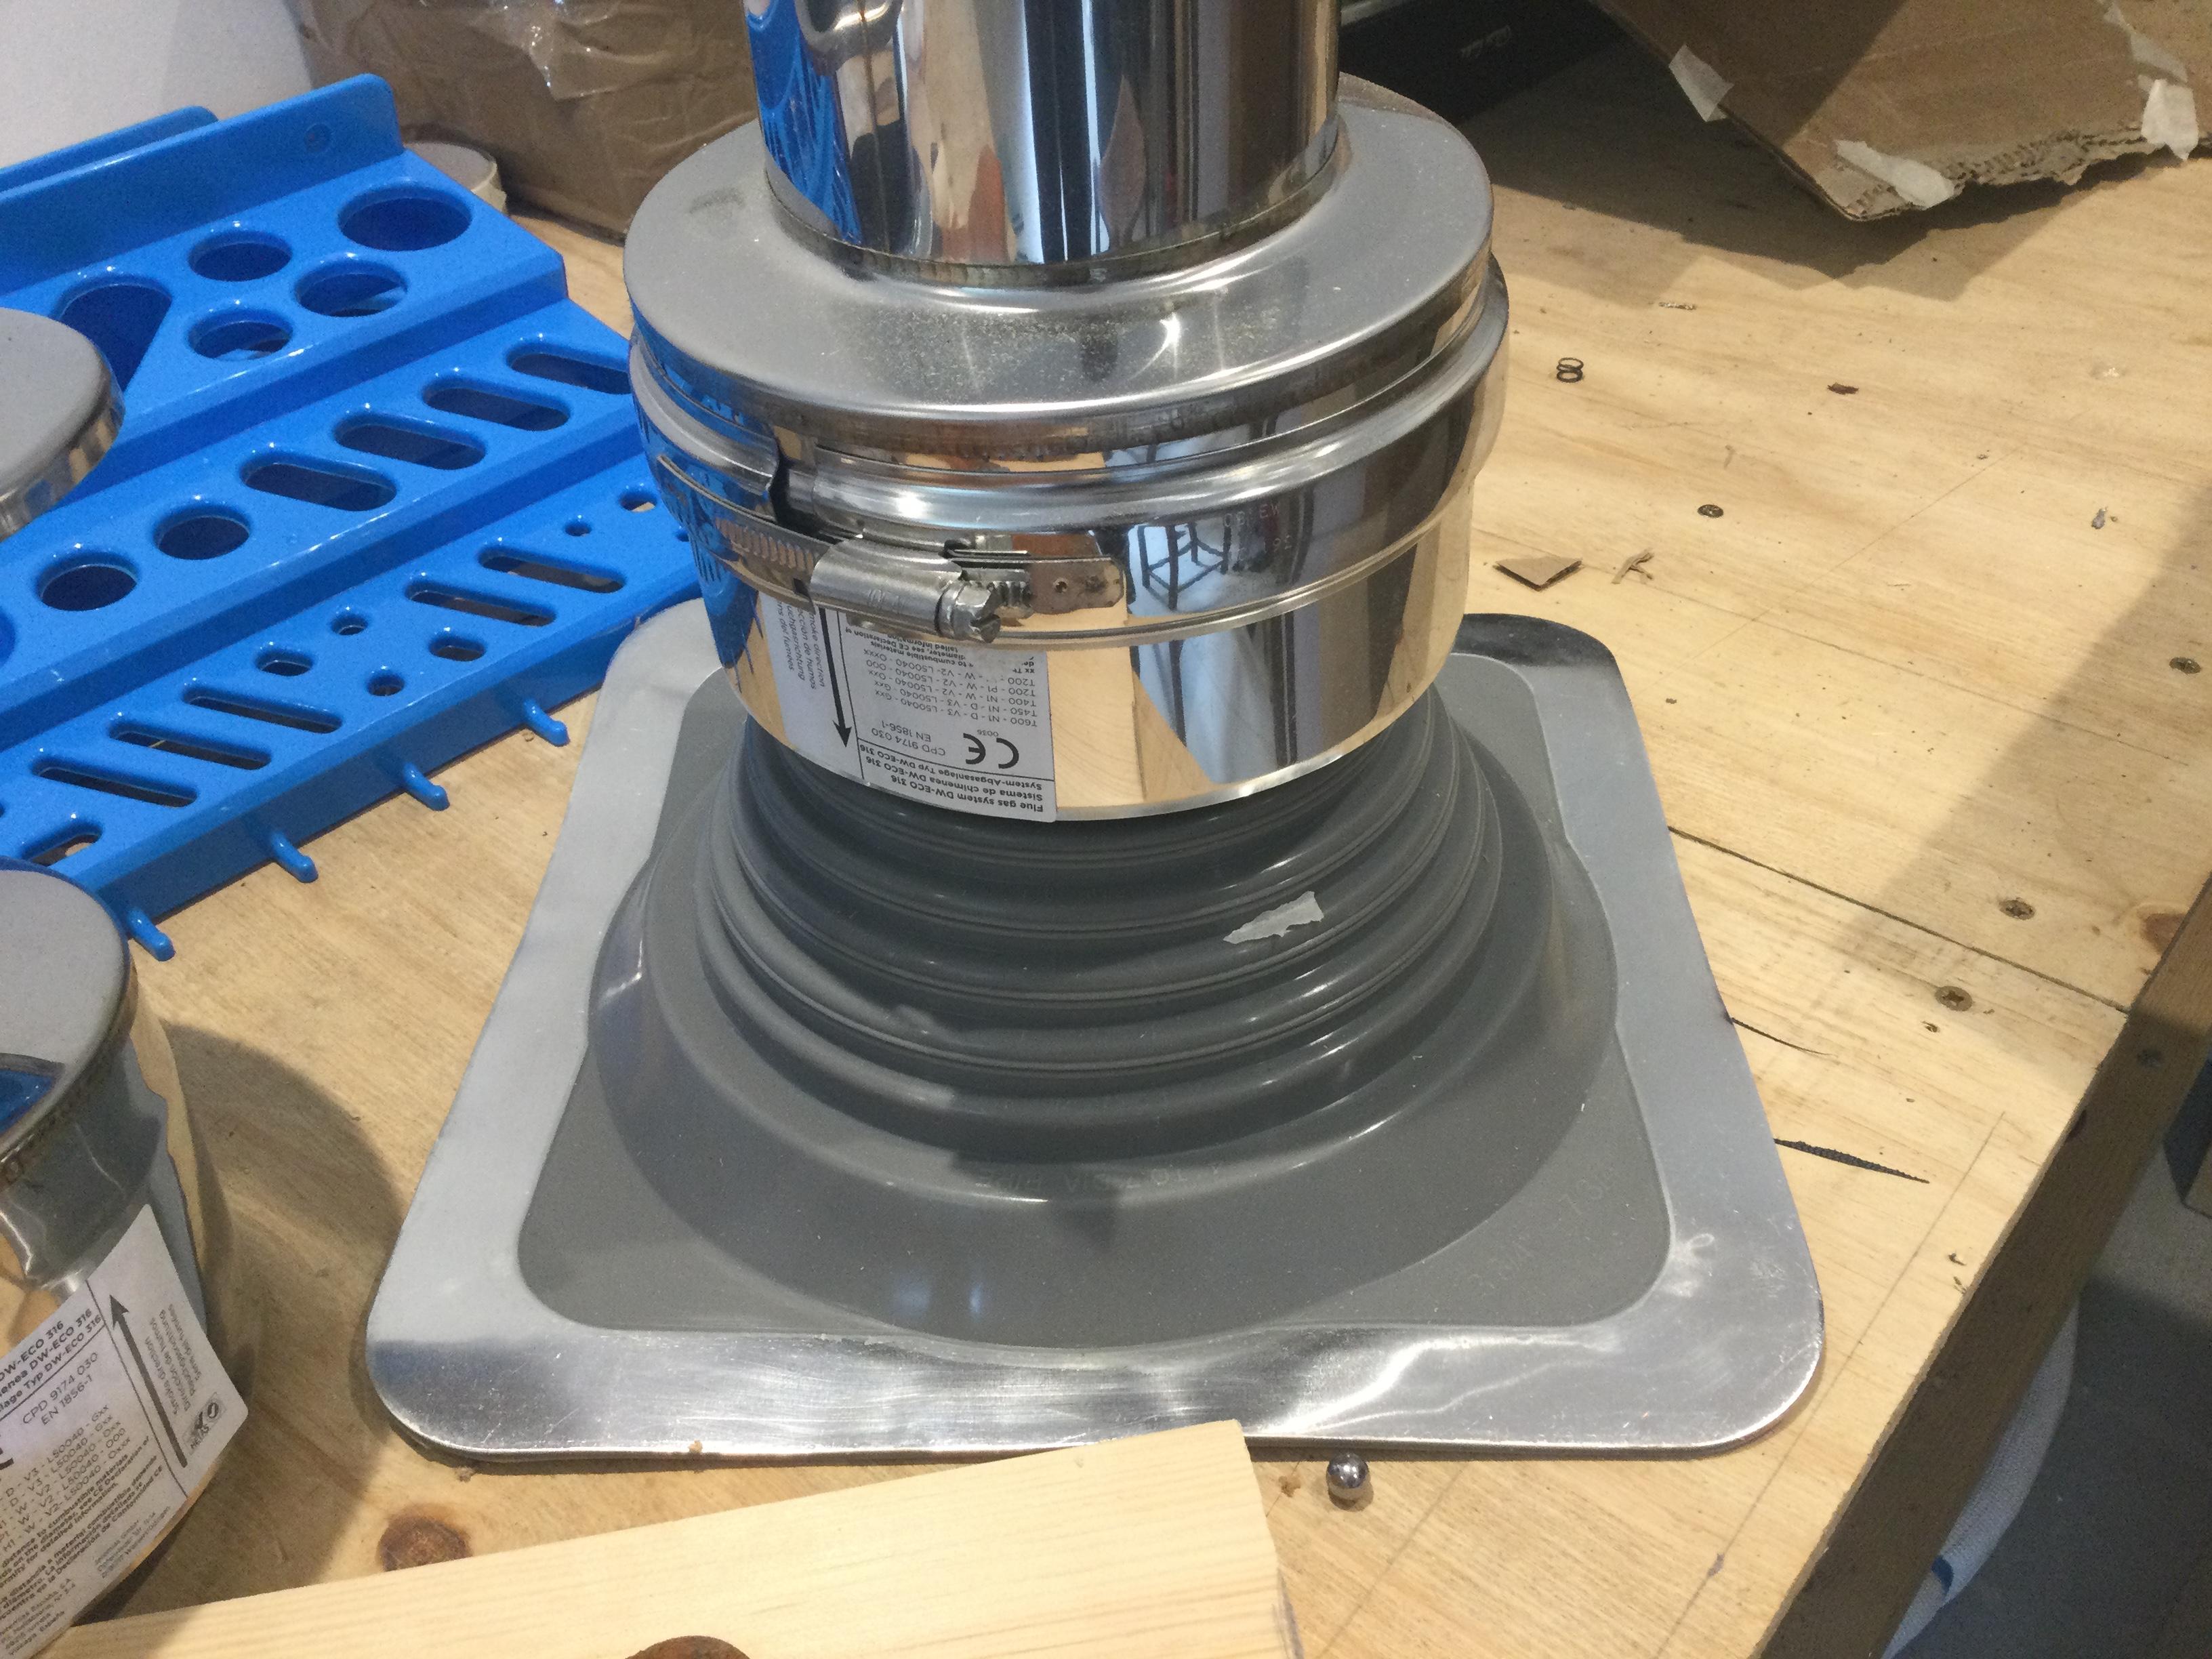
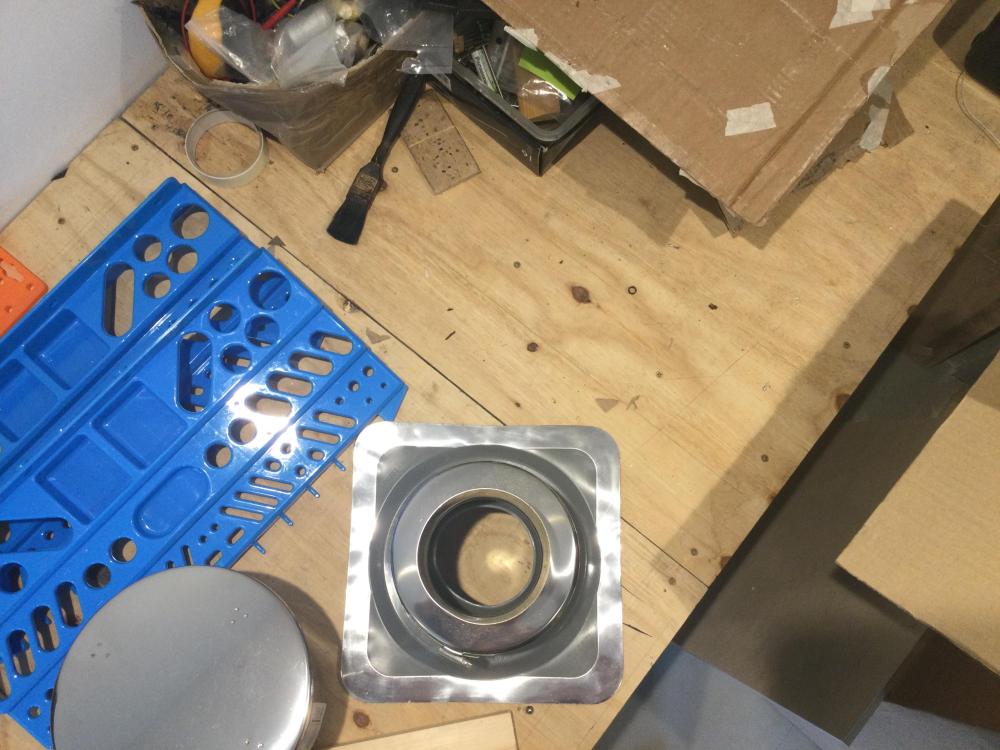
@PeterW Peter could you help. I'm not sure if my rubber roof collar, is suitable. ProDave or someone says to get the biggest one, perhaps. So I don't know if mine is suitable, for use with my 6" flue ( far wider than I had anticipated). I know you linked me to the one I bought, but perhaps you just forgot to factor in the slant of my roof ( totally understandable, & my fault as the smallprint says "for flat roofs" I read -after- buying it). You have given me the idea of hot water, which I can roughly understand makes it more malleable. But. Do I have a wide enough ammount of rubber? Is my flue too wide for it to sdd this slant? I just cannot answer this Q. All I can do is add a photo, of a section of my flue, resting ontop of the collar. I added a small white tape mark, on the rubber, to show where my 6" diameter coincides down. It is roughly midway along the concertina rubber. Is this too close to the outside of it, to form this slant idea with it? Thanks, zoot.
-
Hi SAS, fiberglass string? How could this be heatproof though? I'm just about to start this job, but this bit, & also how I make a ceiling/ roof hole the right shape ( being a shallow pitch, so won't be a circle.. more an oval I guess). Then also whether my rubber collar is sufficiently large following your (or ProDave's) info about it needing, ideally, to be fairly bigger than my flue diameter ( which Im not at all sure it is.. IE in order to have the hot water treatment, then positioning over, & making a good join to this -plus- having the angle moulded into it too).. And Im just not ready to go ahead presently. I can't do this unless Im 100% sure I can make a good weatherproof situation, primarily. One person too.. it's not an easy prospect this job. Thanks, Zoot.
-
@SteamyTea Hi ST. Thanks for this chart info. I'm yet to dive in to the replies on the turbine idea, but will do over wknd to see how feasable an idea it is. In meantime I think ProDave mentioned the size of the roof rubber thingy, & my flue relative to it. Im not sure if Ive got too small a roof johnny.. Small white tape mark @ the 6" diameter of my twinwall flue, on the rubber. Bird nest seems vacant- not sure if cat got the chicks, or fledged. So can think of doing job now. Thanks, Zoot

-
Haha! Fab. I was leaving the door open/ I dared not venture on the crumpet joke re. mrs Onoff! But that is a cracker.. zh.
-
Ah. Right that's a shame. So: the water turbine idea.. I trust your judgment as you know Peter, is this a proper feasable idea (I'd imagine a very light capacity needed/ a light & an ipad battery block if there's such a thing).. or more of a fun 'project' with a 50/50 chance? Not sure if you're able to give an opinion. Thx if so, zoot.
-
@ProDave cold enough, my brilliance determined yesterday in a eureka moment.. to chill my guinness cans. I am thinking basket lowering up/ down, like the silly little dog in Rear Window. What about the idea of a wind turbine? On the roof maybe? I was thinking Old Father Time weathervane.. then this ( serious) idea sprung to mind. Great through-windy channeled spot here (hoping good updraft for my flue). Anyone got one on BHub I wonder? Thanks zoot.